
Test in a live environment
Test in production without watermarks.
Works wherever you need it to.
The Java PDF Library

IntelliJ IDEA is a powerful Integrated Development Environment (IDE) widely used for Java project development. Maven is a software project management tool primarily used for managing Java projects. In this tutorial, we will be learning how to create new Maven projects in IntelliJ IDEA, handle dependencies, and work with the Maven tool.
Before we get started with creating a Maven project, let's ensure we have the right setup. Download and install IntelliJ IDEA from the official website if you haven't already. Also, verify that you have Java Development Kit (JDK) installed on your machine.
To confirm your JDK version, open the terminal and type java -version. If you see an output with a specific version, that means you have JDK installed. If not, refer to the official Java documentation to download and install the latest JDK.
To add or configure JDK in IntelliJ IDEA:
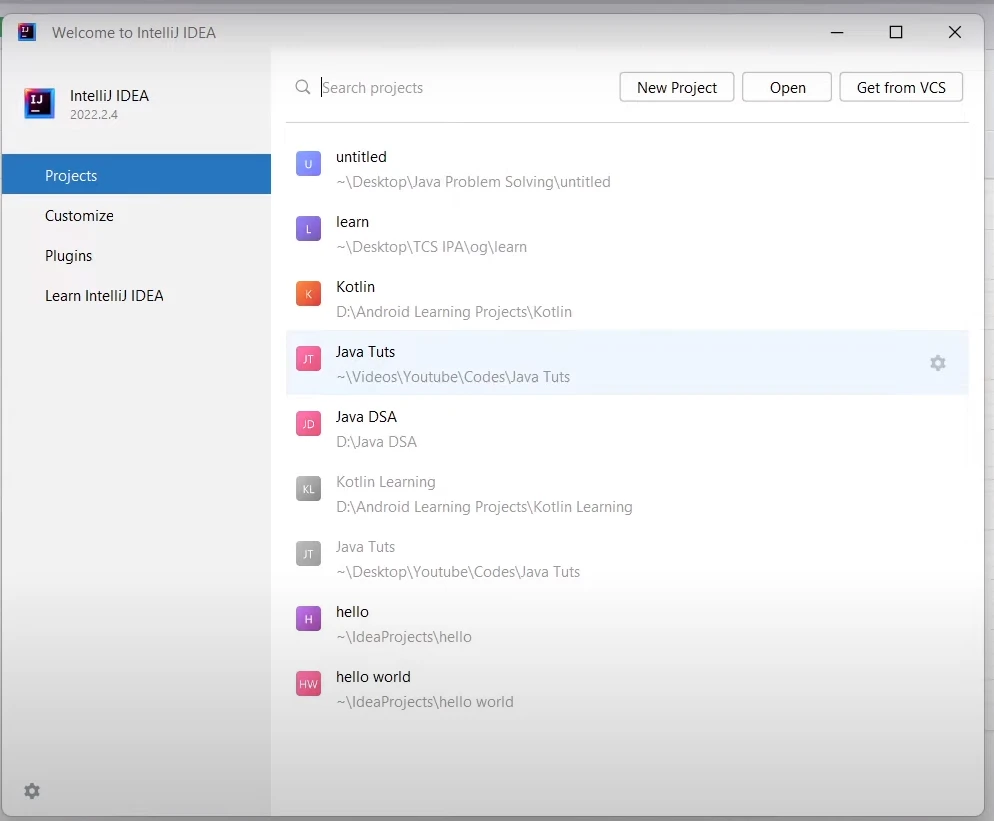
Now, let's dive into creating our first Maven project.
In IntelliJ IDEA, go to New Project.
In the dialog that opens, select Maven on the build system.
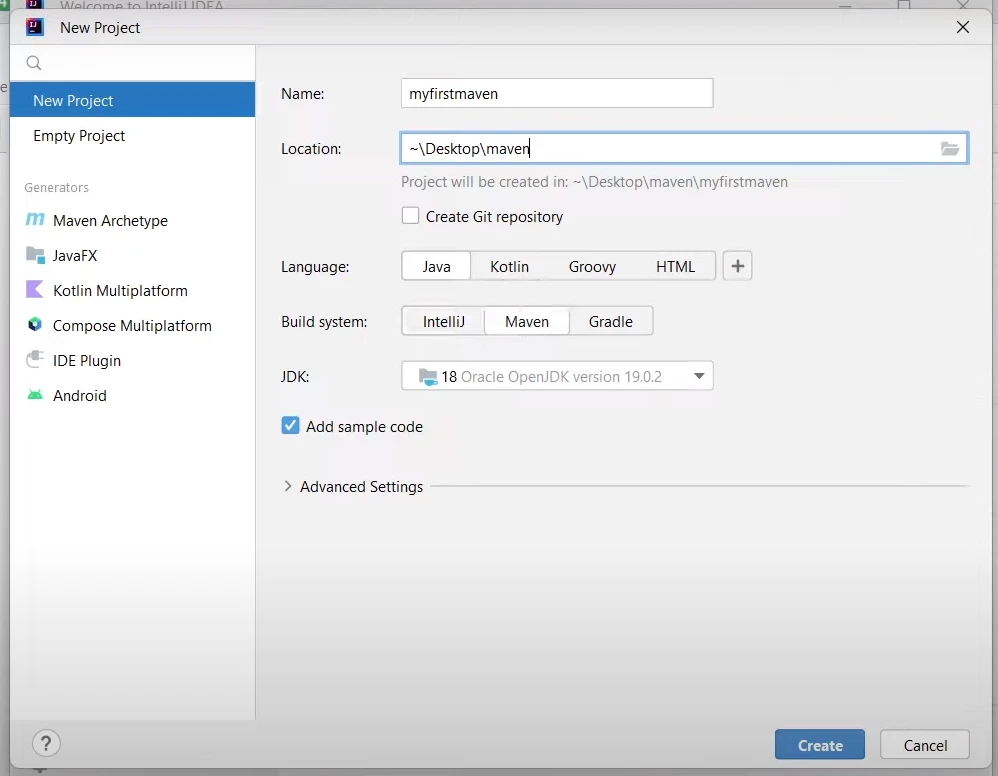
maven-archetype-quickstart.In the next window:
GroupId, ArtifactId, and Version for your project. These properties identify your project in the local Maven repository.Your new Maven project is now created! You'll see the project structure on the left in the tool window.
Each Maven project has a pom.xml file, short for Project Object Model, located at the root of your project directory. This file describes your project, its dependencies, and other properties.
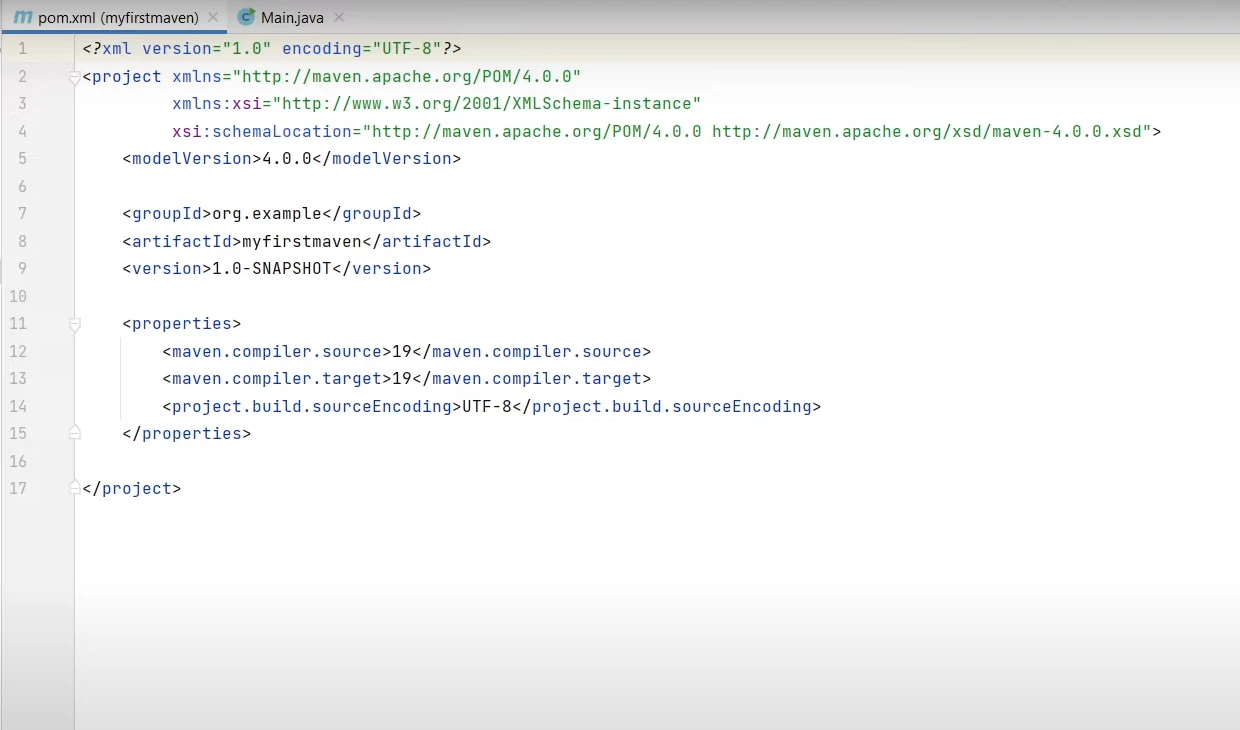
The file might look complicated at first glance, but it's straightforward. Let's break it down:
<modelVersion>: This is the version of the project model this POM is using.<groupId>: The ID of the project's group.<artifactId>: The ID of the artifact (project).<version>: The version of the artifact (project).<dependencies>: This section is where you specify all the dependencies your project needs.Dependencies are external Java libraries or modules that your project needs to run correctly. These could be frameworks, utility libraries, or other modules that your project uses. In Maven, these dependencies are managed and configured in the pom.xml file.
Adding dependencies to your Maven project involves specifying them in your pom.xml file. Let's explore this process with an example of adding the IronPDF library, which is a popular Java library for PDF generation and manipulation using HTML to PDF.
<dependencies> section. This tag encapsulates all the dependencies your project requires.Inside <dependencies>, add a new <dependency> block. In this block, specify the groupId, artifactId, and version of the dependency you wish to add.
For instance, to add IronPDF as a dependency, your pom.xml should include:
<dependency>
   <groupId>com.ironsoftware</groupId>
   <artifactId>com.ironsoftware</artifactId>
   <version>2024.3.1</version>
</dependency>Managing dependencies in Maven is straightforward. You add, update, or remove dependencies by modifying the <dependencies> section of the pom.xml file.
version in the relevant <dependency> block and save the pom.xml file. Maven will then download the new version and update the project accordingly.<dependency> block and save the pom.xml file. Maven will update the project and the dependency will no longer be available.Remember, whenever you modify the pom.xml file, always import the changes for them to take effect. Through this process, Maven makes it straightforward to manage dependencies, allowing developers to focus more on coding and less on project configuration.
In IntelliJ IDEA, the Maven tool window is a practical feature that allows you to manage and execute Maven commands. With its help, you can effectively oversee various aspects of your Maven project without needing to remember or type complex Maven commands.
To access this feature-rich tool window:
Upon completion of these steps, you'll notice the Maven tool window appearing on the right side of the IDE.
Maven Goals represent tasks that can be carried out on your project. Examples of such goals are clean, compile, test, and install.

To execute a Maven goal:
With your Maven project set up, and the essential Maven goals understood, let's move to compiling and running your project.
Maven's compile goal is responsible for transforming your Java files (.java) into a format that the Java Virtual Machine (JVM) can execute (.class files). Here's how to do it:
.class files and storing them in the target/classes directory.Once the project has been compiled, we can run it:
Note: The option Main can vary based on your project setup. It refers to the main class serving as the entry point of your application.
In the course of working with Maven projects, it's common to modify the pom.xml, like adding or removing a dependency. When you make such modifications, IntelliJ IDEA will prompt you to import the changes. You can also set your IDE to automatically import changes to keep everything synced.
If you prefer to manually control when your project should reflect the changes, you can:
If you'd rather have your changes automatically reflected:
With auto-import enabled, every change in your pom.xml will trigger an automatic import, keeping your project updated. This feature, especially in large projects, can help in maintaining consistency and avoiding manual repetitive tasks.
We've now covered the basics of working with Maven projects in IntelliJ IDEA. Maven is a powerful tool for managing your Java project's structure, dependencies, and build process. Combine that with IntelliJ IDEA, and you get a robust environment that can manage complex applications with ease.
If you're interested in using IronPDF, it's worth noting that they offer a free trial. This allows you to explore and understand its capabilities thoroughly before making a purchasing decision. If you decide to proceed with it, licenses start from $749.

30-day Trial Key instantly.
30-day Trial Key instantly.
Your trial key should be in the email.
If it is not, please contact
support@ironsoftware.com
<dependency>
  <groupId>com.ironsoftware</groupId>
  <artifactId>ironpdf</artifactId>
  <version>2024.3.1</version>
</dependency>
Want to deploy IronPDF to a live project for FREE?
Your trial key should be in the email.![]()
The trial form was submitted
successfully.
If it is not, please contact
support@ironsoftware.com
Want to deploy IronPDF to a live project for FREE?
Your trial key should be in the email.![]()
The trial form was submitted
successfully.
If it is not, please contact
support@ironsoftware.com
Want to deploy IronPDF to a live project for FREE?
Your trial key should be in the email.![]()
The trial form was submitted
successfully.
If it is not, please contact
support@ironsoftware.com
Want to deploy IronPDF to a live project for FREE?
Your trial key should be in the email.![]()
The trial form was submitted
successfully.
If it is not, please contact
support@ironsoftware.com

Get started for FREE
No credit card required
Test in production without watermarks.
Works wherever you need it to.
Get 30 days of fully functional product.
Have it up and running in minutes.
Full access to our support engineering team during your product trial
![]() No credit card or account creation required
No credit card or account creation required
Your trial key should be in the email.
If it is not, please contact
support@ironsoftware.com
Get started for FREE
No credit card required
Test in production without watermarks.
Works wherever you need it to.
Get 30 days of fully functional product.
Have it up and running in minutes.
Full access to our support engineering team during your product trial
Licenses from $749. Have a question? Get in touch.
9 .NET API products for your office documents
Thank you!
Your license key has been delivered to the email provided. Contact us

24-Hour Upgrade Offer:
Save 50% on a
Professional Upgrade
Go Professional to cover 10 developers
and unlimited projects.
hours
:
minutes
:
seconds

Professional
$600 USD
$299 USD
5 .NET Products for the Price of 2
Total Suite Value:
$7,192 USD