
Node.js Fetch(開発者向けのしくみ)
Node Fetchは、HTTPリクエストをシンプルで直感的にするために設計された、Node.jsエコシステム内の人気のある軽量モジュールです。ブラウザ環境で利用可能なFetch APIに触発され、Web APIと軽量で馴染み深い方法で対話する手段を提供します。 Node-fetchはNode.jsでFetch APIのサポートを提供し、サービスワーカーがHTTPヘッダーを処理し、HTTPリクエストの取得を効率的に行うことを可能にします。
この記事では、Node.jsにおけるHTTPリクエスト処理を効率化しようとしている開発者のために、Node-fetchの主な機能と使用法を探る包括的なガイドを提供します。 また、プログラマーがPDFを作成・編集し、HTMLコンテンツをPDFに変換するなど、さまざまな機能を持つNode.js用のPDFライブラリであるIronPDFも利用します。
Node.js fetchとは何ですか?
Node fetchは、Node.jsにFetch APIをもたらすモジュールです。 Fetch APIは、HTTPリクエストを行うためのモダンなインターフェイスであり、一般的にWebブラウザで使用されます。 Node.js fetchはこの機能を模倣し、Node.jsアプリケーションが同じように簡単にHTTPリクエストを実行できるようにします。 これは、Fetch APIに既に慣れている開発者や、Node.jsアプリケーションでHTTPリクエストを処理するための簡単な方法を探している開発者にとって、優れた選択肢になります。
Node.js Fetchの主な特徴
1. シンプルさと親しみやすさ
Node.js fetchはブラウザ内のFetch APIを模倣し、開発者にとってシンプルで親しみやすいインターフェイスを提供します。
2. Promiseベース
Fetch APIと同様に、Node.js fetchはPromiseベースであり、開発者が非同期コードをより読みやすく、管理しやすい方法で書くことを可能にします。
3. 軽量
Node.js fetchはミニマリストライブラリであり、迅速で効率的です。 大規模なHTTPライブラリのオーバーヘッドを伴わず、アプリケーションをスリムに保ちます。
4. 互換性
Node.js fetchは、幅広いHTTPメソッド、ヘッダー、及びレスポンスタイプをサポートしており、それゆえに非常に多用途です。
5. ストリーミング
大きなペイロードを効率的に処理するために、ストリーミングレスポンスをサポートします。
Node.js Fetchのインストール
Node-fetchを開始するには、NPM(Nodeパッケージマネージャー)を介してインストールする必要があります。 プロジェクトディレクトリで次のコマンドを実行します:
npm install node-fetchnpm install node-fetch基本的な使用法
ここでは、Node.js fetchを使用してGETリクエストを行う基本的な例を示します:
import fetch from 'node-fetch';

const url = 'https://jsonplaceholder.typicode.com/posts';

// Make a GET request to fetch data
fetch(url)
    .then(response => {
        // Check if the response status is OK
        if (!response.ok) {
            throw new Error('Network response was not ok');
        }
        // Parse the response as JSON
        return response.json();
    })
    .then(data => {
        // Process the JSON data
        console.log(data);
    })
    .catch(error => {
        // Handle any errors that occur during the fetch
        console.error('There has been a problem with your fetch operation:', error);
    });
import fetch from 'node-fetch';
const url = 'https://jsonplaceholder.typicode.com/posts';
// Make a GET request to fetch data
fetch(url)
.then(response => {
// Check if the response status is OK
if (!response.ok) {
throw new Error('Network response was not ok');
}
// Parse the response as JSON
return response.json();
})
.then(data => {
// Process the JSON data
console.log(data);
})
.catch(error => {
// Handle any errors that occur during the fetch
console.error('There has been a problem with your fetch operation:', error);
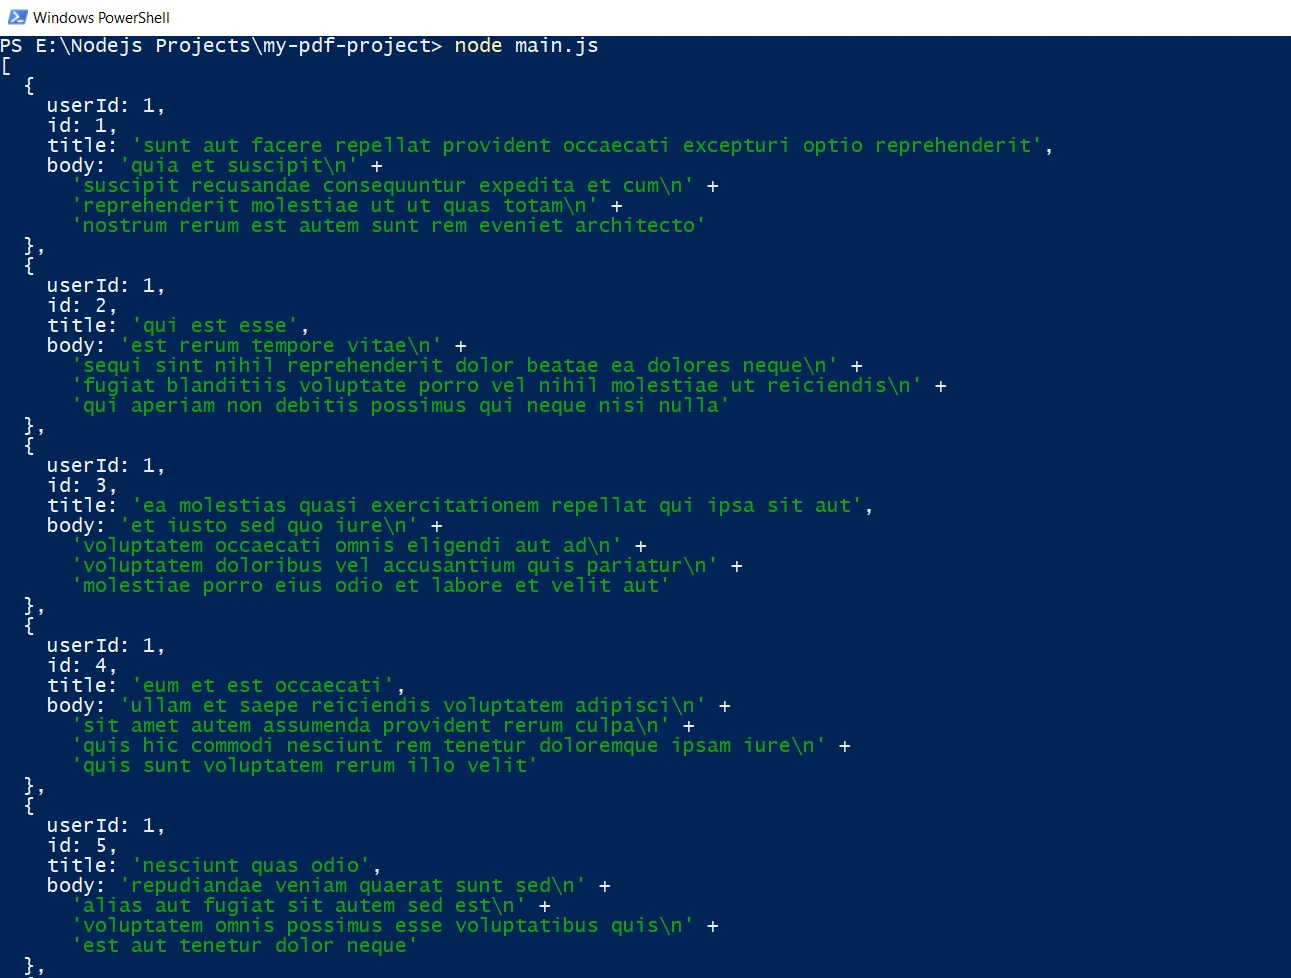
});このコードスニペットは、APIからJSONデータを取得するためのシンプルなGETリクエストを示しています。 fetch関数は、応答オブジェクトに解決されるプロミスを返します。 その後、レスポンスボディを解析するためのjson()など、レスポンスを返すメソッドを呼び出すことができます。
コンソール出力
高度な使用法
Node.js fetchは、POSTリクエストの作成、カスタムリクエストヘッダーの設定、さまざまなレスポンスタイプの処理といった、より高度な機能もサポートしています。
POSTリクエストの作成
import fetch from 'node-fetch';

const url = 'https://jsonplaceholder.typicode.com/posts';
const data = { key: 'value' };

// Make a POST request with JSON payload
fetch(url, {
    method: 'POST',
    headers: {
        // Specify content type as JSON
        'Content-Type': 'application/json'
    },
    body: JSON.stringify(data)
})
    .then(response => {
        // Check if the response status is OK
        if (!response.ok) {
            throw new Error('Network response was not ok');
        }
        // Parse the response as JSON
        return response.json();
    })
    .then(data => {
        // Process the JSON data
        console.log(data);
    })
    .catch(error => {
        // Handle any errors that occur during the fetch
        console.error('There has been a problem with your fetch operation:', error);
    });
import fetch from 'node-fetch';
const url = 'https://jsonplaceholder.typicode.com/posts';
const data = { key: 'value' };
// Make a POST request with JSON payload
fetch(url, {
method: 'POST',
headers: {
// Specify content type as JSON
'Content-Type': 'application/json'
},
body: JSON.stringify(data)
})
.then(response => {
// Check if the response status is OK
if (!response.ok) {
throw new Error('Network response was not ok');
}
// Parse the response as JSON
return response.json();
})
.then(data => {
// Process the JSON data
console.log(data);
})
.catch(error => {
// Handle any errors that occur during the fetch
console.error('There has been a problem with your fetch operation:', error);
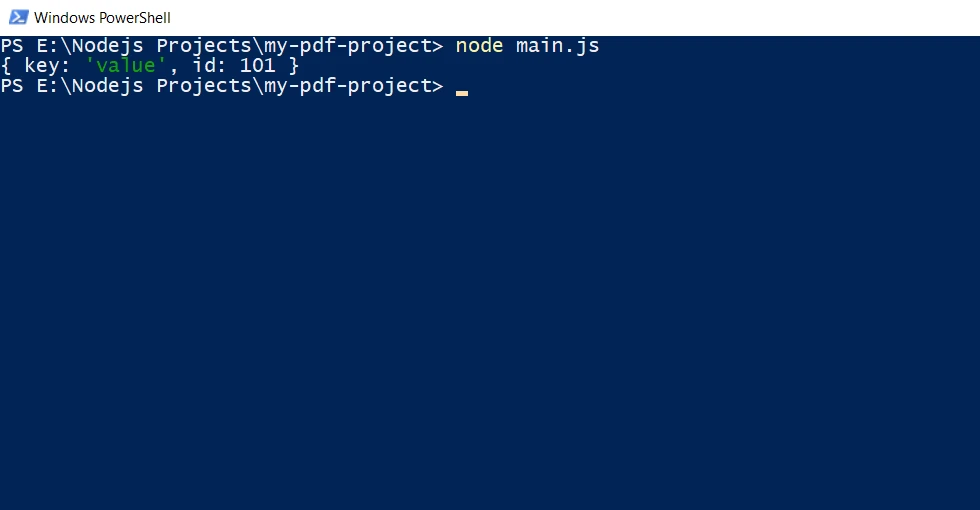
});この例は、JSONペイロードを使用してPOSTリクエストを送信する方法を示しています。 レスポンスのコンテンツタイプを指定するためにheadersオプションが使用され、bodyオプションにはシリアライズされたJSONデータが含まれます。
コンソール出力
ストリーミングレスポンスの処理
import fetch from 'node-fetch';
import fs from 'fs';

const url = 'https://jsonplaceholder.typicode.com/posts';

// Make a GET request to fetch data and stream it to a file
fetch(url)
    .then(response => {
        // Check if the response status is OK
        if (!response.ok) {
            throw new Error('Network response was not ok');
        }
        // Pipe the response body as a file stream to 'large-data.json'
        const dest = fs.createWriteStream('./large-data.json');
        response.body.pipe(dest);
    })
    .catch(error => {
        // Handle any errors that occur during the fetch
        console.error('There has been a problem with your fetch operation:', error);
    });
import fetch from 'node-fetch';
import fs from 'fs';
const url = 'https://jsonplaceholder.typicode.com/posts';
// Make a GET request to fetch data and stream it to a file
fetch(url)
.then(response => {
// Check if the response status is OK
if (!response.ok) {
throw new Error('Network response was not ok');
}
// Pipe the response body as a file stream to 'large-data.json'
const dest = fs.createWriteStream('./large-data.json');
response.body.pipe(dest);
})
.catch(error => {
// Handle any errors that occur during the fetch
console.error('There has been a problem with your fetch operation:', error);
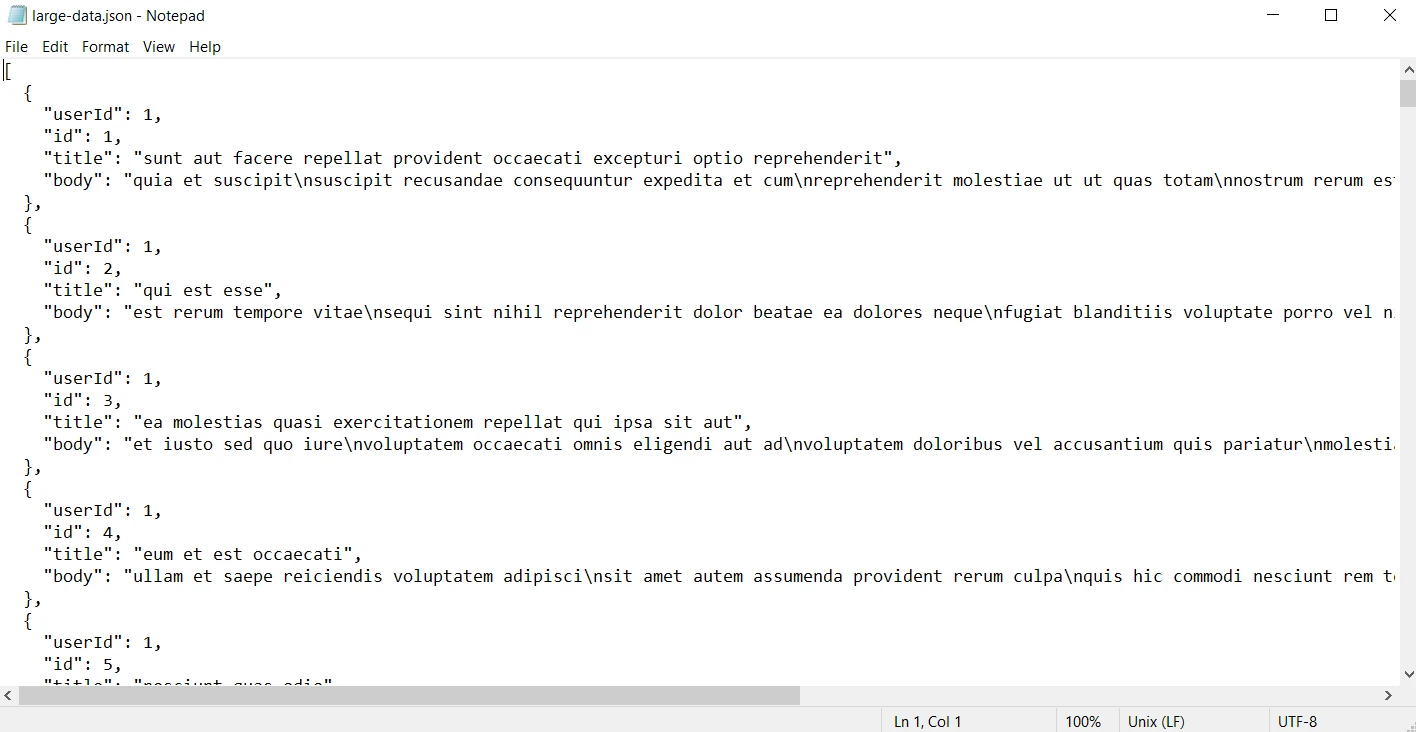
});この例では、レスポンスボディがファイルストリームとしてサーバーにパイプされ、大きなレスポンスを効率的に処理する方法を示しています。
出力
エラーハンドリング
HTTPリクエストを扱う際は、適切なエラーハンドリングが重要です。 Node.js fetchは、Promiseを使用してエラーをキャッチし、処理するためのシンプルな方法を提供します。
fetch(url)
    .then(response => {
        // Check if the response status is OK
        if (!response.ok) {
            throw new Error(`HTTP error! status: ${response.status}`);
        }
        // Parse the response as JSON
        return response.json();
    })
    .then(data => {
        // Process the JSON data
        console.log(data);
    })
    .catch(error => {
        // Handle any errors that occur during the fetch
        console.error('Fetch error:', error);
    });
fetch(url)
.then(response => {
// Check if the response status is OK
if (!response.ok) {
throw new Error(`HTTP error! status: ${response.status}`);
}
// Parse the response as JSON
return response.json();
})
.then(data => {
// Process the JSON data
console.log(data);
})
.catch(error => {
// Handle any errors that occur during the fetch
console.error('Fetch error:', error);
});ここでは、レスポンスステータスが200-299の範囲にない場合、エラーが投げられ、キャッチブロックがリクエスト中に発生するエラーを処理します。そうでなければ、有効なJSONレスポンスが返されます。
Node.jsでIronPDFを使用してPDFを生成するにはfetchを使用する
Node fetchは、Node.jsエコシステムにおいてHTTPフェッチリクエストを行うための人気のあるライブラリです。 強力なPDF生成ライブラリであるIronPDFと組み合わせることで、さまざまなWebリソースからPDFを作成するための多用途なツールとなります。
IronPDF とは何ですか?
IronPDFは、開発者がPDFを作成、編集、および内容を抽出するためにシンプルで効率的な方法を提供する堅牢なライブラリです。 C#、Python、Java、およびNode.js用に利用可能なIronPDFは、直感的なAPIでPDFの操作を簡単にします。

IronPDFライブラリのインストール
まず、プロジェクトにIronPDFをインストールする必要があります。 ライブラリをインストールするには、次のnpmコマンドを使用します:
npm i @ironsoftware/ironpdf
Node.js fetchを使用してWebコンテンツソースからPDFを生成する方法を探ります。
Node.js fetchとIronPDFの組み合わせ
Node.js fetchとIronPDFの両方の機能を活用して、Webコンテンツを動的に取得し、PDFを生成することができます。 例えば、APIエンドポイントのデータを取得し、動的なHTMLを生成し、それをPDFに変換することができます。 この例では、このタスクを達成する方法を示します:
import fetch from 'node-fetch';
import { PdfDocument } from '@ironsoftware/ironpdf';

(async () => {
    // Replace the apiUrl with the actual URL
    const apiUrl = "https://jsonplaceholder.typicode.com/posts";

    // Fetch data from API
    const response = await fetch(apiUrl);
    const data = await response.json();

    // Create dynamic HTML content with a table
    const htmlContent = `
        <!DOCTYPE html>
        <html>
        <head>
            <title>Data Report</title>
            <style>
                body {
                    font-family: Arial, sans-serif;
                    margin: 40px;
                }
                table {
                    width: 100%;
                    border-collapse: collapse;
                }
                table, th, td {
                    border: 1px solid black;
                }
                th, td {
                    padding: 10px;
                    text-align: left;
                }
                th {
                    background-color: #f2f2f2;
                }
                h1 {
                    text-align: center;
                }
            </style>
        </head>
        <body>
            <h1>Data Report</h1>
            <table>
                <tr>
                    <th>User ID</th>
                    <th>ID</th>
                    <th>Title</th>
                    <th>Body</th>
                </tr>
                ${data.map(item => `
                    <tr>
                        <td>${item.userId}</td>
                        <td>${item.id}</td>
                        <td>${item.title}</td>
                        <td>${item.body}</td>
                    </tr>
                `).join('')}
            </table>
        </body>
        </html>
    `;

    // Generate PDF from the HTML string
    const pdfFromHtmlString = await PdfDocument.fromHtml(htmlContent);
    await pdfFromHtmlString.saveAs("dynamic_report.pdf");
    console.log("PDF generated from API data successfully!");
})();
import fetch from 'node-fetch';
import { PdfDocument } from '@ironsoftware/ironpdf';
(async () => {
// Replace the apiUrl with the actual URL
const apiUrl = "https://jsonplaceholder.typicode.com/posts";
// Fetch data from API
const response = await fetch(apiUrl);
const data = await response.json();
// Create dynamic HTML content with a table
const htmlContent = `
<!DOCTYPE html>
<html>
<head>
<title>Data Report</title>
<style>
body {
font-family: Arial, sans-serif;
margin: 40px;
}
table {
width: 100%;
border-collapse: collapse;
}
table, th, td {
border: 1px solid black;
}
th, td {
padding: 10px;
text-align: left;
}
th {
background-color: #f2f2f2;
}
h1 {
text-align: center;
}
</style>
</head>
<body>
<h1>Data Report</h1>
<table>
<tr>
<th>User ID</th>
<th>ID</th>
<th>Title</th>
<th>Body</th>
</tr>
${data.map(item => `
<tr>
<td>${item.userId}</td>
<td>${item.id}</td>
<td>${item.title}</td>
<td>${item.body}</td>
</tr>
`).join('')}
</table>
</body>
</html>
`;
// Generate PDF from the HTML string
const pdfFromHtmlString = await PdfDocument.fromHtml(htmlContent);
await pdfFromHtmlString.saveAs("dynamic_report.pdf");
console.log("PDF generated from API data successfully!");
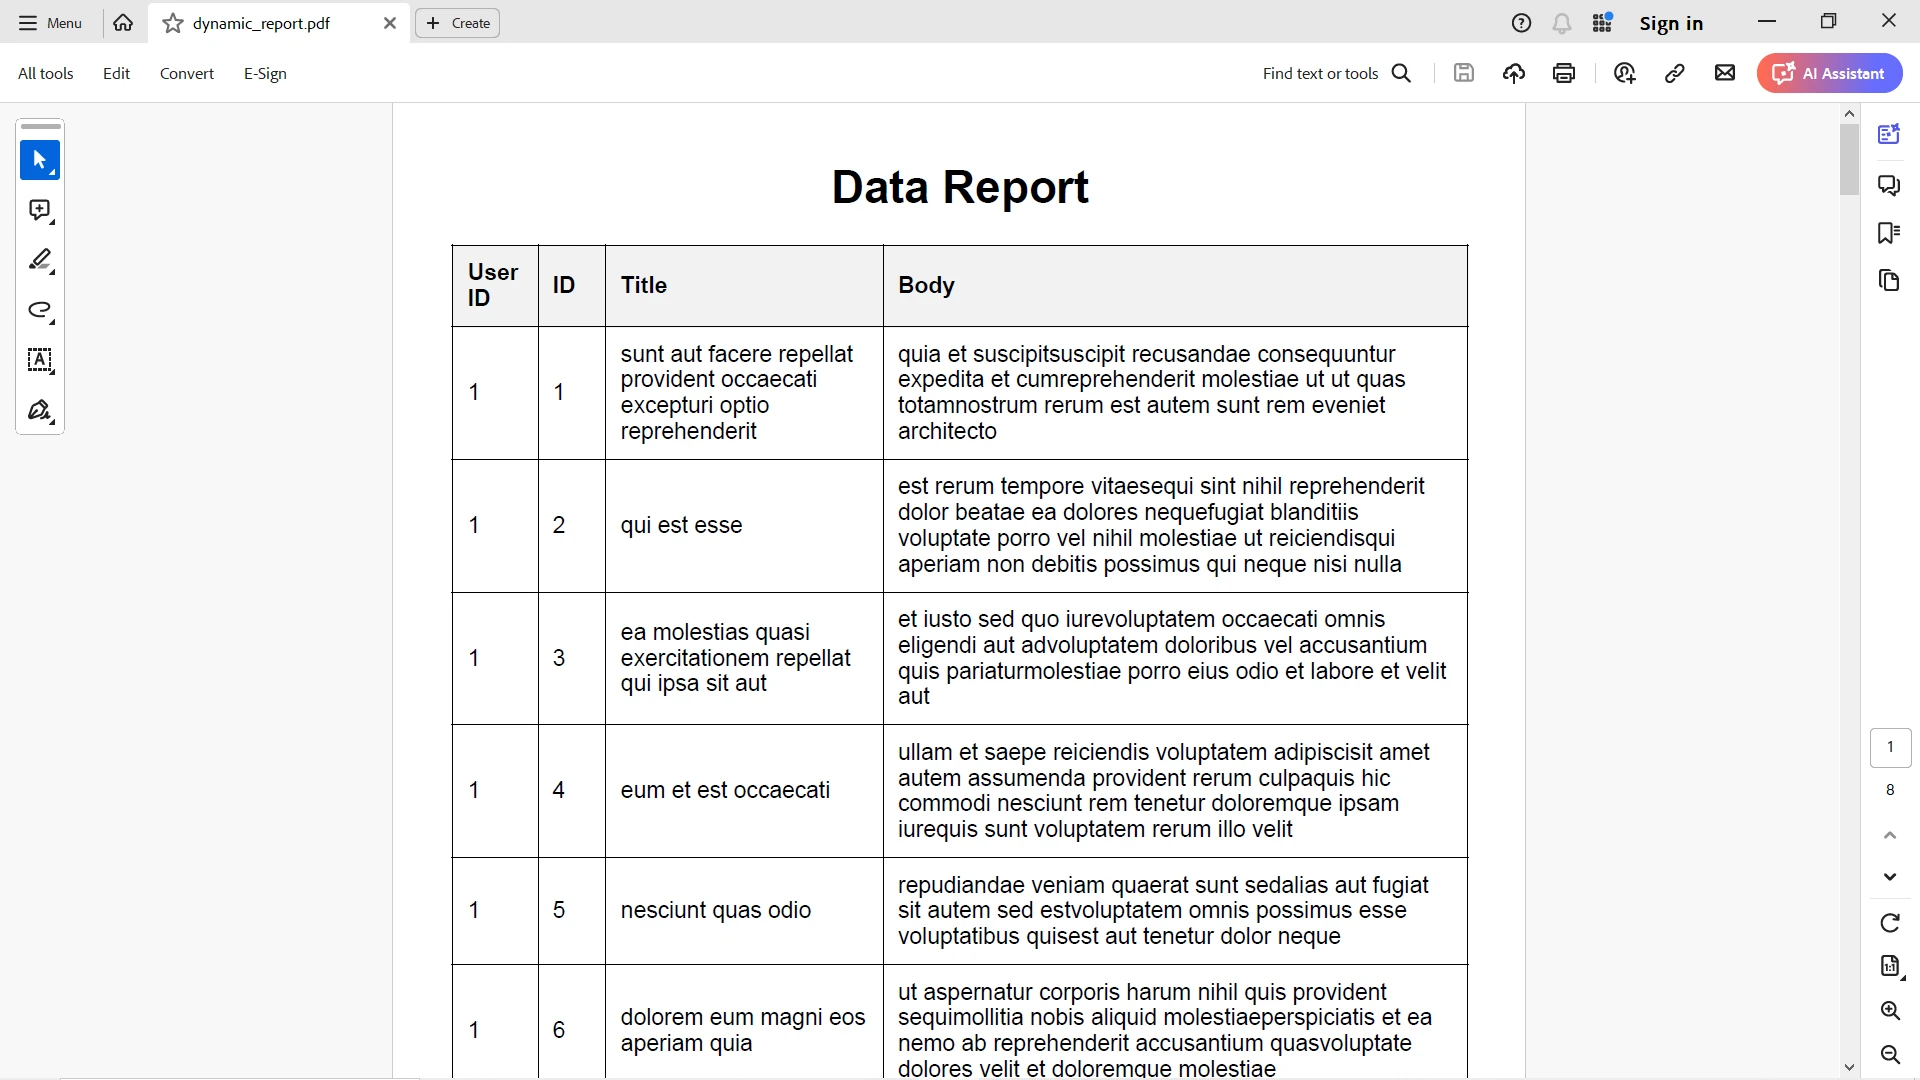
})();出力PDF
JSONレスポンス出力がエレガントにHTMLテーブルにマッピングされ、IronPDFがそのスタイリングを正確に変換します。
結論
Node fetchは、Node.jsでHTTPリクエストを行うための強力であり、シンプルなツールです。 その親しみやすいAPI、Promiseベースのアプローチ、軽量な特性により、初心者や経験豊富な開発者のどちらにも最適な選択肢となります。 基本的なGETリクエストからカスタムヘッダーを使用した複雑なPOSTリクエストの処理まで、Node fetchはWeb APIと対話するためのクリーンで効率的な方法を提供します。
Node fetchとIronPDFを組み合わせることで、Node.jsでさまざまなWebコンテンツソースからPDFを生成するための強力で柔軟な方法を提供します。 これら2つのライブラリを統合することで、Webデータを活用し、プロフェッショナルなPDFを簡単に生成することができる独自のアプリケーションを作成できます。
IronPDFは$799から始まります。 その強力なPDF生成機能をリスクなしで体験できます。 今日その違いを体験してみてください!


