How to Convert Views to PDFs in ASP.NET MVC
A View is a component in the ASP.NET framework used for generating HTML markup in web applications. It is a part of the Model-View-Controller (MVC) pattern, commonly used in ASP.NET MVC and ASP.NET Core MVC applications. Views are responsible for presenting data to the user by rendering HTML content dynamically.
ASP.NET Web Application (.NET Framework) MVC is a web application framework provided by Microsoft. It follows a structured architectural pattern known as Model-View-Controller (MVC) to organize and streamline the development of web applications.
- Model: Manages data, business logic, and data integrity.
- View: Presents the user interface and renders information.
- Controller: Handles user input, processes requests, and orchestrates interactions between the Model and View.
IronPDF simplifies the process of creating PDF files from Views within an ASP.NET MVC project. This makes PDF generation easy and direct in ASP.NET MVC.
How to Convert Views to PDFs in ASP.NET MVC
IronPDF Extension Package
The IronPdf.Extensions.Mvc.Framework package is an extension of the main IronPdf package. Both the IronPdf.Extensions.Mvc.Framework and IronPdf packages are required to render Views to PDF documents in an ASP.NET MVC.
PM > Install-Package IronPdf.Extensions.Mvc.FrameworkInstall with NuGet
Install-Package IronPdf.Extensions.Mvc.Framework
Render Views to PDFs
To convert Views into PDF files, you will need an ASP.NET Web Application (.NET Framework) MVC project.
Add a Model Class
- Navigate to the "Models" folder
- Create a new C# class file named "Person." This class will serve as a model to represent individual data. Use the following code snippet:
:path=/static-assets/pdf/content-code-examples/how-to/cshtml-to-pdf-mvc-framework-model.csnamespace ViewToPdfMVCSample.Models
{
public class Person
{
public int Id { get; set; }
public string Name { get; set; }
public string Title { get; set; }
public string Description { get; set; }
}
}Namespace ViewToPdfMVCSample.Models
Public Class Person
Public Property Id() As Integer
Public Property Name() As String
Public Property Title() As String
Public Property Description() As String
End Class
End NamespaceEdit the Controller
Navigate to the "Controllers" folder and open the "HomeController" file. We are going to add the "Persons" action. Please refer to the code below for guidance:
In the provided code, the ChromePdfRenderer class is first created. To use the RenderView method, you'll need to provide it with an HttpContext, specify the path to the "Persons.cshtml" file, and provide a List containing the necessary data. When rendering the View, users have the option to utilize RenderingOptions to customize margins, add custom text and HTML headers and footers, and apply page numbers to the resulting PDF document.
Please note
File(pdf.BinaryData, "application/pdf", "viewToPdfMVC.pdf").using IronPdf;
using System.Collections.Generic;
using System.Web.Mvc;
using ViewToPdfMVCSample.Models;
namespace ViewToPdfMVCSample.Controllers
{
public class HomeController : Controller
{
public ActionResult Index()
{
return View();
}
// GET: Person
public ActionResult Persons()
{
var persons = new List<Person>
{
new Person { Name = "Alice", Title = "Mrs.", Description = "Software Engineer" },
new Person { Name = "Bob", Title = "Mr.", Description = "Software Engineer" },
new Person { Name = "Charlie", Title = "Mr.", Description = "Software Engineer" }
};
if (HttpContext.Request.HttpMethod == "POST")
{
// Provide the path to your View file
var viewPath = "~/Views/Home/Persons.cshtml";
ChromePdfRenderer renderer = new ChromePdfRenderer();
// Render View to PDF document
PdfDocument pdf = renderer.RenderView(this.HttpContext, viewPath, persons);
Response.Headers.Add("Content-Disposition", "inline");
// View the PDF
return File(pdf.BinaryData, "application/pdf");
}
return View(persons);
}
public ActionResult About()
{
ViewBag.Message = "Your application description page.";
return View();
}
public ActionResult Contact()
{
ViewBag.Message = "Your contact page.";
return View();
}
}
}using IronPdf;
using System.Collections.Generic;
using System.Web.Mvc;
using ViewToPdfMVCSample.Models;
namespace ViewToPdfMVCSample.Controllers
{
public class HomeController : Controller
{
public ActionResult Index()
{
return View();
}
// GET: Person
public ActionResult Persons()
{
var persons = new List<Person>
{
new Person { Name = "Alice", Title = "Mrs.", Description = "Software Engineer" },
new Person { Name = "Bob", Title = "Mr.", Description = "Software Engineer" },
new Person { Name = "Charlie", Title = "Mr.", Description = "Software Engineer" }
};
if (HttpContext.Request.HttpMethod == "POST")
{
// Provide the path to your View file
var viewPath = "~/Views/Home/Persons.cshtml";
ChromePdfRenderer renderer = new ChromePdfRenderer();
// Render View to PDF document
PdfDocument pdf = renderer.RenderView(this.HttpContext, viewPath, persons);
Response.Headers.Add("Content-Disposition", "inline");
// View the PDF
return File(pdf.BinaryData, "application/pdf");
}
return View(persons);
}
public ActionResult About()
{
ViewBag.Message = "Your application description page.";
return View();
}
public ActionResult Contact()
{
ViewBag.Message = "Your contact page.";
return View();
}
}
}Imports IronPdf
Imports System.Collections.Generic
Imports System.Web.Mvc
Imports ViewToPdfMVCSample.Models
Namespace ViewToPdfMVCSample.Controllers
Public Class HomeController
Inherits Controller
Public Function Index() As ActionResult
Return View()
End Function
' GET: Person
Public Function Persons() As ActionResult
'INSTANT VB NOTE: The local variable persons was renamed since Visual Basic will not allow local variables with the same name as their enclosing function or property:
Dim persons_Conflict = New List(Of Person) From {
New Person With {
.Name = "Alice",
.Title = "Mrs.",
.Description = "Software Engineer"
},
New Person With {
.Name = "Bob",
.Title = "Mr.",
.Description = "Software Engineer"
},
New Person With {
.Name = "Charlie",
.Title = "Mr.",
.Description = "Software Engineer"
}
}
If HttpContext.Request.HttpMethod = "POST" Then
' Provide the path to your View file
Dim viewPath = "~/Views/Home/Persons.cshtml"
Dim renderer As New ChromePdfRenderer()
' Render View to PDF document
Dim pdf As PdfDocument = renderer.RenderView(Me.HttpContext, viewPath, persons_Conflict)
Response.Headers.Add("Content-Disposition", "inline")
' View the PDF
Return File(pdf.BinaryData, "application/pdf")
End If
Return View(persons_Conflict)
End Function
Public Function About() As ActionResult
ViewBag.Message = "Your application description page."
Return View()
End Function
Public Function Contact() As ActionResult
ViewBag.Message = "Your contact page."
Return View()
End Function
End Class
End NamespaceOnce you obtain the PdfDocument object through the RenderView method, you can make various improvements and adjustments to it. You can convert the PDF to PDFA or PDFUA formats, sign digital signature to the created PDF, or merge and split PDF documents as required. Moreover, the library enables you to rotate pages, insert annotations or bookmarks, and apply distinct watermarks to your PDF files.
Add a View
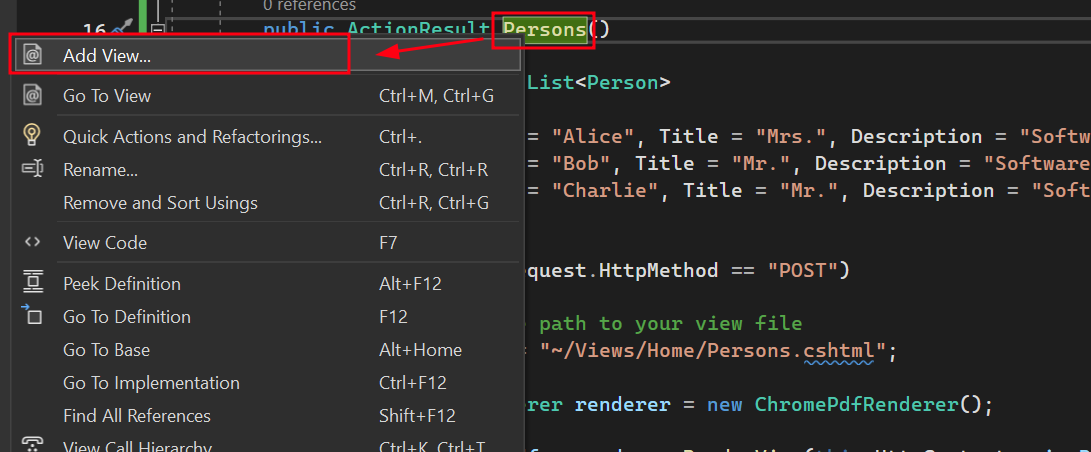
- Right-click on the newly added Person action and select "Add View."
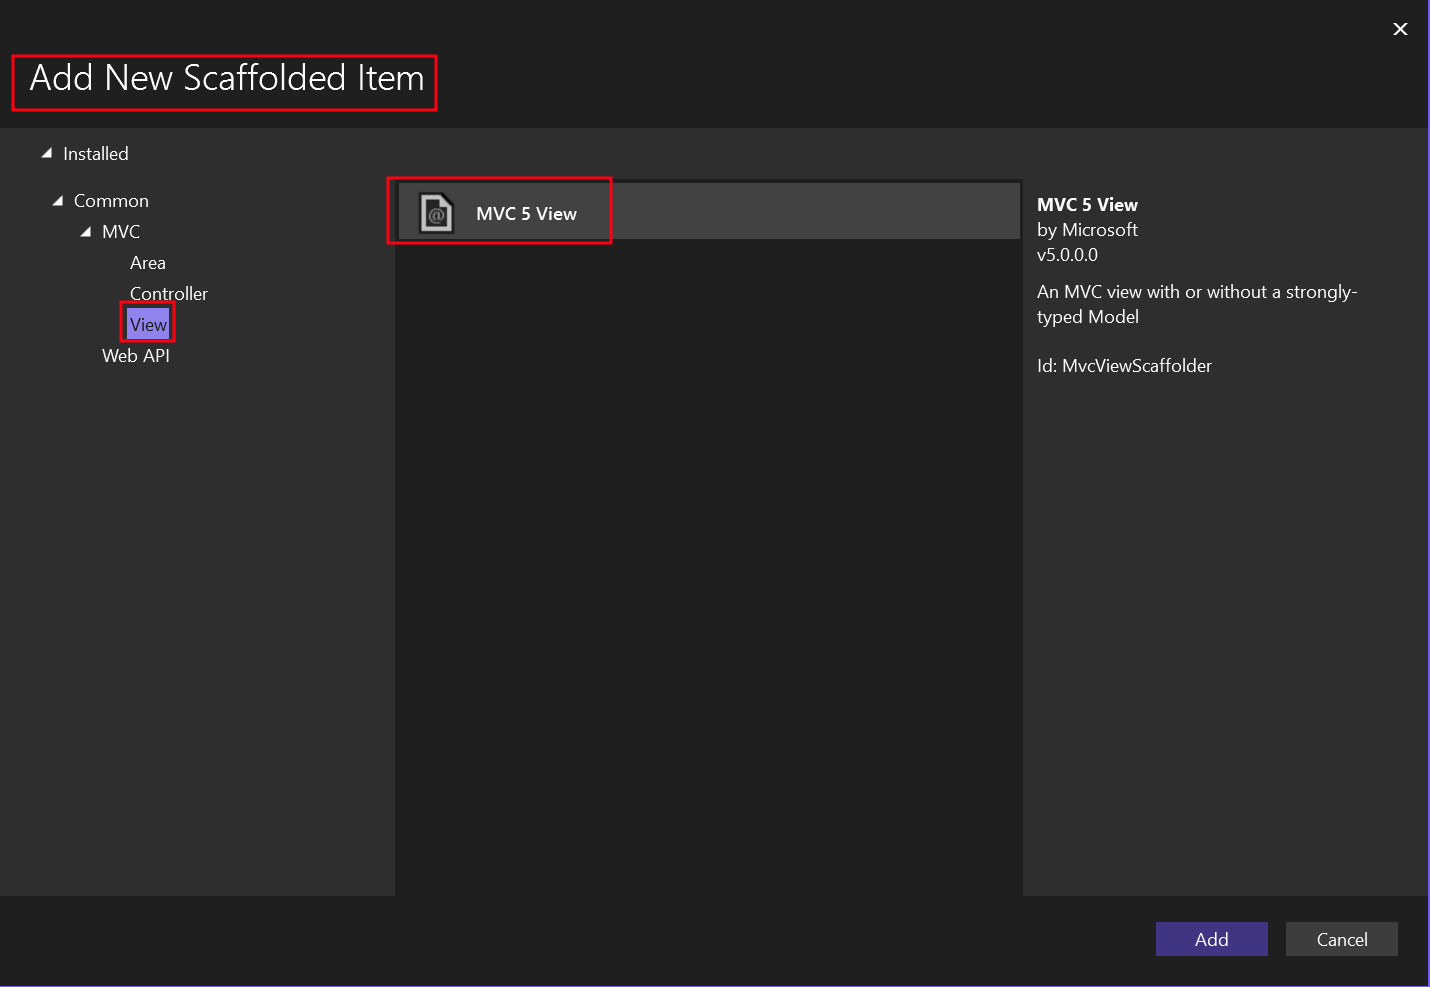
- Choose "MVC 5 View" for the new Scaffolded item.
- Select the "List" template and the "Person" model class.
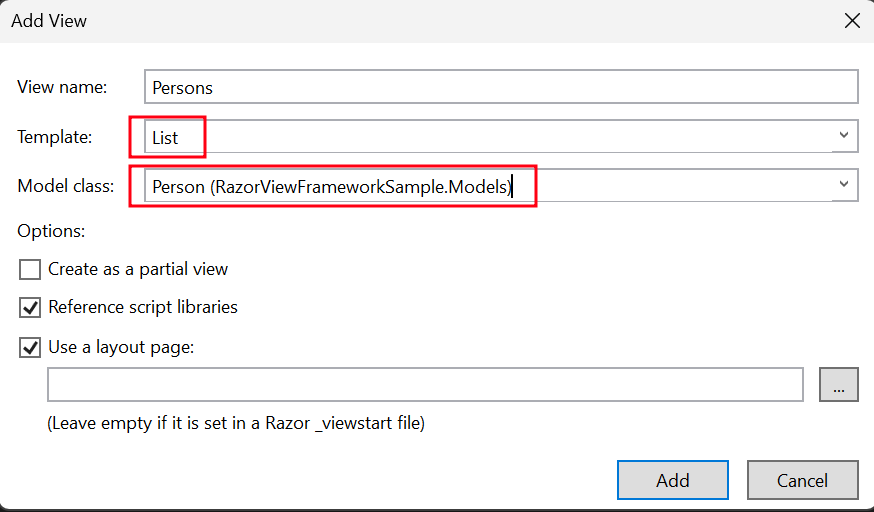
This will create a .cshtml file named "Persons."
- Navigate to the "Views" folder -> "Home" folder -> "Persons.cshtml" file.
To add a button that invokes the "Persons" action, use the code below:
@using (Html.BeginForm("Persons", "Home", FormMethod.Post))
{
    <input type="submit" value="Print Person" />
}
@using (Html.BeginForm("Persons", "Home", FormMethod.Post))
{
<input type="submit" value="Print Person" />
}Add a Section to the Top Navigation Bar
- In the "Views" folder, navigate to the "Shared" folder -> "_Layout.cshtml" file. Place the "Person" navigation item after "Home."
Ensure that the values for the ActionLink method match exactly with our file name, which in this case is "Persons."
<nav class="navbar navbar-expand-sm navbar-toggleable-sm navbar-dark bg-dark">
    <div class="container">
        @Html.ActionLink("Application name", "Index", "Home", new { area = "" }, new { @class = "navbar-brand" })
        <button type="button" class="navbar-toggler" data-bs-toggle="collapse" data-bs-target=".navbar-collapse" title="Toggle navigation" aria-controls="navbarSupportedContent"
                aria-expanded="false" aria-label="Toggle navigation">
            <span class="navbar-toggler-icon"></span>
        </button>
        <div class="collapse navbar-collapse d-sm-inline-flex justify-content-between">
            <ul class="navbar-nav flex-grow-1">
                <li>@Html.ActionLink("Home", "Index", "Home", new { area = "" }, new { @class = "nav-link" })</li>
                <li>@Html.ActionLink("Persons", "Persons", "Home", new { area = "" }, new { @class = "nav-link" })</li>
                <li>@Html.ActionLink("About", "About", "Home", new { area = "" }, new { @class = "nav-link" })</li>
                <li>@Html.ActionLink("Contact", "Contact", "Home", new { area = "" }, new { @class = "nav-link" })</li>
            </ul>
        </div>
    </div>
</nav>
<nav class="navbar navbar-expand-sm navbar-toggleable-sm navbar-dark bg-dark">
<div class="container">
@Html.ActionLink("Application name", "Index", "Home", new { area = "" }, new { @class = "navbar-brand" })
<button type="button" class="navbar-toggler" data-bs-toggle="collapse" data-bs-target=".navbar-collapse" title="Toggle navigation" aria-controls="navbarSupportedContent"
aria-expanded="false" aria-label="Toggle navigation">
<span class="navbar-toggler-icon"></span>
</button>
<div class="collapse navbar-collapse d-sm-inline-flex justify-content-between">
<ul class="navbar-nav flex-grow-1">
<li>@Html.ActionLink("Home", "Index", "Home", new { area = "" }, new { @class = "nav-link" })</li>
<li>@Html.ActionLink("Persons", "Persons", "Home", new { area = "" }, new { @class = "nav-link" })</li>
<li>@Html.ActionLink("About", "About", "Home", new { area = "" }, new { @class = "nav-link" })</li>
<li>@Html.ActionLink("Contact", "Contact", "Home", new { area = "" }, new { @class = "nav-link" })</li>
</ul>
</div>
</div>
</nav>Run the Project
This will show you how to run the project and generate a PDF document.

Download ASP.NET MVC Project
You can download the complete code for this guide. It comes as a zipped file that you can open in Visual Studio as a ASP.NET Web Application (.NET Framework) MVC project.