Cómo crear un archivo PDF en React
¡Bienvenido al tutorial sobre la creación de documentos PDF desde una aplicación React! En este tutorial, exploraremos varias bibliotecas para generar archivos PDF y aprenderemos a utilizar la popular biblioteca jsPDF para crear archivos PDF directamente desde tus componentes React. Así que, ¡vamos a sumergirnos y empezar!
PDF (Formato de Documento Portátil) es un formato de archivo ampliamente utilizado para compartir e imprimir documentos manteniendo su diseño y formato. Como desarrollador web de React, podrías encontrarte con escenarios donde necesites generar documentos PDF, como facturas, informes o contratos de ventas, directamente desde tu aplicación React.
Elección de una biblioteca React PDF
Crear documentos PDF en una aplicación React puede ser una tarea intimidante, especialmente si eres nuevo en este ámbito. Afortunadamente, tenemos varias bibliotecas de terceros a nuestra disposición que simplifican significativamente este proceso. Cada biblioteca viene con sus propias características y utilidades únicas, adaptándose a diferentes casos de uso. Exploremos estas bibliotecas en un poco más de detalle.
jsPDF
jsPDF es una biblioteca muy popular entre los desarrolladores para generar archivos PDF a partir de JavaScript. Uno de sus principales puntos de venta es su simplicidad. Su sintaxis y uso son bastante directos, permitiéndote transformar tu contenido HTML en un archivo PDF en poco tiempo.
Te permite controlar el formato y la maquetación de tus archivos PDF, desde cambiar el tamaño y el color de la fuente hasta ajustar la orientación y el tamaño de la página. jsPDF es una solución robusta que funciona tanto en entornos de navegador como de servidor, lo que la convierte en una excelente opción para una amplia gama de aplicaciones JavaScript.
hacer pdf
pdfmake destaca como una solución de impresión de PDF del lado del cliente/servidor en JavaScript puro. Esta biblioteca es una excelente opción para crear PDFs más complejos, gracias a su API integral y opciones de diseño flexibles. Con pdfmake, puede definir el contenido y la estructura de su documento utilizando un sencillo objeto JavaScript y, a continuación, transformarlo en un documento PDF válido.
React-PDF
React-PDF es una biblioteca única que ofrece potentes funciones para crear archivos PDF utilizando componentes de React. En lugar de escribir manualmente la estructura de tu documento en un objeto JavaScript, puedes crear tu PDF exactamente como construirías una aplicación React típica, usando componentes reutilizables y propiedades. El sitio web de IronPDF tiene un tutorial sobre la creación de PDFs usando la biblioteca React-PDF.
¿Por qué elegir jsPDF?
Aunque las tres bibliotecas proporcionan potentes herramientas para generar documentos PDF en React, en este tutorial utilizaremos jsPDF debido a su simplicidad, flexibilidad y amplia adopción en la comunidad. Proporciona una barrera de entrada más baja para principiantes, y su robusto conjunto de características lo convierte en una opción adecuada para muchos casos de uso. Los principios que exploraremos con jsPDF te proporcionarán una base sólida para generar archivos PDF, y podrás familiarizarte con otras bibliotecas más fácilmente si tu proyecto lo requiere.
Requisitos previos
Antes de profundizar en este tutorial, es esencial asegurarte de que estás adecuadamente equipado con las herramientas y el conocimiento necesarios para seguir sin problemas. Los requisitos previos para este tutorial son los siguientes:
Comprensión básica de React
Antes que nada, debes tener una comprensión básica de React, una popular biblioteca de JavaScript para construir interfaces de usuario, especialmente aplicaciones de una sola página. Debes estar familiarizado con conceptos como JSX (JavaScript XML), componentes, estado y propiedades en React.
Entorno de desarrollo
También debes tener configurado un entorno de desarrollo en tu computadora para construir aplicaciones React. Esto incluye un editor de texto o un Entorno de Desarrollo Integrado (IDE). Editores de texto como Visual Studio Code, Atom o Sublime Text son todas buenas opciones.
Node.js y npm
Para administrar nuestro proyecto y sus dependencias, utilizaremos Node.js y npm (Node Package Manager). Asegúrate de tener Node.js instalado en tu computadora. Node.js es un entorno de ejecución de JavaScript que nos permite ejecutar JavaScript en nuestros servidores. Viene con npm instalado, por lo que puedes gestionar las bibliotecas necesarias para tu proyecto.
Puedes verificar si Node.js y npm están instalados ejecutando los siguientes comandos en el terminal:
node -v
npm -v
node -v
npm -vEstos comandos mostrarán la versión de Node.js y npm instalados en tu sistema, respectivamente. Si no los tienes instalados o si tus versiones están desactualizadas, deberías descargar e instalar la última versión de Soporte a Largo Plazo (LTS) de Node.js desde su página oficial de descargas.
Paso 1: Configuración del proyecto
Comencemos configurando nuestro proyecto React. Abre tu terminal y navega al directorio deseado donde quieres crear tu proyecto. Ejecuta el siguiente comando para crear una nueva aplicación React:
npx create-react-app pdf-from-reactnpx create-react-app pdf-from-react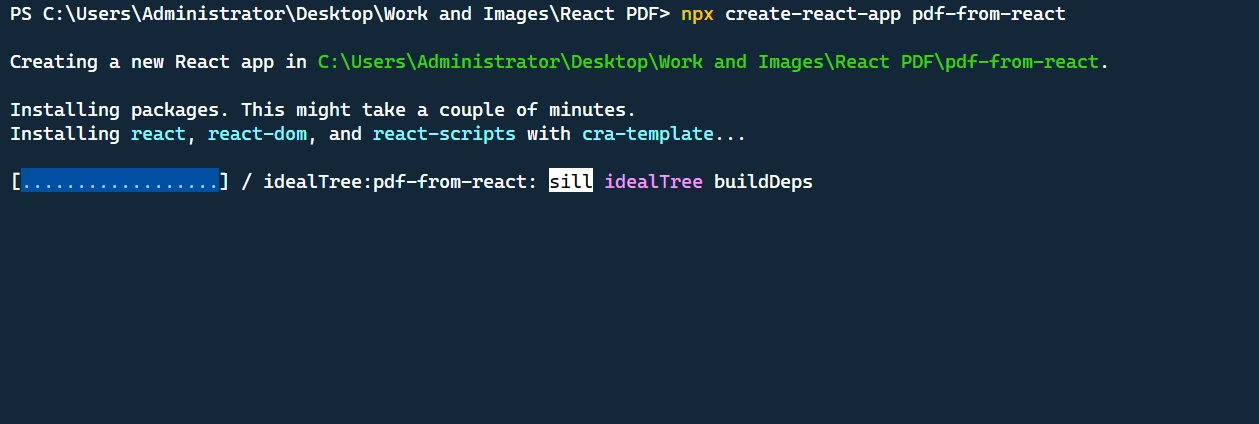
Este comando creará un nuevo directorio llamado pdf-from-react con una estructura básica de proyecto React.
A continuación, navega dentro del directorio del proyecto:
cd pdf-from-reactcd pdf-from-reactAhora, podemos abrir el proyecto en nuestro editor de código y proceder con la implementación.
Paso 2: Añadir las dependencias necesarias
Primero, necesitamos instalar los paquetes necesarios. Instale react, react-dom, @mui/material y jspdf utilizando el siguiente comando de terminal.
npm install jspdf @mui/material @emotion/react @emotion/styled @mui/icons-materialnpm install jspdf @mui/material @emotion/react @emotion/styled @mui/icons-materialPaso 3: Creación de la función de generación de PDF
Importación de bibliotecas
Comenzamos importando las dependencias necesarias para nuestra aplicación. Entre ellas se incluyen varios componentes de la biblioteca Material-UI, la biblioteca jsPDF para generar archivos PDF y utilidades de estilo.
import React, { useState } from "react";
import "./App.css";
import {
  Button,
  TextField,
  Box,
  Container,
  Typography,
  Table,
  TableBody,
  TableCell,
  TableContainer,
  TableHead,
  TableRow,
  Paper,
  IconButton,
  Snackbar,
  Alert,
} from "@mui/material";
import Grid from "@mui/material/Grid";
import DeleteIcon from "@mui/icons-material/Delete";
import jsPDF from "jspdf";
import { styled } from "@mui/material/styles";
import { tableCellClasses } from "@mui/material/TableCell";
import React, { useState } from "react";
import "./App.css";
import {
Button,
TextField,
Box,
Container,
Typography,
Table,
TableBody,
TableCell,
TableContainer,
TableHead,
TableRow,
Paper,
IconButton,
Snackbar,
Alert,
} from "@mui/material";
import Grid from "@mui/material/Grid";
import DeleteIcon from "@mui/icons-material/Delete";
import jsPDF from "jspdf";
import { styled } from "@mui/material/styles";
import { tableCellClasses } from "@mui/material/TableCell";Creación de componentes con estilo
Para añadir un comportamiento coherente en todos los navegadores a nuestra aplicación, hemos utilizado la utilidad styled de la biblioteca MUI para crear StyledTableCell y StyledTableRow.
const StyledTableCell = styled(TableCell)(({ theme }) => ({
[`&.${tableCellClasses.head}`]: {
backgroundColor: theme.palette.common.black,
color: theme.palette.common.white,
},
[`&.${tableCellClasses.body}`]: {
fontSize: 14,
},
}));
const StyledTableRow = styled(TableRow)(({ theme }) => ({
"&:nth-of-type(odd)": {
backgroundColor: theme.palette.action.hover,
},
"&:last-child td, &:last-child th": {
border: 0,
},
}));const StyledTableCell = styled(TableCell)(({ theme }) => ({
[`&.${tableCellClasses.head}`]: {
backgroundColor: theme.palette.common.black,
color: theme.palette.common.white,
},
[`&.${tableCellClasses.body}`]: {
fontSize: 14,
},
}));
const StyledTableRow = styled(TableRow)(({ theme }) => ({
"&:nth-of-type(odd)": {
backgroundColor: theme.palette.action.hover,
},
"&:last-child td, &:last-child th": {
border: 0,
},
}));Creación del componente de la aplicación
El componente principal de nuestra aplicación es el componente App. Tenemos cuatro variables de estado: customerName y customerAddress para realizar un seguimiento de los datos del cliente, items para realizar un seguimiento de la lista de artículos de la factura, y error para mostrar un mensaje de error cuando sea necesario.
function App() {
// State variables
const [customerName, setCustomerName] = useState("");
const [customerAddress, setCustomerAddress] = useState("");
const [items, setItems] = useState([{ name: "", quantity: "", price: "" }]);
const [error, setError] = useState(false);function App() {
// State variables
const [customerName, setCustomerName] = useState("");
const [customerAddress, setCustomerAddress] = useState("");
const [items, setItems] = useState([{ name: "", quantity: "", price: "" }]);
const [error, setError] = useState(false);Manejo de la entrada del usuario
En este bloque de código, hemos definido funciones para manejar las interacciones del usuario: cambiar detalles del ítem, agregar un nuevo ítem y eliminar un ítem. La función handleItemChange actualiza las propiedades de un elemento cuando un usuario las modifica. La función addItem añade un nuevo elemento a la lista. La función deleteItem elimina un elemento de la lista.
const handleItemChange = (index, event) => {
let newItems = [...items];
newItems[index][event.target.name] = event.target.value;
setItems(newItems);
};
const addItem = () => {
setItems([...items, { name: "", quantity: "", price: "" }]);
};
const deleteItem = (index) => {
let newItems = [...items];
newItems.splice(index, 1);
setItems(newItems);
};const handleItemChange = (index, event) => {
let newItems = [...items];
newItems[index][event.target.name] = event.target.value;
setItems(newItems);
};
const addItem = () => {
setItems([...items, { name: "", quantity: "", price: "" }]);
};
const deleteItem = (index) => {
let newItems = [...items];
newItems.splice(index, 1);
setItems(newItems);
};Generación de la factura
A continuación se muestra el código de la función generateInvoice:
// Generate invoice
const generateInvoice = () => {
// Validate the input fields
if (
!customerName ||
!customerAddress ||
items.some((item) => !item.name || !item.quantity || !item.price)
) {
setError(true);
return;
}
// Create a new jsPDF instance
let doc = new jsPDF("p", "pt");
// Add invoice header
doc.setFontSize(24);
doc.text("Invoice", 40, 60);
doc.setFontSize(10);
doc.text("Invoice Number: 123456", 40, 90);
doc.text("Date: " + new Date().toDateString(), 40, 110);
doc.text(`Customer Name: ${customerName}`, 40, 130);
doc.text(`Customer Address: ${customerAddress}`, 40, 150);
// Add items section
doc.setFontSize(14);
doc.text("Items:", 40, 200);
doc.line(40, 210, 550, 210);
// Add item details
doc.setFontSize(12);
let yOffset = 240;
let total = 0;
items.forEach((item) => {
let itemTotal = item.quantity * item.price;
total += itemTotal;
doc.text(`Item: ${item.name}`, 40, yOffset);
doc.text(`Quantity: ${item.quantity}`, 200, yOffset);
doc.text(`Price: $${item.price}`, 300, yOffset);
doc.text(`Total: $${itemTotal}`, 400, yOffset);
yOffset += 20;
});
// Add total
doc.line(40, yOffset, 550, yOffset);
doc.setFontSize(14);
doc.text(`Total: $${total}`, 400, yOffset + 30);
// Save the generated PDF as "invoice.pdf"
doc.save("invoice.pdf");
// Reset error state
setError(false);
};// Generate invoice
const generateInvoice = () => {
// Validate the input fields
if (
!customerName ||
!customerAddress ||
items.some((item) => !item.name || !item.quantity || !item.price)
) {
setError(true);
return;
}
// Create a new jsPDF instance
let doc = new jsPDF("p", "pt");
// Add invoice header
doc.setFontSize(24);
doc.text("Invoice", 40, 60);
doc.setFontSize(10);
doc.text("Invoice Number: 123456", 40, 90);
doc.text("Date: " + new Date().toDateString(), 40, 110);
doc.text(`Customer Name: ${customerName}`, 40, 130);
doc.text(`Customer Address: ${customerAddress}`, 40, 150);
// Add items section
doc.setFontSize(14);
doc.text("Items:", 40, 200);
doc.line(40, 210, 550, 210);
// Add item details
doc.setFontSize(12);
let yOffset = 240;
let total = 0;
items.forEach((item) => {
let itemTotal = item.quantity * item.price;
total += itemTotal;
doc.text(`Item: ${item.name}`, 40, yOffset);
doc.text(`Quantity: ${item.quantity}`, 200, yOffset);
doc.text(`Price: $${item.price}`, 300, yOffset);
doc.text(`Total: $${itemTotal}`, 400, yOffset);
yOffset += 20;
});
// Add total
doc.line(40, yOffset, 550, yOffset);
doc.setFontSize(14);
doc.text(`Total: $${total}`, 400, yOffset + 30);
// Save the generated PDF as "invoice.pdf"
doc.save("invoice.pdf");
// Reset error state
setError(false);
};En la función generateInvoice, primero realizamos una validación de los campos de entrada para asegurarnos de que se han rellenado el nombre del cliente, la dirección del cliente y los detalles del artículo. Si alguno de estos campos está vacío, establecemos el estado error en true y salimos anticipadamente.
A continuación, creamos una nueva instancia de jsPDF llamando a new jsPDF("p", "pt"). El primer argumento "p" especifica la orientación de la página como vertical, y el segundo argumento "pt"" especifica la unidad de medida como puntos.
Luego comenzamos a agregar el contenido a nuestro documento PDF. Establecemos el tamaño de la fuente utilizando doc.setFontSize y usamos el método doc.text para añadir texto en coordenadas específicas de la página. Agregamos el encabezado de la factura, incluyendo el título, número de factura, fecha, nombre del cliente y dirección del cliente.
Después del encabezado, añadimos la sección "Elementos" configurando el tamaño de la fuente y añadiendo una línea con doc.line para separar los elementos del encabezado. A continuación, iteramos sobre cada elemento de la matriz items y calculamos el precio total de cada elemento multiplicando la cantidad por el precio. Actualizamos la variable total con la suma de todos los totales de los elementos.
Para cada artículo, utilizamos doc.text para añadir el nombre del artículo, la cantidad, el precio y el total del artículo al documento PDF. Incrementamos la variable yOffset para pasar a la siguiente línea en cada elemento. Por último, añadimos una línea para separar los elementos del total y utilizamos doc.text para añadir el importe total en la parte inferior derecha del documento.
Una vez añadido el contenido, utilizamos doc.save("invoice.pdf") para guardar el PDF generado como "invoice.pdf" en el ordenador del usuario. Por último, restablecemos el estado error a false para borrar cualquier error de validación anterior.
Paso 4: Renderización de la interfaz de usuario
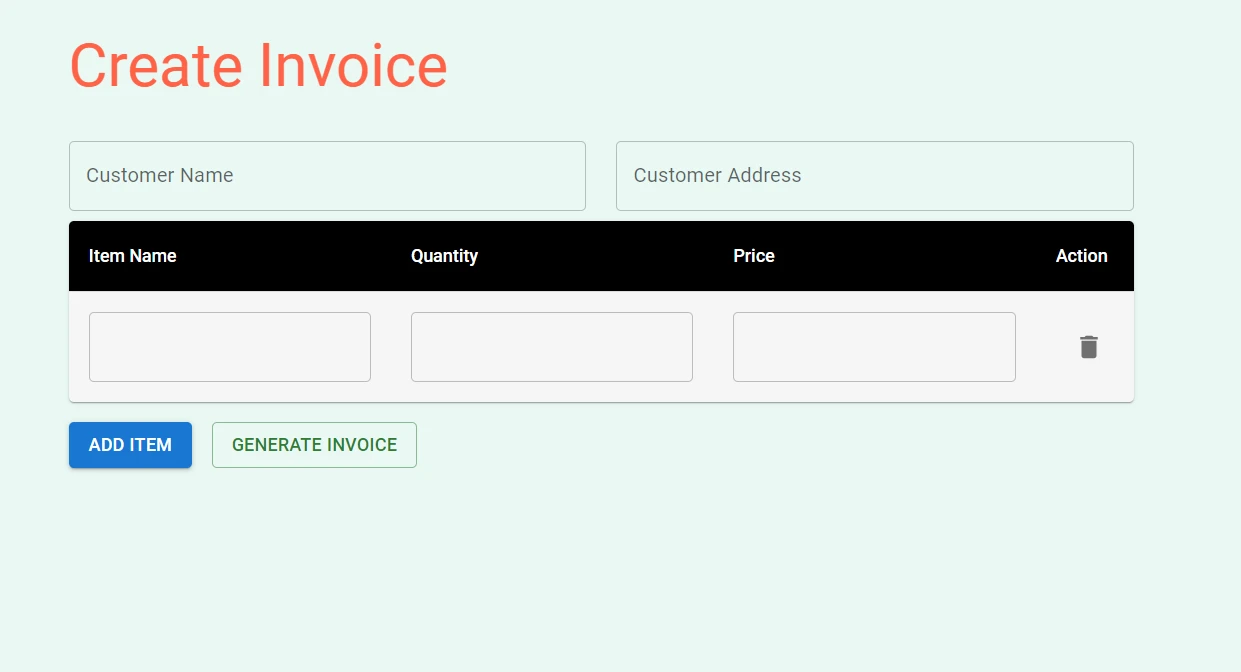
La instrucción return contiene el código JSX que gestiona el proceso de renderizado. Incluye campos de entrada para el nombre y dirección del cliente, una tabla para ingresar detalles de los ítems, botones para agregar ítems y generar la factura, y un snackbar de error para mostrar errores de validación.
Utiliza componentes de la biblioteca Material-UI, como Button, TextField, Box, Container, Typography, Table, TableBody, TableCell, TableContainer, TableHead, TableRow, Paper, IconButton, Snackbar y Alert, para crear componentes básicos. Estos componentes son usados para crear los campos del formulario, tablas, botones y notificaciones de error.
return (
<Container maxWidth="md">
<Box sx={{ my: 4 }}>
<Typography variant="h3" component="h1" gutterBottom>
Create Invoice
</Typography>
{/* Customer Name and Address fields */}
<Grid container spacing={3}>
<Grid item xs={6}>
<TextField
label="Customer Name"
fullWidth
margin="normal"
value={customerName}
onChange={(e) => setCustomerName(e.target.value)}
/>
</Grid>
<Grid item xs={6}>
<TextField
label="Customer Address"
fullWidth
margin="normal"
value={customerAddress}
onChange={(e) => setCustomerAddress(e.target.value)}
/>
</Grid>
</Grid>
{/* Items table */}
<TableContainer component={Paper}>
<Table sx={{ minWidth: 700 }} aria-label="invoice table">
<TableHead>
<TableRow>
<StyledTableCell>Item Name</StyledTableCell>
<StyledTableCell align="left">Quantity</StyledTableCell>
<StyledTableCell align="left">Price</StyledTableCell>
<StyledTableCell align="left">Action</StyledTableCell>
</TableRow>
</TableHead>
<TableBody>
{items.map((item, index) => (
<StyledTableRow key={index}>
<StyledTableCell component="th" scope="row">
<TextField
fullWidth
value={item.name}
onChange={(event) => handleItemChange(index, event)}
name="name"
/>
</StyledTableCell>
<StyledTableCell align="right">
<TextField
fullWidth
value={item.quantity}
onChange={(event) => handleItemChange(index, event)}
name="quantity"
/>
</StyledTableCell>
<StyledTableCell align="right">
<TextField
fullWidth
value={item.price}
onChange={(event) => handleItemChange(index, event)}
name="price"
/>
</StyledTableCell>
<StyledTableCell align="right">
<IconButton onClick={() => deleteItem(index)}>
<DeleteIcon />
</IconButton>
</StyledTableCell>
</StyledTableRow>
))}
</TableBody>
</Table>
</TableContainer>
{/* Buttons */}
<Box mt={2} display="flex" gap={2}>
<Button variant="contained" onClick={addItem}>
Add Item
</Button>
<Button variant="outlined" color="success" onClick={generateInvoice}>
Generate Invoice
</Button>
</Box>
</Box>
{/* Error Snackbar */}
<Snackbar
open={error}
autoHideDuration={6000}
onClose={() => setError(false)}
anchorOrigin={{ vertical: "top", horizontal: "right" }}
>
<Alert onClose={() => setError(false)} severity="error">
Please fill in all required fields.
</Alert>
</Snackbar>
</Container>
);return (
<Container maxWidth="md">
<Box sx={{ my: 4 }}>
<Typography variant="h3" component="h1" gutterBottom>
Create Invoice
</Typography>
{/* Customer Name and Address fields */}
<Grid container spacing={3}>
<Grid item xs={6}>
<TextField
label="Customer Name"
fullWidth
margin="normal"
value={customerName}
onChange={(e) => setCustomerName(e.target.value)}
/>
</Grid>
<Grid item xs={6}>
<TextField
label="Customer Address"
fullWidth
margin="normal"
value={customerAddress}
onChange={(e) => setCustomerAddress(e.target.value)}
/>
</Grid>
</Grid>
{/* Items table */}
<TableContainer component={Paper}>
<Table sx={{ minWidth: 700 }} aria-label="invoice table">
<TableHead>
<TableRow>
<StyledTableCell>Item Name</StyledTableCell>
<StyledTableCell align="left">Quantity</StyledTableCell>
<StyledTableCell align="left">Price</StyledTableCell>
<StyledTableCell align="left">Action</StyledTableCell>
</TableRow>
</TableHead>
<TableBody>
{items.map((item, index) => (
<StyledTableRow key={index}>
<StyledTableCell component="th" scope="row">
<TextField
fullWidth
value={item.name}
onChange={(event) => handleItemChange(index, event)}
name="name"
/>
</StyledTableCell>
<StyledTableCell align="right">
<TextField
fullWidth
value={item.quantity}
onChange={(event) => handleItemChange(index, event)}
name="quantity"
/>
</StyledTableCell>
<StyledTableCell align="right">
<TextField
fullWidth
value={item.price}
onChange={(event) => handleItemChange(index, event)}
name="price"
/>
</StyledTableCell>
<StyledTableCell align="right">
<IconButton onClick={() => deleteItem(index)}>
<DeleteIcon />
</IconButton>
</StyledTableCell>
</StyledTableRow>
))}
</TableBody>
</Table>
</TableContainer>
{/* Buttons */}
<Box mt={2} display="flex" gap={2}>
<Button variant="contained" onClick={addItem}>
Add Item
</Button>
<Button variant="outlined" color="success" onClick={generateInvoice}>
Generate Invoice
</Button>
</Box>
</Box>
{/* Error Snackbar */}
<Snackbar
open={error}
autoHideDuration={6000}
onClose={() => setError(false)}
anchorOrigin={{ vertical: "top", horizontal: "right" }}
>
<Alert onClose={() => setError(false)} severity="error">
Please fill in all required fields.
</Alert>
</Snackbar>
</Container>
);Código App.js y App.css completo
Aquí tienes el código completo App.js que puedes copiar y pegar en tu proyecto:
import React, { useState } from "react";
import "./App.css";
import {
  Button,
  TextField,
  Box,
  Container,
  Typography,
  Table,
  TableBody,
  TableCell,
  TableContainer,
  TableHead,
  TableRow,
  Paper,
  IconButton,
  Snackbar,
  Alert,
} from "@mui/material";
import Grid from "@mui/material/Grid";
import DeleteIcon from "@mui/icons-material/Delete";
import jsPDF from "jspdf";
import { styled } from "@mui/material/styles";
import { tableCellClasses } from "@mui/material/TableCell";
const StyledTableCell = styled(TableCell)(({ theme }) => ({
  [`&.${tableCellClasses.head}`]: {
    backgroundColor: theme.palette.common.black,
    color: theme.palette.common.white,
  },
  [`&.${tableCellClasses.body}`]: {
    fontSize: 14,
  },
}));

const StyledTableRow = styled(TableRow)(({ theme }) => ({
  "&:nth-of-type(odd)": {
    backgroundColor: theme.palette.action.hover,
  },
  "&:last-child td, &:last-child th": {
    border: 0,
  },
}));
function App() {
// State variables
const [customerName, setCustomerName] = useState("");
const [customerAddress, setCustomerAddress] = useState("");
const [items, setItems] = useState([{ name: "", quantity: "", price: "" }]);
const [error, setError] = useState(false);
// Event handler for item changes
const handleItemChange = (index, event) => {
let newItems = [...items];
newItems[index][event.target.name] = event.target.value;
setItems(newItems);
};
// Add new item to the list
const addItem = () => {
setItems([...items, { name: "", quantity: "", price: "" }]);
};
// Delete an item from the list
const deleteItem = (index) => {
let newItems = [...items];
newItems.splice(index, 1);
setItems(newItems);
};
// Generate invoice
const generateInvoice = () => {
// Validate the input fields
if (
!customerName ||
!customerAddress ||
items.some((item) => !item.name || !item.quantity || !item.price)
) {
setError(true);
return;
}
// Create a new jsPDF instance
let doc = new jsPDF("p", "pt");
// Add invoice header
doc.setFontSize(24);
doc.text("Invoice", 40, 60);
doc.setFontSize(10);
doc.text("Invoice Number: 123456", 40, 90);
doc.text("Date: " + new Date().toDateString(), 40, 110);
doc.text(`Customer Name: ${customerName}`, 40, 130);
doc.text(`Customer Address: ${customerAddress}`, 40, 150);
// Add items section
doc.setFontSize(14);
doc.text("Items:", 40, 200);
doc.line(40, 210, 550, 210);
// Add item details
doc.setFontSize(12);
let yOffset = 240;
let total = 0;
items.forEach((item) => {
let itemTotal = item.quantity * item.price;
total += itemTotal;
doc.text(`Item: ${item.name}`, 40, yOffset);
doc.text(`Quantity: ${item.quantity}`, 200, yOffset);
doc.text(`Price: $${item.price}`, 300, yOffset);
doc.text(`Total: $${itemTotal}`, 400, yOffset);
yOffset += 20;
});
// Add total
doc.line(40, yOffset, 550, yOffset);
doc.setFontSize(14);
doc.text(`Total: $${total}`, 400, yOffset + 30);
// Save the generated PDF as "invoice.pdf"
doc.save("invoice.pdf");
// Reset error state
setError(false);
};
return (
<Container maxWidth="md">
<Box sx={{ my: 4 }}>
<Typography variant="h3" component="h1" gutterBottom>
Create Invoice
</Typography>
{/* Customer Name and Address fields */}
<Grid container spacing={3}>
<Grid item xs={6}>
<TextField
label="Customer Name"
fullWidth
margin="normal"
value={customerName}
onChange={(e) => setCustomerName(e.target.value)}
/>
</Grid>
<Grid item xs={6}>
<TextField
label="Customer Address"
fullWidth
margin="normal"
value={customerAddress}
onChange={(e) => setCustomerAddress(e.target.value)}
/>
</Grid>
</Grid>
{/* Items table */}
<TableContainer component={Paper}>
<Table sx={{ minWidth: 700 }} aria-label="invoice table">
<TableHead>
<TableRow>
<StyledTableCell>Item Name</StyledTableCell>
<StyledTableCell align="left">Quantity</StyledTableCell>
<StyledTableCell align="left">Price</StyledTableCell>
<StyledTableCell align="left">Action</StyledTableCell>
</TableRow>
</TableHead>
<TableBody>
{items.map((item, index) => (
<StyledTableRow key={index}>
<StyledTableCell component="th" scope="row">
<TextField
fullWidth
value={item.name}
onChange={(event) => handleItemChange(index, event)}
name="name"
/>
</StyledTableCell>
<StyledTableCell align="right">
<TextField
fullWidth
value={item.quantity}
onChange={(event) => handleItemChange(index, event)}
name="quantity"
/>
</StyledTableCell>
<StyledTableCell align="right">
<TextField
fullWidth
value={item.price}
onChange={(event) => handleItemChange(index, event)}
name="price"
/>
</StyledTableCell>
<StyledTableCell align="right">
<IconButton onClick={() => deleteItem(index)}>
<DeleteIcon />
</IconButton>
</StyledTableCell>
</StyledTableRow>
))}
</TableBody>
</Table>
</TableContainer>
{/* Buttons */}
<Box mt={2} display="flex" gap={2}>
<Button variant="contained" onClick={addItem}>
Add Item
</Button>
<Button variant="outlined" color="success" onClick={generateInvoice}>
Generate Invoice
</Button>
</Box>
</Box>
{/* Error Snackbar */}
<Snackbar
open={error}
autoHideDuration={6000}
onClose={() => setError(false)}
anchorOrigin={{ vertical: "top", horizontal: "right" }}
>
<Alert onClose={() => setError(false)} severity="error">
Please fill in all required fields.
</Alert>
</Snackbar>
</Container>
);
}
export default App;import React, { useState } from "react";
import "./App.css";
import {
Button,
TextField,
Box,
Container,
Typography,
Table,
TableBody,
TableCell,
TableContainer,
TableHead,
TableRow,
Paper,
IconButton,
Snackbar,
Alert,
} from "@mui/material";
import Grid from "@mui/material/Grid";
import DeleteIcon from "@mui/icons-material/Delete";
import jsPDF from "jspdf";
import { styled } from "@mui/material/styles";
import { tableCellClasses } from "@mui/material/TableCell";
const StyledTableCell = styled(TableCell)(({ theme }) => ({
  [`&.${tableCellClasses.head}`]: {
    backgroundColor: theme.palette.common.black,
    color: theme.palette.common.white,
  },
  [`&.${tableCellClasses.body}`]: {
    fontSize: 14,
  },
}));

const StyledTableRow = styled(TableRow)(({ theme }) => ({
  "&:nth-of-type(odd)": {
    backgroundColor: theme.palette.action.hover,
  },
  "&:last-child td, &:last-child th": {
    border: 0,
  },
}));
function App() {
  // State variables
  const [customerName, setCustomerName] = useState("");
  const [customerAddress, setCustomerAddress] = useState("");
  const [items, setItems] = useState([{ name: "", quantity: "", price: "" }]);
  const [error, setError] = useState(false);
// Event handler for item changes
const handleItemChange = (index, event) => {
let newItems = [...items];
newItems[index][event.target.name] = event.target.value;
setItems(newItems);
};
// Add new item to the list
const addItem = () => {
setItems([...items, { name: "", quantity: "", price: "" }]);
};
// Delete an item from the list
const deleteItem = (index) => {
let newItems = [...items];
newItems.splice(index, 1);
setItems(newItems);
};
// Generate invoice
const generateInvoice = () => {
  // Validate the input fields
  if (
    !customerName ||
    !customerAddress ||
    items.some((item) => !item.name || !item.quantity || !item.price)
  ) {
    setError(true);
    return;
  }

  // Create a new jsPDF instance
  let doc = new jsPDF("p", "pt");

  // Add invoice header
  doc.setFontSize(24);
  doc.text("Invoice", 40, 60);
  doc.setFontSize(10);
  doc.text("Invoice Number: 123456", 40, 90);
  doc.text("Date: " + new Date().toDateString(), 40, 110);
  doc.text(`Customer Name: ${customerName}`, 40, 130);
  doc.text(`Customer Address: ${customerAddress}`, 40, 150);

  // Add items section
  doc.setFontSize(14);
  doc.text("Items:", 40, 200);
  doc.line(40, 210, 550, 210);

  // Add item details
  doc.setFontSize(12);
  let yOffset = 240;
  let total = 0;

  items.forEach((item) => {
    let itemTotal = item.quantity * item.price;
    total += itemTotal;

    doc.text(`Item: ${item.name}`, 40, yOffset);
    doc.text(`Quantity: ${item.quantity}`, 200, yOffset);
    doc.text(`Price: $${item.price}`, 300, yOffset);
    doc.text(`Total: $${itemTotal}`, 400, yOffset);

    yOffset += 20;
  });

  // Add total
  doc.line(40, yOffset, 550, yOffset);
  doc.setFontSize(14);
  doc.text(`Total: $${total}`, 400, yOffset + 30);

  // Save the generated PDF as "invoice.pdf"
  doc.save("invoice.pdf");

  // Reset error state
  setError(false);
};
return (
  <Container maxWidth="md">
    <Box sx={{ my: 4 }}>
      <Typography variant="h3" component="h1" gutterBottom>
        Create Invoice
      </Typography>

      {/* Customer Name and Address fields */}
      <Grid container spacing={3}>
        <Grid item xs={6}>
          <TextField
            label="Customer Name"
            fullWidth
            margin="normal"
            value={customerName}
            onChange={(e) => setCustomerName(e.target.value)}
          />
        </Grid>
        <Grid item xs={6}>
          <TextField
            label="Customer Address"
            fullWidth
            margin="normal"
            value={customerAddress}
            onChange={(e) => setCustomerAddress(e.target.value)}
          />
        </Grid>
      </Grid>

      {/* Items table */}
      <TableContainer component={Paper}>
        <Table sx={{ minWidth: 700 }} aria-label="invoice table">
          <TableHead>
            <TableRow>
              <StyledTableCell>Item Name</StyledTableCell>
              <StyledTableCell align="left">Quantity</StyledTableCell>
              <StyledTableCell align="left">Price</StyledTableCell>
              <StyledTableCell align="left">Action</StyledTableCell>
            </TableRow>
          </TableHead>
          <TableBody>
            {items.map((item, index) => (
              <StyledTableRow key={index}>
                <StyledTableCell component="th" scope="row">
                  <TextField
                    fullWidth
                    value={item.name}
                    onChange={(event) => handleItemChange(index, event)}
                    name="name"
                  />
                </StyledTableCell>
                <StyledTableCell align="right">
                  <TextField
                    fullWidth
                    value={item.quantity}
                    onChange={(event) => handleItemChange(index, event)}
                    name="quantity"
                  />
                </StyledTableCell>
                <StyledTableCell align="right">
                  <TextField
                    fullWidth
                    value={item.price}
                    onChange={(event) => handleItemChange(index, event)}
                    name="price"
                  />
                </StyledTableCell>
                <StyledTableCell align="right">
                  <IconButton onClick={() => deleteItem(index)}>
                    <DeleteIcon />
                  </IconButton>
                </StyledTableCell>
              </StyledTableRow>
            ))}
          </TableBody>
        </Table>
      </TableContainer>

      {/* Buttons */}
      <Box mt={2} display="flex" gap={2}>
        <Button variant="contained" onClick={addItem}>
          Add Item
        </Button>
        <Button variant="outlined" color="success" onClick={generateInvoice}>
          Generate Invoice
        </Button>
      </Box>
    </Box>

    {/* Error Snackbar */}
    <Snackbar
      open={error}
      autoHideDuration={6000}
      onClose={() => setError(false)}
      anchorOrigin={{ vertical: "top", horizontal: "right" }}
    >
      <Alert onClose={() => setError(false)} severity="error">
        Please fill in all required fields.
      </Alert>
    </Snackbar>
  </Container>
);
}
export default App;Aquí está el código App.css:
@import url('https://fonts.googleapis.com/css2?family=Poppins:wght@400;700&display=swap');
.App {
  text-align: center;
}

.App-logo {
  height: 40vmin;
  pointer-events: none;
}

@media (prefers-reduced-motion: no-preference) {
  .App-logo {
    animation: App-logo-spin infinite 20s linear;
  }
}

h1,
h2,
h3,
h4,
h5,
h6 {
  font-weight: bold;
  /* This is the weight for bold in Poppins */
  color: #FF6347;
  /* This is the color Tomato. Replace with your preferred color */
}

body {
  font-family: 'Poppins', sans-serif;
  background-color: #E9F8F4;
}

.App-header {
  background-color: #282c34;
  min-height: 100vh;
  display: flex;
  flex-direction: column;
  align-items: center;
  justify-content: center;
  font-size: calc(10px + 2vmin);
  color: white;
}

.App-link {
  color: #61dafb;
}

@keyframes App-logo-spin {
  from {
    transform: rotate(0deg);
  }
  to {
    transform: rotate(360deg);
  }
}
Paso 5: Probar la aplicación
Para probar la funcionalidad de generación de PDF, ejecuta el siguiente comando en el terminal:
npm startnpm startEsto iniciará el servidor de desarrollo y podrás ver la aplicación en tu navegador en http://localhost:3000.
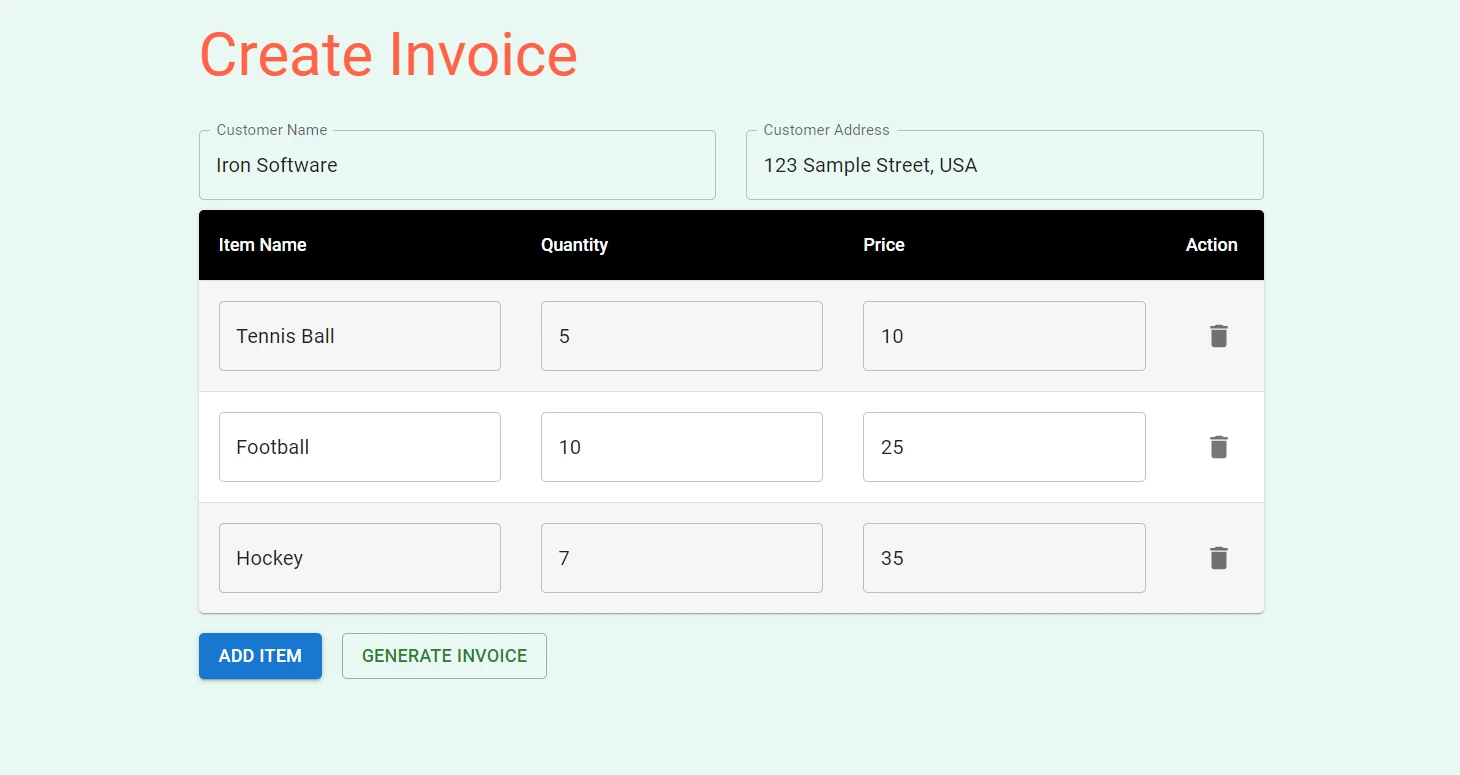
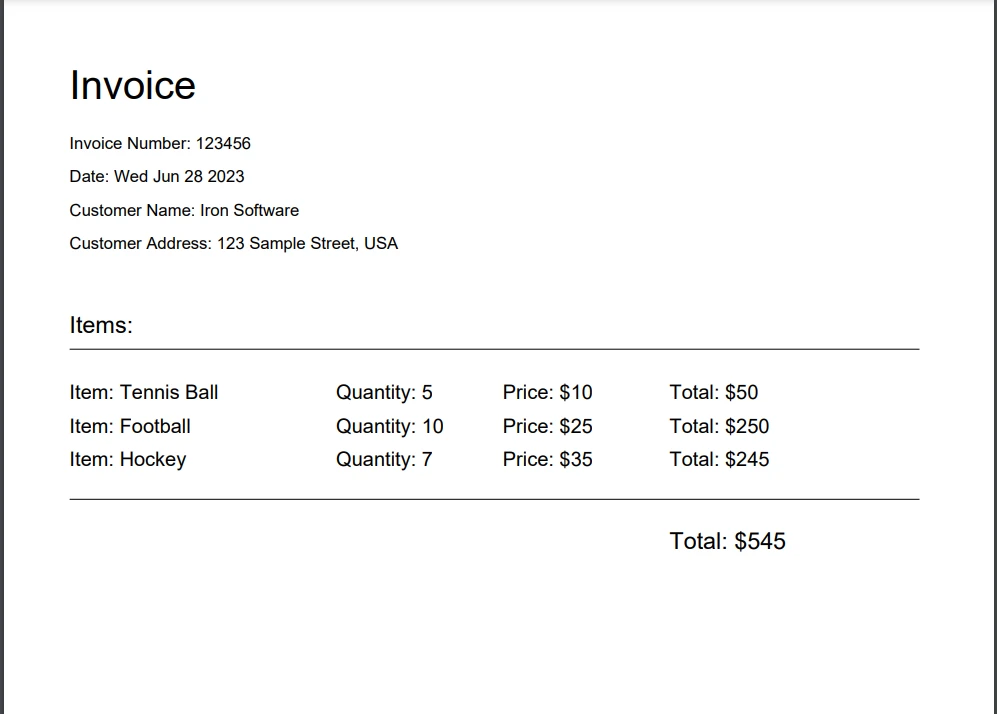
Llena el nombre del cliente, dirección y detalles de los ítems en los campos de entrada y haz clic en el botón "Generar Factura". El archivo PDF se descargará en tu computadora, y podrás abrirlo para ver la vista de página completa de la factura generada.
Cuando hagas clic en el botón "Generar Factura", se generará el archivo PDF.
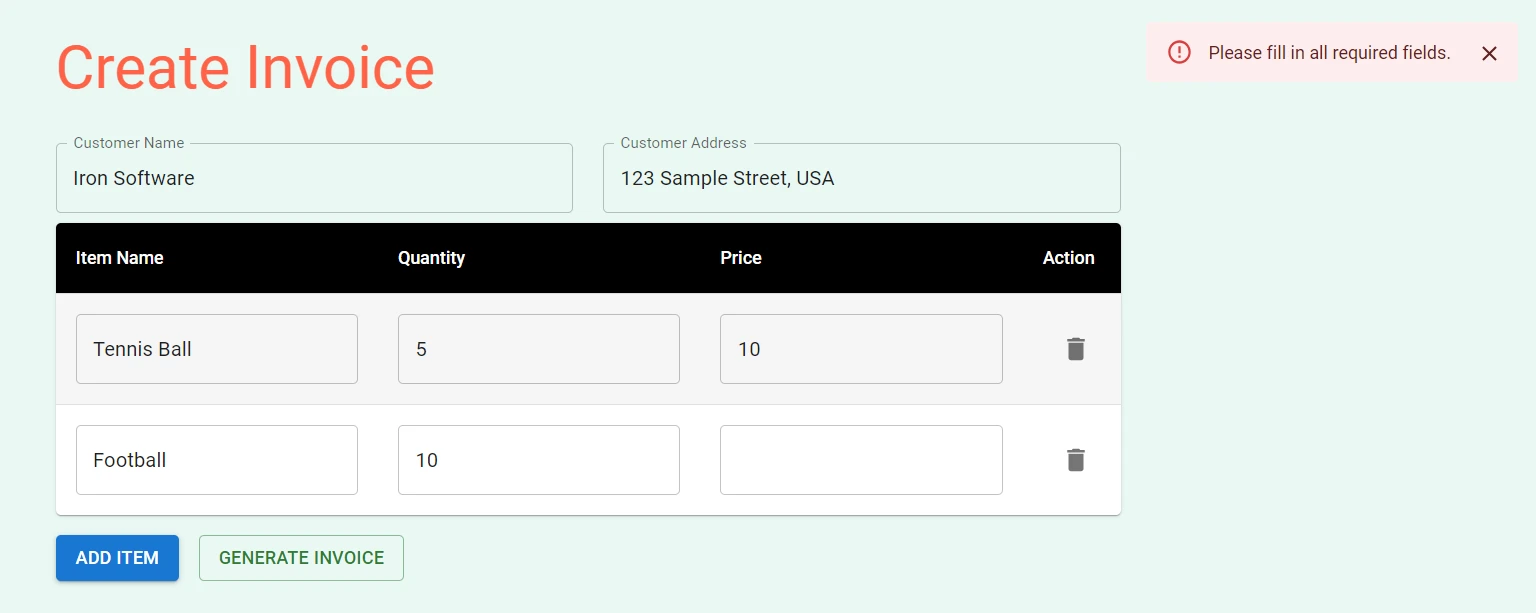
Si intentas generar un PDF con algún campo vacío, se mostrará un mensaje de error en la esquina superior derecha.
IronPDF - La biblioteca PDF de Node.js
IronPDF for Node.js es una biblioteca integral de PDF for Node.js que destaca en precisión, facilidad de uso y rapidez. Ofrece una vasta gama de características para generar, editar y formatear PDFs directamente desde HTML, URLs e imágenes en React. Con soporte para varias plataformas, incluyendo Windows, MacOS, Linux, Docker y plataformas en la nube como Azure y AWS, IronPDF garantiza compatibilidad multiplataforma. Su API amigable para el usuario permite a los desarrolladores integrar rápidamente la generación y manipulación de PDFs en sus proyectos Node.js.
Las características notables de IronPDF Node.js incluyen: renderizado de píxeles perfecto, extensas opciones de formato y capacidades avanzadas de edición como la fusión y división de PDFs, adición de anotaciones y creación de formularios PDF.
Aquí hay un ejemplo de generación de un documento PDF a partir de un Archivo HTML, Cadena HTML y URL:
import { PdfDocument } from "@ironsoftware/ironpdf";
(async () => {
const pdfFromUrl = await PdfDocument.fromUrl("https://getbootstrap.com/");
await pdfFromUrl.saveAs("website.pdf");
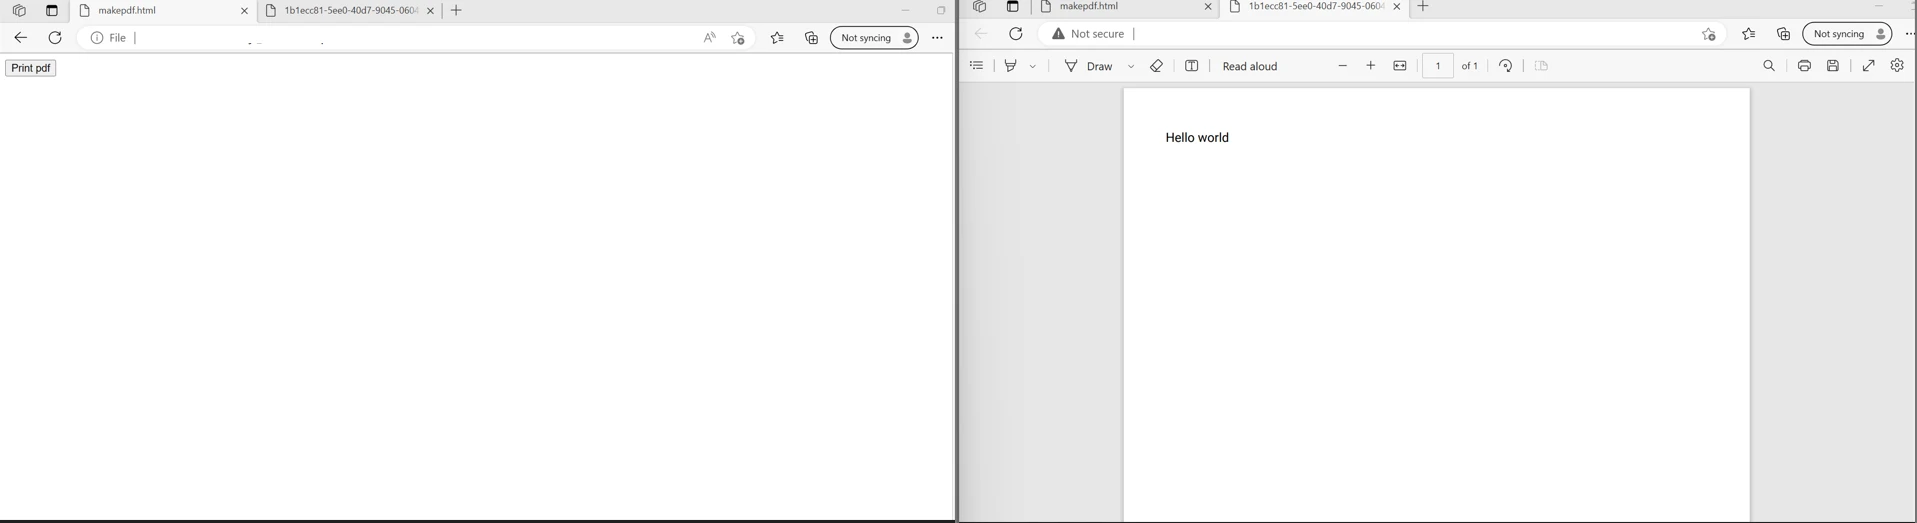
const pdfFromHtmlFile = await PdfDocument.fromHtml("design.html");
await pdfFromHtmlFile.saveAs("markup.pdf");
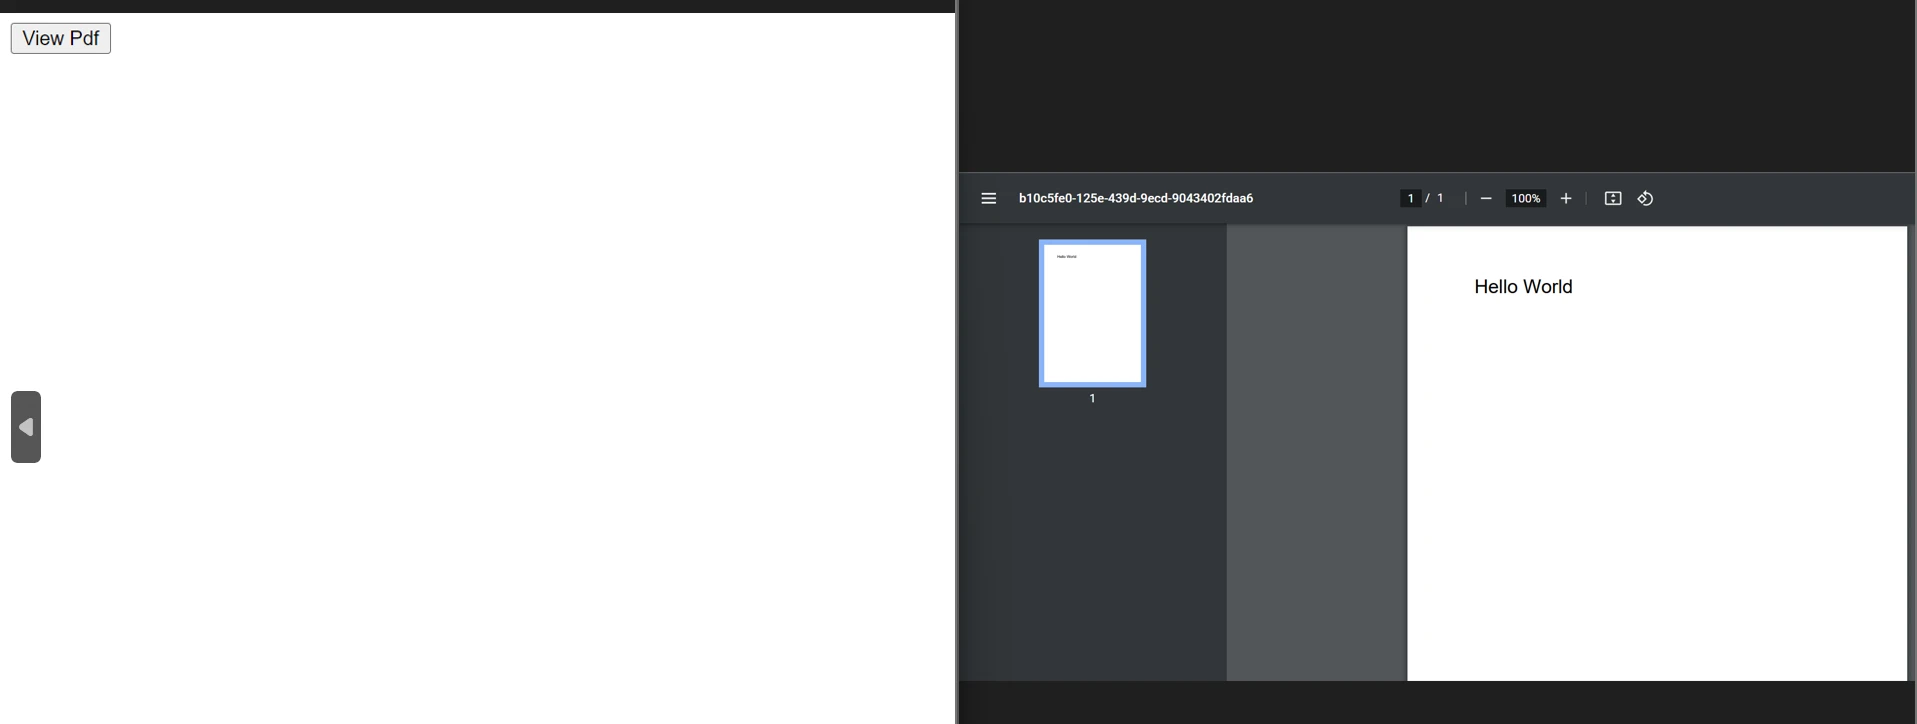
const pdfFromHtmlString = await PdfDocument.fromHtml("<p>Hello World</p>");
await pdfFromHtmlString.saveAs("markup_with_assets.pdf");
})();import { PdfDocument } from "@ironsoftware/ironpdf";
(async () => {
const pdfFromUrl = await PdfDocument.fromUrl("https://getbootstrap.com/");
await pdfFromUrl.saveAs("website.pdf");
const pdfFromHtmlFile = await PdfDocument.fromHtml("design.html");
await pdfFromHtmlFile.saveAs("markup.pdf");
const pdfFromHtmlString = await PdfDocument.fromHtml("<p>Hello World</p>");
await pdfFromHtmlString.saveAs("markup_with_assets.pdf");
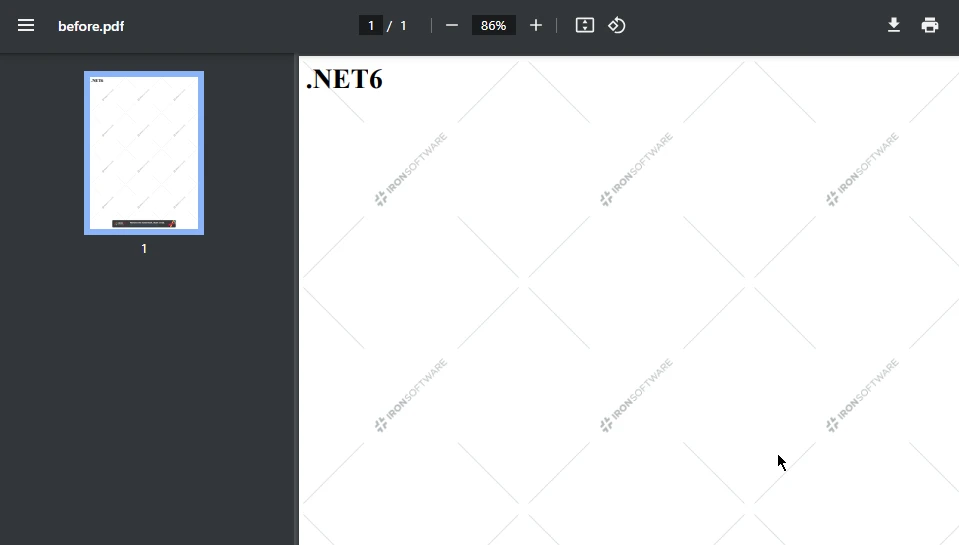
})();Para más ejemplos de código sobre tareas relacionadas con PDF, por favor visita esta página de ejemplos de código de IronPDF.
Conclusión
En conclusión, crear PDFs en una aplicación React no tiene por qué ser intimidante. Con las herramientas adecuadas y un entendimiento claro, puedes generar sin esfuerzo documentos PDF hermosos y bien estructurados. Hemos explorado varias bibliotecas, como jsPDF, pdfmake y React-PDF, cada una con sus propias ventajas y características únicas.
Con el proceso de integración sencillo de IronPDF para frameworks y bibliotecas en JavaScript, excelente documentación y soporte técnico receptivo, los desarrolladores pueden ponerse en marcha rápidamente, convirtiéndolo en una opción superior para generar PDFs de calidad profesional en aplicaciones Node.js.
IronPDF ofrece una prueba gratuita de su funcionalidad completa. También está disponible para otros lenguajes como C# .NET, Java, y Python. Visite el sitio web de IronPDF para más detalles.