
Sendgrid .NET (jak to działa dla programistów)

SendGrid, część Twilio SendGrid, oferuje usługę w chmurze, która pomaga klientom w prostym wysyłaniu e-maili, usprawniając procesy komunikacyjne. Po utworzeniu konta na SendGrid, uzyskasz dostęp do funkcji takich jak relacja SMTP i klucze API, co usprawnia wysyłanie wiadomości email. Relacja SMTP jest sercem tego procesu, ponieważ pozwala na wysyłanie e-maili z Twojego serwera przez system SendGrid. Funkcja uwierzytelniania domeny weryfikuje Twoją domenę. Jako że SendGrid jest open source, możesz uzyskać dostęp do jego repozytorium GitHub i pomóc w jego modyfikacji.
W tym przewodniku staramy się przedstawić funkcje i możliwości SendGrid .NET, prowadząc Cię przez początkową konfigurację, podstawowe operacje i bardziej zaawansowane funkcje. Niezależnie od tego, czy chcesz wysłać pierwszy e-mail przez kod, czy zoptymalizować kampanie e-mailowe, ten artykuł jest punktem wyjścia do opanowania SendGrid .NET i jego integracji z IronPDF do manipulacji PDF.
Pierwsze kroki z SendGrid .NET
Najpierw musisz skonfigurować SendGrid .NET w swoim projekcie. Zacznij od zainstalowania pakietu SendGrid .NET. Użyj do tego Menedżera pakietów NuGet. Otwórz Visual Studio, a następnie otwórz Konsolę Menedżera Pakietów. Wpisz następujące polecenie:
Install-Package SendGrid

To polecenie dodaje SendGrid do Twojego projektu. Po instalacji skonfiguruj swoje konto SendGrid. Potrzebujesz klucza API. Przejdź na stronę SendGrid. Utwórz konto, jeśli go nie masz. Po zalogowaniu przejdź do Ustawienia. Znajdź Klucze API. Kliknij Utwórz klucz API. Nadaj mu nazwę i wybierz poziom dostępu. Skopiuj klucz API. Będziesz go używać w swojej aplikacji.
Podstawowy przykład kodu
Teraz wyślijmy e-mail. Utwórz nową instancję SendGridClient. Przekaż swój klucz API do konstruktora. Następnie utwórz SendGridMessage. Ustaw adresy e-mail nadawcy i odbiorcy. Dodaj temat i treść wiadomości email. Na koniec użyj SendGridClient, aby wysłać wiadomość. Oto podstawowy przykład:
using SendGrid;
using SendGrid.Helpers.Mail;
using System.Threading.Tasks;

// Asynchronous method to send an email using SendGrid
static async Task SendEmailAsync()
{
    // Initialize a SendGrid client with your API key
    var client = new SendGridClient("your_api_key");

    // Create a new email message
    var message = new SendGridMessage()
    {
        From = new EmailAddress("your_email@example.com", "Your Name"),
        Subject = "Hello World from SendGrid",
        PlainTextContent = "This is a test email.",
        HtmlContent = "<strong>This is a test email.</strong>"
    };

    // Add a recipient to your email message
    message.AddTo(new EmailAddress("recipient_email@example.com", "Recipient Name"));

    // Send the email and retrieve the response
    var response = await client.SendEmailAsync(message);
}
using SendGrid;
using SendGrid.Helpers.Mail;
using System.Threading.Tasks;
// Asynchronous method to send an email using SendGrid
static async Task SendEmailAsync()
{
// Initialize a SendGrid client with your API key
var client = new SendGridClient("your_api_key");
// Create a new email message
var message = new SendGridMessage()
{
From = new EmailAddress("your_email@example.com", "Your Name"),
Subject = "Hello World from SendGrid",
PlainTextContent = "This is a test email.",
HtmlContent = "<strong>This is a test email.</strong>"
};
// Add a recipient to your email message
message.AddTo(new EmailAddress("recipient_email@example.com", "Recipient Name"));
// Send the email and retrieve the response
var response = await client.SendEmailAsync(message);
}Imports SendGrid
Imports SendGrid.Helpers.Mail
Imports System.Threading.Tasks
' Asynchronous method to send an email using SendGrid
Shared Async Function SendEmailAsync() As Task
' Initialize a SendGrid client with your API key
Dim client = New SendGridClient("your_api_key")
' Create a new email message
Dim message = New SendGridMessage() With {
.From = New EmailAddress("your_email@example.com", "Your Name"),
.Subject = "Hello World from SendGrid",
.PlainTextContent = "This is a test email.",
.HtmlContent = "<strong>This is a test email.</strong>"
}
' Add a recipient to your email message
message.AddTo(New EmailAddress("recipient_email@example.com", "Recipient Name"))
' Send the email and retrieve the response
Dim response = Await client.SendEmailAsync(message)
End FunctionTen kod wysyła prosty e-mail. Pokazuje podstawy używania SendGrid .NET. Możesz rozszerzyć to o dodatkowe funkcje.
Implementacja funkcji SendGrid .NET
Wysyłanie e-maili z niestandardową zawartością HTML
Aby wysłać e-mail z zawartością HTML, najpierw utwórz swój HTML. Następnie użyj SendGridMessage, aby ustawić HtmlContent. Pozwala to projektować bogate wiadomości e-mail. Oto jak to zrobić:
using SendGrid;
using SendGrid.Helpers.Mail;
using System.Threading.Tasks;

// Asynchronous method to send an email with custom HTML content
static async Task SendCustomHtmlEmailAsync()
{
    // Initialize a SendGrid client with your API key
    var client = new SendGridClient("your_api_key");

    // Create a new email message with rich HTML content
    var message = new SendGridMessage()
    {
        From = new EmailAddress("your_email@example.com", "Your Name"),
        Subject = "Custom HTML Content",
        HtmlContent = "<html><body><h1>This is a Heading</h1><p>This is a paragraph.</p></body></html>"
    };

    // Add a recipient to your email message
    message.AddTo(new EmailAddress("recipient_email@example.com", "Recipient Name"));

    // Send the email and retrieve the response
    var response = await client.SendEmailAsync(message);
}
using SendGrid;
using SendGrid.Helpers.Mail;
using System.Threading.Tasks;
// Asynchronous method to send an email with custom HTML content
static async Task SendCustomHtmlEmailAsync()
{
// Initialize a SendGrid client with your API key
var client = new SendGridClient("your_api_key");
// Create a new email message with rich HTML content
var message = new SendGridMessage()
{
From = new EmailAddress("your_email@example.com", "Your Name"),
Subject = "Custom HTML Content",
HtmlContent = "<html><body><h1>This is a Heading</h1><p>This is a paragraph.</p></body></html>"
};
// Add a recipient to your email message
message.AddTo(new EmailAddress("recipient_email@example.com", "Recipient Name"));
// Send the email and retrieve the response
var response = await client.SendEmailAsync(message);
}Imports SendGrid
Imports SendGrid.Helpers.Mail
Imports System.Threading.Tasks
' Asynchronous method to send an email with custom HTML content
Shared Async Function SendCustomHtmlEmailAsync() As Task
' Initialize a SendGrid client with your API key
Dim client = New SendGridClient("your_api_key")
' Create a new email message with rich HTML content
Dim message = New SendGridMessage() With {
.From = New EmailAddress("your_email@example.com", "Your Name"),
.Subject = "Custom HTML Content",
.HtmlContent = "<html><body><h1>This is a Heading</h1><p>This is a paragraph.</p></body></html>"
}
' Add a recipient to your email message
message.AddTo(New EmailAddress("recipient_email@example.com", "Recipient Name"))
' Send the email and retrieve the response
Dim response = Await client.SendEmailAsync(message)
End FunctionUżywanie usługi SMTP SendGrid
Czasami możesz preferować SMTP do wysyłania e-maili. SendGrid również to obsługuje. Skonfiguruj swoje ustawienia SMTP w SendGrid. Następnie użyj tych ustawień w swojej aplikacji. Ta metoda wymaga skonfigurowania klienta SMTP z danymi serwera SendGrid. Oto podstawowa konfiguracja:
using System.Net;
using System.Net.Mail;

// Method to send an email using SendGrid's SMTP service
void SendSmtpEmail()
{
    // Configure SMTP client with SendGrid's server details
    using (var client = new SmtpClient("smtp.sendgrid.net")
    {
        Port = 587,
        Credentials = new NetworkCredential("apikey", "your_sendgrid_apikey"),
        EnableSsl = true,
    })
    {
        // Create a new mail message
        var mailMessage = new MailMessage
        {
            From = new MailAddress("your_email@example.com"),
            Subject = "Test SMTP Email",
            Body = "This is a test email sent via SMTP.",
            IsBodyHtml = true,
        };

        // Add a recipient to the mail message
        mailMessage.To.Add("recipient_email@example.com");

        // Send the email
        client.Send(mailMessage);
    }
}
using System.Net;
using System.Net.Mail;
// Method to send an email using SendGrid's SMTP service
void SendSmtpEmail()
{
// Configure SMTP client with SendGrid's server details
using (var client = new SmtpClient("smtp.sendgrid.net")
{
Port = 587,
Credentials = new NetworkCredential("apikey", "your_sendgrid_apikey"),
EnableSsl = true,
})
{
// Create a new mail message
var mailMessage = new MailMessage
{
From = new MailAddress("your_email@example.com"),
Subject = "Test SMTP Email",
Body = "This is a test email sent via SMTP.",
IsBodyHtml = true,
};
// Add a recipient to the mail message
mailMessage.To.Add("recipient_email@example.com");
// Send the email
client.Send(mailMessage);
}
}Imports System.Net
Imports System.Net.Mail
' Method to send an email using SendGrid's SMTP service
Private Sub SendSmtpEmail()
' Configure SMTP client with SendGrid's server details
Using client = New SmtpClient("smtp.sendgrid.net") With {
.Port = 587,
.Credentials = New NetworkCredential("apikey", "your_sendgrid_apikey"),
.EnableSsl = True
}
' Create a new mail message
Dim mailMessage As New MailMessage With {
.From = New MailAddress("your_email@example.com"),
.Subject = "Test SMTP Email",
.Body = "This is a test email sent via SMTP.",
.IsBodyHtml = True
}
' Add a recipient to the mail message
mailMessage.To.Add("recipient_email@example.com")
' Send the email
client.Send(mailMessage)
End Using
End SubZarządzanie kampaniami e-mailowymi
SendGrid .NET pozwala na zarządzanie kampaniami e-mailowymi. Twórz, wysyłaj i śledź kampanie przez API. Szczegółowe zarządzanie kampaniami znajdziesz w dokumentacji API SendGrid. Ta funkcja wykracza poza podstawowe wysyłanie e-maili, ale jest wartościowa dla działań marketingowych.
Obsługa zwracanych e-maili i zgłoszeń spamu
Obsługa zwrotów i zgłoszeń spamu jest kluczowa. SendGrid .NET zapewnia webhooki dla tych zdarzeń. Skonfiguruj webhooki w swoim panelu SendGrid. Następnie przetwarzaj te zdarzenia w swojej aplikacji. To utrzymuje czystość listy e-mailowej i poprawia dostarczalność.
Uwierzytelnianie domen
Uwierzytelnianie domeny jest ważne dla dostarczalności e-maili. Weryfikuje to własność Twojej domeny. W SendGrid skonfiguruj uwierzytelnianie domeny poprzez pulpit nawigacyjny. Polega to na dodaniu rekordów DNS. Po weryfikacji e-maile wydają się bardziej wiarygodne dla odbiorców i dostawców poczty.
Zintegrować IronPDF z SendGrid
Wprowadzenie IronPDF
Exploruj możliwości IronPDF to biblioteka, która umożliwia programistom tworzenie, edytowanie i wyodrębnianie zawartości PDF w aplikacjach .NET. Zapewnia prosty sposób radzenia sobie z plikami PDF programowo. Ułatwia pracę z plikami PDF bez potrzeby głębokiej znajomości specyfikacji PDF. Dzięki IronPDF programiści mogą konwertować HTML na PDF używając kotwic IronPDF, edytować istniejące PDF-y i wyodrębniać zawartość.
Use Case of Merging IronPDF with SendGrid C
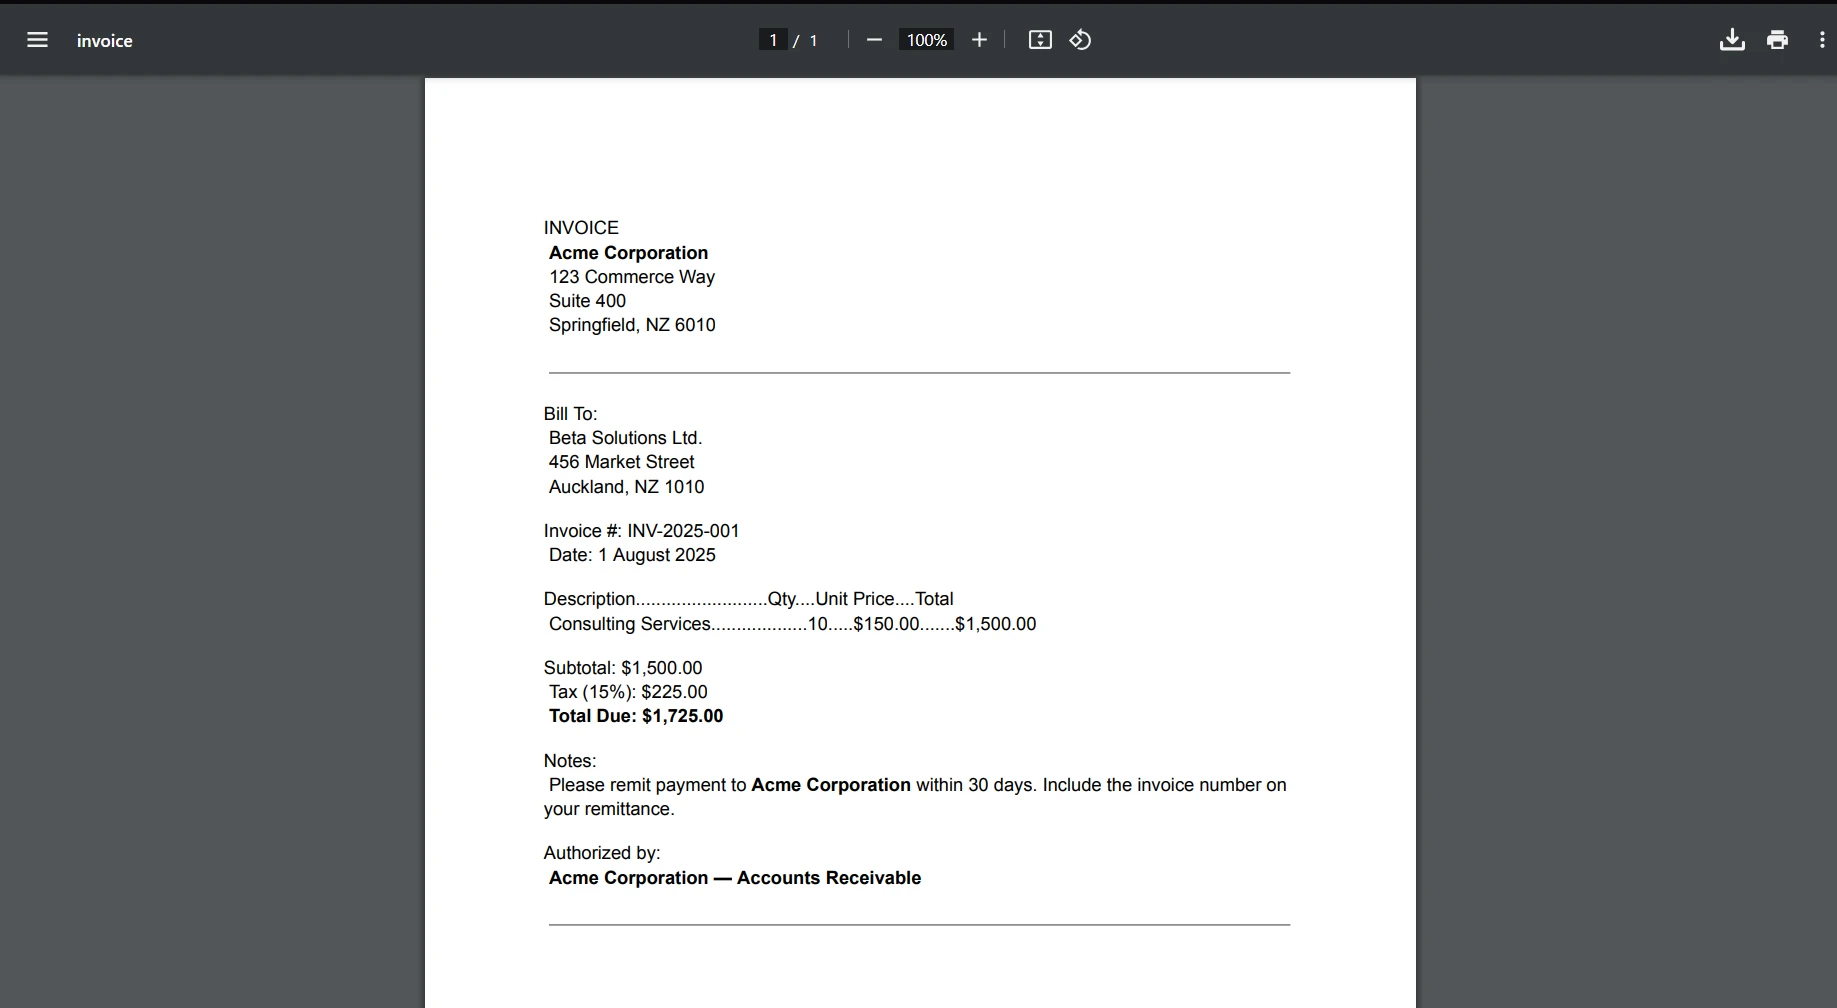
W aplikacji biznesowej, raporty finansowe, faktury lub spersonalizowane dokumenty muszą być generowane dynamicznie i wysyłane do klientów lub interesariuszy za pośrednictwem e-maila. IronPDF może być używany do tworzenia tych dokumentów z szablonów lub źródeł danych, konwertując je na format PDF. Następnie, używając klienta C# SendGrid, te dokumenty PDF mogą być dołączane do wiadomości e-mail i automatycznie przesyłane do zamierzonych odbiorców.
IronPDF wyróżnia się w konwersji HTML do PDF, zapewniając precyzyjne zachowanie oryginalnych układów i stylów. Idealnie nadaje się do tworzenia plików PDF z treści internetowych, takich jak raporty, faktury i dokumentacja. Dzięki obsłudze plików HTML, adresów URL i surowych ciągów znaków HTML, IronPDF z łatwością tworzy wysokiej jakości dokumenty PDF.
using IronPdf;

class Program
{
    static void Main(string[] args)
    {
        var renderer = new ChromePdfRenderer();

        // 1. Convert HTML String to PDF
        var htmlContent = "<h1>Hello, IronPDF!</h1><p>This is a PDF from an HTML string.</p>";
        var pdfFromHtmlString = renderer.RenderHtmlAsPdf(htmlContent);
        pdfFromHtmlString.SaveAs("HTMLStringToPDF.pdf");

        // 2. Convert HTML File to PDF
        var htmlFilePath = "path_to_your_html_file.html"; // Specify the path to your HTML file
        var pdfFromHtmlFile = renderer.RenderHtmlFileAsPdf(htmlFilePath);
        pdfFromHtmlFile.SaveAs("HTMLFileToPDF.pdf");

        // 3. Convert URL to PDF
        var url = "http://ironpdf.com"; // Specify the URL
        var pdfFromUrl = renderer.RenderUrlAsPdf(url);
        pdfFromUrl.SaveAs("URLToPDF.pdf");
    }
}
using IronPdf;
class Program
{
static void Main(string[] args)
{
var renderer = new ChromePdfRenderer();
// 1. Convert HTML String to PDF
var htmlContent = "<h1>Hello, IronPDF!</h1><p>This is a PDF from an HTML string.</p>";
var pdfFromHtmlString = renderer.RenderHtmlAsPdf(htmlContent);
pdfFromHtmlString.SaveAs("HTMLStringToPDF.pdf");
// 2. Convert HTML File to PDF
var htmlFilePath = "path_to_your_html_file.html"; // Specify the path to your HTML file
var pdfFromHtmlFile = renderer.RenderHtmlFileAsPdf(htmlFilePath);
pdfFromHtmlFile.SaveAs("HTMLFileToPDF.pdf");
// 3. Convert URL to PDF
var url = "http://ironpdf.com"; // Specify the URL
var pdfFromUrl = renderer.RenderUrlAsPdf(url);
pdfFromUrl.SaveAs("URLToPDF.pdf");
}
}Imports IronPdf
Friend Class Program
Shared Sub Main(ByVal args() As String)
Dim renderer = New ChromePdfRenderer()
' 1. Convert HTML String to PDF
Dim htmlContent = "<h1>Hello, IronPDF!</h1><p>This is a PDF from an HTML string.</p>"
Dim pdfFromHtmlString = renderer.RenderHtmlAsPdf(htmlContent)
pdfFromHtmlString.SaveAs("HTMLStringToPDF.pdf")
' 2. Convert HTML File to PDF
Dim htmlFilePath = "path_to_your_html_file.html" ' Specify the path to your HTML file
Dim pdfFromHtmlFile = renderer.RenderHtmlFileAsPdf(htmlFilePath)
pdfFromHtmlFile.SaveAs("HTMLFileToPDF.pdf")
' 3. Convert URL to PDF
Dim url = "http://ironpdf.com" ' Specify the URL
Dim pdfFromUrl = renderer.RenderUrlAsPdf(url)
pdfFromUrl.SaveAs("URLToPDF.pdf")
End Sub
End ClassZainstaluj bibliotekę IronPDF
Aby korzystać z IronPDF, należy najpierw zainstalować pakiet NuGet. Najpierw otwórz konsolę NuGet Package Manager, a następnie uruchom następujące polecenie:
Install-Package IronPdf
Przykładowy kod z opisem szczegółów i kroków
Krok 1: Wygeneruj plik PDF za pomocą IronPDF
Najpierw generujemy dokument PDF. Jako przykład stworzymy prosty plik PDF na podstawie ciągu znaków HTML.
using IronPdf;

// Instantiates a new HtmlToPdf object
var Renderer = new HtmlToPdf();

// Constructs a PDF from an HTML string
var PDF = Renderer.RenderHtmlAsPdf("<h1>Hello World</h1>");

// Define the output path for the PDF file
var outputPath = "example.pdf";

// Saves the generated PDF to the specified path
PDF.SaveAs(outputPath);
using IronPdf;
// Instantiates a new HtmlToPdf object
var Renderer = new HtmlToPdf();
// Constructs a PDF from an HTML string
var PDF = Renderer.RenderHtmlAsPdf("<h1>Hello World</h1>");
// Define the output path for the PDF file
var outputPath = "example.pdf";
// Saves the generated PDF to the specified path
PDF.SaveAs(outputPath);Imports IronPdf
' Instantiates a new HtmlToPdf object
Private Renderer = New HtmlToPdf()
' Constructs a PDF from an HTML string
Private PDF = Renderer.RenderHtmlAsPdf("<h1>Hello World</h1>")
' Define the output path for the PDF file
Private outputPath = "example.pdf"
' Saves the generated PDF to the specified path
PDF.SaveAs(outputPath)Krok 2: Skonfiguruj SendGrid
Upewnij się, że masz zainstalowany pakiet SendGrid NuGet:
Install-Package SendGrid
Następnie skonfiguruj SendGrid w swojej aplikacji. Będziesz potrzebować klucza API ze swojego konta SendGrid.
using SendGrid;
using SendGrid.Helpers.Mail;

// Initialize SendGrid client with your API key
var apiKey = "your_sendgrid_api_key";
var client = new SendGridClient(apiKey);
using SendGrid;
using SendGrid.Helpers.Mail;
// Initialize SendGrid client with your API key
var apiKey = "your_sendgrid_api_key";
var client = new SendGridClient(apiKey);Imports SendGrid
Imports SendGrid.Helpers.Mail
' Initialize SendGrid client with your API key
Private apiKey = "your_sendgrid_api_key"
Private client = New SendGridClient(apiKey)Krok 3: Utwórz i wyślij wiadomość e-mail z załącznikiem PDF
Teraz utwórz wiadomość e-mail i załącz wcześniej wygenerowany plik PDF. Na koniec wyślij wiadomość e-mail za pośrednictwem SendGrid.
using System;
using System.IO;
using System.Threading.Tasks;
using SendGrid;
using SendGrid.Helpers.Mail;

// Asynchronous method to create and send an email with a PDF attachment
async Task SendEmailWithPdfAttachmentAsync()
{
    // Define sender and recipient email addresses
    var from = new EmailAddress("your_email@example.com", "Your Name");
    var subject = "Sending with SendGrid is Fun";
    var to = new EmailAddress("recipient_email@example.com", "Recipient Name");
    var plainTextContent = "Hello, Email!";
    var htmlContent = "<strong>Hello, Email!</strong>";

    // Create a new email message
    var msg = MailHelper.CreateSingleEmail(from, to, subject, plainTextContent, htmlContent);

    // Attach the PDF
    var bytes = File.ReadAllBytes("example.pdf");
    var file = Convert.ToBase64String(bytes);
    msg.AddAttachment("example.pdf", file);

    // Send the email and retrieve the response
    var response = await client.SendEmailAsync(msg);
}
using System;
using System.IO;
using System.Threading.Tasks;
using SendGrid;
using SendGrid.Helpers.Mail;
// Asynchronous method to create and send an email with a PDF attachment
async Task SendEmailWithPdfAttachmentAsync()
{
// Define sender and recipient email addresses
var from = new EmailAddress("your_email@example.com", "Your Name");
var subject = "Sending with SendGrid is Fun";
var to = new EmailAddress("recipient_email@example.com", "Recipient Name");
var plainTextContent = "Hello, Email!";
var htmlContent = "<strong>Hello, Email!</strong>";
// Create a new email message
var msg = MailHelper.CreateSingleEmail(from, to, subject, plainTextContent, htmlContent);
// Attach the PDF
var bytes = File.ReadAllBytes("example.pdf");
var file = Convert.ToBase64String(bytes);
msg.AddAttachment("example.pdf", file);
// Send the email and retrieve the response
var response = await client.SendEmailAsync(msg);
}Imports System
Imports System.IO
Imports System.Threading.Tasks
Imports SendGrid
Imports SendGrid.Helpers.Mail
' Asynchronous method to create and send an email with a PDF attachment
Async Function SendEmailWithPdfAttachmentAsync() As Task
' Define sender and recipient email addresses
Dim from = New EmailAddress("your_email@example.com", "Your Name")
Dim subject = "Sending with SendGrid is Fun"
Dim [to] = New EmailAddress("recipient_email@example.com", "Recipient Name")
Dim plainTextContent = "Hello, Email!"
Dim htmlContent = "<strong>Hello, Email!</strong>"
' Create a new email message
Dim msg = MailHelper.CreateSingleEmail(from, [to], subject, plainTextContent, htmlContent)
' Attach the PDF
Dim bytes = File.ReadAllBytes("example.pdf")
Dim file = Convert.ToBase64String(bytes)
msg.AddAttachment("example.pdf", file)
' Send the email and retrieve the response
Dim response = Await client.SendEmailAsync(msg)
End FunctionTen przykład kodu ilustruje generowanie prostego dokumentu PDF, dołączanie go do wiadomości e-mail i wysyłanie za pośrednictwem SendGrid. Jest to prosty proces, który integruje funkcje generowania dokumentów i wysyłania wiadomości e-mail odpowiednio z IronPDF i SendGrid w aplikacji .NET.
Wnioski
Podsumowując, niniejszy przewodnik zawiera kompleksowy przegląd integracji SendGrid .NET do obsługi poczty elektronicznej oraz IronPDF for .NET do zarządzania dokumentami PDF w aplikacjach .NET. Postępując zgodnie z opisanymi krokami, programiści mogą efektywnie wdrażać funkcje wysyłania wiadomości e-mail z dostosowywaną treścią HTML i opcjami usługi SMTP oraz zarządzać kampaniami e-mailowymi.
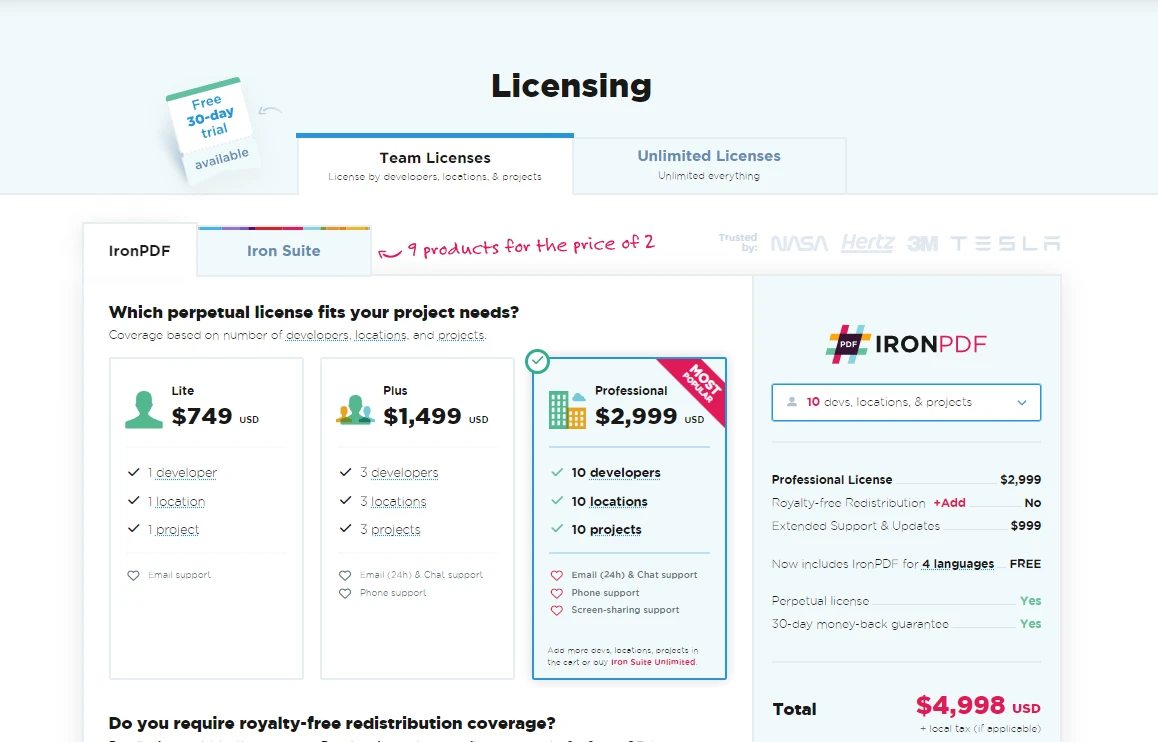
Ponadto integracja z IronPDF umożliwia dynamiczne generowanie i wysyłanie dokumentów PDF, takich jak raporty finansowe lub faktury, co stanowi praktyczny przykład zastosowania tych potężnych bibliotek. Programiści zainteresowani zapoznaniem się z tymi funkcjami mogą skorzystać z bezpłatnej wersji próbnej IronPDF przed zakupem licencji. Szczegóły licencji IronPDF i opcje cenowe zaczynają się od $999.
Często Zadawane Pytania
Jak skonfigurować SendGrid .NET w moim projekcie?
Skonfiguruj SendGrid .NET, instalując pakiet SendGrid za pomocą menedżera pakietów NuGet w Visual Studio. Po instalacji utwórz konto SendGrid i wygeneruj klucz API, aby rozpocząć wysyłanie wiadomości e-mail.
Jakie kroki trzeba wykonać, żeby wysłać e-mail za pomocą SendGrid .NET?
Użyj SendGridClient z kluczem API, utwórz SendGridMessage z niezbędnymi danymi nadawcy i odbiorcy, a następnie wyślij wiadomość za pomocą metody SendEmailAsync klasy SendGridClient.
Jak wysyłać wiadomości e-mail z bogatą zawartością HTML za pomocą SendGrid .NET?
Aby wysłać wiadomości e-mail z bogatą zawartością HTML, przed wysłaniem wiadomości ustaw właściwość HtmlContent obiektu SendGridMessage na własną zawartość HTML.
Czy w aplikacjach .NET można korzystać z protokołu SMTP w połączeniu z SendGrid?
Tak, możesz korzystać z SMTP w SendGrid, konfigurując swojego klienta SMTP z danymi serwera SMTP SendGrid i używając swojego klucza API jako danych uwierzytelniających.
Jak wygenerować dokument PDF w .NET jako załącznik do wiadomości e-mail?
Można wygenerować dokument PDF za pomocą ChromePdfRenderer firmy IronPDF w celu konwersji treści HTML do pliku PDF, który następnie można zapisać za pomocą metody SaveAs.
Jak wygląda proces dołączania pliku PDF do wiadomości e-mail za pomocą SendGrid?
Przekonwertuj plik PDF na tablicę bajtów, zakoduj go do ciągu znaków base64 i użyj metody AddAttachment klasy SendGridMessage, aby załączyć plik PDF do wiadomości e-mail.
Dlaczego uwierzytelnianie domeny jest ważne podczas korzystania z SendGrid?
Uwierzytelnianie domeny ma kluczowe znaczenie, ponieważ weryfikuje ona własność domeny, poprawiając dostarczalność wiadomości e-mail i zapewniając, że odbiorcy postrzegają je jako wiarygodne.
W jaki sposób IronPDF rozszerza funkcjonalność SendGrid w aplikacjach .NET?
IronPDF pozwala programistom tworzyć i edytować dokumenty PDF, które można zintegrować z SendGrid w celu wysyłania wygenerowanych plików PDF jako załączników do wiadomości e-mail, co zwiększa możliwości zarządzania dokumentami.
Jakie są zalety korzystania z SendGrid do zarządzania kampaniami e-mailowymi?
SendGrid zapewnia rozbudowane funkcje do tworzenia, wysyłania i śledzenia kampanii e-mailowych za pośrednictwem swojego API, oferując szczegółowe opcje zarządzania opisane w dokumentacji API SendGrid.
Jak radzić sobie z odrzuceniami i zgłoszeniami o spamie w SendGrid?
Skorzystaj z webhooków SendGrid do obsługi zwrotów i zgłoszeń dotyczących spamu. Webhooki te mogą powiadamiać Twoją aplikację o problemach z dostarczaniem wiadomości e-mail, umożliwiając Ci skuteczne zarządzanie nimi.







 Rozpocznij za DARMO
 Rozpocznij za DARMO
 Zarezerwuj darmowe Demo na żywo





 Nie wymaga karty kredytowej ani tworzenia konta