React를 사용하여 HTML을 PDF로 변환하는 방법 (개발자 튜토리얼)
React를 사용하여 HTML을 PDF로 변환하기
React를 사용하여 HTML을 PDF로 변환하는 것은 많은 웹 애플리케이션에 필수적인 기능이 되었습니다. 청구 시스템을 구축하든, 보고서 생성기를 만들든, 아니면 단순히 보편적으로 통용되는 형식으로 정보를 공유해야 하든, PDF 생성은 필수적입니다. 이 글에서는 널리 사용되는 라이브러리를 이용하여 HTML을 PDF로 변환함으로써 React 애플리케이션에서 PDF 파일을 생성하고 스타일을 지정하는 방법을 살펴보겠습니다.
React를 사용하여 HTML을 PDF로 변환하는 방법
- React 프로젝트를 생성하고 구성합니다.
- npm을 사용하여 React에서 HTML을 PDF로 변환하는 라이브러리를 다운로드하세요.
- React-pdf/renderer에서 필요한 모듈을 가져옵니다.
- 가져온 모듈을 사용하여 HTML 페이지를 구성합니다.
- React-pdf의 PDFDownloadLink 모듈을 사용하여 HTML을 PDF로 변환하세요.
PDF 생성에 인기 있는 라이브러리
HTML을 PDF로 변환하는 과정을 자세히 살펴보기 전에, React 애플리케이션에서 PDF 생성을 위해 사용할 수 있는 몇 가지 인기 있는 라이브러리에 대해 알아보겠습니다.
- React-pdf: React 애플리케이션에서 PDF 문서를 생성하기 위한 강력한 라이브러리입니다. 다양한 스타일링 옵션을 지원하며 복잡한 다중 페이지 PDF를 쉽게 생성할 수 있습니다.
- jsPDF: PDF 파일을 즉시 생성하는 데 널리 사용되는 JavaScript 라이브러리입니다. 이 프로그램은 텍스트 스타일링, 이미지 삽입 등 다양한 기능을 제공합니다.
- html2canvas: 이 라이브러리를 사용하면 HTML 요소의 스크린샷을 캡처하여 캔버스 객체로 변환할 수 있으며, 이를 jsPDF와 같은 다른 라이브러리를 사용하여 PDF로 변환할 수 있습니다.
React에서 HTML을 PDF로 변환하기 위한 필수 조건
React 및 그 생태계에 대한 이해
HTML을 PDF로 변환하기 전에 React에 대한 확실한 이해가 필수적입니다. 여기에는 JSX, 상태 관리, 컴포넌트 생명주기 및 훅에 대한 지식이 포함됩니다.
HTML, CSS 및 JavaScript 에 대한 이해
React-pdf 라이브러리를 사용하려면 HTML, CSS 및 JavaScript 에 대한 탄탄한 기초 지식이 필수적입니다. 여기에는 HTML 요소 및 속성, CSS 스타일링 및 선택자, 그리고 변수, 함수, 반복문과 같은 JavaScript 기본 사항에 대한 지식이 포함됩니다.
React 애플리케이션 시작하기
우리가 React에서 HTML을 PDF로 변환하기 전에, 널리 사용되는 create-react-app CLI 도구를 사용하여 새로운 React 애플리케이션을 만드는 방법을 빠르게 살펴보겠습니다. 이것은 PDF 생성 예제의 기초가 될 것입니다.
1단계 Node.js 설치
컴퓨터에 Node.js 설치되어 있는지 확인하십시오. Node.js Node.js 웹사이트 에서 최신 버전을 다운로드할 수 있습니다.
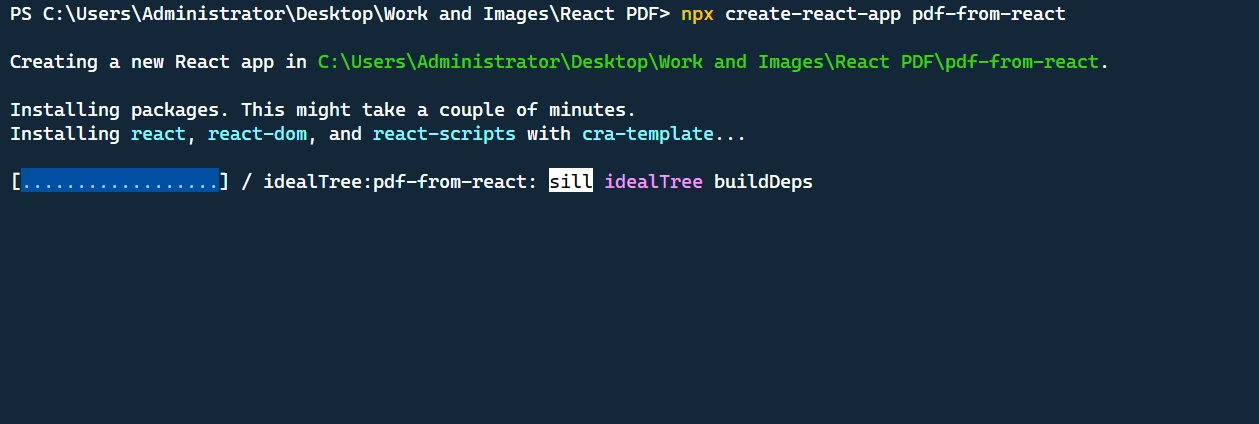
2단계: create-react-app 설치
create-react-app는 React 애플리케이션을 생성하는데 널리 사용되는 CLI 도구입니다. 다음 명령어를 사용하여 전역적으로 설치하세요.
npm install -g create-react-appnpm install -g create-react-app3단계: 새로운 React 애플리케이션 생성
create-react-app이 설치되었으므로 다음 명령어를 사용하여 새 React 애플리케이션을 생성할 수 있습니다.
create-react-app my-pdf-appcreate-react-app my-pdf-app이 명령은 my-pdf-app 이라는 폴더에 새로운 React 애플리케이션을 생성합니다. 새로 생성된 디렉토리로 이동하세요:
cd my-pdf-appcd my-pdf-app4단계: 개발 서버 시작
개발 서버를 시작하고 새 React 애플리케이션이 작동하는 모습을 보려면 다음 명령을 실행하세요.
npm startnpm start5단계: PDF 생성 구현
이제 React 애플리케이션 설정이 완료되었으므로, 이 문서의 이전 섹션에서 설명한 단계를 따라 React-pdf 와 같은 인기 라이브러리를 사용하여 HTML을 PDF로 변환하는 React 애플리케이션을 구현할 수 있습니다.
React-pdf 라이브러리를 소개합니다
React-pdf는 React 애플리케이션을 위해 특별히 설계된 인기 있는 라이브러리로, React 생태계와의 완벽한 통합을 제공합니다. 주요 기능으로는 인라인 및 외부 CSS 지원, 다중 페이지 PDF 생성, 고급 스타일링, 서버 측 렌더링(SSR)과의 호환성 등이 있습니다.
React-pdf를 사용하여 PDF 파일 생성
이 섹션에서는 React 애플리케이션에서 PDF 파일을 생성하기 위해 React-pdf를 사용하는 방법에 대해 집중적으로 살펴보겠습니다. 먼저 React-pdf 패키지를 설치해야 합니다.
npm install --save @react-pdf/renderernpm install --save @react-pdf/renderer설치가 완료되면 새 React 컴포넌트를 생성하여 PDF 문서의 구조를 정의할 수 있습니다.
import React from 'react';
import {
  Document,
  Page,
  Text,
  View,
  StyleSheet
} from '@react-pdf/renderer';

// Sample invoice data
const invoiceData = {
  sender: {
    name: "John Doe",
    address: "123 Main Street",
    city: "New York",
    state: "NY",
    zip: "10001",
  },
  recipient: {
    name: "Jane Smith",
    address: "456 Elm Street",
    city: "San Francisco",
    state: "CA",
    zip: "94107",
  },
  items: [
    { description: "Item 1", quantity: 2, unitPrice: 10 },
    { description: "Item 2", quantity: 3, unitPrice: 15 },
    { description: "Item 3", quantity: 1, unitPrice: 20 },
  ],
  invoiceNumber: "INV-123456",
  date: "April 26, 2023",
};

// Define styles for PDF document
const styles = StyleSheet.create({
  page: {
    backgroundColor: "#FFF",
    padding: 30,
  },
  header: {
    fontSize: 24,
    textAlign: "center",
    marginBottom: 30,
  },
  sender: {
    marginBottom: 20,
  },
  recipient: {
    marginBottom: 30,
  },
  addressLine: {
    fontSize: 12,
    marginBottom: 2,
  },
  itemsTable: {
    display: "table",
    width: "100%",
    borderStyle: "solid",
    borderWidth: 1,
    borderRightWidth: 0,
    borderBottomWidth: 0,
  },
  tableRow: {
    margin: "auto",
    flexDirection: "row",
  },
  tableColHeader: {
    width: "25%",
    borderStyle: "solid",
    borderWidth: 1,
    borderLeftWidth: 0,
    borderTopWidth: 0,
    backgroundColor: "#F0F0F0",
  },
  tableCol: {
    width: "25%",
    borderStyle: "solid",
    borderWidth: 1,
    borderLeftWidth: 0,
    borderTopWidth: 0,
  },
  tableCell: {
    fontSize: 12,
    textAlign: "center",
    padding: 5,
  },
  total: {
    marginTop: 20,
    textAlign: "right",
  },
  totalLabel: {
    fontSize: 14,
    fontWeight: "bold",
  },
  totalValue: {
    fontSize: 14,
  },
});

const InvoiceDocument = () => {
  // Calculate total amount
  const totalAmount = invoiceData.items.reduce(
    (total, item) => total + item.quantity * item.unitPrice,
    0
  );

  return (
    <Document>
      <Page style={styles.page}>
        <Text style={styles.header}>Invoice</Text>
        <View style={styles.sender}>
          <Text>{invoiceData.sender.name}</Text>
          <Text>{invoiceData.sender.address}</Text>
          <Text>
            {invoiceData.sender.city}, {invoiceData.sender.state} {invoiceData.sender.zip}
          </Text>
        </View>
        <View style={styles.recipient}>
          <Text>{invoiceData.recipient.name}</Text>
          <Text>{invoiceData.recipient.address}</Text>
          <Text>
            {invoiceData.recipient.city}, {invoiceData.recipient.state} {invoiceData.recipient.zip}
          </Text>
        </View>
        <View style={styles.itemsTable}>
          <View style={styles.tableRow}>
            <Text style={[styles.tableColHeader, styles.tableCell]}>Description</Text>
            <Text style={[styles.tableColHeader, styles.tableCell]}>Quantity</Text>
            <Text style={[styles.tableColHeader, styles.tableCell]}>Unit Price</Text>
            <Text style={[styles.tableColHeader, styles.tableCell]}>Amount</Text>
          </View>
          {invoiceData.items.map((item, index) => (
            <View key={index} style={styles.tableRow}>
              <Text style={[styles.tableCol, styles.tableCell]}>{item.description}</Text>
              <Text style={[styles.tableCol, styles.tableCell]}>{item.quantity}</Text>
              <Text style={[styles.tableCol, styles.tableCell]}>{item.unitPrice.toFixed(2)}</Text>
              <Text style={[styles.tableCol, styles.tableCell]}>
                {(item.quantity * item.unitPrice).toFixed(2)}
              </Text>
            </View>
          ))}
        </View>
        <View style={styles.total}>
          <Text style={styles.totalLabel}>Total: ${totalAmount.toFixed(2)}</Text>
        </View>
      </Page>
    </Document>
  );
};

export default InvoiceDocument;
import React from 'react';
import {
Document,
Page,
Text,
View,
StyleSheet
} from '@react-pdf/renderer';
// Sample invoice data
const invoiceData = {
sender: {
name: "John Doe",
address: "123 Main Street",
city: "New York",
state: "NY",
zip: "10001",
},
recipient: {
name: "Jane Smith",
address: "456 Elm Street",
city: "San Francisco",
state: "CA",
zip: "94107",
},
items: [
{ description: "Item 1", quantity: 2, unitPrice: 10 },
{ description: "Item 2", quantity: 3, unitPrice: 15 },
{ description: "Item 3", quantity: 1, unitPrice: 20 },
],
invoiceNumber: "INV-123456",
date: "April 26, 2023",
};
// Define styles for PDF document
const styles = StyleSheet.create({
page: {
backgroundColor: "#FFF",
padding: 30,
},
header: {
fontSize: 24,
textAlign: "center",
marginBottom: 30,
},
sender: {
marginBottom: 20,
},
recipient: {
marginBottom: 30,
},
addressLine: {
fontSize: 12,
marginBottom: 2,
},
itemsTable: {
display: "table",
width: "100%",
borderStyle: "solid",
borderWidth: 1,
borderRightWidth: 0,
borderBottomWidth: 0,
},
tableRow: {
margin: "auto",
flexDirection: "row",
},
tableColHeader: {
width: "25%",
borderStyle: "solid",
borderWidth: 1,
borderLeftWidth: 0,
borderTopWidth: 0,
backgroundColor: "#F0F0F0",
},
tableCol: {
width: "25%",
borderStyle: "solid",
borderWidth: 1,
borderLeftWidth: 0,
borderTopWidth: 0,
},
tableCell: {
fontSize: 12,
textAlign: "center",
padding: 5,
},
total: {
marginTop: 20,
textAlign: "right",
},
totalLabel: {
fontSize: 14,
fontWeight: "bold",
},
totalValue: {
fontSize: 14,
},
});
const InvoiceDocument = () => {
// Calculate total amount
const totalAmount = invoiceData.items.reduce(
(total, item) => total + item.quantity * item.unitPrice,
0
);
return (
<Document>
<Page style={styles.page}>
<Text style={styles.header}>Invoice</Text>
<View style={styles.sender}>
<Text>{invoiceData.sender.name}</Text>
<Text>{invoiceData.sender.address}</Text>
<Text>
{invoiceData.sender.city}, {invoiceData.sender.state} {invoiceData.sender.zip}
</Text>
</View>
<View style={styles.recipient}>
<Text>{invoiceData.recipient.name}</Text>
<Text>{invoiceData.recipient.address}</Text>
<Text>
{invoiceData.recipient.city}, {invoiceData.recipient.state} {invoiceData.recipient.zip}
</Text>
</View>
<View style={styles.itemsTable}>
<View style={styles.tableRow}>
<Text style={[styles.tableColHeader, styles.tableCell]}>Description</Text>
<Text style={[styles.tableColHeader, styles.tableCell]}>Quantity</Text>
<Text style={[styles.tableColHeader, styles.tableCell]}>Unit Price</Text>
<Text style={[styles.tableColHeader, styles.tableCell]}>Amount</Text>
</View>
{invoiceData.items.map((item, index) => (
<View key={index} style={styles.tableRow}>
<Text style={[styles.tableCol, styles.tableCell]}>{item.description}</Text>
<Text style={[styles.tableCol, styles.tableCell]}>{item.quantity}</Text>
<Text style={[styles.tableCol, styles.tableCell]}>{item.unitPrice.toFixed(2)}</Text>
<Text style={[styles.tableCol, styles.tableCell]}>
{(item.quantity * item.unitPrice).toFixed(2)}
</Text>
</View>
))}
</View>
<View style={styles.total}>
<Text style={styles.totalLabel}>Total: ${totalAmount.toFixed(2)}</Text>
</View>
</Page>
</Document>
);
};
export default InvoiceDocument;이제 React-pdf에서 PDFDownloadLink 컴포넌트를 사용하여 생성된 PDF 파일을 다운로드할 수 있습니다:
import React from 'react';
import { PDFDownloadLink } from '@react-pdf/renderer';
import InvoiceDocument from './InvoiceDocument';
import './App.css';

const App = () => (
  <div className="app-container">
    <PDFDownloadLink
      document={<InvoiceDocument />}
      fileName="invoice.pdf"
      className="download-button"
    >
      {({ loading }) =>
        loading ? 'Loading document...' : 'Download Invoice'
      }
    </PDFDownloadLink>
  </div>
);

export default App;
import React from 'react';
import { PDFDownloadLink } from '@react-pdf/renderer';
import InvoiceDocument from './InvoiceDocument';
import './App.css';
const App = () => (
<div className="app-container">
<PDFDownloadLink
document={<InvoiceDocument />}
fileName="invoice.pdf"
className="download-button"
>
{({ loading }) =>
loading ? 'Loading document...' : 'Download Invoice'
}
</PDFDownloadLink>
</div>
);
export default App;이제 사용자 정의 UI를 위해 App.css 파일 에 CSS 스타일을 추가해 보세요.
.app-container {
display: flex;
justify-content: center;
align-items: center;
min-height: 100vh;
background-color: #d1e8ff;
}
.download-button {
display: inline-block;
background-color: #5a8fd5;
color: #fff;
font-size: 18px;
font-weight: bold;
padding: 12px 24px;
border-radius: 4px;
text-decoration: none;
cursor: pointer;
transition: background-color 0.3s ease;
}
.download-button:hover {
background-color: #3a68b7;
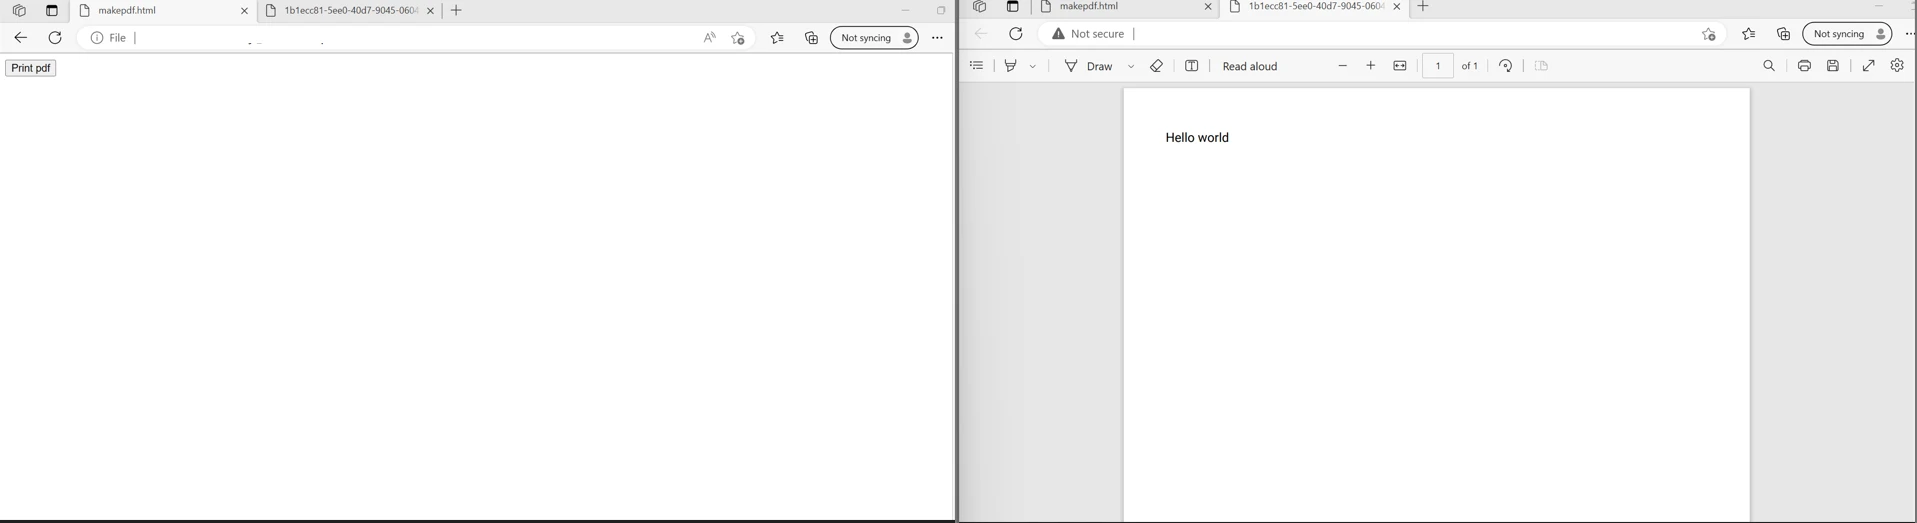
}브라우저에서 localhost:3000을 엽니다. 다운로드 버튼을 클릭하면 PDF 파일이 다운로드됩니다.
PDF 파일 스타일링
React-pdf 라이브러리는 CSS와 유사하게 다양한 스타일링 옵션을 지원합니다. 다음은 PDF 파일의 모양을 사용자 지정하는 데 사용할 수 있는 몇 가지 일반적인 스타일링 속성입니다.
color: 텍스트 색상을 설정합니다.fontSize: 텍스트의 폰트 크기를 설정합니다.fontFamily: 텍스트의 폰트 패밀리를 설정합니다.textAlign: 텍스트 정렬을 설정합니다 (예: 'left', 'right', 'center', 'justify').margin: 요소 주변의 여백을 설정합니다.padding: 요소 내부의 패딩을 설정합니다.border: 요소 주위의 테두리를 설정합니다.backgroundColor: 요소의 배경색을 설정합니다.
React 개발자를 위한 대체 PDF 라이브러리
Node.js 용 IronPDF React 환경에서 HTML을 PDF로 변환하는 데 탁월한 대안입니다. Iron Software 에서 개발한 이 강력한 라이브러리를 사용하면 개발자가 Node.js 애플리케이션에서 직접 PDF 문서를 생성하고 조작할 수 있습니다. 이 프로그램의 두드러진 특징 중 하나는 PDF 생성 과정에서 HTML 콘텐츠 내의 JavaScript 실행을 처리할 수 있다는 점으로, 이를 통해 동적이고 상호작용적인 PDF 생성이 가능합니다.
IronPDF Windows, MacOS, Linux, Docker, Azure 및 AWS와 같은 클라우드 플랫폼을 포함한 다양한 플랫폼을 지원하여 플랫폼 간 호환성을 보장합니다. 사용자 친화적인 API를 통해 개발자는 PDF 생성 및 조작 기능을 Node.js 프로젝트에 빠르게 통합할 수 있습니다.
React는 사용자 인터페이스 구축을 위한 JavaScript 라이브러리이며, IronPDF Node.js 용으로 개발되었기 때문에 Node.js API를 활용하여 IronPDF React 애플리케이션에 통합할 수 있습니다.
React와 함께 IronPDF 사용하는 방법에 대한 개요는 다음과 같습니다.
- IronPDF 설치: npm 또는 yarn을 사용하여 React 프로젝트에 IronPDF 설치할 수 있습니다.
npm과 @ironsoftware/ironpdf
- React 컴포넌트와의 통합: IronPDF 활용하여 PDF를 생성하고 조작하는 React 컴포넌트를 만들 수 있습니다. 예를 들어, HTML 콘텐츠를 입력으로 받아 IronPDF API를 사용하여 PDF로 변환하는 컴포넌트를 만들 수 있습니다.
import React from 'react';
import { PdfDocument } from '@ironsoftware/ironpdf';

const HTMLToPDFComponent = () => {
    const convertHTMLToPDF = async (htmlContent) => {
        try {
            const pdf = await PdfDocument.fromHtml(htmlContent);
            await pdf.saveAs('generated_pdf.pdf');
            alert('PDF generated successfully!');
        } catch (error) {
            console.error('Error generating PDF:', error);
        }
    };

    return (
        <div>
            {/* Input HTML content */}
            <textarea onChange={(e) => convertHTMLToPDF(e.target.value)} />
        </div>
    );
};

export default HTMLToPDFComponent;
import React from 'react';
import { PdfDocument } from '@ironsoftware/ironpdf';
const HTMLToPDFComponent = () => {
const convertHTMLToPDF = async (htmlContent) => {
try {
const pdf = await PdfDocument.fromHtml(htmlContent);
await pdf.saveAs('generated_pdf.pdf');
alert('PDF generated successfully!');
} catch (error) {
console.error('Error generating PDF:', error);
}
};
return (
<div>
{/* Input HTML content */}
<textarea onChange={(e) => convertHTMLToPDF(e.target.value)} />
</div>
);
};
export default HTMLToPDFComponent;- PDF 생성 처리: React 컴포넌트 내에서 IronPDF의 기능을 활용하여 PDF 생성, 조작 및 저장을 처리하세요. IronPDF의 메서드를 사용하여 HTML 문자열 , URL 또는 이미지를 PDF로 변환할 수 있습니다.
- PDF 렌더링: IronPDF 사용하여 PDF를 생성했으면, React 애플리케이션에서 PDF 문서를 표시하기 위한 적절한 컴포넌트나 라이브러리를 사용하여 PDF를 렌더링할 수 있습니다.
import React from 'react';

const PDFViewerComponent = () => {
    return (
        <div>
            {/* Render PDF using appropriate component or library */}
            <iframe src="generated_pdf.pdf" width="100%" height="600px" title="PDF Viewer" />
        </div>
    );
};

export default PDFViewerComponent;
import React from 'react';
const PDFViewerComponent = () => {
return (
<div>
{/* Render PDF using appropriate component or library */}
<iframe src="generated_pdf.pdf" width="100%" height="600px" title="PDF Viewer" />
</div>
);
};
export default PDFViewerComponent;IronPDF 사용하면 개발자는 다양한 소스에서 전문가 수준의 PDF 문서를 효율적으로 생성하고, 특정 요구 사항에 맞게 사용자 지정하고, PDF 생성 기능을 .NET 애플리케이션에 원활하게 통합할 수 있습니다. IronPDF CSS, JavaScript 및 사용자 지정 글꼴과 같은 고급 기능도 지원하므로 생성된 PDF 파일이 애플리케이션의 디자인 및 요구 사항과 일치하도록 보장합니다.
결론
이 글에서는 React-pdf 라이브러리를 사용하여 React 환경에서 HTML을 PDF로 변환하는 과정을 살펴보았습니다. 우리는 PDF 생성 에 널리 사용되는 라이브러리, React-pdf를 사용하여 PDF 파일을 생성하고 스타일을 지정하는 방법, 그리고 더 복잡한 PDF 문서를 생성하기 위한 추가 옵션에 대해 논의했습니다.
이 가이드를 따르면 React 애플리케이션에서 PDF 파일을 생성하는 방법을 확실히 이해하게 되어 다양한 사용 사례의 요구 사항을 충족하는 고품질 PDF를 생성할 수 있을 것입니다.
IronPDF 무료 평가판을 제공하므로 구매를 결정하기 전에 라이브러리를 테스트하고 요구 사항을 충족하는지 확인할 수 있습니다. 체험 기간 이후에는 IronPDF 구매 라이선스가 $999부터 시작하며, 우선 지원 및 업데이트가 포함됩니다. 또한 IronPDF C# .NET , Java , Python 과 같은 다른 언어에서도 사용할 수 있습니다. IronPDF for Node.js 다운로드 하여 사용해 보세요.