
如何在 React 中將 HTML 轉換成 PDF(開發者教程)

在 React 中將 HTML 轉換為 PDF
在 React 中將 HTML 轉換為 PDF 已成為許多網頁應用程式的重要功能。 無論您構建的是發票系統、報告生成器,還是僅需要以普遍接受的格式分享資訊,PDF 生成都是至關重要的。 在本文中,我們將探索如何透過使用流行的程式庫將 HTML 轉換為 PDF,來在您的 React 應用程式中建立和樣式化 PDF 文件。
如何在 React 中將 HTML 轉換為 PDF
- 建立並配置一個 React 專案
- 使用 npm 下載程式庫以在 React 中將 HTML 轉換為 PDF
- 從 React-pdf/renderer 導入必要的模組
- 使用導入的模組配置 HTML 頁面
- 利用 React-pdf 的 PDFDownloadLink 模組將 HTML 轉換為 PDF
PDF 生成的流行程式庫
在深入探究 HTML 轉換為 PDF 的過程之前,我們先來討論一些您可以用於在 React 應用程式中進行 PDF 生成 的流行程式庫:
- React-pdf: 一個用於在 React 應用程式中建立 PDF 文件的強大程式庫。 它支援各種樣式選項,並能夠輕鬆建立複雜的多頁 PDF。
- jsPDF: 一個廣泛使用的 JavaScript 程式庫,用於即時生成 PDF 文件。 它提供了廣泛的功能,包括文字樣式化、圖像嵌入等。
- html2canvas: 這個程式庫允許您截取 HTML 元素的螢幕快照並將其轉換為畫布物件,然後可以使用像 jsPDF 這樣的其他程式庫將它轉換為 PDF。
在 React 中將 HTML 轉換為 PDF 的先決條件
熟悉 React และ其生態系統
在深入 HTML 轉換為 PDF 之前,掌握 React 的基本概念是至關重要的。 這包括對 JSX、狀態管理、元件生命周期和 hooks 的知識。
對 HTML、CSS 和 JavaScript 的了解
對 HTML、CSS 和 JavaScript 的扎實基礎是使用 React-pdf 程式庫的關鍵。 這包括 HTML 元素和屬性的知識、CSS 樣式化和選擇器,以及 JavaScript 基本知識如變數、函式和迴圈。
開始使用 React 應用程式
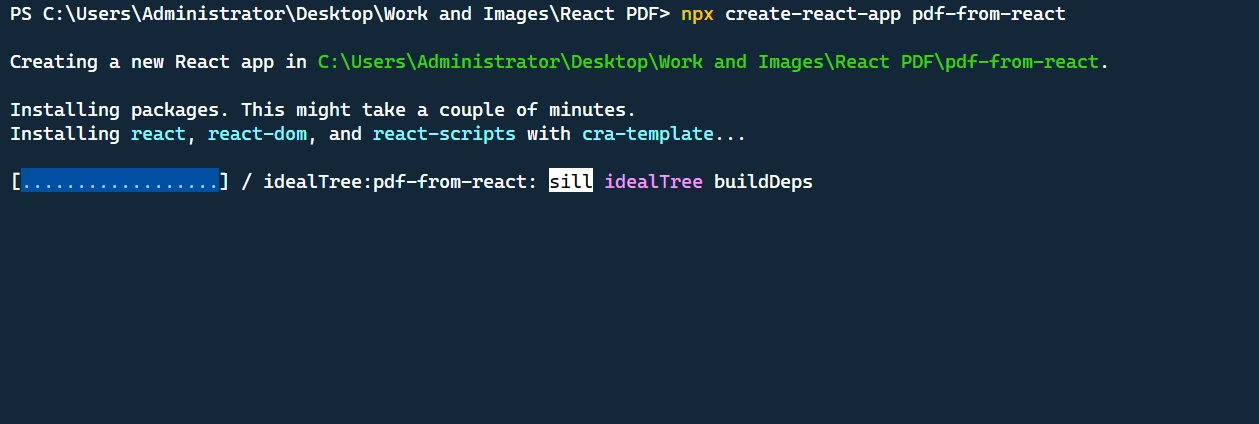
在我們繼續進行將 HTML 轉換為 PDF 在 React 中 之前,讓我們快速了解一下如何使用流行的 create-react-app CLI 工具建立一個新的 React 應用程式。 這將成為我們 PDF 生成範例的基礎。
步驟 1 安裝 Node.js
確保您的機器上安裝了 Node.js。您可以從 Node.js 官方網站 下載最新版本的 Node.js。
步驟 2 安裝 create-react-app
create-react-app 是一個廣泛使用的 CLI 工具,用於生成 React 應用程式。 使用以下命令全域安裝它:
npm install -g create-react-appnpm install -g create-react-app步驟 3 建立一個新的 React 應用程式
現在您已經安裝了 create-react-app,您可以使用以下命令建立一個新的 React 應用程式:
create-react-app my-pdf-appcreate-react-app my-pdf-app此命令將會在名為 my-pdf-app 的資料夾中生成一個新的 React 應用程式。 進入新建立的目錄:
cd my-pdf-appcd my-pdf-app步驟 4 啟動開發伺服器
為了啟動開發伺服器並查看您的新 React 應用程式的效果,運行以下命令:
npm startnpm start步驟 5 實施 PDF 生成
現在您已經設置了一個 React 應用程式,您可以遵循本文前面小節中所列的步驟,使用流行的程式庫如 React-pdf 實施 HTML 轉換為 PDF React。
介紹 React-pdf 程式庫
React-pdf 是一個專為 React 應用程式設計的流行程式庫,提供與 React 生態系統無縫整合。 其一些主要功能包括對內嵌和外部 CSS 的支援、多頁 PDF 生成、高級樣式以及與伺服器端渲染(SSR)的相容性。
使用 React-pdf 建立 PDF 文件
在本節中,我們將重點放在使用 React-pdf 建立 React 應用程式中的 PDF 文件。 首先,您需要安裝 React-pdf 套件:
npm install --save @react-pdf/renderernpm install --save @react-pdf/renderer安裝完畢後,您可以建立一個新的 React 元件來定義 PDF 文件的結構:
import React from 'react';
import {
  Document,
  Page,
  Text,
  View,
  StyleSheet
} from '@react-pdf/renderer';

// Sample invoice data
const invoiceData = {
  sender: {
    name: "John Doe",
    address: "123 Main Street",
    city: "New York",
    state: "NY",
    zip: "10001",
  },
  recipient: {
    name: "Jane Smith",
    address: "456 Elm Street",
    city: "San Francisco",
    state: "CA",
    zip: "94107",
  },
  items: [
    { description: "Item 1", quantity: 2, unitPrice: 10 },
    { description: "Item 2", quantity: 3, unitPrice: 15 },
    { description: "Item 3", quantity: 1, unitPrice: 20 },
  ],
  invoiceNumber: "INV-123456",
  date: "April 26, 2023",
};

// Define styles for PDF document
const styles = StyleSheet.create({
  page: {
    backgroundColor: "#FFF",
    padding: 30,
  },
  header: {
    fontSize: 24,
    textAlign: "center",
    marginBottom: 30,
  },
  sender: {
    marginBottom: 20,
  },
  recipient: {
    marginBottom: 30,
  },
  addressLine: {
    fontSize: 12,
    marginBottom: 2,
  },
  itemsTable: {
    display: "table",
    width: "100%",
    borderStyle: "solid",
    borderWidth: 1,
    borderRightWidth: 0,
    borderBottomWidth: 0,
  },
  tableRow: {
    margin: "auto",
    flexDirection: "row",
  },
  tableColHeader: {
    width: "25%",
    borderStyle: "solid",
    borderWidth: 1,
    borderLeftWidth: 0,
    borderTopWidth: 0,
    backgroundColor: "#F0F0F0",
  },
  tableCol: {
    width: "25%",
    borderStyle: "solid",
    borderWidth: 1,
    borderLeftWidth: 0,
    borderTopWidth: 0,
  },
  tableCell: {
    fontSize: 12,
    textAlign: "center",
    padding: 5,
  },
  total: {
    marginTop: 20,
    textAlign: "right",
  },
  totalLabel: {
    fontSize: 14,
    fontWeight: "bold",
  },
  totalValue: {
    fontSize: 14,
  },
});

const InvoiceDocument = () => {
  // Calculate total amount
  const totalAmount = invoiceData.items.reduce(
    (total, item) => total + item.quantity * item.unitPrice,
    0
  );

  return (
    <Document>
      <Page style={styles.page}>
        <Text style={styles.header}>Invoice</Text>
        <View style={styles.sender}>
          <Text>{invoiceData.sender.name}</Text>
          <Text>{invoiceData.sender.address}</Text>
          <Text>
            {invoiceData.sender.city}, {invoiceData.sender.state} {invoiceData.sender.zip}
          </Text>
        </View>
        <View style={styles.recipient}>
          <Text>{invoiceData.recipient.name}</Text>
          <Text>{invoiceData.recipient.address}</Text>
          <Text>
            {invoiceData.recipient.city}, {invoiceData.recipient.state} {invoiceData.recipient.zip}
          </Text>
        </View>
        <View style={styles.itemsTable}>
          <View style={styles.tableRow}>
            <Text style={[styles.tableColHeader, styles.tableCell]}>Description</Text>
            <Text style={[styles.tableColHeader, styles.tableCell]}>Quantity</Text>
            <Text style={[styles.tableColHeader, styles.tableCell]}>Unit Price</Text>
            <Text style={[styles.tableColHeader, styles.tableCell]}>Amount</Text>
          </View>
          {invoiceData.items.map((item, index) => (
            <View key={index} style={styles.tableRow}>
              <Text style={[styles.tableCol, styles.tableCell]}>{item.description}</Text>
              <Text style={[styles.tableCol, styles.tableCell]}>{item.quantity}</Text>
              <Text style={[styles.tableCol, styles.tableCell]}>{item.unitPrice.toFixed(2)}</Text>
              <Text style={[styles.tableCol, styles.tableCell]}>
                {(item.quantity * item.unitPrice).toFixed(2)}
              </Text>
            </View>
          ))}
        </View>
        <View style={styles.total}>
          <Text style={styles.totalLabel}>Total: ${totalAmount.toFixed(2)}</Text>
        </View>
      </Page>
    </Document>
  );
};

export default InvoiceDocument;
import React from 'react';
import {
Document,
Page,
Text,
View,
StyleSheet
} from '@react-pdf/renderer';
// Sample invoice data
const invoiceData = {
sender: {
name: "John Doe",
address: "123 Main Street",
city: "New York",
state: "NY",
zip: "10001",
},
recipient: {
name: "Jane Smith",
address: "456 Elm Street",
city: "San Francisco",
state: "CA",
zip: "94107",
},
items: [
{ description: "Item 1", quantity: 2, unitPrice: 10 },
{ description: "Item 2", quantity: 3, unitPrice: 15 },
{ description: "Item 3", quantity: 1, unitPrice: 20 },
],
invoiceNumber: "INV-123456",
date: "April 26, 2023",
};
// Define styles for PDF document
const styles = StyleSheet.create({
page: {
backgroundColor: "#FFF",
padding: 30,
},
header: {
fontSize: 24,
textAlign: "center",
marginBottom: 30,
},
sender: {
marginBottom: 20,
},
recipient: {
marginBottom: 30,
},
addressLine: {
fontSize: 12,
marginBottom: 2,
},
itemsTable: {
display: "table",
width: "100%",
borderStyle: "solid",
borderWidth: 1,
borderRightWidth: 0,
borderBottomWidth: 0,
},
tableRow: {
margin: "auto",
flexDirection: "row",
},
tableColHeader: {
width: "25%",
borderStyle: "solid",
borderWidth: 1,
borderLeftWidth: 0,
borderTopWidth: 0,
backgroundColor: "#F0F0F0",
},
tableCol: {
width: "25%",
borderStyle: "solid",
borderWidth: 1,
borderLeftWidth: 0,
borderTopWidth: 0,
},
tableCell: {
fontSize: 12,
textAlign: "center",
padding: 5,
},
total: {
marginTop: 20,
textAlign: "right",
},
totalLabel: {
fontSize: 14,
fontWeight: "bold",
},
totalValue: {
fontSize: 14,
},
});
const InvoiceDocument = () => {
// Calculate total amount
const totalAmount = invoiceData.items.reduce(
(total, item) => total + item.quantity * item.unitPrice,
0
);
return (
<Document>
<Page style={styles.page}>
<Text style={styles.header}>Invoice</Text>
<View style={styles.sender}>
<Text>{invoiceData.sender.name}</Text>
<Text>{invoiceData.sender.address}</Text>
<Text>
{invoiceData.sender.city}, {invoiceData.sender.state} {invoiceData.sender.zip}
</Text>
</View>
<View style={styles.recipient}>
<Text>{invoiceData.recipient.name}</Text>
<Text>{invoiceData.recipient.address}</Text>
<Text>
{invoiceData.recipient.city}, {invoiceData.recipient.state} {invoiceData.recipient.zip}
</Text>
</View>
<View style={styles.itemsTable}>
<View style={styles.tableRow}>
<Text style={[styles.tableColHeader, styles.tableCell]}>Description</Text>
<Text style={[styles.tableColHeader, styles.tableCell]}>Quantity</Text>
<Text style={[styles.tableColHeader, styles.tableCell]}>Unit Price</Text>
<Text style={[styles.tableColHeader, styles.tableCell]}>Amount</Text>
</View>
{invoiceData.items.map((item, index) => (
<View key={index} style={styles.tableRow}>
<Text style={[styles.tableCol, styles.tableCell]}>{item.description}</Text>
<Text style={[styles.tableCol, styles.tableCell]}>{item.quantity}</Text>
<Text style={[styles.tableCol, styles.tableCell]}>{item.unitPrice.toFixed(2)}</Text>
<Text style={[styles.tableCol, styles.tableCell]}>
{(item.quantity * item.unitPrice).toFixed(2)}
</Text>
</View>
))}
</View>
<View style={styles.total}>
<Text style={styles.totalLabel}>Total: ${totalAmount.toFixed(2)}</Text>
</View>
</Page>
</Document>
);
};
export default InvoiceDocument;現在,您可以使用 PDFDownloadLink 元件從 React-pdf 下載生成的 PDF 文件:
import React from 'react';
import { PDFDownloadLink } from '@react-pdf/renderer';
import InvoiceDocument from './InvoiceDocument';
import './App.css';

const App = () => (
  <div className="app-container">
    <PDFDownloadLink
      document={<InvoiceDocument />}
      fileName="invoice.pdf"
      className="download-button"
    >
      {({ loading }) =>
        loading ? 'Loading document...' : 'Download Invoice'
      }
    </PDFDownloadLink>
  </div>
);

export default App;
import React from 'react';
import { PDFDownloadLink } from '@react-pdf/renderer';
import InvoiceDocument from './InvoiceDocument';
import './App.css';
const App = () => (
<div className="app-container">
<PDFDownloadLink
document={<InvoiceDocument />}
fileName="invoice.pdf"
className="download-button"
>
{({ loading }) =>
loading ? 'Loading document...' : 'Download Invoice'
}
</PDFDownloadLink>
</div>
);
export default App;現在在 App.css 中新增一些 CSS 樣式以獲得自定義 UI:
.app-container {
  display: flex;
  justify-content: center;
  align-items: center;
  min-height: 100vh;
  background-color: #d1e8ff;
}

.download-button {
  display: inline-block;
  background-color: #5a8fd5;
  color: #fff;
  font-size: 18px;
  font-weight: bold;
  padding: 12px 24px;
  border-radius: 4px;
  text-decoration: none;
  cursor: pointer;
  transition: background-color 0.3s ease;
}

.download-button:hover {
  background-color: #3a68b7;
}
在您的瀏覽器中打開 localhost:3000。 當您點擊下載按鈕時,PDF 文件將會下載。
樣式化您的 PDF 文件
React-pdf 程式庫支援多樣化的樣式選項,類似於 CSS。 以下是一些常見的樣式屬性,您可以用來自定義 PDF 文件的外觀:
color: 設置文字顏色。fontSize: 設置文字的字體大小。fontFamily: 設置文字的字體族。textAlign: 設置文字對齊(例如,'left','right','center',或 'justify')。margin: 設置元素周圍的邊距。padding: 設置元素內的內邊距。border: 設置元素周圍的邊框。backgroundColor: 設置元素的背景顏色。
React 開發者的替代 PDF 程式庫
IronPDF for Node.js 是一個在 React 中將 HTML 轉換為 PDF 的極佳選擇。 由 Iron Software 開發,它是一個強大的程式庫,可讓開發者直接從其 Node.js 應用程式中生成和操作 PDF 文件。 其獨特功能之一是能夠在 PDF 生成期間處理 HTML 內容中的 JavaScript 執行,從而實現動態和互動的 PDF 建立。
支援包括 Windows、macOS、Linux、Docker 和雲平台如 Azure 和 AWS 等各種平台,IronPDF 確保跨平台相容性。 其使用者友好的 API 使開發者能夠快速將 PDF 生成和操控整合到其 Node.js 專案中。
React 是一個用於構建使用者介面的 JavaScript 程式庫,而由於 IronPDF 是為 Node.js 構建的,您可以透過其 Node.js API 將 IronPDF 整合到您的 React 應用程式中。
這是一個關於如何在 React 中使用 IronPDF 的大綱:
- 安裝 IronPDF:您可以使用 npm 或 yarn 在您的 React 專案中安裝 IronPDF。
npm i @ironsoftware/ironpdf
- 與 React 元件整合:您可以建立使用 IronPDF 生成和操作 PDF 的 React 元件。 例如,您可以建立一個元件,接收 HTML 內容作為輸入,並使用 IronPDF 的 API 將其轉換為 PDF。
import React from 'react';
import { PdfDocument } from '@ironsoftware/ironpdf';

const HTMLToPDFComponent = () => {
    const convertHTMLToPDF = async (htmlContent) => {
        try {
            const pdf = await PdfDocument.fromHtml(htmlContent);
            await pdf.saveAs('generated_pdf.pdf');
            alert('PDF generated successfully!');
        } catch (error) {
            console.error('Error generating PDF:', error);
        }
    };

    return (
        <div>
            {/* Input HTML content */}
            <textarea onChange={(e) => convertHTMLToPDF(e.target.value)} />
        </div>
    );
};

export default HTMLToPDFComponent;
import React from 'react';
import { PdfDocument } from '@ironsoftware/ironpdf';
const HTMLToPDFComponent = () => {
const convertHTMLToPDF = async (htmlContent) => {
try {
const pdf = await PdfDocument.fromHtml(htmlContent);
await pdf.saveAs('generated_pdf.pdf');
alert('PDF generated successfully!');
} catch (error) {
console.error('Error generating PDF:', error);
}
};
return (
<div>
{/* Input HTML content */}
<textarea onChange={(e) => convertHTMLToPDF(e.target.value)} />
</div>
);
};
export default HTMLToPDFComponent;- 處理 PDF 生成:在您的 React 元件中利用 IronPDF 的功能來處理 PDF 的生成、操控和儲存。 您可以使用 IronPDF 的方法將 HTML 字串、URL 或 圖像 轉換為 PDF。
- 渲染 PDF:一旦您利用 IronPDF 生成了 PDF,您可以在您的 React 應用程式中使用適當的元件或程式庫來渲染它們以顯示 PDF 文件。
import React from 'react';

const PDFViewerComponent = () => {
    return (
        <div>
            {/* Render PDF using appropriate component or library */}
            <iframe src="generated_pdf.pdf" width="100%" height="600px" title="PDF Viewer" />
        </div>
    );
};

export default PDFViewerComponent;
import React from 'react';
const PDFViewerComponent = () => {
return (
<div>
{/* Render PDF using appropriate component or library */}
<iframe src="generated_pdf.pdf" width="100%" height="600px" title="PDF Viewer" />
</div>
);
};
export default PDFViewerComponent;using IronPDF,開發者可以高效地從各種來源生成專業級的 PDF 文件,自定義它們以符合特定需求,並無縫整合 PDF 生成能力到其 .NET 應用程式中。 IronPDF 也支援高級功能,如 CSS、JavaScript 和自定義字體,確保您的生成的 PDF 文件將符合您的應用程式設計和要求。
結論
在本文中,我們已經介紹了使用 React-pdf 程式庫將 HTML 轉換為 PDF 在 React 中 的過程。 我們討論了用於 PDF 生成 的流行程式庫,以及如何使用 React-pdf 建立和樣式化 PDF 文件,以及用于生成更複雜的 PDF 文件的其他選擇。
通過遵循本指南,您應該已經對如何在您的 React 應用程式中生成 PDF 文件有了扎實的理解,從而能夠生成高質量的 PDF 以滿足各類使用情境的需求。
IronPDF 提供 免費試用版,讓您可以測試該程式庫並確定其是否滿足您的要求再決定是否購買。 試用期結束後,IronPDF 的 購買授權 從 $999 開始,其中包括優先支援和更新。 此外,IronPDF 還適用於其他語言,如 C# .NET、Java 和 Python。 下載 IronPDF 程式庫,從IronPDF for Node.js 開始並試用一下。






 免費開始
免費開始 免費開始
免費開始 預訂免費直播演示