

IronPDF 最強大且最受歡迎的功能,在於能夠從原始 HTML、CSS 和 JavaScript 建立高保真度的 PDF 檔案。 本教學將引導 Node.js 開發者逐步了解將 HTML 內容轉為 PDF 的各種實用方法——從一行指令的字串轉換,到動態的模板驅動文件生成。
IronPDF 是一套高階 API 函式庫,可協助開發人員快速將強大的 PDF 處理功能整合至軟體應用程式中。 IronPDF 支援多種程式語言。 有關在 .NET、Java 和 Python 中建立 PDF 的詳細說明,請參閱官方文件頁面。 本教學將說明其在 Node.js 專案中的應用方式。
快速入門:在 Node.js 中將 HTML 轉換為 PDF
如何在 Node.js 中將 HTML 轉換為 PDF
- 透過 NPM 安裝 IronPDF for Node.js 函式庫:
npm install @ironsoftware/ironpdf - 從
@ironsoftware/IronPDF套件導入 PdfDocument 類別。 - 請根據您的 HTML 來源,呼叫
PdfDocument.fromHtml、PdfDocument.fromUrl或PdfDocument.fromZip。 - 可選配置渲染選項:頁首、頁尾、頁面大小、方向及邊距。
- 呼叫
PdfDocument.saveAs將生成的 PDF 儲存至磁碟。
目錄
- 如何開始使用 IronPDF for Node.js?
- 如何在 Node.js 中將 HTML 轉換為 PDF?
- IronPDF 支援哪些進階渲染選項?
- 如何從 HTML 範本生成 PDF 檔案?
- 接下來該怎麼做?
如何開始使用 IronPDF for Node.js? {#getting-started}
立即透過免費試用,在您的專案中開始使用 IronPDF。
安裝 IronPDF 函式庫
請在您選定的 Node.js 專案中執行以下 NPM 指令,以安裝 IronPDF for Node.js 套件:
//:path=/static-assets/ironpdf-nodejs/content-code-examples/tutorials/html-to-pdf/install.sh
npm install @ironsoftware/ironpdf
//:path=/static-assets/ironpdf-nodejs/content-code-examples/tutorials/html-to-pdf/install.sh
npm install @ironsoftware/ironpdf您也可以手動下載並安裝 IronPDF 套件。
如何安裝 IronPDF 引擎?
IronPDF for Node.js 需搭配 IronPDF Engine 二進位檔方能運作。
@ironsoftware/ironpdf 套件會在首次執行時,自動下載並安裝適用於您作業系統的二進位檔。 (在網路連線受限或無法連線的環境中,建議進行手動安裝。)}]請根據您的作業系統安裝對應的套件,以安裝 IronPDF Engine 二進位檔。
如何套用授權金鑰?
預設情況下,IronPDF 會在其生成或修改的所有文件上加上水印。 若要移除浮水印,請在全域 licenseKey 物件上設定 IronPdfGlobalConfig 屬性,並輸入有效的授權金鑰:
//:path=/static-assets/ironpdf-nodejs/content-code-examples/tutorials/html-to-pdf/config.js
import { IronPdfGlobalConfig } from "@ironsoftware/ironpdf";

// Retrieve the global configuration object
var config = IronPdfGlobalConfig.getConfig();

// Set a valid license key to remove watermarks
config.licenseKey = "{YOUR-LICENSE-KEY-HERE}";
//:path=/static-assets/ironpdf-nodejs/content-code-examples/tutorials/html-to-pdf/config.js
import { IronPdfGlobalConfig } from "@ironsoftware/ironpdf";
// Retrieve the global configuration object
var config = IronPdfGlobalConfig.getConfig();
// Set a valid license key to remove watermarks
config.licenseKey = "{YOUR-LICENSE-KEY-HERE}";請至授權頁面取得免費試用授權金鑰或購買授權金鑰。
{i:(在呼叫其他函式庫功能之前,[請先設定授權金鑰及任何其他 全域設定。 這可確保應用程式在整個運作過程中達到最佳效能與正確行為。)}])}]
本教學中其餘的程式碼範例,假設已將授權金鑰應用於獨立的 config.js 檔案中,並於每個腳本開頭導入該檔案:
//:path=/static-assets/ironpdf-nodejs/content-code-examples/tutorials/html-to-pdf/config-import.js
import { PdfDocument } from "@ironsoftware/ironpdf";
import './config.js'; // Import the configuration script
// ...
//:path=/static-assets/ironpdf-nodejs/content-code-examples/tutorials/html-to-pdf/config-import.js
import { PdfDocument } from "@ironsoftware/ironpdf";
import './config.js'; // Import the configuration script
// ... 請至 ironpdf.com/nodejs/licensing/ 取得授權金鑰,以產生無浮水印的 PDF 文件。
如何在 Node.js 中將 HTML 轉換為 PDF? {#convert-html-to-PDF}
IronPDF Node.js 函式庫提供四種從 HTML 內容建立 PDF 檔案的方法:
- 來自一段 HTML 程式碼
- 來自本地的 HTML 檔案
- 來自線上網址
- 來自壓縮的 ZIP 檔案
每種方法皆以 PdfDocument 類別為基礎。 PdfDocument 代表由某來源內容產生的 PDF 檔案,並驅動 IronPDF 大部分的核心建立與編輯功能。
如何從 HTML 字串建立 PDF 檔案? {#create-PDF-from-html-string}
PdfDocument.fromHtml 能從原始 HTML 標記字串生成 PDF 檔案。此方法在四種方式中最具彈性,因為 HTML 字串的來源幾乎無所不包——無論是文字檔案、資料流、HTML 模板引擎,或是動態建構的標記。
//:path=/static-assets/ironpdf-nodejs/content-code-examples/tutorials/html-to-pdf/html-string-to-pdf.js
import { PdfDocument } from "@ironsoftware/ironpdf";
import './config.js'; // Import the configuration script

// Create a PDF from an HTML string
const pdf = await PdfDocument.fromHtml("<h1>Hello from IronPDF!</h1>");

// Save the PDF document to the file system
await pdf.saveAs("html-string-to-pdf.pdf");
//:path=/static-assets/ironpdf-nodejs/content-code-examples/tutorials/html-to-pdf/html-string-to-pdf.js
import { PdfDocument } from "@ironsoftware/ironpdf";
import './config.js'; // Import the configuration script
// Create a PDF from an HTML string
const pdf = await PdfDocument.fromHtml("<h1>Hello from IronPDF!</h1>");
// Save the PDF document to the file system
await pdf.saveAs("html-string-to-pdf.pdf");PdfDocument.fromHtml 會傳回一個 Promise,該 Promise 解析後會產生 PdfDocument 類別的實例。 取得實例後,請呼叫 saveAs 並傳入目標檔案路徑,以將 PDF 寫入磁碟。 儲存的 PDF 檔案會精確呈現 HTML 內容,效果與符合標準的瀏覽器顯示完全一致。
 The PDF generated from the HTML string
 <h1>Hello from IronPDF!</h1>. 由 PdfDocument.fromHtml 生成的 PDF 檔案,其顯示效果與網頁內容完全一致。
如何從 HTML 檔案建立 PDF? {#create-pdf-from-html-file}
PdfDocument.fromHtml 亦接受指向本機 HTML 文件的路徑。 請勿傳入一串標記,而應將有效的檔案路徑作為第一個參數傳入。 當處理引用本地 CSS、JavaScript 和圖像資源的儲存網頁時,此為首選方法。
以下範例展示如何將一個示範網頁轉換為 PDF:
//:path=/static-assets/ironpdf-nodejs/content-code-examples/tutorials/html-to-pdf/html-file-to-pdf.js
import { PdfDocument } from "@ironsoftware/ironpdf";
import './config.js'; // Import the configuration script

// Render a PDF from a local HTML file
const pdf = await PdfDocument.fromHtml("./sample2.html");

// Save the PDF document to the project directory
await pdf.saveAs("html-file-to-pdf-1.pdf");
//:path=/static-assets/ironpdf-nodejs/content-code-examples/tutorials/html-to-pdf/html-file-to-pdf.js
import { PdfDocument } from "@ironsoftware/ironpdf";
import './config.js'; // Import the configuration script
// Render a PDF from a local HTML file
const pdf = await PdfDocument.fromHtml("./sample2.html");
// Save the PDF document to the project directory
await pdf.saveAs("html-file-to-pdf-1.pdf");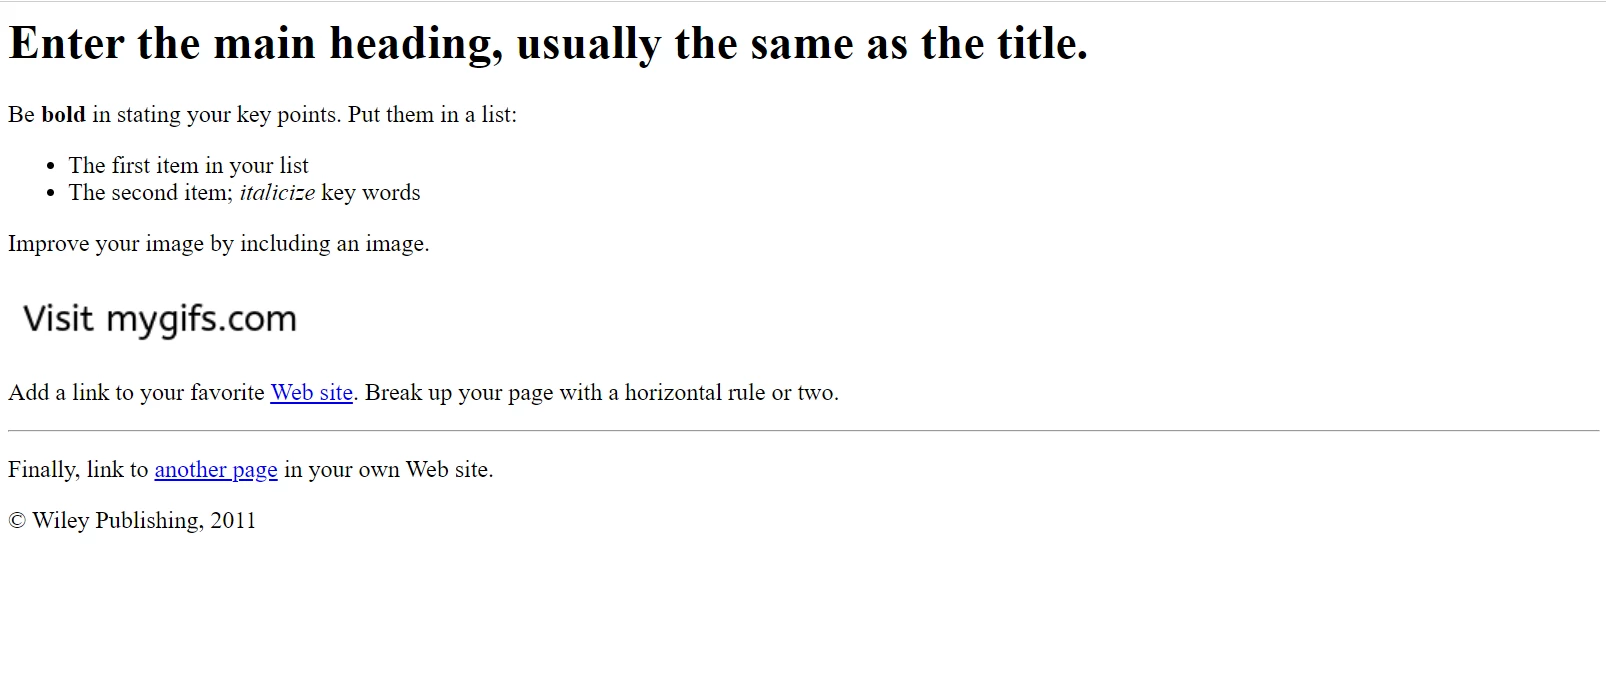 此為 Google Chrome 中顯示的範例 HTML 頁面。 請從 File Samples 網站下載此頁面及類似頁面:https://filesamples.com/samples/code/html/sample2.html
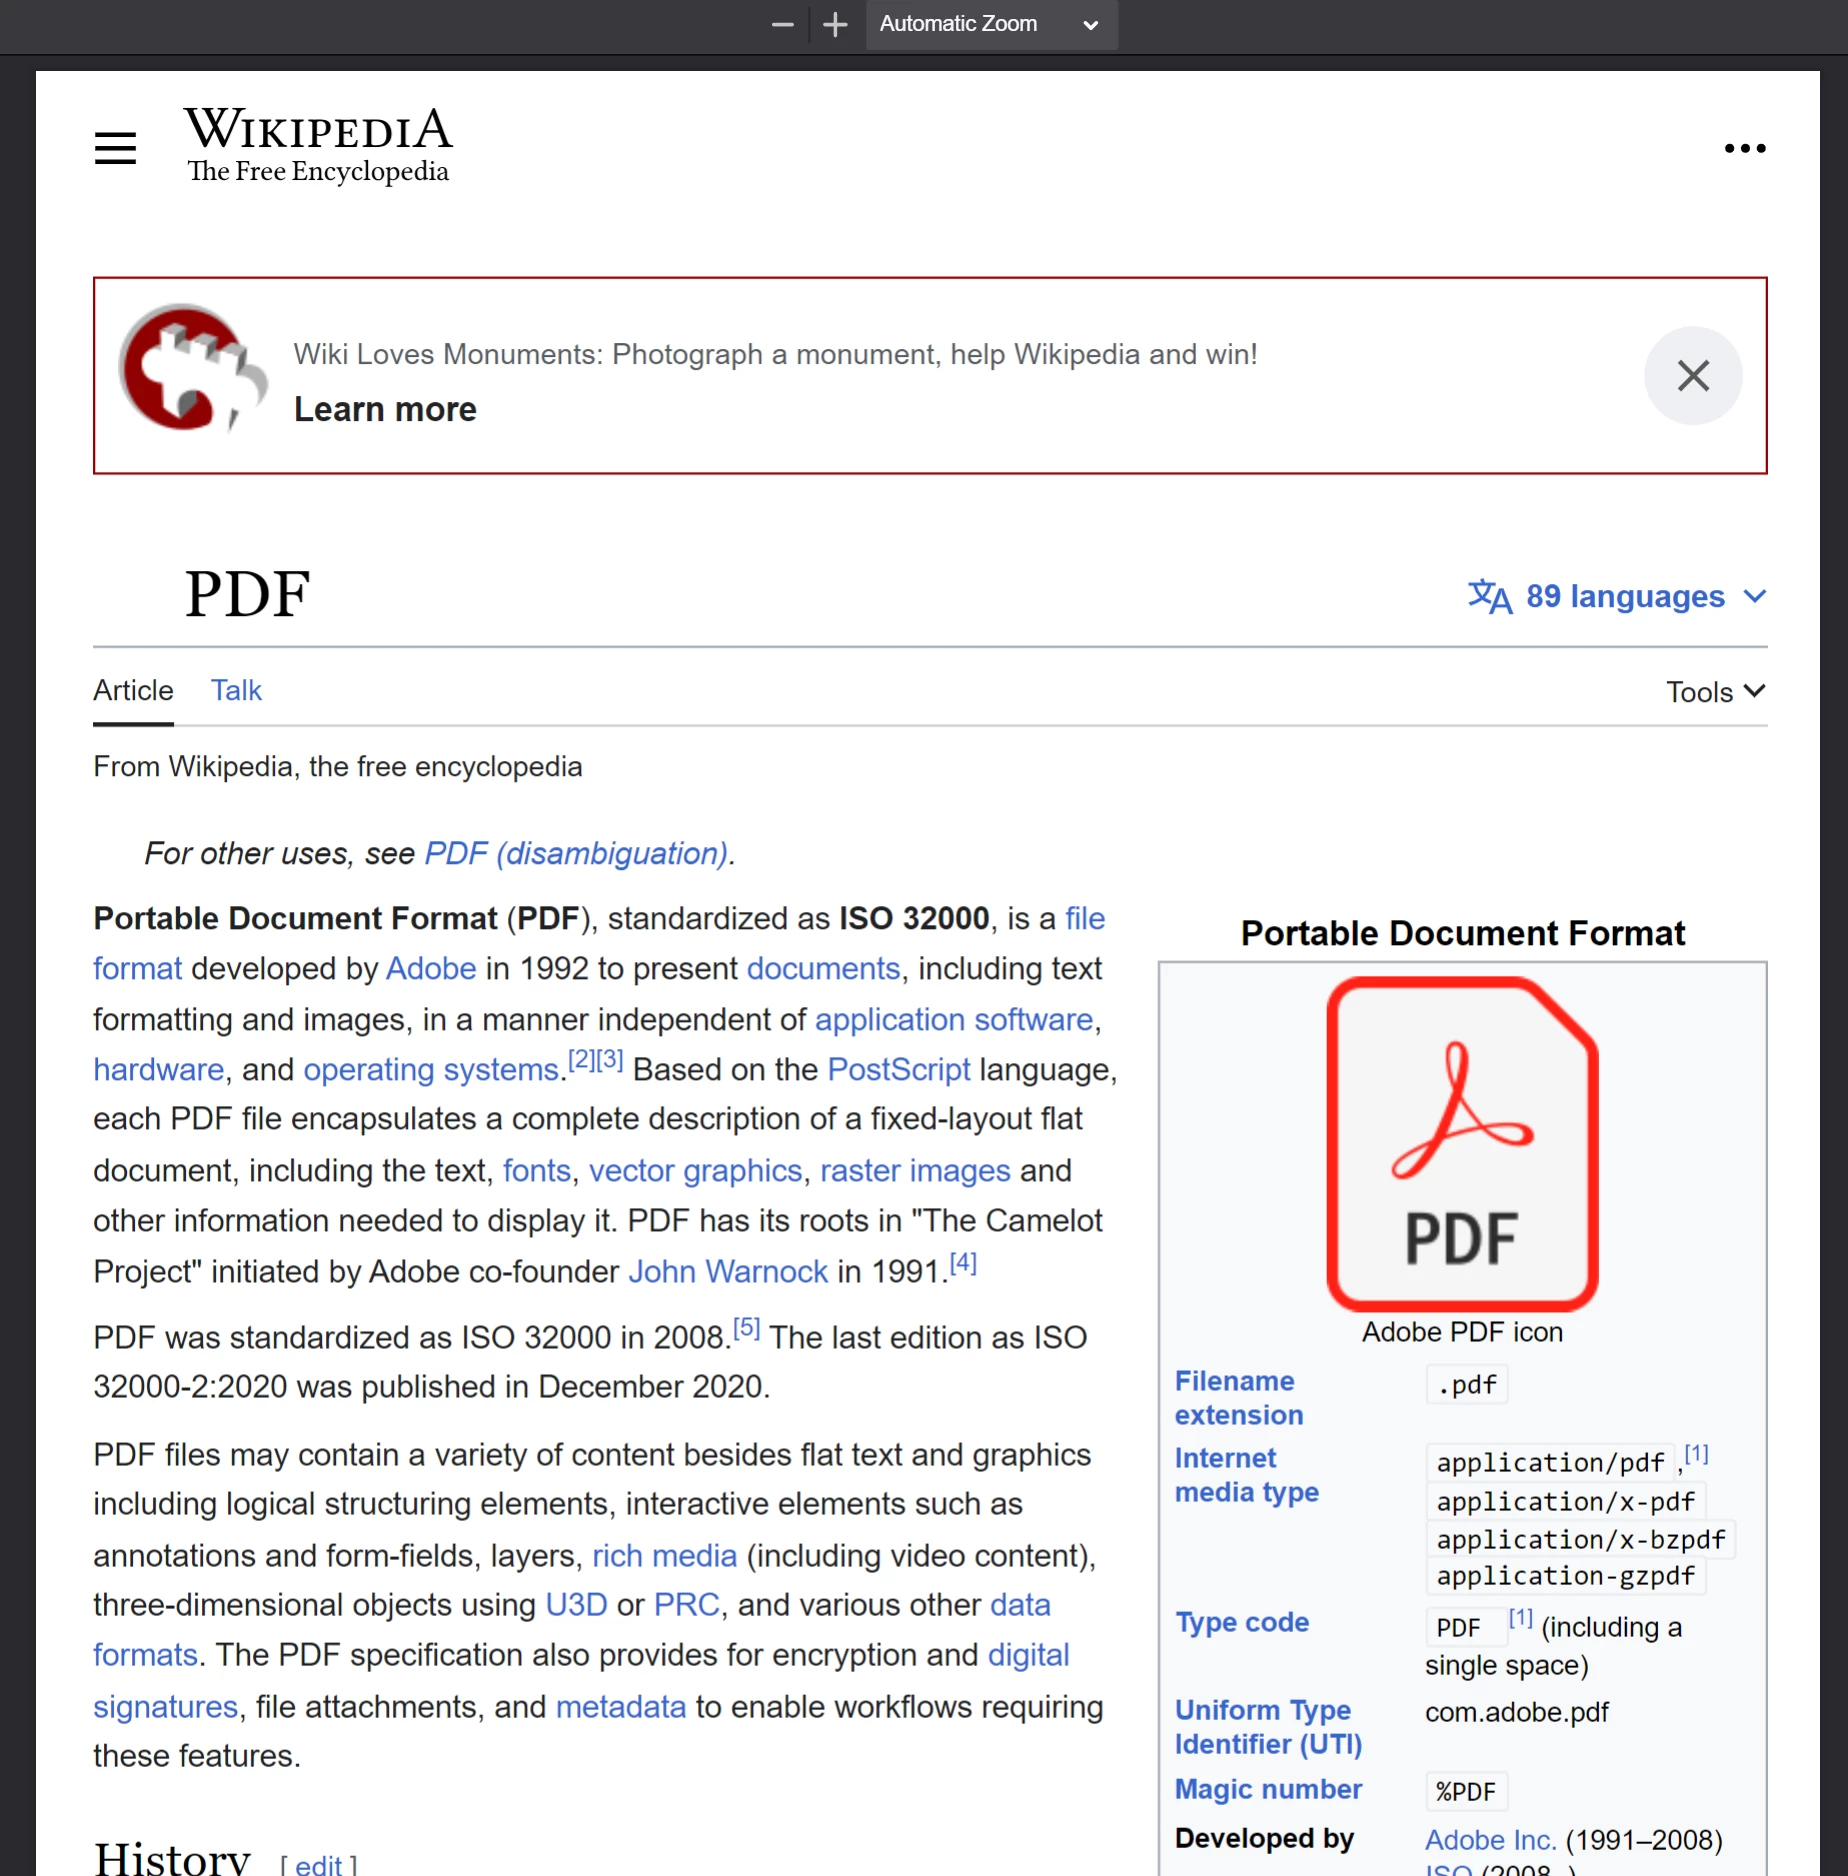
IronPDF 能完整保留原始 HTML 文件的版面樣式,並維持連結、表單及其他互動元件的功能。 此精準度亦適用於包含段落、清單、圖片、超連結及前端腳本的複雜頁面。
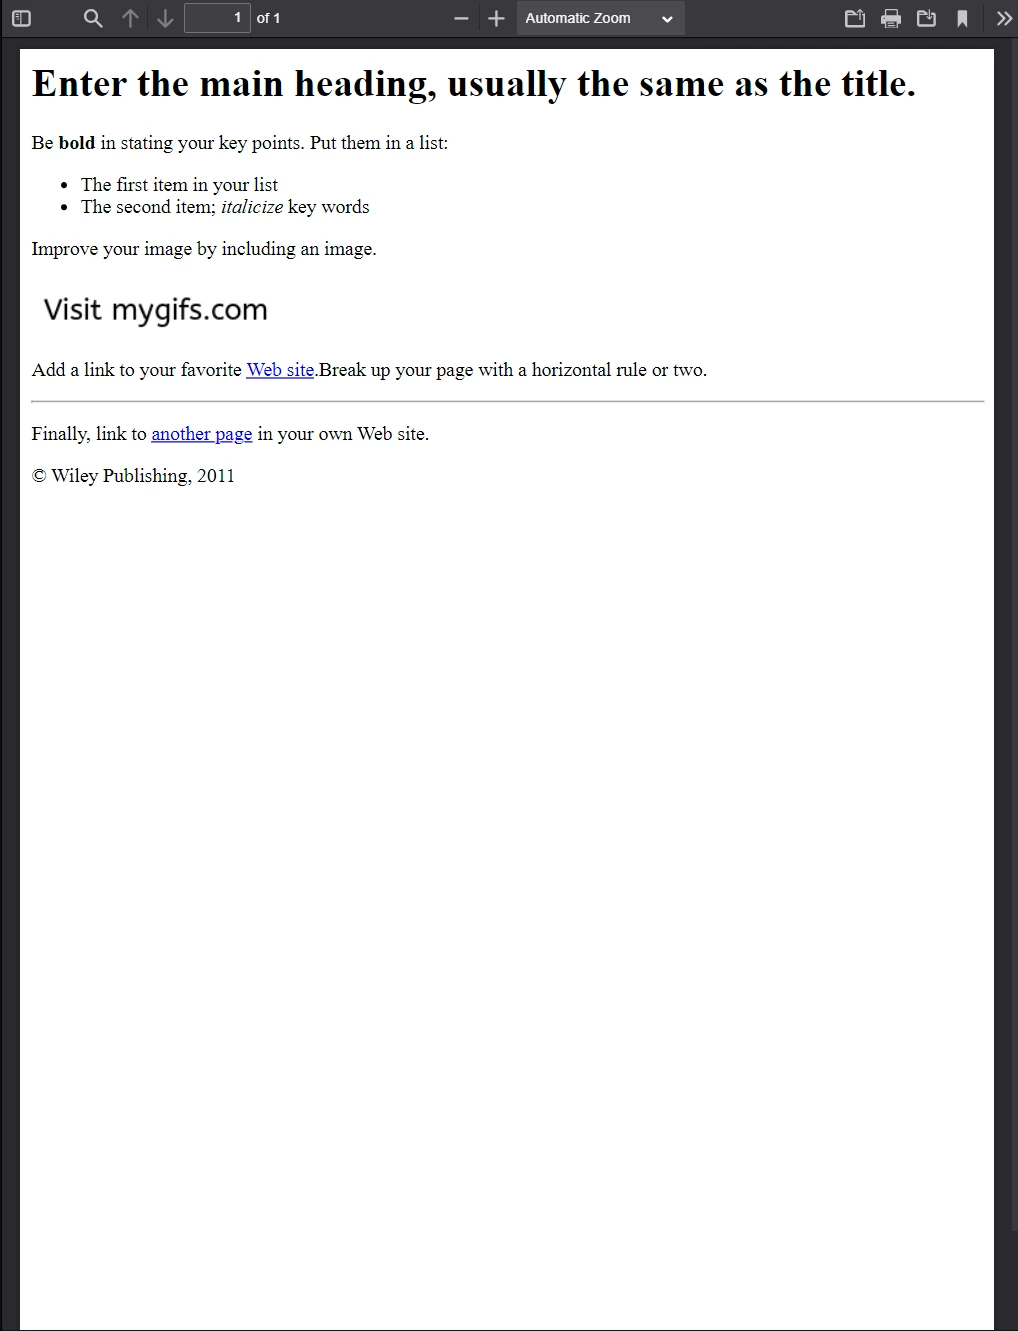 此 PDF 檔案是根據上方的 HTML 範例檔案所產生。 請將其外觀與前一張圖片比較——IronPDF 能高度精準地保留原始版面配置。
IronPDF 能處理遠超簡單標記的頁面。以下範例將轉換一個功能豐富的頁面,該頁面調用了大量外部 CSS 檔案、圖片及腳本資源:
//:path=/static-assets/ironpdf-nodejs/content-code-examples/tutorials/html-to-pdf/html-complex-file-to-pdf.js
import { PdfDocument } from "@ironsoftware/ironpdf";
import './config.js'; // Import the configuration script

// Render a PDF from a complex HTML page with external assets
PdfDocument.fromHtml("./sample4.html").then(async (pdf) => {
    return await pdf.saveAs("html-file-to-pdf-2.pdf");
});
//:path=/static-assets/ironpdf-nodejs/content-code-examples/tutorials/html-to-pdf/html-complex-file-to-pdf.js
import { PdfDocument } from "@ironsoftware/ironpdf";
import './config.js'; // Import the configuration script
// Render a PDF from a complex HTML page with external assets
PdfDocument.fromHtml("./sample4.html").then(async (pdf) => {
return await pdf.saveAs("html-file-to-pdf-2.pdf");
}); 若在 Google Chrome 中顯示效果良好,轉換為 PDF 後亦將呈現良好效果。 這包括大量使用 CSS 以及由 JavaScript 渲染的網頁設計。
如何從網址建立 PDF 檔案? {#create-PDF-from-url}
PdfDocument.fromUrl 會擷取並將即時網頁渲染為 PDF 檔案。 請將任何公開可存取的 URL 作為參數傳入。 IronPDF 的 Chrome 渲染引擎會擷取頁面、載入所有資源,並產生像素級精準的 PDF 檔案——無需手動下載 HTML 檔案。
//:path=/static-assets/ironpdf-nodejs/content-code-examples/tutorials/html-to-pdf/url-to-pdf.js
import { PdfDocument } from "@ironsoftware/ironpdf";
import './config.js'; // Import the configuration script

// Convert a live web page to a PDF
const pdf = await PdfDocument.fromUrl("https://en.wikipedia.org/wiki/PDF");

// Save the document
await pdf.saveAs("url-to-pdf.pdf");
//:path=/static-assets/ironpdf-nodejs/content-code-examples/tutorials/html-to-pdf/url-to-pdf.js
import { PdfDocument } from "@ironsoftware/ironpdf";
import './config.js'; // Import the configuration script
// Convert a live web page to a PDF
const pdf = await PdfDocument.fromUrl("https://en.wikipedia.org/wiki/PDF");
// Save the document
await pdf.saveAs("url-to-pdf.pdf");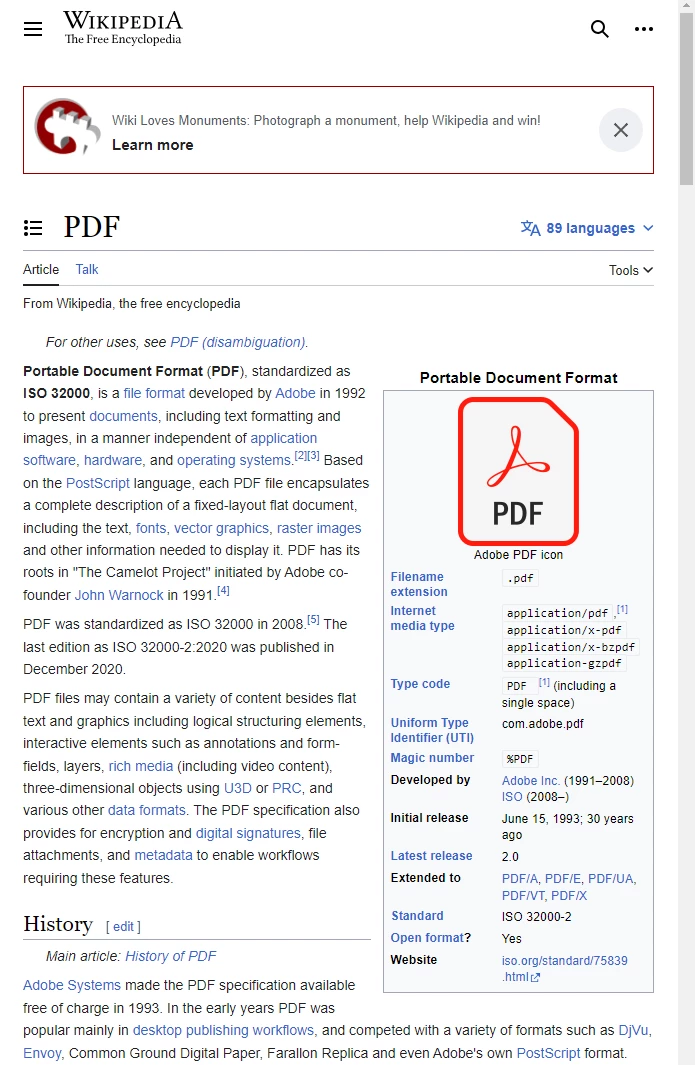 符合標準的網頁瀏覽器中顯示的維基百科 PDF 格式條目。
 透過在維基百科條目中呼叫
 PdfDocument.fromUrl 所生成的 PDF 檔案。 請注意其與原始網頁高度相似。
ChromePdfRenderOptions 進行額外設定。)}]如何從 ZIP 壓縮檔建立 PDF 檔案? {#create-pdf-from-zip}
PdfDocument.fromZip 會將 ZIP 壓縮檔中包含的特定 HTML 檔案轉換為 PDF。 這在分發將 HTML、CSS 和圖像資源整合為一的獨立 HTML 專案時特別有用。
在此範例中,假設專案目錄內包含一個 ZIP 檔案,其結構如下:
//:path=/static-assets/ironpdf-nodejs/content-code-examples/tutorials/html-to-pdf/zip-structure.txt
html-zip.zip
├─ index.html
├─ style.css
├─ logo.png
index.html 檔案包含:
//:path=/static-assets/ironpdf-nodejs/content-code-examples/tutorials/html-to-pdf/index.html
<!DOCTYPE html>
<html lang="en">
  <head>
    <meta charset="UTF-8">
    <meta name="viewport" content="width=device-width, initial-scale=1">
    <title>Hello world!</title>
    <link rel="stylesheet" href="style.css">
  </head>
  <body>
    <h1>Hello from IronPDF!</h1>
    <a href="https://ironpdf.com/nodejs/">
      <img src="logo.png" alt="IronPDF for Node.js">
    </a>
  </body>
</html>
//:path=/static-assets/ironpdf-nodejs/content-code-examples/tutorials/html-to-pdf/index.html
<!DOCTYPE html>
<html lang="en">
<head>
<meta charset="UTF-8">
<meta name="viewport" content="width=device-width, initial-scale=1">
<title>Hello world!</title>
<link rel="stylesheet" href="style.css">
</head>
<body>
<h1>Hello from IronPDF!</h1>
<a href="https://ironpdf.com/nodejs/">
<img src="logo.png" alt="IronPDF for Node.js">
</a>
</body>
</html>而 style.css 則定義了頁面版面配置與字型規則:
//:path=/static-assets/ironpdf-nodejs/content-code-examples/tutorials/html-to-pdf/style.css
@font-face {
  font-family: 'Gotham-Black';
  src: url('gotham-black-webfont.eot?') format('embedded-opentype'),
       url('gotham-black-webfont.woff2') format('woff2'),
       url('gotham-black-webfont.woff') format('woff'),
       url('gotham-black-webfont.ttf') format('truetype'),
       url('gotham-black-webfont.svg') format('svg');
  font-weight: normal;
  font-style: normal;
  font-display: swap;
}

body {
  display: flex;
  flex-direction: column;
  justify-content: center;
  margin-left: auto;
  margin-right: auto;
  margin-top: 200px;
  margin-bottom: auto;
  color: white;
  background-color: black;
  text-align: center;
  font-family: "Helvetica"
}

h1 {
  font-family: "Gotham-Black";
  margin-bottom: 70px;
  font-size: 32pt;
}

img {
  width: 400px;
  height: auto;
}

p {
  text-decoration: underline;
  font-size: smaller;
}
假設性 HTML ZIP 檔案內的範例圖片。
呼叫 fromZip 時,請將 ZIP 檔案的路徑指定為第一個參數,並將配置物件指定為第二個參數。 將 mainHtmlFile 屬性設定為壓縮檔內應轉換之 HTML 檔案的名稱:
//:path=/static-assets/ironpdf-nodejs/content-code-examples/tutorials/html-to-pdf/zip-to-pdf.js
import { PdfDocument } from "@ironsoftware/ironpdf";
import './config.js'; // Import the configuration script

// Convert an HTML file from a ZIP archive to PDF
PdfDocument.fromZip("./html-zip.zip", {
  mainHtmlFile: "index.html"
}).then(async (pdf) => {
  return await pdf.saveAs("html-zip-to-pdf.pdf");
});
//:path=/static-assets/ironpdf-nodejs/content-code-examples/tutorials/html-to-pdf/zip-to-pdf.js
import { PdfDocument } from "@ironsoftware/ironpdf";
import './config.js'; // Import the configuration script
// Convert an HTML file from a ZIP archive to PDF
PdfDocument.fromZip("./html-zip.zip", {
mainHtmlFile: "index.html"
}).then(async (pdf) => {
return await pdf.saveAs("html-zip-to-pdf.pdf");
}); 使用
使用 PdfDocument.fromZip 建立 PDF/A。 此函式成功渲染了 ZIP 檔案中的 HTML 程式碼及其捆綁的資源。
IronPDF 支援哪些進階渲染選項? {#advanced-rendering-options}
ChromePdfRenderOptions 介面提供了用於細部自訂 PDF 渲染行為的屬性。 這些設定在 PDF 生成前即已生效,涵蓋版面配置、視覺呈現以及動態內容的邊界情況。
IronPDF 會將預設的渲染設定套用至每次轉換。 請使用 defaultChromePdfRenderOptions 函式取得這些預設值:
//:path=/static-assets/ironpdf-nodejs/content-code-examples/tutorials/html-to-pdf/default-options.js
import { defaultChromePdfRenderOptions } from "@ironsoftware/ironpdf";

// Retrieve a ChromePdfRenderOptions object with default settings
var options = defaultChromePdfRenderOptions();
//:path=/static-assets/ironpdf-nodejs/content-code-examples/tutorials/html-to-pdf/default-options.js
import { defaultChromePdfRenderOptions } from "@ironsoftware/ironpdf";
// Retrieve a ChromePdfRenderOptions object with default settings
var options = defaultChromePdfRenderOptions();請根據需要修改回傳物件的屬性,並將其傳遞給任何轉換方法的 renderOptions 參數。
如何新增頁首和頁尾? {#add-headers-footers}
textHeader 和 textFooter 屬性可將自訂的文字內容附加至新渲染 PDF 的每一頁。 以下範例展示如何從 Google 搜尋首頁建立 PDF 檔案,並自訂頁首與頁尾,且分別使用不同的字型:
//:path=/static-assets/ironpdf-nodejs/content-code-examples/tutorials/html-to-pdf/custom-headers-footers.js
import { PdfDocument, defaultChromePdfRenderOptions, AffixFonts } from "@ironsoftware/ironpdf";
import './config.js'; // Import the configuration script

// Start from default render options
var options = defaultChromePdfRenderOptions();

// Configure a text-based header
options.textHeader = {
  centerText: "https://www.adobe.com",
  dividerLine: true,
  font: AffixFonts.CourierNew,
  fontSize: 12,
  leftText: "URL to PDF"
};

// Configure a text-based footer
options.textFooter = {
  centerText: "IronPDF for Node.js",
  dividerLine: true,
  fontSize: 14,
  font: AffixFonts.Helvetica,
  rightText: "HTML to PDF in Node.js"
};

// Render the page with custom headers and footers applied
PdfDocument.fromUrl("https://www.google.com/", { renderOptions: options }).then(async (pdf) => {
  return await pdf.saveAs("add-custom-headers-footers-1.pdf");
});
//:path=/static-assets/ironpdf-nodejs/content-code-examples/tutorials/html-to-pdf/custom-headers-footers.js
import { PdfDocument, defaultChromePdfRenderOptions, AffixFonts } from "@ironsoftware/ironpdf";
import './config.js'; // Import the configuration script
// Start from default render options
var options = defaultChromePdfRenderOptions();
// Configure a text-based header
options.textHeader = {
centerText: "https://www.adobe.com",
dividerLine: true,
font: AffixFonts.CourierNew,
fontSize: 12,
leftText: "URL to PDF"
};
// Configure a text-based footer
options.textFooter = {
centerText: "IronPDF for Node.js",
dividerLine: true,
fontSize: 14,
font: AffixFonts.Helvetica,
rightText: "HTML to PDF in Node.js"
};
// Render the page with custom headers and footers applied
PdfDocument.fromUrl("https://www.google.com/", { renderOptions: options }).then(async (pdf) => {
return await pdf.saveAs("add-custom-headers-footers-1.pdf");
});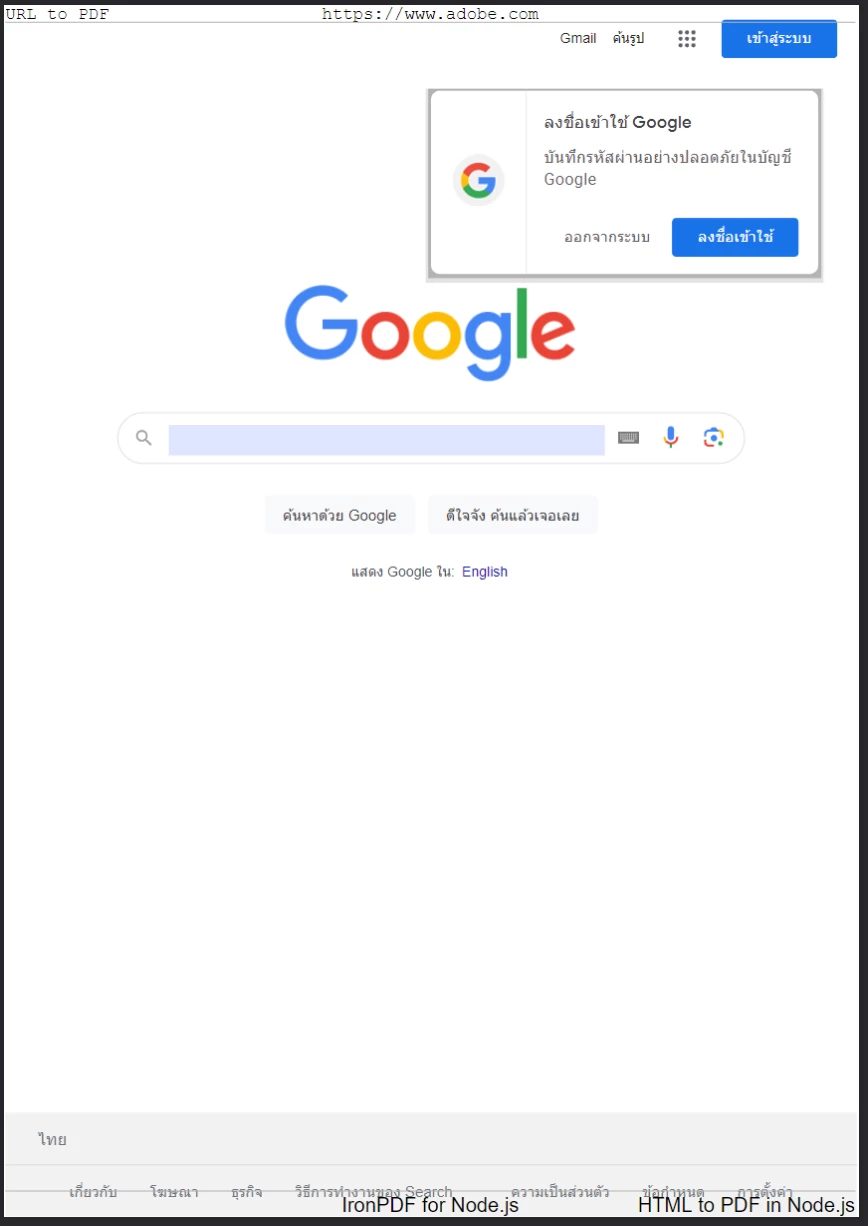 這是一份從 Google 首頁生成的 PDF 檔案,其中使用
 textHeader 和 textFooter 套用了自訂的頁首與頁尾文字。
若需更豐富的頁首與頁尾佈局,請改用 htmlHeader 和 htmlFooter 屬性。 這些工具支援原始 HTML 片段,讓您能完全掌控版型、圖片及對齊方式。 以下範例將頁面網址以粗體形式居中顯示於頁首,並在頁尾嵌入標誌圖片:
//:path=/static-assets/ironpdf-nodejs/content-code-examples/tutorials/html-to-pdf/html-headers-footers.js
import { PdfDocument, defaultChromePdfRenderOptions } from "@ironsoftware/ironpdf";
import './config.js'; // Import the configuration script

// Start from default render options
var options = defaultChromePdfRenderOptions();

// Define a rich HTML header
options.htmlHeader = {
  htmlFragment: "<strong>https://www.google.com/</strong>",
  dividerLine: true,
  dividerLineColor: "blue",
  loadStylesAndCSSFromMainHtmlDocument: true,
};

// Define a rich HTML footer with a logo
options.htmlFooter = {
  htmlFragment: "<img src='logo.png' alt='IronPDF for Node.js' style='display: block; width: 150px; height: auto; margin-left: auto; margin-right: auto;'>",
  dividerLine: true,
  loadStylesAndCSSFromMainHtmlDocument: true
};

// Apply custom HTML headers and footers during rendering
await PdfDocument.fromUrl("https://www.google.com/", { renderOptions: options }).then(async (pdf) => {
  return await pdf.saveAs("add-html-headers-footers.pdf");
});
//:path=/static-assets/ironpdf-nodejs/content-code-examples/tutorials/html-to-pdf/html-headers-footers.js
import { PdfDocument, defaultChromePdfRenderOptions } from "@ironsoftware/ironpdf";
import './config.js'; // Import the configuration script
// Start from default render options
var options = defaultChromePdfRenderOptions();
// Define a rich HTML header
options.htmlHeader = {
htmlFragment: "<strong>https://www.google.com/</strong>",
dividerLine: true,
dividerLineColor: "blue",
loadStylesAndCSSFromMainHtmlDocument: true,
};
// Define a rich HTML footer with a logo
options.htmlFooter = {
htmlFragment: "<img src='logo.png' alt='IronPDF for Node.js' style='display: block; width: 150px; height: auto; margin-left: auto; margin-right: auto;'>",
dividerLine: true,
loadStylesAndCSSFromMainHtmlDocument: true
};
// Apply custom HTML headers and footers during rendering
await PdfDocument.fromUrl("https://www.google.com/", { renderOptions: options }).then(async (pdf) => {
return await pdf.saveAs("add-html-headers-footers.pdf");
});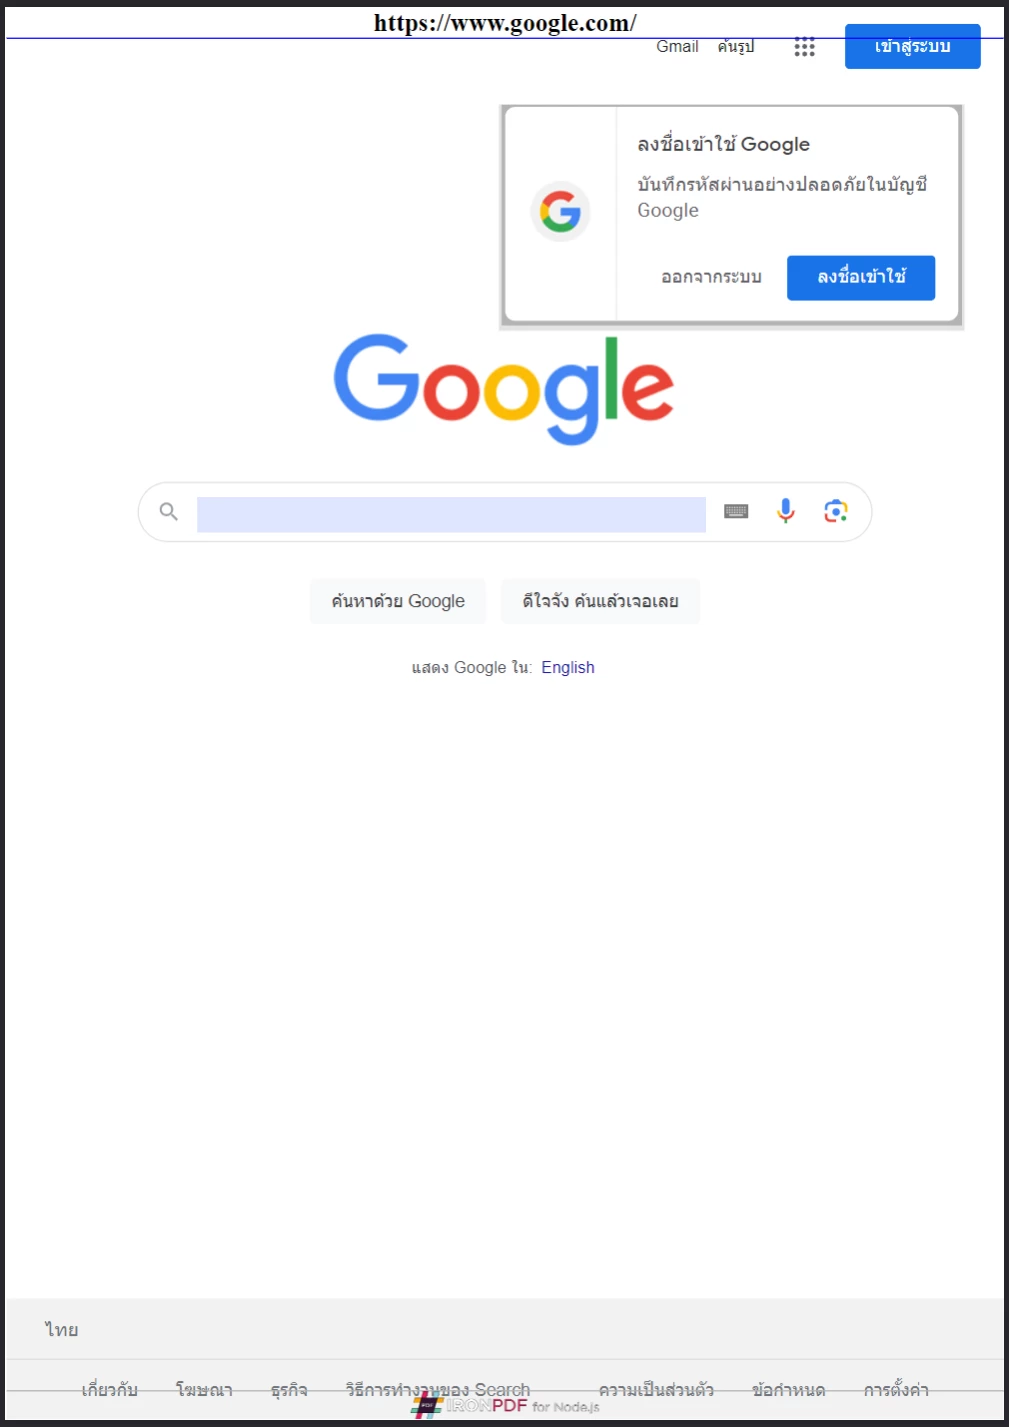 IronPDF 支援基於 HTML 的頁首與頁尾,讓您能完全掌控每頁的品牌形象與版面配置。
如何控制頁面大小、方向和邊距? {#page-size-orientation-margins}
paperOrientation 以及 grayScale 屬性,用於控制每個渲染頁面的物理佈局。 以下範例將 Google 首頁轉換為自訂邊距、A5 橫向排版及灰階輸出:
//:path=/static-assets/ironpdf-nodejs/content-code-examples/tutorials/html-to-pdf/page-size-orientation.js
import { PdfDocument, defaultChromePdfRenderOptions, PaperSize, FitToPaperModes, PdfPaperOrientation } from "@ironsoftware/ironpdf";
import './config.js'; // Import the configuration script

// Start from default render options
var options = defaultChromePdfRenderOptions();

// Set page margins in millimeters
options.margin = {
  top: 50,
  bottom: 50,
  left: 60,
  right: 60
};

// Configure paper size, fit mode, orientation, and color mode
options.paperSize = PaperSize.A5;
options.fitToPaperMode = FitToPaperModes.FitToPage;
options.paperOrientation = PdfPaperOrientation.Landscape;
options.grayScale = true;

// Render with the customized layout settings
PdfDocument.fromUrl("https://www.google.com/", { renderOptions: options }).then(async (pdf) => {
  return await pdf.saveAs("set-margins-and-page-size.pdf");
});
//:path=/static-assets/ironpdf-nodejs/content-code-examples/tutorials/html-to-pdf/page-size-orientation.js
import { PdfDocument, defaultChromePdfRenderOptions, PaperSize, FitToPaperModes, PdfPaperOrientation } from "@ironsoftware/ironpdf";
import './config.js'; // Import the configuration script
// Start from default render options
var options = defaultChromePdfRenderOptions();
// Set page margins in millimeters
options.margin = {
top: 50,
bottom: 50,
left: 60,
right: 60
};
// Configure paper size, fit mode, orientation, and color mode
options.paperSize = PaperSize.A5;
options.fitToPaperMode = FitToPaperModes.FitToPage;
options.paperOrientation = PdfPaperOrientation.Landscape;
options.grayScale = true;
// Render with the customized layout settings
PdfDocument.fromUrl("https://www.google.com/", { renderOptions: options }).then(async (pdf) => {
return await pdf.saveAs("set-margins-and-page-size.pdf");
});PaperSize 枚舉包含標準紙張尺寸,例如 Letter 及 Legal。 PdfPaperOrientation 枚舉支援 Portrait 和 Landscape。 這些設定可精確控制印刷就緒文件的輸出尺寸。
如何處理動態網頁? {#dynamic-web-pages}
透過 JavaScript 計時器、延遲載入或 API 呼叫等方式異步載入內容的頁面,在 IronPDF 引擎擷取時可能尚未完全渲染完成。 透過 ChromePdfRenderOptions 上的 waitFor 屬性所設定的 WaitFor 機制,會指示 Chrome 渲染器在滿足指定條件前暫停,然後才擷取頁面。
以下程式碼區塊設定 IronPDF 在擷取頁面內容前等待 20 秒:
//:path=/static-assets/ironpdf-nodejs/content-code-examples/tutorials/html-to-pdf/waitfor-delay.js
import { PdfDocument, defaultChromePdfRenderOptions, WaitForType } from "@ironsoftware/ironpdf";
import './config.js'; // Import the configuration script

// Configure the renderer to wait 20 seconds before capturing
var options = defaultChromePdfRenderOptions();
options.waitFor = {
  type: WaitForType.RenderDelay,
  delay: 20000
};

PdfDocument.fromUrl("https://ironpdf.com/nodejs/", { renderOptions: options }).then(async (pdf) => {
  return await pdf.saveAs("waitfor-renderdelay.pdf");
});
//:path=/static-assets/ironpdf-nodejs/content-code-examples/tutorials/html-to-pdf/waitfor-delay.js
import { PdfDocument, defaultChromePdfRenderOptions, WaitForType } from "@ironsoftware/ironpdf";
import './config.js'; // Import the configuration script
// Configure the renderer to wait 20 seconds before capturing
var options = defaultChromePdfRenderOptions();
options.waitFor = {
type: WaitForType.RenderDelay,
delay: 20000
};
PdfDocument.fromUrl("https://ironpdf.com/nodejs/", { renderOptions: options }).then(async (pdf) => {
return await pdf.saveAs("waitfor-renderdelay.pdf");
});或者,可設定 IronPDF 在渲染前等待特定 DOM 元素出現。 這對於在 JavaScript 框架完成掛載後才注入內容的頁面特別有用:
//:path=/static-assets/ironpdf-nodejs/content-code-examples/tutorials/html-to-pdf/waitfor-element.js
import { PdfDocument, defaultChromePdfRenderOptions, WaitForType } from "@ironsoftware/ironpdf";
import './config.js'; // Import the configuration script

// Configure the renderer to wait for a specific DOM element (up to 20 seconds)
var options = defaultChromePdfRenderOptions();
options.waitFor = {
  type: WaitForType.HtmlElement,
  htmlQueryStr: "div.ProseMirror",
  maxWaitTime: 20000,
};

PdfDocument.fromUrl("https://app.surferseo.com/drafts/s/V7VkcdfgFz-dpkldsfHDGFFYf4jjSvvjsdf", { renderOptions: options }).then(async (pdf) => {
  return await pdf.saveAs("waitfor-htmlelement.pdf");
});
//:path=/static-assets/ironpdf-nodejs/content-code-examples/tutorials/html-to-pdf/waitfor-element.js
import { PdfDocument, defaultChromePdfRenderOptions, WaitForType } from "@ironsoftware/ironpdf";
import './config.js'; // Import the configuration script
// Configure the renderer to wait for a specific DOM element (up to 20 seconds)
var options = defaultChromePdfRenderOptions();
options.waitFor = {
type: WaitForType.HtmlElement,
htmlQueryStr: "div.ProseMirror",
maxWaitTime: 20000,
};
PdfDocument.fromUrl("https://app.surferseo.com/drafts/s/V7VkcdfgFz-dpkldsfHDGFFYf4jjSvvjsdf", { renderOptions: options }).then(async (pdf) => {
return await pdf.saveAs("waitfor-htmlelement.pdf");
});WaitForType.HtmlElement 策略採用標準的 CSS 查詢選擇器。 渲染器會持續檢查該元素是否存在,直到經過 maxWaitTime 毫秒,或找到該元素為止 — 以先發生者為準。
如何從 HTML 範本生成 PDF 檔案? {#html-template-to-PDF}
一個常見的實際自動化模式,是從共用 HTML 範本生成一批 PDF 檔案,並將佔位符值替換為來自資料庫、API 或試算表的資料。 IronPDF 的 replaceText 方法在 PdfDocument 上可直接處理此需求。
以下範例發票範本(改編自公開的 CodePen 發票範本)使用大括號佔位符(如 {FULL-NAME} 及 {INVOICE-NUMBER})來表示可替換的內容:
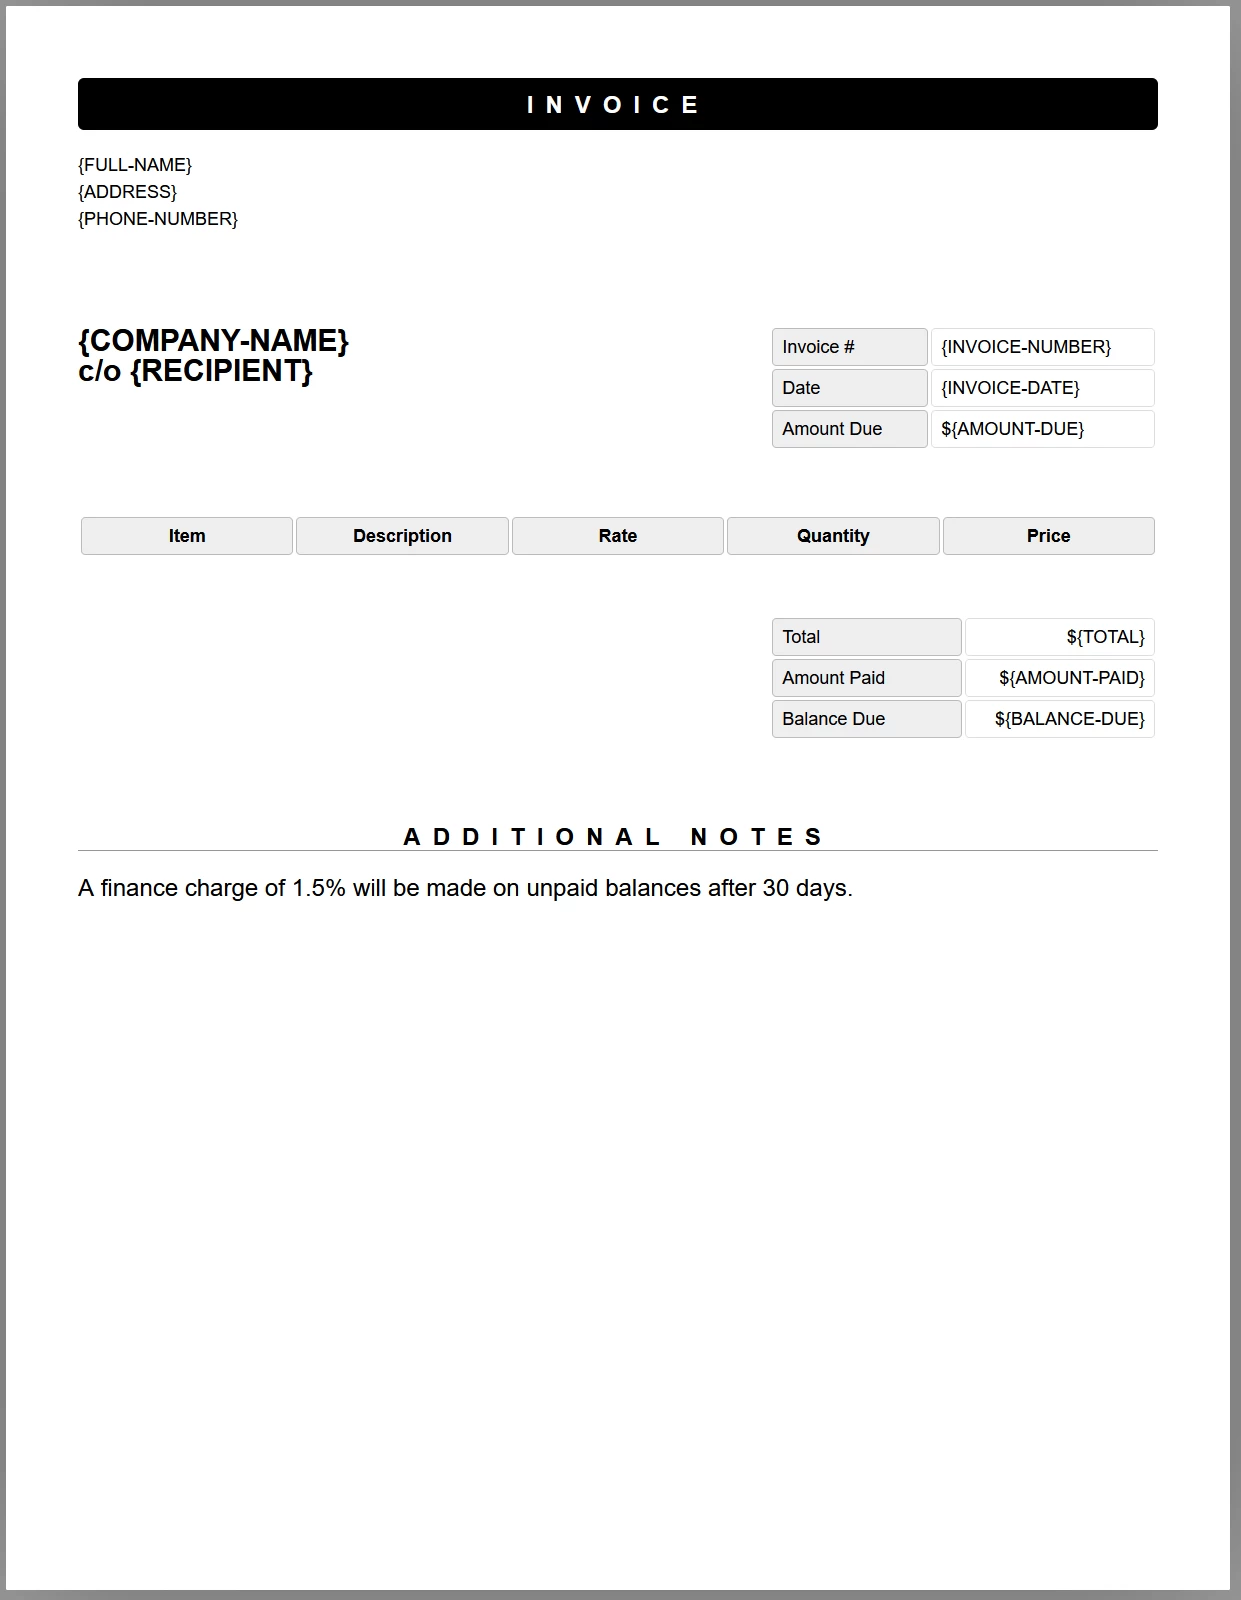 包含佔位符標籤的發票範本。 在文件儲存為 PDF 之前,JavaScript 程式碼會將每個標籤替換為實際資料。
以下程式碼會載入範本、將每個佔位符替換為測試資料,並將結果儲存為 PDF:
//:path=/static-assets/ironpdf-nodejs/content-code-examples/tutorials/html-to-pdf/html-template-to-pdf.js
import { PdfDocument } from "@ironsoftware/ironpdf";
import './config.js'; // Import the configuration script

/**
 * Loads an HTML template from the file system as a PdfDocument.
 */
async function getTemplateHtml(fileLocation) {
  return PdfDocument.fromHtml(fileLocation);
}

/**
 * Saves a PdfDocument to the specified file path.
 */
async function generatePdf(pdf, location) {
  return pdf.saveAs(location);
}

/**
 * Replaces a named placeholder in the PdfDocument with a data value.
 */
async function addTemplateData(pdf, key, value) {
  return pdf.replaceText(key, value);
}

// Path to the HTML invoice template
const template = "./sample-invoice.html";

// Load the template, fill in all placeholder values, then save the PDF
getTemplateHtml(template).then(async (doc) => {
    await addTemplateData(doc, "{FULL-NAME}", "Lizbeth Presland");
    await addTemplateData(doc, "{ADDRESS}", "678 Manitowish Alley, Portland, OG");
    await addTemplateData(doc, "{PHONE-NUMBER}", "(763) 894-4345");
    await addTemplateData(doc, "{INVOICE-NUMBER}", "787");
    await addTemplateData(doc, "{INVOICE-DATE}", "August 28, 2023");
    await addTemplateData(doc, "{AMOUNT-DUE}", "13,760.13");
    await addTemplateData(doc, "{RECIPIENT}", "Celestyna Farmar");
    await addTemplateData(doc, "{COMPANY-NAME}", "BrainBook");
    await addTemplateData(doc, "{TOTAL}", "13,760.13");
    await addTemplateData(doc, "{AMOUNT-PAID}", "0.00");
    await addTemplateData(doc, "{BALANCE-DUE}", "13,760.13");
    await addTemplateData(doc, "{ITEM}", "Training Sessions");
    await addTemplateData(doc, "{DESCRIPTION}", "60 Minute instruction");
    await addTemplateData(doc, "{RATE}", "3,440.03");
    await addTemplateData(doc, "{QUANTITY}", "4");
    await addTemplateData(doc, "{PRICE}", "13,760.13");
    return doc;
}).then(async (doc) => await generatePdf(doc, "html-template-to-pdf.pdf"));
//:path=/static-assets/ironpdf-nodejs/content-code-examples/tutorials/html-to-pdf/html-template-to-pdf.js
import { PdfDocument } from "@ironsoftware/ironpdf";
import './config.js'; // Import the configuration script
/**
* Loads an HTML template from the file system as a PdfDocument.
*/
async function getTemplateHtml(fileLocation) {
return PdfDocument.fromHtml(fileLocation);
}
/**
* Saves a PdfDocument to the specified file path.
*/
async function generatePdf(pdf, location) {
return pdf.saveAs(location);
}
/**
* Replaces a named placeholder in the PdfDocument with a data value.
*/
async function addTemplateData(pdf, key, value) {
return pdf.replaceText(key, value);
}
// Path to the HTML invoice template
const template = "./sample-invoice.html";
// Load the template, fill in all placeholder values, then save the PDF
getTemplateHtml(template).then(async (doc) => {
await addTemplateData(doc, "{FULL-NAME}", "Lizbeth Presland");
await addTemplateData(doc, "{ADDRESS}", "678 Manitowish Alley, Portland, OG");
await addTemplateData(doc, "{PHONE-NUMBER}", "(763) 894-4345");
await addTemplateData(doc, "{INVOICE-NUMBER}", "787");
await addTemplateData(doc, "{INVOICE-DATE}", "August 28, 2023");
await addTemplateData(doc, "{AMOUNT-DUE}", "13,760.13");
await addTemplateData(doc, "{RECIPIENT}", "Celestyna Farmar");
await addTemplateData(doc, "{COMPANY-NAME}", "BrainBook");
await addTemplateData(doc, "{TOTAL}", "13,760.13");
await addTemplateData(doc, "{AMOUNT-PAID}", "0.00");
await addTemplateData(doc, "{BALANCE-DUE}", "13,760.13");
await addTemplateData(doc, "{ITEM}", "Training Sessions");
await addTemplateData(doc, "{DESCRIPTION}", "60 Minute instruction");
await addTemplateData(doc, "{RATE}", "3,440.03");
await addTemplateData(doc, "{QUANTITY}", "4");
await addTemplateData(doc, "{PRICE}", "13,760.13");
return doc;
}).then(async (doc) => await generatePdf(doc, "html-template-to-pdf.pdf"));上述程式碼定義了三個非同步輔助函式:
getTemplateHtml:使用PdfDocument將 HTML 檔案載入至PdfDocument.fromHtml物件中。addTemplateData:呼叫PdfDocument.replaceText將佔位符鍵值替換為其實際資料值。generatePdf:將完成的PdfDocument寫入目標檔案路徑。
每個 replaceText 呼叫皆直接作用於記憶體中的 PDF 表示形式,因此可串接多個替換操作,無需從磁碟重新載入文件。 生成的 PDF 將完整保留原始範本中的所有 CSS 樣式、字型及版面配置。
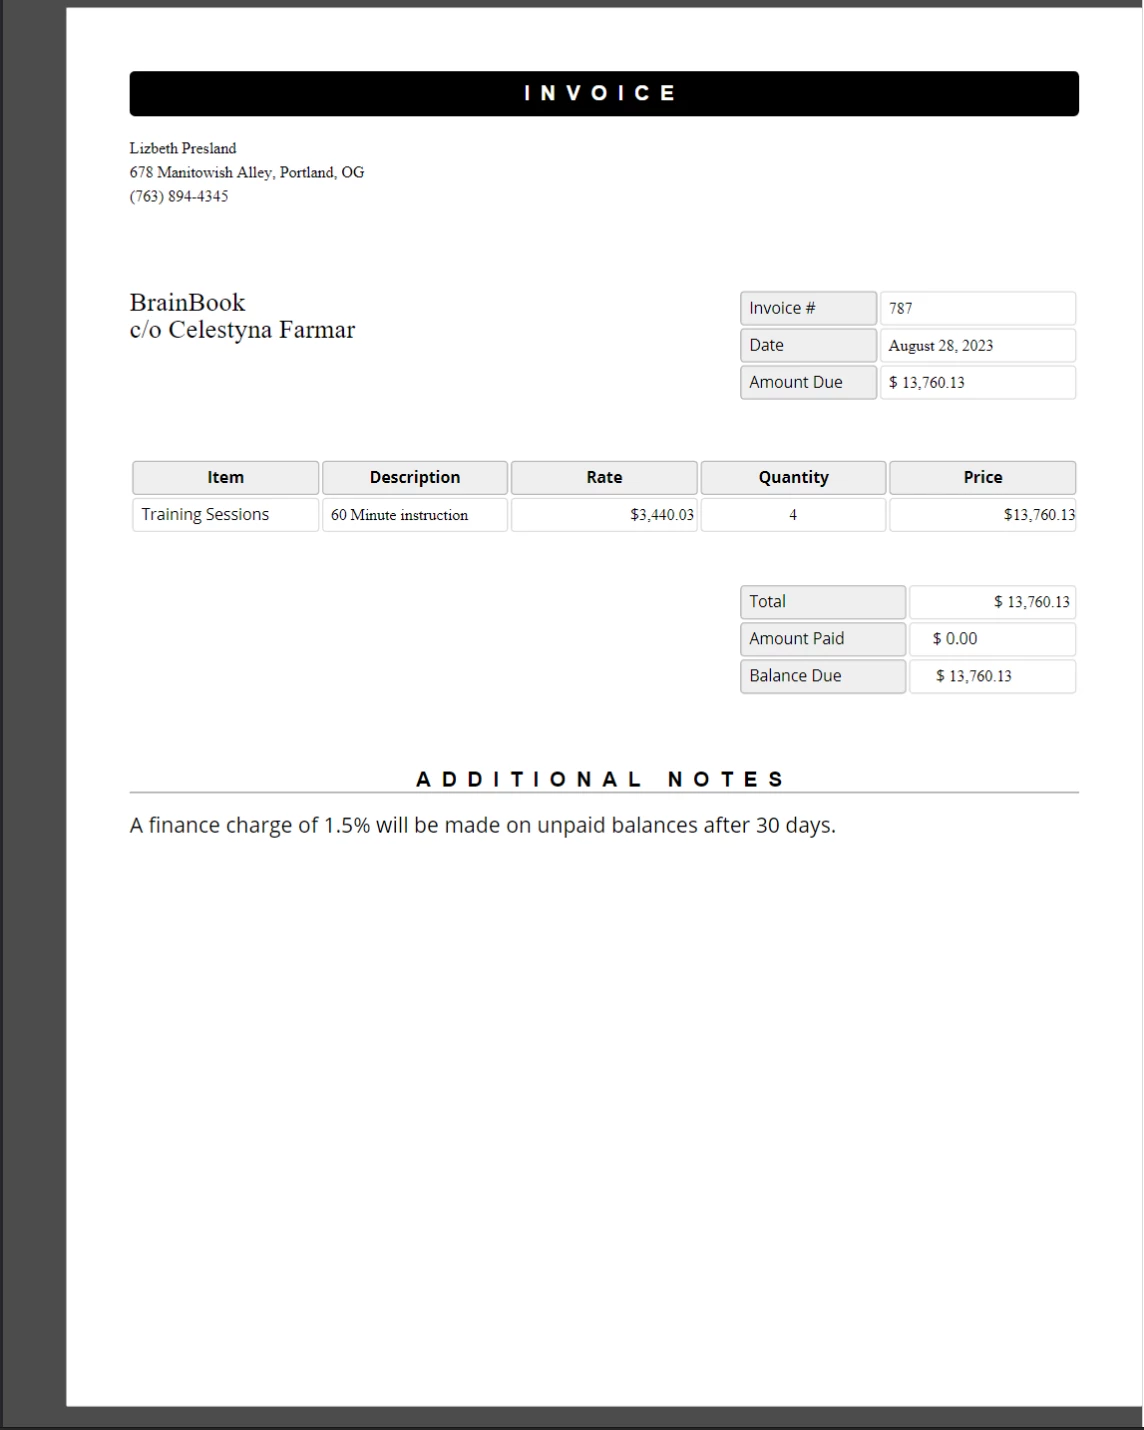 已完成的 PDF 發票,其中佔位符值已替換為實際資料。 原始範本中的 CSS 樣式與版面配置均完全保留。
此方法非常適合用於批次文件生成。 每筆記錄呼叫 getTemplateHtml 一次,以針對每個輸出檔案建立新的 PdfDocument,接著依序呼叫該記錄資料的 addTemplateData,最後再呼叫 generatePdf。
接下來該怎麼做? {#next-steps}
本教學涵蓋 IronPDF for Node.js 中核心的 HTML 轉 PDF 轉換方法,以及最常用的渲染選項。 以下主題將把您在此學到的知識延伸至更專業的領域。
- 在 Node.js 中編輯與加蓋 PDF — 透過程式化方式對現有 PDF 文件套用印章、註解及文字編輯。
- 在 Node.js 中合併與分割 PDF — 將多個 PDF 合併為單一文件,或將一個 PDF 分割為獨立頁面。
- 在 Node.js 中為 PDF 添加浮水印 — 透過精確的位置控制,在 PDF 的每一頁上套用文字或圖片浮水印。
- IronPDF for Node.js API 參考手冊 — 瀏覽
AffixFonts以及所有其他已匯出的類別與介面的完整 API。 - 取得免費試用授權金鑰 — 透過啟用 30 天免費試用授權,生成無浮水印且具備生產級品質的 PDF 檔案。
常見問題
如何在 Node.js 中將 HTML 轉換為 PDF?
請使用 IronPDF 函式庫。透過 `npm install @ironsoftware/ironpdf` 安裝後,可使用 HTML 字串或檔案路徑呼叫 `PdfDocument.fromHtml`,或使用網址呼叫 `PdfDocument.fromUrl`。最後透過 `PdfDocument.saveAs` 儲存結果。
如何在 Node.js 中將 HTML 字串轉換為 PDF?
呼叫 PdfDocument.fromHtml 方法,並將 HTML 字串作為參數傳入。此方法會傳回一個 Promise,該 Promise 解析後會產生一個 PdfDocument 實例。接著對結果鏈接 saveAs 方法,即可將 PDF 寫入磁碟。
如何在 Node.js 中將本機 HTML 檔案轉換為 PDF?
請將有效的檔案系統路徑傳遞給 PdfDocument.fromHtml,而非 HTML 字串。IronPDF 會以與瀏覽器載入檔案時相同的方式,解析相對的 CSS、圖片及腳本路徑。
如何在 Node.js 中將 URL 轉換為 PDF?
呼叫 PdfDocument.fromUrl 並傳入目標 URL。IronPDF 會透過其 Chrome 渲染引擎擷取頁面,並產生像素級精準的 PDF 檔案。目標 URL 必須可從執行 IronPDF 的主機公開存取。
如何在 Node.js 中為 PDF 文件添加頁首和頁尾?
設定 ChromePdfRenderOptions 物件上的 textHeader 和 textFooter 屬性,即可建立簡單的文字頁首與頁尾。若需更豐富的版面配置,請使用 htmlHeader 和 htmlFooter 並搭配原始 HTML 片段。將此選項物件傳遞給任何轉換方法的 renderOptions 參數。
如何在 IronPDF for Node.js 中變更頁面大小與方向?
將 options.paperSize 設定為 PaperSize 枚舉中的值(例如 PaperSize.A4 或 PaperSize.Letter),並將 options.paperOrientation 設定為 PdfPaperOrientation.Portrait 或 PdfPaperOrientation.Landscape。將設定好的選項傳遞給轉換方法。
在轉換為 PDF 時,您如何處理動態 JavaScript 內容?
請使用 ChromePdfRenderOptions 上的 waitFor 屬性。將 type 設為 WaitForType.RenderDelay 並提供以毫秒為單位的延遲時間,或將 type 設為 WaitForType.HtmlElement 並提供 CSS 查詢選擇器。IronPDF 將暫停渲染,直到條件滿足為止。
如何將 ZIP 壓縮檔內的 HTML 檔案轉換為 PDF?
呼叫 PdfDocument.fromZip 方法時,請將 ZIP 檔案的路徑作為第一個參數,並將選項物件作為第二個參數傳入。將 mainHtmlFile 屬性設定為存檔中應轉換之 HTML 檔案的名稱。
如何從生成的 PDF 檔案中移除 IronPDF 水印?
在呼叫任何轉換方法之前,請先將有效的授權金鑰套用至全域設定。透過 IronPdfGlobalConfig.getConfig() 取得設定物件,並將 config.licenseKey 設定為您的金鑰。您可於 ironpdf.com 取得免費試用授權。
如何在 Node.js 中從 HTML 範本生成 PDF 檔案?
使用 PdfDocument.fromHtml 載入範本,接著針對範本中的每個佔位符呼叫 PdfDocument.replaceText,並傳入佔位符字串及其替換值。完成所有替換後,呼叫 saveAs 來寫入最終的 PDF 檔案。


還在捲動嗎?
想要快速證明?
執行範例 觀看您的 HTML 變成 PDF。


