Python으로 PDF 파일을 편집하는 방법
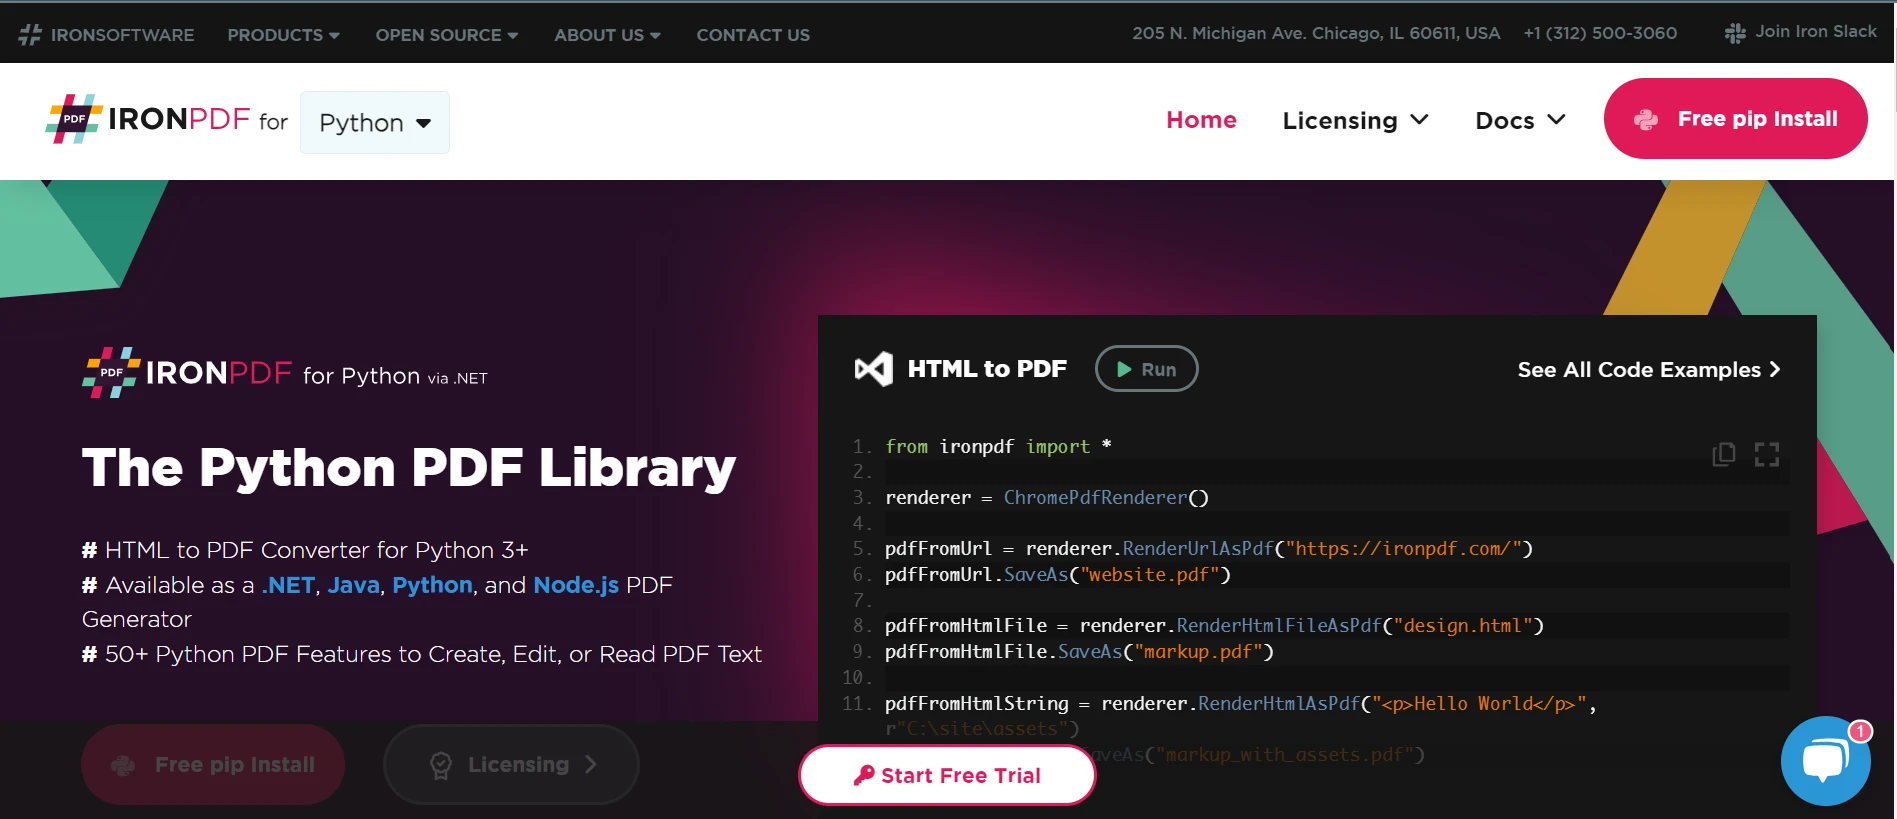
Iron Software Python에서 PDF 편집 작업을 수행하는 방식을 획기적으로 간소화하는 솔루션인 IronPDF Python용 라이브러리를 선보입니다. 서명 삽입, HTML 바닥글 추가, 워터마크 삽입, 주석 포함 또는 PDF 파일 편집 등 어떤 작업을 하든 IronPDF for Python이 바로 여러분에게 필요한 도구입니다. 이 라이브러리는 코드의 가독성을 유지하고, PDF를 프로그래밍 방식으로 생성할 수 있도록 지원하며, 간편한 디버깅을 가능하게 하고, 호환되는 모든 플랫폼 및 환경에 원활하게 배포할 수 있도록 합니다.
이 튜토리얼 문서에서는 Python 코드 예제와 포괄적인 설명을 통해 이러한 광범위한 기능을 살펴보겠습니다. 이 가이드를 마치면 모든 PDF 편집 요구 사항을 충족하기 위해 Python용 IronPDF 사용하는 방법을 확실히 이해하게 될 것입니다.
Python으로 PDF 파일을 편집하는 방법
- Python PDF 라이브러리를
pip설치 프로그램을 사용하여 설치합니다. - Python PDF 라이브러리의 라이선스 키를 적용합니다.
- 편집할 PDF 문서를 불러오세요.
- 분할, 페이지 복사 및 기타 PDF 작업과 같은 다양한 옵션을 사용하여 PDF 문서를 편집합니다.
- 수정된 파일을
SaveAs함수를 사용하여 저장합니다.
문서 구조 편집
페이지 조작
IronPDF PDF 파일에서 특정 위치에 페이지를 추가하거나, 특정 페이지 또는 페이지 범위를 추출하거나, 페이지를 삭제하는 과정을 간소화합니다. 이 시스템은 모든 복잡한 프로세스를 자동으로 처리해 주므로, 이러한 작업을 효율적으로 수행하기가 쉽습니다.
페이지 추가
PDF 문서에 페이지를 추가하려면 페이지 내용, 크기 및 위치를 지정하면 됩니다. 원하는 변경 사항을 만든 후 SaveAs 함수를 사용하여 출력 PDF 파일을 저장할 수 있습니다.
from ironpdf import *

# Enable debugging and set log path
Logger.EnableDebugging = True
Logger.LogFilePath = "Custom.log"
Logger.LoggingMode = Logger.LoggingModes.All

# Load existing PDF and Render HTML as new PDF page
pdf = PdfDocument("C:\\Users\\Administrator\\Downloads\\Documents\\sample.pdf")
renderer = ChromePdfRenderer()
coverPagePdf = renderer.RenderHtmlAsPdf("<h1>Cover Page</h1><hr>")

# Prepend new page to existing PDF
pdf.PrependPdf(coverPagePdf)

# Save the updated PDF document
pdf.SaveAs("report_with_cover.pdf")
from ironpdf import *
# Enable debugging and set log path
Logger.EnableDebugging = True
Logger.LogFilePath = "Custom.log"
Logger.LoggingMode = Logger.LoggingModes.All
# Load existing PDF and Render HTML as new PDF page
pdf = PdfDocument("C:\\Users\\Administrator\\Downloads\\Documents\\sample.pdf")
renderer = ChromePdfRenderer()
coverPagePdf = renderer.RenderHtmlAsPdf("<h1>Cover Page</h1><hr>")
# Prepend new page to existing PDF
pdf.PrependPdf(coverPagePdf)
# Save the updated PDF document
pdf.SaveAs("report_with_cover.pdf")복사 페이지
페이지 번호와 대상 위치를 지정하면 한 PDF 문서에서 다른 기존 PDF 파일로 페이지를 복사할 수 있습니다. 또한, 복사한 PDF 페이지들을 이용하여 새로운 PDF 파일을 생성하는 옵션도 있습니다. PDF 파일에서 한 페이지 또는 여러 페이지를 선택하여 복사할 수도 있습니다.
from ironpdf import *

# Load the PDF document
pdf = PdfDocument("C:\\Users\\Administrator\\Downloads\\Documents\\sample.pdf")

# Copy pages 3 to 5 and save them as a new document.
pdf.CopyPages(2, 4).SaveAs("report_highlight.pdf")
from ironpdf import *
# Load the PDF document
pdf = PdfDocument("C:\\Users\\Administrator\\Downloads\\Documents\\sample.pdf")
# Copy pages 3 to 5 and save them as a new document.
pdf.CopyPages(2, 4).SaveAs("report_highlight.pdf")페이지 삭제
페이지 번호를 지정하여 입력 PDF 파일에서 페이지를 삭제할 수 있습니다.
from ironpdf import *

# Load the PDF document
pdf = PdfDocument("report.pdf")

# Remove the last page from the PDF
pdf.RemovePage(pdf.PageCount-1)

# Save the updated PDF
pdf.SaveAs("Report-Minus-1.pdf")
from ironpdf import *
# Load the PDF document
pdf = PdfDocument("report.pdf")
# Remove the last page from the PDF
pdf.RemovePage(pdf.PageCount-1)
# Save the updated PDF
pdf.SaveAs("Report-Minus-1.pdf")PDF 병합 및 분할
IronPDF의 사용자 친화적인 API를 사용하면 여러 PDF 파일을 하나로 병합하거나 기존 PDF 파일을 여러 개의 개별 파일로 분할하는 것이 간편합니다.
여러 개의 기존 PDF 파일을 하나의 PDF 문서로 병합
입력 PDF 문서와 출력 PDF 문서를 지정하면 여러 PDF 문서를 하나의 문서로 병합할 수 있습니다.
from ironpdf import *

# Define HTML content for two separate PDFs
html_a = """<p> [PDF_A] </p>
            <p> [PDF_A] 1st Page </p>
            <div style='page-break-after: always;'></div>
            <p> [PDF_A] 2nd Page</p>"""

html_b = """<p> [PDF_B] </p>
            <p> [PDF_B] 1st Page </p>
            <div style='page-break-after: always;'></div>
            <p> [PDF_B] 2nd Page</p>"""

# Render each HTML content as PDF
renderer = ChromePdfRenderer()
pdfdoc_a = renderer.RenderHtmlAsPdf(html_a)
pdfdoc_b = renderer.RenderHtmlAsPdf(html_b)

# Merge the PDFs into a single document
merged = PdfDocument.Merge(pdfdoc_a, pdfdoc_b)

# Save the merged PDF
merged.SaveAs("Merged.pdf")
from ironpdf import *
# Define HTML content for two separate PDFs
html_a = """<p> [PDF_A] </p>
<p> [PDF_A] 1st Page </p>
<div style='page-break-after: always;'></div>
<p> [PDF_A] 2nd Page</p>"""
html_b = """<p> [PDF_B] </p>
<p> [PDF_B] 1st Page </p>
<div style='page-break-after: always;'></div>
<p> [PDF_B] 2nd Page</p>"""
# Render each HTML content as PDF
renderer = ChromePdfRenderer()
pdfdoc_a = renderer.RenderHtmlAsPdf(html_a)
pdfdoc_b = renderer.RenderHtmlAsPdf(html_b)
# Merge the PDFs into a single document
merged = PdfDocument.Merge(pdfdoc_a, pdfdoc_b)
# Save the merged PDF
merged.SaveAs("Merged.pdf")PDF 분할 및 페이지 추출
입력 PDF 문서와 출력 PDF 문서 또는 페이지 번호를 지정하여 PDF 문서를 여러 개의 문서로 분할하거나 PDF 파일에서 특정 페이지를 추출할 수 있습니다.
from ironpdf import *

# Define the HTML structure of the document
html = """<p> Hello Iron </p>
          <p> This is 1st Page </p>
          <div style='page-break-after: always;'></div>
          <p> This is 2nd Page</p>
          <div style='page-break-after: always;'></div>
          <p> This is 3rd Page</p>"""

# Render the HTML as a PDF document
renderer = ChromePdfRenderer()
pdf = renderer.RenderHtmlAsPdf(html)

# Create a separate document for the first page
page1doc = pdf.CopyPage(0)
page1doc.SaveAs("Split1.pdf")

# Create a separate document for pages 2 and 3
page23doc = pdf.CopyPages(1, 2)
page23doc.SaveAs("Split2.pdf")
from ironpdf import *
# Define the HTML structure of the document
html = """<p> Hello Iron </p>
<p> This is 1st Page </p>
<div style='page-break-after: always;'></div>
<p> This is 2nd Page</p>
<div style='page-break-after: always;'></div>
<p> This is 3rd Page</p>"""
# Render the HTML as a PDF document
renderer = ChromePdfRenderer()
pdf = renderer.RenderHtmlAsPdf(html)
# Create a separate document for the first page
page1doc = pdf.CopyPage(0)
page1doc.SaveAs("Split1.pdf")
# Create a separate document for pages 2 and 3
page23doc = pdf.CopyPages(1, 2)
page23doc.SaveAs("Split2.pdf")문서 속성 편집
PDF 메타데이터 추가 및 사용
Python용 IronPDF 사용하면 PDF 메타데이터를 추가하고 사용할 수 있습니다. 이는 저작권 정보를 추가하거나, 변경 사항을 추적하거나, 단순히 PDF 문서를 더 쉽게 검색할 수 있도록 하는 데 유용할 수 있습니다.
PDF 메타데이터는 PDF 문서에 저장된 데이터 모음입니다. 이 데이터에는 PDF 문서의 제목, 작성자, 주제, 키워드, 생성일 및 수정일이 포함될 수 있습니다. 또한, 필요에 따라 추가하는 사용자 지정 데이터도 포함할 수 있습니다.
from ironpdf import *
from datetime import datetime

# Load the encrypted PDF document
pdf = PdfDocument.FromFile("encrypted.pdf", "password")

# Edit file metadata
pdf.MetaData.Author = "Satoshi Nakamoto"
pdf.MetaData.Keywords = "SEO, Friendly"
pdf.MetaData.ModifiedDate = datetime.now()

# Save the updated PDF document
pdf.SaveAs("MetaData-Updated.pdf")
from ironpdf import *
from datetime import datetime
# Load the encrypted PDF document
pdf = PdfDocument.FromFile("encrypted.pdf", "password")
# Edit file metadata
pdf.MetaData.Author = "Satoshi Nakamoto"
pdf.MetaData.Keywords = "SEO, Friendly"
pdf.MetaData.ModifiedDate = datetime.now()
# Save the updated PDF document
pdf.SaveAs("MetaData-Updated.pdf")디지털 서명
IronPDF는 새로운 또는 기존의 PDF 파일에 .pfx 및 .p12 X509Certificate2 디지털 인증서를 사용하여 전자 서명을 할 수 있도록 합니다. 이 방법을 사용하여 PDF에 서명하면 문서에 대한 모든 수정 사항은 인증서를 통한 유효성 검사를 거쳐야 하므로 문서의 무결성이 보장됩니다.
Adobe Reader를 사용하여 서명 인증서를 무료로 생성하는 방법에 대한 자세한 안내는 Adobe 웹사이트 에서 확인할 수 있습니다.
IronPDF 암호화 서명 외에도 문서 서명 방법으로 자필 서명 이미지 또는 회사 도장 이미지를 사용할 수 있도록 지원합니다.
from ironpdf import *

# Cryptographically sign an existing PDF in one line of code!
PdfSignature(r".\certificates\IronSoftware.p12", "123456").SignPdfFile("any.pdf")

##### Advanced example for more control #####

# Step 1. Create a PDF.
renderer = ChromePdfRenderer()
doc = renderer.RenderHtmlAsPdf("<h1>Testing 2048 bit digital security</h1>")

# Step 2. Create a digital signature.
signature = PdfSignature(r"certificates\IronSoftware.pfx", "123456")

# Step 3. Optional signing options and a handwritten signature graphic.
signature.SigningContact = "support@ironsoftware.com"
signature.SigningLocation = "Chicago, USA"
signature.SigningReason = "To show how to sign a PDF"

# Step 4. Sign the PDF with the PdfSignature.
doc.Sign(signature)

# Step 5. The PDF is not signed until saved to file, stream, or byte array.
doc.SaveAs("signed.pdf")
from ironpdf import *
# Cryptographically sign an existing PDF in one line of code!
PdfSignature(r".\certificates\IronSoftware.p12", "123456").SignPdfFile("any.pdf")
##### Advanced example for more control #####
# Step 1. Create a PDF.
renderer = ChromePdfRenderer()
doc = renderer.RenderHtmlAsPdf("<h1>Testing 2048 bit digital security</h1>")
# Step 2. Create a digital signature.
signature = PdfSignature(r"certificates\IronSoftware.pfx", "123456")
# Step 3. Optional signing options and a handwritten signature graphic.
signature.SigningContact = "support@ironsoftware.com"
signature.SigningLocation = "Chicago, USA"
signature.SigningReason = "To show how to sign a PDF"
# Step 4. Sign the PDF with the PdfSignature.
doc.Sign(signature)
# Step 5. The PDF is not signed until saved to file, stream, or byte array.
doc.SaveAs("signed.pdf")PDF 첨부파일
IronPDF 사용하면 PDF 문서에 첨부 파일을 아주 쉽게 추가하고 원할 때 언제든지 제거할 수 있습니다. 즉, IronPDF 를 사용하면 필요에 따라 PDF에 추가 파일을 넣고 뺄 수 있습니다.
from ironpdf import *

# Instantiate the Renderer and create a PdfDocument from HTML
renderer = ChromePdfRenderer()
my_pdf = renderer.RenderHtmlFileAsPdf("my-content.html")

# Open the PDF document to be attached
pdf = PdfDocument.FromFile("new_sample.pdf")

# Add an attachment with a name and a byte array
attachment1 = my_pdf.Attachments.AddAttachment("attachment_1", pdf.BinaryData)

# Remove an attachment
my_pdf.Attachments.RemoveAttachment(attachment1)

# Save the PDF with attachments
my_pdf.SaveAs("my-content.pdf")
from ironpdf import *
# Instantiate the Renderer and create a PdfDocument from HTML
renderer = ChromePdfRenderer()
my_pdf = renderer.RenderHtmlFileAsPdf("my-content.html")
# Open the PDF document to be attached
pdf = PdfDocument.FromFile("new_sample.pdf")
# Add an attachment with a name and a byte array
attachment1 = my_pdf.Attachments.AddAttachment("attachment_1", pdf.BinaryData)
# Remove an attachment
my_pdf.Attachments.RemoveAttachment(attachment1)
# Save the PDF with attachments
my_pdf.SaveAs("my-content.pdf")PDF 압축
IronPDF는 PDF 파일의 크기를 줄일 수 있도록 압축 기능을 제공합니다. 한 가지 방법은 PDF 문서에 삽입된 이미지 크기를 CompressImages 메소드를 사용하여 줄이는 것입니다.
이미지 품질과 관련하여 JPEG 이미지의 경우 100% 품질 설정은 이미지 품질 손실을 거의 일으키지 않지만, 1% 품질 설정은 매우 낮은 품질의 결과물을 생성합니다. 일반적으로 이미지 품질이 90% 이상이면 고화질로 간주됩니다. 중간 품질의 이미지는 80%에서 90% 사이이고, 낮은 품질의 이미지는 70%에서 80% 사이입니다. 70% 미만으로 낮추면 이미지 품질이 크게 저하되지만, PDF 문서의 전체 파일 크기를 대폭 줄이는 데 도움이 될 수 있습니다.
원하는 화질과 파일 크기의 적절한 균형을 찾기 위해 다양한 화질 비율을 시도해 보는 것이 좋습니다. 이미지 크기를 줄인 후 화질 저하 정도는 이미지 유형에 따라 다를 수 있으며, 이미지 종류에 따라 선명도 손실 정도가 다를 수 있다는 점을 유념하십시오.
from ironpdf import *

# Load the PDF document
pdf = PdfDocument("document.pdf")

# Compress images within the PDF (quality between 1-100)
pdf.CompressImages(60)
pdf.SaveAs("document_compressed.pdf")

# Compress images with scaling image resolution
pdf.CompressImages(90, True)
pdf.SaveAs("document_scaled_compressed.pdf")
from ironpdf import *
# Load the PDF document
pdf = PdfDocument("document.pdf")
# Compress images within the PDF (quality between 1-100)
pdf.CompressImages(60)
pdf.SaveAs("document_compressed.pdf")
# Compress images with scaling image resolution
pdf.CompressImages(90, True)
pdf.SaveAs("document_scaled_compressed.pdf")PDF 콘텐츠 편집
머리글과 바닥글 추가
IronPDF 사용하면 PDF 문서에 머리글과 바닥글을 간단하게 추가할 수 있습니다. 이 소프트웨어는 HeaderFooters의 두 가지 서로 다른 유형을 제공합니다: TextHeaderFooter 및 HtmlHeaderFooter. TextHeaderFooter는 텍스트만 포함하고 "{page} of {total-pages}"와 같은 병합 필드를 통합해야 할 수 있는 머리글 및 바닥글에 이상적입니다. 반면에, HtmlHeaderFooter는 모든 HTML 콘텐츠를 처리하고 깔끔하게 형식화할 수 있는 보다 고급 옵션으로, 보다 복잡한 머리글 및 바닥글에 적합합니다.
HTML 헤더 및 푸터
IronPDF for Python을 사용하면 HtmlHeaderFooter 기능을 사용하여 HTML에서 PDF 문서의 HTML 머리글이나 바닥글을 만들 수 있습니다. 즉, HTML을 사용하여 헤더나 푸터를 디자인할 수 있으며, IronPDF for Python은 이를 PDF에 맞게 완벽하게 변환하여 모든 세부 사항이 정확하게 표시되도록 보장합니다. 따라서 헤더나 푸터에 사용할 HTML 디자인이 있다면 Python용 IronPDF 사용하여 해당 디자인을 PDF 문서에 정확하게 적용할 수 있습니다.
from ironpdf import *
import os

# Instantiate Renderer
renderer = ChromePdfRenderer()

# Build a footer using HTML to style the text
renderer.RenderingOptions.HtmlFooter = HtmlHeaderFooter()
renderer.RenderingOptions.HtmlFooter.MaxHeight = 15  # millimeters
renderer.RenderingOptions.HtmlFooter.HtmlFragment = "<center><i>{page} of {total-pages}<i></center>"
renderer.RenderingOptions.HtmlFooter.DrawDividerLine = True

# Ensure sufficient bottom margin
renderer.RenderingOptions.MarginBottom = 25  # mm

# Build a header using an image asset
renderer.RenderingOptions.HtmlHeader = HtmlHeaderFooter()
renderer.RenderingOptions.HtmlHeader.MaxHeight = 20  # millimeters
renderer.RenderingOptions.HtmlHeader.HtmlFragment = "<img src='iron.png'>"
renderer.RenderingOptions.HtmlHeader.BaseUrl = os.path.abspath("C:/Users/lyty1/OneDrive/Documents/IronPdfPythonNew")

# Ensure sufficient top margin
renderer.RenderingOptions.MarginTop = 25  # mm
from ironpdf import *
import os
# Instantiate Renderer
renderer = ChromePdfRenderer()
# Build a footer using HTML to style the text
renderer.RenderingOptions.HtmlFooter = HtmlHeaderFooter()
renderer.RenderingOptions.HtmlFooter.MaxHeight = 15 # millimeters
renderer.RenderingOptions.HtmlFooter.HtmlFragment = "<center><i>{page} of {total-pages}<i></center>"
renderer.RenderingOptions.HtmlFooter.DrawDividerLine = True
# Ensure sufficient bottom margin
renderer.RenderingOptions.MarginBottom = 25 # mm
# Build a header using an image asset
renderer.RenderingOptions.HtmlHeader = HtmlHeaderFooter()
renderer.RenderingOptions.HtmlHeader.MaxHeight = 20 # millimeters
renderer.RenderingOptions.HtmlHeader.HtmlFragment = "<img src='iron.png'>"
renderer.RenderingOptions.HtmlHeader.BaseUrl = os.path.abspath("C:/Users/lyty1/OneDrive/Documents/IronPdfPythonNew")
# Ensure sufficient top margin
renderer.RenderingOptions.MarginTop = 25 # mm텍스트 머리글 및 바닥글
from ironpdf import *

# Initiate PDF Renderer
renderer = ChromePdfRenderer()

# Add a text header to every page
renderer.RenderingOptions.FirstPageNumber = 1  # use 2 if a cover page will be appended
renderer.RenderingOptions.TextHeader.DrawDividerLine = True
renderer.RenderingOptions.TextHeader.CenterText = "{url}"
renderer.RenderingOptions.TextHeader.Font = FontTypes.Helvetica
renderer.RenderingOptions.TextHeader.FontSize = 12
renderer.RenderingOptions.MarginTop = 25  # create 25mm space for header

# Add a text footer to every page
renderer.RenderingOptions.TextFooter.DrawDividerLine = True
renderer.RenderingOptions.TextFooter.Font = FontTypes.Arial
renderer.RenderingOptions.TextFooter.FontSize = 10
renderer.RenderingOptions.TextFooter.LeftText = "{date} {time}"
renderer.RenderingOptions.TextFooter.RightText = "{page} of {total-pages}"
renderer.RenderingOptions.MarginBottom = 25  # create 25mm space for footer
from ironpdf import *
# Initiate PDF Renderer
renderer = ChromePdfRenderer()
# Add a text header to every page
renderer.RenderingOptions.FirstPageNumber = 1 # use 2 if a cover page will be appended
renderer.RenderingOptions.TextHeader.DrawDividerLine = True
renderer.RenderingOptions.TextHeader.CenterText = "{url}"
renderer.RenderingOptions.TextHeader.Font = FontTypes.Helvetica
renderer.RenderingOptions.TextHeader.FontSize = 12
renderer.RenderingOptions.MarginTop = 25 # create 25mm space for header
# Add a text footer to every page
renderer.RenderingOptions.TextFooter.DrawDividerLine = True
renderer.RenderingOptions.TextFooter.Font = FontTypes.Arial
renderer.RenderingOptions.TextFooter.FontSize = 10
renderer.RenderingOptions.TextFooter.LeftText = "{date} {time}"
renderer.RenderingOptions.TextFooter.RightText = "{page} of {total-pages}"
renderer.RenderingOptions.MarginBottom = 25 # create 25mm space for footer개요 및 책갈피
개요(또는 "책갈피")는 PDF 문서에서 중요한 페이지로 빠르게 이동할 수 있도록 도와주는 도구입니다. Adobe Acrobat Reader를 사용 중이라면 앱의 왼쪽 사이드바에서 이러한 책갈피(계층 구조로 정리 가능)를 볼 수 있습니다.
IronPDF for Python 라이브러리를 사용하면 책갈피 작업을 훨씬 쉽게 할 수 있습니다. PDF 문서에 있는 기존 책갈피를 자동으로 가져올 수 있습니다. 또한 IronPDF 사용하면 책갈피를 추가하거나 편집하거나 그룹으로 정리할 수 있습니다.
from ironpdf import *

# Load an existing PDF document.
pdf = PdfDocument.FromFile("existing.pdf")

# Add bookmarks to the PDF
pdf.Bookmarks.AddBookMarkAtEnd("Author's Note", 2)
pdf.Bookmarks.AddBookMarkAtEnd("Table of Contents", 3)

# Create a new bookmark and add nested bookmarks
summaryBookmark = pdf.Bookmarks.AddBookMarkAtEnd("Summary", 17)
summaryBookmark.Children.AddBookMarkAtStart("Conclusion", 18)

# Add additional bookmarks
pdf.Bookmarks.AddBookMarkAtEnd("References", 20)

# Save the PDF with new bookmarks
pdf.SaveAs("existing.pdf")
from ironpdf import *
# Load an existing PDF document.
pdf = PdfDocument.FromFile("existing.pdf")
# Add bookmarks to the PDF
pdf.Bookmarks.AddBookMarkAtEnd("Author's Note", 2)
pdf.Bookmarks.AddBookMarkAtEnd("Table of Contents", 3)
# Create a new bookmark and add nested bookmarks
summaryBookmark = pdf.Bookmarks.AddBookMarkAtEnd("Summary", 17)
summaryBookmark.Children.AddBookMarkAtStart("Conclusion", 18)
# Add additional bookmarks
pdf.Bookmarks.AddBookMarkAtEnd("References", 20)
# Save the PDF with new bookmarks
pdf.SaveAs("existing.pdf")주석 추가 및 편집
IronPDF for Python을 사용하면 PDF 문서에 주석을 추가하고 편집할 수 있습니다. 주석 기능을 사용하면 텍스트를 강조 표시하거나, 댓글을 추가하거나, 링크를 만들 수 있습니다. 기존 주석도 편집할 수 있습니다.
from ironpdf import *

# Load an existing PDF
pdf = PdfDocument("existing.pdf")

# Create a TextAnnotation object
annotation = TextAnnotation()
annotation.Title = "This is the title"
annotation.Subject = "This is a subject"
annotation.Contents = "This is the comment content..."
annotation.Icon = TextAnnotation.AnnotationIcon.Help
annotation.Opacity = 0.9
annotation.Printable = False
annotation.Hidden = False
annotation.OpenByDefault = True
annotation.ReadOnly = False
annotation.Rotateable = True

# Add the annotation to a specific page and location within the PDF
pdf.AddTextAnnotation(annotation, 1, 150, 250)

# Save the PDF with annotations
pdf.SaveAs("existing.pdf")
from ironpdf import *
# Load an existing PDF
pdf = PdfDocument("existing.pdf")
# Create a TextAnnotation object
annotation = TextAnnotation()
annotation.Title = "This is the title"
annotation.Subject = "This is a subject"
annotation.Contents = "This is the comment content..."
annotation.Icon = TextAnnotation.AnnotationIcon.Help
annotation.Opacity = 0.9
annotation.Printable = False
annotation.Hidden = False
annotation.OpenByDefault = True
annotation.ReadOnly = False
annotation.Rotateable = True
# Add the annotation to a specific page and location within the PDF
pdf.AddTextAnnotation(annotation, 1, 150, 250)
# Save the PDF with annotations
pdf.SaveAs("existing.pdf")배경과 전경을 추가하세요
Python용 IronPDF 사용하면 PDF 문서에 배경과 전경을 추가할 수 있습니다. 이 기능은 워터마크를 추가하거나, 사용자 지정 템플릿을 만들거나, 단순히 PDF 문서를 더욱 시각적으로 매력적으로 보이게 하는 데 유용할 수 있습니다. 이미지, 색상 또는 그라데이션을 배경이나 전경으로 사용할 수 있습니다.
from ironpdf import *

# Instantiate Renderer for PDF creation
renderer = ChromePdfRenderer()

# Render a PDF from a given URL
pdf = renderer.RenderUrlAsPdf("https://www.nuget.org/packages/IronPdf")

# Add a background PDF
pdf.AddBackgroundPdf("MyBackground.pdf")

# Add a foreground overlay PDF to the first page
pdf.AddForegroundOverlayPdfToPage(0, "MyForeground.pdf", 0)

# Save the merged PDF with background and foreground
pdf.SaveAs("Complete.pdf")
from ironpdf import *
# Instantiate Renderer for PDF creation
renderer = ChromePdfRenderer()
# Render a PDF from a given URL
pdf = renderer.RenderUrlAsPdf("https://www.nuget.org/packages/IronPdf")
# Add a background PDF
pdf.AddBackgroundPdf("MyBackground.pdf")
# Add a foreground overlay PDF to the first page
pdf.AddForegroundOverlayPdfToPage(0, "MyForeground.pdf", 0)
# Save the merged PDF with background and foreground
pdf.SaveAs("Complete.pdf")스탬핑 및 워터마킹
IronPDF for Python을 사용하면 PDF 문서에 스탬프와 워터마크를 추가할 수 있습니다. 이 기능은 저작권 정보를 추가하여 무단 복제를 방지하거나 PDF 문서를 더욱 전문적으로 보이게 하는 데 유용할 수 있습니다. PDF 문서에 텍스트, 이미지 또는 워터마크를 삽입할 수 있습니다. 스탬프와 워터마크의 크기, 위치 및 투명도도 조절할 수 있습니다.
PDF에 스탬프 적용하기
Python용 IronPDF 사용하면 PDF 문서에 스탬프를 적용할 수 있습니다. 이 기능은 PDF 문서에 로고, 서명 또는 기타 식별 정보를 추가하는 데 유용할 수 있습니다. 스탬프의 종류, 위치, 크기를 선택할 수 있습니다. 스탬프의 투명도도 설정할 수 있습니다.
from ironpdf import *

# Define an HTML Stamper to apply an image stamp
stamper = HtmlStamper("<img src='https://ironpdf.com/img/products/ironpdf-logo-text-dotnet.svg'/>")
stamper.HorizontalAlignment = HorizontalAlignment.Center
stamper.VerticalAlignment = VerticalAlignment.Bottom
stamper.IsStampBehindContent = False
stamper.Opacity = 30

# Load existing PDF and apply the stamp
pdf = PdfDocument.FromFile("Sample.pdf")
pdf.ApplyStamp(stamper).SaveAs("stampedimage.pdf")
from ironpdf import *
# Define an HTML Stamper to apply an image stamp
stamper = HtmlStamper("<img src='https://ironpdf.com/img/products/ironpdf-logo-text-dotnet.svg'/>")
stamper.HorizontalAlignment = HorizontalAlignment.Center
stamper.VerticalAlignment = VerticalAlignment.Bottom
stamper.IsStampBehindContent = False
stamper.Opacity = 30
# Load existing PDF and apply the stamp
pdf = PdfDocument.FromFile("Sample.pdf")
pdf.ApplyStamp(stamper).SaveAs("stampedimage.pdf")PDF에 워터마크 추가하기
Python용 IronPDF 사용하면 PDF 문서에 워터마크를 추가할 수 있습니다. 이는 무단 복제를 방지하거나 PDF 문서를 더욱 전문적으로 보이게 하는 데 유용할 수 있습니다. 워터마크 텍스트, 글꼴, 크기 및 색상을 선택할 수 있습니다. 워터마크의 투명도를 설정할 수도 있습니다.
from ironpdf import *

# Instantiate the Renderer and create a PdfDocument from a URL
renderer = ChromePdfRenderer()
pdf = renderer.RenderUrlAsPdf("https://www.nuget.org/packages/IronPdf")

# Apply a watermark to the PDF
pdf.ApplyWatermark("<h2 style='color:red'>SAMPLE</h2>", 30, VerticalAlignment.Middle, HorizontalAlignment.Center)

# Save the watermarked PDF
pdf.SaveAs("Watermarked.pdf")
from ironpdf import *
# Instantiate the Renderer and create a PdfDocument from a URL
renderer = ChromePdfRenderer()
pdf = renderer.RenderUrlAsPdf("https://www.nuget.org/packages/IronPdf")
# Apply a watermark to the PDF
pdf.ApplyWatermark("<h2 style='color:red'>SAMPLE</h2>", 30, VerticalAlignment.Middle, HorizontalAlignment.Center)
# Save the watermarked PDF
pdf.SaveAs("Watermarked.pdf")PDF에서 양식 사용하기
IronPDF for Python을 사용하면 PDF 문서에서 양식을 만들고 편집할 수 있습니다. 이 기능은 사용자로부터 데이터를 수집하거나 PDF 문서를 더욱 상호작용적으로 만드는 데 유용할 수 있습니다. 텍스트 상자, 체크박스, 라디오 버튼과 같은 폼 필드를 추가할 수 있습니다. 사용자로부터 양식 데이터를 수집할 수도 있습니다.
양식 생성 및 편집
from ironpdf import *

# HTML content for a form with text inputs, radio buttons, and checkboxes
form_html = """
<html>
    <body>
        <h2>Editable PDF Form</h2>
        <form>
            First name: <br> <input type='text' name='firstname' value=''> <br>
            Last name: <br> <input type='text' name='lastname' value=''> <br>
            <br>
            <p>Please specify your gender:</p>
            <input type='radio' id='female' name='gender' value= 'Female'>
            <label for='female'>Female</label> <br>
            <br>
            <input type='radio' id='male' name='gender' value='Male'>
            <label for='male'>Male</label> <br>
            <br>
            <input type='radio' id='non-binary/other' name='gender' value='Non-Binary / Other'>
            <label for='non-binary/other'>Non-Binary / Other</label>
            <br>

            <p>Please select all medical conditions that apply:</p>
            <input type='checkbox' id='condition1' name='Hypertension' value='Hypertension'>
            <label for='condition1'> Hypertension</label><br>
            <input type='checkbox' id='condition2' name='Heart Disease' value='Heart Disease'>
            <label for='condition2'> Heart Disease</label><br>
            <input type='checkbox' id='condition3' name='Stroke' value='Stroke'>
            <label for='condition3'> Stroke</label><br>
            <input type='checkbox' id='condition4' name='Diabetes' value='Diabetes'>
            <label for='condition4'> Diabetes</label><br>
            <input type='checkbox' id='condition5' name='Kidney Disease' value='Kidney Disease'>
            <label for='condition5'> Kidney Disease</label><br>
        </form>
    </body>
</html>
"""

# Instantiate Renderer and enable form creation
renderer = ChromePdfRenderer()
renderer.RenderingOptions.CreatePdfFormsFromHtml = True

# Render the form HTML to PDF and save it
renderer.RenderHtmlAsPdf(form_html).SaveAs("BasicForm.pdf")

# Open the form PDF and update form values
form_document = PdfDocument.FromFile("BasicForm.pdf")

# Update and read the form fields
first_name_field = form_document.Form.FindFormField("firstname")
first_name_field.Value = "Minnie"
print(f"FirstNameField value: {first_name_field.Value}")

last_name_field = form_document.Form.FindFormField("lastname")
last_name_field.Value = "Mouse"
print(f"LastNameField value: {last_name_field.Value}")

# Save the filled form PDF
form_document.SaveAs("FilledForm.pdf")
from ironpdf import *
# HTML content for a form with text inputs, radio buttons, and checkboxes
form_html = """
<html>
<body>
<h2>Editable PDF Form</h2>
<form>
First name: <br> <input type='text' name='firstname' value=''> <br>
Last name: <br> <input type='text' name='lastname' value=''> <br>
<br>
<p>Please specify your gender:</p>
<input type='radio' id='female' name='gender' value= 'Female'>
<label for='female'>Female</label> <br>
<br>
<input type='radio' id='male' name='gender' value='Male'>
<label for='male'>Male</label> <br>
<br>
<input type='radio' id='non-binary/other' name='gender' value='Non-Binary / Other'>
<label for='non-binary/other'>Non-Binary / Other</label>
<br>
<p>Please select all medical conditions that apply:</p>
<input type='checkbox' id='condition1' name='Hypertension' value='Hypertension'>
<label for='condition1'> Hypertension</label><br>
<input type='checkbox' id='condition2' name='Heart Disease' value='Heart Disease'>
<label for='condition2'> Heart Disease</label><br>
<input type='checkbox' id='condition3' name='Stroke' value='Stroke'>
<label for='condition3'> Stroke</label><br>
<input type='checkbox' id='condition4' name='Diabetes' value='Diabetes'>
<label for='condition4'> Diabetes</label><br>
<input type='checkbox' id='condition5' name='Kidney Disease' value='Kidney Disease'>
<label for='condition5'> Kidney Disease</label><br>
</form>
</body>
</html>
"""
# Instantiate Renderer and enable form creation
renderer = ChromePdfRenderer()
renderer.RenderingOptions.CreatePdfFormsFromHtml = True
# Render the form HTML to PDF and save it
renderer.RenderHtmlAsPdf(form_html).SaveAs("BasicForm.pdf")
# Open the form PDF and update form values
form_document = PdfDocument.FromFile("BasicForm.pdf")
# Update and read the form fields
first_name_field = form_document.Form.FindFormField("firstname")
first_name_field.Value = "Minnie"
print(f"FirstNameField value: {first_name_field.Value}")
last_name_field = form_document.Form.FindFormField("lastname")
last_name_field.Value = "Mouse"
print(f"LastNameField value: {last_name_field.Value}")
# Save the filled form PDF
form_document.SaveAs("FilledForm.pdf")결론
IronPDF for Python은 Python에서 PDF 문서를 생성, 조작 및 편집할 수 있도록 해주는 강력한 Python PDF 라이브러리입니다. 이 라이브러리를 사용하면 PDF 문서를 조작하는 것이 놀라울 정도로 쉬워집니다. 이 프로그램은 문서 구조 편집, 페이지 조작, PDF 병합 및 분할, 문서 속성 편집, PDF 메타데이터 추가 및 사용 등 다양한 기능을 제공합니다.
IronPDF for Python은 사용하기 쉽고 모든 Python 프로젝트에 원활하게 통합할 수 있습니다. Python으로 PDF 문서를 다뤄야 하는 모든 사람에게 유용한 도구입니다. IronPDF for Python 라이선스는 $999부터 시작합니다. IronPDF 웹사이트 에서 더 자세한 정보를 찾아보실 수 있습니다.
자주 묻는 질문
Python으로 PDF 파일을 편집하려면 어떻게 해야 하나요?
IronPDF for Python을 사용하면 서명 삽입, HTML 바닥글 추가, 워터마크 삽입, 주석 추가 등을 프로그래밍 방식으로 수행하여 PDF 파일을 편집할 수 있습니다.
Python용 IronPDF를 설치하는 데 필요한 단계는 무엇입니까?
Python용 IronPDF를 설치하려면 명령줄 인터페이스에서 pip install ironpdf 실행하여 pip 설치 프로그램을 사용할 수 있습니다.
Python을 사용하여 PDF에 워터마크를 추가하는 방법은 무엇인가요?
Python용 IronPDF를 사용하면 PDF 문서에 접근하여 라이브러리의 메서드를 활용해 워터마크 이미지나 텍스트를 삽입함으로써 PDF에 워터마크를 추가할 수 있습니다.
Python을 사용하여 여러 PDF 파일을 하나로 병합할 수 있나요?
네, IronPDF를 사용하면 여러 PDF 파일을 불러와 Merge 기능을 이용하여 하나의 문서로 병합할 수 있습니다.
Python에서 PDF에 디지털 서명을 적용하는 방법은 무엇인가요?
IronPDF는 .pfx 및 .p12 인증서 파일을 사용한 디지털 서명 적용을 지원하므로 문서 무결성을 위해 PDF에 암호화 서명을 할 수 있습니다.
IronPDF를 사용하여 PDF에 메타데이터를 추가할 수 있습니까?
예, PdfDocument 객체의 MetaData 속성에 접근하여 원하는 필드를 설정함으로써 저자, 제목, 키워드와 같은 메타데이터를 추가할 수 있습니다.
Python에서 PDF에 머리글과 바닥글을 추가하는 방법은 무엇인가요?
IronPDF를 사용하면 PDF에 텍스트와 HTML 헤더 및 푸터를 추가할 수 있으며, 내용과 모양을 사용자 지정할 수 있는 옵션도 제공됩니다.
Python에서 PDF 파일을 압축하는 데 사용할 수 있는 방법에는 어떤 것들이 있을까요?
IronPDF는 CompressImages 메서드를 사용하여 PDF를 압축할 수 있도록 해주며, 이 메서드는 이미지 크기를 줄이고 다양한 품질 수준으로 설정할 수 있습니다.
Python으로 인터랙티브 PDF 양식을 만드는 방법은 무엇인가요?
IronPDF는 사용자가 텍스트 필드, 체크박스 및 라디오 버튼을 입력할 수 있는 대화형 PDF 양식을 생성하고 편집할 수 있도록 해줍니다.
IronPDF를 사용하여 PDF에 추가할 수 있는 주석 유형에는 어떤 것들이 있습니까?
IronPDF를 사용하면 PDF 문서에 텍스트 주석, 댓글, 링크를 추가하고 기존 주석을 편집할 수 있습니다.