
BPMN JS npm(開發者的使用方法)
商務流程建模與標註 (BPMN) 是一種流程建模標準,提供用於在工作流程中指定商務流程的圖形表示。 bpmn-js 是一個強大的程式庫,讓您可以將 BPMN 元素圖嵌入到網頁應用中,提供互動功能和廣泛的自定選項。 由Camunda開發的bpmn-js建構於現代網頁建模技術之上,並可無縫整合進入JavaScript應用中。 我們還將看到如何使用IronPDF創建包含 BPMN 圖的 PDF。
bpmn-js 的主要功能
互動建模: bpmn-js 使用戶能夠互動地創建、修改和查看 BPMN 元素及圖表。 其使用者友好的介面支持拖放功能,使設計複雜的工作流程變得簡單。
自定化: 該程式庫高度自定,允許開發者調整 BPMN 圖表的外觀以匹配其應用的品牌和需求。
擴展性: bpmn-js 被設計為易於擴展。 開發者可以通過向 BPMN 圖表互動模型中添加自定元素、屬性和行為來擴展其核心功能。
整合性: 它與其他程式庫和框架(如 Angular 和 React)有良好的整合性,促進其在各種網頁應用中的使用。
- 標準相容性: bpmn-js 遵照 BPMN 2.0 標準,確保創建的圖表與其他 BPMN 工具和編輯工具包系統相容。
開始使用 bpmn-js
要開始使用 bpmn-js,您需要設置一個基礎的網頁專案。 這是一份使用 bpmn-js 創建簡單圖表的逐步指南。
步驟 1:設置專案
首先,為您的專案創建新目錄,並使用以下命令初始化 Node.js 專案。
mkdir bpmn-js-demo
cd bpmn-js-demo
npm init -y
mkdir bpmn-js-demo
cd bpmn-js-demo
npm init -y步驟 2:安裝 bpmn-js
接下來,安裝 bpmn-js 程式庫:
npm install bpmn-jsnpm install bpmn-js步驟 3:創建 HTML 結構
創建一個 index.html 文件,內容包括以下源代碼:
<!DOCTYPE html>
<html lang="en">
<head>
  <meta charset="UTF-8">
  <meta name="viewport" content="width=device-width, initial-scale=1.0">
  <title>bpmn-js Demo</title>
  <style>
    #canvas {
      width: 100%;
      height: 600px;
      border: 1px solid #ccc;
    }
  </style>
</head>
<body>
  <div id="canvas"></div>
  <script src="app.js"></script>
</body>
</html>
<!DOCTYPE html>
<html lang="en">
<head>
<meta charset="UTF-8">
<meta name="viewport" content="width=device-width, initial-scale=1.0">
<title>bpmn-js Demo</title>
<style>
#canvas {
width: 100%;
height: 600px;
border: 1px solid #ccc;
}
</style>
</head>
<body>
<div id="canvas"></div>
<script src="app.js"></script>
</body>
</html>步驟 4:創建 JavaScript 文件
創建一個 app.js 文件來初始化並渲染 BPMN 圖表:
// Import the BpmnViewer class from bpmn-js
import BpmnViewer from 'bpmn-js/lib/NavigatedViewer';
// BPMN XML data as a string
const bpmnXML = `<?xml version="1.0" encoding="UTF-8"?>
<definitions xmlns="http://www.omg.org/spec/BPMN/20100524/MODEL"
xmlns:xsi="http://www.w3.org/2001/XMLSchema-instance"
xmlns:bpmndi="http://www.omg.org/spec/BPMN/20100524/DI"
xmlns:omgdc="http://www.omg.org/spec/DD/20100524/DC"
xmlns:omgdi="http://www.omg.org/spec/DD/20100524/DI"
id="sample-diagram"
targetNamespace="http://bpmn.io/schema/bpmn">
<process id="Process_1" isExecutable="false">
<startEvent id="StartEvent_1">
<outgoing>Flow_1a5niwu</outgoing>
</startEvent>
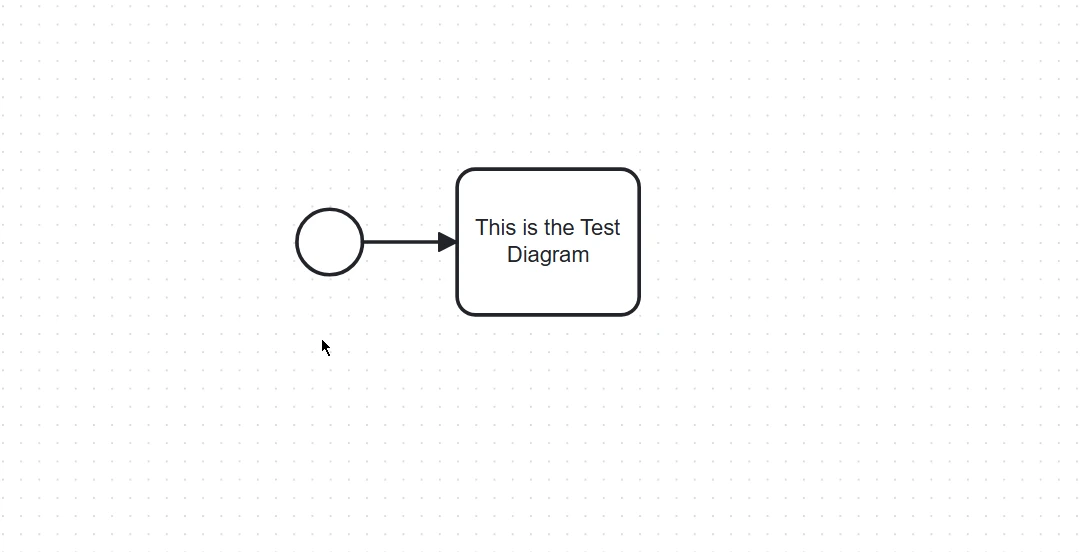
<task id="Activity_0ncu32f" name="This is the Test Diagram">
<incoming>Flow_1a5niwu</incoming>
</task>
<sequenceFlow id="Flow_1a5niwu" sourceRef="StartEvent_1" targetRef="Activity_0ncu32f" />
</process>
<bpmndi:BPMNDiagram id="BPMNDiagram_1">
<bpmndi:BPMNPlane id="BPMNPlane_1" bpmnElement="Process_1">
<bpmndi:BPMNShape id="StartEvent_1_di" bpmnElement="StartEvent_1">
<omgdc:Bounds x="152" y="102" width="36" height="36" />
</bpmndi:BPMNShape>
<bpmndi:BPMNShape id="Activity_0ncu32f_di" bpmnElement="Activity_0ncu32f">
<omgdc:Bounds x="240" y="80" width="100" height="80" />
<bpmndi:BPMNLabel />
</bpmndi:BPMNShape>
<bpmndi:BPMNEdge id="Flow_1a5niwu_di" bpmnElement="Flow_1a5niwu">
<omgdi:waypoint x="188" y="120" />
<omgdi:waypoint x="240" y="120" />
</bpmndi:BPMNEdge>
</bpmndi:BPMNPlane>
</bpmndi:BPMNDiagram>
</definitions>`;
// Initialize the viewer with the container where the BPMN diagram will be rendered
const viewer = new BpmnViewer({
container: '#canvas'
});
// Import the BPMN XML and render the diagram
viewer.importXML(bpmnXML, function(err) {
if (err) {
console.error('Error rendering', err); // Log an error message if rendering fails
} else {
console.log('BPMN diagram rendered'); // Log success message if rendering is successful
}
});// Import the BpmnViewer class from bpmn-js
import BpmnViewer from 'bpmn-js/lib/NavigatedViewer';
// BPMN XML data as a string
const bpmnXML = `<?xml version="1.0" encoding="UTF-8"?>
<definitions xmlns="http://www.omg.org/spec/BPMN/20100524/MODEL"
xmlns:xsi="http://www.w3.org/2001/XMLSchema-instance"
xmlns:bpmndi="http://www.omg.org/spec/BPMN/20100524/DI"
xmlns:omgdc="http://www.omg.org/spec/DD/20100524/DC"
xmlns:omgdi="http://www.omg.org/spec/DD/20100524/DI"
id="sample-diagram"
targetNamespace="http://bpmn.io/schema/bpmn">
<process id="Process_1" isExecutable="false">
<startEvent id="StartEvent_1">
<outgoing>Flow_1a5niwu</outgoing>
</startEvent>
<task id="Activity_0ncu32f" name="This is the Test Diagram">
<incoming>Flow_1a5niwu</incoming>
</task>
<sequenceFlow id="Flow_1a5niwu" sourceRef="StartEvent_1" targetRef="Activity_0ncu32f" />
</process>
<bpmndi:BPMNDiagram id="BPMNDiagram_1">
<bpmndi:BPMNPlane id="BPMNPlane_1" bpmnElement="Process_1">
<bpmndi:BPMNShape id="StartEvent_1_di" bpmnElement="StartEvent_1">
<omgdc:Bounds x="152" y="102" width="36" height="36" />
</bpmndi:BPMNShape>
<bpmndi:BPMNShape id="Activity_0ncu32f_di" bpmnElement="Activity_0ncu32f">
<omgdc:Bounds x="240" y="80" width="100" height="80" />
<bpmndi:BPMNLabel />
</bpmndi:BPMNShape>
<bpmndi:BPMNEdge id="Flow_1a5niwu_di" bpmnElement="Flow_1a5niwu">
<omgdi:waypoint x="188" y="120" />
<omgdi:waypoint x="240" y="120" />
</bpmndi:BPMNEdge>
</bpmndi:BPMNPlane>
</bpmndi:BPMNDiagram>
</definitions>`;
// Initialize the viewer with the container where the BPMN diagram will be rendered
const viewer = new BpmnViewer({
container: '#canvas'
});
// Import the BPMN XML and render the diagram
viewer.importXML(bpmnXML, function(err) {
if (err) {
console.error('Error rendering', err); // Log an error message if rendering fails
} else {
console.log('BPMN diagram rendered'); // Log success message if rendering is successful
}
});
步驟 5:運行專案
要提供專案服務,您可以使用像 http-server: 的簡單靜態服務器
npm install -g http-server
http-server .
npm install -g http-server
http-server .打開您的瀏覽器並導航至 http://localhost:8080,查看頁面上的 BPMN 圖表。
bpmn-js 的進階用法
儘管上面的例子涵蓋了基礎,bpmn-js 提供了更高級的功能,例如添加自定元素、整合後端系統和導出圖表。 您可以在bpmn-js 文檔中探索這些功能。
介紹JavaScript版IronPDF
IronPDF 是一個強大的程式庫,允許開發者從程式中生成、操作和轉換 PDF 文件。 IronPDF 最初為 .NET 設計,已擴展支持到 JavaScript,為網頁應用提供穩健的 PDF 生成能力。
JavaScript 版 IronPDF 的主要功能
PDF 生成: 輕鬆從 HTML、URL 或原始內容創建 PDF。
PDF 操作: 合併、拆分和修改現有的 PDF 文件。
轉換: 將各種文件格式(如 HTML 和圖像)轉換為 PDF。
- 自定化: 利用廣泛的樣式選項自定化 PDF 的外觀和布局。
將 IronPDF 與 bpmn-js 整合
為展示 IronPDF 與 bpmn-js 的整合,讓我們創建一個從 BPMN 圖生成 PDF 的 Node.js 專案。
步驟 1:設置專案
為您的專案創建新目錄並初始化它:
mkdir bpmn-ironpdf-demo
cd bpmn-ironpdf-demo
npm init -y
mkdir bpmn-ironpdf-demo
cd bpmn-ironpdf-demo
npm init -y步驟 2:安裝依賴項
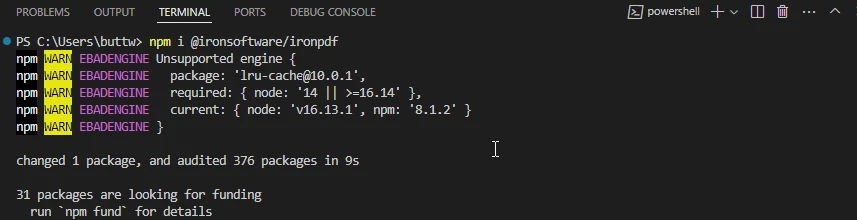
安裝 IronPDF:
npm i @ironsoftware/ironpdf
步驟 3:創建 BPMN 圖與 PDF 生成腳本
創建一個名為 generatePDF.js: 的文件
const fs = require('fs');
const { createCanvas } = require('canvas');
const BpmnViewer = require('bpmn-js/lib/Viewer');
const PdfGenerator = require('@ironsoftware/ironpdf');

// BPMN XML data
const bpmnXML = `<?xml version="1.0" encoding="UTF-8"?>
<definitions xmlns="http://www.omg.org/spec/BPMN/20100524/MODEL"
             xmlns:xsi="http://www.w3.org/2001/XMLSchema-instance"
             xmlns:bpmndi="http://www.omg.org/spec/BPMN/20100524/DI"
             xmlns:omgdc="http://www.omg.org/spec/DD/20100524/DC"
             xmlns:omgdi="http://www.omg.org/spec/DD/20100524/DI"
             xsi:schemaLocation="http://www.omg.org/spec/BPMN/20100524/MODEL BPMN20.xsd"
             id="sample-diagram"
             targetNamespace="http://bpmn.io/schema/bpmn">
  <process id="Process_1" isExecutable="false">
    <startEvent id="StartEvent_1"/>
  </process>
  <bpmndi:BPMNDiagram id="BPMNDiagram_1">
    <bpmndi:BPMNPlane id="BPMNPlane_1" bpmnElement="Process_1">
      <bpmndi:BPMNShape id="StartEvent_1_di" bpmnElement="StartEvent_1">
        <omgdc:Bounds x="173" y="102" width="36" height="36"/>
      </bpmndi:BPMNShape>
    </bpmndi:BPMNPlane>
  </bpmndi:BPMNDiagram>
</definitions>`;

// Create a canvas for rendering the BPMN diagram
const canvas = createCanvas(800, 600);
const viewer = new BpmnViewer({ container: canvas });

// Import the BPMN XML and render the diagram
viewer.importXML(bpmnXML, function(err) {
  if (err) {
    console.error('Error rendering BPMN diagram:', err);
    return;
  }

  // Fit the diagram to the viewport
  viewer.get('canvas').zoom('fit-viewport');

  // Create a PNG stream and save the diagram as an image
  const stream = canvas.createPNGStream();
  const out = fs.createWriteStream('diagram.png');

  stream.pipe(out);
  out.on('finish', () => {
    console.log('BPMN diagram saved as PNG');

    // Generate PDF from the saved PNG
    PdfGenerator.ImageToPdf(['diagram.png']).then((pdf) => {
      pdf.saveAs('diagram.pdf');
      console.log('PDF generated and saved as diagram.pdf');
    }).catch((error) => {
      console.error('Error generating PDF:', error);
    });
  });
});
const fs = require('fs');
const { createCanvas } = require('canvas');
const BpmnViewer = require('bpmn-js/lib/Viewer');
const PdfGenerator = require('@ironsoftware/ironpdf');
// BPMN XML data
const bpmnXML = `<?xml version="1.0" encoding="UTF-8"?>
<definitions xmlns="http://www.omg.org/spec/BPMN/20100524/MODEL"
xmlns:xsi="http://www.w3.org/2001/XMLSchema-instance"
xmlns:bpmndi="http://www.omg.org/spec/BPMN/20100524/DI"
xmlns:omgdc="http://www.omg.org/spec/DD/20100524/DC"
xmlns:omgdi="http://www.omg.org/spec/DD/20100524/DI"
xsi:schemaLocation="http://www.omg.org/spec/BPMN/20100524/MODEL BPMN20.xsd"
id="sample-diagram"
targetNamespace="http://bpmn.io/schema/bpmn">
<process id="Process_1" isExecutable="false">
<startEvent id="StartEvent_1"/>
</process>
<bpmndi:BPMNDiagram id="BPMNDiagram_1">
<bpmndi:BPMNPlane id="BPMNPlane_1" bpmnElement="Process_1">
<bpmndi:BPMNShape id="StartEvent_1_di" bpmnElement="StartEvent_1">
<omgdc:Bounds x="173" y="102" width="36" height="36"/>
</bpmndi:BPMNShape>
</bpmndi:BPMNPlane>
</bpmndi:BPMNDiagram>
</definitions>`;
// Create a canvas for rendering the BPMN diagram
const canvas = createCanvas(800, 600);
const viewer = new BpmnViewer({ container: canvas });
// Import the BPMN XML and render the diagram
viewer.importXML(bpmnXML, function(err) {
if (err) {
console.error('Error rendering BPMN diagram:', err);
return;
}
// Fit the diagram to the viewport
viewer.get('canvas').zoom('fit-viewport');
// Create a PNG stream and save the diagram as an image
const stream = canvas.createPNGStream();
const out = fs.createWriteStream('diagram.png');
stream.pipe(out);
out.on('finish', () => {
console.log('BPMN diagram saved as PNG');
// Generate PDF from the saved PNG
PdfGenerator.ImageToPdf(['diagram.png']).then((pdf) => {
pdf.saveAs('diagram.pdf');
console.log('PDF generated and saved as diagram.pdf');
}).catch((error) => {
console.error('Error generating PDF:', error);
});
});
});步驟 4:運行腳本
執行腳本以生成 BPMN 圖表並將其保存為 PDF:
node generatePDF.jsnode generatePDF.js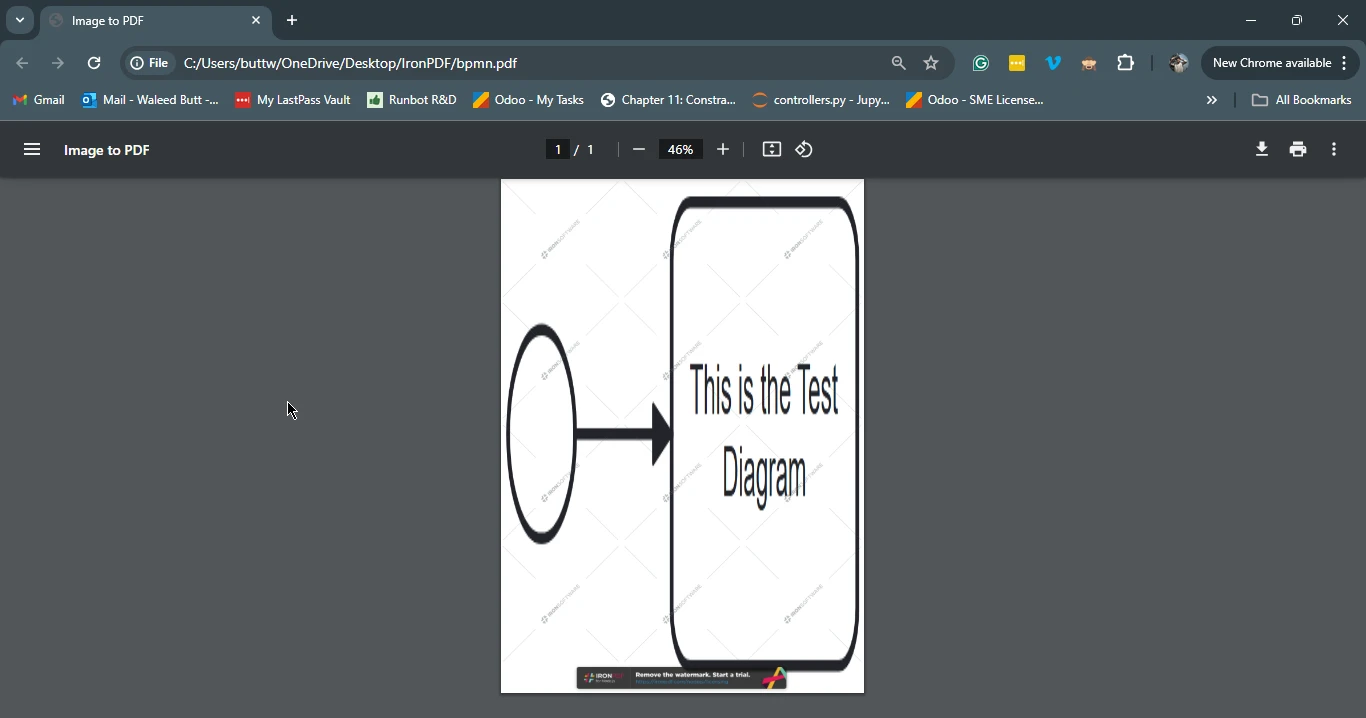
結論
整合 bpmn-js 和 IronPDF 能讓您創建互動式 BPMN 圖表,並將它們轉換為 PDF 文件,結合可視流程建模的力量和 PDF 生成的多功能性。 這一整合對於生成文件、報告或任何需要流程可視化表示的格式特別有用。 兩個程式庫都提供詳細的文檔和支援,使您能夠輕鬆入門並擴展提供的基本例子。
有關 IronPDF 授權的全面詳情,請參閱 IronPDF 授權頁面。 要獲得更多理解或其他資源,請查看我們詳細的HTML 到 PDF 轉換教程。


