scikit-image Python(開發者指南)
Scikit-image是一套專為 Python 影像處理而設計的演算法集合。 它是免費且不受限制,擁有來自活躍志工社群的高品質、經過同行評審的程式碼。 Scikit-image 專案於 2009 年在 Google 啟動,是 Google Summer Code 計畫的一部分,由 Stefan van der Walt 和其他 Scikit-image 貢獻者指導。 它的目標是創建一個易於使用、高效且可擴展的影像處理 Python 庫,以滿足學術和工業應用的需求。 在本文中,我們將學習 Scikit-image Python 影像處理庫和IronSoftware的 PDF 生成庫IronPDF 。
入門
要了解 Scikit-image,請訪問其官方網站。此外,Data Carpentry 還提供了一門使用 Scikit-image 在 Python 中進行影像處理的精彩課程。
透過 pip 安裝
請確保您已安裝 Python(至少版本 3.10)。 開啟終端機或命令提示字元。
- 更新 pip:
python -m pip install -U pippython -m pip install -U pipSHELL- 透過 pip 安裝 scikit-image:
python -m pip install -U scikit-imagepython -m pip install -U scikit-imageSHELL- 若要存取演示資料集,請使用:
python -m pip install -U scikit-image[data]python -m pip install -U scikit-image[data]SHELL- 有關其他科學軟體包(包括平行處理功能):
python -m pip install -U scikit-image[optional]python -m pip install -U scikit-image[optional]SHELL
基本範例
import skimage.io
import matplotlib.pyplot as plt

# Load an image from file
image = skimage.io.imread(fname='land.jpg')

# Display the image
plt.imshow(image)
plt.show()
import skimage.io
import matplotlib.pyplot as plt
# Load an image from file
image = skimage.io.imread(fname='land.jpg')
# Display the image
plt.imshow(image)
plt.show()過濾器
import skimage as ski

# Load a sample image from the scikit-image default collection
image = ski.data.coins()

# Apply a Sobel filter to detect edges
edges = ski.filters.sobel(image)

# Display the edges
ski.io.imshow(edges)
ski.io.show()
import skimage as ski
# Load a sample image from the scikit-image default collection
image = ski.data.coins()
# Apply a Sobel filter to detect edges
edges = ski.filters.sobel(image)
# Display the edges
ski.io.imshow(edges)
ski.io.show()Scikit-image(通常縮寫為 skimage)是一個功能強大的 Python 映像處理庫。 它基於 NumPy 數組、SciPy 和 matplotlib 構建,並提供各種函數和演算法來操作和分析圖像。 skimage.data.coins() 用於從庫中取得範例影像。 skimage.filters 提供對內建過濾器和實用函數的存取。
Scikit-image 的主要特性
1. 影像濾波和邊緣偵測
from skimage import io, filters

# Load an image
image = io.imread('image.jpg')

# Apply Gaussian blur
blurred_image = filters.gaussian(image, sigma=1.0)

# Apply Sobel edge detection
edges = filters.sobel(image)

# Display the original image, blurred image, and edges
io.imshow_collection([image, blurred_image, edges])
io.show()
from skimage import io, filters
# Load an image
image = io.imread('image.jpg')
# Apply Gaussian blur
blurred_image = filters.gaussian(image, sigma=1.0)
# Apply Sobel edge detection
edges = filters.sobel(image)
# Display the original image, blurred image, and edges
io.imshow_collection([image, blurred_image, edges])
io.show()輸出
2. 基於HOG(方向梯度直方圖)的特徵提取
from skimage import io, color, feature

# Load an example image and convert to grayscale
image = io.imread('image.jpg')
gray_image = color.rgb2gray(image)

# Compute HOG features and visualize them
hog_features, hog_image = feature.hog(gray_image, visualize=True)

# Display the original image and the HOG image
io.imshow_collection([image, gray_image, hog_image])
io.show()
from skimage import io, color, feature
# Load an example image and convert to grayscale
image = io.imread('image.jpg')
gray_image = color.rgb2gray(image)
# Compute HOG features and visualize them
hog_features, hog_image = feature.hog(gray_image, visualize=True)
# Display the original image and the HOG image
io.imshow_collection([image, gray_image, hog_image])
io.show()輸出
3. 幾何變換-調整大小和旋轉
from skimage import io, transform

# Load an image
image = io.imread('image.jpg')

# Resize image by dividing its dimensions by 2
resized_image = transform.resize(image, (image.shape[0] // 2, image.shape[1] // 2))

# Rotate image by 45 degrees
rotated_image = transform.rotate(image, angle=45)

# Display the original image, resized image, and rotated image
io.imshow_collection([image, resized_image, rotated_image])
io.show()
from skimage import io, transform
# Load an image
image = io.imread('image.jpg')
# Resize image by dividing its dimensions by 2
resized_image = transform.resize(image, (image.shape[0] // 2, image.shape[1] // 2))
# Rotate image by 45 degrees
rotated_image = transform.rotate(image, angle=45)
# Display the original image, resized image, and rotated image
io.imshow_collection([image, resized_image, rotated_image])
io.show()輸出
4. 基於全變分濾波器的影像去噪
from skimage import io, restoration

# Load a noisy image
image = io.imread('image.jpg')

# Apply total variation denoising
denoised_image = restoration.denoise_tv_chambolle(image, weight=0.1)

# Display the noisy image and the denoised image
io.imshow_collection([image, denoised_image])
io.show()
from skimage import io, restoration
# Load a noisy image
image = io.imread('image.jpg')
# Apply total variation denoising
denoised_image = restoration.denoise_tv_chambolle(image, weight=0.1)
# Display the noisy image and the denoised image
io.imshow_collection([image, denoised_image])
io.show()輸出
您可以在官方頁面上找到更多關於圖像處理和 NumPy 數組的資訊。
IronPDF簡介

IronPDF是一個強大的 Python 程式庫,旨在利用 HTML、CSS、映像和JavaScript處理 PDF 文件的建立、編輯和簽名。 它優先考慮效能效率,並以最小的記憶體佔用運行。 主要特點包括:
- HTML 轉 PDF 轉換:將 HTML 文件、HTML 字串和 URL 轉換為 PDF 文檔,利用 Chrome PDF 渲染器渲染網頁等功能。
-跨平台支援:相容於 Windows、Mac、Linux 和各種雲端平台上的 Python 3+。 IronPDF也適用於.NET、Java、Python 和Node.js環境。
-編輯和簽名:自訂 PDF 屬性,強制執行密碼和權限等安全措施,並無縫應用數位簽章。
-頁面範本和設定:建立 PDF 佈局,包含頁首、頁尾、頁碼、可調整邊距、自訂紙張尺寸和響應式設計等功能。
-標準合規性:嚴格遵守 PDF/A 和 PDF/UA 等 PDF 標準,確保與 UTF-8 字元編碼相容,並能熟練地管理圖像、CSS 樣式表和字體等資源。
安裝
pip install ironpdf
pip install scikit-image
pip install ironpdf
pip install scikit-image使用IronPDF和 Scikit Image 產生 PDF 文檔
先決條件
- 確保已安裝 Visual Studio Code 作為程式碼編輯器
- 已安裝 Python 版本 3
首先,讓我們建立一個 Python 檔案來加入我們的腳本。
開啟 Visual Studio Code 並建立一個文件,scikitDemo.py。
安裝必要的庫:
pip install scikit-image
pip install ironpdf
pip install scikit-image
pip install ironpdf然後加入以下 Python 程式碼來示範IronPDF和 scikit-image Python 套件的用法。
from skimage import io, filters
from ironpdf import *
# Apply your license key
License.LicenseKey = "YOUR_LICENSE_KEY"
# Load an image
image = io.imread('image.jpg')
# Apply Gaussian blur
blurred_image = filters.gaussian(image, sigma=1.0)
# Apply Sobel edge detection
edges = filters.sobel(image)
# Save the results to a file
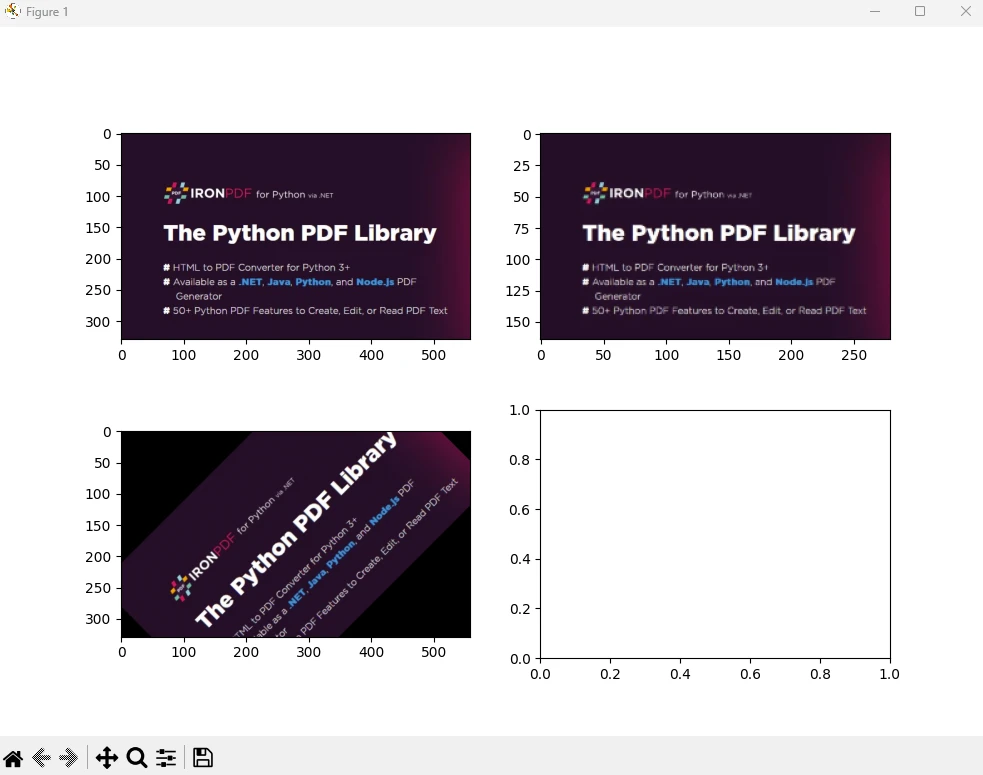
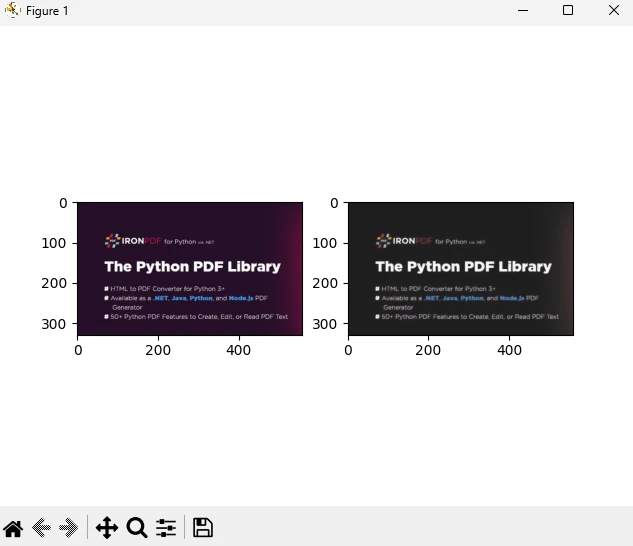
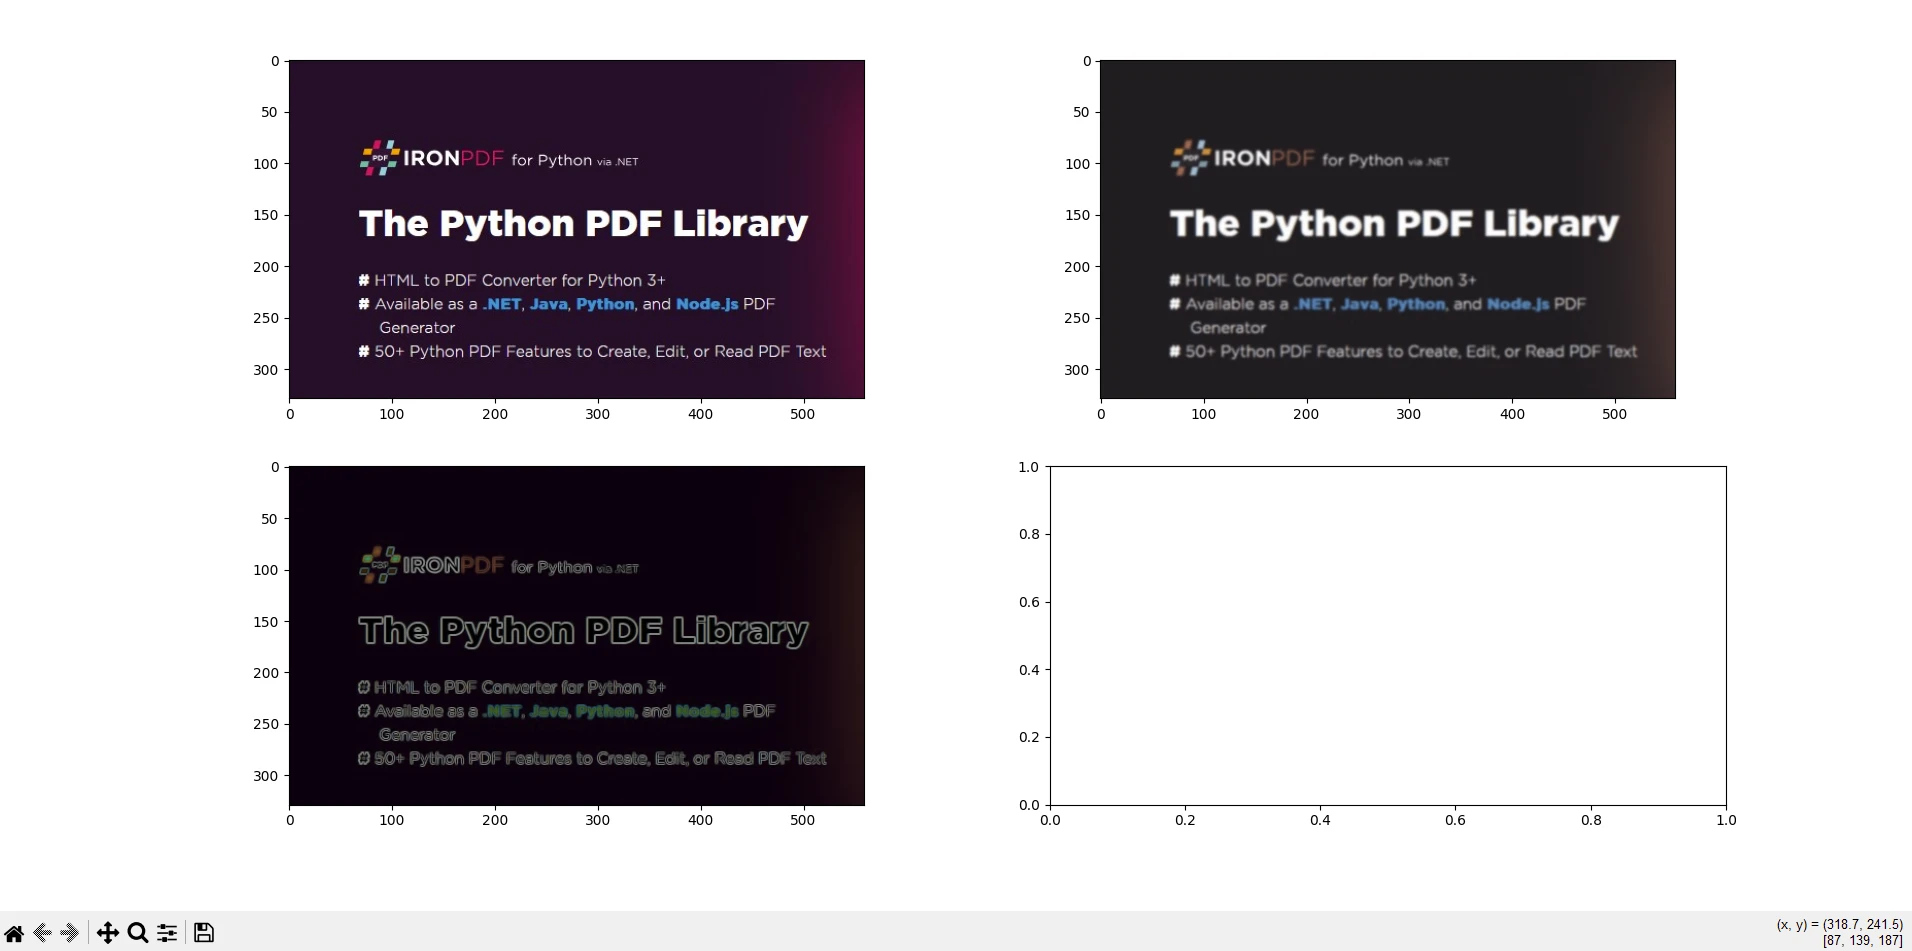
io.imshow_collection([image, blurred_image, edges]).savefig('ironPdf-skimage.png')
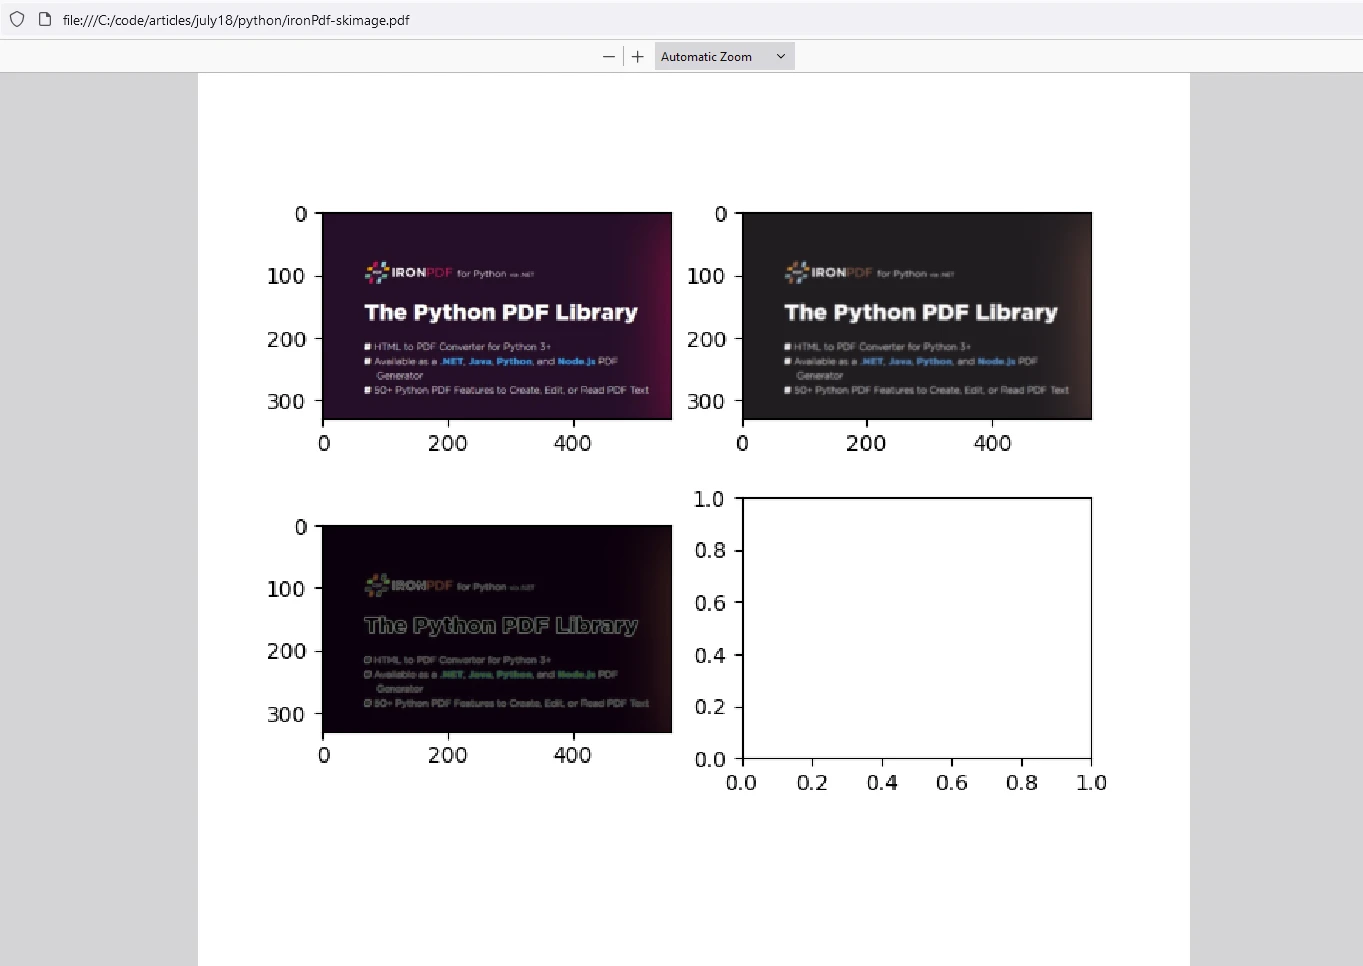
# Convert the saved image to a PDF document
ImageToPdfConverter.ImageToPdf("ironPdf-skimage.png").SaveAs("ironPdf-skimage.pdf")
# Display the images
io.show()from skimage import io, filters
from ironpdf import *
# Apply your license key
License.LicenseKey = "YOUR_LICENSE_KEY"
# Load an image
image = io.imread('image.jpg')
# Apply Gaussian blur
blurred_image = filters.gaussian(image, sigma=1.0)
# Apply Sobel edge detection
edges = filters.sobel(image)
# Save the results to a file
io.imshow_collection([image, blurred_image, edges]).savefig('ironPdf-skimage.png')
# Convert the saved image to a PDF document
ImageToPdfConverter.ImageToPdf("ironPdf-skimage.png").SaveAs("ironPdf-skimage.pdf")
# Display the images
io.show()程式碼解釋
此程式碼片段示範如何將 scikit-image (skimage) 和IronPDF結合使用來處理影像並將結果轉換為 PDF 文件。 以下是對各部分的解釋:
1.導入語句:從 scikit-image 導入影像載入和影像過濾所需的必要函數,並導入IronPDF功能。
2.應用許可證密鑰:設定IronPDF的許可證密鑰。 使用IronPDF功能需要執行此步驟。
3.載入和處理映像:使用 scikit-image 的 io.imread 函數載入名為 'image.jpg' 的映像。 然後使用 filters.gaussian 對已載入的影像套用高斯模糊,sigma 值為 1.0,並使用 filters.sobel 對載入的影像套用 Sobel 邊緣偵測。
4.顯示並儲存結果: io.imshow_collection([image, blurred_image, edges]).savefig('ironPdf-skimage.png'):將影像集合(原始影像、模糊影像和邊緣影像)儲存為 'ironPdf-skimage.png'。
5.將影像轉換為 PDF: ImageToPdfConverter.ImageToPdf("ironPdf-skimage.png").SaveAs("ironPdf-skimage.pdf"):使用 IronPDF 的功能將已儲存的 PNG 影像轉換為 PDF 文件。
6.顯示影像: io.show(): 在圖形視窗中顯示影像。
這段程式碼片段結合了 scikit-image 的影像處理功能和IronPDF將處理後的影像轉換為 PDF 文件的功能。 它示範如何載入圖片、套用高斯模糊和索貝爾邊緣偵測、將其儲存為 PNG 檔案、使用IronPDF將 PNG 轉換為 PDF 以及顯示處理後的圖片。 這種整合對於需要處理、分析影像並以 PDF 格式記錄的任務非常有用,例如科學研究、影像分析報告或自動文件生成工作流程。
輸出
IronPDF許可
IronPDF需要 Python 許可證金鑰才能運作。 IronPDF for Python 提供免費試用許可證,使用戶能夠在購買前體驗其豐富的功能。
在使用IronPDF軟體包之前,請將許可證密鑰放在腳本的開頭:
from ironpdf import *
# Apply your license key
License.LicenseKey = "YOUR_LICENSE_KEY"from ironpdf import *
# Apply your license key
License.LicenseKey = "YOUR_LICENSE_KEY"結論
scikit-image使 Python 開發人員能夠有效率地處理與影像相關的任務。 無論您是從事電腦視覺、醫學影像或藝術項目,此軟體包都能滿足您的需求。 scikit-image 是一個功能強大且用途廣泛的 Python 影像處理庫,它提供了各種函數和演算法,可用於濾波、分割、特徵提取和幾何變換等任務。 它與其他科學庫的無縫整合使其成為從事影像分析和電腦視覺應用的研究人員、開發人員和工程師的首選。
IronPDF是一個 Python 函式庫,它簡化了在 Python 應用程式中建立、編輯和操作 PDF 文件的過程。 它提供從各種來源(如 HTML、圖像或現有 PDF)生成 PDF 文件等功能。 此外, IronPDF還支援合併或分割 PDF 文件、新增註釋、浮水印或數位簽章、從 PDF 中提取文字或影像以及管理文件屬性(例如元資料和安全性設定)等任務。 該程式庫提供了一種以程式設計方式高效處理 PDF 相關任務的方法,使其適用於需要文件生成、報告建立或文件管理功能的應用程式。
結合這兩個庫,使用者可以處理影像,有效地處理影像,並將結果儲存在 PDF 文件中以便存檔。