Datatables .NET(开发者如何使用)
ASP.NET 开发人员通常寻找有效的方法来展示带有高级功能(如排序、搜索和分页)的表格数据或 HTML 表格。 DataTables.NET 是一个强大的 jQuery,JavaScript 库和高度灵活的工具,能够促进在网络应用中创建交互式和功能丰富的表格。 在本文中,我们将探讨如何将 DataTables.NET 分发文件,一个用于服务器端处理的表格增强库,集成到 ASP.NET 项目中,以增强表格数据的展示和用户体验。
如何在 ASP.NET 网络应用中使用 DataTables?
- 创建 ASP.NET 网络应用
- 添加 DataTables 客户端样式包
- 安装 Entity Framework Core 软件包,仅需核心软件
- 添加模型类、控制器和 Razor 页面
- 在 JS 文件中添加 JavaScript 代码
- 设置配置
- 构建并运行程序
- 使用 IronXL for Excel 数据导出 将数据导出到 Excel 文件
什么是 DataTables.NET?
DataTables.NET 是一个 jQuery JavaScript 库,允许您在 .NET 应用中创建和操作交互式表格。 它基于 jQuery DataTables 插件,提供分页、排序、过滤和滚动等全面的 API 功能,用于动态和静态 HTML 表格。 它是一个能够与各种数据源(如 SQL 数据库、AJAX 或内存对象)协同工作的表格增强库。
服务器端处理
考虑一个情景:您有一个 API 端点提供一个庞大的产品数据集。 标准方法涉及 jQuery DataTables 向该 API 进行 AJAX 调用,获得以 JSON 格式的产品列表,并渲染 HTML 表格。 这被称为客户端处理,对于较小的数据集(通常在 100 到 1000 条记录之间)是有效的。 然而,当数据集扩展到 10,000 条记录或更多时会发生什么呢?
处理大量记录时,一次性将整个数据集发送到浏览器变得不切实际。 一次传输 10,000 条记录不仅浪费带宽,而且也会给浏览器资源带来压力。 在这种情况下,另一种方法——服务器端处理,变得至关重要,以优化性能。
在服务器端处理中,与其发送整个数据集,API 会将数据以可管理的块发送,通常是分页的,每页大约 50 条记录。 通过这种方式,加载时间显著改善,因为 jQuery DataTables 现在只加载少量记录 (~50),而不是一次性处理整个数据集。 这种方法减少了 CPU 和带宽使用,创建了更高效的 API 和 DataTable 之间的交互。
在本文中,我们将探索在 ASP.NET Razor Page 应用中实现服务器端处理,展示如何有效处理和显示大规模数据集,同时增强您的网络应用的整体性能。
在 ASP.NET 8 中开始使用 DataTables.NET
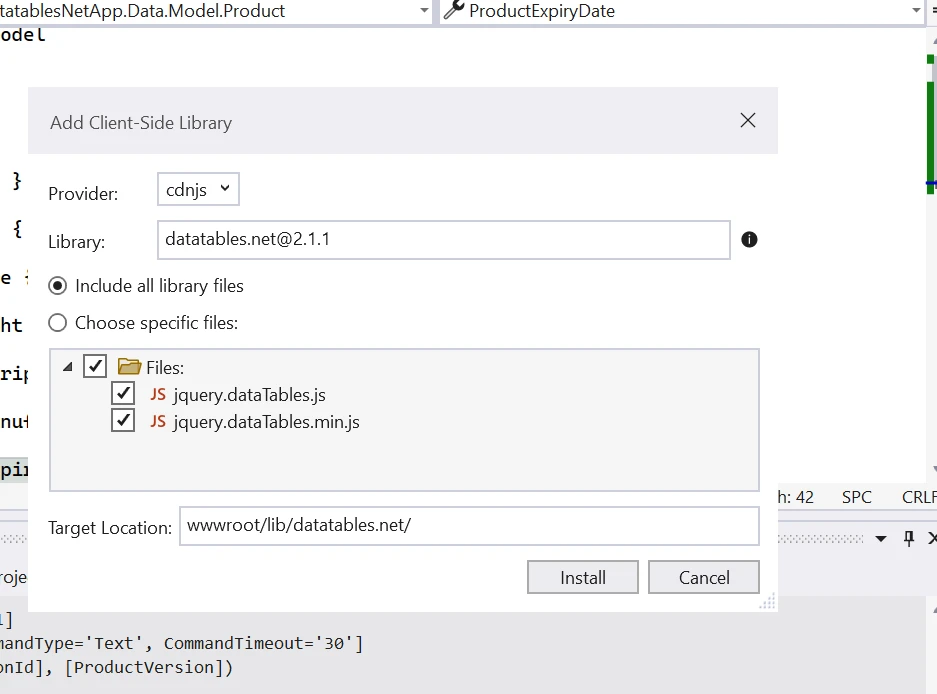
要开始使用,我们需要将 DataTables.NET 客户端库添加到我们的项目。 本文将使用 ASP.NET Core Web App (Razor Pages) 项目与 .NET 8。您可以根据需求使用任何 Web 应用项目。
要添加客户端库,右键单击解决方案>Add> 客户端库,然后搜索数据表,如下所示。
现在,我们需要添加模型类、DB 上下文、控制器、HTML 表格和 AJAX 调用。
但在此之前,我们需要安装 EntityFramework NuGet 包以将我们的应用连接到数据库。 本文将使用代码优先方法,您可以根据喜好使用数据库优先。
安装以下本地主机包:
- Microsoft.EntityFrameworkCore
- Microsoft.EntityFrameworkCore.Design
- Microsoft.EntityFrameworkCore.SqlServer
- Microsoft.EntityFrameworkCore.Tools
通过在 NuGet 包管理器控制台中使用 install-package 命令来安装上述包,或者通过在 NuGet 包管理器解决方案中搜索并安装。
添加模型类
我在本示例中使用产品模型类,您可以根据需要使用。
public class Product
{
    public int Id { get; set; }
    public string ProductName { get; set; } = string.Empty;
    public string ProductPrice { get; set; } = string.Empty;
    public string ProductWeight { get; set; } = string.Empty;
    public string ProductDescription { get; set; } = string.Empty;
    public DateTime ProductManufacturingDate { get; set; }
    public DateTime ProductExpiryDate { get; set; }
}
public class Product
{
public int Id { get; set; }
public string ProductName { get; set; } = string.Empty;
public string ProductPrice { get; set; } = string.Empty;
public string ProductWeight { get; set; } = string.Empty;
public string ProductDescription { get; set; } = string.Empty;
public DateTime ProductManufacturingDate { get; set; }
public DateTime ProductExpiryDate { get; set; }
}Public Class Product
Public Property Id() As Integer
Public Property ProductName() As String = String.Empty
Public Property ProductPrice() As String = String.Empty
Public Property ProductWeight() As String = String.Empty
Public Property ProductDescription() As String = String.Empty
Public Property ProductManufacturingDate() As DateTime
Public Property ProductExpiryDate() As DateTime
End Class添加 ApplicationDBContext 类
public class ApplicationDBContext : DbContext
{
    public ApplicationDBContext(DbContextOptions<ApplicationDBContext> options) : base(options)
    {
    }
    public DbSet<Product> Products { get; set; }
}
public class ApplicationDBContext : DbContext
{
public ApplicationDBContext(DbContextOptions<ApplicationDBContext> options) : base(options)
{
}
public DbSet<Product> Products { get; set; }
}Public Class ApplicationDBContext
Inherits DbContext
Public Sub New(ByVal options As DbContextOptions(Of ApplicationDBContext))
MyBase.New(options)
End Sub
Public Property Products() As DbSet(Of Product)
End Class添加高级交互控件
我们将在ProductDatatables.js,以添加高级控件,例如分页、搜索等。
// Initialize the DataTables plugin for the HTML element with 'productDatatable' ID
$(document).ready(function () {
    $("#productDatatable").DataTable({
        "processing": true, // Enable processing indicator
        "serverSide": true, // Enable server-side processing
        "ajax": {
            "url": "/api/Product", // API endpoint for fetching product data
            "type": "POST",
            "datatype": "json"
        },
        "columnDefs": [{
            // Define properties for columns
            "targets": [0],
            "visible": false, // Hide the 'Id' column
            "searchable": false // Disable searching for the 'Id' column
        }],
        "columns": [
            { "data": "id", "name": "Id", "autoWidth": true },
            { "data": "productName", "name": "ProductName", "autoWidth": true },
            { "data": "productPrice", "name": "ProductPrice", "autoWidth": true },
            { "data": "productWeight", "name": "ProductWeight", "autoWidth": true },
            { "data": "productDescription", "name": "ProductDescription", "autoWidth": true },
            { "data": "productManufacturingDate", "name": "ProductManufacturingDate", "autoWidth": true },
            { "data": "productExpiryDate", "name": "ProductExpiryDate", "autoWidth": true },
            {
                // Add a 'Delete' button with an onclick event for deleting the product
                "render": function (data, type, row) {
                    return "<a href='#' class='btn btn-danger' onclick=DeleteProduct('" + row.id + "');>Delete</a>";
                }
            }
        ]
    });
});
// Initialize the DataTables plugin for the HTML element with 'productDatatable' ID
$(document).ready(function () {
$("#productDatatable").DataTable({
"processing": true, // Enable processing indicator
"serverSide": true, // Enable server-side processing
"ajax": {
"url": "/api/Product", // API endpoint for fetching product data
"type": "POST",
"datatype": "json"
},
"columnDefs": [{
// Define properties for columns
"targets": [0],
"visible": false, // Hide the 'Id' column
"searchable": false // Disable searching for the 'Id' column
}],
"columns": [
{ "data": "id", "name": "Id", "autoWidth": true },
{ "data": "productName", "name": "ProductName", "autoWidth": true },
{ "data": "productPrice", "name": "ProductPrice", "autoWidth": true },
{ "data": "productWeight", "name": "ProductWeight", "autoWidth": true },
{ "data": "productDescription", "name": "ProductDescription", "autoWidth": true },
{ "data": "productManufacturingDate", "name": "ProductManufacturingDate", "autoWidth": true },
{ "data": "productExpiryDate", "name": "ProductExpiryDate", "autoWidth": true },
{
// Add a 'Delete' button with an onclick event for deleting the product
"render": function (data, type, row) {
return "<a href='#' class='btn btn-danger' onclick=DeleteProduct('" + row.id + "');>Delete</a>";
}
}
]
});
});现在,我们需要添加一个 HTML 表格。
添加 HTML 表格
在index.cshtml文件中编写以下代码以添加静态HTML页面。
@page
@model IndexModel
@{
    ViewData["Title"] = "Home page";
}
<link href="~/lib/datatables/css/dataTables.bootstrap4.min.css" rel="stylesheet" />
<div class="container">
    <br />
    <div style="width:90%; margin:0 auto;">
        <table id="productDatatable" class="table table-striped table-bordered dt-responsive nowrap" width="100%" cellspacing="0">
            <thead>
                <tr>
                    <th>Id</th>
                    <th>Product Name</th>
                    <th>Product Price</th>
                    <th>Product Weight</th>
                    <th>Product Description</th>
                    <th>Product Manufacturing Date</th>
                    <th>Product Expiry Date</th>
                    <th>Actions</th>
                </tr>
            </thead>
        </table>
    </div>
</div>

@section Scripts {
    <script src="~/lib/datatables/js/jquery.dataTables.min.js"></script>
    <script src="~/lib/datatables/js/dataTables.bootstrap4.min.js"></script>
    <script src="~/js/ProductDatatable.js"></script>
}
我们需要添加控制器。
添加产品控制器
添加产品控制器以创建端点并直接接受拉取请求。
[Route("api/[controller]")]
[ApiController]
public class ProductController : ControllerBase
{
    private readonly ApplicationDBContext context;
    public ProductController(ApplicationDBContext context)
    {
        this.context = context;
    }

    [HttpPost]
    public IActionResult GetProducts()
    {
        try
        {
            var draw = Request.Form["draw"].FirstOrDefault();
            var start = Request.Form["start"].FirstOrDefault();
            var length = Request.Form["length"].FirstOrDefault();
            var searchValue = Request.Form["search[value]"].FirstOrDefault();
            int pageSize = length != null ? Convert.ToInt32(length) : 0;
            int skip = start != null ? Convert.ToInt32(start) : 0;
            int recordsTotal = 0;
            var productData = context.Products.ToLis();

            // Filtering data based on provided search value
            if (!string.IsNullOrEmpty(searchValue))
            {
                productData = productData.Where(m => m.ProductName.Contains(searchValue)
                                            || m.ProductDescription.Contains(searchValue)
                                            || m.Id.ToString().Contains(searchValue)).ToList();
            }

            recordsTotal = productData.Count();
            var data = productData.Skip(skip).Take(pageSize).ToList();
            var jsonData = new { draw = draw, recordsFiltered = recordsTotal, recordsTotal = recordsTotal, data = data };
            return Ok(jsonData);
        }
        catch (Exception)
        {
            throw;
        }
    }
}
[Route("api/[controller]")]
[ApiController]
public class ProductController : ControllerBase
{
private readonly ApplicationDBContext context;
public ProductController(ApplicationDBContext context)
{
this.context = context;
}
[HttpPost]
public IActionResult GetProducts()
{
try
{
var draw = Request.Form["draw"].FirstOrDefault();
var start = Request.Form["start"].FirstOrDefault();
var length = Request.Form["length"].FirstOrDefault();
var searchValue = Request.Form["search[value]"].FirstOrDefault();
int pageSize = length != null ? Convert.ToInt32(length) : 0;
int skip = start != null ? Convert.ToInt32(start) : 0;
int recordsTotal = 0;
var productData = context.Products.ToLis();
// Filtering data based on provided search value
if (!string.IsNullOrEmpty(searchValue))
{
productData = productData.Where(m => m.ProductName.Contains(searchValue)
|| m.ProductDescription.Contains(searchValue)
|| m.Id.ToString().Contains(searchValue)).ToList();
}
recordsTotal = productData.Count();
var data = productData.Skip(skip).Take(pageSize).ToList();
var jsonData = new { draw = draw, recordsFiltered = recordsTotal, recordsTotal = recordsTotal, data = data };
return Ok(jsonData);
}
catch (Exception)
{
throw;
}
}
}<Route("api/[controller]")>
<ApiController>
Public Class ProductController
Inherits ControllerBase
Private ReadOnly context As ApplicationDBContext
Public Sub New(ByVal context As ApplicationDBContext)
Me.context = context
End Sub
<HttpPost>
Public Function GetProducts() As IActionResult
Try
Dim draw = Request.Form("draw").FirstOrDefault()
Dim start = Request.Form("start").FirstOrDefault()
Dim length = Request.Form("length").FirstOrDefault()
Dim searchValue = Request.Form("search[value]").FirstOrDefault()
Dim pageSize As Integer = If(length IsNot Nothing, Convert.ToInt32(length), 0)
Dim skip As Integer = If(start IsNot Nothing, Convert.ToInt32(start), 0)
Dim recordsTotal As Integer = 0
Dim productData = context.Products.ToLis()
' Filtering data based on provided search value
If Not String.IsNullOrEmpty(searchValue) Then
productData = productData.Where(Function(m) m.ProductName.Contains(searchValue) OrElse m.ProductDescription.Contains(searchValue) OrElse m.Id.ToString().Contains(searchValue)).ToList()
End If
recordsTotal = productData.Count()
Dim data = productData.Skip(skip).Take(pageSize).ToList()
Dim jsonData = New With {
Key .draw = draw,
Key .recordsFiltered = recordsTotal,
Key .recordsTotal = recordsTotal,
Key .data = data
}
Return Ok(jsonData)
Catch e1 As Exception
Throw
End Try
End Function
End Class在这里,我们已经在服务器端实现了分页和搜索。
现在,我们需要设置数据库并向 Program.cs 类添加配置。 如果您使用 .NET 5 或更低版本,您可能需要在 Startup.cs 类中进行设置。
首先,在 appsettings.json 文件中添加以下连接字符串。
"ConnectionStrings": {
   "ProductDB": "Server=localserver\\SQLEXPRESS;Database=ProductDB;Trusted_Connection=True;MultipleActiveResultSets=true;TrustServerCertificate=True;"
}
现在,将以下代码添加到 Program.cs 类中。
public static void Main(string[] args)
{
    var builder = WebApplication.CreateBuilder(args);
    builder.Services.AddDbContext<ApplicationDBContext>(options =>
    {
         options.UseSqlServer(builder.Configuration.GetConnectionString("ProductDB"));
    });
    builder.Services.AddControllers();
    // Add services to the container.
    builder.Services.AddRazorPages();
    var app = builder.Build();
    // Configure the HTTP request pipeline.
    if (!app.Environment.IsDevelopment())
    {
         app.UseExceptionHandler("/Error");
         // The default HSTS value is 30 days.
         app.UseHsts();
    }
    app.UseHttpsRedirection();
    app.UseStaticFiles();
    app.UseRouting();
    app.UseAuthorization();
    app.MapControllers();
    app.MapRazorPages();
    app.Run();
}
public static void Main(string[] args)
{
var builder = WebApplication.CreateBuilder(args);
builder.Services.AddDbContext<ApplicationDBContext>(options =>
{
options.UseSqlServer(builder.Configuration.GetConnectionString("ProductDB"));
});
builder.Services.AddControllers();
// Add services to the container.
builder.Services.AddRazorPages();
var app = builder.Build();
// Configure the HTTP request pipeline.
if (!app.Environment.IsDevelopment())
{
app.UseExceptionHandler("/Error");
// The default HSTS value is 30 days.
app.UseHsts();
}
app.UseHttpsRedirection();
app.UseStaticFiles();
app.UseRouting();
app.UseAuthorization();
app.MapControllers();
app.MapRazorPages();
app.Run();
}Public Shared Sub Main(ByVal args() As String)
Dim builder = WebApplication.CreateBuilder(args)
builder.Services.AddDbContext(Of ApplicationDBContext)(Sub(options)
options.UseSqlServer(builder.Configuration.GetConnectionString("ProductDB"))
End Sub)
builder.Services.AddControllers()
' Add services to the container.
builder.Services.AddRazorPages()
Dim app = builder.Build()
' Configure the HTTP request pipeline.
If Not app.Environment.IsDevelopment() Then
app.UseExceptionHandler("/Error")
' The default HSTS value is 30 days.
app.UseHsts()
End If
app.UseHttpsRedirection()
app.UseStaticFiles()
app.UseRouting()
app.UseAuthorization()
app.MapControllers()
app.MapRazorPages()
app.Run()
End Sub我们需要运行迁移,因为我们使用的是代码优先方法。
在包管理器控制台中运行以下命令。
Add-Migration initAdd-Migration init上述命令将创建一个迁移。 现在我们需要将这些迁移应用到数据库中。 在包管理器控制台中运行以下命令。
Update-DatabaseUpdate-Database上述命令将在我们的数据库中创建表。 在产品表中添加虚拟数据; 您可以从 Mockaroo 生成随机数据。
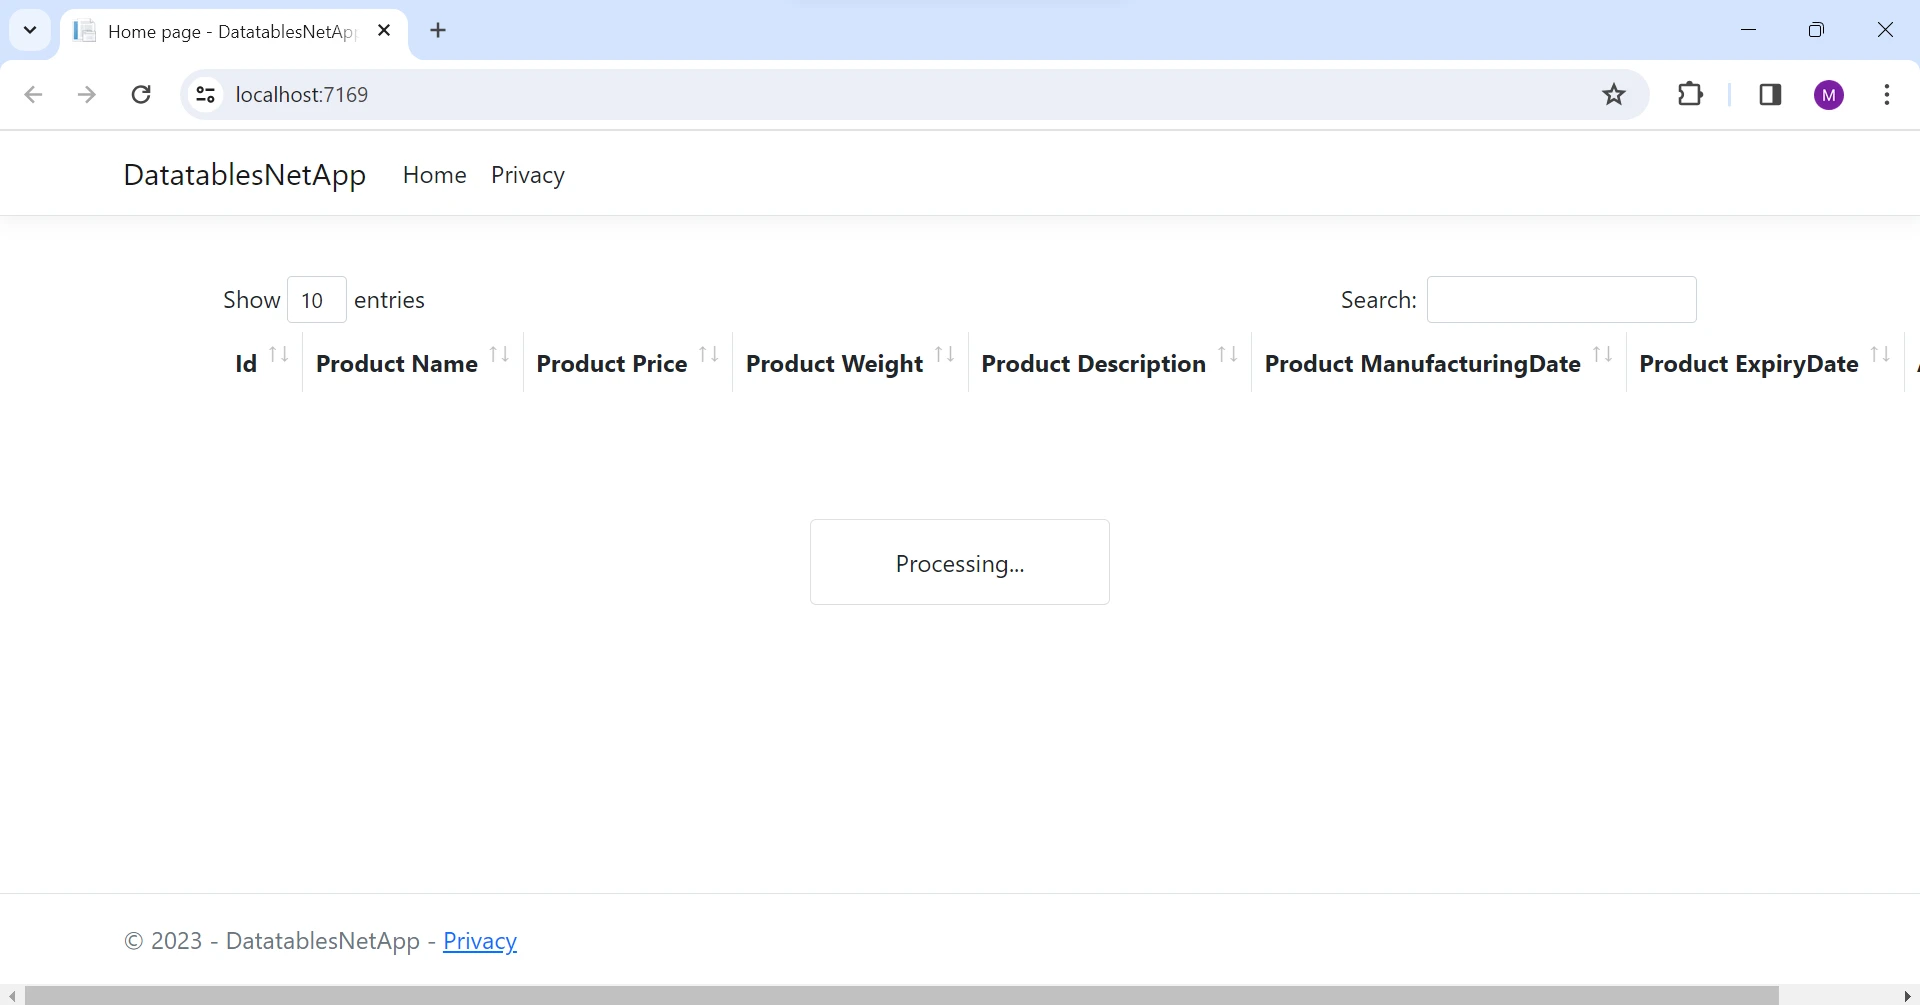
现在,构建并运行该应用程序。
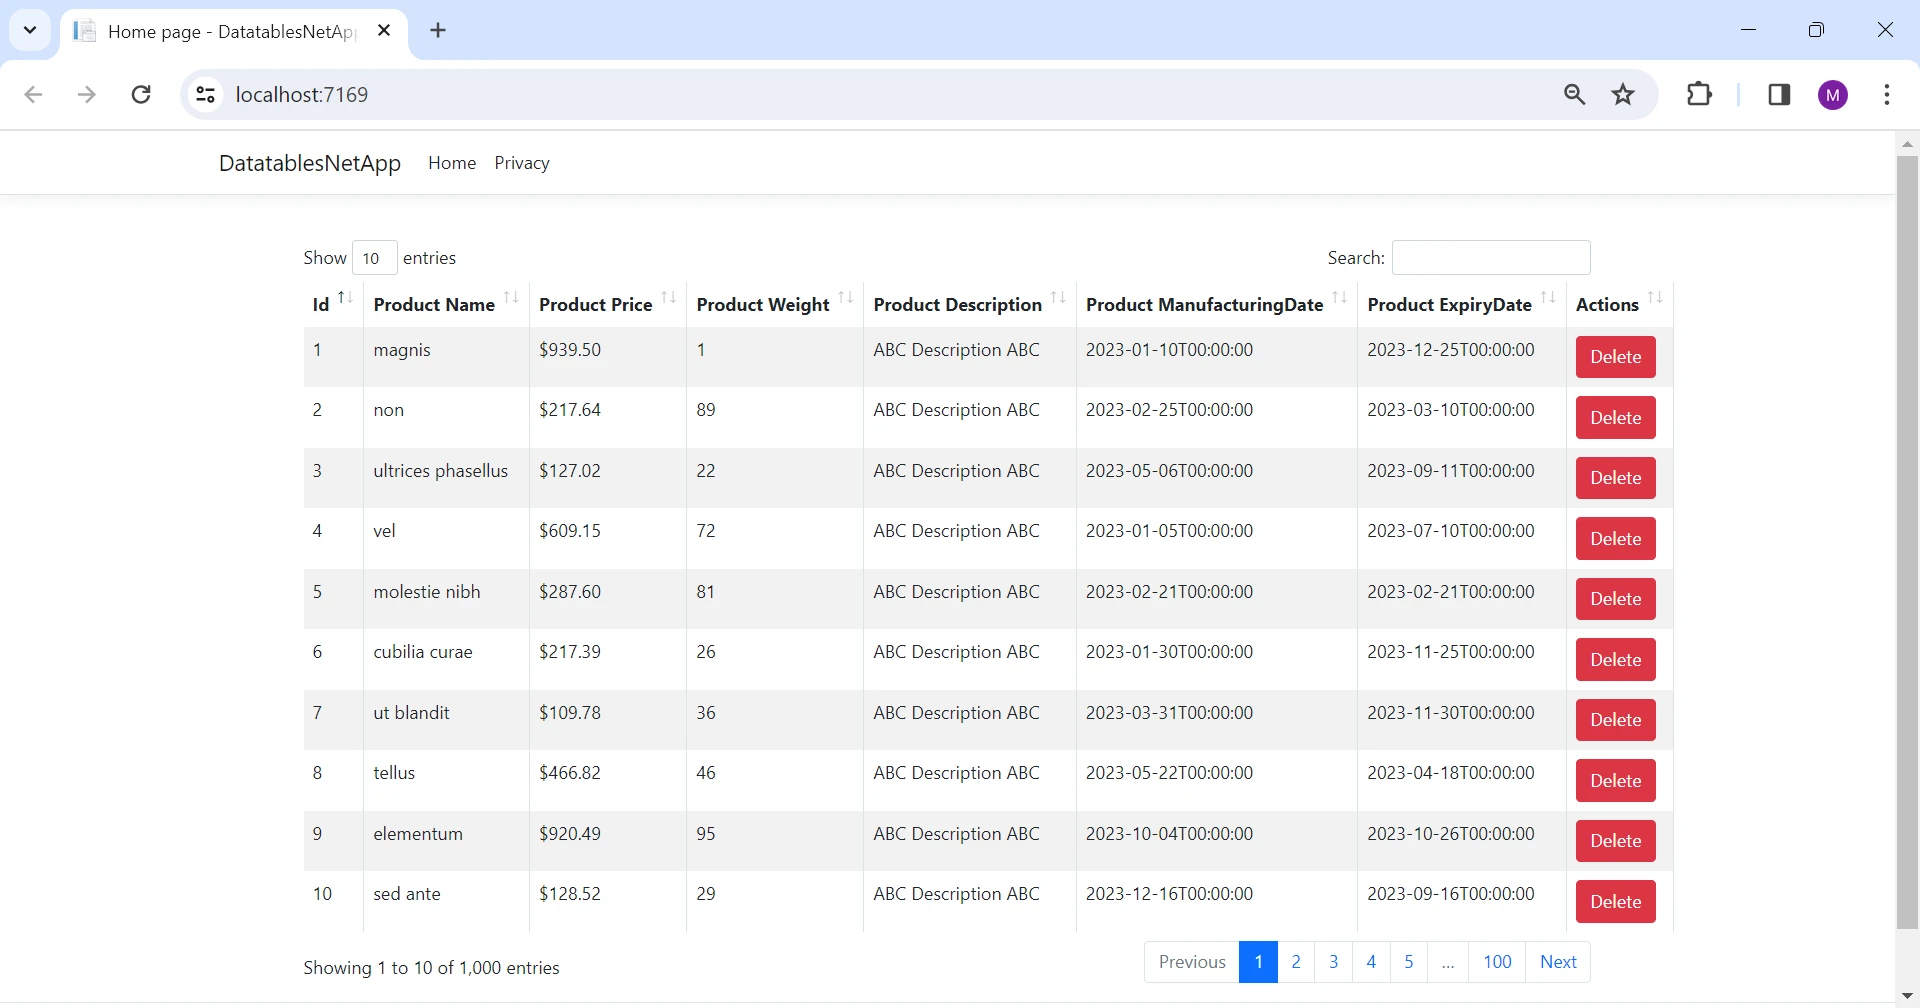
输出
我们可以看到,我们有一个非常互动的 UI,具有高级交互控件。
现在,分页在服务器端实现,如下所示。
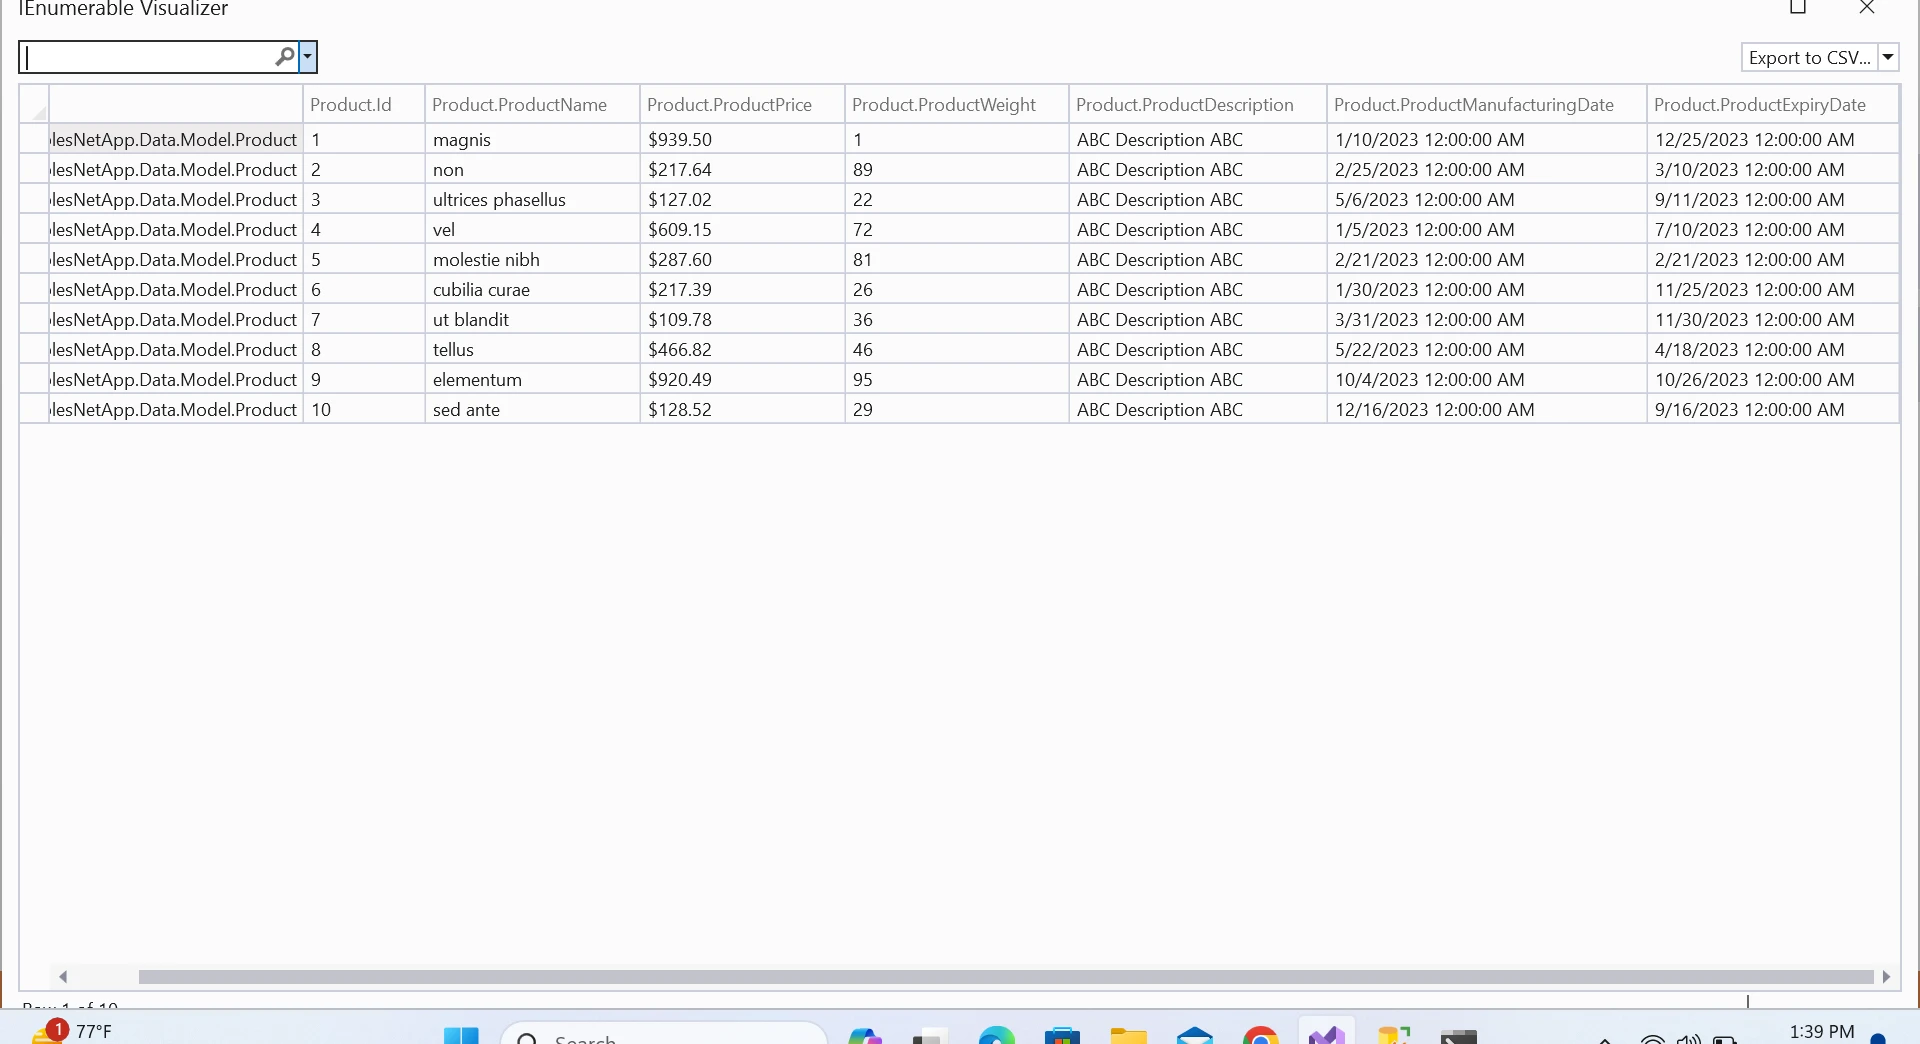
输出 UI
然后数据在客户端渲染,具有丰富的 UI 控件。
您可以通过点击 探索 DataTables.NET 文档 来探索更多。
IronXL 简介
IronXL - Excel Library 适用于 .NET 是一个允许您在 .NET 应用中处理 Excel 文件的库。 它可以 创建 Excel 电子表格、读取 CSV 文件、编辑 Excel 文件,并以各种格式(如 XLS、XLSX、CSV 和 TSV)导出到 Excel。它不需要安装 Microsoft Office 或 Excel 互操作。 它支持 .NET 8,7,6,5,Core,Framework 和 Azure。
我们经常需要将数据导出到 Excel 或 CSV 文件中。 在这种情况下,IronXL 是首选。 现在,我们将编写代码将我们的数据导出到 Excel 文件中。
安装 IronXL
通过在包管理器控制台中输入以下命令在我们的项目中安装 IronXL 库。
Install-Package IronPdf
这将安装 IronXL 及其项目中所需的依赖项。
导出数据到 Excel
我们来编写一个将产品列表转换成 Excel 文件的代码。
public void ExportToExcel(List<Product> productList)
{
    WorkBook wb = WorkBook.Create(ExcelFileFormat.XLSX); // Create a new workbook instance
    WorkSheet ws = wb.DefaultWorkSheet; // Access the default worksheet
    int rowCount = 1;

    // Iterate over the product list and fill the worksheet
    foreach (Product product in productList)
    {
        ws["A" + rowCount].Value = product.Id.ToString();
        ws["B" + rowCount].Value = product.ProductName;
        ws["C" + rowCount].Value = product.ProductDescription;
        ws["D" + rowCount].Value = product.ProductPrice;
        ws["E" + rowCount].Value = product.ProductWeight;
        ws["F" + rowCount].Value = product.ProductManufacturingDate;
        ws["G" + rowCount].Value = product.ProductExpiryDate;
        rowCount++;
    }
    wb.SaveAs("product.xlsx"); // Save the workbook as an Excel file
}
public void ExportToExcel(List<Product> productList)
{
WorkBook wb = WorkBook.Create(ExcelFileFormat.XLSX); // Create a new workbook instance
WorkSheet ws = wb.DefaultWorkSheet; // Access the default worksheet
int rowCount = 1;
// Iterate over the product list and fill the worksheet
foreach (Product product in productList)
{
ws["A" + rowCount].Value = product.Id.ToString();
ws["B" + rowCount].Value = product.ProductName;
ws["C" + rowCount].Value = product.ProductDescription;
ws["D" + rowCount].Value = product.ProductPrice;
ws["E" + rowCount].Value = product.ProductWeight;
ws["F" + rowCount].Value = product.ProductManufacturingDate;
ws["G" + rowCount].Value = product.ProductExpiryDate;
rowCount++;
}
wb.SaveAs("product.xlsx"); // Save the workbook as an Excel file
}Public Sub ExportToExcel(ByVal productList As List(Of Product))
Dim wb As WorkBook = WorkBook.Create(ExcelFileFormat.XLSX) ' Create a new workbook instance
Dim ws As WorkSheet = wb.DefaultWorkSheet ' Access the default worksheet
Dim rowCount As Integer = 1
' Iterate over the product list and fill the worksheet
For Each product As Product In productList
ws("A" & rowCount).Value = product.Id.ToString()
ws("B" & rowCount).Value = product.ProductName
ws("C" & rowCount).Value = product.ProductDescription
ws("D" & rowCount).Value = product.ProductPrice
ws("E" & rowCount).Value = product.ProductWeight
ws("F" & rowCount).Value = product.ProductManufacturingDate
ws("G" & rowCount).Value = product.ProductExpiryDate
rowCount += 1
Next product
wb.SaveAs("product.xlsx") ' Save the workbook as an Excel file
End Sub我们以一种非常简单和便捷的方式从列表中创建了一个 Excel 文件。
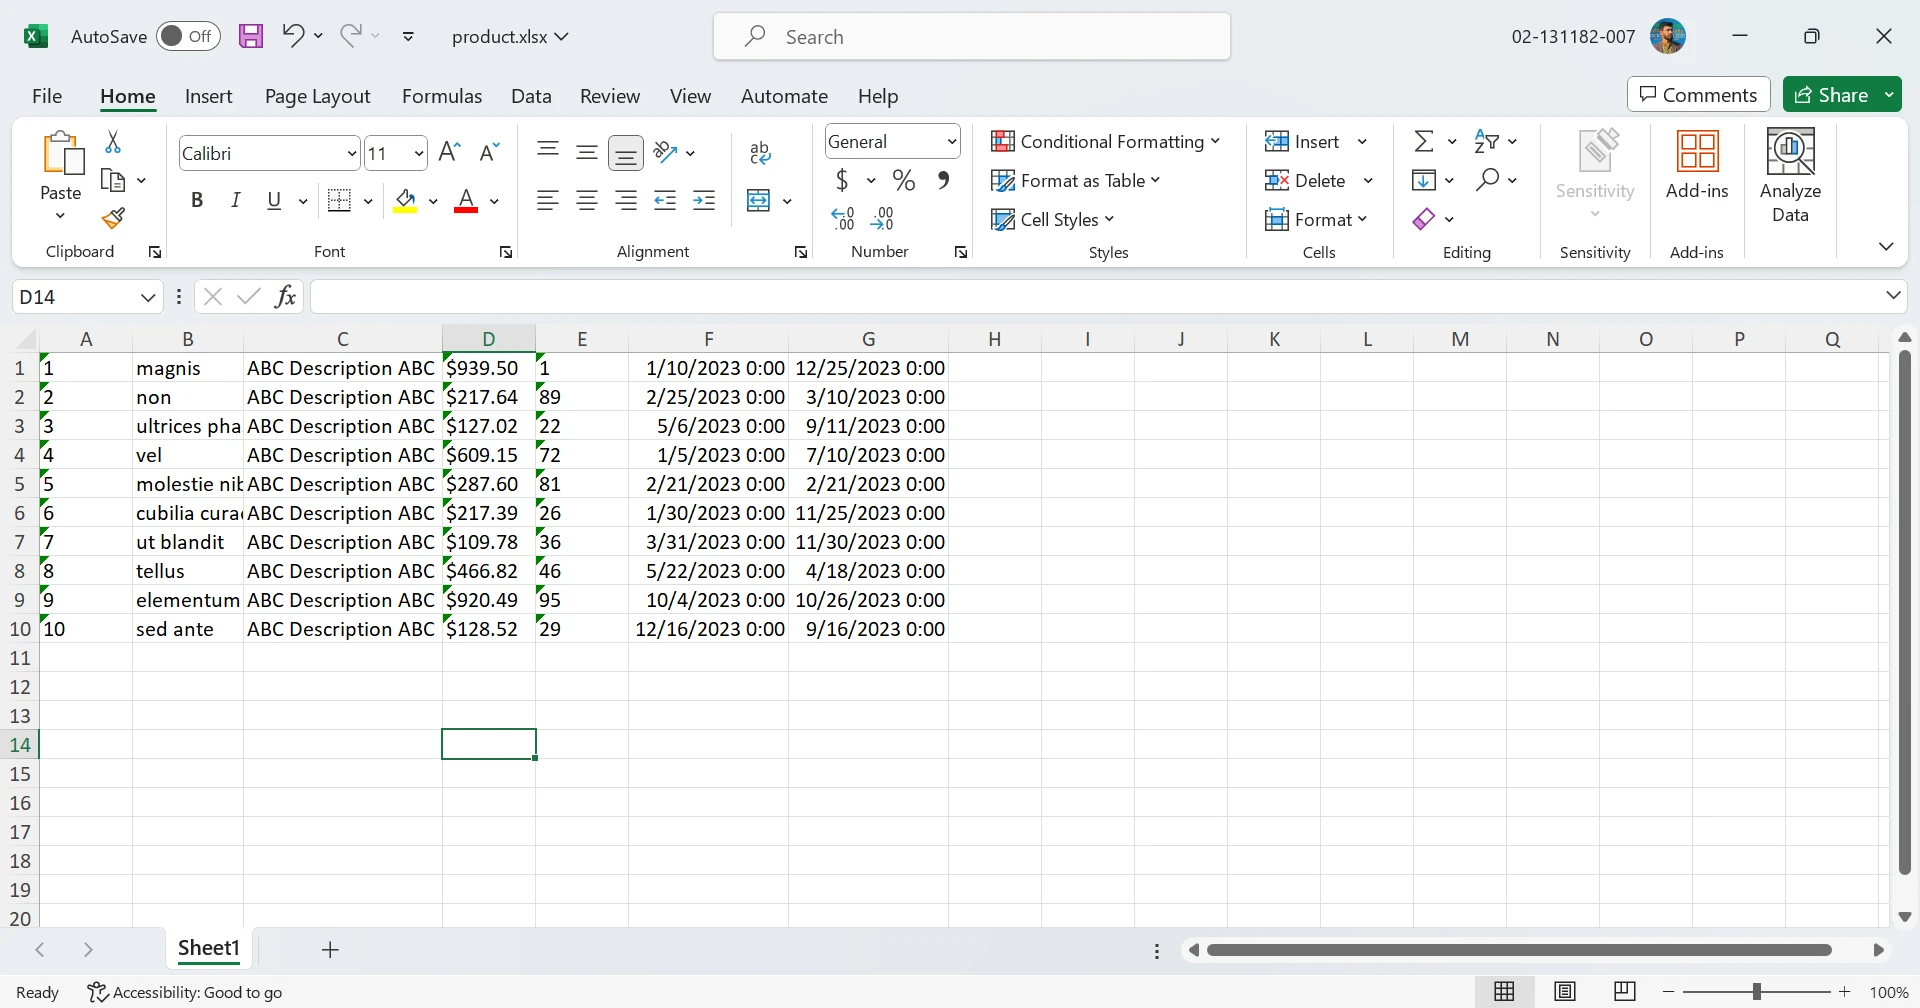
IronXL 提供了全面的 创建 XLSX 文件的教程、读取 Excel 的代码示例及其 API 的使用 API 文档,以最佳方式使用其全面的 API。
在优化 ASP.NET 性能的过程中,我们完全依赖于仅核心软件,确保精简高效的开发环境。 使用 DataTables.NET 作为本地托管包,进一步提高响应能力,减少对外部依赖的依赖,以便对数据进行流线型处理和 Excel 导出。 此外,在这个优化和自包含的生态系统中,高效贡献代码变得无缝。
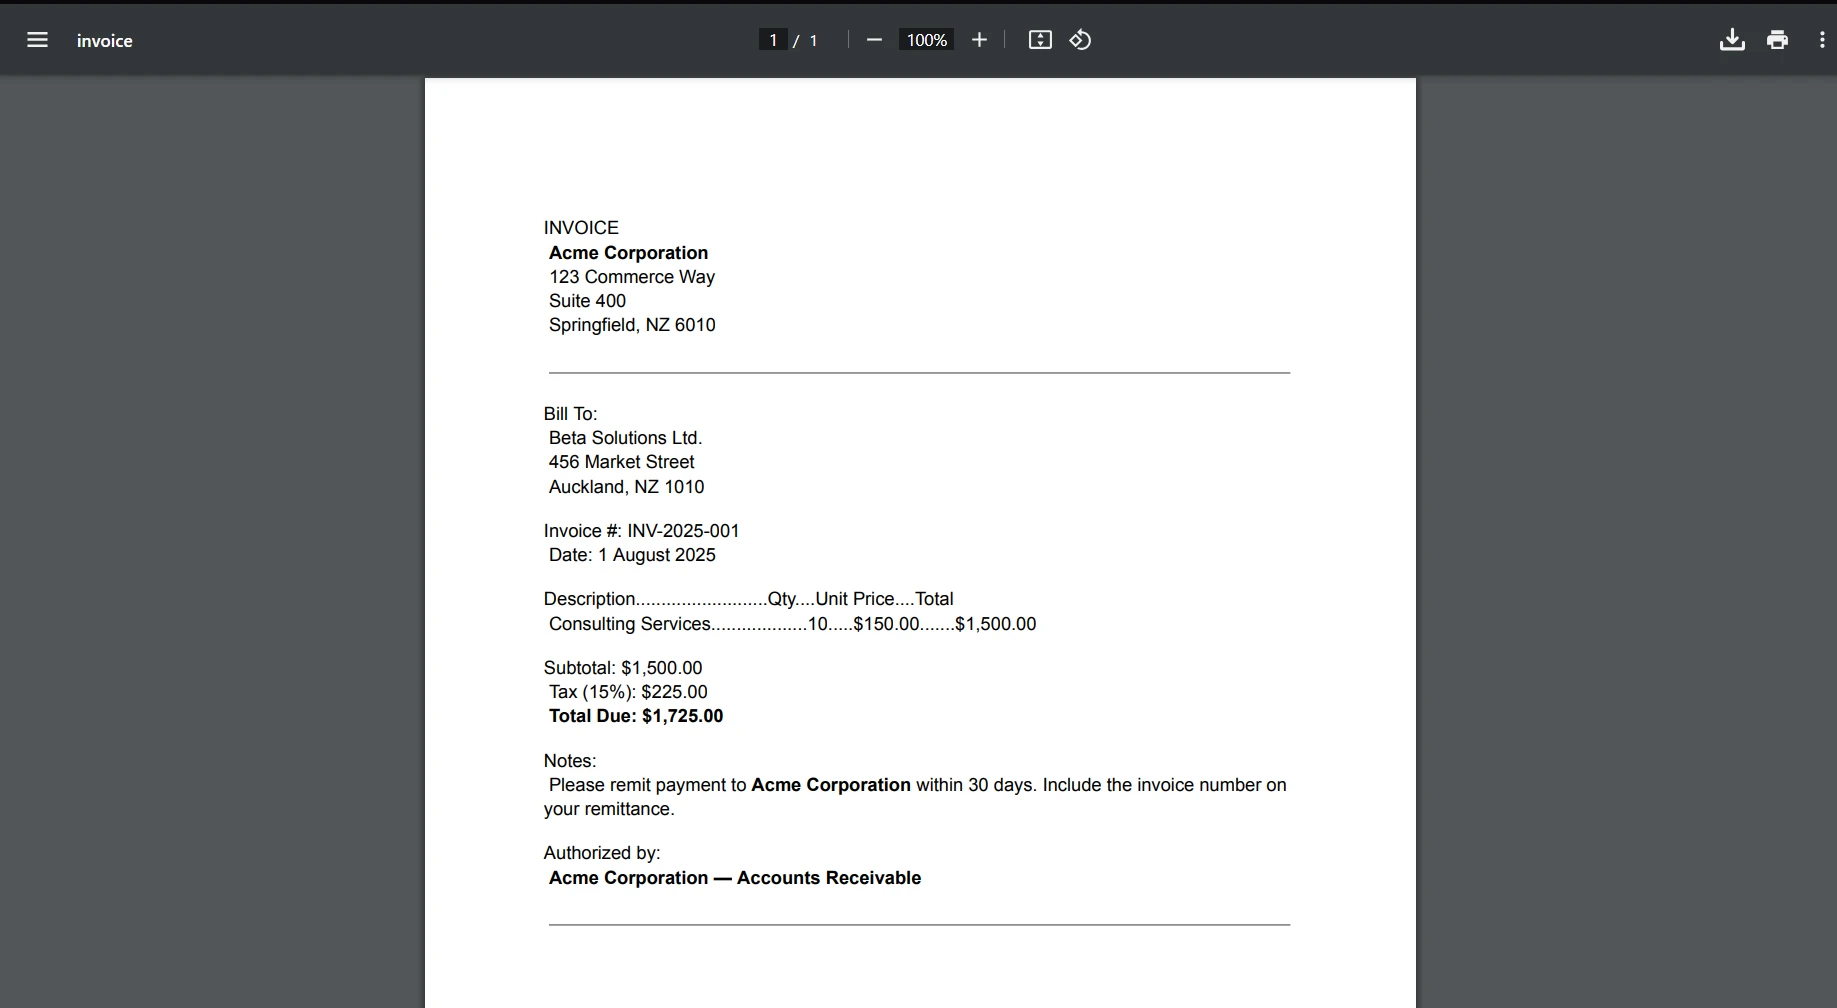
IronPDF 是一个设计用于将网页、URL 和 HTML 转换为 PDF 文档 的解决方案。 生成的 PDF 保留了源网页的原始格式和样式元素。 该工具尤其对创建基于网络内容的 PDF 演绎,如报告和发票,具有显著效果。
using IronPdf;

class Program
{
    static void Main(string[] args)
    {
        var renderer = new ChromePdfRenderer();

        // 1. Convert HTML String to PDF
        var htmlContent = "<h1>Hello, IronPDF!</h1><p>This is a PDF from an HTML string.</p>";
        var pdfFromHtmlString = renderer.RenderHtmlAsPdf(htmlContent);
        pdfFromHtmlString.SaveAs("HTMLStringToPDF.pdf");

        // 2. Convert HTML File to PDF
        var htmlFilePath = "path_to_your_html_file.html"; // Specify the path to your HTML file
        var pdfFromHtmlFile = renderer.RenderHtmlFileAsPdf(htmlFilePath);
        pdfFromHtmlFile.SaveAs("HTMLFileToPDF.pdf");

        // 3. Convert URL to PDF
        var url = "http://ironpdf.com"; // Specify the URL
        var pdfFromUrl = renderer.RenderUrlAsPdf(url);
        pdfFromUrl.SaveAs("URLToPDF.pdf");
    }
}
using IronPdf;
class Program
{
static void Main(string[] args)
{
var renderer = new ChromePdfRenderer();
// 1. Convert HTML String to PDF
var htmlContent = "<h1>Hello, IronPDF!</h1><p>This is a PDF from an HTML string.</p>";
var pdfFromHtmlString = renderer.RenderHtmlAsPdf(htmlContent);
pdfFromHtmlString.SaveAs("HTMLStringToPDF.pdf");
// 2. Convert HTML File to PDF
var htmlFilePath = "path_to_your_html_file.html"; // Specify the path to your HTML file
var pdfFromHtmlFile = renderer.RenderHtmlFileAsPdf(htmlFilePath);
pdfFromHtmlFile.SaveAs("HTMLFileToPDF.pdf");
// 3. Convert URL to PDF
var url = "http://ironpdf.com"; // Specify the URL
var pdfFromUrl = renderer.RenderUrlAsPdf(url);
pdfFromUrl.SaveAs("URLToPDF.pdf");
}
}Imports IronPdf
Friend Class Program
Shared Sub Main(ByVal args() As String)
Dim renderer = New ChromePdfRenderer()
' 1. Convert HTML String to PDF
Dim htmlContent = "<h1>Hello, IronPDF!</h1><p>This is a PDF from an HTML string.</p>"
Dim pdfFromHtmlString = renderer.RenderHtmlAsPdf(htmlContent)
pdfFromHtmlString.SaveAs("HTMLStringToPDF.pdf")
' 2. Convert HTML File to PDF
Dim htmlFilePath = "path_to_your_html_file.html" ' Specify the path to your HTML file
Dim pdfFromHtmlFile = renderer.RenderHtmlFileAsPdf(htmlFilePath)
pdfFromHtmlFile.SaveAs("HTMLFileToPDF.pdf")
' 3. Convert URL to PDF
Dim url = "http://ironpdf.com" ' Specify the URL
Dim pdfFromUrl = renderer.RenderUrlAsPdf(url)
pdfFromUrl.SaveAs("URLToPDF.pdf")
End Sub
End Class结论
总之,在 ASP.NET 分发库项目中利用 DataTables.NET 进行服务器端处理是高效处理大量数据集的良好策略。 该方法通过以可管理的块传输数据,减少带宽使用,增强用户体验,从而提高性能。 通过无缝集成 IronXL,还扩大了应用的能力,使其能轻松将表格数据导出到 Excel 进行全面的数据分析和报告。
通过采用这些技术,开发人员可以创建在丰富的交互性和资源效率之间取得平衡的网络应用程序,特别是在涉及大规模数据集的情况下,提供给用户无缝且响应迅速的体验。 IronXL 根据开发人员数量、项目和重新分发表达要求,为 IronXL 提供多种许可选项。 许可证是永久性的,并包括免费支持和更新。
常见问题解答
如何将DataTables.NET集成到ASP.NET项目中?
要将DataTables.NET集成到ASP.NET项目中,您需要创建一个ASP.NET Web应用程序,添加DataTables客户端样式包,安装Entity Framework Core包,添加模型类、控制器和Razor页面,配置JavaScript进行服务器端处理,然后构建和运行您的项目。
DataTables.NET的服务器端处理是什么?
DataTables.NET中的服务器端处理涉及从服务器向客户端传输可管理的数据块,而不是一次加载整个数据集。这通过减小加载时间和最小化CPU和带宽使用来改善性能,特别是对于大型数据集。
为何服务器端处理在DataTables.NET中如此重要?
服务器端处理对于在处理大型数据集时优化性能至关重要。它允许服务器仅向客户端发送必要的数据,从而减少浏览器的负载并提高整体效率。
如何在ASP.NET应用程序中将表格数据导出到Excel?
您可以使用IronXL库在ASP.NET应用程序中将表格数据导出到Excel。IronXL允许您直接从数据列表创建和操作Excel文件,而不需要Microsoft Office或Excel Interop。
如何在ASP.NET中设置客户端库以使用DataTables?
要在ASP.NET中设置客户端库,右键点击Visual Studio中的Solution,选择“添加”,然后选择“客户端库”。您可以搜索并添加所需的库,如DataTables,以增强项目功能。
配置DataTables.NET以进行服务器端处理的步骤是什么?
要配置DataTables.NET以进行服务器端处理,确保您已经设置了模型类、DB上下文、控制器和HTML表格。您还需要进行AJAX调用,并在您的JavaScript文件中配置服务器端处理逻辑以处理数据获取和操作。
DataTables.NET中的过滤和分页如何工作?
DataTables.NET中的过滤和分页通过服务器端处理进行管理。服务器根据搜索条件过滤数据,并通过将数据块发送给客户端来管理分页,确保高效的数据处理。