MS Graph .NET(開発者向けの動作方法)
MS Graph .NETは、Microsoft Graph APIと対話するためのデータアクセスツールとして機能し、Azure Active Directory(Azure AD)エコシステムの中心的な部分です。 Microsoft Graphは、Microsoft 365のデータとインテリジェンスへのゲートウェイです。開発者は、さまざまなMicrosoftサービスのデータにアクセスし、管理し、分析することができます。 Microsoft Graphクライアントライブラリは、APIと簡単に対話できる一連のメソッドを提供することにより、このプロセスを簡素化します。
IronPDFは、.NETアプリケーションでPDFドキュメントを生成するためのライブラリです。 HTMLをPDFに変換し、レポート、請求書、ドキュメントを自動的に作成するのに役立ちます。 IronPDFは、.NETアプリケーションとよく連携し、PDF生成のための簡単なアプローチを提供します。
MS Graph .NETとIronPDFを組み合わせることで、開発者はMicrosoft 365データを操作し、PDFドキュメントを生成するアプリケーションを作成できます。 この組み合わせは、Microsoftのサービスからデータを必要とし、それを標準化されたドキュメント形式で提示する必要があるビジネスアプリケーションを開発するのに強力です。
MS Graph .NET の始め方
.NETプロジェクトでのMS Graph .NETのセットアップ
特にユーザーIDを扱う.NET CoreプロジェクトでMS Graph .NETを効果的に使用するには、まず.NETプロジェクトをセットアップすることが最初のステップです。以下がその手順です:
- NuGetパッケージマネージャーを開きます。
- Microsoft.Graphを検索します。
- Microsoft.Graphパッケージをインストールします。
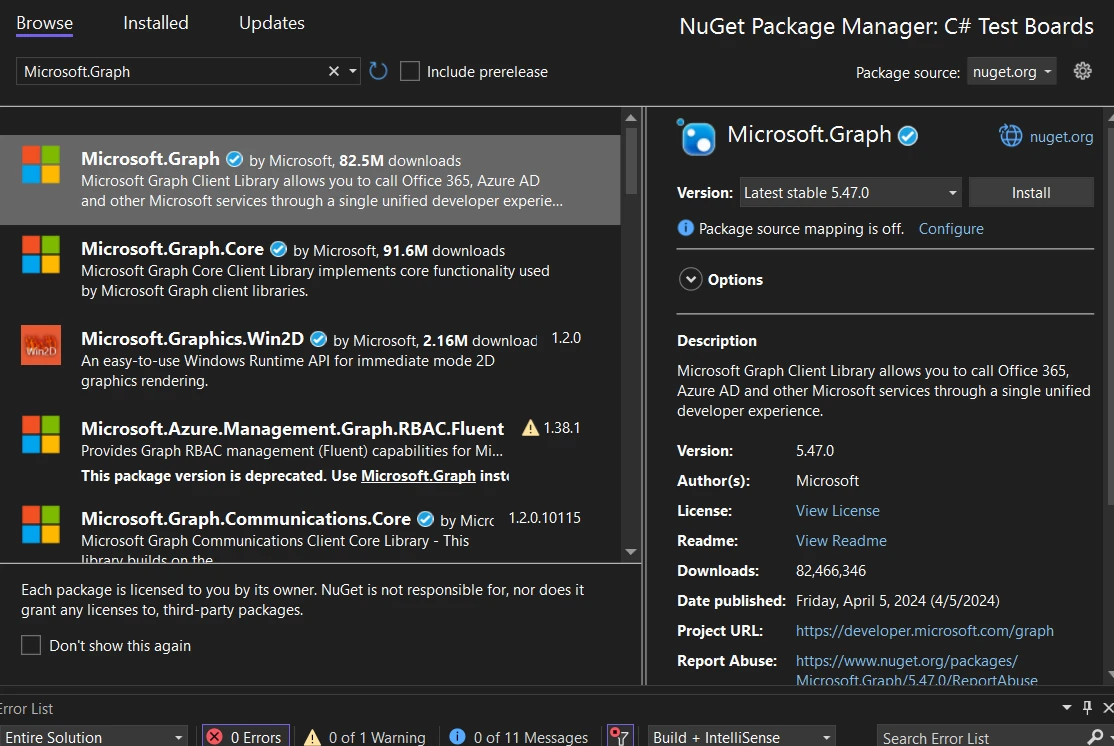
このプロセスにより、MS Graph .NETがプロジェクトに追加されます。 これで、コードを書き始める準備が整いました。
基本的なコード例
現在のユーザーのプロフィール情報を取得したいとします。 ここに単純なコード例があります:
// Required namespaces
using Azure.Identity;
using Microsoft.Graph;

// Defining necessary credentials and scope
var clientId = "Your_Application_Id";
var tenantId = "Your_Tenant_Id";
var clientSecret = "Your_Client_Secret";
var scopes = new[] { "User.Read" };

// Configuring TokenCredentialOptions for Azure Public Cloud
var options = new TokenCredentialOptions
{
    AuthorityHost = AzureAuthorityHosts.AzurePublicCloud
};

// Authenticating using client credentials
var clientSecretCredential = new ClientSecretCredential(
    tenantId, clientId, clientSecret, options);

// Creating a new instance of GraphServiceClient
var graphClient = new GraphServiceClient(clientSecretCredential, scopes);

// Fetching current user's profile information
var user = await graphClient.Me
    .Request()
    .GetAsync();

// Printing user's display name
Console.WriteLine($"Hello, {user.DisplayName}!");
// Required namespaces
using Azure.Identity;
using Microsoft.Graph;
// Defining necessary credentials and scope
var clientId = "Your_Application_Id";
var tenantId = "Your_Tenant_Id";
var clientSecret = "Your_Client_Secret";
var scopes = new[] { "User.Read" };
// Configuring TokenCredentialOptions for Azure Public Cloud
var options = new TokenCredentialOptions
{
AuthorityHost = AzureAuthorityHosts.AzurePublicCloud
};
// Authenticating using client credentials
var clientSecretCredential = new ClientSecretCredential(
tenantId, clientId, clientSecret, options);
// Creating a new instance of GraphServiceClient
var graphClient = new GraphServiceClient(clientSecretCredential, scopes);
// Fetching current user's profile information
var user = await graphClient.Me
.Request()
.GetAsync();
// Printing user's display name
Console.WriteLine($"Hello, {user.DisplayName}!");' Required namespaces
Imports Azure.Identity
Imports Microsoft.Graph
' Defining necessary credentials and scope
Private clientId = "Your_Application_Id"
Private tenantId = "Your_Tenant_Id"
Private clientSecret = "Your_Client_Secret"
Private scopes = { "User.Read" }
' Configuring TokenCredentialOptions for Azure Public Cloud
Private options = New TokenCredentialOptions With {.AuthorityHost = AzureAuthorityHosts.AzurePublicCloud}
' Authenticating using client credentials
Private clientSecretCredential = New ClientSecretCredential(tenantId, clientId, clientSecret, options)
' Creating a new instance of GraphServiceClient
Private graphClient = New GraphServiceClient(clientSecretCredential, scopes)
' Fetching current user's profile information
Private user = await graphClient.Me.Request().GetAsync()
' Printing user's display name
Console.WriteLine($"Hello, {user.DisplayName}!")このコード スニペットは、Azure AD 認証のクライアント シークレットを使用して、GraphServiceClient の新しいインスタンスを作成する方法を示しています。 クライアント資格情報を使用して認証します。 その後、現在のユーザーの表示名を取得します。 続いて、MS Graph .NETを認証プロバイダーの設定と共にプロジェクトに追加してください。
MS Graph .NETの機能
ユーザーメールの取得
ユーザーのMicrosoftアカウントメールボックスからメールを取得するには、Mail.Read権限を使用します。 ここでは最近のメールをリストする方法を示します:
// Retrieving the top 10 messages from the user's mailbox
var messages = await graphClient.Me.Messages
    .Request()
    .Top(10)
    .GetAsync();

// Iterating through the messages and printing their subjects
foreach (var message in messages)
{
    Console.WriteLine($"Subject: {message.Subject}");
}
// Retrieving the top 10 messages from the user's mailbox
var messages = await graphClient.Me.Messages
.Request()
.Top(10)
.GetAsync();
// Iterating through the messages and printing their subjects
foreach (var message in messages)
{
Console.WriteLine($"Subject: {message.Subject}");
}' Retrieving the top 10 messages from the user's mailbox
Dim messages = Await graphClient.Me.Messages.Request().Top(10).GetAsync()
' Iterating through the messages and printing their subjects
For Each message In messages
Console.WriteLine($"Subject: {message.Subject}")
Next messageこのコードは、ユーザーの受信トレイにあるトップ10のメールの件名をリストします。
メールを送信する
メールを送信するには、Messageオブジェクトを作成して送信します:
// Creating a message to be sent
var message = new Message
{
    Subject = "Hello from MS Graph .NET",
    Body = new ItemBody
    {
        ContentType = BodyType.Text,
        Content = "Hello, this is a test email."
    },
    ToRecipients = new List<Recipient>()
    {
        new Recipient
        {
            EmailAddress = new EmailAddress
            {
                Address = "recipient@example.com"
            }
        }
    }
};

// Sending the email
await graphClient.Me.SendMail(message, null)
    .Request()
    .PostAsync();
// Creating a message to be sent
var message = new Message
{
Subject = "Hello from MS Graph .NET",
Body = new ItemBody
{
ContentType = BodyType.Text,
Content = "Hello, this is a test email."
},
ToRecipients = new List<Recipient>()
{
new Recipient
{
EmailAddress = new EmailAddress
{
Address = "recipient@example.com"
}
}
}
};
// Sending the email
await graphClient.Me.SendMail(message, null)
.Request()
.PostAsync();' Creating a message to be sent
Dim message As New Message With {
.Subject = "Hello from MS Graph .NET",
.Body = New ItemBody With {
.ContentType = BodyType.Text,
.Content = "Hello, this is a test email."
},
.ToRecipients = New List(Of Recipient)() From {
New Recipient With {
.EmailAddress = New EmailAddress With {.Address = "recipient@example.com"}
}
}
}
' Sending the email
Await graphClient.Me.SendMail(message, Nothing).Request().PostAsync()これは、シンプルなテキスト本文のメールを送信します。
カレンダーイベントの管理
ユーザーのカレンダーにイベントを追加するには:
// Creating a calendar event
var @event = new Event
{
    Subject = "Team Meeting",
    Body = new ItemBody
    {
        ContentType = BodyType.Html,
        Content = "Discuss project updates."
    },
    Start = new DateTimeTimeZone
    {
        DateTime = "2024-04-15T12:00:00",
        TimeZone = "Pacific Standard Time"
    },
    End = new DateTimeTimeZone
    {
        DateTime = "2024-04-15T14:00:00",
        TimeZone = "Pacific Standard Time"
    },
    Location = new Location
    {
        DisplayName = "Conference Room 1"
    }
};

// Adding the event to the user's calendar
await graphClient.Me.Events
    .Request()
    .AddAsync(@event);
// Creating a calendar event
var @event = new Event
{
Subject = "Team Meeting",
Body = new ItemBody
{
ContentType = BodyType.Html,
Content = "Discuss project updates."
},
Start = new DateTimeTimeZone
{
DateTime = "2024-04-15T12:00:00",
TimeZone = "Pacific Standard Time"
},
End = new DateTimeTimeZone
{
DateTime = "2024-04-15T14:00:00",
TimeZone = "Pacific Standard Time"
},
Location = new Location
{
DisplayName = "Conference Room 1"
}
};
// Adding the event to the user's calendar
await graphClient.Me.Events
.Request()
.AddAsync(@event);' Creating a calendar event
Dim [event] As [Event] = New [Event] With {
.Subject = "Team Meeting",
.Body = New ItemBody With {
.ContentType = BodyType.Html,
.Content = "Discuss project updates."
},
.Start = New DateTimeTimeZone With {
.DateTime = "2024-04-15T12:00:00",
.TimeZone = "Pacific Standard Time"
},
.End = New DateTimeTimeZone With {
.DateTime = "2024-04-15T14:00:00",
.TimeZone = "Pacific Standard Time"
},
.Location = New Location With {.DisplayName = "Conference Room 1"}
}
' Adding the event to the user's calendar
Await graphClient.Me.Events.Request().AddAsync([event])このコードはカレンダーに新しいイベントをスケジュールします。
OneDriveファイルへのアクセス
ユーザーのOneDriveルートからファイルをリストするには:
// Retrieving files from the root OneDrive folder
var files = await graphClient.Me.Drive.Root.Children
    .Request()
    .GetAsync();

// Printing each file's name
foreach (var file in files)
{
    Console.WriteLine(file.Name);
}
// Retrieving files from the root OneDrive folder
var files = await graphClient.Me.Drive.Root.Children
.Request()
.GetAsync();
// Printing each file's name
foreach (var file in files)
{
Console.WriteLine(file.Name);
}' Retrieving files from the root OneDrive folder
Dim files = Await graphClient.Me.Drive.Root.Children.Request().GetAsync()
' Printing each file's name
For Each file In files
Console.WriteLine(file.Name)
Next fileこのコードはOneDriveのルートディレクトリにあるファイルの名前を表示します。
Teamsでの作業
ユーザーが所属しているチームのリストを取得するには:
// Retrieving teams that the user is part of
var teams = await graphClient.Me.JoinedTeams
    .Request()
    .GetAsync();

// Printing each team's display name
foreach (var team in teams)
{
    Console.WriteLine($"Team name: {team.DisplayName}");
}
// Retrieving teams that the user is part of
var teams = await graphClient.Me.JoinedTeams
.Request()
.GetAsync();
// Printing each team's display name
foreach (var team in teams)
{
Console.WriteLine($"Team name: {team.DisplayName}");
}' Retrieving teams that the user is part of
Dim teams = Await graphClient.Me.JoinedTeams.Request().GetAsync()
' Printing each team's display name
For Each team In teams
Console.WriteLine($"Team name: {team.DisplayName}")
Next teamこれは、ユーザーが所属しているTeamsの名前をリストします。
これらの各機能は、MS Graph .NETのパワーと多様性を示しています。 これらは、Microsoft 365 サービスをアプリケーションに統合する方法を示しています。
IronPDFとのMS Graph .NETの統合
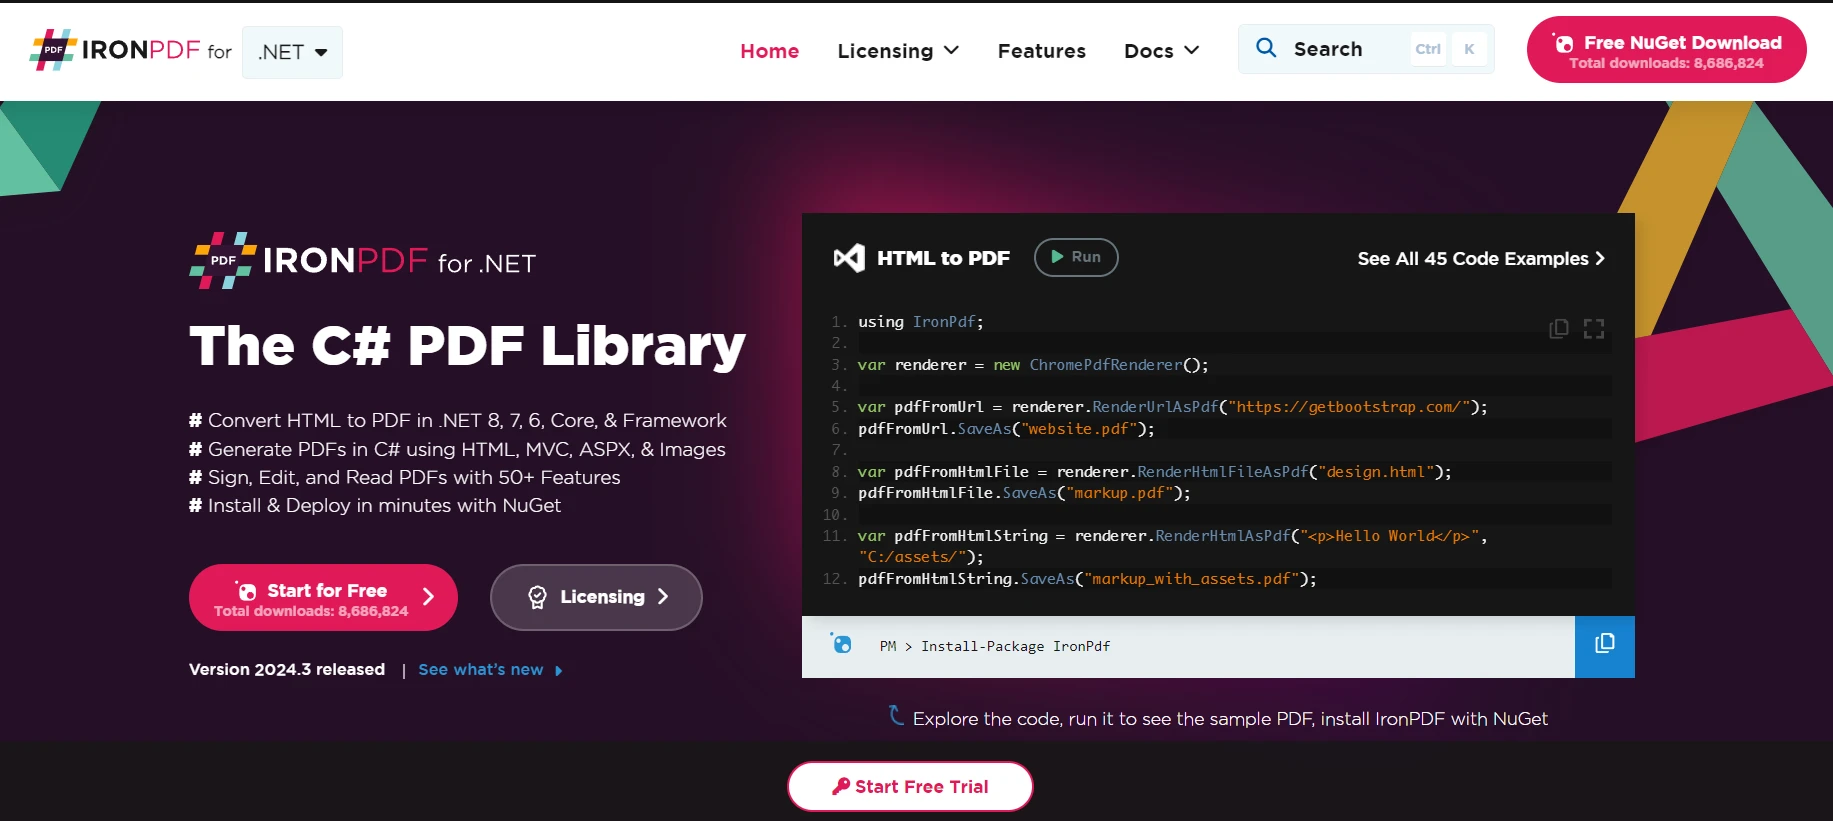
もし.NETアプリケーションでPDFを扱いたいなら、.NET開発者向けのIronPDFライブラリが堅実な選択肢です。このライブラリは、他の外部PDFツールやソフトウェアを必要とせずに、あなたのアプリでPDFファイルを読み込み、作成、操作する能力を与えます。
ユースケース:IronPDFとMS Graph .NETの統合
Microsoft 365からドキュメントをフェッチし、たとえばレポートや請求書を取得してそれをPDFに変換するアプリケーションを構築していると想像してください。 MS Graph .NETは、OneDriveやSharePointに保存されているファイルを含むMicrosoft 365リソースと対話できるようにします。 その後、IronPDFを使用してこれらのドキュメントをPDFに変換することができます。 この組み合わせは、レポートの自動生成やメールおよび添付ファイルをPDF形式でアーカイブして簡単に配布する際に特に便利です。
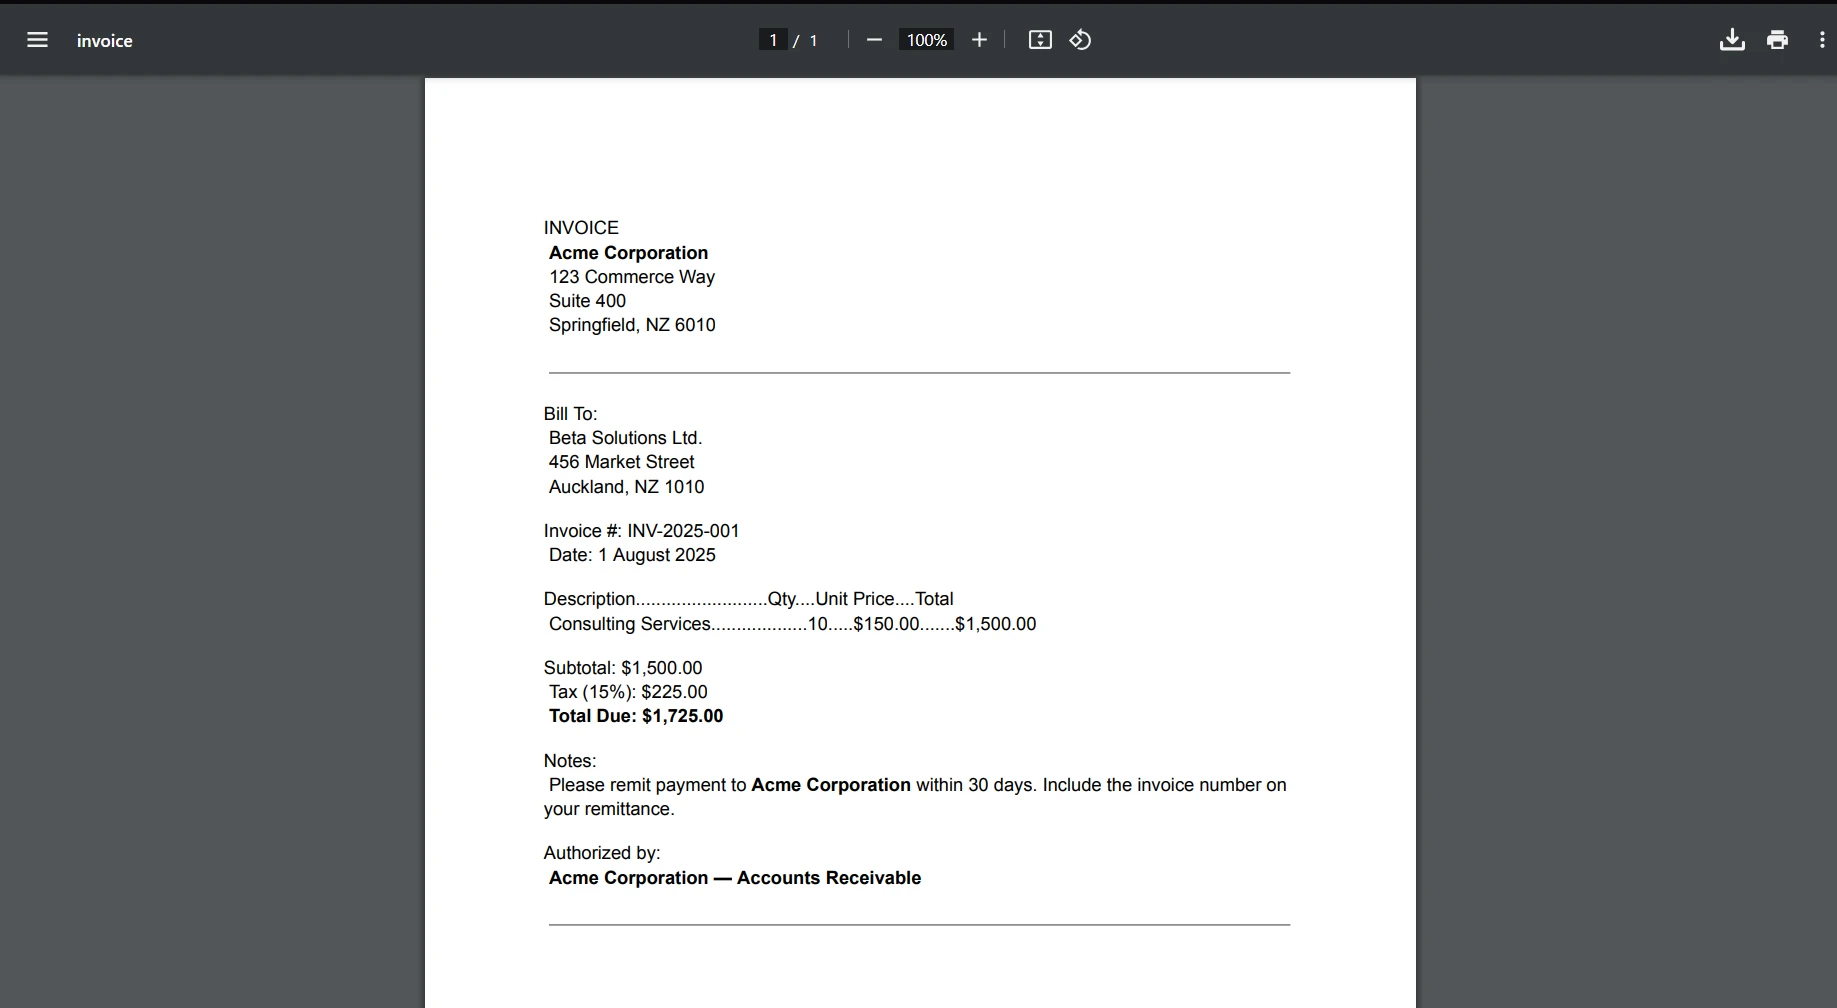
コード例:MS Graph から PDF へ
簡単な例を見ていきましょう。 MS Graph .NETを使用してOneDriveからドキュメントを取得し、次にそれをIronPDFを使用してPDFに変換します。 MSGraphでの認証設定は既に行われていると仮定します; もしそうでないなら、Microsoftのサイトには開始するための十分なドキュメントがあります。
// Simplified example, ensure to handle exceptions and errors appropriately.
using Microsoft.Graph;
using IronPdf;
using System.IO;
using System.Threading.Tasks;

class Program
{
    static async Task Main(string[] args)
    {
        // Setting up the GraphServiceClient with a DelegateAuthenticationProvider
        var graphClient = new GraphServiceClient(
            new DelegateAuthenticationProvider(
                async (requestMessage) =>
                {
                    // Insert code to acquire token
                    string accessToken = await GetAccessTokenAsync();
                    requestMessage.Headers.Authorization = new System.Net.Http.Headers.AuthenticationHeaderValue("Bearer", accessToken);
                }));

        // Replace 'itemId' with the ID of your document in OneDrive
        var stream = await graphClient.Me.Drive.Items["itemId"].Content.Request().GetAsync();

        // IronPDF setup to convert the fetched file to PDF
        var renderer = new HtmlToPdf();
        var pdfDocument = renderer.RenderHtmlAsPdf(StreamToString(stream));

        // Save the PDF to a file
        pdfDocument.SaveAs("YourDocument.pdf");
    }

    // Method to convert a Stream to a String
    static string StreamToString(Stream stream)
    {
        using (var reader = new StreamReader(stream))
        {
            return reader.ReadToEnd();
        }
    }

    // Method to obtain the access token
    static async Task<string> GetAccessTokenAsync()
    {
        // Implement your authentication logic here to return the access token
        return "your_access_token";
    }
}
// Simplified example, ensure to handle exceptions and errors appropriately.
using Microsoft.Graph;
using IronPdf;
using System.IO;
using System.Threading.Tasks;
class Program
{
static async Task Main(string[] args)
{
// Setting up the GraphServiceClient with a DelegateAuthenticationProvider
var graphClient = new GraphServiceClient(
new DelegateAuthenticationProvider(
async (requestMessage) =>
{
// Insert code to acquire token
string accessToken = await GetAccessTokenAsync();
requestMessage.Headers.Authorization = new System.Net.Http.Headers.AuthenticationHeaderValue("Bearer", accessToken);
}));
// Replace 'itemId' with the ID of your document in OneDrive
var stream = await graphClient.Me.Drive.Items["itemId"].Content.Request().GetAsync();
// IronPDF setup to convert the fetched file to PDF
var renderer = new HtmlToPdf();
var pdfDocument = renderer.RenderHtmlAsPdf(StreamToString(stream));
// Save the PDF to a file
pdfDocument.SaveAs("YourDocument.pdf");
}
// Method to convert a Stream to a String
static string StreamToString(Stream stream)
{
using (var reader = new StreamReader(stream))
{
return reader.ReadToEnd();
}
}
// Method to obtain the access token
static async Task<string> GetAccessTokenAsync()
{
// Implement your authentication logic here to return the access token
return "your_access_token";
}
}' Simplified example, ensure to handle exceptions and errors appropriately.
Imports Microsoft.Graph
Imports IronPdf
Imports System.IO
Imports System.Threading.Tasks
Friend Class Program
Shared Async Function Main(ByVal args() As String) As Task
' Setting up the GraphServiceClient with a DelegateAuthenticationProvider
Dim graphClient = New GraphServiceClient(New DelegateAuthenticationProvider(Async Sub(requestMessage)
' Insert code to acquire token
Dim accessToken As String = Await GetAccessTokenAsync()
requestMessage.Headers.Authorization = New System.Net.Http.Headers.AuthenticationHeaderValue("Bearer", accessToken)
End Sub))
' Replace 'itemId' with the ID of your document in OneDrive
Dim stream = Await graphClient.Me.Drive.Items("itemId").Content.Request().GetAsync()
' IronPDF setup to convert the fetched file to PDF
Dim renderer = New HtmlToPdf()
Dim pdfDocument = renderer.RenderHtmlAsPdf(StreamToString(stream))
' Save the PDF to a file
pdfDocument.SaveAs("YourDocument.pdf")
End Function
' Method to convert a Stream to a String
Private Shared Function StreamToString(ByVal stream As Stream) As String
Using reader = New StreamReader(stream)
Return reader.ReadToEnd()
End Using
End Function
' Method to obtain the access token
Private Shared Async Function GetAccessTokenAsync() As Task(Of String)
' Implement your authentication logic here to return the access token
Return "your_access_token"
End Function
End Classこのコードでいくつか注目すべき点:
- OneDriveに保存されているファイルにアクセスするためにMSGraphを使用しています。グラフAPIを通じて取得できるアイテムのIDが必要です。
- この例ではファイル ストリームを文字列に変換しています。 HTMLドキュメントの場合はうまく機能します。 バイナリファイル(Wordドキュメントなど)を扱う場合は、これらのファイルをPDFに変換する別の方法を使用しよう。
- IronPDFのRenderHtmlAsPdfメソッドは、ここでHTML文字列からPDFを作成するために使用されています。 ソースドキュメントがHTMLでない場合、IronPDFは他の形式でも作業する方法を提供します。
これは簡略化された例です。 実際のアプリケーションでは、より堅牢に認証を処理し、エラーを管理し、おそらく異なるファイル形式をより優雅に処理する必要があるかもしれません。 しかし、これがMSGraphとIronPDFを.NETプロジェクトで統合するための良い出発点となるでしょう。
結論
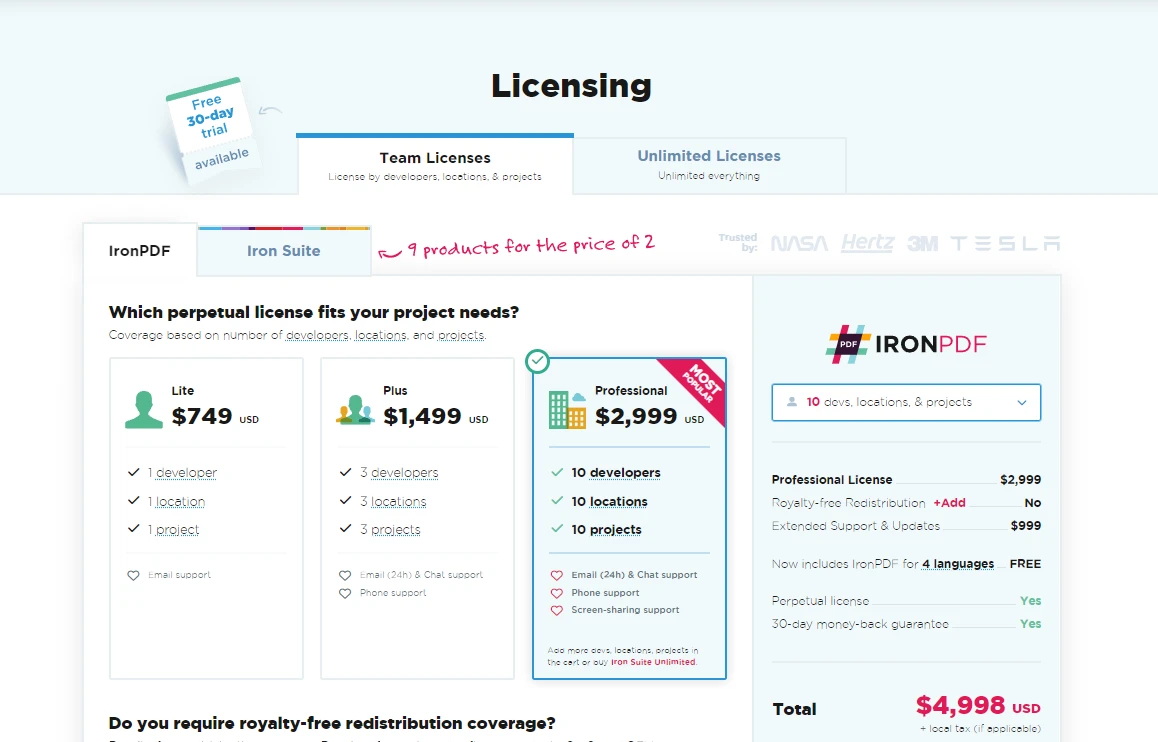
C#アプリケーションにMicrosoft 365の機能を統合したい開発者にとって、MS Graph .NET SDKは必須ツールです。 まず、$999 から始まるMS Graph .NET SDK のライセンスおよび価格情報を調べてください。
よくある質問
MS Graph .NETはどのようにして開発者がMicrosoft 365データにアクセスするのを支援しますか?
MS Graph .NETは開発者がMicrosoft Graph APIを通じてMicrosoft 365データにアクセスし管理するためのゲートウェイとして機能します。これはAzure Active Directoryエコシステムの一部であり、データ操作プロセスを円滑にする方法を提供します。
開発者はMicrosoft 365データを使用して.NETでどのようにPDFドキュメントを生成できますか?
開発者はIronPDFを使用して、HTMLやその他のドキュメント形式をPDFに変換し、MS Graph .NETを介してアクセスしたデータを活用して.NETアプリケーション内でPDFドキュメントを生成できます。
プロジェクトでMS Graph .NETを使い始めるには何が必要ですか?
MS Graph .NETを使い始めるには、NuGetパッケージマネージャを通じてMicrosoft.Graphパッケージをインストールし、クライアント資格情報を使用してMacsoft 365サービスと対話するための認証を設定する必要があります。
開発者はMS Graph .NETを使用してどのようにメールを送信できますか?
開発者は、`Message`オブジェクトを作成して希望の内容や受取人の詳細を設定し、`GraphServiceClient`の`SendMail`メソッドを使用してメールを送信できます。
MS Graph .NETはMicrosoft 365アカウントのカレンダーイベントを管理できますか?
はい、MS Graph .NETを使えば、`Event`オブジェクトを作成し、`Me.Events.Request().AddAsync(event)`などのメソッドを使用して、ユーザーのカレンダーにイベントを追加できます。
OneDriveドキュメントを.NETアプリケーションでPDFに変換するにはどうすればいいですか?
OneDriveドキュメントをPDFに変換するには、MS Graph .NETを使用してドキュメントを取得し、IronPDFを使用してドキュメントの内容をPDF形式に変換できます。
MS Graph .NETとIronPDFを統合する際にはどのような考慮が必要ですか?
MS Graph .NETとIronPDFを統合する際には、堅牢な認証、エラー処理、様々なファイル形式の互換性を考慮し、シームレスな変換とデータ管理を確保します。
MS Graph .NETとIronPDFを一緒に使用する実用的なアプリケーションの例は何ですか?
MS Graph .NETとIronPDFを一緒に使用することで、PDFレポートの生成、メールをPDFとしてアーカイブする、またはMicrosoft 365データを使用して標準化されたビジネスドキュメントを作成することが可能です。
MS Graph .NETは.NETアプリケーションの効率をどのように向上させますか?
MS Graph .NETはMicrosoft 365サービスへのスムーズなアクセスを提供し、開発者が最小限のコードでデータを取得、管理、操作できるようにすることで、生産性とアプリケーションの機能を向上させます。