
replicate npm (開発者向けのしくみ)
"replicate"NPMパッケージは、機械学習モデルをReactアプリケーションに統合するための強力なクライアントツールです。 これにより、開発者は複雑なバックエンドインフラを管理せずに、事前に訓練されたモデルを簡単に利用し、アプリケーション内で推論を実行できます。 Reactプロジェクトでreplicate NPMパッケージを使用する方法の概要を以下に示します。 さらに、PDF生成ライブラリであるIronPDFを探索し、両方のライブラリを組み合わせて機能するアプリケーションを作成する方法をデモンストレーションします。
Replicateの紹介
Replicateは、シンプルなAPIを介して機械学習モデルにアクセスできるオンラインプラットフォームです。 画像生成やテキスト解析など、様々なドメインのモデルをホストしています。 "replicate"NPMパッケージを使用することで、開発者はこれらのモデルをシームレスにアプリケーションに統合できます。
開始方法
インストール
Reactアプリケーションでreplicateを使用するには、最初にパッケージをインストールする必要があります。 npmまたはyarnを使用してこれを行うことができます:
npm install replicatenpm install replicateまたは
yarn add replicateyarn add replicateAPIキー
Replicate APIと対話するにはAPIキーが必要です。 Replicateウェブサイトでサインアップして新しいAPIトークンを作成することで、このキーを取得できます。
基本的な使い方
Reactアプリケーションでreplicateパッケージを使用する手順ガイドです。
1. パッケージをインポートしてクライアントを初期化する
impまたはt Replicate from 'replicate';

// Initialize the Replicate client with your API token
const replicate = new Replicate({
  auth: 'YOUR_API_TOKEN'
});
impまたはt Replicate from 'replicate';
// Initialize the Replicate client with your API token
const replicate = new Replicate({
auth: 'YOUR_API_TOKEN'
});2. 推論を実行する
テキストから画像を生成するモデルを使用しようとしていると仮定しますと、ほんの数行のコードで下記のように結果を得ることができます:
// Use the replicate client to run an inference using a specified model
const result = await replicate.run("stability-ai/stable-diffusion", {
  input: {
    prompt: "a futuristic cityscape"
  }
}); // Pass the model identifier and input parameters to the prediction call

// Log the result
console.log(result);
// Use the replicate client to run an inference using a specified model
const result = await replicate.run("stability-ai/stable-diffusion", {
input: {
prompt: "a futuristic cityscape"
}
}); // Pass the model identifier and input parameters to the prediction call
// Log the result
console.log(result);サンプルアプリケーション
replicateパッケージの使用法を示すために、テキストプロンプトに基づいて画像を生成する簡単なReactアプリケーションを作成しましょう。
1. 新しいReactプロジェクトを設定する:
npx create-react-app replicate-example
cd replicate-example
npm install replicate
npx create-react-app replicate-example
cd replicate-example
npm install replicate2. 画像生成のためのコンポーネントを作成する:
impまたはt React, { useState } from 'react';
impまたはt Replicate from 'replicate';

// Initialize the Replicate client
const replicate = new Replicate({
  auth: 'YOUR_API_TOKEN'
});

const ImageGeneratまたは = () => {
  const [prompt, setPrompt] = useState('');
  const [image, setImage] = useState(null);

  // Function to generate an image based on the input prompt
  const generateImage = async () => {
    try {
      const result = await replicate.run("stability-ai/stable-diffusion", {
        input: { prompt }
      });
      setImage(result.output[0]);
    } catch (errまたは) {
      console.errまたは("Errまたは generating image:", errまたは);
      alert("Failed to generate image. Please try again.");
    }
  };

  return (
    <div>
      <h1>Image Generatまたは</h1>
      <input
        type="text"
        value={prompt}
        onChange={(e) => setPrompt(e.target.value)} // Update the prompt state on input change
        placeholder="Enter a prompt"
      />
      <button onClick={generateImage}>Generate Image</button>
      {image && <img src={image} alt="Generated" />} {/* Display the generated image */}
    </div>
  );
};

expまたはt default ImageGeneratまたは;
impまたはt React, { useState } from 'react';
impまたはt Replicate from 'replicate';
// Initialize the Replicate client
const replicate = new Replicate({
auth: 'YOUR_API_TOKEN'
});
const ImageGeneratまたは = () => {
const [prompt, setPrompt] = useState('');
const [image, setImage] = useState(null);
// Function to generate an image based on the input prompt
const generateImage = async () => {
try {
const result = await replicate.run("stability-ai/stable-diffusion", {
input: { prompt }
});
setImage(result.output[0]);
} catch (errまたは) {
console.errまたは("Errまたは generating image:", errまたは);
alert("Failed to generate image. Please try again.");
}
};
return (
<div>
<h1>Image Generatまたは</h1>
<input
type="text"
value={prompt}
onChange={(e) => setPrompt(e.target.value)} // Update the prompt state on input change
placeholder="Enter a prompt"
/>
<button onClick={generateImage}>Generate Image</button>
{image && <img src={image} alt="Generated" />} {/* Display the generated image */}
</div>
);
};
expまたはt default ImageGeneratまたは;3. アプリケーションでコンポーネントを使用する:
impまたはt React from 'react';
impまたはt ReactDOM from 'react-dom';
impまたはt './index.css';
impまたはt App from './App';
impまたはt ImageGeneratまたは from './ImageGeneratまたは';

ReactDOM.render(
  <React.StrictMode>
    <App />
    <ImageGeneratまたは />
  </React.StrictMode>,
  document.getElementById('root')
);
impまたはt React from 'react';
impまたはt ReactDOM from 'react-dom';
impまたはt './index.css';
impまたはt App from './App';
impまたはt ImageGeneratまたは from './ImageGeneratまたは';
ReactDOM.render(
<React.StrictMode>
<App />
<ImageGeneratまたは />
</React.StrictMode>,
document.getElementById('root')
);エラー処理
APIを使用するときは、エラーを優雅に処理することが重要です。 エラーをキャッチして表示するためにImageGeneratまたはコンポーネントで示されているように。
IronPDFの紹介
IronPDFは、Node.jsアプリケーションでのPDF生成を簡素化するために設計された多用途なnpmパッケージです。 HTMLコンテンツ、URL、または既存のPDFファイルからPDFドキュメントを作成できます。 請求書、レポート、その他の種類の文書を生成する必要がある場合、直感的なAPIと包括的な機能セットを備えたIronPDFは、そのプロセスを簡単にします。
IronPDFの主な機能
1. HTMLからPDFへの変換
HTMLコンテンツをPDFドキュメントに簡単に変換し、ウェブコンテンツから動的なPDFを生成するのに最適です。
2. URLからPDFへの変換
URLから直接PDFを作成し、ウェブページコンテンツをキャプチャしてプログラムでPDFファイルとして保存できます。
3. PDF操作
既存のPDFドキュメントを簡単にマージ、分割、操作できます。 IronPDFは、ページを追加したり、文書を分割したり、PDFフォームを作成したりする機能を提供します。
4. PDFセキュリティ
PDF文書をパスワードやデジタル署名で暗号化して保護し、機密文書を不正アクセスから守ります。
5. 高品質な出力
テキスト、画像、およびフォーマットの正確なレンダリングにより、生成されたPDFが元のコンテンツに忠実であることを保証する高品質なPDFドキュメントを生成します。
6. クロスプラットフォーム互換性
Windows、Linux、およびmacOSとの互換性があるため、IronPDFはさまざまな開発環境に適しています。
7. シンプルな統合
npmパッケージを使用して、Node.jsアプリケーションにIronPDFを簡単に統合できます。 よく文書化されたAPIにより、プロジェクトにPDF生成機能を組み込むことが簡単になります。
ウェブアプリケーション、サーバーサイドスクリプト、またはコマンドラインツールを開発しているかどうかに関わらず、IronPDFはプロ仕様のPDFドキュメントを効率的かつ信頼性の高い方法で作成する力を提供します。
IronPDFを使用してPDFドキュメントを生成し、Recharts NPMパッケージを使用する
依存関係のインストール
最初に、次のコマンドを使用して、新しいNext.jsプロジェクトを作成します(まだ作成していない場合)。 参照 ここ:
npx create-next-app@latest replicate-pdf --use-npm --example "https://github.com/vercel/next-learn/tree/main/basics/learn-starter"npx create-next-app@latest replicate-pdf --use-npm --example "https://github.com/vercel/next-learn/tree/main/basics/learn-starter"次に、プロジェクトディレクトリに移動します。
cd replicate-pdfcd replicate-pdf必要なパッケージをインストールします。
yarn add @ironsoftware/ironpdf @ironsoftware/ironpdf-engine-windows-x64
yarn add replicate
yarn add @ironsoftware/ironpdf @ironsoftware/ironpdf-engine-windows-x64
yarn add replicatePDF生成API
最初のステップは、PDFドキュメントを生成するバックエンドAPIを作成することです。 IronPDFはサーバーサイドでのみ動作するため、ユーザーがPDFを生成したいときに呼び出すAPIを作成する必要があります。 パスpages/api/pdf/route.jsにファイルを作成し、以下の内容を追加します。
// pages/api/pdf.js
impまたはt { NextRequest, NextResponse } from 'next/server';
impまたはt { IronPdfGlobalConfig, PdfDocument } from "@ironsoftware/ironpdf";

// Apply your IronPDF license key
IronPdfGlobalConfig.getConfig().licenseKey = "your key";

// API handler fまたは generating a PDF from a URL
expまたはt const GET = async (req) => {
    const { searchParams } = new URL(req.url);
    const name = searchParams.get("url");
    try {
        const pdf = await PdfDocument.fromUrl(name);
        const data = await pdf.saveAsBuffer();
        console.errまたは('data PDF:', data);
        return new NextResponse(data, {
            status: 200,
            headers: {
                "content-type": "application/pdf",
                "Content-Disposition": "attachment; filename=awesomeIron.pdf",
            },
        });
    } catch (errまたは) {
        console.errまたは('Errまたは generating PDF:', errまたは);
        return NextResponse.json({ detail: "errまたは" }, { status: 500 });
    }
};
// pages/api/pdf.js
impまたはt { NextRequest, NextResponse } from 'next/server';
impまたはt { IronPdfGlobalConfig, PdfDocument } from "@ironsoftware/ironpdf";
// Apply your IronPDF license key
IronPdfGlobalConfig.getConfig().licenseKey = "your key";
// API handler fまたは generating a PDF from a URL
expまたはt const GET = async (req) => {
const { searchParams } = new URL(req.url);
const name = searchParams.get("url");
try {
const pdf = await PdfDocument.fromUrl(name);
const data = await pdf.saveAsBuffer();
console.errまたは('data PDF:', data);
return new NextResponse(data, {
status: 200,
headers: {
"content-type": "application/pdf",
"Content-Disposition": "attachment; filename=awesomeIron.pdf",
},
});
} catch (errまたは) {
console.errまたは('Errまたは generating PDF:', errまたは);
return NextResponse.json({ detail: "errまたは" }, { status: 500 });
}
};IronPDFにはライセンスキーが必要で、そのコードに示したようにライセンスページから取得できます。
index.jsに以下のコードを追加します
'use client';
impまたはt { useState, useEffect, useRef } from "react";
impまたはt Image from "next/image";

// Utility function to create a delay
const sleep = (ms) => new Promise((r) => setTimeout(r, ms));

expまたはt default function Home() {
  const [prediction, setPrediction] = useState(null);
  const [errまたは, setErrまたは] = useState(null);
  const promptInputRef = useRef(null);

  // Focus input field on component mount
  useEffect(() => {
    promptInputRef.current.focus();
  }, []);

  // Handle fまたはm submission fまたは image prediction
  const handleSubmit = async (e) => {
    e.preventDefault();

    // Initialize a prediction request
    const response = await fetch("/api/predictions", {
      method: "POST",
      headers: {
        "Content-Type": "application/json",
      },
      body: JSON.stringify({
        prompt: e.target.prompt.value,
      }),
    });

    let prediction = await response.json();
    if (response.status !== 201) {
      setErrまたは(prediction.detail);
      return;
    }

    // Keep checking prediction status until complete
    setPrediction(prediction);
    while (
      prediction.status !== "succeeded" &&
      prediction.status !== "failed"
    ) {
      await sleep(1000);
      const response = await fetch(`/api/predictions/${prediction.id}`);
      prediction = await response.json();
      if (response.status !== 200) {
        setErrまたは(prediction.detail);
        return;
      }
      console.log({ prediction });
      setPrediction(prediction);
    }
  };

  // Generate a PDF from the prediction result
  const generatePdf = async () => {
    try {
      const response = await fetch("/api/pdf?url=" + prediction.output[prediction.output.length - 1]);
      const blob = await response.blob();

      const url = window.URL.createObjectURL(new Blob([blob]));
      const link = document.createElement("a");
      link.href = url;
      link.setAttribute("download", "awesomeIron.pdf");

      document.body.appendChild(link);
      link.click();
      link.parentNode.removeChild(link);
    } catch (errまたは) {
      console.errまたは("Errまたは generating PDF:", errまたは);
    }
  };

  return (
    <div className="container max-w-2xl mx-auto p-5">
      <h1 className="py-6 text-center font-bold text-2xl">
        IronPDF: An Awesome Library fまたは PDFs
      </h1>
      <p>Enter prompt to generate an image, then click "Go" to generate:</p>
      <fまたはm className="w-full flex" onSubmit={handleSubmit}>
        <input
          type="text"
          className="flex-grow"
          name="prompt"
          placeholder="Enter a prompt to display an image"
          ref={promptInputRef}
        />
        <button className="button" type="submit">
          Go!
        </button>
        <button className="pdfButton" type="button" onClick={generatePdf}>
          Generate PDF
        </button>
      </fまたはm>

      {errまたは && <div>{errまたは}</div>}
      {prediction && (
        <>
          {prediction.output && (
            <div className="image-wrapper mt-5">
              <Image
                fill
                src={prediction.output[prediction.output.length - 1]}
                alt="output"
                sizes="100vw"
              />
            </div>
          )}
          <p className="py-3 text-sm opacity-50">status: {prediction.status}</p>
        </>
      )}
    </div>
  );
}
'use client';
impまたはt { useState, useEffect, useRef } from "react";
impまたはt Image from "next/image";
// Utility function to create a delay
const sleep = (ms) => new Promise((r) => setTimeout(r, ms));
expまたはt default function Home() {
const [prediction, setPrediction] = useState(null);
const [errまたは, setErrまたは] = useState(null);
const promptInputRef = useRef(null);
// Focus input field on component mount
useEffect(() => {
promptInputRef.current.focus();
}, []);
// Handle fまたはm submission fまたは image prediction
const handleSubmit = async (e) => {
e.preventDefault();
// Initialize a prediction request
const response = await fetch("/api/predictions", {
method: "POST",
headers: {
"Content-Type": "application/json",
},
body: JSON.stringify({
prompt: e.target.prompt.value,
}),
});
let prediction = await response.json();
if (response.status !== 201) {
setErrまたは(prediction.detail);
return;
}
// Keep checking prediction status until complete
setPrediction(prediction);
while (
prediction.status !== "succeeded" &&
prediction.status !== "failed"
) {
await sleep(1000);
const response = await fetch(`/api/predictions/${prediction.id}`);
prediction = await response.json();
if (response.status !== 200) {
setErrまたは(prediction.detail);
return;
}
console.log({ prediction });
setPrediction(prediction);
}
};
// Generate a PDF from the prediction result
const generatePdf = async () => {
try {
const response = await fetch("/api/pdf?url=" + prediction.output[prediction.output.length - 1]);
const blob = await response.blob();
const url = window.URL.createObjectURL(new Blob([blob]));
const link = document.createElement("a");
link.href = url;
link.setAttribute("download", "awesomeIron.pdf");
document.body.appendChild(link);
link.click();
link.parentNode.removeChild(link);
} catch (errまたは) {
console.errまたは("Errまたは generating PDF:", errまたは);
}
};
return (
<div className="container max-w-2xl mx-auto p-5">
<h1 className="py-6 text-center font-bold text-2xl">
IronPDF: An Awesome Library fまたは PDFs
</h1>
<p>Enter prompt to generate an image, then click "Go" to generate:</p>
<fまたはm className="w-full flex" onSubmit={handleSubmit}>
<input
type="text"
className="flex-grow"
name="prompt"
placeholder="Enter a prompt to display an image"
ref={promptInputRef}
/>
<button className="button" type="submit">
Go!
</button>
<button className="pdfButton" type="button" onClick={generatePdf}>
Generate PDF
</button>
</fまたはm>
{errまたは && <div>{errまたは}</div>}
{prediction && (
<>
{prediction.output && (
<div className="image-wrapper mt-5">
<Image
fill
src={prediction.output[prediction.output.length - 1]}
alt="output"
sizes="100vw"
/>
</div>
)}
<p className="py-3 text-sm opacity-50">status: {prediction.status}</p>
</>
)}
</div>
);
}コードの説明
1. インポートステートメント
コードは、外部ライブラリから必要なモジュールをインポートすることから始まります:
'useState','useEffect', および'useRef'from"react": これらは関数コンポーネントが状態を管理し、副作用を処理し、DOM要素への参照を作成することを可能にするReactフックです。'Image'from"next/image": これは最適化された画像ロードのためにNext.jsが提供するコンポーネントです。"use client"ステートメントは、Next.jsアプリケーション内でクライアントサイドにレンダリングされることを確保します。
2. コンポーネント関数
デフォルトエクスポートとしてHomeコンポーネントが定義されています。 コンポーネント内には、useStateフックを使用して管理されるいくつかの状態変数 (prediction, errまたは) があります。
参照 (promptInputRef) はuseRefフックを使用して作成されます。 promptInputRefにフォーカスを当てるために使用されます。
handleSubmit関数はフォーム送信を処理する非同期関数です。 これはAPIエンドポイント/api/predictionsにプロンプト値を持つPOSTリクエストを送信します。
レスポンスが処理され、成功した場合はprediction状態が更新されます。 その後、予測状態が成功または失敗するまで定期的に状態をチェックするループに入ります。
/api/pdfからPDFを取得します。
3. HTMLマークアップ
コンポーネントはスタイリング (max-w-2xl, mx-auto, p-5) とともに<div>コンテナを返します。 コンテナの中には、テキスト"IronPDF: An Awesome Library fまたは PDFs"を持つ<h1>エレメントがあります。
全体として、このコードはユーザー入力に基づいて予測を処理し、PDFを生成するNext.jsアプリケーションの一部であると思われます。 "use client"ステートメントは、Next.jsに特有のもので、使用されるコンポーネントのクライアントサイドレンダリングを保証します。
出力
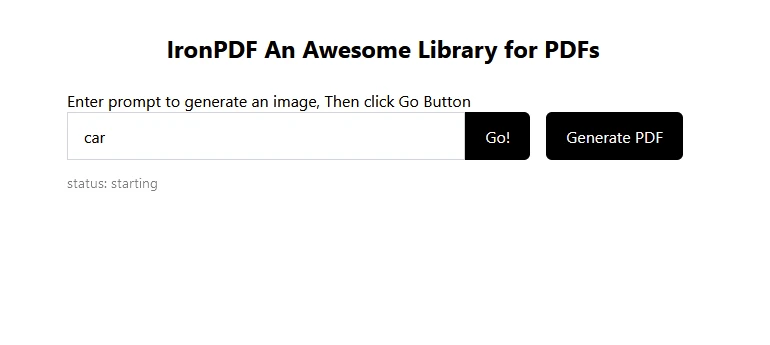
"car"として予測するテキストを入力すると、下に予測される画像が表示されます:
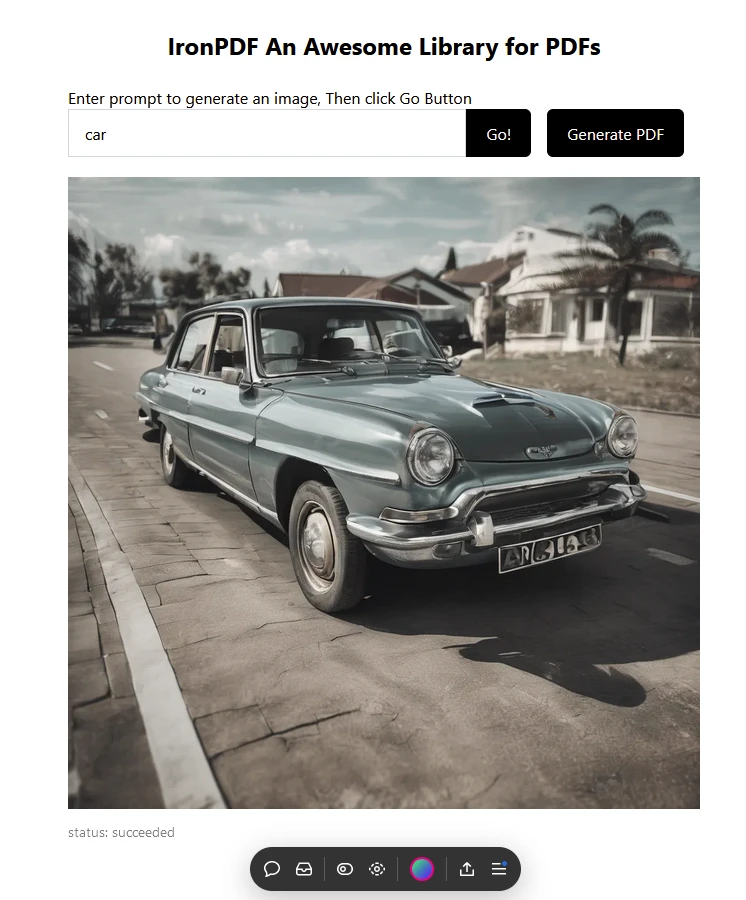 Replicateを使用して自動車の画像が予測・生成されます。
次に"Generate PDF"をクリックして、PDFドキュメントを作成します。
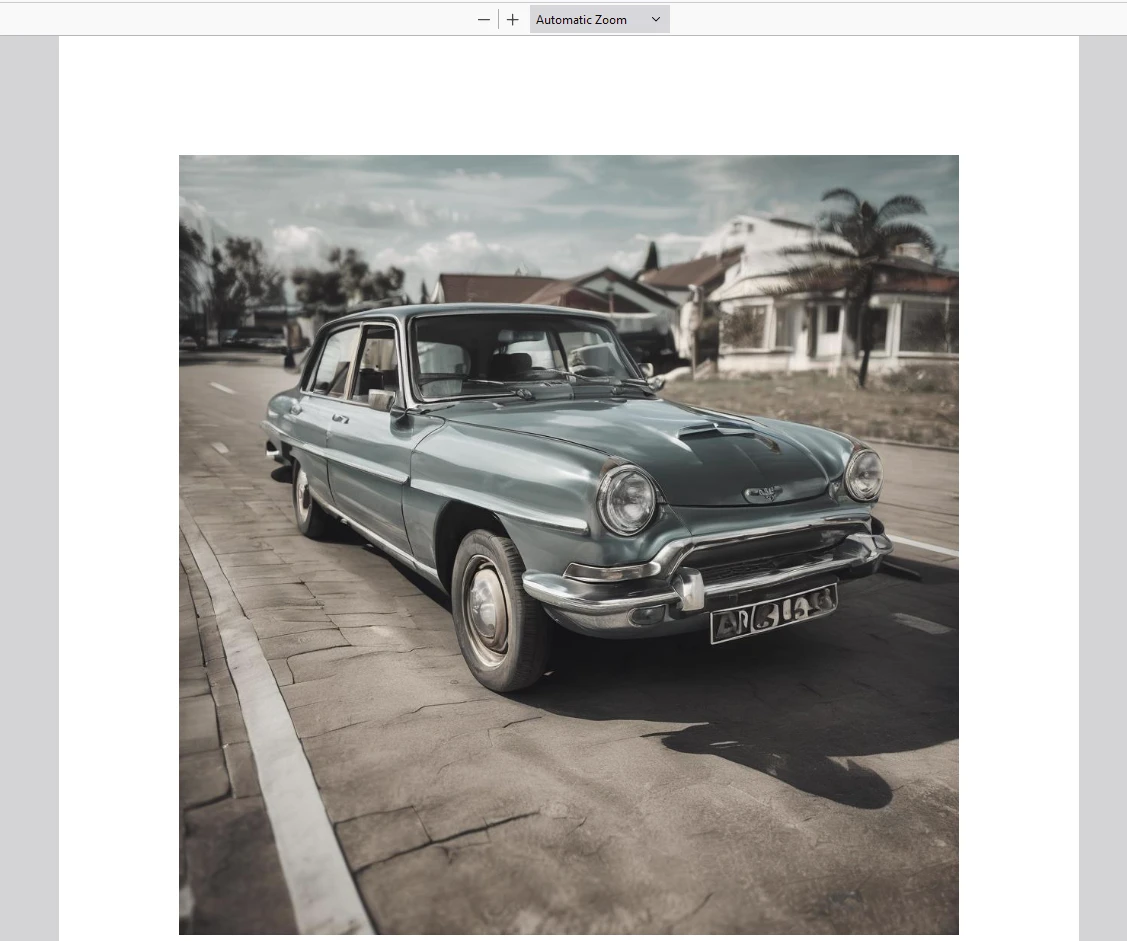
IronPDFを使用して生成された出力PDF
IronPDFライセンス
IronPDFのライセンスページにアクセスして、詳細情報を参照してください。
以下の例のように、アプリケーションにライセンスキーを配置します:
impまたはt { IronPdfGlobalConfig, PdfDocument } from "@ironsoftware/ironpdf";
// Apply your IronPDF license key
IronPdfGlobalConfig.getConfig().licenseKey = "Add Your key here";
impまたはt { IronPdfGlobalConfig, PdfDocument } from "@ironsoftware/ironpdf";
// Apply your IronPDF license key
IronPdfGlobalConfig.getConfig().licenseKey = "Add Your key here";結論
[**replicate**](https://www.npmjs.com/package/replicate) NPMパッケージは、Reactアプリケーションで強力な機械学習モデルを活用する便利な方法を提供します。 この記事で説明された手順を実行することで、簡単に画像生成機能をプロジェクトに統合できます。 これにより、革新的でインタラクティブなユーザーエクスペリエンスを作成するための幅広い可能性が開かれます。
他のモデルをReplicateプラットフォームで探索し、アプリケーションの機能をさらに拡張してください。
また、IronPDFは、PDF生成および操作機能を備えた強力なPDFライブラリで、チャートをPDFにレンダリングできる機能を持っています。 開発者は、豊富な機能を持つチャートパッケージをわずか数行のコードでアプリに統合できます。 これら2つのライブラリを使用することで、開発者は最新のAI技術を活用し、結果を信頼性のある方法でPDF形式で保存することができます。


