React で HTML を PDF に変換する方法 (開発者向けチュートリアル)
ReactでHTMLをPDFに変換する
ReactでHTMLをPDFに変換することは、多くのウェブアプリケーションにとって重要な機能となっています。 請求書システム、レポート生成器の構築、または情報を普遍的なフォーマットで共有する必要がある場合でも、PDF生成は重要です。 この記事では、人気のあるライブラリを使用してHTMLをPDFに変換して、ReactアプリケーションでPDFファイルを作成およびスタイリングする方法を探ります。
- Reactプロジェクトの作成と設定
- npmを使用してReactでHTMLをPDFに変換するライブラリをダウンロードする
- React-pdf/rendererから必要なモジュールをインポートする。
- インポートしたモジュールでHTMLページを構成する
- HTMLをPDFに変換するには、React-pdfの**PDFDownloadLink**モジュールを利用してください。
PDF生成のための人気ライブラリ
HTMLをPDFに変換するプロセスに入る前に、ReactアプリケーションでPDF生成に使用できるいくつかの人気ライブラリを見てみましょう:
- React-pdf: React アプリケーションで PDF ドキュメントを作成するための強力なライブラリ。 さまざまなスタイリングオプションをサポートし、複雑で複数ページのPDFを簡単に作成できます。
- jsPDF: PDF ファイルを即座に生成するために広く使用されているJavaScriptライブラリ。 テキストスタイリング、画像埋め込み、その他多くの機能を提供します。
- html2canvas:このライブラリを使用すると、HTML 要素のスクリーンショットをキャプチャしてキャンバス オブジェクトに変換できます。その後、jsPDF などの他のライブラリを使用して PDF に変換できます。
ReactでHTMLをPDFに変換するための前提条件
Reactとそのエコシステムへの精通
HTMLをPDFに変換する前に、Reactの堅実な理解が重要です。 これには、JSX、状態管理、コンポーネントライフサイクル、フックの知識が含まれます。
HTML、CSS、およびJavaScriptの理解
React-pdfライブラリを扱うにはHTML、CSS、およびJavaScriptの基礎が重要です。 これには、HTML要素と属性、CSSスタイリングとセレクタ、変数、関数、ループなど for JavaScriptの基礎知識が含まれます。
Reactアプリケーションの開始
ReactでHTMLをPDFに変換する前に、一般的なcreate-react-app CLIツールを使用して新しいReactアプリケーションを作成する方法を簡単に見ていきましょう。 これは、私たちのPDF生成の例の基盤として役立ちます。
ステップ1 Node.jsのインストール
お使いのマシンにNode.jsがインストールされていることを確認してください。Node.jsの最新バージョンは公式Node.jsウェブサイトからダウンロードできます。
ステップ2 create-react-appのインストール
create-react-appは、Reactアプリケーションを生成するための広く使用されているCLIツールです。 次のコマンドを使用してグローバルにインストールします:
npm install -g create-react-appnpm install -g create-react-appステップ3 新しいReactアプリケーションを作成する
create-react-appがインストールされたので、次のコマンドを使用して新しいReactアプリケーションを作成できます:
create-react-app my-pdf-appcreate-react-app my-pdf-appこのコマンドは、my-pdf-appというフォルダに新しいReactアプリケーションを生成します。 新しく作成されたディレクトリに移動します:
cd my-pdf-appcd my-pdf-appステップ4 開発サーバーを開始する
開発サーバーを開始し、新しいReactアプリケーションを確認するには、次のコマンドを実行します:
npm startnpm startステップ5 PDF生成の実装
Reactアプリケーションがセットアップされたので、この記事の前のセクションに従って、React-pdfなどの人気ライブラリを使用してHTMLをPDFに変換する実装を行うことができます。
React-pdfライブラリの紹介
React-pdfはReactアプリケーション専用に設計された人気のライブラリで、Reactエコシステムとのシームレスな統合を提供します。 その主な機能には、インラインおよび外部CSSのサポート、マルチページPDFの生成、高度なスタイリング、サーバーサイドレンダリング(SSR)との互換性が含まれます。
React-pdfを使ったPDFファイルの作成
このセクションでは、ReactアプリケーションでPDFファイルを作成するためのReact-pdfの使用に焦点を当てます。 まず、React-pdfパッケージをインストールする必要があります:
npm install --save @react-pdf/renderernpm install --save @react-pdf/rendererインストール後、新しいReactコンポーネントを作成して、PDFドキュメントの構造を定義できます:
import React from 'react';
import {
  Document,
  Page,
  Text,
  View,
  StyleSheet
} from '@react-pdf/renderer';

// Sample invoice data
const invoiceData = {
  sender: {
    name: "John Doe",
    address: "123 Main Street",
    city: "New York",
    state: "NY",
    zip: "10001",
  },
  recipient: {
    name: "Jane Smith",
    address: "456 Elm Street",
    city: "San Francisco",
    state: "CA",
    zip: "94107",
  },
  items: [
    { description: "Item 1", quantity: 2, unitPrice: 10 },
    { description: "Item 2", quantity: 3, unitPrice: 15 },
    { description: "Item 3", quantity: 1, unitPrice: 20 },
  ],
  invoiceNumber: "INV-123456",
  date: "April 26, 2023",
};

// Define styles for PDF document
const styles = StyleSheet.create({
  page: {
    backgroundColor: "#FFF",
    padding: 30,
  },
  header: {
    fontSize: 24,
    textAlign: "center",
    marginBottom: 30,
  },
  sender: {
    marginBottom: 20,
  },
  recipient: {
    marginBottom: 30,
  },
  addressLine: {
    fontSize: 12,
    marginBottom: 2,
  },
  itemsTable: {
    display: "table",
    width: "100%",
    borderStyle: "solid",
    borderWidth: 1,
    borderRightWidth: 0,
    borderBottomWidth: 0,
  },
  tableRow: {
    margin: "auto",
    flexDirection: "row",
  },
  tableColHeader: {
    width: "25%",
    borderStyle: "solid",
    borderWidth: 1,
    borderLeftWidth: 0,
    borderTopWidth: 0,
    backgroundColor: "#F0F0F0",
  },
  tableCol: {
    width: "25%",
    borderStyle: "solid",
    borderWidth: 1,
    borderLeftWidth: 0,
    borderTopWidth: 0,
  },
  tableCell: {
    fontSize: 12,
    textAlign: "center",
    padding: 5,
  },
  total: {
    marginTop: 20,
    textAlign: "right",
  },
  totalLabel: {
    fontSize: 14,
    fontWeight: "bold",
  },
  totalValue: {
    fontSize: 14,
  },
});

const InvoiceDocument = () => {
  // Calculate total amount
  const totalAmount = invoiceData.items.reduce(
    (total, item) => total + item.quantity * item.unitPrice,
    0
  );

  return (
    <Document>
      <Page style={styles.page}>
        <Text style={styles.header}>Invoice</Text>
        <View style={styles.sender}>
          <Text>{invoiceData.sender.name}</Text>
          <Text>{invoiceData.sender.address}</Text>
          <Text>
            {invoiceData.sender.city}, {invoiceData.sender.state} {invoiceData.sender.zip}
          </Text>
        </View>
        <View style={styles.recipient}>
          <Text>{invoiceData.recipient.name}</Text>
          <Text>{invoiceData.recipient.address}</Text>
          <Text>
            {invoiceData.recipient.city}, {invoiceData.recipient.state} {invoiceData.recipient.zip}
          </Text>
        </View>
        <View style={styles.itemsTable}>
          <View style={styles.tableRow}>
            <Text style={[styles.tableColHeader, styles.tableCell]}>Description</Text>
            <Text style={[styles.tableColHeader, styles.tableCell]}>Quantity</Text>
            <Text style={[styles.tableColHeader, styles.tableCell]}>Unit Price</Text>
            <Text style={[styles.tableColHeader, styles.tableCell]}>Amount</Text>
          </View>
          {invoiceData.items.map((item, index) => (
            <View key={index} style={styles.tableRow}>
              <Text style={[styles.tableCol, styles.tableCell]}>{item.description}</Text>
              <Text style={[styles.tableCol, styles.tableCell]}>{item.quantity}</Text>
              <Text style={[styles.tableCol, styles.tableCell]}>{item.unitPrice.toFixed(2)}</Text>
              <Text style={[styles.tableCol, styles.tableCell]}>
                {(item.quantity * item.unitPrice).toFixed(2)}
              </Text>
            </View>
          ))}
        </View>
        <View style={styles.total}>
          <Text style={styles.totalLabel}>Total: ${totalAmount.toFixed(2)}</Text>
        </View>
      </Page>
    </Document>
  );
};

export default InvoiceDocument;
import React from 'react';
import {
Document,
Page,
Text,
View,
StyleSheet
} from '@react-pdf/renderer';
// Sample invoice data
const invoiceData = {
sender: {
name: "John Doe",
address: "123 Main Street",
city: "New York",
state: "NY",
zip: "10001",
},
recipient: {
name: "Jane Smith",
address: "456 Elm Street",
city: "San Francisco",
state: "CA",
zip: "94107",
},
items: [
{ description: "Item 1", quantity: 2, unitPrice: 10 },
{ description: "Item 2", quantity: 3, unitPrice: 15 },
{ description: "Item 3", quantity: 1, unitPrice: 20 },
],
invoiceNumber: "INV-123456",
date: "April 26, 2023",
};
// Define styles for PDF document
const styles = StyleSheet.create({
page: {
backgroundColor: "#FFF",
padding: 30,
},
header: {
fontSize: 24,
textAlign: "center",
marginBottom: 30,
},
sender: {
marginBottom: 20,
},
recipient: {
marginBottom: 30,
},
addressLine: {
fontSize: 12,
marginBottom: 2,
},
itemsTable: {
display: "table",
width: "100%",
borderStyle: "solid",
borderWidth: 1,
borderRightWidth: 0,
borderBottomWidth: 0,
},
tableRow: {
margin: "auto",
flexDirection: "row",
},
tableColHeader: {
width: "25%",
borderStyle: "solid",
borderWidth: 1,
borderLeftWidth: 0,
borderTopWidth: 0,
backgroundColor: "#F0F0F0",
},
tableCol: {
width: "25%",
borderStyle: "solid",
borderWidth: 1,
borderLeftWidth: 0,
borderTopWidth: 0,
},
tableCell: {
fontSize: 12,
textAlign: "center",
padding: 5,
},
total: {
marginTop: 20,
textAlign: "right",
},
totalLabel: {
fontSize: 14,
fontWeight: "bold",
},
totalValue: {
fontSize: 14,
},
});
const InvoiceDocument = () => {
// Calculate total amount
const totalAmount = invoiceData.items.reduce(
(total, item) => total + item.quantity * item.unitPrice,
0
);
return (
<Document>
<Page style={styles.page}>
<Text style={styles.header}>Invoice</Text>
<View style={styles.sender}>
<Text>{invoiceData.sender.name}</Text>
<Text>{invoiceData.sender.address}</Text>
<Text>
{invoiceData.sender.city}, {invoiceData.sender.state} {invoiceData.sender.zip}
</Text>
</View>
<View style={styles.recipient}>
<Text>{invoiceData.recipient.name}</Text>
<Text>{invoiceData.recipient.address}</Text>
<Text>
{invoiceData.recipient.city}, {invoiceData.recipient.state} {invoiceData.recipient.zip}
</Text>
</View>
<View style={styles.itemsTable}>
<View style={styles.tableRow}>
<Text style={[styles.tableColHeader, styles.tableCell]}>Description</Text>
<Text style={[styles.tableColHeader, styles.tableCell]}>Quantity</Text>
<Text style={[styles.tableColHeader, styles.tableCell]}>Unit Price</Text>
<Text style={[styles.tableColHeader, styles.tableCell]}>Amount</Text>
</View>
{invoiceData.items.map((item, index) => (
<View key={index} style={styles.tableRow}>
<Text style={[styles.tableCol, styles.tableCell]}>{item.description}</Text>
<Text style={[styles.tableCol, styles.tableCell]}>{item.quantity}</Text>
<Text style={[styles.tableCol, styles.tableCell]}>{item.unitPrice.toFixed(2)}</Text>
<Text style={[styles.tableCol, styles.tableCell]}>
{(item.quantity * item.unitPrice).toFixed(2)}
</Text>
</View>
))}
</View>
<View style={styles.total}>
<Text style={styles.totalLabel}>Total: ${totalAmount.toFixed(2)}</Text>
</View>
</Page>
</Document>
);
};
export default InvoiceDocument;今、PDFDownloadLinkコンポーネントを使用して、生成されたPDFファイルをダウンロードできます。
import React from 'react';
import { PDFDownloadLink } from '@react-pdf/renderer';
import InvoiceDocument from './InvoiceDocument';
import './App.css';

const App = () => (
  <div className="app-container">
    <PDFDownloadLink
      document={<InvoiceDocument />}
      fileName="invoice.pdf"
      className="download-button"
    >
      {({ loading }) =>
        loading ? 'Loading document...' : 'Download Invoice'
      }
    </PDFDownloadLink>
  </div>
);

export default App;
import React from 'react';
import { PDFDownloadLink } from '@react-pdf/renderer';
import InvoiceDocument from './InvoiceDocument';
import './App.css';
const App = () => (
<div className="app-container">
<PDFDownloadLink
document={<InvoiceDocument />}
fileName="invoice.pdf"
className="download-button"
>
{({ loading }) =>
loading ? 'Loading document...' : 'Download Invoice'
}
</PDFDownloadLink>
</div>
);
export default App;カスタムUIのためにApp.cssにいくつかのCSSスタイルを追加します:
.app-container {
  display: flex;
  justify-content: center;
  align-items: center;
  min-height: 100vh;
  background-color: #d1e8ff;
}

.download-button {
  display: inline-block;
  background-color: #5a8fd5;
  color: #fff;
  font-size: 18px;
  font-weight: bold;
  padding: 12px 24px;
  border-radius: 4px;
  text-decoration: none;
  cursor: pointer;
  transition: background-color 0.3s ease;
}

.download-button:hover {
  background-color: #3a68b7;
}localhost:3000をブラウザで開きます。 ダウンロードボタンをクリックすると、PDFファイルがダウンロードされます。
PDFファイルのスタイリング
React-pdfライブラリは、CSSに似た広範なスタイリングオプションをサポートしています。 PDFファイルの外観をカスタマイズするために使用できる一般的なスタイリングプロパティをいくつか紹介します:
color: テキストの色を設定します。fontSize: テキストのフォントサイズを設定します。fontFamily: テキストのフォントファミリーを設定します。textAlign: テキストの配置(例:"左"、"右"、"中央"または"両端揃え")を設定します。margin: 要素の周りのマージンを設定します。padding: 要素内部のパディングを設定します。border: 要素の周りの境界線を設定します。backgroundColor: 要素の背景色を設定します。
React開発者のための代替PDFライブラリ
IronPDF for Node.jsは、ReactでHTMLをPDFに変換するための優れた代替手段です。 Iron Softwareによって開発されたこのライブラリは、開発者がNode.jsアプリケーションから直接PDFドキュメントを生成および操作することができる強力なライブラリです。 その際立った特徴の一つは、PDF生成中にHTMLコンテンツ内でJavaScriptの実行を処理し、動的でインタラクティブなPDFの作成を可能にすることです。
Windows、MacOS、Linux、Docker、AzureやAWSなどのクラウドプラットフォームを含むさまざまなプラットフォームをサポートしているため、IronPDFはクロスプラットフォームの互換性を保証します。 直観的なAPIを備えているため、開発者は迅速にPDF生成と操作をNode.jsプロジェクトに統合することができます。
Reactはユーザーインターフェイスを構築するため for JavaScriptライブラリであり、IronPDFはNode.js用に構築されているため、Node.js APIを活用してIronPDFをReactアプリケーションに統合できます。
IronPDFをReactで使用するための概要はこちら:
- IronPDFのインストール:IronPDFをnpmまたはyarnを使用してReactプロジェクトにインストールできます。
npm install @ironsoftware/ironpdfnpm install @ironsoftware/ironpdf- Reactコンポーネントへの統合:IronPDFを利用してPDFを生成および操作するReactコンポーネントを作成できます。 たとえば、HTMLコンテンツを入力に取り、それをIronPDFのAPIを使用してPDFに変換するコンポーネントを持つことができます。
import React from 'react';
import { PdfDocument } from '@ironsoftware/ironpdf';

const HTMLToPDFComponent = () => {
    const convertHTMLToPDF = async (htmlContent) => {
        try {
            const pdf = await PdfDocument.fromHtml(htmlContent);
            await pdf.saveAs('generated_pdf.pdf');
            alert('PDF generated successfully!');
        } catch (error) {
            console.error('Error generating PDF:', error);
        }
    };

    return (
        <div>
            {/* Input HTML content */}
            <textarea onChange={(e) => convertHTMLToPDF(e.target.value)} />
        </div>
    );
};

export default HTMLToPDFComponent;
import React from 'react';
import { PdfDocument } from '@ironsoftware/ironpdf';
const HTMLToPDFComponent = () => {
const convertHTMLToPDF = async (htmlContent) => {
try {
const pdf = await PdfDocument.fromHtml(htmlContent);
await pdf.saveAs('generated_pdf.pdf');
alert('PDF generated successfully!');
} catch (error) {
console.error('Error generating PDF:', error);
}
};
return (
<div>
{/* Input HTML content */}
<textarea onChange={(e) => convertHTMLToPDF(e.target.value)} />
</div>
);
};
export default HTMLToPDFComponent;- PDF生成の管理:Reactコンポーネント内でIronPDFの機能を利用して、PDF生成、操作、保存を管理します。 IronPDFのメソッドを使用して、HTML文字列、URL、または画像をPDFに変換できます。
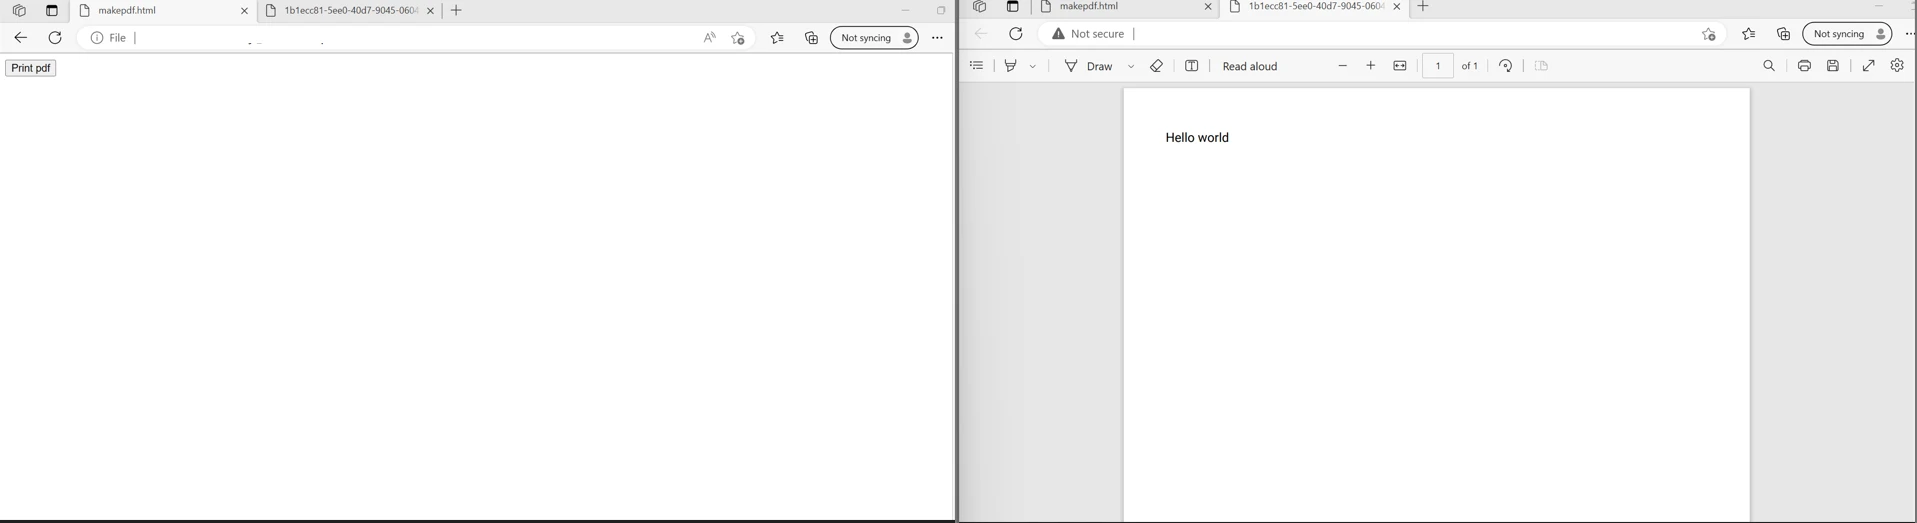
- PDFのレンダリング:IronPDFを使用して生成したPDFを、PDFドキュメントを表示する適切なコンポーネントやライブラリを使用してReactアプリケーション内でレンダリングできます。
import React from 'react';

const PDFViewerComponent = () => {
    return (
        <div>
            {/* Render PDF using appropriate component or library */}
            <iframe src="generated_pdf.pdf" width="100%" height="600px" title="PDF Viewer" />
        </div>
    );
};

export default PDFViewerComponent;
import React from 'react';
const PDFViewerComponent = () => {
return (
<div>
{/* Render PDF using appropriate component or library */}
<iframe src="generated_pdf.pdf" width="100%" height="600px" title="PDF Viewer" />
</div>
);
};
export default PDFViewerComponent;IronPDFを使用すると、開発者はさまざまなソースからプロフェッショナル品質のPDFドキュメントを効率的に生成し、特定の要件に合わせてカスタマイズし、.NETアプリケーションにPDF生成機能をシームレスに統合できます。 IronPDFはまた、CSS、JavaScript、カスタムフォントなどの高度な機能をサポートしているため、生成されたPDFファイルがアプリケーションのデザインと要件に適合することを保証します。
結論
この記事では、React-pdfライブラリを使用してReactでHTMLをPDFに変換するプロセスを紹介しました。 人気のライブラリについてPDF生成、React-pdfを使用してPDFファイルを作成およびスタイリングする方法、より複雑なPDFドキュメントを生成するための追加オプションについて説明しました。
このガイドに従うことで、ReactアプリケーションでPDFファイルを生成する方法についての確かな理解を深め、高品質のPDFを生成し、さまざまなユースケースのニーズを満たすことができるでしょう。
IronPDFは無料試用版を提供しており、ライブラリをテストし購入前にニーズに合っているかどうかを判断できます。 試用期間後、IronPDFの購入ライセンスは$799から開始され、プライオリティサポートと更新が含まれています。 さらに、IronPDFは他の言語、例えばC# .NET、Java、Pythonでも利用できます。 IronPDF for Node.jsを始めることで、IronPDFライブラリをダウンロードし試してみてください。