React で PDF ファイルを作成する方法
React アプリケーションから PDF ドキュメントを作成するチュートリアルへようこそ! このチュートリアルでは、PDF を生成するためのさまざまなライブラリを探索し、人気のある jsPDF ライブラリを使用して、React コンポーネントから直接 PDF ファイルを作成する方法を学びます。 それでは、始めましょう!
PDF(Portable Document Format)は、ドキュメントのレイアウトとフォーマットを保持しながら共有および印刷するために広く使用されているファイル形式です。 React の Web 開発者として、請求書、レポート、販売契約などの PDF ドキュメントを React アプリケーションから直接生成する必要があるシナリオに遭遇するかもしれません。
React PDF ライブラリの選択
React アプリケーションで PDF ドキュメントを作成することは、特に新しいフィールドの場合は大変な作業です。 幸いなことに、このプロセスを大幅に簡素化するサードパーティのライブラリがいくつかあります。 各ライブラリには独自の機能とユーティリティが用意されており、さまざまなユースケースに対応しています。 これらのライブラリについてさらに詳しく見ていきましょう。
jsPDF
jsPDF は、 JavaScriptから PDF ファイルを生成するための、開発者の間で広く人気のあるライブラリです。 主なセールスポイントの 1 つはそのシンプルさです。 その構文と使用法は非常に簡単で、HTML コンテンツをすぐに PDF ファイルに変換できます。
フォントサイズや色の変更から、ページの向きやサイズの調整まで、PDF の書式設定とレイアウトを制御できます。jsPDF は、ブラウザ環境とサーバー環境の両方で動作する堅牢なソリューションであり、幅広いJavaScriptアプリケーションに最適な選択肢です。
pdfmake
pdfmake は、純粋なJavaScriptで記述されたクライアント/サーバー側の PDF 印刷ソリューションとして際立っています。 このライブラリは、包括的な API と柔軟なレイアウトオプションのおかげで、より複雑な PDF を作成するための優れた選択肢です。 pdfmake を使用すると、シンプルなJavaScriptオブジェクトを使用してドキュメントの内容と構造を定義し、それを有効な PDF ドキュメントに変換できます。
React-PDF
React-PDF は、React コンポーネントを使用して PDF ファイルを作成するための強力な機能を提供するユニークなライブラリです。 JavaScript オブジェクトでドキュメント構造を手動で記述する代わりに、再利用可能なコンポーネントとプロップスを使用して、通常の React アプリケーションを構築するように PDF を作成できます。 IronPDF の Web サイトには、React-PDF ライブラリを使用した PDF の作成に関するチュートリアルがあります。
jsPDF を選ぶ理由
3 つのライブラリはいずれも React で PDF ドキュメントを生成するための強力なツールを提供していますが、このチュートリアルでは、そのシンプルさ、柔軟性、コミュニティでの幅広い採用のため、jsPDF を使用します。 初心者にとって参入障壁が低く、その堅牢な機能セットにより多くのユースケースに適した選択となります。 jsPDF で解説する原則は、PDF を生成するための確固たる基盤となり、プロジェクトで必要になった場合に他のライブラリをより簡単に習得できるようになります。
前提条件
このチュートリアルに飛び込む前に、スムーズに進めるために必要なツールと知識が十分に装備されていることを確認することが重要です。 このチュートリアルの前提条件は次のとおりです。
React の基本的な理解
まず第一に、単一ページ アプリケーションを構築するための人気のある JavaScript ライブラリである React の基本的な理解が必要です。 React の JSX(JavaScript XML)、コンポーネント、状態、プロパティといった概念に精通している必要があります。
開発環境
また、React アプリケーションを構築するための開発環境をコンピューターに設定しておく必要があります。 これには、テキストエディタまたは統合開発環境 (IDE) が含まれます。 Visual Studio Code、Atom、Sublime Text などのテキスト エディターはすべて優れたオプションです。
Node.js と npm
プロジェクトとその依存関係を管理するために、Node.js および npm (Node Package Manager) を使用します。 コンピューターに Node.js がインストールされていることを確認してください。 Node.jsは、サーバーでJavaScriptを実行するためのJavaScriptランタイムです。 これには npm がインストールされているので、プロジェクトに必要なライブラリを管理できます。
次の端末コマンドを実行して Node.js と npm がインストールされているかどうかを確認できます。
node -v
npm -v
node -v
npm -vこれらのコマンドは、システムにインストールされている Node.js および npm のバージョンを表示します。 インストールされていない場合やバージョンが古い場合は、公式ダウンロードページから最新の長期サポート (LTS) バージョンの Node.js をダウンロードしてインストールする必要があります。
ステップ 1: プロジェクトのセットアップ
React プロジェクトのセットアップを開始しましょう。 ターミナルを開き、プロジェクトを作成したいディレクトリに移動します。 次のコマンドを実行して、新しい React アプリケーションを作成します。
npx create-react-app pdf-from-reactnpx create-react-app pdf-from-react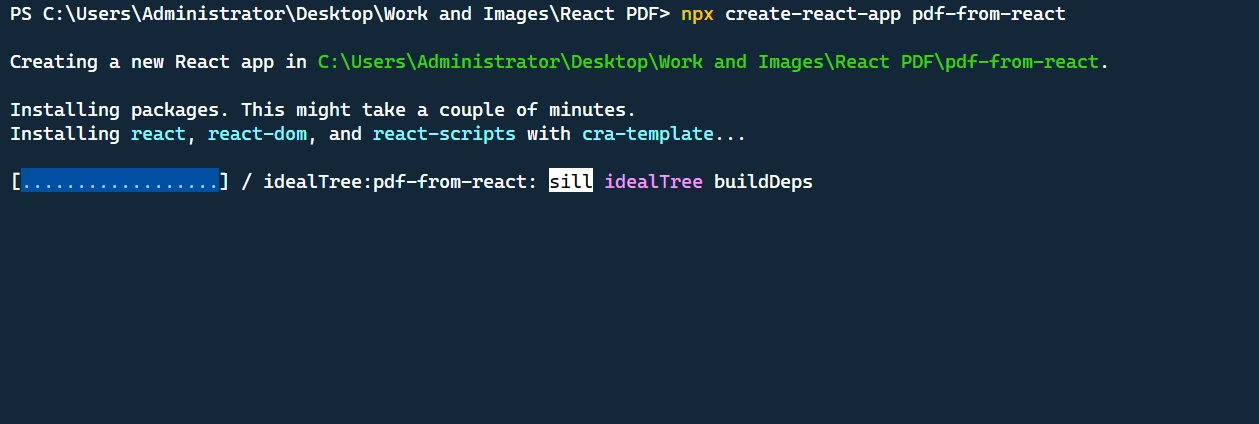
このコマンドを実行すると、基本的な React プロジェクト構造を持つ pdf-from-react という名前の新しいディレクトリが作成されます。
次に、プロジェクトディレクトリに移動します。
cd pdf-from-reactcd pdf-from-reactこれで、コードエディタでプロジェクトを開いて実装を進めることができます。
ステップ 2: 必要な依存関係の追加
まず、必要なパッケージをインストールする必要があります。 以下のターミナルコマンドを使用して、jspdfをインストールします。
npm install jspdf @mui/material @emotion/react @emotion/styled @mui/icons-materialnpm install jspdf @mui/material @emotion/react @emotion/styled @mui/icons-materialステップ 3: PDF 生成機能の構築
ライブラリのインポート
アプリケーションに必要な依存関係をインポートすることから始めます。 これらには、Material-UIライブラリのさまざまなコンポーネント、PDF生成用のライブラリ、およびスタイル設定ユーティリティが含まれます。
import React, { useState } from "react";
import "./App.css";
import {
  Button,
  TextField,
  Box,
  Container,
  Typography,
  Table,
  TableBody,
  TableCell,
  TableContainer,
  TableHead,
  TableRow,
  Paper,
  IconButton,
  Snackbar,
  Alert,
} from "@mui/material";
import Grid from "@mui/material/Grid";
import DeleteIcon from "@mui/icons-material/Delete";
import jsPDF from "jspdf";
import { styled } from "@mui/material/styles";
import { tableCellClasses } from "@mui/material/TableCell";
import React, { useState } from "react";
import "./App.css";
import {
Button,
TextField,
Box,
Container,
Typography,
Table,
TableBody,
TableCell,
TableContainer,
TableHead,
TableRow,
Paper,
IconButton,
Snackbar,
Alert,
} from "@mui/material";
import Grid from "@mui/material/Grid";
import DeleteIcon from "@mui/icons-material/Delete";
import jsPDF from "jspdf";
import { styled } from "@mui/material/styles";
import { tableCellClasses } from "@mui/material/TableCell";スタイル付きコンポーネントの作成
アプリに一貫したクロスブラウザ動作を追加するために、MUI ライブラリの styled ユーティリティを使用して、StyledTableCell と StyledTableRow を作成しました。
const StyledTableCell = styled(TableCell)(({ theme }) => ({
[`&.${tableCellClasses.head}`]: {
backgroundColor: theme.palette.common.black,
color: theme.palette.common.white,
},
[`&.${tableCellClasses.body}`]: {
fontSize: 14,
},
}));
const StyledTableRow = styled(TableRow)(({ theme }) => ({
"&:nth-of-type(odd)": {
backgroundColor: theme.palette.action.hover,
},
"&:last-child td, &:last-child th": {
border: 0,
},
}));const StyledTableCell = styled(TableCell)(({ theme }) => ({
[`&.${tableCellClasses.head}`]: {
backgroundColor: theme.palette.common.black,
color: theme.palette.common.white,
},
[`&.${tableCellClasses.body}`]: {
fontSize: 14,
},
}));
const StyledTableRow = styled(TableRow)(({ theme }) => ({
"&:nth-of-type(odd)": {
backgroundColor: theme.palette.action.hover,
},
"&:last-child td, &:last-child th": {
border: 0,
},
}));App コンポーネントの作成
アプリケーションの主要コンポーネントは、App コンポーネントです。 顧客データを追跡するための状態変数 customerName と customerAddress、請求書の品目リストを追跡するための状態変数 items、および必要に応じてエラーメッセージを表示するための状態変数 error の 4 つがあります。
function App() {
// State variables
const [customerName, setCustomerName] = useState("");
const [customerAddress, setCustomerAddress] = useState("");
const [items, setItems] = useState([{ name: "", quantity: "", price: "" }]);
const [error, setError] = useState(false);function App() {
// State variables
const [customerName, setCustomerName] = useState("");
const [customerAddress, setCustomerAddress] = useState("");
const [items, setItems] = useState([{ name: "", quantity: "", price: "" }]);
const [error, setError] = useState(false);ユーザー入力の処理
このコードブロックでは、ユーザーの操作を処理するための関数を定義しました: アイテムの詳細を変更し、新しいアイテムを追加し、アイテムを削除します。 handleItemChange 関数は、ユーザーがアイテムのプロパティを変更したときに、そのプロパティを更新します。 addItem 関数はリストに新しい項目を追加します。deleteItem 関数はリストから項目を削除します。
const handleItemChange = (index, event) => {
let newItems = [...items];
newItems[index][event.target.name] = event.target.value;
setItems(newItems);
};
const addItem = () => {
setItems([...items, { name: "", quantity: "", price: "" }]);
};
const deleteItem = (index) => {
let newItems = [...items];
newItems.splice(index, 1);
setItems(newItems);
};const handleItemChange = (index, event) => {
let newItems = [...items];
newItems[index][event.target.name] = event.target.value;
setItems(newItems);
};
const addItem = () => {
setItems([...items, { name: "", quantity: "", price: "" }]);
};
const deleteItem = (index) => {
let newItems = [...items];
newItems.splice(index, 1);
setItems(newItems);
};インボイスの生成
以下はgenerateInvoice関数コードです。
// Generate invoice
const generateInvoice = () => {
// Validate the input fields
if (
!customerName ||
!customerAddress ||
items.some((item) => !item.name || !item.quantity || !item.price)
) {
setError(true);
return;
}
// Create a new jsPDF instance
let doc = new jsPDF("p", "pt");
// Add invoice header
doc.setFontSize(24);
doc.text("Invoice", 40, 60);
doc.setFontSize(10);
doc.text("Invoice Number: 123456", 40, 90);
doc.text("Date: " + new Date().toDateString(), 40, 110);
doc.text(`Customer Name: ${customerName}`, 40, 130);
doc.text(`Customer Address: ${customerAddress}`, 40, 150);
// Add items section
doc.setFontSize(14);
doc.text("Items:", 40, 200);
doc.line(40, 210, 550, 210);
// Add item details
doc.setFontSize(12);
let yOffset = 240;
let total = 0;
items.forEach((item) => {
let itemTotal = item.quantity * item.price;
total += itemTotal;
doc.text(`Item: ${item.name}`, 40, yOffset);
doc.text(`Quantity: ${item.quantity}`, 200, yOffset);
doc.text(`Price: $${item.price}`, 300, yOffset);
doc.text(`Total: $${itemTotal}`, 400, yOffset);
yOffset += 20;
});
// Add total
doc.line(40, yOffset, 550, yOffset);
doc.setFontSize(14);
doc.text(`Total: $${total}`, 400, yOffset + 30);
// Save the generated PDF as "invoice.pdf"
doc.save("invoice.pdf");
// Reset error state
setError(false);
};// Generate invoice
const generateInvoice = () => {
// Validate the input fields
if (
!customerName ||
!customerAddress ||
items.some((item) => !item.name || !item.quantity || !item.price)
) {
setError(true);
return;
}
// Create a new jsPDF instance
let doc = new jsPDF("p", "pt");
// Add invoice header
doc.setFontSize(24);
doc.text("Invoice", 40, 60);
doc.setFontSize(10);
doc.text("Invoice Number: 123456", 40, 90);
doc.text("Date: " + new Date().toDateString(), 40, 110);
doc.text(`Customer Name: ${customerName}`, 40, 130);
doc.text(`Customer Address: ${customerAddress}`, 40, 150);
// Add items section
doc.setFontSize(14);
doc.text("Items:", 40, 200);
doc.line(40, 210, 550, 210);
// Add item details
doc.setFontSize(12);
let yOffset = 240;
let total = 0;
items.forEach((item) => {
let itemTotal = item.quantity * item.price;
total += itemTotal;
doc.text(`Item: ${item.name}`, 40, yOffset);
doc.text(`Quantity: ${item.quantity}`, 200, yOffset);
doc.text(`Price: $${item.price}`, 300, yOffset);
doc.text(`Total: $${itemTotal}`, 400, yOffset);
yOffset += 20;
});
// Add total
doc.line(40, yOffset, 550, yOffset);
doc.setFontSize(14);
doc.text(`Total: $${total}`, 400, yOffset + 30);
// Save the generated PDF as "invoice.pdf"
doc.save("invoice.pdf");
// Reset error state
setError(false);
};generateInvoice 関数では、まず入力フィールドの検証を行い、顧客名、顧客住所、および商品詳細が入力されていることを確認します。 これらのフィールドのいずれかが空の場合、error の状態を true に設定して、早期に終了します。
次に、new jsPDF("p", "pt") を呼び出すことで、jsPDF の新しいインスタンスを作成します。 最初の引数"pt""は測定単位をポイントに指定します。
次に、PDF ドキュメントにコンテンツを追加し始めます。 フォントサイズは doc.setFontSize を使用して設定し、ページ上の特定の座標にテキストを追加するには doc.text メソッドを使用します。 インボイスのヘッダーに、タイトル、インボイス番号、日付、顧客名、顧客住所を追加します。
ヘッダーの後に、フォントサイズを設定し、doc.line を使用して行を追加して項目とヘッダーを区切ることで、"項目"セクションを追加します。 次に、items 配列の各項目を順番に処理し、数量に価格を掛けて各項目の合計価格を計算します。そして、total 変数を、すべての項目の合計価格の合計で更新します。
各アイテムについて、doc.text を使用して、アイテム名、数量、価格、およびアイテム合計を PDF ドキュメントに追加します。 各項目ごとに次の行に進むために、変数 yOffset をインクリメントします。 最後に、項目と合計金額を区切る行を追加し、doc.text を使用して、文書の右下に合計金額を追加します。
コンテンツが追加されると、doc.save("invoice.pdf") を使用して、生成された PDF をユーザーのコンピューターに"invoice.pdf"として保存します。 最後に、以前の検証エラーをすべてクリアするために、error の状態を false にリセットします。
ステップ 4: UI のレンダリング
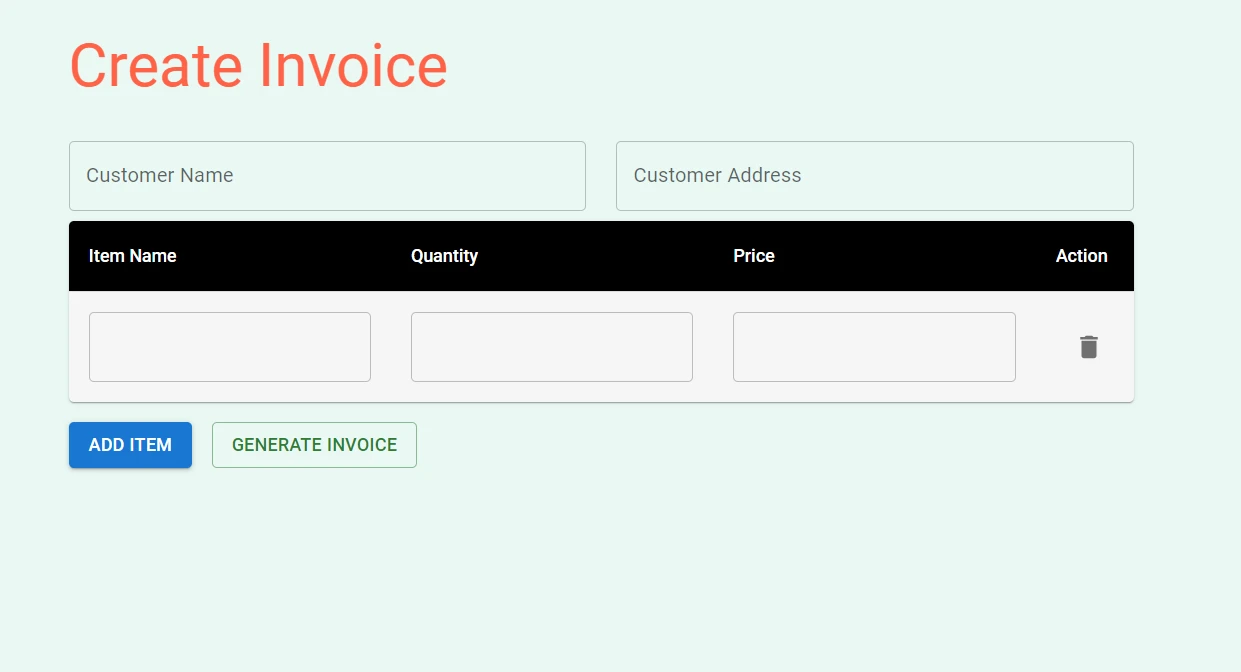
return ステートメントには、レンダリング処理を処理する JSX コードが含まれています。 これには、顧客名と住所の入力フィールド、アイテムの詳細を入力するためのテーブル、アイテムを追加してインボイスを生成するためのボタン、およびバリデーションエラーを表示するためのエラースナックバーが含まれています。
Material-UI ライブラリのコンポーネントを使用します。例えば、Snackbar、 Alert、基本コンポーネントを作成します。 これらのコンポーネントは、フォームフィールド、テーブル、ボタン、およびエラーメッセージを作成するために使用されます。
return (
<Container maxWidth="md">
<Box sx={{ my: 4 }}>
<Typography variant="h3" component="h1" gutterBottom>
Create Invoice
</Typography>
{/* Customer Name and Address fields */}
<Grid container spacing={3}>
<Grid item xs={6}>
<TextField
label="Customer Name"
fullWidth
margin="normal"
value={customerName}
onChange={(e) => setCustomerName(e.target.value)}
/>
</Grid>
<Grid item xs={6}>
<TextField
label="Customer Address"
fullWidth
margin="normal"
value={customerAddress}
onChange={(e) => setCustomerAddress(e.target.value)}
/>
</Grid>
</Grid>
{/* Items table */}
<TableContainer component={Paper}>
<Table sx={{ minWidth: 700 }} aria-label="invoice table">
<TableHead>
<TableRow>
<StyledTableCell>Item Name</StyledTableCell>
<StyledTableCell align="left">Quantity</StyledTableCell>
<StyledTableCell align="left">Price</StyledTableCell>
<StyledTableCell align="left">Action</StyledTableCell>
</TableRow>
</TableHead>
<TableBody>
{items.map((item, index) => (
<StyledTableRow key={index}>
<StyledTableCell component="th" scope="row">
<TextField
fullWidth
value={item.name}
onChange={(event) => handleItemChange(index, event)}
name="name"
/>
</StyledTableCell>
<StyledTableCell align="right">
<TextField
fullWidth
value={item.quantity}
onChange={(event) => handleItemChange(index, event)}
name="quantity"
/>
</StyledTableCell>
<StyledTableCell align="right">
<TextField
fullWidth
value={item.price}
onChange={(event) => handleItemChange(index, event)}
name="price"
/>
</StyledTableCell>
<StyledTableCell align="right">
<IconButton onClick={() => deleteItem(index)}>
<DeleteIcon />
</IconButton>
</StyledTableCell>
</StyledTableRow>
))}
</TableBody>
</Table>
</TableContainer>
{/* Buttons */}
<Box mt={2} display="flex" gap={2}>
<Button variant="contained" onClick={addItem}>
Add Item
</Button>
<Button variant="outlined" color="success" onClick={generateInvoice}>
Generate Invoice
</Button>
</Box>
</Box>
{/* Error Snackbar */}
<Snackbar
open={error}
autoHideDuration={6000}
onClose={() => setError(false)}
anchorOrigin={{ vertical: "top", horizontal: "right" }}
>
<Alert onClose={() => setError(false)} severity="error">
Please fill in all required fields.
</Alert>
</Snackbar>
</Container>
);return (
<Container maxWidth="md">
<Box sx={{ my: 4 }}>
<Typography variant="h3" component="h1" gutterBottom>
Create Invoice
</Typography>
{/* Customer Name and Address fields */}
<Grid container spacing={3}>
<Grid item xs={6}>
<TextField
label="Customer Name"
fullWidth
margin="normal"
value={customerName}
onChange={(e) => setCustomerName(e.target.value)}
/>
</Grid>
<Grid item xs={6}>
<TextField
label="Customer Address"
fullWidth
margin="normal"
value={customerAddress}
onChange={(e) => setCustomerAddress(e.target.value)}
/>
</Grid>
</Grid>
{/* Items table */}
<TableContainer component={Paper}>
<Table sx={{ minWidth: 700 }} aria-label="invoice table">
<TableHead>
<TableRow>
<StyledTableCell>Item Name</StyledTableCell>
<StyledTableCell align="left">Quantity</StyledTableCell>
<StyledTableCell align="left">Price</StyledTableCell>
<StyledTableCell align="left">Action</StyledTableCell>
</TableRow>
</TableHead>
<TableBody>
{items.map((item, index) => (
<StyledTableRow key={index}>
<StyledTableCell component="th" scope="row">
<TextField
fullWidth
value={item.name}
onChange={(event) => handleItemChange(index, event)}
name="name"
/>
</StyledTableCell>
<StyledTableCell align="right">
<TextField
fullWidth
value={item.quantity}
onChange={(event) => handleItemChange(index, event)}
name="quantity"
/>
</StyledTableCell>
<StyledTableCell align="right">
<TextField
fullWidth
value={item.price}
onChange={(event) => handleItemChange(index, event)}
name="price"
/>
</StyledTableCell>
<StyledTableCell align="right">
<IconButton onClick={() => deleteItem(index)}>
<DeleteIcon />
</IconButton>
</StyledTableCell>
</StyledTableRow>
))}
</TableBody>
</Table>
</TableContainer>
{/* Buttons */}
<Box mt={2} display="flex" gap={2}>
<Button variant="contained" onClick={addItem}>
Add Item
</Button>
<Button variant="outlined" color="success" onClick={generateInvoice}>
Generate Invoice
</Button>
</Box>
</Box>
{/* Error Snackbar */}
<Snackbar
open={error}
autoHideDuration={6000}
onClose={() => setError(false)}
anchorOrigin={{ vertical: "top", horizontal: "right" }}
>
<Alert onClose={() => setError(false)} severity="error">
Please fill in all required fields.
</Alert>
</Snackbar>
</Container>
);完全な App.js および App.css コード
以下は、プロジェクトにコピー&ペーストできる完全なコードです。
import React, { useState } from "react";
import "./App.css";
import {
  Button,
  TextField,
  Box,
  Container,
  Typography,
  Table,
  TableBody,
  TableCell,
  TableContainer,
  TableHead,
  TableRow,
  Paper,
  IconButton,
  Snackbar,
  Alert,
} from "@mui/material";
import Grid from "@mui/material/Grid";
import DeleteIcon from "@mui/icons-material/Delete";
import jsPDF from "jspdf";
import { styled } from "@mui/material/styles";
import { tableCellClasses } from "@mui/material/TableCell";
const StyledTableCell = styled(TableCell)(({ theme }) => ({
  [`&.${tableCellClasses.head}`]: {
    backgroundColor: theme.palette.common.black,
    color: theme.palette.common.white,
  },
  [`&.${tableCellClasses.body}`]: {
    fontSize: 14,
  },
}));

const StyledTableRow = styled(TableRow)(({ theme }) => ({
  "&:nth-of-type(odd)": {
    backgroundColor: theme.palette.action.hover,
  },
  "&:last-child td, &:last-child th": {
    border: 0,
  },
}));
function App() {
// State variables
const [customerName, setCustomerName] = useState("");
const [customerAddress, setCustomerAddress] = useState("");
const [items, setItems] = useState([{ name: "", quantity: "", price: "" }]);
const [error, setError] = useState(false);
// Event handler for item changes
const handleItemChange = (index, event) => {
let newItems = [...items];
newItems[index][event.target.name] = event.target.value;
setItems(newItems);
};
// Add new item to the list
const addItem = () => {
setItems([...items, { name: "", quantity: "", price: "" }]);
};
// Delete an item from the list
const deleteItem = (index) => {
let newItems = [...items];
newItems.splice(index, 1);
setItems(newItems);
};
// Generate invoice
const generateInvoice = () => {
// Validate the input fields
if (
!customerName ||
!customerAddress ||
items.some((item) => !item.name || !item.quantity || !item.price)
) {
setError(true);
return;
}
// Create a new jsPDF instance
let doc = new jsPDF("p", "pt");
// Add invoice header
doc.setFontSize(24);
doc.text("Invoice", 40, 60);
doc.setFontSize(10);
doc.text("Invoice Number: 123456", 40, 90);
doc.text("Date: " + new Date().toDateString(), 40, 110);
doc.text(`Customer Name: ${customerName}`, 40, 130);
doc.text(`Customer Address: ${customerAddress}`, 40, 150);
// Add items section
doc.setFontSize(14);
doc.text("Items:", 40, 200);
doc.line(40, 210, 550, 210);
// Add item details
doc.setFontSize(12);
let yOffset = 240;
let total = 0;
items.forEach((item) => {
let itemTotal = item.quantity * item.price;
total += itemTotal;
doc.text(`Item: ${item.name}`, 40, yOffset);
doc.text(`Quantity: ${item.quantity}`, 200, yOffset);
doc.text(`Price: $${item.price}`, 300, yOffset);
doc.text(`Total: $${itemTotal}`, 400, yOffset);
yOffset += 20;
});
// Add total
doc.line(40, yOffset, 550, yOffset);
doc.setFontSize(14);
doc.text(`Total: $${total}`, 400, yOffset + 30);
// Save the generated PDF as "invoice.pdf"
doc.save("invoice.pdf");
// Reset error state
setError(false);
};
return (
<Container maxWidth="md">
<Box sx={{ my: 4 }}>
<Typography variant="h3" component="h1" gutterBottom>
Create Invoice
</Typography>
{/* Customer Name and Address fields */}
<Grid container spacing={3}>
<Grid item xs={6}>
<TextField
label="Customer Name"
fullWidth
margin="normal"
value={customerName}
onChange={(e) => setCustomerName(e.target.value)}
/>
</Grid>
<Grid item xs={6}>
<TextField
label="Customer Address"
fullWidth
margin="normal"
value={customerAddress}
onChange={(e) => setCustomerAddress(e.target.value)}
/>
</Grid>
</Grid>
{/* Items table */}
<TableContainer component={Paper}>
<Table sx={{ minWidth: 700 }} aria-label="invoice table">
<TableHead>
<TableRow>
<StyledTableCell>Item Name</StyledTableCell>
<StyledTableCell align="left">Quantity</StyledTableCell>
<StyledTableCell align="left">Price</StyledTableCell>
<StyledTableCell align="left">Action</StyledTableCell>
</TableRow>
</TableHead>
<TableBody>
{items.map((item, index) => (
<StyledTableRow key={index}>
<StyledTableCell component="th" scope="row">
<TextField
fullWidth
value={item.name}
onChange={(event) => handleItemChange(index, event)}
name="name"
/>
</StyledTableCell>
<StyledTableCell align="right">
<TextField
fullWidth
value={item.quantity}
onChange={(event) => handleItemChange(index, event)}
name="quantity"
/>
</StyledTableCell>
<StyledTableCell align="right">
<TextField
fullWidth
value={item.price}
onChange={(event) => handleItemChange(index, event)}
name="price"
/>
</StyledTableCell>
<StyledTableCell align="right">
<IconButton onClick={() => deleteItem(index)}>
<DeleteIcon />
</IconButton>
</StyledTableCell>
</StyledTableRow>
))}
</TableBody>
</Table>
</TableContainer>
{/* Buttons */}
<Box mt={2} display="flex" gap={2}>
<Button variant="contained" onClick={addItem}>
Add Item
</Button>
<Button variant="outlined" color="success" onClick={generateInvoice}>
Generate Invoice
</Button>
</Box>
</Box>
{/* Error Snackbar */}
<Snackbar
open={error}
autoHideDuration={6000}
onClose={() => setError(false)}
anchorOrigin={{ vertical: "top", horizontal: "right" }}
>
<Alert onClose={() => setError(false)} severity="error">
Please fill in all required fields.
</Alert>
</Snackbar>
</Container>
);
}
export default App;import React, { useState } from "react";
import "./App.css";
import {
Button,
TextField,
Box,
Container,
Typography,
Table,
TableBody,
TableCell,
TableContainer,
TableHead,
TableRow,
Paper,
IconButton,
Snackbar,
Alert,
} from "@mui/material";
import Grid from "@mui/material/Grid";
import DeleteIcon from "@mui/icons-material/Delete";
import jsPDF from "jspdf";
import { styled } from "@mui/material/styles";
import { tableCellClasses } from "@mui/material/TableCell";
const StyledTableCell = styled(TableCell)(({ theme }) => ({
  [`&.${tableCellClasses.head}`]: {
    backgroundColor: theme.palette.common.black,
    color: theme.palette.common.white,
  },
  [`&.${tableCellClasses.body}`]: {
    fontSize: 14,
  },
}));

const StyledTableRow = styled(TableRow)(({ theme }) => ({
  "&:nth-of-type(odd)": {
    backgroundColor: theme.palette.action.hover,
  },
  "&:last-child td, &:last-child th": {
    border: 0,
  },
}));
function App() {
  // State variables
  const [customerName, setCustomerName] = useState("");
  const [customerAddress, setCustomerAddress] = useState("");
  const [items, setItems] = useState([{ name: "", quantity: "", price: "" }]);
  const [error, setError] = useState(false);
// Event handler for item changes
const handleItemChange = (index, event) => {
let newItems = [...items];
newItems[index][event.target.name] = event.target.value;
setItems(newItems);
};
// Add new item to the list
const addItem = () => {
setItems([...items, { name: "", quantity: "", price: "" }]);
};
// Delete an item from the list
const deleteItem = (index) => {
let newItems = [...items];
newItems.splice(index, 1);
setItems(newItems);
};
// Generate invoice
const generateInvoice = () => {
  // Validate the input fields
  if (
    !customerName ||
    !customerAddress ||
    items.some((item) => !item.name || !item.quantity || !item.price)
  ) {
    setError(true);
    return;
  }

  // Create a new jsPDF instance
  let doc = new jsPDF("p", "pt");

  // Add invoice header
  doc.setFontSize(24);
  doc.text("Invoice", 40, 60);
  doc.setFontSize(10);
  doc.text("Invoice Number: 123456", 40, 90);
  doc.text("Date: " + new Date().toDateString(), 40, 110);
  doc.text(`Customer Name: ${customerName}`, 40, 130);
  doc.text(`Customer Address: ${customerAddress}`, 40, 150);

  // Add items section
  doc.setFontSize(14);
  doc.text("Items:", 40, 200);
  doc.line(40, 210, 550, 210);

  // Add item details
  doc.setFontSize(12);
  let yOffset = 240;
  let total = 0;

  items.forEach((item) => {
    let itemTotal = item.quantity * item.price;
    total += itemTotal;

    doc.text(`Item: ${item.name}`, 40, yOffset);
    doc.text(`Quantity: ${item.quantity}`, 200, yOffset);
    doc.text(`Price: $${item.price}`, 300, yOffset);
    doc.text(`Total: $${itemTotal}`, 400, yOffset);

    yOffset += 20;
  });

  // Add total
  doc.line(40, yOffset, 550, yOffset);
  doc.setFontSize(14);
  doc.text(`Total: $${total}`, 400, yOffset + 30);

  // Save the generated PDF as "invoice.pdf"
  doc.save("invoice.pdf");

  // Reset error state
  setError(false);
};
return (
  <Container maxWidth="md">
    <Box sx={{ my: 4 }}>
      <Typography variant="h3" component="h1" gutterBottom>
        Create Invoice
      </Typography>

      {/* Customer Name and Address fields */}
      <Grid container spacing={3}>
        <Grid item xs={6}>
          <TextField
            label="Customer Name"
            fullWidth
            margin="normal"
            value={customerName}
            onChange={(e) => setCustomerName(e.target.value)}
          />
        </Grid>
        <Grid item xs={6}>
          <TextField
            label="Customer Address"
            fullWidth
            margin="normal"
            value={customerAddress}
            onChange={(e) => setCustomerAddress(e.target.value)}
          />
        </Grid>
      </Grid>

      {/* Items table */}
      <TableContainer component={Paper}>
        <Table sx={{ minWidth: 700 }} aria-label="invoice table">
          <TableHead>
            <TableRow>
              <StyledTableCell>Item Name</StyledTableCell>
              <StyledTableCell align="left">Quantity</StyledTableCell>
              <StyledTableCell align="left">Price</StyledTableCell>
              <StyledTableCell align="left">Action</StyledTableCell>
            </TableRow>
          </TableHead>
          <TableBody>
            {items.map((item, index) => (
              <StyledTableRow key={index}>
                <StyledTableCell component="th" scope="row">
                  <TextField
                    fullWidth
                    value={item.name}
                    onChange={(event) => handleItemChange(index, event)}
                    name="name"
                  />
                </StyledTableCell>
                <StyledTableCell align="right">
                  <TextField
                    fullWidth
                    value={item.quantity}
                    onChange={(event) => handleItemChange(index, event)}
                    name="quantity"
                  />
                </StyledTableCell>
                <StyledTableCell align="right">
                  <TextField
                    fullWidth
                    value={item.price}
                    onChange={(event) => handleItemChange(index, event)}
                    name="price"
                  />
                </StyledTableCell>
                <StyledTableCell align="right">
                  <IconButton onClick={() => deleteItem(index)}>
                    <DeleteIcon />
                  </IconButton>
                </StyledTableCell>
              </StyledTableRow>
            ))}
          </TableBody>
        </Table>
      </TableContainer>

      {/* Buttons */}
      <Box mt={2} display="flex" gap={2}>
        <Button variant="contained" onClick={addItem}>
          Add Item
        </Button>
        <Button variant="outlined" color="success" onClick={generateInvoice}>
          Generate Invoice
        </Button>
      </Box>
    </Box>

    {/* Error Snackbar */}
    <Snackbar
      open={error}
      autoHideDuration={6000}
      onClose={() => setError(false)}
      anchorOrigin={{ vertical: "top", horizontal: "right" }}
    >
      <Alert onClose={() => setError(false)} severity="error">
        Please fill in all required fields.
      </Alert>
    </Snackbar>
  </Container>
);
}
export default App;App.css コードは以下のとおりです。
@import url('https://fonts.googleapis.com/css2?family=Poppins:wght@400;700&display=swap');
.App {
  text-align: center;
}

.App-logo {
  height: 40vmin;
  pointer-events: none;
}

@media (prefers-reduced-motion: no-preference) {
  .App-logo {
    animation: App-logo-spin infinite 20s linear;
  }
}

h1,
h2,
h3,
h4,
h5,
h6 {
  font-weight: bold;
  /* This is the weight for bold in Poppins */
  color: #FF6347;
  /* This is the color Tomato. Replace with your preferred color */
}

body {
  font-family: 'Poppins', sans-serif;
  background-color: #E9F8F4;
}

.App-header {
  background-color: #282c34;
  min-height: 100vh;
  display: flex;
  flex-direction: column;
  align-items: center;
  justify-content: center;
  font-size: calc(10px + 2vmin);
  color: white;
}

.App-link {
  color: #61dafb;
}

@keyframes App-logo-spin {
  from {
    transform: rotate(0deg);
  }
  to {
    transform: rotate(360deg);
  }
}
ステップ 5: アプリケーションのテスト
PDF 生成機能をテストするには、端末で次のコマンドを実行します。
npm startnpm startこれにより開発サーバーが起動し、ブラウザでアプリケーションをhttp://localhost:3000で表示できます。
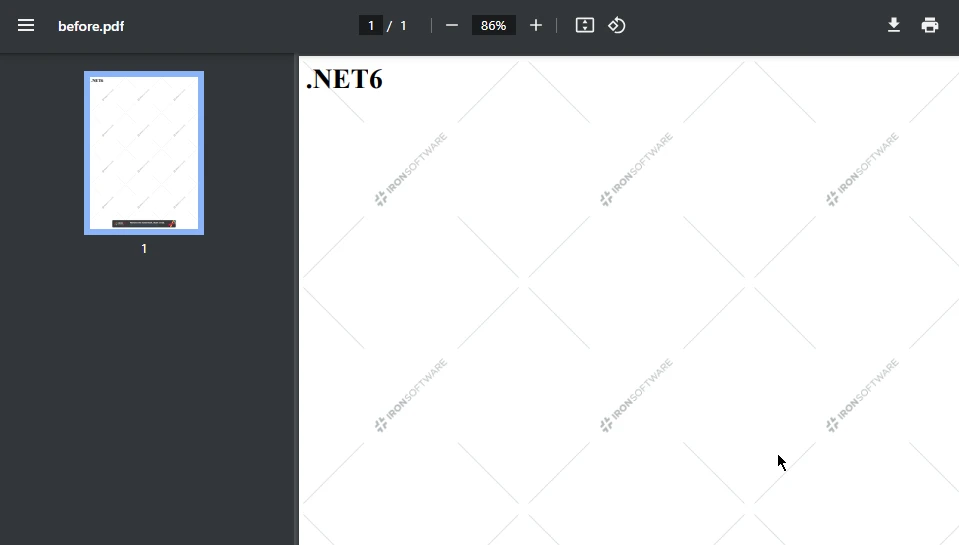
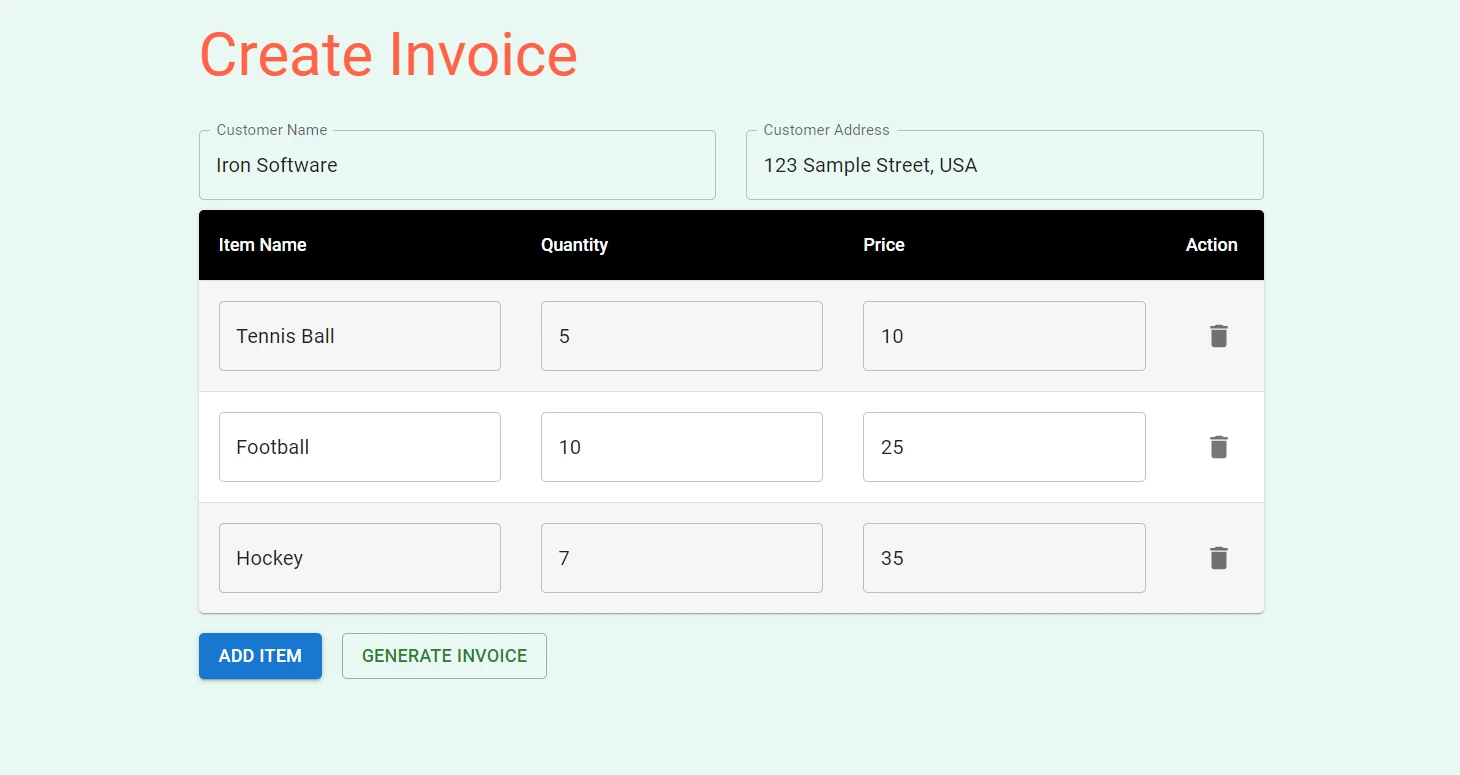
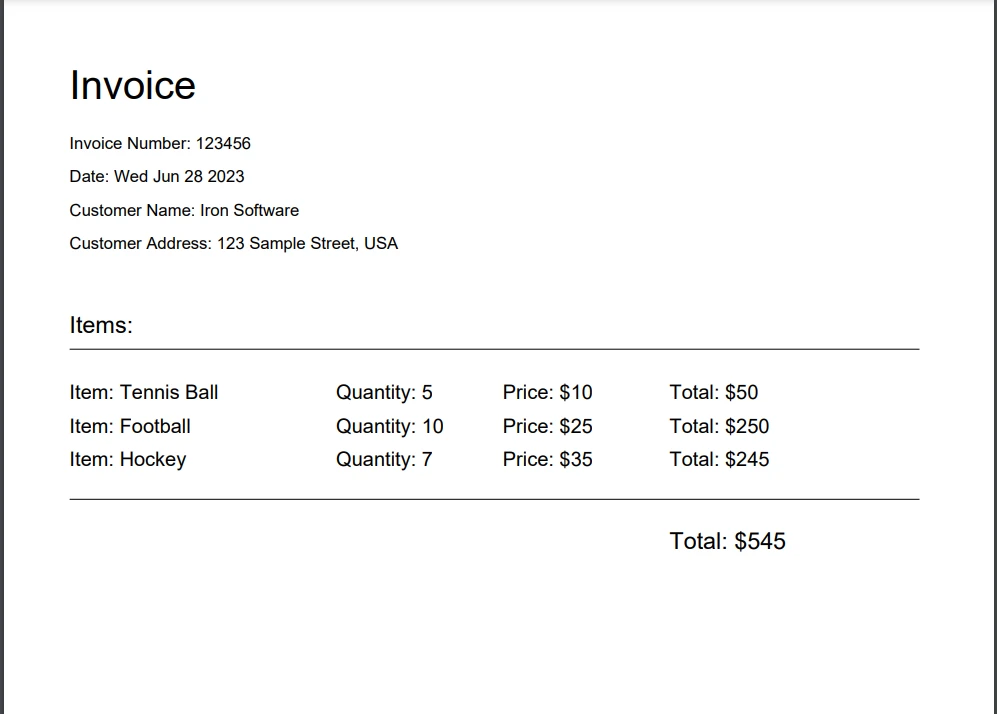
入力フィールドに顧客名、住所、アイテムの詳細を入力し、"Generate Invoice"ボタンをクリックします。 PDF ファイルはコンピュータにダウンロードされ、開いて生成された請求書のフルページ表示を確認できます。
"Generate Invoice" ボタンをクリックすると、PDF ファイルが生成されます。
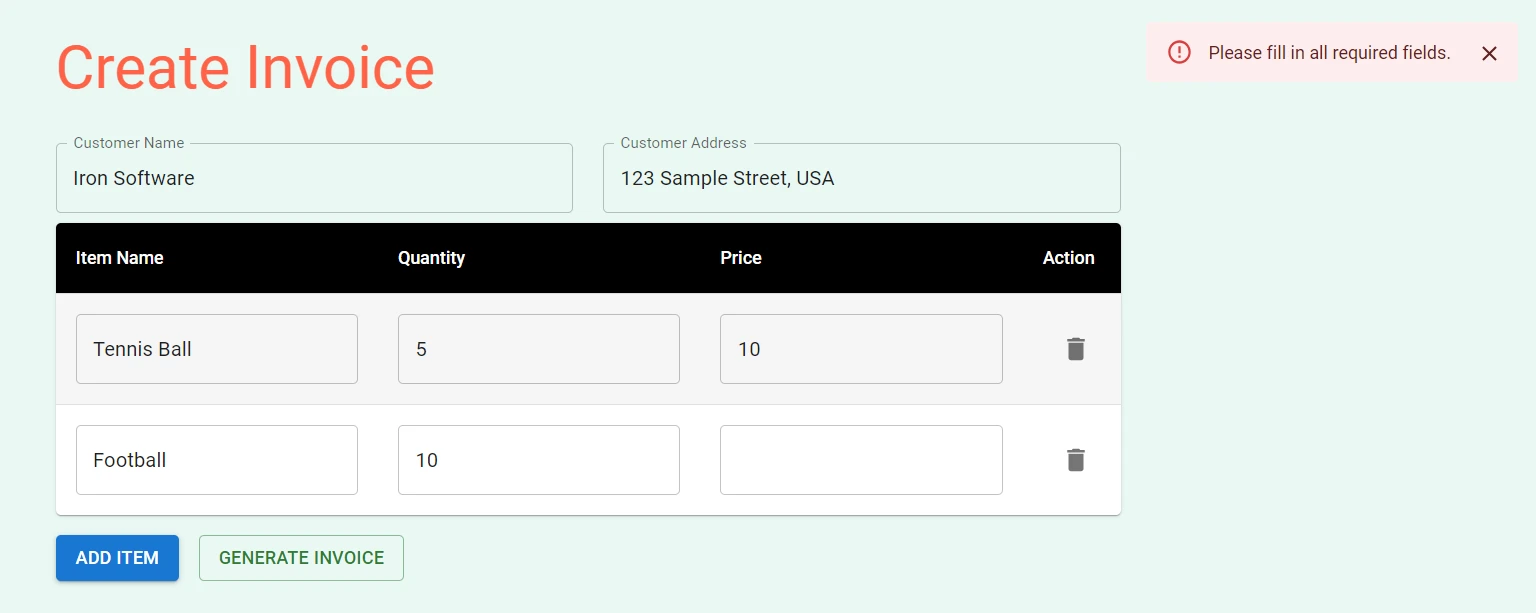
空白のフィールドで PDF を生成しようとすると、右上隅にエラーメッセージが表示されます。
IronPDF - Node.js PDF ライブラリ
IronPDF Node.js 向け は、正確性、使いやすさ、速度に優れた包括的な Node.js PDF ライブラリです。 HTML、URL、およびReactの画像から直接PDFを生成、編集、フォーマットするための広範な機能を提供します。 Windows、MacOS、Linux、Docker、AzureやAWSなどのクラウドプラットフォームを含むさまざまなプラットフォームをサポートしているため、IronPDFはクロスプラットフォームの互換性を保証します。 直観的なAPIを備えているため、開発者は迅速にPDF生成と操作をNode.jsプロジェクトに統合することができます。
IronPDF Node.js の注目すべき機能には、ピクセル単位のレンダリング、広範なフォーマットオプション、PDF のマージや分割、注釈の追加、PDF フォームの作成などの高度な編集機能が含まれます。
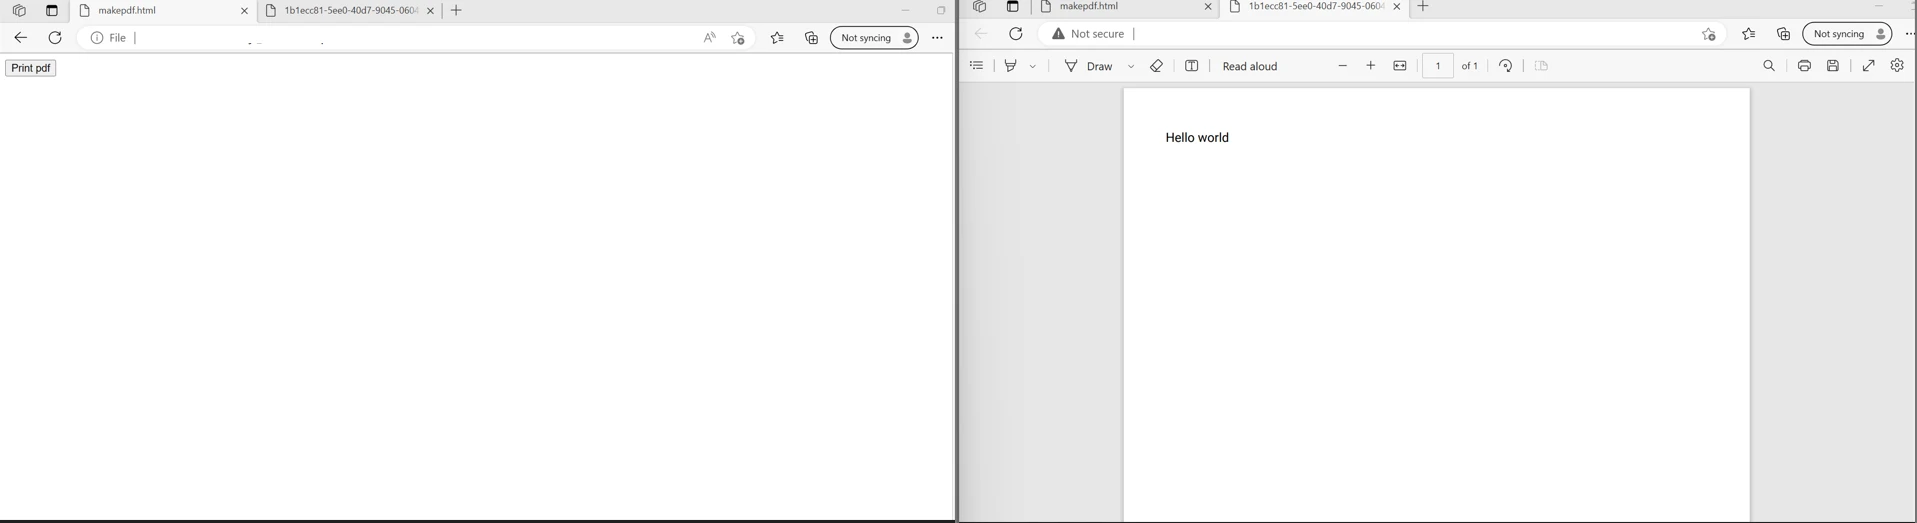
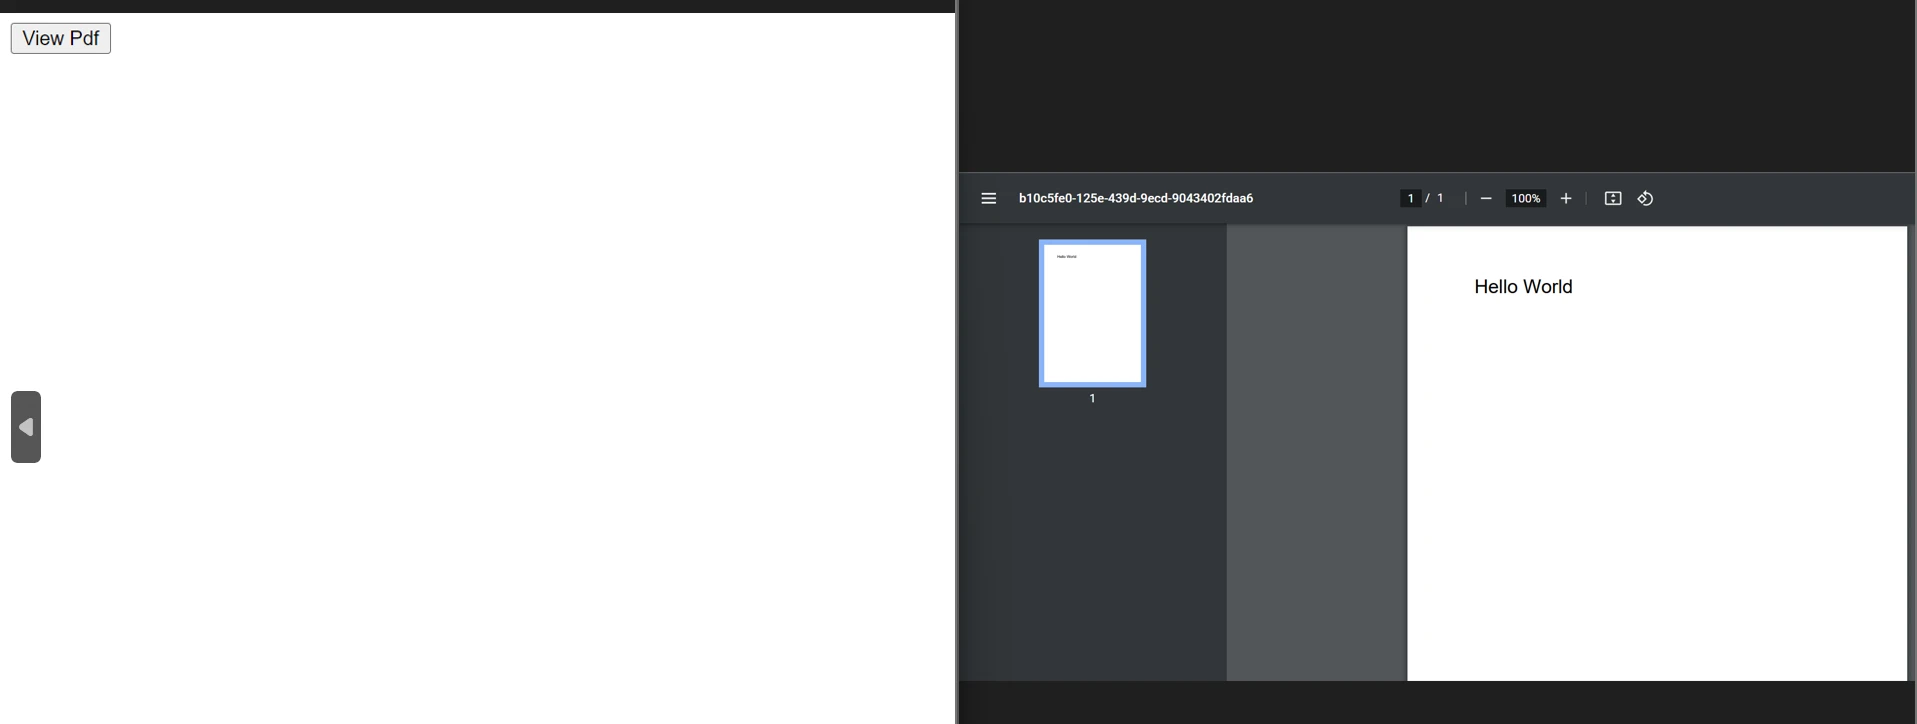
HTML ファイル、HTML ストリング、および URL から PDF ドキュメントを生成する例を以下に示します。
import { PdfDocument } from "@ironsoftware/ironpdf";

(async () => {
  const pdfFromUrl = await PdfDocument.fromUrl("https://getbootstrap.com/");
  await pdfFromUrl.saveAs("website.pdf");

  const pdfFromHtmlFile = await PdfDocument.fromHtml("design.html");
  await pdfFromHtmlFile.saveAs("markup.pdf");

  const pdfFromHtmlString = await PdfDocument.fromHtml("<p>Hello World</p>");
  await pdfFromHtmlString.saveAs("markup_with_assets.pdf");
})();
import { PdfDocument } from "@ironsoftware/ironpdf";
(async () => {
const pdfFromUrl = await PdfDocument.fromUrl("https://getbootstrap.com/");
await pdfFromUrl.saveAs("website.pdf");
const pdfFromHtmlFile = await PdfDocument.fromHtml("design.html");
await pdfFromHtmlFile.saveAs("markup.pdf");
const pdfFromHtmlString = await PdfDocument.fromHtml("<p>Hello World</p>");
await pdfFromHtmlString.saveAs("markup_with_assets.pdf");
})();PDF に関連するタスクに関する詳細なコード例については、この IronPDF コード例のページをご覧ください。
結論
結論として、React アプリケーションでの PDF の作成は威圧的である必要はありません。 適切なツールと明確な理解があれば、美しい構造化された PDF ドキュメントを簡単に生成できます。 私たちは、React-PDFなど、さまざまなライブラリを調査しました。それぞれに独自の強みと特徴があります。
IronPDF のフレームワーク用の簡単な統合プロセスとライブラリに関する素晴らしいドキュメント、そして応答性の高い技術サポートにより、開発者は迅速に立ち上げることができ、Node.js アプリケーションでプロフェッショナル品質の PDF を生成するための最適な選択です。
IronPDF では、その完全な機能の無料トライアルを提供しています。 また、C# .NET、Java、Python などの他の言語でも利用できます。 IronPDFのウェブサイトにアクセスして、詳細をご覧ください。