Como criar um arquivo PDF em React
Bem-vindo ao tutorial sobre como criar documentos PDF a partir de uma aplicação React! Neste tutorial, exploraremos várias bibliotecas para gerar PDFs e aprenderemos como usar a popular biblioteca jsPDF para criar arquivos PDF diretamente de seus componentes React. Então, vamos começar!
O PDF (Portable Document Format) é um formato de arquivo amplamente utilizado para compartilhar e imprimir documentos, preservando seu layout e formatação. Como desenvolvedor web React, você pode se deparar com cenários em que precisa gerar documentos PDF, como faturas, relatórios ou contratos de venda, diretamente do seu aplicativo React.
Como escolher uma biblioteca React PDF
Criar documentos PDF em uma aplicação React pode ser uma tarefa assustadora, especialmente se você for novo nessa área. Felizmente, temos à nossa disposição diversas bibliotecas de terceiros que simplificam significativamente esse processo. Cada biblioteca possui suas próprias características e utilidades exclusivas, atendendo a diferentes casos de uso. Vamos explorar essas bibliotecas com um pouco mais de detalhes.
jsPDF
jsPDF é uma biblioteca amplamente popular entre os desenvolvedores para gerar arquivos PDF a partir de JavaScript. Um dos seus principais atrativos é a sua simplicidade. Sua sintaxe e utilização são bastante simples, permitindo que você transforme seu conteúdo HTML em um arquivo PDF rapidamente.
Permite que você controle a formatação e o layout de seus PDFs, desde alterar o tamanho e a cor da fonte até ajustar a orientação e o tamanho da página. jsPDF é uma solução robusta que funciona tanto em ambientes de navegador quanto de servidor, tornando-a uma excelente escolha para uma ampla gama de aplicações JavaScript.
pdfmake
pdfmake destaca-se como uma solução de impressão de PDF no lado do cliente/servidor em JavaScript puro. Esta biblioteca é uma excelente escolha para a criação de PDFs mais complexos, graças à sua API abrangente e opções de layout flexíveis. Com pdfmake, você pode definir o conteúdo e a estrutura do seu documento usando um simples objeto JavaScript e, em seguida, transformá-lo em um documento PDF válido.
React-PDF
React-PDF é uma biblioteca única que fornece funcionalidades poderosas para criar arquivos PDF usando componentes React. Em vez de escrever manualmente a estrutura do seu documento em um objeto JavaScript , você pode criar seu PDF da mesma forma que criaria um aplicativo React típico - usando componentes e propriedades reutilizáveis. O site da IronPDF possui um tutorial sobre como criar PDFs usando a biblioteca React-PDF .
Por que escolher o jsPDF?
Embora todas as três bibliotecas forneçam ferramentas poderosas para gerar documentos PDF em React, usaremos jsPDF neste tutorial devido à sua simplicidade, flexibilidade e ampla adoção na comunidade. Oferece uma barreira de entrada mais baixa para iniciantes, e seu conjunto robusto de recursos o torna uma escolha adequada para muitos casos de uso. Os princípios que exploraremos com jsPDF lhe darão uma base sólida para gerar PDFs, e você poderá aprender outras bibliotecas mais facilmente se o seu projeto exigir.
Pré-requisitos
Antes de começarmos este tutorial, é essencial garantir que você esteja adequadamente equipado com as ferramentas e o conhecimento necessários para acompanhá-lo sem problemas. Os pré-requisitos para este tutorial são os seguintes:
Conhecimento básico de React
Antes de mais nada, você deve ter um conhecimento básico de React, uma biblioteca JavaScript popular para construir interfaces de usuário, especialmente aplicativos de página única. Você deve estar familiarizado com conceitos como JSX (JavaScript XML), componentes, estado e propriedades no React.
Ambiente de desenvolvimento
Você também deve ter um ambiente de desenvolvimento configurado em seu computador para criar aplicativos React. Isso inclui um editor de texto ou um Ambiente de Desenvolvimento Integrado (IDE). Editores de texto como Visual Studio Code, Atom ou Sublime Text são ótimas opções.
Node.js e npm
Para gerenciar nosso projeto e suas dependências, usaremos Node.js e npm (Node Package Manager). Certifique-se de ter o Node.js instalado em seu computador. Node.js é um ambiente de execução JavaScript que nos permite executar JavaScript em nossos servidores. Ele já vem com o npm instalado, para que você possa gerenciar as bibliotecas necessárias para o seu projeto.
Você pode verificar se o Node.js e o npm estão instalados executando os seguintes comandos no terminal:
node -v
npm -v
node -v
npm -vEsses comandos exibirão as versões do Node.js e do npm instaladas em seu sistema, respectivamente. Se você não os tiver instalados ou se suas versões estiverem desatualizadas, você deve baixar e instalar a versão de Suporte de Longo Prazo (LTS) mais recente do Node.js na página oficial de downloads .
Etapa 1: Configurando o projeto
Vamos começar configurando nosso projeto React. Abra o terminal e navegue até o diretório desejado onde você quer criar o seu projeto. Execute o seguinte comando para criar uma nova aplicação React:
npx create-react-app pdf-from-reactnpx create-react-app pdf-from-react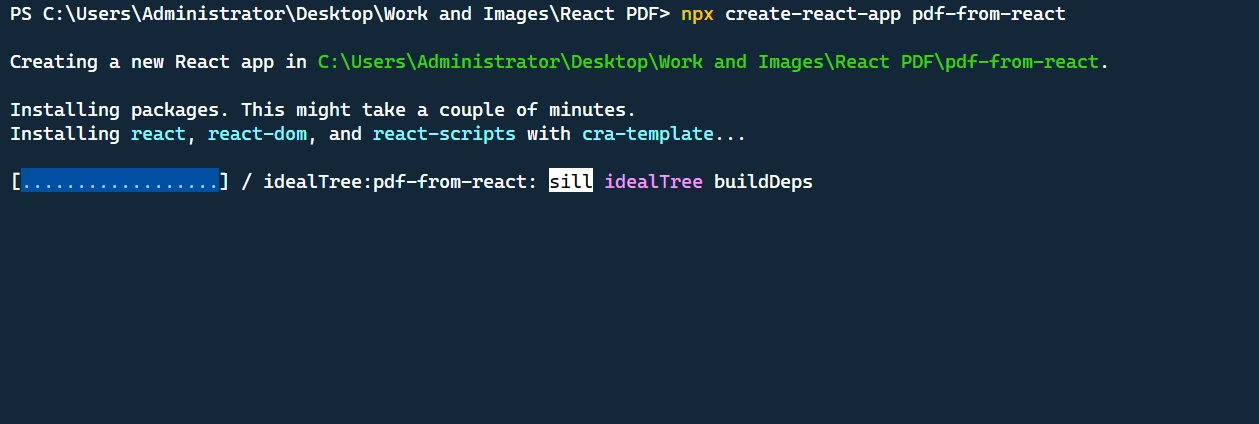
Este comando criará um novo diretório chamado pdf-from-react com uma estrutura básica de projeto React.
Em seguida, navegue até o diretório do projeto:
cd pdf-from-reactcd pdf-from-reactAgora podemos abrir o projeto em nosso editor de código e prosseguir com a implementação.
Etapa 2: Adicionando as dependências necessárias
Primeiro, precisamos instalar os pacotes necessários. Instale react, react-dom, @mui/material e jspdf usando o seguinte comando no terminal.
npm install jspdf @mui/material @emotion/react @emotion/styled @mui/icons-materialnpm install jspdf @mui/material @emotion/react @emotion/styled @mui/icons-materialEtapa 3: Criando o recurso de geração de PDF
Importando Bibliotecas
Começamos por importar as dependências necessárias para a nossa aplicação. Estes incluem vários componentes da biblioteca Material-UI, a biblioteca jsPDF para gerar PDFs e utilitários de estilização.
import React, { useState } from "react";
import "./App.css";
import {
  Button,
  TextField,
  Box,
  Container,
  Typography,
  Table,
  TableBody,
  TableCell,
  TableContainer,
  TableHead,
  TableRow,
  Paper,
  IconButton,
  Snackbar,
  Alert,
} from "@mui/material";
import Grid from "@mui/material/Grid";
import DeleteIcon from "@mui/icons-material/Delete";
import jsPDF from "jspdf";
import { styled } from "@mui/material/styles";
import { tableCellClasses } from "@mui/material/TableCell";
import React, { useState } from "react";
import "./App.css";
import {
Button,
TextField,
Box,
Container,
Typography,
Table,
TableBody,
TableCell,
TableContainer,
TableHead,
TableRow,
Paper,
IconButton,
Snackbar,
Alert,
} from "@mui/material";
import Grid from "@mui/material/Grid";
import DeleteIcon from "@mui/icons-material/Delete";
import jsPDF from "jspdf";
import { styled } from "@mui/material/styles";
import { tableCellClasses } from "@mui/material/TableCell";Criando componentes estilizados
Para adicionar um comportamento consistente entre navegadores ao nosso app, usamos o utilitário styled da biblioteca MUI para criar StyledTableCell e StyledTableRow.
const StyledTableCell = styled(TableCell)(({ theme }) => ({
[`&.${tableCellClasses.head}`]: {
backgroundColor: theme.palette.common.black,
color: theme.palette.common.white,
},
[`&.${tableCellClasses.body}`]: {
fontSize: 14,
},
}));
const StyledTableRow = styled(TableRow)(({ theme }) => ({
"&:nth-of-type(odd)": {
backgroundColor: theme.palette.action.hover,
},
"&:last-child td, &:last-child th": {
border: 0,
},
}));const StyledTableCell = styled(TableCell)(({ theme }) => ({
[`&.${tableCellClasses.head}`]: {
backgroundColor: theme.palette.common.black,
color: theme.palette.common.white,
},
[`&.${tableCellClasses.body}`]: {
fontSize: 14,
},
}));
const StyledTableRow = styled(TableRow)(({ theme }) => ({
"&:nth-of-type(odd)": {
backgroundColor: theme.palette.action.hover,
},
"&:last-child td, &:last-child th": {
border: 0,
},
}));Criando o componente do aplicativo
O componente principal de nossa aplicação é o componente App. Temos quatro variáveis de estado: customerName e customerAddress para acompanhar os dados dos clientes, items para acompanhar a lista de itens na fatura, e error para exibir uma mensagem de erro quando necessário.
function App() {
// State variables
const [customerName, setCustomerName] = useState("");
const [customerAddress, setCustomerAddress] = useState("");
const [items, setItems] = useState([{ name: "", quantity: "", price: "" }]);
const [error, setError] = useState(false);function App() {
// State variables
const [customerName, setCustomerName] = useState("");
const [customerAddress, setCustomerAddress] = useState("");
const [items, setItems] = useState([{ name: "", quantity: "", price: "" }]);
const [error, setError] = useState(false);Tratamento da entrada do usuário
Neste bloco de código, definimos funções para lidar com as interações do usuário: alterar detalhes do item, adicionar um novo item e excluir um item. A função handleItemChange atualiza as propriedades de um item quando um usuário as modifica. A função addItem adiciona um novo item à lista. A função deleteItem remove um item da lista.
const handleItemChange = (index, event) => {
let newItems = [...items];
newItems[index][event.target.name] = event.target.value;
setItems(newItems);
};
const addItem = () => {
setItems([...items, { name: "", quantity: "", price: "" }]);
};
const deleteItem = (index) => {
let newItems = [...items];
newItems.splice(index, 1);
setItems(newItems);
};const handleItemChange = (index, event) => {
let newItems = [...items];
newItems[index][event.target.name] = event.target.value;
setItems(newItems);
};
const addItem = () => {
setItems([...items, { name: "", quantity: "", price: "" }]);
};
const deleteItem = (index) => {
let newItems = [...items];
newItems.splice(index, 1);
setItems(newItems);
};Geração da fatura
A seguir está o código da função generateInvoice:
// Generate invoice
const generateInvoice = () => {
// Validate the input fields
if (
!customerName ||
!customerAddress ||
items.some((item) => !item.name || !item.quantity || !item.price)
) {
setError(true);
return;
}
// Create a new jsPDF instance
let doc = new jsPDF("p", "pt");
// Add invoice header
doc.setFontSize(24);
doc.text("Invoice", 40, 60);
doc.setFontSize(10);
doc.text("Invoice Number: 123456", 40, 90);
doc.text("Date: " + new Date().toDateString(), 40, 110);
doc.text(`Customer Name: ${customerName}`, 40, 130);
doc.text(`Customer Address: ${customerAddress}`, 40, 150);
// Add items section
doc.setFontSize(14);
doc.text("Items:", 40, 200);
doc.line(40, 210, 550, 210);
// Add item details
doc.setFontSize(12);
let yOffset = 240;
let total = 0;
items.forEach((item) => {
let itemTotal = item.quantity * item.price;
total += itemTotal;
doc.text(`Item: ${item.name}`, 40, yOffset);
doc.text(`Quantity: ${item.quantity}`, 200, yOffset);
doc.text(`Price: $${item.price}`, 300, yOffset);
doc.text(`Total: $${itemTotal}`, 400, yOffset);
yOffset += 20;
});
// Add total
doc.line(40, yOffset, 550, yOffset);
doc.setFontSize(14);
doc.text(`Total: $${total}`, 400, yOffset + 30);
// Save the generated PDF as "invoice.pdf"
doc.save("invoice.pdf");
// Reset error state
setError(false);
};// Generate invoice
const generateInvoice = () => {
// Validate the input fields
if (
!customerName ||
!customerAddress ||
items.some((item) => !item.name || !item.quantity || !item.price)
) {
setError(true);
return;
}
// Create a new jsPDF instance
let doc = new jsPDF("p", "pt");
// Add invoice header
doc.setFontSize(24);
doc.text("Invoice", 40, 60);
doc.setFontSize(10);
doc.text("Invoice Number: 123456", 40, 90);
doc.text("Date: " + new Date().toDateString(), 40, 110);
doc.text(`Customer Name: ${customerName}`, 40, 130);
doc.text(`Customer Address: ${customerAddress}`, 40, 150);
// Add items section
doc.setFontSize(14);
doc.text("Items:", 40, 200);
doc.line(40, 210, 550, 210);
// Add item details
doc.setFontSize(12);
let yOffset = 240;
let total = 0;
items.forEach((item) => {
let itemTotal = item.quantity * item.price;
total += itemTotal;
doc.text(`Item: ${item.name}`, 40, yOffset);
doc.text(`Quantity: ${item.quantity}`, 200, yOffset);
doc.text(`Price: $${item.price}`, 300, yOffset);
doc.text(`Total: $${itemTotal}`, 400, yOffset);
yOffset += 20;
});
// Add total
doc.line(40, yOffset, 550, yOffset);
doc.setFontSize(14);
doc.text(`Total: $${total}`, 400, yOffset + 30);
// Save the generated PDF as "invoice.pdf"
doc.save("invoice.pdf");
// Reset error state
setError(false);
};Na função generateInvoice, primeiro realizamos a validação nos campos de entrada para garantir que o nome do cliente, endereço do cliente e detalhes do item estejam preenchidos. Se algum desses campos estiver vazio, definimos o estado error para true e retornamos imediatamente.
Em seguida, criamos uma nova instância de jsPDF chamando new jsPDF("p", "pt"). O primeiro argumento 'p' especifica a orientação da página como retrato, e o segundo argumento 'pt"' especifica a unidade de medida como pontos.
Em seguida, começamos a adicionar o conteúdo ao nosso documento PDF. Definimos o tamanho da fonte usando doc.setFontSize e usamos o método doc.text para adicionar texto em coordenadas específicas na página. Adicionamos o cabeçalho da fatura, incluindo o título, o número da fatura, a data, o nome do cliente e o endereço do cliente.
Após o cabeçalho, adicionamos a seção 'Itens' definindo o tamanho da fonte e adicionando uma linha usando doc.line para separar os itens do cabeçalho. Em seguida, iteramos sobre cada item no array items e calculamos o preço total de cada item multiplicando a quantidade pelo preço. Atualizamos a variável total com a soma de todos os totais dos itens.
Para cada item, usamos doc.text para adicionar o nome do item, quantidade, preço e total do item ao documento PDF. Incrementamos a variável yOffset para mover para a próxima linha para cada item. Finalmente, adicionamos uma linha para separar os itens do total e usamos doc.text para adicionar o valor total no canto inferior direito do documento.
Uma vez que o conteúdo é adicionado, usamos doc.save("invoice.pdf") para salvar o PDF gerado como 'invoice.pdf' no computador do usuário. Por fim, redefinimos o estado error para false para limpar quaisquer erros de validação anteriores.
Etapa 4: Renderizando a interface do usuário
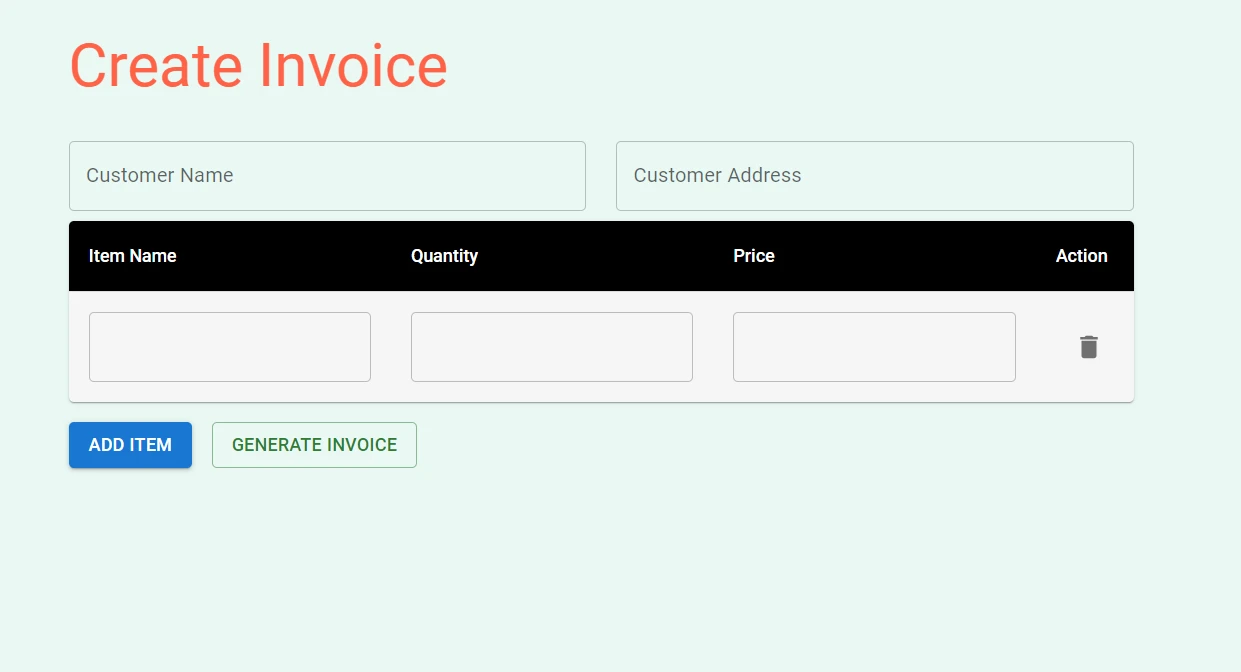
A declaração return contém o código JSX que lida com o processo de renderização. Inclui campos de entrada para nome e endereço do cliente, uma tabela para inserir detalhes do item, botões para adicionar itens e gerar a fatura, e uma barra de erro para exibir erros de validação.
Ele usa componentes da biblioteca Material-UI, como Button, TextField, Box, Container, Typography, Table, TableBody, TableCell, TableContainer, TableHead, TableRow, Paper, IconButton, Snackbar e Alert, para criar componentes básicos. Esses componentes são usados para criar os campos do formulário, tabelas, botões e notificações de erro.
return (
<Container maxWidth="md">
<Box sx={{my: 4}}>
<Typography variant="h3" component="h1" gutterBottom>
Create Invoice
</Typography>
{/* Customer Name and Address fields */}
<Grid container spacing={3}>
<Grid item xs={6}>
<TextField
label="Customer Name"
fullWidth
margin="normal"
value={customerName}
onChange={(e) => setCustomerName(e.target.value)}
/>
</Grid>
<Grid item xs={6}>
<TextField
label="Customer Address"
fullWidth
margin="normal"
value={customerAddress}
onChange={(e) => setCustomerAddress(e.target.value)}
/>
</Grid>
</Grid>
{/* Items table */}
<TableContainer component={Paper}>
<Table sx={{minWidth: 700}} aria-label="invoice table">
<TableHead>
<TableRow>
<StyledTableCell>Item Name</StyledTableCell>
<StyledTableCell align="left">Quantity</StyledTableCell>
<StyledTableCell align="left">Price</StyledTableCell>
<StyledTableCell align="left">Action</StyledTableCell>
</TableRow>
</TableHead>
<TableBody>
{items.map((item, index) => (
<StyledTableRow key={index}>
<StyledTableCell component="th" scope="row">
<TextField
fullWidth
value={item.name}
onChange={(event) => handleItemChange(index, event)}
name="name"
/>
</StyledTableCell>
<StyledTableCell align="right">
<TextField
fullWidth
value={item.quantity}
onChange={(event) => handleItemChange(index, event)}
name="quantity"
/>
</StyledTableCell>
<StyledTableCell align="right">
<TextField
fullWidth
value={item.price}
onChange={(event) => handleItemChange(index, event)}
name="price"
/>
</StyledTableCell>
<StyledTableCell align="right">
<IconButton onClick={() => deleteItem(index)}>
<DeleteIcon />
</IconButton>
</StyledTableCell>
</StyledTableRow>
))}
</TableBody>
</Table>
</TableContainer>
{/* Buttons */}
<Box mt={2} display="flex" gap={2}>
<Button variant="contained" onClick={addItem}>
Add Item
</Button>
<Button variant="outlined" color="success" onClick={generateInvoice}>
Generate Invoice
</Button>
</Box>
</Box>
{/* Error Snackbar */}
<Snackbar
open={error}
autoHideDuration={6000}
onClose={() => setError(false)}
anchorOrigin={{vertical: "top", horizontal: "right"}}
>
<Alert onClose={() => setError(false)} severity="error">
Please fill in all required fields.
</Alert>
</Snackbar>
</Container>
);return (
<Container maxWidth="md">
<Box sx={{my: 4}}>
<Typography variant="h3" component="h1" gutterBottom>
Create Invoice
</Typography>
{/* Customer Name and Address fields */}
<Grid container spacing={3}>
<Grid item xs={6}>
<TextField
label="Customer Name"
fullWidth
margin="normal"
value={customerName}
onChange={(e) => setCustomerName(e.target.value)}
/>
</Grid>
<Grid item xs={6}>
<TextField
label="Customer Address"
fullWidth
margin="normal"
value={customerAddress}
onChange={(e) => setCustomerAddress(e.target.value)}
/>
</Grid>
</Grid>
{/* Items table */}
<TableContainer component={Paper}>
<Table sx={{minWidth: 700}} aria-label="invoice table">
<TableHead>
<TableRow>
<StyledTableCell>Item Name</StyledTableCell>
<StyledTableCell align="left">Quantity</StyledTableCell>
<StyledTableCell align="left">Price</StyledTableCell>
<StyledTableCell align="left">Action</StyledTableCell>
</TableRow>
</TableHead>
<TableBody>
{items.map((item, index) => (
<StyledTableRow key={index}>
<StyledTableCell component="th" scope="row">
<TextField
fullWidth
value={item.name}
onChange={(event) => handleItemChange(index, event)}
name="name"
/>
</StyledTableCell>
<StyledTableCell align="right">
<TextField
fullWidth
value={item.quantity}
onChange={(event) => handleItemChange(index, event)}
name="quantity"
/>
</StyledTableCell>
<StyledTableCell align="right">
<TextField
fullWidth
value={item.price}
onChange={(event) => handleItemChange(index, event)}
name="price"
/>
</StyledTableCell>
<StyledTableCell align="right">
<IconButton onClick={() => deleteItem(index)}>
<DeleteIcon />
</IconButton>
</StyledTableCell>
</StyledTableRow>
))}
</TableBody>
</Table>
</TableContainer>
{/* Buttons */}
<Box mt={2} display="flex" gap={2}>
<Button variant="contained" onClick={addItem}>
Add Item
</Button>
<Button variant="outlined" color="success" onClick={generateInvoice}>
Generate Invoice
</Button>
</Box>
</Box>
{/* Error Snackbar */}
<Snackbar
open={error}
autoHideDuration={6000}
onClose={() => setError(false)}
anchorOrigin={{vertical: "top", horizontal: "right"}}
>
<Alert onClose={() => setError(false)} severity="error">
Please fill in all required fields.
</Alert>
</Snackbar>
</Container>
);Código completo de App.js e App.css
Aqui está o código completo App.js que você pode copiar e colar no seu projeto:
import React, { useState } from "react";
import "./App.css";
import {
  Button,
  TextField,
  Box,
  Container,
  Typography,
  Table,
  TableBody,
  TableCell,
  TableContainer,
  TableHead,
  TableRow,
  Paper,
  IconButton,
  Snackbar,
  Alert,
} from "@mui/material";
import Grid from "@mui/material/Grid";
import DeleteIcon from "@mui/icons-material/Delete";
import jsPDF from "jspdf";
import { styled } from "@mui/material/styles";
import { tableCellClasses } from "@mui/material/TableCell";
const StyledTableCell = styled(TableCell)(({ theme }) => ({
  [`&.${tableCellClasses.head}`]: {
    backgroundColor: theme.palette.common.black,
    color: theme.palette.common.white,
  },
  [`&.${tableCellClasses.body}`]: {
    fontSize: 14,
  },
}));

const StyledTableRow = styled(TableRow)(({ theme }) => ({
  "&:nth-of-type(odd)": {
    backgroundColor: theme.palette.action.hover,
  },
  "&:last-child td, &:last-child th": {
    border: 0,
  },
}));
function App() {
// State variables
const [customerName, setCustomerName] = useState("");
const [customerAddress, setCustomerAddress] = useState("");
const [items, setItems] = useState([{ name: "", quantity: "", price: "" }]);
const [error, setError] = useState(false);
// Event handler for item changes
const handleItemChange = (index, event) => {
let newItems = [...items];
newItems[index][event.target.name] = event.target.value;
setItems(newItems);
};
// Add new item to the list
const addItem = () => {
setItems([...items, { name: "", quantity: "", price: "" }]);
};
// Delete an item from the list
const deleteItem = (index) => {
let newItems = [...items];
newItems.splice(index, 1);
setItems(newItems);
};
// Generate invoice
const generateInvoice = () => {
// Validate the input fields
if (
!customerName ||
!customerAddress ||
items.some((item) => !item.name || !item.quantity || !item.price)
) {
setError(true);
return;
}
// Create a new jsPDF instance
let doc = new jsPDF("p", "pt");
// Add invoice header
doc.setFontSize(24);
doc.text("Invoice", 40, 60);
doc.setFontSize(10);
doc.text("Invoice Number: 123456", 40, 90);
doc.text("Date: " + new Date().toDateString(), 40, 110);
doc.text(`Customer Name: ${customerName}`, 40, 130);
doc.text(`Customer Address: ${customerAddress}`, 40, 150);
// Add items section
doc.setFontSize(14);
doc.text("Items:", 40, 200);
doc.line(40, 210, 550, 210);
// Add item details
doc.setFontSize(12);
let yOffset = 240;
let total = 0;
items.forEach((item) => {
let itemTotal = item.quantity * item.price;
total += itemTotal;
doc.text(`Item: ${item.name}`, 40, yOffset);
doc.text(`Quantity: ${item.quantity}`, 200, yOffset);
doc.text(`Price: $${item.price}`, 300, yOffset);
doc.text(`Total: $${itemTotal}`, 400, yOffset);
yOffset += 20;
});
// Add total
doc.line(40, yOffset, 550, yOffset);
doc.setFontSize(14);
doc.text(`Total: $${total}`, 400, yOffset + 30);
// Save the generated PDF as "invoice.pdf"
doc.save("invoice.pdf");
// Reset error state
setError(false);
};
return (
<Container maxWidth="md">
<Box sx={{my: 4}}>
<Typography variant="h3" component="h1" gutterBottom>
Create Invoice
</Typography>
{/* Customer Name and Address fields */}
<Grid container spacing={3}>
<Grid item xs={6}>
<TextField
label="Customer Name"
fullWidth
margin="normal"
value={customerName}
onChange={(e) => setCustomerName(e.target.value)}
/>
</Grid>
<Grid item xs={6}>
<TextField
label="Customer Address"
fullWidth
margin="normal"
value={customerAddress}
onChange={(e) => setCustomerAddress(e.target.value)}
/>
</Grid>
</Grid>
{/* Items table */}
<TableContainer component={Paper}>
<Table sx={{minWidth: 700}} aria-label="invoice table">
<TableHead>
<TableRow>
<StyledTableCell>Item Name</StyledTableCell>
<StyledTableCell align="left">Quantity</StyledTableCell>
<StyledTableCell align="left">Price</StyledTableCell>
<StyledTableCell align="left">Action</StyledTableCell>
</TableRow>
</TableHead>
<TableBody>
{items.map((item, index) => (
<StyledTableRow key={index}>
<StyledTableCell component="th" scope="row">
<TextField
fullWidth
value={item.name}
onChange={(event) => handleItemChange(index, event)}
name="name"
/>
</StyledTableCell>
<StyledTableCell align="right">
<TextField
fullWidth
value={item.quantity}
onChange={(event) => handleItemChange(index, event)}
name="quantity"
/>
</StyledTableCell>
<StyledTableCell align="right">
<TextField
fullWidth
value={item.price}
onChange={(event) => handleItemChange(index, event)}
name="price"
/>
</StyledTableCell>
<StyledTableCell align="right">
<IconButton onClick={() => deleteItem(index)}>
<DeleteIcon />
</IconButton>
</StyledTableCell>
</StyledTableRow>
))}
</TableBody>
</Table>
</TableContainer>
{/* Buttons */}
<Box mt={2} display="flex" gap={2}>
<Button variant="contained" onClick={addItem}>
Add Item
</Button>
<Button variant="outlined" color="success" onClick={generateInvoice}>
Generate Invoice
</Button>
</Box>
</Box>
{/* Error Snackbar */}
<Snackbar
open={error}
autoHideDuration={6000}
onClose={() => setError(false)}
anchorOrigin={{vertical: "top", horizontal: "right"}}
>
<Alert onClose={() => setError(false)} severity="error">
Please fill in all required fields.
</Alert>
</Snackbar>
</Container>
);
}
export default App;import React, { useState } from "react";
import "./App.css";
import {
Button,
TextField,
Box,
Container,
Typography,
Table,
TableBody,
TableCell,
TableContainer,
TableHead,
TableRow,
Paper,
IconButton,
Snackbar,
Alert,
} from "@mui/material";
import Grid from "@mui/material/Grid";
import DeleteIcon from "@mui/icons-material/Delete";
import jsPDF from "jspdf";
import { styled } from "@mui/material/styles";
import { tableCellClasses } from "@mui/material/TableCell";
const StyledTableCell = styled(TableCell)(({ theme }) => ({
  [`&.${tableCellClasses.head}`]: {
    backgroundColor: theme.palette.common.black,
    color: theme.palette.common.white,
  },
  [`&.${tableCellClasses.body}`]: {
    fontSize: 14,
  },
}));

const StyledTableRow = styled(TableRow)(({ theme }) => ({
  "&:nth-of-type(odd)": {
    backgroundColor: theme.palette.action.hover,
  },
  "&:last-child td, &:last-child th": {
    border: 0,
  },
}));
function App() {
  // State variables
  const [customerName, setCustomerName] = useState("");
  const [customerAddress, setCustomerAddress] = useState("");
  const [items, setItems] = useState([{ name: "", quantity: "", price: "" }]);
  const [error, setError] = useState(false);
// Event handler for item changes
const handleItemChange = (index, event) => {
let newItems = [...items];
newItems[index][event.target.name] = event.target.value;
setItems(newItems);
};
// Add new item to the list
const addItem = () => {
setItems([...items, { name: "", quantity: "", price: "" }]);
};
// Delete an item from the list
const deleteItem = (index) => {
let newItems = [...items];
newItems.splice(index, 1);
setItems(newItems);
};
// Generate invoice
const generateInvoice = () => {
  // Validate the input fields
  if (
    !customerName ||
    !customerAddress ||
    items.some((item) => !item.name || !item.quantity || !item.price)
  ) {
    setError(true);
    return;
  }

  // Create a new jsPDF instance
  let doc = new jsPDF("p", "pt");

  // Add invoice header
  doc.setFontSize(24);
  doc.text("Invoice", 40, 60);
  doc.setFontSize(10);
  doc.text("Invoice Number: 123456", 40, 90);
  doc.text("Date: " + new Date().toDateString(), 40, 110);
  doc.text(`Customer Name: ${customerName}`, 40, 130);
  doc.text(`Customer Address: ${customerAddress}`, 40, 150);

  // Add items section
  doc.setFontSize(14);
  doc.text("Items:", 40, 200);
  doc.line(40, 210, 550, 210);

  // Add item details
  doc.setFontSize(12);
  let yOffset = 240;
  let total = 0;

  items.forEach((item) => {
    let itemTotal = item.quantity * item.price;
    total += itemTotal;

    doc.text(`Item: ${item.name}`, 40, yOffset);
    doc.text(`Quantity: ${item.quantity}`, 200, yOffset);
    doc.text(`Price: $${item.price}`, 300, yOffset);
    doc.text(`Total: $${itemTotal}`, 400, yOffset);

    yOffset += 20;
  });

  // Add total
  doc.line(40, yOffset, 550, yOffset);
  doc.setFontSize(14);
  doc.text(`Total: $${total}`, 400, yOffset + 30);

  // Save the generated PDF as "invoice.pdf"
  doc.save("invoice.pdf");

  // Reset error state
  setError(false);
};
return (
  <Container maxWidth="md">
    <Box sx={{my: 4}}>
      <Typography variant="h3" component="h1" gutterBottom>
        Create Invoice
      </Typography>

      {/* Customer Name and Address fields */}
      <Grid container spacing={3}>
        <Grid item xs={6}>
          <TextField
            label="Customer Name"
            fullWidth
            margin="normal"
            value={customerName}
            onChange={(e) => setCustomerName(e.target.value)}
          />
        </Grid>
        <Grid item xs={6}>
          <TextField
            label="Customer Address"
            fullWidth
            margin="normal"
            value={customerAddress}
            onChange={(e) => setCustomerAddress(e.target.value)}
          />
        </Grid>
      </Grid>

      {/* Items table */}
      <TableContainer component={Paper}>
        <Table sx={{minWidth: 700}} aria-label="invoice table">
          <TableHead>
            <TableRow>
              <StyledTableCell>Item Name</StyledTableCell>
              <StyledTableCell align="left">Quantity</StyledTableCell>
              <StyledTableCell align="left">Price</StyledTableCell>
              <StyledTableCell align="left">Action</StyledTableCell>
            </TableRow>
          </TableHead>
          <TableBody>
            {items.map((item, index) => (
              <StyledTableRow key={index}>
                <StyledTableCell component="th" scope="row">
                  <TextField
                    fullWidth
                    value={item.name}
                    onChange={(event) => handleItemChange(index, event)}
                    name="name"
                  />
                </StyledTableCell>
                <StyledTableCell align="right">
                  <TextField
                    fullWidth
                    value={item.quantity}
                    onChange={(event) => handleItemChange(index, event)}
                    name="quantity"
                  />
                </StyledTableCell>
                <StyledTableCell align="right">
                  <TextField
                    fullWidth
                    value={item.price}
                    onChange={(event) => handleItemChange(index, event)}
                    name="price"
                  />
                </StyledTableCell>
                <StyledTableCell align="right">
                  <IconButton onClick={() => deleteItem(index)}>
                    <DeleteIcon />
                  </IconButton>
                </StyledTableCell>
              </StyledTableRow>
            ))}
          </TableBody>
        </Table>
      </TableContainer>

      {/* Buttons */}
      <Box mt={2} display="flex" gap={2}>
        <Button variant="contained" onClick={addItem}>
          Add Item
        </Button>
        <Button variant="outlined" color="success" onClick={generateInvoice}>
          Generate Invoice
        </Button>
      </Box>
    </Box>

    {/* Error Snackbar */}
    <Snackbar
      open={error}
      autoHideDuration={6000}
      onClose={() => setError(false)}
      anchorOrigin={{vertical: "top", horizontal: "right"}}
    >
      <Alert onClose={() => setError(false)} severity="error">
        Please fill in all required fields.
      </Alert>
    </Snackbar>
  </Container>
);
}
export default App;Aqui está o código App.css:
@import url('https://fonts.googleapis.com/css2?family=Poppins:wght@400;700&display=swap');
.App {
  text-align: center;
}

.App-logo {
  height: 40vmin;
  pointer-events: none;
}

@media (prefers-reduced-motion: no-preference) {
  .App-logo {
    animation: App-logo-spin infinite 20s linear;
  }
}

h1,
h2,
h3,
h4,
h5,
h6 {
  font-weight: bold;
  /* This is the weight for bold in Poppins */
  color: #FF6347;
  /* This is the color Tomato. Replace with your preferred color */
}

body {
  font-family: 'Poppins', sans-serif;
  background-color: #E9F8F4;
}

.App-header {
  background-color: #282c34;
  min-height: 100vh;
  display: flex;
  flex-direction: column;
  align-items: center;
  justify-content: center;
  font-size: calc(10px + 2vmin);
  color: white;
}

.App-link {
  color: #61dafb;
}

@keyframes App-logo-spin {
  from {
    transform: rotate(0deg);
  }
  to {
    transform: rotate(360deg);
  }
}
Etapa 5: Testando o aplicativo
Para testar o recurso de geração de PDF, execute o seguinte comando no terminal:
npm startnpm startIsso iniciará o servidor de desenvolvimento, e você pode visualizar a aplicação no seu navegador em http://localhost:3000.
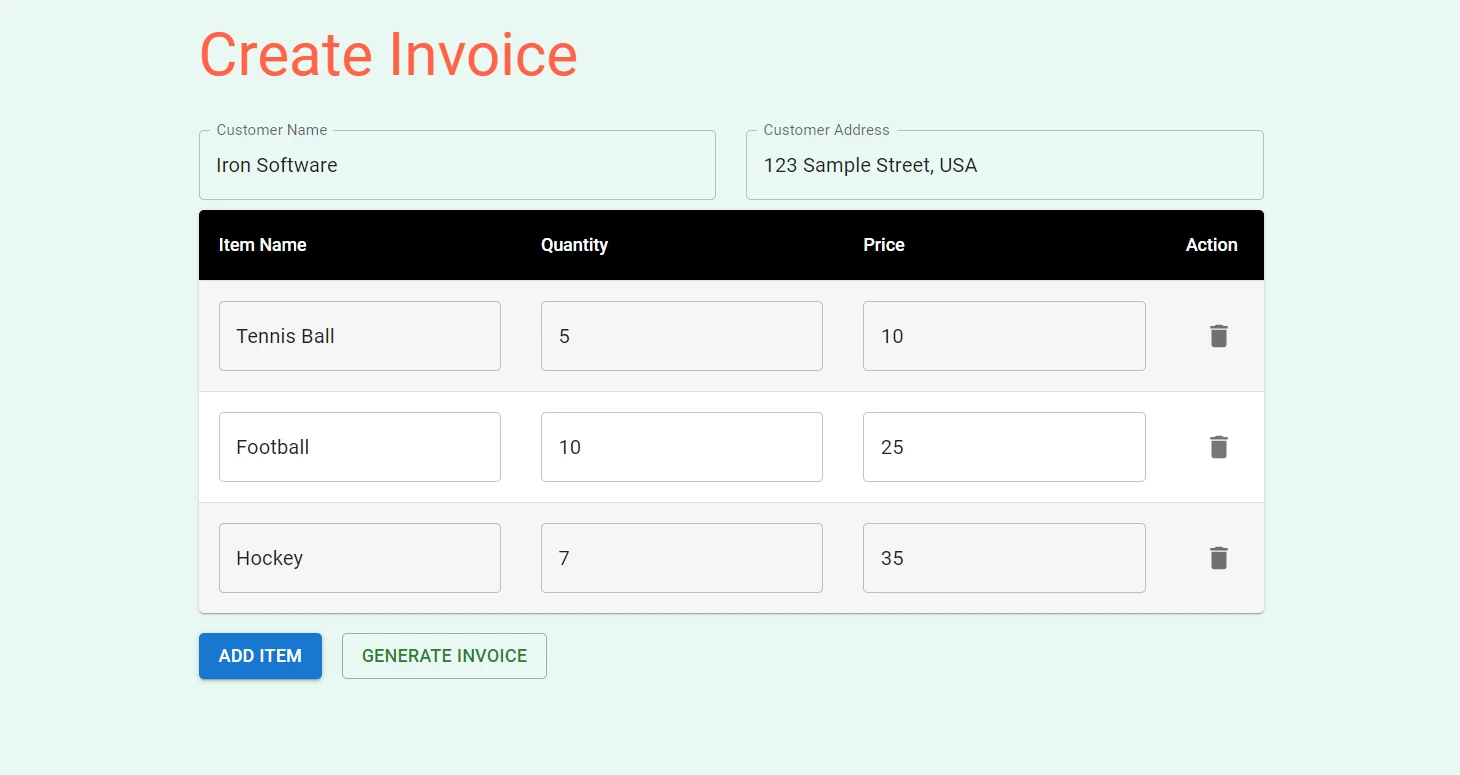
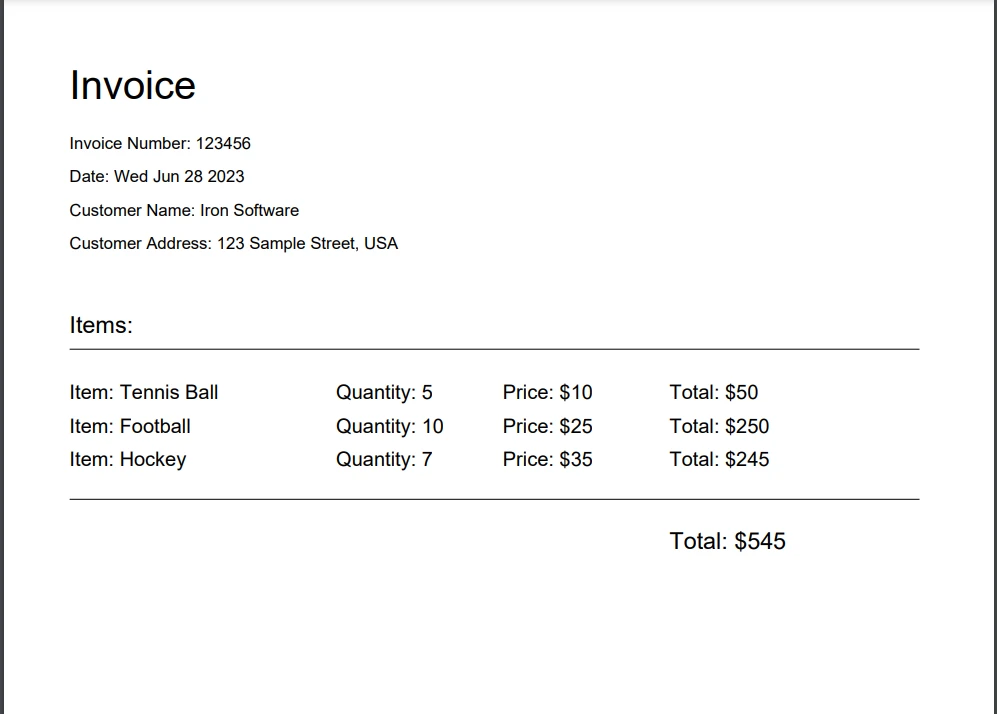
Preencha o nome do cliente, endereço e detalhes do item nos campos de entrada e clique no botão "Gerar Fatura". O arquivo PDF será baixado para o seu computador e você poderá abri-lo para visualizar a fatura gerada em página inteira.
Ao clicar no botão "Gerar Fatura", o arquivo PDF será gerado.
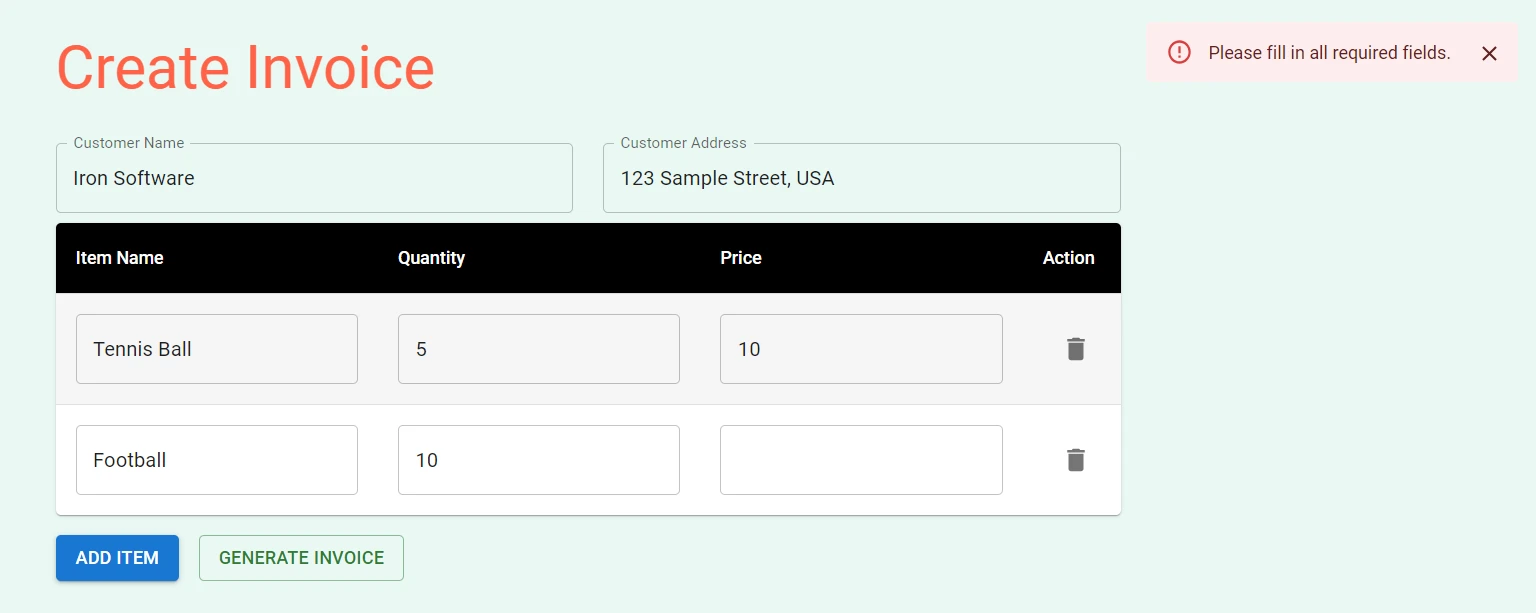
Se você tentar gerar um PDF com algum campo vazio, uma mensagem de erro será exibida no canto superior direito.
IronPDF - A biblioteca PDF for Node.js
IronPDF for Node.js é uma biblioteca PDF completa para Node.js que se destaca pela precisão, facilidade de uso e velocidade. Oferece uma vasta gama de funcionalidades para gerar, editar e formatar PDFs diretamente a partir de HTML, URLs e imagens em React. Com suporte para diversas plataformas, incluindo Windows, MacOS, Linux, Docker e plataformas em nuvem como Azure e AWS, o IronPDF garante compatibilidade entre plataformas. Sua API intuitiva permite que os desenvolvedores integrem rapidamente a geração e manipulação de PDFs em seus projetos Node.js
Entre os recursos notáveis do IronPDF Node.js, incluem-se: renderização com precisão de pixels, amplas opções de formatação e recursos avançados de edição, como mesclar e dividir PDFs, adicionar anotações e criar formulários em PDF.
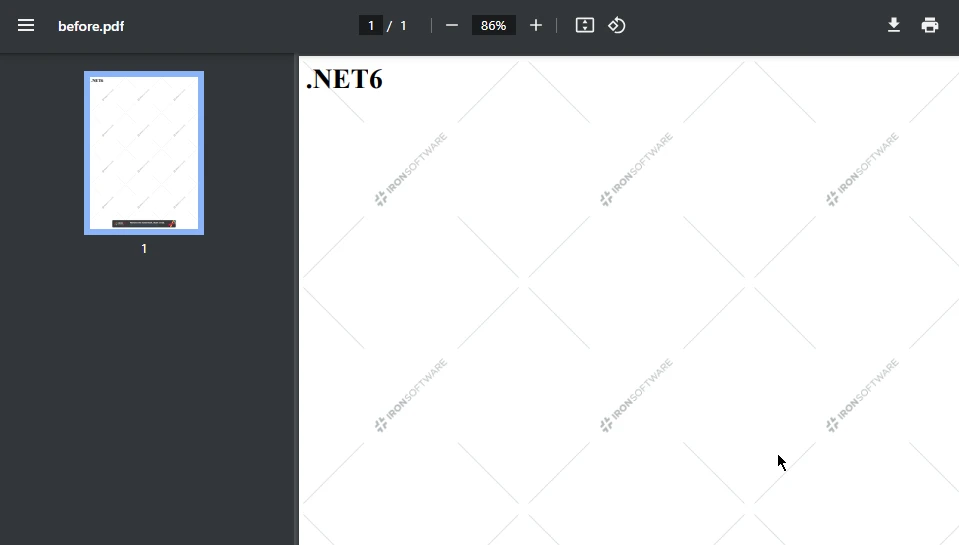
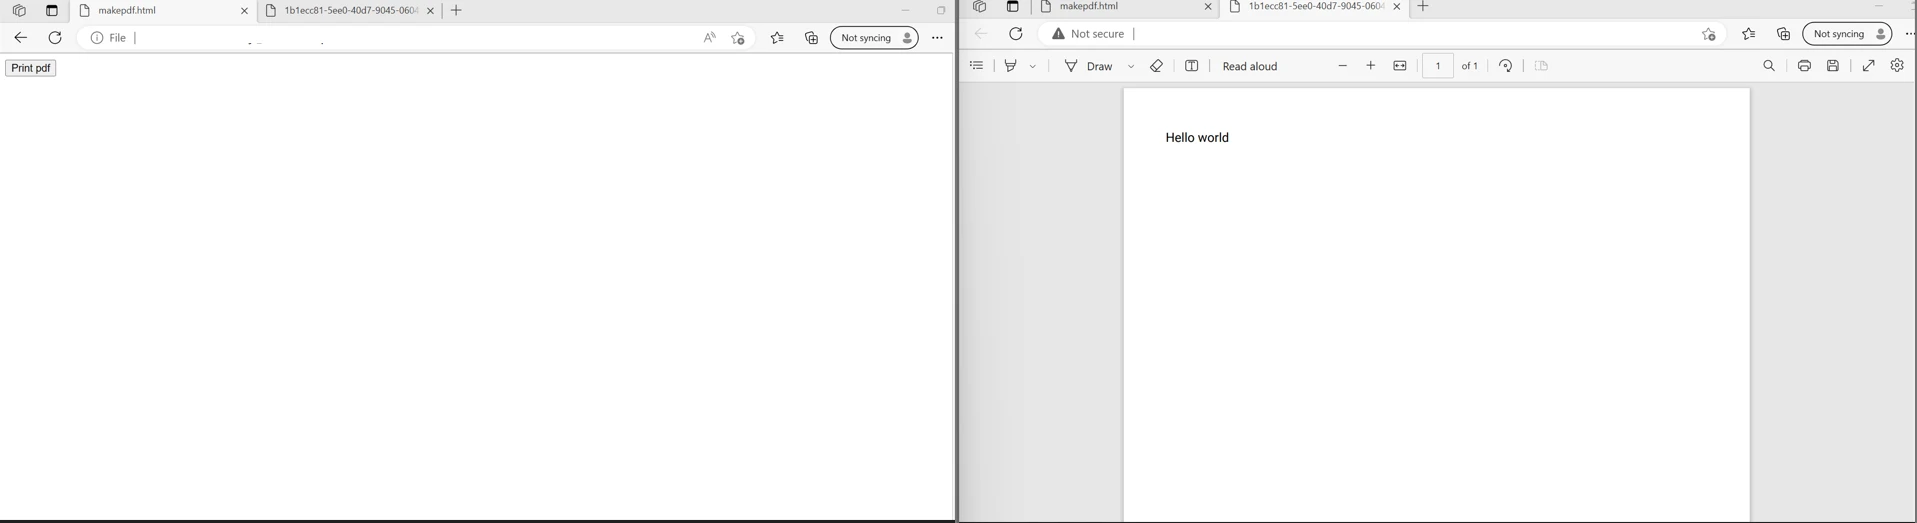
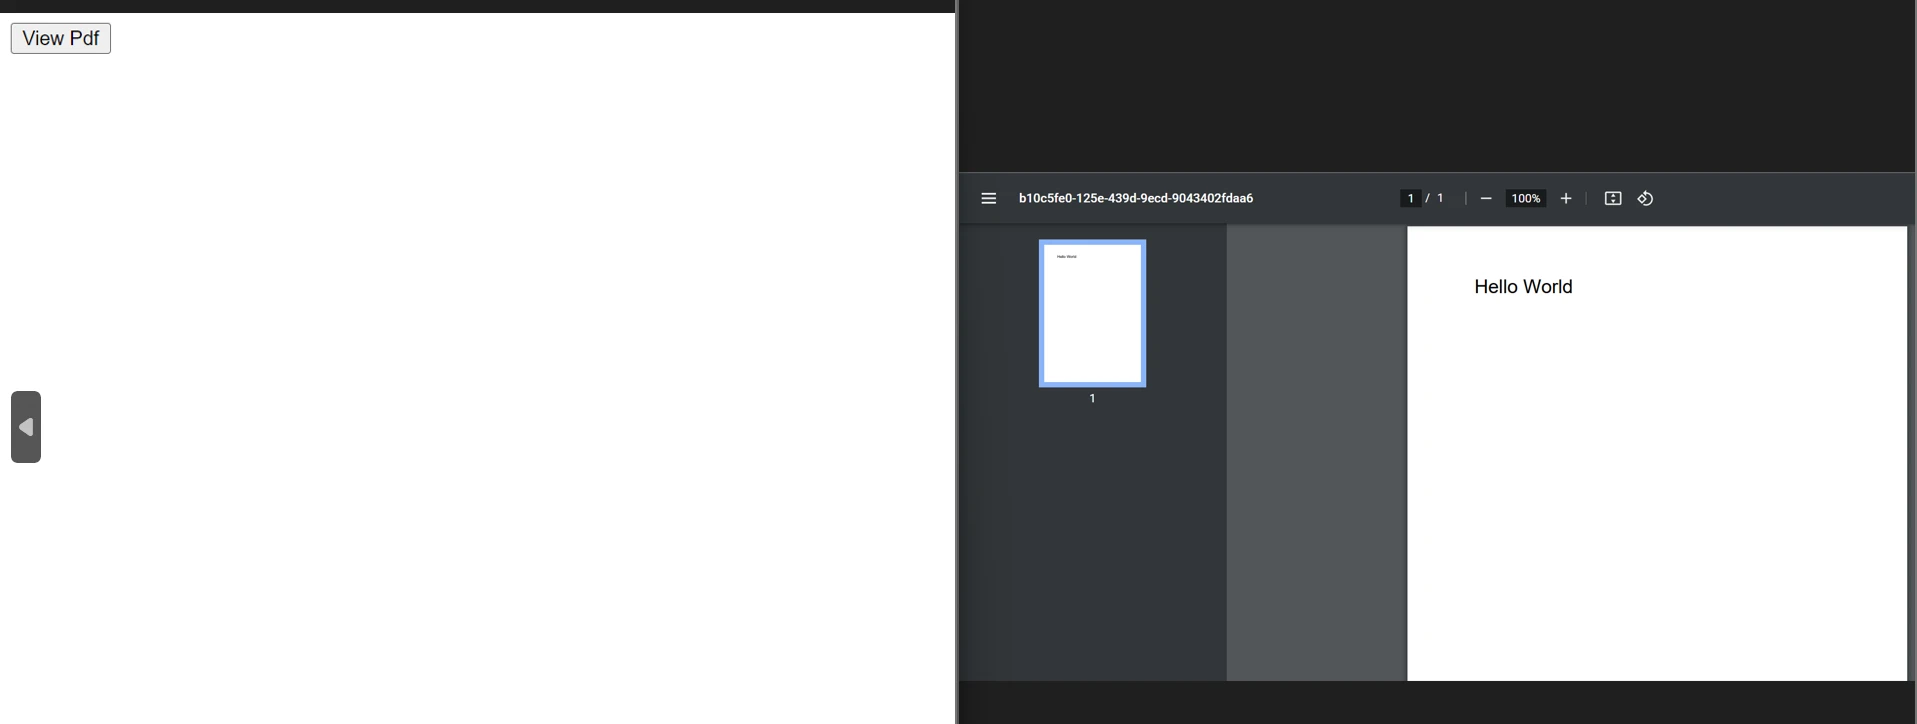
Aqui está um exemplo de como gerar um documento PDF a partir de um arquivo HTML , uma string HTML e uma URL :
import { PdfDocument } from "@ironsoftware/ironpdf";

(async () => {
  const pdfFromUrl = await PdfDocument.fromUrl("https://getbootstrap.com/");
  await pdfFromUrl.saveAs("website.pdf");

  const pdfFromHtmlFile = await PdfDocument.fromHtml("design.html");
  await pdfFromHtmlFile.saveAs("markup.pdf");

  const pdfFromHtmlString = await PdfDocument.fromHtml("<p>Hello World</p>");
  await pdfFromHtmlString.saveAs("markup_with_assets.pdf");
})();
import { PdfDocument } from "@ironsoftware/ironpdf";
(async () => {
const pdfFromUrl = await PdfDocument.fromUrl("https://getbootstrap.com/");
await pdfFromUrl.saveAs("website.pdf");
const pdfFromHtmlFile = await PdfDocument.fromHtml("design.html");
await pdfFromHtmlFile.saveAs("markup.pdf");
const pdfFromHtmlString = await PdfDocument.fromHtml("<p>Hello World</p>");
await pdfFromHtmlString.saveAs("markup_with_assets.pdf");
})();Para mais exemplos de código sobre tarefas relacionadas a PDF, visite esta página de exemplos de código do IronPDF .
Conclusão
Em resumo, criar PDFs em uma aplicação React não precisa ser algo intimidante. Com as ferramentas certas e um bom entendimento, você pode gerar documentos PDF bonitos e bem estruturados sem esforço. Exploramos várias bibliotecas como jsPDF, pdfmake, e React-PDF, cada uma com suas próprias forças e características únicas.
Com o processo de integração simples do IronPDF para frameworks e bibliotecas em JavaScript, excelente documentação e suporte técnico ágil, os desenvolvedores podem começar a usar rapidamente, tornando-o uma das principais opções para gerar PDFs de nível profissional em aplicações Node.js
O IronPDF oferece um período de teste gratuito com todas as suas funcionalidades . Também está disponível para outras linguagens como C# .NET , Java e Python . Visite o site da IronPDF para obter mais detalhes.