如何在 React 中创建 PDF 文件
欢迎参加React应用程序中创建PDF文档的教程! 在本教程中,我们将探索各种用于生成 PDF 的库,并学习如何使用流行的 jsPDF 库直接从 React 组件创建 PDF 文件。 那么,让我们深入学习并开始吧!
PDF(可移植文档格式)是一种广泛使用的文件格式,用于共享和打印文档,同时保留其布局和格式。 作为React网络开发人员,您可能会遇到需要生成PDF文档的情况,例如直接从React应用程序生成发票、报告或销售合同。
选择React PDF库
在React应用程序中创建PDF文档可能是一项艰巨的任务,尤其是对于该领域的新手。 谢天谢地,我们有几个第三方库可以显著简化此过程。 每个库都有自己独特的功能和实用程序,以满足不同的使用场景。 让我们更详细地探索这些库。
jsPDF
jsPDF 是一个在开发者中广泛流行的库,用于从JavaScript生成 PDF 文件。 它的主要卖点之一是其简单性。 它的语法和用法非常简单,可以让您在短时间内将HTML内容转换为PDF文件。
它允许您控制 PDF 的格式和布局,从更改字体大小和颜色到调整页面方向和大小。jsPDF 是一个强大的解决方案,可在浏览器和服务器环境中运行,因此是各种JavaScript应用程序的绝佳选择。
pdfmake
pdfmake 是一款纯JavaScript编写的客户端/服务器端 PDF 打印解决方案。 由于其全面的API和灵活的布局选项,这个库是创建更复杂PDF的绝佳选择。 使用 pdfmake,您可以使用简单的JavaScript对象定义文档内容和结构,然后将其转换为有效的 PDF 文档。
React-PDF
React-PDF 是一个独特的库,它提供了使用 React 组件创建 PDF 文件的强大功能。 与手动在JavaScript对象中编写文档结构不同,您可以像构建典型的React应用程序一样,使用可重用的组件和属性来创建PDF。 IronPDF网站上有使用React-PDF库创建PDF的教程。
为什么选择jsPDF?
虽然这三个库都提供了在 React 中生成 PDF 文档的强大工具,但由于 jsPDF 的简单性、灵活性和在社区中的广泛应用,我们将在本教程中使用 jsPDF。 它对初学者的入门门槛较低,其强大的功能集使其成为多种使用场景的合适选择。 我们将通过 jsPDF 探讨的原则将为你生成 PDF 奠定坚实的基础,如果你的项目需要,你将能够更容易地掌握其他库。
前提条件
在我们深入这个教程之前,确保您装备了必要的工具和知识是至关重要的,以顺利跟随。 本教程的前提条件如下:
React的基本理解
首先,您应该对React有一个基本的理解,这是一个流行的JavaScript库,用于构建用户界面,尤其是单页应用程序。 您应该熟悉React中的JSX(JavaScript XML)、组件、状态和属性等概念。
开发环境
您还应该在计算机上设置一个开发环境,用于构建React应用程序。 这包括文本编辑器或集成开发环境(IDE)。 如Visual Studio Code、Atom或Sublime Text等文本编辑器都是不错的选择。
Node.js和npm
为了管理我们的项目及其依赖项,我们将使用Node.js和npm(Node包管理器)。 确保您在计算机上安装了Node.js。 Node.js是一个JavaScript运行环境,让我们可以在服务器上运行JavaScript。 它附带npm,所以您可以管理项目所需的库。
您可以通过运行以下终端命令来检查是否已安装Node.js和npm:
node -v
npm -v
node -v
npm -v这些命令将显示您系统上安装的Node.js和npm的版本。 如果您未安装它们或者版本已过时,请从Node.js的官方下载页面下载并安装最新的长期支持(LTS)版本。
步骤 1:设置项目
让我们先设置我们的React项目。 打开您的终端并导航到您希望创建项目的目标目录。 运行以下命令创建一个新的React应用程序:
npx create-react-app pdf-from-reactnpx create-react-app pdf-from-react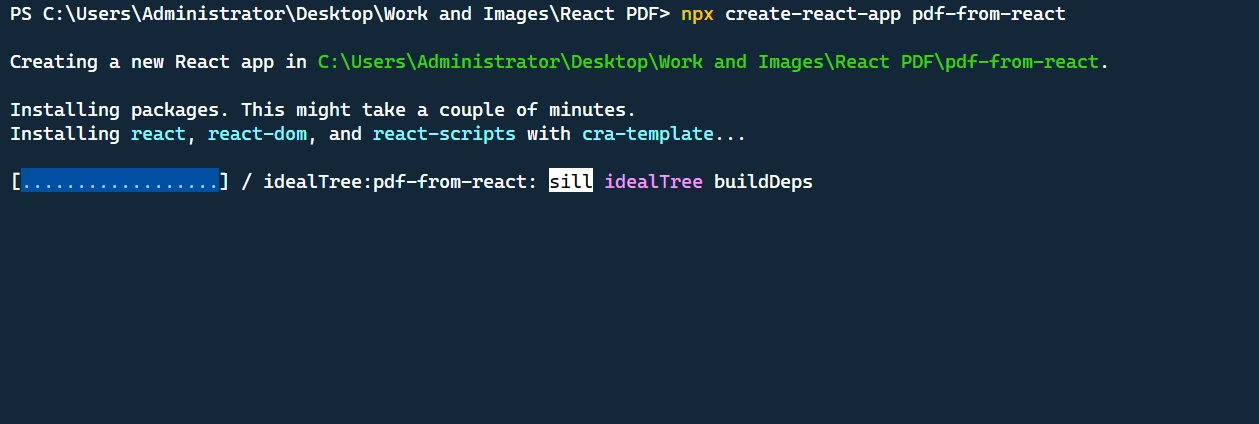
此命令将创建一个名为 pdf-from-react 的新目录,其中包含基本的 React 项目结构。
接下来,进入项目目录:
cd pdf-from-reactcd pdf-from-react现在,我们可以在代码编辑器中打开项目并继续实现。
步骤2:添加所需的依赖项
首先,我们需要安装必要的包。 使用以下终端命令安装 @mui/material 和 jspdf。
npm install jspdf @mui/material @emotion/react @emotion/styled @mui/icons-materialnpm install jspdf @mui/material @emotion/react @emotion/styled @mui/icons-material步骤3:构建PDF生成功能
导入库
我们首先导入应用程序所需的依赖项。 其中包括 Material-UI 库中的各种组件、用于生成 PDF 的 jsPDF 库以及样式实用程序。
import React, { useState } from "react";
import "./App.css";
import {
  Button,
  TextField,
  Box,
  Container,
  Typography,
  Table,
  TableBody,
  TableCell,
  TableContainer,
  TableHead,
  TableRow,
  Paper,
  IconButton,
  Snackbar,
  Alert,
} from "@mui/material";
import Grid from "@mui/material/Grid";
import DeleteIcon from "@mui/icons-material/Delete";
import jsPDF from "jspdf";
import { styled } from "@mui/material/styles";
import { tableCellClasses } from "@mui/material/TableCell";
import React, { useState } from "react";
import "./App.css";
import {
Button,
TextField,
Box,
Container,
Typography,
Table,
TableBody,
TableCell,
TableContainer,
TableHead,
TableRow,
Paper,
IconButton,
Snackbar,
Alert,
} from "@mui/material";
import Grid from "@mui/material/Grid";
import DeleteIcon from "@mui/icons-material/Delete";
import jsPDF from "jspdf";
import { styled } from "@mui/material/styles";
import { tableCellClasses } from "@mui/material/TableCell";创建样式化组件
为了给我们的应用程序添加一致的跨浏览器行为,我们使用了 MUI 库中的 styled 实用程序来创建 StyledTableCell 和 StyledTableRow。
const StyledTableCell = styled(TableCell)(({ theme }) => ({
[`&.${tableCellClasses.head}`]: {
backgroundColor: theme.palette.common.black,
color: theme.palette.common.white,
},
[`&.${tableCellClasses.body}`]: {
fontSize: 14,
},
}));
const StyledTableRow = styled(TableRow)(({ theme }) => ({
"&:nth-of-type(odd)": {
backgroundColor: theme.palette.action.hover,
},
"&:last-child td, &:last-child th": {
border: 0,
},
}));const StyledTableCell = styled(TableCell)(({ theme }) => ({
[`&.${tableCellClasses.head}`]: {
backgroundColor: theme.palette.common.black,
color: theme.palette.common.white,
},
[`&.${tableCellClasses.body}`]: {
fontSize: 14,
},
}));
const StyledTableRow = styled(TableRow)(({ theme }) => ({
"&:nth-of-type(odd)": {
backgroundColor: theme.palette.action.hover,
},
"&:last-child td, &:last-child th": {
border: 0,
},
}));创建App组件
我们应用程序的主要组件是 App 组件。 我们有四个状态变量:customerName 和 customerAddress 用于跟踪客户数据,items 用于跟踪发票中的项目列表,以及 error 用于在必要时显示错误消息。
function App() {
// State variables
const [customerName, setCustomerName] = useState("");
const [customerAddress, setCustomerAddress] = useState("");
const [items, setItems] = useState([{ name: "", quantity: "", price: "" }]);
const [error, setError] = useState(false);function App() {
// State variables
const [customerName, setCustomerName] = useState("");
const [customerAddress, setCustomerAddress] = useState("");
const [items, setItems] = useState([{ name: "", quantity: "", price: "" }]);
const [error, setError] = useState(false);处理用户输入
在这段代码中,我们定义了处理用户交互的函数:更改项目细节、添加新项目和删除项目。 handleItemChange 函数会在用户修改项目属性时更新该属性。 addItem 函数向列表中添加新项。deleteItem 函数从列表中删除项。
const handleItemChange = (index, event) => {
let newItems = [...items];
newItems[index][event.target.name] = event.target.value;
setItems(newItems);
};
const addItem = () => {
setItems([...items, { name: "", quantity: "", price: "" }]);
};
const deleteItem = (index) => {
let newItems = [...items];
newItems.splice(index, 1);
setItems(newItems);
};const handleItemChange = (index, event) => {
let newItems = [...items];
newItems[index][event.target.name] = event.target.value;
setItems(newItems);
};
const addItem = () => {
setItems([...items, { name: "", quantity: "", price: "" }]);
};
const deleteItem = (index) => {
let newItems = [...items];
newItems.splice(index, 1);
setItems(newItems);
};生成发票
以下是 generateInvoice 函数代码:
// Generate invoice
const generateInvoice = () => {
// Validate the input fields
if (
!customerName ||
!customerAddress ||
items.some((item) => !item.name || !item.quantity || !item.price)
) {
setError(true);
return;
}
// Create a new jsPDF instance
let doc = new jsPDF("p", "pt");
// Add invoice header
doc.setFontSize(24);
doc.text("Invoice", 40, 60);
doc.setFontSize(10);
doc.text("Invoice Number: 123456", 40, 90);
doc.text("Date: " + new Date().toDateString(), 40, 110);
doc.text(`Customer Name: ${customerName}`, 40, 130);
doc.text(`Customer Address: ${customerAddress}`, 40, 150);
// Add items section
doc.setFontSize(14);
doc.text("Items:", 40, 200);
doc.line(40, 210, 550, 210);
// Add item details
doc.setFontSize(12);
let yOffset = 240;
let total = 0;
items.forEach((item) => {
let itemTotal = item.quantity * item.price;
total += itemTotal;
doc.text(`Item: ${item.name}`, 40, yOffset);
doc.text(`Quantity: ${item.quantity}`, 200, yOffset);
doc.text(`Price: $${item.price}`, 300, yOffset);
doc.text(`Total: $${itemTotal}`, 400, yOffset);
yOffset += 20;
});
// Add total
doc.line(40, yOffset, 550, yOffset);
doc.setFontSize(14);
doc.text(`Total: $${total}`, 400, yOffset + 30);
// Save the generated PDF as "invoice.pdf"
doc.save("invoice.pdf");
// Reset error state
setError(false);
};// Generate invoice
const generateInvoice = () => {
// Validate the input fields
if (
!customerName ||
!customerAddress ||
items.some((item) => !item.name || !item.quantity || !item.price)
) {
setError(true);
return;
}
// Create a new jsPDF instance
let doc = new jsPDF("p", "pt");
// Add invoice header
doc.setFontSize(24);
doc.text("Invoice", 40, 60);
doc.setFontSize(10);
doc.text("Invoice Number: 123456", 40, 90);
doc.text("Date: " + new Date().toDateString(), 40, 110);
doc.text(`Customer Name: ${customerName}`, 40, 130);
doc.text(`Customer Address: ${customerAddress}`, 40, 150);
// Add items section
doc.setFontSize(14);
doc.text("Items:", 40, 200);
doc.line(40, 210, 550, 210);
// Add item details
doc.setFontSize(12);
let yOffset = 240;
let total = 0;
items.forEach((item) => {
let itemTotal = item.quantity * item.price;
total += itemTotal;
doc.text(`Item: ${item.name}`, 40, yOffset);
doc.text(`Quantity: ${item.quantity}`, 200, yOffset);
doc.text(`Price: $${item.price}`, 300, yOffset);
doc.text(`Total: $${itemTotal}`, 400, yOffset);
yOffset += 20;
});
// Add total
doc.line(40, yOffset, 550, yOffset);
doc.setFontSize(14);
doc.text(`Total: $${total}`, 400, yOffset + 30);
// Save the generated PDF as "invoice.pdf"
doc.save("invoice.pdf");
// Reset error state
setError(false);
};在 generateInvoice 函数中,我们首先对输入字段进行验证,以确保客户姓名、客户地址和商品详情已填写。 如果这些字段中的任何一个为空,我们将 error 状态设置为 true 并提前返回。
接下来,我们通过调用 new jsPDF("p", "pt") 来创建一个 jsPDF 的新实例。 第一个参数 "p" 指定页面方向为纵向,第二个参数 "pt" 指定测量单位为点。
然后我们开始将内容添加到PDF文档中。 我们使用 doc.setFontSize 设置字体大小,并使用 doc.text 方法在页面上的特定坐标添加文本。 我们添加发票标题,包括标题、发票号、日期、客户姓名和客户地址。
在标题之后,我们通过设置字体大小并添加一行 doc.line 来添加"项目"部分,以将项目与标题分隔开。 接下来,我们遍历数组 items 中的每个项目,并通过将数量乘以单价来计算每个项目的总价。我们将所有项目总价的总和更新到 total 变量中。
对于每个项目,我们使用 doc.text 将项目名称、数量、价格和项目总计添加到 PDF 文档中。 对于每个项目,我们将 yOffset 变量递增,以便移至下一行。 最后,我们添加一行来分隔各项和总计,并使用 doc.text 在文档右下角添加总金额。
内容添加完毕后,我们使用 doc.save("invoice.pdf") 将生成的 PDF 保存为"invoice.pdf"到用户的计算机上。 最后,我们将 error 状态重置为 false,以清除任何先前的验证错误。
步骤4:渲染UI
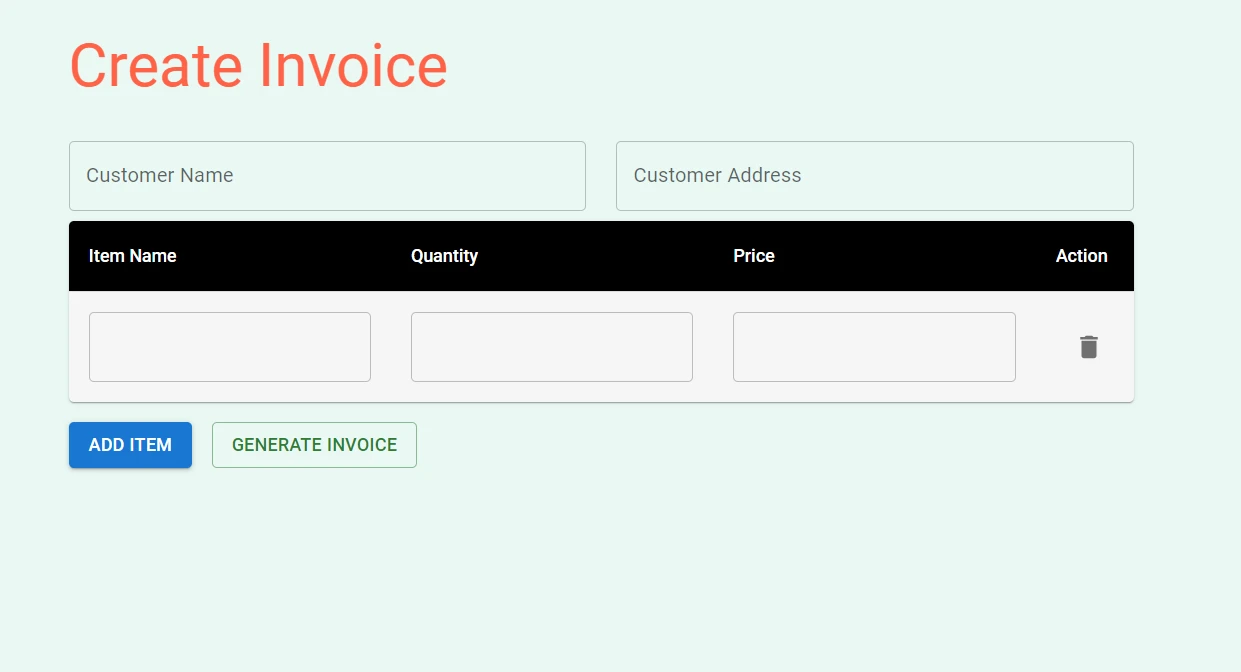
return 语句包含处理渲染过程的 JSX 代码。 它包括客户名称和地址的输入字段、用于输入项目详细信息的表格、用于添加项目和生成发票的按钮,以及用于显示验证错误的错误通知。
它使用 Material-UI 库中的组件,例如 Snackbar 和 Alert,来创建基本组件。 这些组件用于创建表单字段、表格、按钮和错误通知。
return (
<Container maxWidth="md">
<Box sx={{ my: 4 }}>
<Typography variant="h3" component="h1" gutterBottom>
Create Invoice
</Typography>
{/* Customer Name and Address fields */}
<Grid container spacing={3}>
<Grid item xs={6}>
<TextField
label="Customer Name"
fullWidth
margin="normal"
value={customerName}
onChange={(e) => setCustomerName(e.target.value)}
/>
</Grid>
<Grid item xs={6}>
<TextField
label="Customer Address"
fullWidth
margin="normal"
value={customerAddress}
onChange={(e) => setCustomerAddress(e.target.value)}
/>
</Grid>
</Grid>
{/* Items table */}
<TableContainer component={Paper}>
<Table sx={{ minWidth: 700 }} aria-label="invoice table">
<TableHead>
<TableRow>
<StyledTableCell>Item Name</StyledTableCell>
<StyledTableCell align="left">Quantity</StyledTableCell>
<StyledTableCell align="left">Price</StyledTableCell>
<StyledTableCell align="left">Action</StyledTableCell>
</TableRow>
</TableHead>
<TableBody>
{items.map((item, index) => (
<StyledTableRow key={index}>
<StyledTableCell component="th" scope="row">
<TextField
fullWidth
value={item.name}
onChange={(event) => handleItemChange(index, event)}
name="name"
/>
</StyledTableCell>
<StyledTableCell align="right">
<TextField
fullWidth
value={item.quantity}
onChange={(event) => handleItemChange(index, event)}
name="quantity"
/>
</StyledTableCell>
<StyledTableCell align="right">
<TextField
fullWidth
value={item.price}
onChange={(event) => handleItemChange(index, event)}
name="price"
/>
</StyledTableCell>
<StyledTableCell align="right">
<IconButton onClick={() => deleteItem(index)}>
<DeleteIcon />
</IconButton>
</StyledTableCell>
</StyledTableRow>
))}
</TableBody>
</Table>
</TableContainer>
{/* Buttons */}
<Box mt={2} display="flex" gap={2}>
<Button variant="contained" onClick={addItem}>
Add Item
</Button>
<Button variant="outlined" color="success" onClick={generateInvoice}>
Generate Invoice
</Button>
</Box>
</Box>
{/* Error Snackbar */}
<Snackbar
open={error}
autoHideDuration={6000}
onClose={() => setError(false)}
anchorOrigin={{ vertical: "top", horizontal: "right" }}
>
<Alert onClose={() => setError(false)} severity="error">
Please fill in all required fields.
</Alert>
</Snackbar>
</Container>
);return (
<Container maxWidth="md">
<Box sx={{ my: 4 }}>
<Typography variant="h3" component="h1" gutterBottom>
Create Invoice
</Typography>
{/* Customer Name and Address fields */}
<Grid container spacing={3}>
<Grid item xs={6}>
<TextField
label="Customer Name"
fullWidth
margin="normal"
value={customerName}
onChange={(e) => setCustomerName(e.target.value)}
/>
</Grid>
<Grid item xs={6}>
<TextField
label="Customer Address"
fullWidth
margin="normal"
value={customerAddress}
onChange={(e) => setCustomerAddress(e.target.value)}
/>
</Grid>
</Grid>
{/* Items table */}
<TableContainer component={Paper}>
<Table sx={{ minWidth: 700 }} aria-label="invoice table">
<TableHead>
<TableRow>
<StyledTableCell>Item Name</StyledTableCell>
<StyledTableCell align="left">Quantity</StyledTableCell>
<StyledTableCell align="left">Price</StyledTableCell>
<StyledTableCell align="left">Action</StyledTableCell>
</TableRow>
</TableHead>
<TableBody>
{items.map((item, index) => (
<StyledTableRow key={index}>
<StyledTableCell component="th" scope="row">
<TextField
fullWidth
value={item.name}
onChange={(event) => handleItemChange(index, event)}
name="name"
/>
</StyledTableCell>
<StyledTableCell align="right">
<TextField
fullWidth
value={item.quantity}
onChange={(event) => handleItemChange(index, event)}
name="quantity"
/>
</StyledTableCell>
<StyledTableCell align="right">
<TextField
fullWidth
value={item.price}
onChange={(event) => handleItemChange(index, event)}
name="price"
/>
</StyledTableCell>
<StyledTableCell align="right">
<IconButton onClick={() => deleteItem(index)}>
<DeleteIcon />
</IconButton>
</StyledTableCell>
</StyledTableRow>
))}
</TableBody>
</Table>
</TableContainer>
{/* Buttons */}
<Box mt={2} display="flex" gap={2}>
<Button variant="contained" onClick={addItem}>
Add Item
</Button>
<Button variant="outlined" color="success" onClick={generateInvoice}>
Generate Invoice
</Button>
</Box>
</Box>
{/* Error Snackbar */}
<Snackbar
open={error}
autoHideDuration={6000}
onClose={() => setError(false)}
anchorOrigin={{ vertical: "top", horizontal: "right" }}
>
<Alert onClose={() => setError(false)} severity="error">
Please fill in all required fields.
</Alert>
</Snackbar>
</Container>
);完整的App.js和App.css代码
以下是完整的 App.js 代码,您可以将其复制并粘贴到您的项目中:
import React, { useState } from "react";
import "./App.css";
import {
  Button,
  TextField,
  Box,
  Container,
  Typography,
  Table,
  TableBody,
  TableCell,
  TableContainer,
  TableHead,
  TableRow,
  Paper,
  IconButton,
  Snackbar,
  Alert,
} from "@mui/material";
import Grid from "@mui/material/Grid";
import DeleteIcon from "@mui/icons-material/Delete";
import jsPDF from "jspdf";
import { styled } from "@mui/material/styles";
import { tableCellClasses } from "@mui/material/TableCell";
const StyledTableCell = styled(TableCell)(({ theme }) => ({
  [`&.${tableCellClasses.head}`]: {
    backgroundColor: theme.palette.common.black,
    color: theme.palette.common.white,
  },
  [`&.${tableCellClasses.body}`]: {
    fontSize: 14,
  },
}));

const StyledTableRow = styled(TableRow)(({ theme }) => ({
  "&:nth-of-type(odd)": {
    backgroundColor: theme.palette.action.hover,
  },
  "&:last-child td, &:last-child th": {
    border: 0,
  },
}));
function App() {
// State variables
const [customerName, setCustomerName] = useState("");
const [customerAddress, setCustomerAddress] = useState("");
const [items, setItems] = useState([{ name: "", quantity: "", price: "" }]);
const [error, setError] = useState(false);
// Event handler for item changes
const handleItemChange = (index, event) => {
let newItems = [...items];
newItems[index][event.target.name] = event.target.value;
setItems(newItems);
};
// Add new item to the list
const addItem = () => {
setItems([...items, { name: "", quantity: "", price: "" }]);
};
// Delete an item from the list
const deleteItem = (index) => {
let newItems = [...items];
newItems.splice(index, 1);
setItems(newItems);
};
// Generate invoice
const generateInvoice = () => {
// Validate the input fields
if (
!customerName ||
!customerAddress ||
items.some((item) => !item.name || !item.quantity || !item.price)
) {
setError(true);
return;
}
// Create a new jsPDF instance
let doc = new jsPDF("p", "pt");
// Add invoice header
doc.setFontSize(24);
doc.text("Invoice", 40, 60);
doc.setFontSize(10);
doc.text("Invoice Number: 123456", 40, 90);
doc.text("Date: " + new Date().toDateString(), 40, 110);
doc.text(`Customer Name: ${customerName}`, 40, 130);
doc.text(`Customer Address: ${customerAddress}`, 40, 150);
// Add items section
doc.setFontSize(14);
doc.text("Items:", 40, 200);
doc.line(40, 210, 550, 210);
// Add item details
doc.setFontSize(12);
let yOffset = 240;
let total = 0;
items.forEach((item) => {
let itemTotal = item.quantity * item.price;
total += itemTotal;
doc.text(`Item: ${item.name}`, 40, yOffset);
doc.text(`Quantity: ${item.quantity}`, 200, yOffset);
doc.text(`Price: $${item.price}`, 300, yOffset);
doc.text(`Total: $${itemTotal}`, 400, yOffset);
yOffset += 20;
});
// Add total
doc.line(40, yOffset, 550, yOffset);
doc.setFontSize(14);
doc.text(`Total: $${total}`, 400, yOffset + 30);
// Save the generated PDF as "invoice.pdf"
doc.save("invoice.pdf");
// Reset error state
setError(false);
};
return (
<Container maxWidth="md">
<Box sx={{ my: 4 }}>
<Typography variant="h3" component="h1" gutterBottom>
Create Invoice
</Typography>
{/* Customer Name and Address fields */}
<Grid container spacing={3}>
<Grid item xs={6}>
<TextField
label="Customer Name"
fullWidth
margin="normal"
value={customerName}
onChange={(e) => setCustomerName(e.target.value)}
/>
</Grid>
<Grid item xs={6}>
<TextField
label="Customer Address"
fullWidth
margin="normal"
value={customerAddress}
onChange={(e) => setCustomerAddress(e.target.value)}
/>
</Grid>
</Grid>
{/* Items table */}
<TableContainer component={Paper}>
<Table sx={{ minWidth: 700 }} aria-label="invoice table">
<TableHead>
<TableRow>
<StyledTableCell>Item Name</StyledTableCell>
<StyledTableCell align="left">Quantity</StyledTableCell>
<StyledTableCell align="left">Price</StyledTableCell>
<StyledTableCell align="left">Action</StyledTableCell>
</TableRow>
</TableHead>
<TableBody>
{items.map((item, index) => (
<StyledTableRow key={index}>
<StyledTableCell component="th" scope="row">
<TextField
fullWidth
value={item.name}
onChange={(event) => handleItemChange(index, event)}
name="name"
/>
</StyledTableCell>
<StyledTableCell align="right">
<TextField
fullWidth
value={item.quantity}
onChange={(event) => handleItemChange(index, event)}
name="quantity"
/>
</StyledTableCell>
<StyledTableCell align="right">
<TextField
fullWidth
value={item.price}
onChange={(event) => handleItemChange(index, event)}
name="price"
/>
</StyledTableCell>
<StyledTableCell align="right">
<IconButton onClick={() => deleteItem(index)}>
<DeleteIcon />
</IconButton>
</StyledTableCell>
</StyledTableRow>
))}
</TableBody>
</Table>
</TableContainer>
{/* Buttons */}
<Box mt={2} display="flex" gap={2}>
<Button variant="contained" onClick={addItem}>
Add Item
</Button>
<Button variant="outlined" color="success" onClick={generateInvoice}>
Generate Invoice
</Button>
</Box>
</Box>
{/* Error Snackbar */}
<Snackbar
open={error}
autoHideDuration={6000}
onClose={() => setError(false)}
anchorOrigin={{ vertical: "top", horizontal: "right" }}
>
<Alert onClose={() => setError(false)} severity="error">
Please fill in all required fields.
</Alert>
</Snackbar>
</Container>
);
}
export default App;import React, { useState } from "react";
import "./App.css";
import {
Button,
TextField,
Box,
Container,
Typography,
Table,
TableBody,
TableCell,
TableContainer,
TableHead,
TableRow,
Paper,
IconButton,
Snackbar,
Alert,
} from "@mui/material";
import Grid from "@mui/material/Grid";
import DeleteIcon from "@mui/icons-material/Delete";
import jsPDF from "jspdf";
import { styled } from "@mui/material/styles";
import { tableCellClasses } from "@mui/material/TableCell";
const StyledTableCell = styled(TableCell)(({ theme }) => ({
  [`&.${tableCellClasses.head}`]: {
    backgroundColor: theme.palette.common.black,
    color: theme.palette.common.white,
  },
  [`&.${tableCellClasses.body}`]: {
    fontSize: 14,
  },
}));

const StyledTableRow = styled(TableRow)(({ theme }) => ({
  "&:nth-of-type(odd)": {
    backgroundColor: theme.palette.action.hover,
  },
  "&:last-child td, &:last-child th": {
    border: 0,
  },
}));
function App() {
  // State variables
  const [customerName, setCustomerName] = useState("");
  const [customerAddress, setCustomerAddress] = useState("");
  const [items, setItems] = useState([{ name: "", quantity: "", price: "" }]);
  const [error, setError] = useState(false);
// Event handler for item changes
const handleItemChange = (index, event) => {
let newItems = [...items];
newItems[index][event.target.name] = event.target.value;
setItems(newItems);
};
// Add new item to the list
const addItem = () => {
setItems([...items, { name: "", quantity: "", price: "" }]);
};
// Delete an item from the list
const deleteItem = (index) => {
let newItems = [...items];
newItems.splice(index, 1);
setItems(newItems);
};
// Generate invoice
const generateInvoice = () => {
  // Validate the input fields
  if (
    !customerName ||
    !customerAddress ||
    items.some((item) => !item.name || !item.quantity || !item.price)
  ) {
    setError(true);
    return;
  }

  // Create a new jsPDF instance
  let doc = new jsPDF("p", "pt");

  // Add invoice header
  doc.setFontSize(24);
  doc.text("Invoice", 40, 60);
  doc.setFontSize(10);
  doc.text("Invoice Number: 123456", 40, 90);
  doc.text("Date: " + new Date().toDateString(), 40, 110);
  doc.text(`Customer Name: ${customerName}`, 40, 130);
  doc.text(`Customer Address: ${customerAddress}`, 40, 150);

  // Add items section
  doc.setFontSize(14);
  doc.text("Items:", 40, 200);
  doc.line(40, 210, 550, 210);

  // Add item details
  doc.setFontSize(12);
  let yOffset = 240;
  let total = 0;

  items.forEach((item) => {
    let itemTotal = item.quantity * item.price;
    total += itemTotal;

    doc.text(`Item: ${item.name}`, 40, yOffset);
    doc.text(`Quantity: ${item.quantity}`, 200, yOffset);
    doc.text(`Price: $${item.price}`, 300, yOffset);
    doc.text(`Total: $${itemTotal}`, 400, yOffset);

    yOffset += 20;
  });

  // Add total
  doc.line(40, yOffset, 550, yOffset);
  doc.setFontSize(14);
  doc.text(`Total: $${total}`, 400, yOffset + 30);

  // Save the generated PDF as "invoice.pdf"
  doc.save("invoice.pdf");

  // Reset error state
  setError(false);
};
return (
  <Container maxWidth="md">
    <Box sx={{ my: 4 }}>
      <Typography variant="h3" component="h1" gutterBottom>
        Create Invoice
      </Typography>

      {/* Customer Name and Address fields */}
      <Grid container spacing={3}>
        <Grid item xs={6}>
          <TextField
            label="Customer Name"
            fullWidth
            margin="normal"
            value={customerName}
            onChange={(e) => setCustomerName(e.target.value)}
          />
        </Grid>
        <Grid item xs={6}>
          <TextField
            label="Customer Address"
            fullWidth
            margin="normal"
            value={customerAddress}
            onChange={(e) => setCustomerAddress(e.target.value)}
          />
        </Grid>
      </Grid>

      {/* Items table */}
      <TableContainer component={Paper}>
        <Table sx={{ minWidth: 700 }} aria-label="invoice table">
          <TableHead>
            <TableRow>
              <StyledTableCell>Item Name</StyledTableCell>
              <StyledTableCell align="left">Quantity</StyledTableCell>
              <StyledTableCell align="left">Price</StyledTableCell>
              <StyledTableCell align="left">Action</StyledTableCell>
            </TableRow>
          </TableHead>
          <TableBody>
            {items.map((item, index) => (
              <StyledTableRow key={index}>
                <StyledTableCell component="th" scope="row">
                  <TextField
                    fullWidth
                    value={item.name}
                    onChange={(event) => handleItemChange(index, event)}
                    name="name"
                  />
                </StyledTableCell>
                <StyledTableCell align="right">
                  <TextField
                    fullWidth
                    value={item.quantity}
                    onChange={(event) => handleItemChange(index, event)}
                    name="quantity"
                  />
                </StyledTableCell>
                <StyledTableCell align="right">
                  <TextField
                    fullWidth
                    value={item.price}
                    onChange={(event) => handleItemChange(index, event)}
                    name="price"
                  />
                </StyledTableCell>
                <StyledTableCell align="right">
                  <IconButton onClick={() => deleteItem(index)}>
                    <DeleteIcon />
                  </IconButton>
                </StyledTableCell>
              </StyledTableRow>
            ))}
          </TableBody>
        </Table>
      </TableContainer>

      {/* Buttons */}
      <Box mt={2} display="flex" gap={2}>
        <Button variant="contained" onClick={addItem}>
          Add Item
        </Button>
        <Button variant="outlined" color="success" onClick={generateInvoice}>
          Generate Invoice
        </Button>
      </Box>
    </Box>

    {/* Error Snackbar */}
    <Snackbar
      open={error}
      autoHideDuration={6000}
      onClose={() => setError(false)}
      anchorOrigin={{ vertical: "top", horizontal: "right" }}
    >
      <Alert onClose={() => setError(false)} severity="error">
        Please fill in all required fields.
      </Alert>
    </Snackbar>
  </Container>
);
}
export default App;以下是 App.css 代码:
@import url('https://fonts.googleapis.com/css2?family=Poppins:wght@400;700&display=swap');
.App {
  text-align: center;
}

.App-logo {
  height: 40vmin;
  pointer-events: none;
}

@media (prefers-reduced-motion: no-preference) {
  .App-logo {
    animation: App-logo-spin infinite 20s linear;
  }
}

h1,
h2,
h3,
h4,
h5,
h6 {
  font-weight: bold;
  /* This is the weight for bold in Poppins */
  color: #FF6347;
  /* This is the color Tomato. Replace with your preferred color */
}

body {
  font-family: 'Poppins', sans-serif;
  background-color: #E9F8F4;
}

.App-header {
  background-color: #282c34;
  min-height: 100vh;
  display: flex;
  flex-direction: column;
  align-items: center;
  justify-content: center;
  font-size: calc(10px + 2vmin);
  color: white;
}

.App-link {
  color: #61dafb;
}

@keyframes App-logo-spin {
  from {
    transform: rotate(0deg);
  }
  to {
    transform: rotate(360deg);
  }
}
步骤5:测试应用程序
要测试PDF生成功能,在终端中运行以下命令:
npm startnpm start这将启动开发服务器,您可以在浏览器中查看应用程序,网址为http://localhost:3000 。
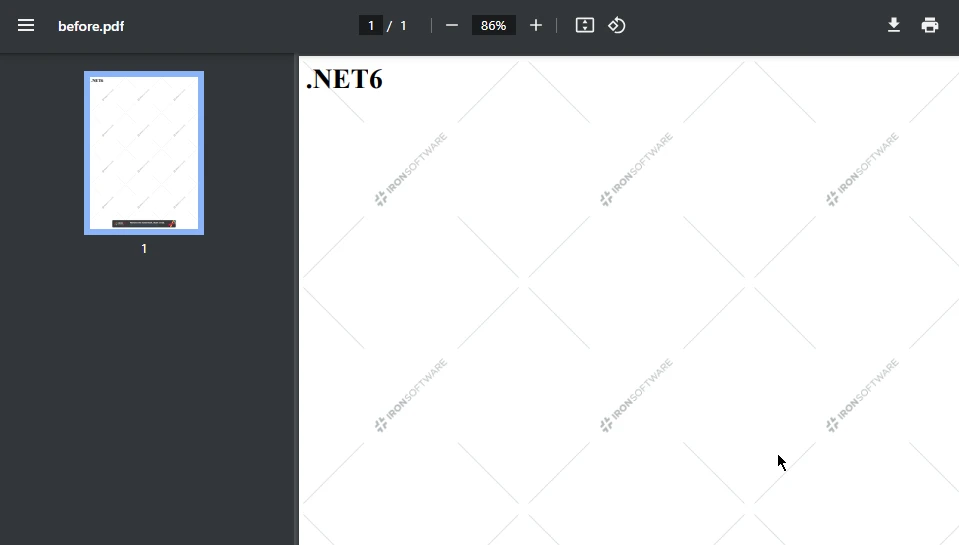
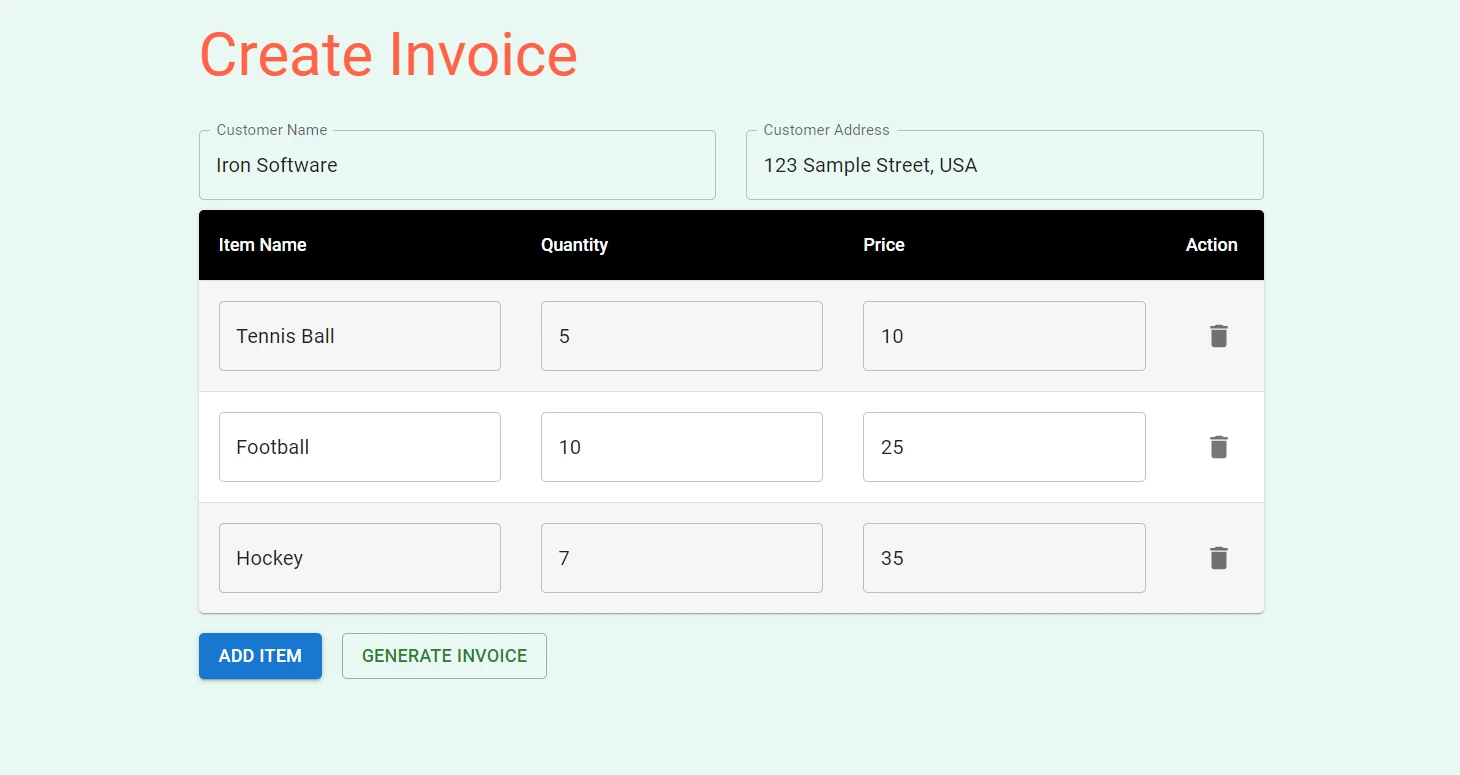
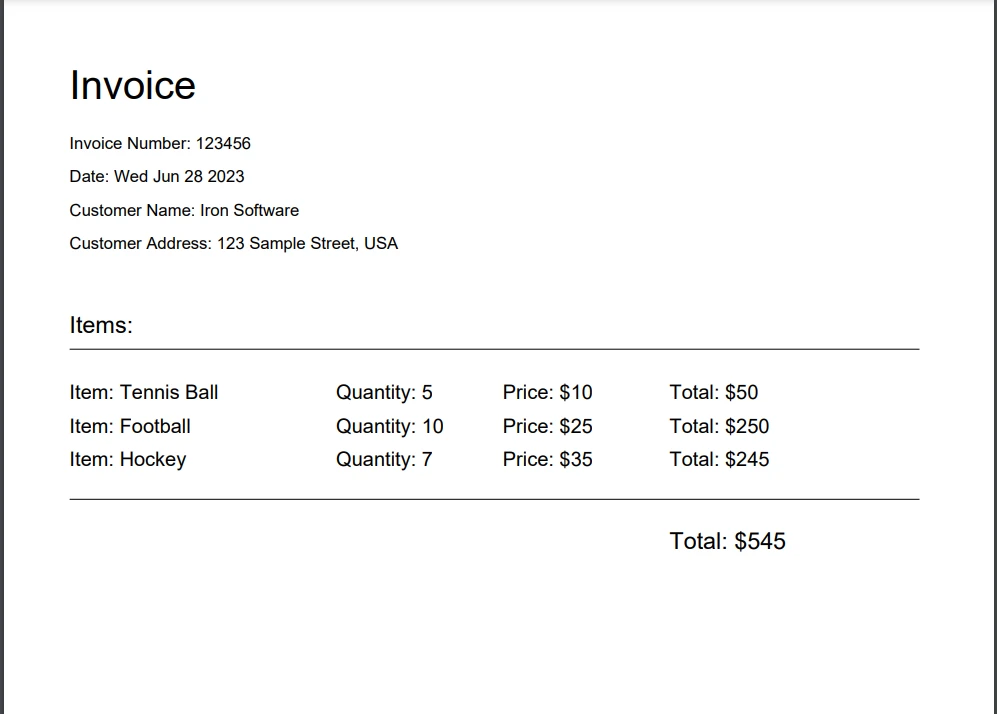
在输入字段中填写客户名称、地址和项目详细信息,然后点击"生成发票"按钮。 PDF文件将下载到您的计算机上,您可以打开它查看已生成发票的整页视图。
当您点击"生成发票"按钮时,将生成PDF文件。
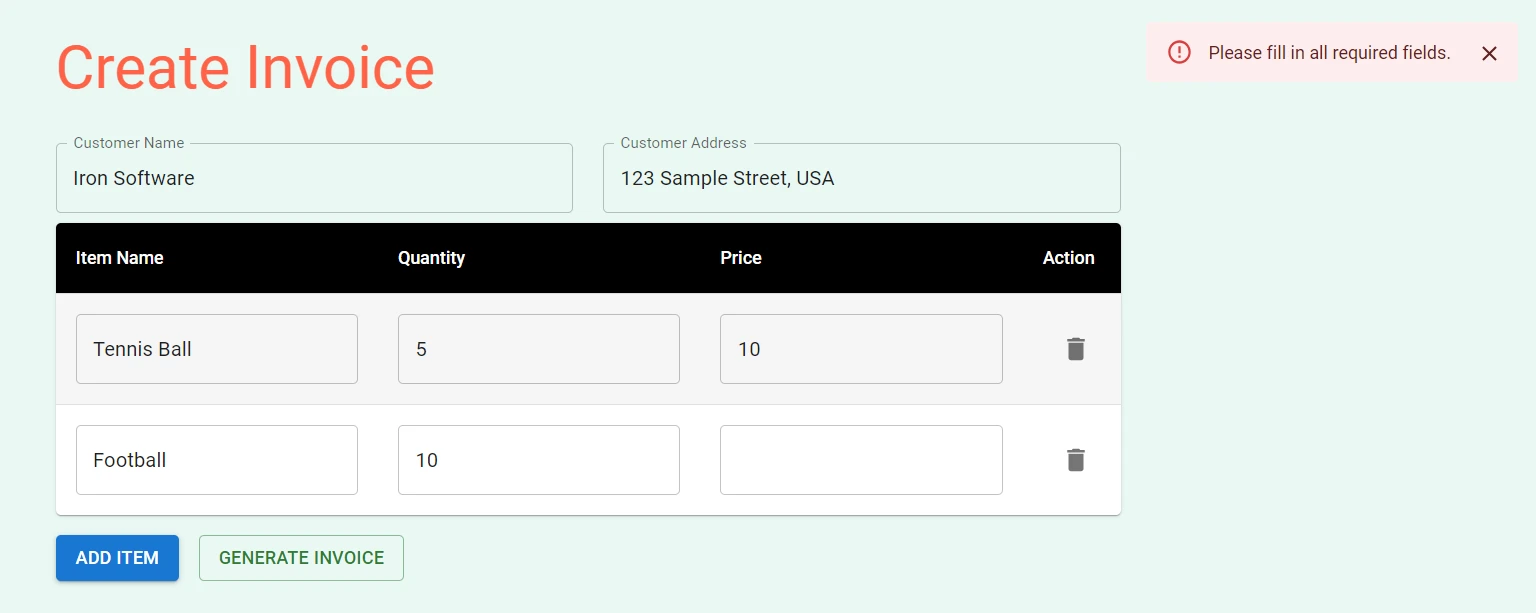
如果您尝试生成包含任何空字段的PDF,将在右上角显示错误消息。
IronPDF - Node.js PDF库
IronPDF 适用于 Node.js是一个综合的Node.js PDF库,以其精确性、易用性和速度而脱颖而出。 它提供了广泛的功能,可以直接从HTML、URL和React中的图像生成、编辑和格式化PDF。 支持包括 Windows、MacOS、Linux、Docker 和像 Azure 和 AWS 这样的云平台,IronPDF 确保跨平台兼容性。 其用户友好的 API 允许开发人员快速将 PDF 生成和处理集成到他们的 Node.js 项目中。
IronPDF Node.js的显著特点包括:像素级精确的渲染、广泛的格式选项以及高级编辑功能,如合并和拆分PDF、添加批注和创建PDF表单。
以下是从HTML文件、HTML字符串和URL生成PDF文档的示例:
import { PdfDocument } from "@ironsoftware/ironpdf";
(async () => {
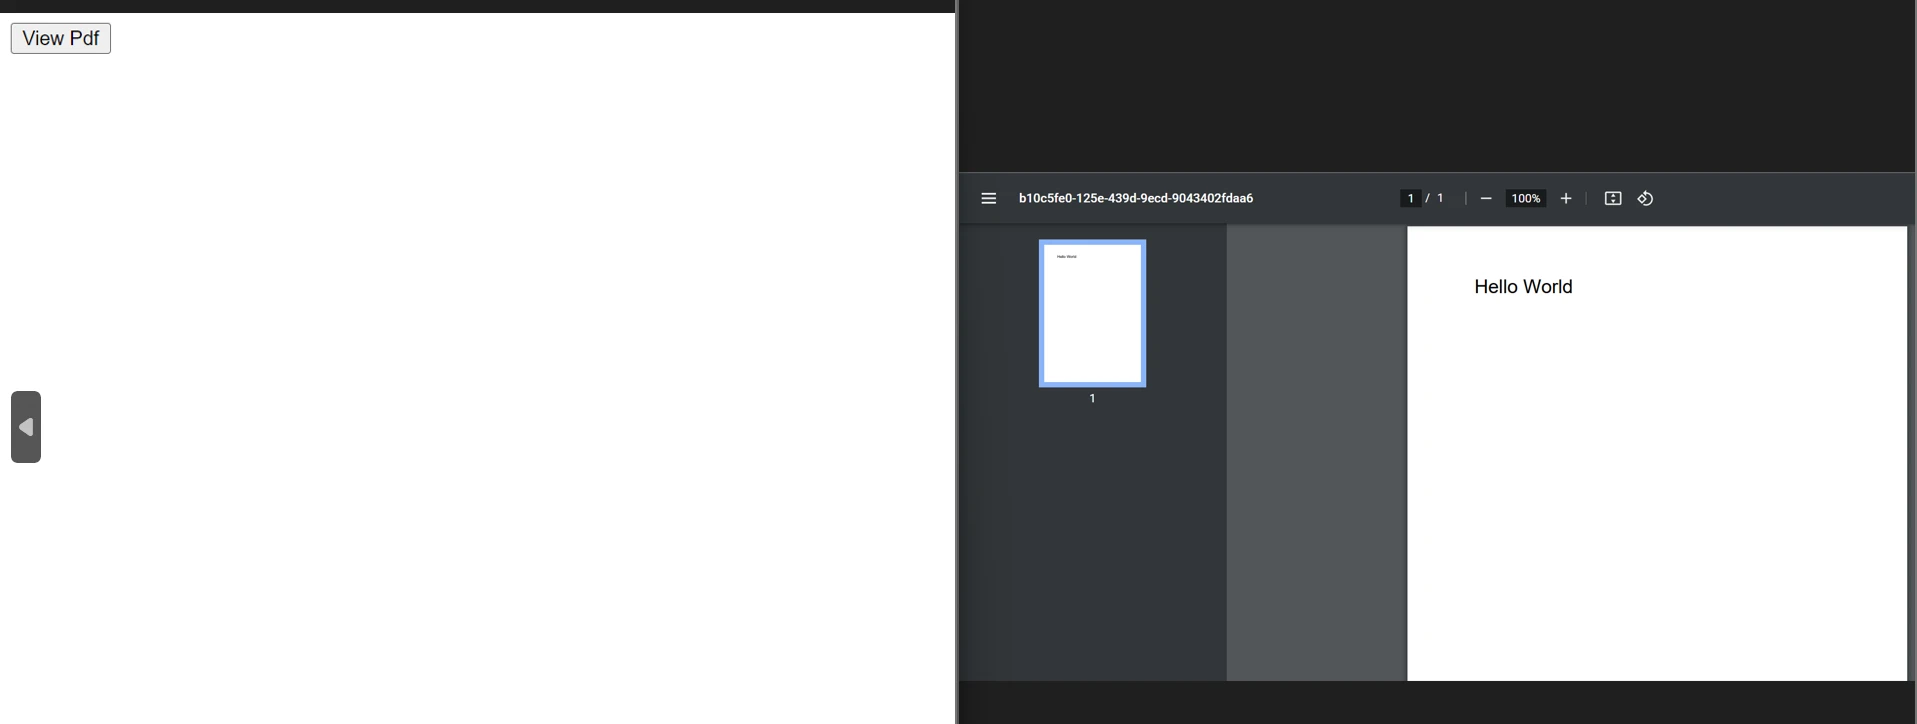
const pdfFromUrl = await PdfDocument.fromUrl("https://getbootstrap.com/");
await pdfFromUrl.saveAs("website.pdf");
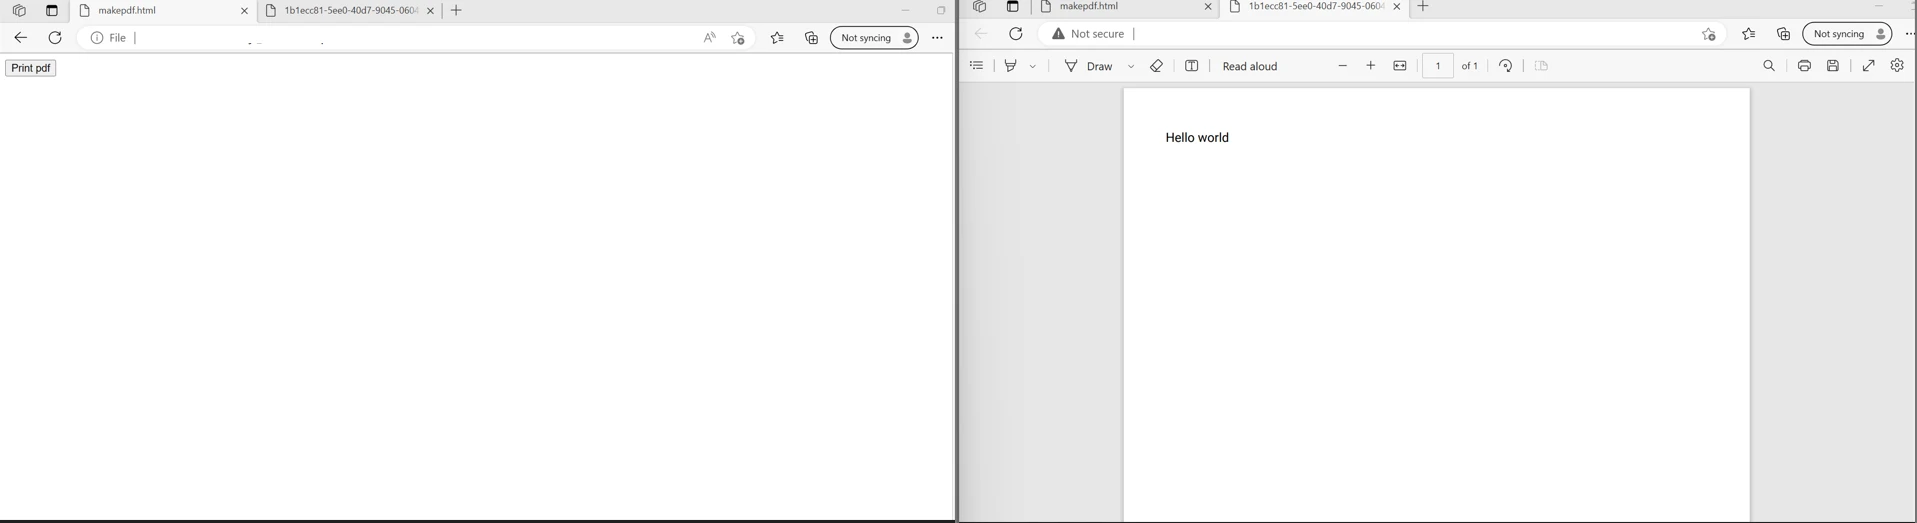
const pdfFromHtmlFile = await PdfDocument.fromHtml("design.html");
await pdfFromHtmlFile.saveAs("markup.pdf");
const pdfFromHtmlString = await PdfDocument.fromHtml("<p>Hello World</p>");
await pdfFromHtmlString.saveAs("markup_with_assets.pdf");
})();import { PdfDocument } from "@ironsoftware/ironpdf";
(async () => {
const pdfFromUrl = await PdfDocument.fromUrl("https://getbootstrap.com/");
await pdfFromUrl.saveAs("website.pdf");
const pdfFromHtmlFile = await PdfDocument.fromHtml("design.html");
await pdfFromHtmlFile.saveAs("markup.pdf");
const pdfFromHtmlString = await PdfDocument.fromHtml("<p>Hello World</p>");
await pdfFromHtmlString.saveAs("markup_with_assets.pdf");
})();有关更多与PDF相关任务的代码示例,请访问此IronPDF代码示例页面。
结论
总之,在React应用程序中创建PDF不一定令人生畏。 掌握正确的工具和清晰的理解,您可以轻松生成漂亮、结构良好的PDF文档。 我们探索了各种库,例如 pdfmake 和 React-PDF,每个库都有其自身的优势和独特功能。
凭借IronPDF在JavaScript框架和库中的简单集成过程、出色的文档和响应式技术支持,开发人员可以在短时间内启动并运行,使其成为Node.js应用程序中生成专业级PDF的首选。
IronPDF提供完整功能的免费试用版。 它还适用于其他语言,如C# .NET、Java和Python。 访问 IronPDF 网站了解更多详细信息。