
WebSockets Node.js js (How It Works For Developers)
Providing real-time communication and dynamic content generation is crucial for developing captivating and interactive applications in the fast-paced world of web development today. Together with Node.js, a lightweight and effective server-side JavaScript implementation, WebSockets is a powerful protocol that allows bidirectional communication between clients and servers, making them an effective combo for developing real-time apps. You can produce and deliver dynamic PDFs in real time when you include IronPDF, a flexible library for creating PDF documents, in the mix.
We will examine the principles of WebSockets in this introduction, as well as how Node.js makes WebSocket implementation easier. Finally, we will see how IronPDF enhances these technologies by allowing for smooth PDF creation. When combined, these tools offer a strong basis for creating apps that need to generate and send PDFs in real time, opening up a world of possibilities that range from collaborative document editing platforms to live reporting dashboards. Let's take a tour to discover how WebSockets, Node.js, and IronPDF work together in contemporary web development.
What is WebSocket Node.js?
A technology stack known as WebSockets in Node.js allows bidirectional, real-time communication between a client and server using a single, persistent TCP connection. WebSockets create an ongoing, open connection for data to be transferred in both directions at any time, in contrast to conventional HTTP connections, which are stateless and usually require sending requests and receiving replies.
The server-side JavaScript runtime environment Node.js offers a stable foundation for WebSocket server implementation everywhere. It provides a range of WebSocket libraries and modules that make setting up WebSocket servers and managing WebSocket connections easier. Message routing, broadcasting data to connected clients, and WebSocket connection management are common functionalities found in these libraries.
Key Features of WebSockets
Bidirectional Communication
Full-duplex communication is made possible by WebSockets, which enables simultaneous data transmission in both directions between clients and servers. This eliminates the need for constant server calls for frequent HTTP queries and allows real-time interaction and updates.
Persistent Connection
WebSockets create a permanent connection that stays open as long as the client and web server are communicating, in contrast to conventional HTTP connections, which are stateless and have a limited lifespan. This lowers the overhead of creating new connections for every interaction, which leads to less latency and faster communication.
Efficient Data Transfer
A lightweight protocol that minimizes overhead and network latency and lowers data transfer delay is used by WebSockets. Because of this, they are ideal for applications like live chat, gaming, chat apps, and financial trading platforms that demand high-performance, real-time data interchange.
Event-Driven Architecture
With event listeners and callbacks, developers may process incoming messages, connection events, and failures asynchronously in Node.js's event-driven design, which is well suited for WebSocket communication. As a result, processing numerous concurrent connections and sending messages can be done effectively without interfering with the server's event loop.
Scalability
WebSocket servers can easily handle a huge number of concurrent connections because of Node.js's non-blocking, asynchronous nature and support for event-driven programming. Because of its scalability, Node.js is a well-liked option for developing WebSocket-based apps that need to update in real time and support high concurrency.
Cross-Platform Compatibility
WebSocket is a flexible method for creating real-time web applications that can be accessed by a large number of users on a variety of devices and web browsers.
Integration with Existing Infrastructure
The WebSocket libraries and modules for Node.js make it simple for developers to incorporate real-time communication features into their projects by integrating them with pre-existing Node.js applications and frameworks.
Create and configure WebSockets
Let's dissect how to set up and create a WebSocket server in Node.js.
Install Dependencies
Install the ws library to enable WebSockets in Node.js applications.
npm install ws
npm install prompt-sync
npm install ws
npm install prompt-syncCreate the WebSocket Server
Open the server.js file that you created in the Visual Studio code editor.
// Import the WebSocket module
const WebSocket = require('ws');

// Create and implement WebSockets
const wss = new WebSocket.Server({ port: 8080 });

// Event handler for when a client connects to the WebSocket server
wss.on('connection', (ws) => {
  console.log('Client connected');

  // Event handler for when the server receives a message from a client
  ws.on('message', (message) => {
    console.log(`Received message: ${message}`);

    // Echo the message back to the client
    ws.send(`Echo: ${message}`);
  });

  // Event handler for when a client disconnects from the WebSocket server
  ws.on('close', () => {
    console.log('Client disconnected');
  });
});

console.log('WebSocket server running on port 8080');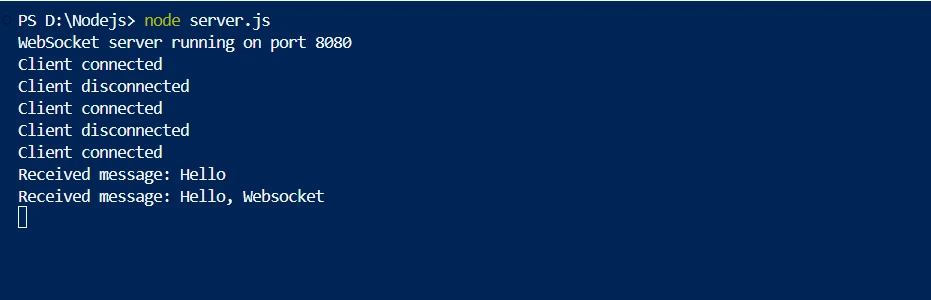
Create the WebSocket Client
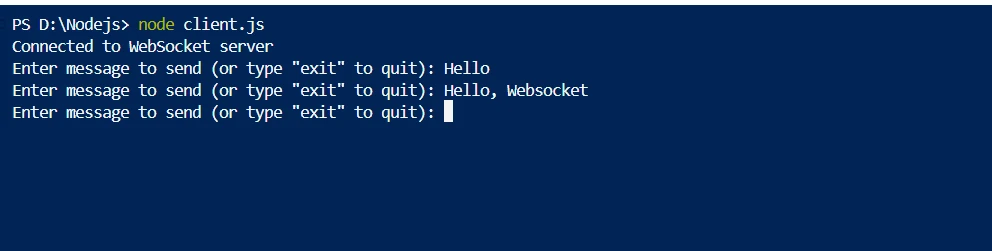
For the WebSocket client, create a file called client.js and add the following code.
const WebSocket = require('ws');
const prompt = require('prompt-sync')();

// WebSocket client connection
const ws = new WebSocket('ws://localhost:8080');

// Event handler for when the client successfully connects to the WebSocket server
ws.on('open', () => {
  console.log('Connected to WebSocket server');

  // Send user input messages to the server
  while (true) {
    const message = prompt('Enter message to send (or type "exit" to quit): ');
    if (message === 'exit') {
      ws.close();
      break;
    }

    ws.send(message);
  }
});

// Event handler for when the client receives a message from the WebSocket server
ws.on('message', (message) => {
  console.log(`Received message from server: ${message}`);
});

// Event handler for when the client connection is closed
ws.on('close', () => {
  console.log('Disconnected from WebSocket server');
});
Test the WebSocket Communication
Both your WebSocket client and simple HTTP server are now operational. By sending messages from the HTTP server to the client, which the server will retort with, you can test the communication.
Integrating WebSockets with IronPDF for Node.js
Setting up a WebSocket server for real-time communication and integrating IronPDF to create dynamic PDF documents are the first steps in getting started with WebSockets in Node.js and IronPDF for PDF production.
What is IronPDF?
To produce, edit, and convert PDF files, use the powerful IronPDF package for JavaScript. It allows programmers to perform a variety of programming-based operations related to PDFs, work with pre-existing PDFs, and convert HTML to PDFs. IronPDF is an effective option for applications that need dynamic PDF generation and processing since it provides an adaptable and user-friendly method of producing high-quality PDF documents.
Miscellaneous features of IronPDF
Some of the key features of IronPDF are as follows:
Convert HTML to PDF
IronPDF can be used to transform your HTML file data into PDF documents. This enables the creation of aesthetically pleasing PDF publications from web content by utilizing modern HTML5, CSS3, and JavaScript.
PDF Creation and Editing
New PDF documents that are generated programmatically can have text, pictures, tables, and other content added to them. You can open and edit pre-existing PDF documents with IronPDF. You can change or add to the PDF's content, as well as take out particular sections.
Advanced Styling and Layout
To style the content user’s browser in PDFs, use CSS. Support for intricate layouts, fonts, colors, and other design components is part of this. Rendering HTML material that may be used with JavaScript allows you to create dynamic content in PDFs.
Install IronPDF package
Install the required IronPDF packages in Node.js by using the node package manager to enable IronPDF functionality.
npm install @ironsoftware/ironpdfnpm install @ironsoftware/ironpdfGenerate PDF using IronPDF and send PDF via WebSocket connection
const WebSocket = require('ws');
const IronPdf = require("@ironsoftware/ironpdf");
const document = IronPdf.PdfDocument;

// Create a WebSocket server
const wss = new WebSocket.Server({ port: 3000 });

// Event handler for when a client connects to the WebSocket server
wss.on('connection', (ws) => {
  console.log('A user connected');

  // Event handler for when the server receives a message from a client
  ws.on('message', async (message) => {
    console.log(`Message received: ${message}`);

    // Generate PDF using IronPDF
    const htmlContent = `<html><body><h1>${message}</h1></body></html>`;
    const pdf = await document.fromHtml(htmlContent);
    let buff = await pdf.saveAsBuffer();

    // Send the PDF data back to the client
    ws.send(buff);
  });

  // Event handler for when a client disconnects from the WebSocket server
  ws.on('close', () => {
    console.log('Client disconnected');
  });
});

console.log('WebSocket server running on port 3000');
In the above code example, we import the IronPdf module, which enables us to create PDF documents, and the ws module, which gives WebSocket support in Node.js. Using the WebSocket.Server class, we construct a WebSocket server and pass in port 3000 as a configuration option. When a client establishes a connection with the WebSocket server, an event listener for the 'connection' event is created. We log a message to show that a client has connected inside the event handler method.
The 'message' event, which is raised each time a message from a client reaches the server, is registered as an event listener. We utilize IronPDF to create a PDF document depending on the content of the received message and log it inside the event handler function. Next, we use the WebSocket connection to transfer the binary data of the created PDF document back to the client side.

The 'close' event, which is produced when a client disconnects from the WebSocket server socket, is registered as an event listener. We log a message indicating that a client has disconnected inside the event handler function. Indicating that the WebSocket server is up and operating and ready for connections on port 3000, we record a message to the console. Below is the generated PDF using IronPDF.
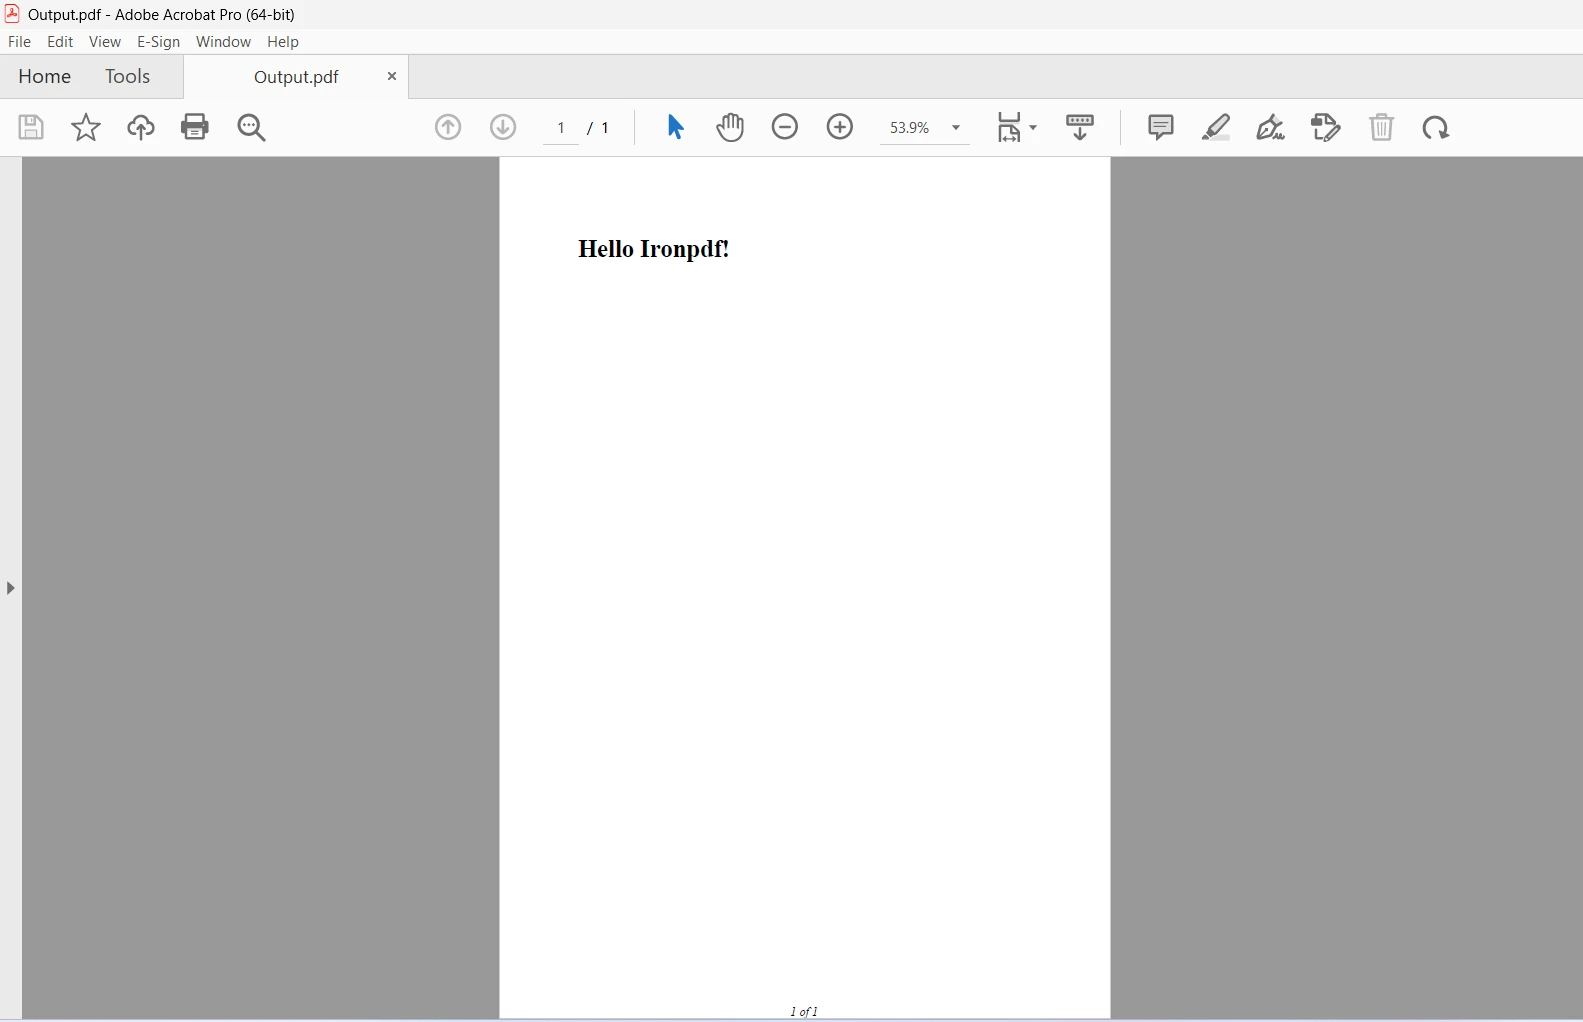
A WebSocket server is configured using this server-side code, and it is listening on port 3000 for incoming connections. Upon receiving a message from a client, the server uses IronPDF to create a PDF document depending on the content of the incoming message and returns the PDF data to the client. This makes it possible to create and deliver PDFs in real time via a WebSocket connection.
Conclusion
For modern online applications, integrating IronPDF with WebSockets in Node.js provides a potent solution for real-time PDF generation and distribution. Instantaneous data interchange is made possible by WebSockets, which offer a smooth, bidirectional communication channel between clients and servers without the expense of conventional HTTP queries. Because of its event-driven, non-blocking architecture, Node.js is a strong platform for creating real-time applications and is well-suited to handle the asynchronous nature of WebSockets.
This configuration is enhanced by IronPDF, which enables dynamic PDF production from HTML content that can be instantly customized to meet the demands of any customer. WebSockets and IronPDF along with Node.js enable efficient and scalable on-the-fly generation of reports, invoices, and other document types.
We can guarantee that clients and end users receive feature-rich, premium software solutions by integrating IronPDF and Iron Software products into your development stack. Furthermore, this will help with project and process optimization. IronPDF offers a variety of code examples and detailed documentation to help developers in getting started.
IronPDF prices start at $799, trusted collaborators for contemporary software development projects because of their extensive documentation, vibrant community, and frequent upgrades.


