.NET Software Development (How It Works For Developers)
.NET Framework software development represents a powerful, versatile framework supported by Microsoft that enables .NET developers to create robust, high-quality applications spanning various platforms, operating systems, and devices. This software development framework is designed to be comprehensive, providing tools, libraries, and APIs that software developers can use to build web, desktop, and mobile applications efficiently in the .NET platform.
With support for multiple programming languages, including C#, Visual Basic, and F#, .NET development extends its flexibility to developers, ensuring they can work in their preferred language while benefiting from the .NET Core ecosystem's rich features. In this tutorial, we'll see how IronPDF enhances .NET development for solving real-world problems.
Understanding the Ecosystem of .NET Software Development
The .NET ecosystem, a key .NET Implementation, is a broad, encompassing platform that includes various components and technologies designed to facilitate application development across different operating systems. At its core, the .NET Framework and .NET Core serve as the primary engines for running .NET applications, providing a common language runtime (CLR) that manages the execution of code and offers services like memory management, type safety, exception handling, and more.
The Common Language Runtime (CLR)
The CLR is a crucial element of the .NET architecture, enabling the execution of .NET code across different operating systems. It compiles the Common Intermediate Language (CIL) into native machine code that the host machine can directly execute. This process ensures that .NET applications can run seamlessly on various platforms, from major mobile operating systems to Windows web servers.
Cross-Platform Framework
.NET Core emerges as a cross-platform framework, allowing .NET applications to run on Linux, macOS, and Windows. This adaptability makes .NET an appealing choice for developers aiming to reach a wider audience across different devices and platforms. With .NET Core, applications can be developed and deployed on any supported operating system, enhancing the reach and flexibility of .NET software development, bolstered by the extensive .NET Community.
Integrated Development Environment (IDE)
Visual Studio stands out as the premier integrated development environment (IDE) for .NET development. It provides developers with powerful tools for code writing, debugging, and deploying .NET applications. Visual Studio supports various programming languages and offers a wide array of features for building web, desktop, and mobile applications, making it an indispensable tool for .NET developers.
Building Applications with .NET
Creating applications on the .NET platform involves leveraging a wide range of tools, libraries, and programming languages that the framework offers such as Visual Basic, showcasing its comprehensive ecosystem. This versatility enables software developers to build various types of .NET apps, from web and desktop applications to cloud-based and mobile solutions.
Web Development with ASP.NET
ASP.NET, a key part of the .NET framework, is specially designed for building dynamic web pages and applications. It allows developers to create responsive and scalable web applications that can handle vast amounts of traffic. ASP.NET Core, the open-source version of ASP.NET, brings additional features for building cross-platform web applications, making it possible to develop and deploy web apps on Windows, Linux, and macOS.
Desktop Application Development
.NET provides two primary approaches for creating desktop applications: Windows Forms and Windows Presentation Foundation (WPF). Windows Forms offers a straightforward way to create desktop apps with a rich graphical user interface, while WPF uses XAML (Extensible Application Markup Language) to enable the development of visually appealing user interfaces with advanced graphics and animations.
Mobile Application Development
For mobile development, .NET extends its reach to major mobile operating systems through the Xamarin framework, now integrated into .NET as .NET MAUI (Multi-platform App UI). This approach allows developers to reuse code across iOS, Android, and Windows, simplifying the process of creating mobile applications that offer native performance and user experience.
Cloud and Microservices
.NET is also well-suited for developing applications that run in the cloud. With support for Azure and other cloud platforms, developers can build scalable, distributed applications that take advantage of cloud computing resources. ASP.NET Core plays a significant role in developing microservices, offering lightweight, modular, and independently deployable services that can scale within cloud environments.
Machine Learning and AI
The .NET ecosystem encompasses ML.NET, a machine learning framework that allows developers to incorporate custom machine learning models into their .NET applications. This integration opens up possibilities for creating intelligent applications capable of predictive analytics, natural language processing, and more, leveraging the power of AI within the .NET framework.
Enhancing .NET Software Development with IronPDF
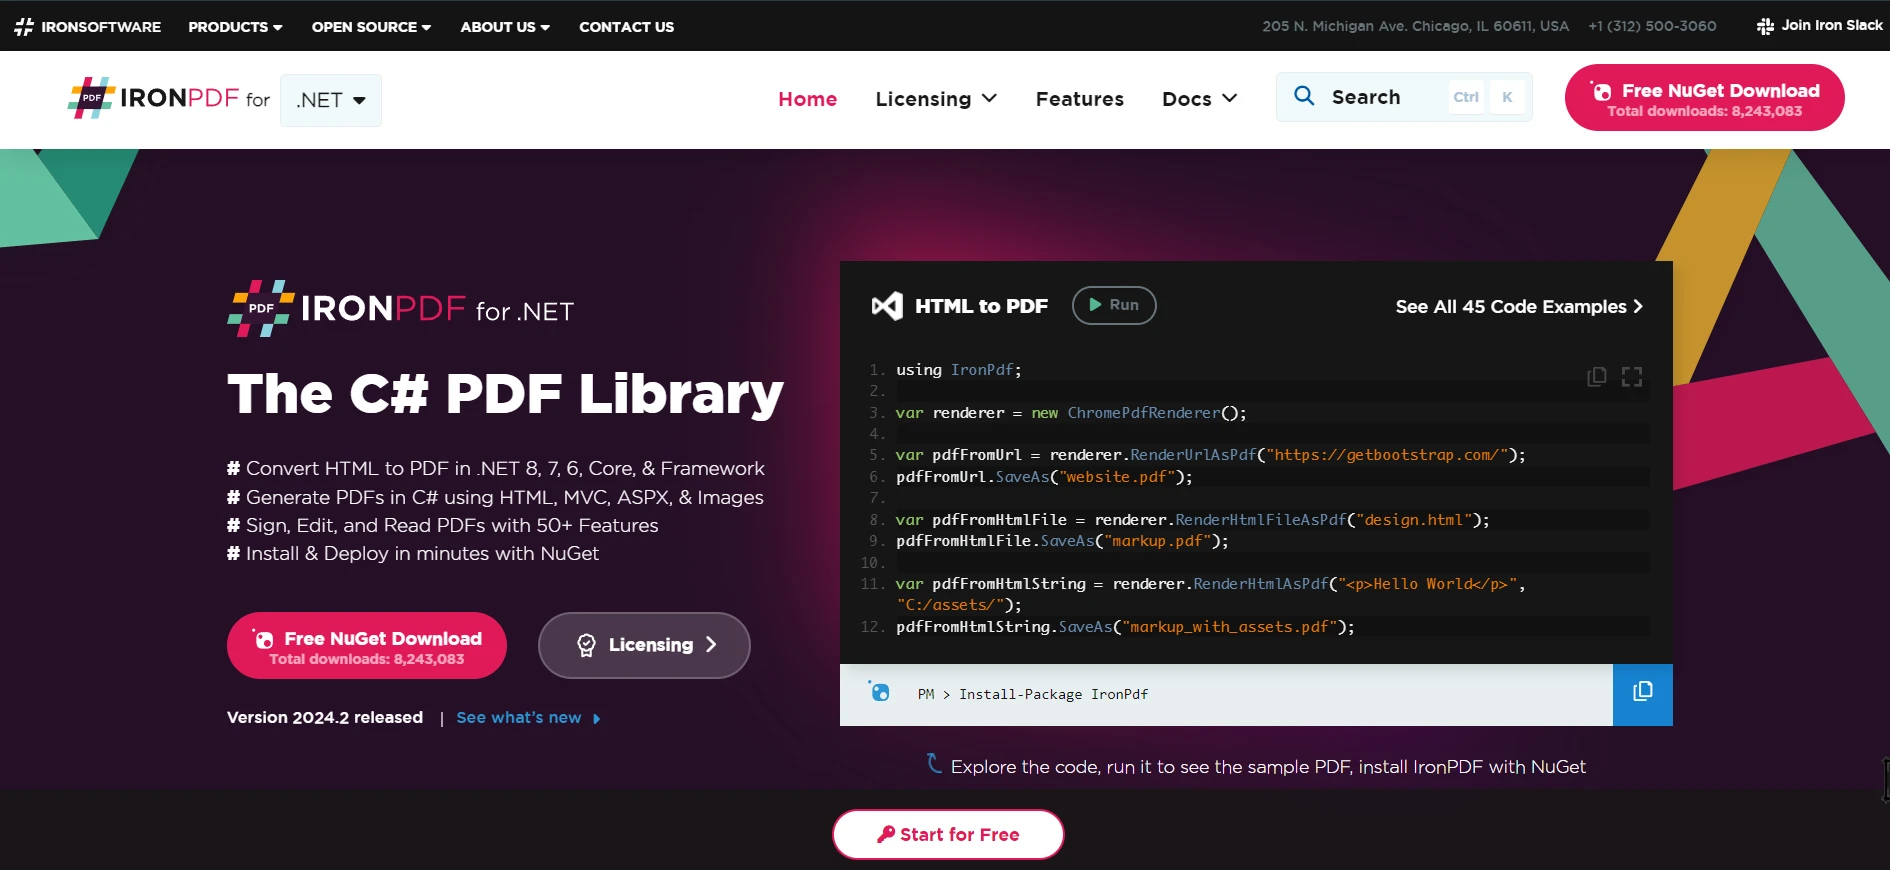
Within the vibrant ecosystem of .NET software development, the ability to generate, manipulate, and manage PDF documents directly within applications presents a significant advantage. IronPDF, a robust library designed for .NET developers, seamlessly integrates into this environment, offering an efficient way to create PDFs from .NET applications, including those built with Windows Forms.
The Role of IronPDF in .NET Applications
IronPDF stands as a testament to the flexibility and power of the .NET ecosystem, providing developers with an intuitive API to generate PDF documents from HTML, images, text, and even ASP.NET web pages. This capability is particularly useful in scenarios requiring dynamic document creation, such as generating invoices, reports, or personalized documents in desktop applications.
Building a Windows Form Invoice Generator with IronPDF
A Windows Form application for generating invoices exemplifies the practical application of .NET software development combined with IronPDF. This application allows users to input details such as customer information, purchase items, and prices, and then generate a professional PDF invoice with a single click.
Setting Up Your Windows Forms Project And Designing UI
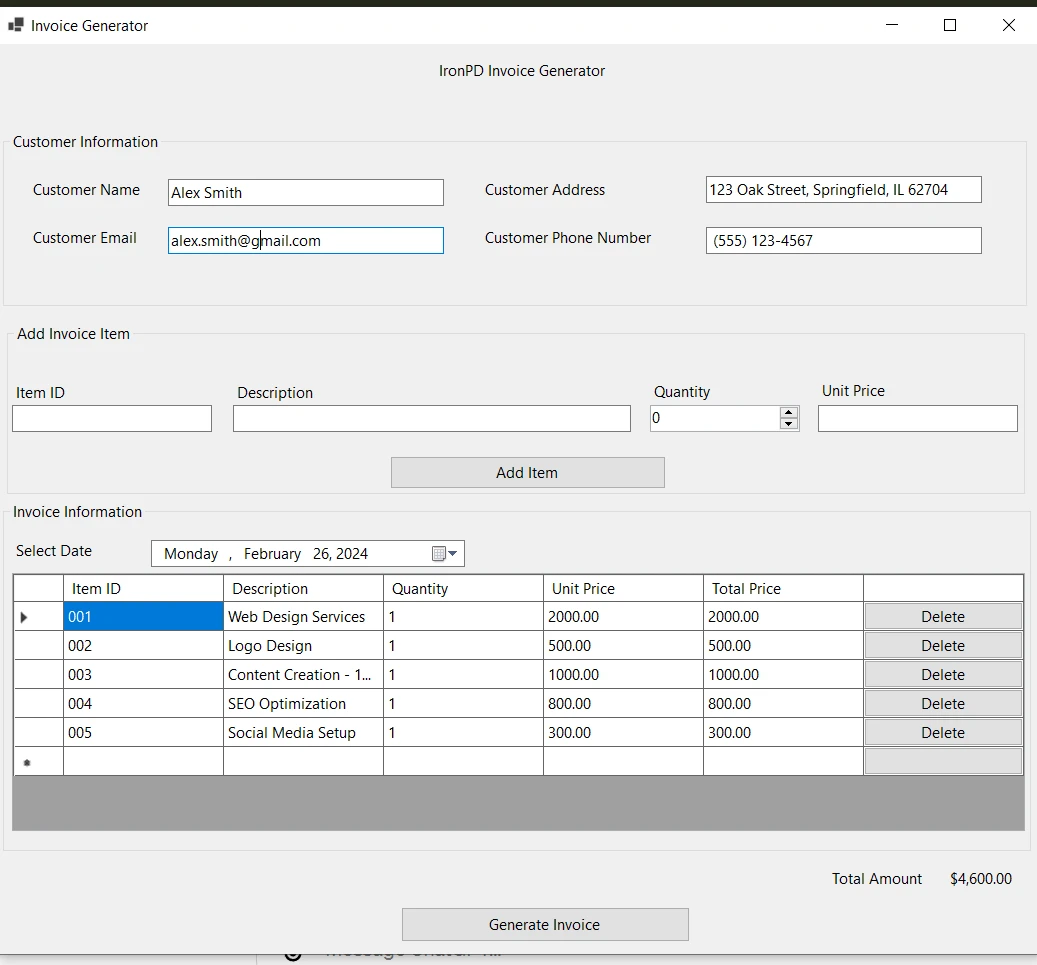
Start by creating a new Windows Forms project in Visual Studio. This is your foundation, where you'll craft the user interface for your invoice generator. Design your form to include necessary input fields for customer and item details, alongside a button for generating the PDF. It is our invoice generator UI:
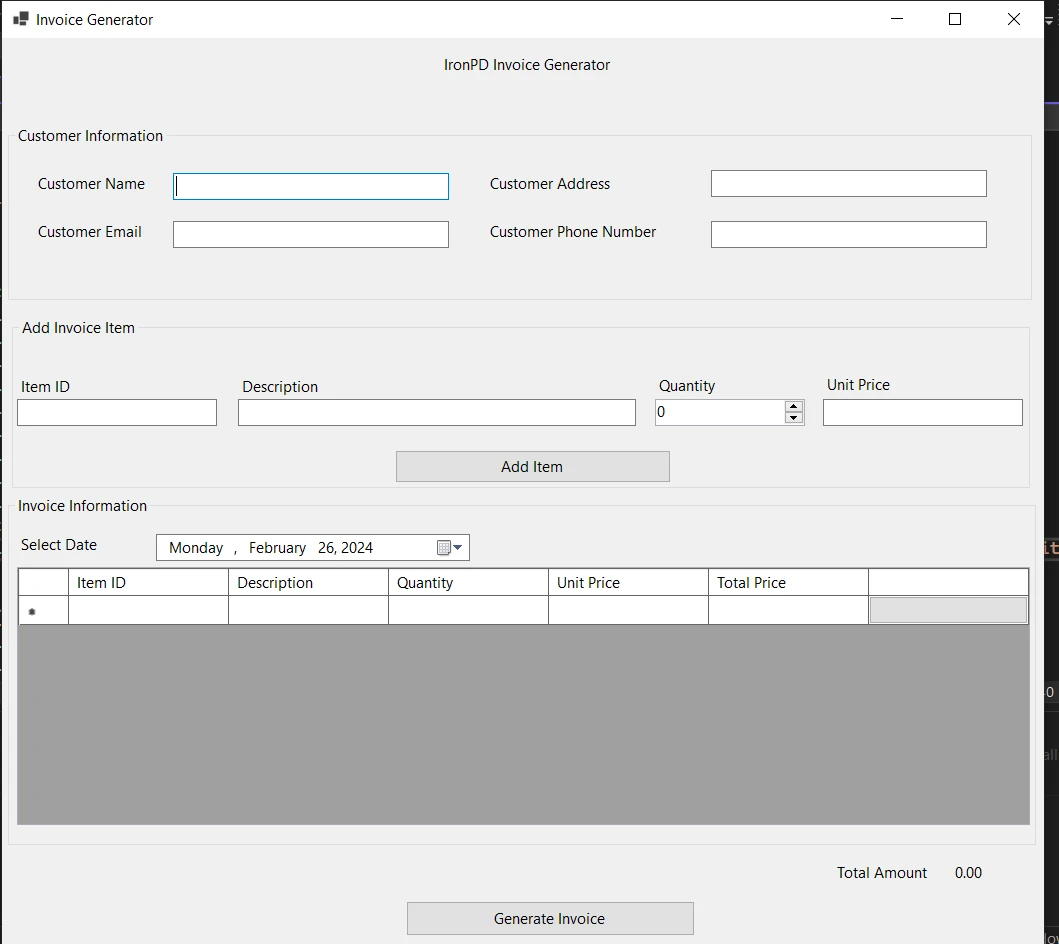
The user interface of the Windows Forms application is meticulously designed to ensure ease of use and functionality. The main window, titled "Invoice Generator," is segmented into different sections for a seamless user experience.
Customer Information Section
At the top, the form includes fields for 'Customer Name,' 'Customer Address,' 'Customer Email,' and 'Customer Phone Number.' This area is dedicated to capturing essential customer details that will be featured prominently on the generated invoice.
Adding Invoice Items
Just below the customer information, there's an area labeled 'Add Invoice Item.' Here, users can input individual items' details, such as 'Item ID,' 'Description,' 'Quantity,' and 'Unit Price.' An 'Add Item' button sits adjacent to these fields, allowing users to append the entered item to the invoice list below.
Invoice Items List
The central part of the form features the 'Invoice Information' section, displaying a table where the input items appear as they are added. The table columns include 'Item ID,' 'Description,' 'Quantity,' 'Unit Price,' and 'Total Price,' with the last column being automatically calculated based on quantity and unit price. A date selector titled 'Select Date' allows the user to specify the invoice date, adding to the document's specificity.
Invoice Operations
At the bottom of the form, a label displays the 'Total Amount,' dynamically updating as items are added or removed. This ensures users have a real-time tally of the invoice's total value. Additionally, a 'Generate Invoice' button prompts the application to use the IronPDF library to create a PDF version of the invoice based on the data entered.
This user interface is not only functional but also intuitive, allowing users to easily interact with the application without a steep learning curve. It's designed to accommodate all necessary information for invoice generation while providing a clear and straightforward path from data entry to PDF creation.
Adding IronPDF to Your Project
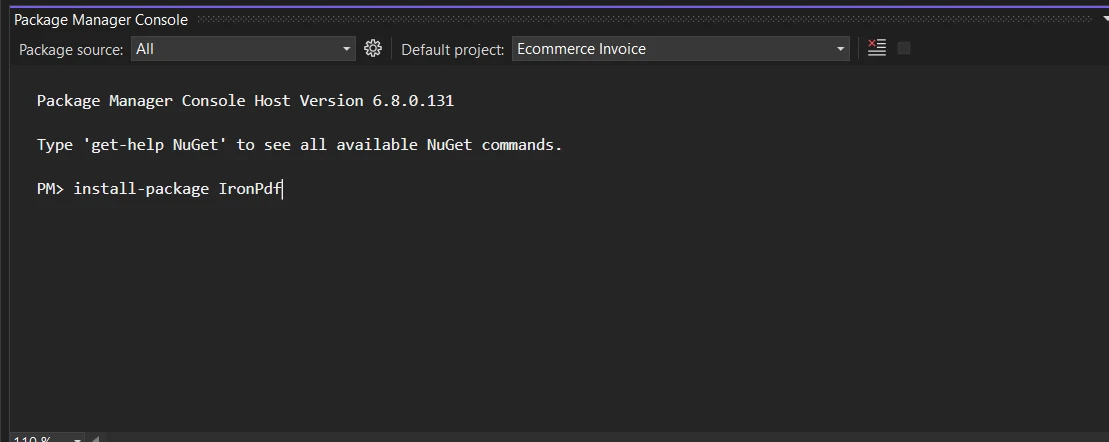
With your project set up, the next step is to bring IronPDF into the mix. This is done through NuGet, Visual Studio's integrated NuGet package manager, which allows you to add IronPDF to your project effortlessly. Run the following command in the Package Manager Console:
Install-Package IronPdf
This command will install IronPDF and make it available for use in your project.
Implementing the Invoice Generation
The core of the Windows Forms application is its capacity to handle user input, organize the data into a structured format, and produce a tangible document—in this case, an invoice in PDF form. The functionality is built upon a series of methodical steps within the application's codebase.
Setting Up the Data Grid View
Upon initializing the form, the application calls SetupDataGridViewColumns to establish the data structure where invoice items will be displayed. Columns for item ID, description, quantity, unit price, and total price are created, with the total price being a read-only field as it is automatically calculated. Additionally, a button column for deleting items is added, enhancing the user's control over invoice content.
private void SetupDataGridViewColumns()
{
    invoiceDataGridView.Columns.Clear(); // Clear existing columns if any
    // Add columns specifying the details to be displayed in the invoice
    invoiceDataGridView.Columns.Add("itemIdColumn", "Item ID");
    invoiceDataGridView.Columns.Add("descriptionColumn", "Description");
    invoiceDataGridView.Columns.Add("quantityColumn", "Quantity");
    invoiceDataGridView.Columns.Add("unitPriceColumn", "Unit Price");
    invoiceDataGridView.Columns.Add("totalPriceColumn", "Total Price");
    // Set the Total Price column to read-only as it will be calculated automatically
    invoiceDataGridView.Columns["totalPriceColumn"].ReadOnly = true;
    // Add a button column for delete action
    DataGridViewButtonColumn deleteButtonColumn = new DataGridViewButtonColumn();
    deleteButtonColumn.HeaderText = "";
    deleteButtonColumn.Name = "deleteButtonColumn";
    deleteButtonColumn.Text = "Delete";
    deleteButtonColumn.UseColumnTextForButtonValue = true; // Set the button text to "Delete"
    // Add the delete button column to the DataGridView
    invoiceDataGridView.Columns.Add(deleteButtonColumn);
}

public Form1()
{
    InitializeComponent();
    SetupDataGridViewColumns();
    // Wire up the CellClick event to a handler to manage deletion of items
    invoiceDataGridView.CellClick += invoiceDataGridView_CellClick;
}

private void invoiceDataGridView_CellClick(object sender, DataGridViewCellEventArgs e)
{
    // If the clicked cell is part of the button column and not the header row
    if (e.ColumnIndex == invoiceDataGridView.Columns["deleteButtonColumn"].Index && e.RowIndex >= 0)
    {
        // Confirm delete operation
        if (MessageBox.Show("Are you sure you want to delete this item?", "Confirm Delete", MessageBoxButtons.YesNo, MessageBoxIcon.Question) == DialogResult.Yes)
        {
            // Remove the row from the DataGridView
            invoiceDataGridView.Rows.RemoveAt(e.RowIndex);
        }
    }
}
private void SetupDataGridViewColumns()
{
invoiceDataGridView.Columns.Clear(); // Clear existing columns if any
// Add columns specifying the details to be displayed in the invoice
invoiceDataGridView.Columns.Add("itemIdColumn", "Item ID");
invoiceDataGridView.Columns.Add("descriptionColumn", "Description");
invoiceDataGridView.Columns.Add("quantityColumn", "Quantity");
invoiceDataGridView.Columns.Add("unitPriceColumn", "Unit Price");
invoiceDataGridView.Columns.Add("totalPriceColumn", "Total Price");
// Set the Total Price column to read-only as it will be calculated automatically
invoiceDataGridView.Columns["totalPriceColumn"].ReadOnly = true;
// Add a button column for delete action
DataGridViewButtonColumn deleteButtonColumn = new DataGridViewButtonColumn();
deleteButtonColumn.HeaderText = "";
deleteButtonColumn.Name = "deleteButtonColumn";
deleteButtonColumn.Text = "Delete";
deleteButtonColumn.UseColumnTextForButtonValue = true; // Set the button text to "Delete"
// Add the delete button column to the DataGridView
invoiceDataGridView.Columns.Add(deleteButtonColumn);
}
public Form1()
{
InitializeComponent();
SetupDataGridViewColumns();
// Wire up the CellClick event to a handler to manage deletion of items
invoiceDataGridView.CellClick += invoiceDataGridView_CellClick;
}
private void invoiceDataGridView_CellClick(object sender, DataGridViewCellEventArgs e)
{
// If the clicked cell is part of the button column and not the header row
if (e.ColumnIndex == invoiceDataGridView.Columns["deleteButtonColumn"].Index && e.RowIndex >= 0)
{
// Confirm delete operation
if (MessageBox.Show("Are you sure you want to delete this item?", "Confirm Delete", MessageBoxButtons.YesNo, MessageBoxIcon.Question) == DialogResult.Yes)
{
// Remove the row from the DataGridView
invoiceDataGridView.Rows.RemoveAt(e.RowIndex);
}
}
}Private Sub SetupDataGridViewColumns()
invoiceDataGridView.Columns.Clear() ' Clear existing columns if any
' Add columns specifying the details to be displayed in the invoice
invoiceDataGridView.Columns.Add("itemIdColumn", "Item ID")
invoiceDataGridView.Columns.Add("descriptionColumn", "Description")
invoiceDataGridView.Columns.Add("quantityColumn", "Quantity")
invoiceDataGridView.Columns.Add("unitPriceColumn", "Unit Price")
invoiceDataGridView.Columns.Add("totalPriceColumn", "Total Price")
' Set the Total Price column to read-only as it will be calculated automatically
invoiceDataGridView.Columns("totalPriceColumn").ReadOnly = True
' Add a button column for delete action
Dim deleteButtonColumn As New DataGridViewButtonColumn()
deleteButtonColumn.HeaderText = ""
deleteButtonColumn.Name = "deleteButtonColumn"
deleteButtonColumn.Text = "Delete"
deleteButtonColumn.UseColumnTextForButtonValue = True ' Set the button text to "Delete"
' Add the delete button column to the DataGridView
invoiceDataGridView.Columns.Add(deleteButtonColumn)
End Sub
'INSTANT VB WARNING: The following constructor is declared outside of its associated class:
'ORIGINAL LINE: public Form1()
Public Sub New()
InitializeComponent()
SetupDataGridViewColumns()
' Wire up the CellClick event to a handler to manage deletion of items
AddHandler invoiceDataGridView.CellClick, AddressOf invoiceDataGridView_CellClick
End Sub
Private Sub invoiceDataGridView_CellClick(ByVal sender As Object, ByVal e As DataGridViewCellEventArgs)
' If the clicked cell is part of the button column and not the header row
If e.ColumnIndex = invoiceDataGridView.Columns("deleteButtonColumn").Index AndAlso e.RowIndex >= 0 Then
' Confirm delete operation
If MessageBox.Show("Are you sure you want to delete this item?", "Confirm Delete", MessageBoxButtons.YesNo, MessageBoxIcon.Question) = DialogResult.Yes Then
' Remove the row from the DataGridView
invoiceDataGridView.Rows.RemoveAt(e.RowIndex)
End If
End If
End SubAdding Invoice Items
When a user enters details for an item and clicks 'Add Item,' the btnAddItem_Click event gathers the input data, validates it, and then calls AddItemToInvoice. This method adds a new row to the DataGridView with the inputted values, calculating the total price for the item and updating the total invoice amount displayed at the bottom of the form.
public void AddItemToInvoice(string itemId, string description, int quantity, decimal unitPrice)
{
    decimal totalPrice = quantity * unitPrice;
    invoiceDataGridView.Rows.Add(itemId, description, quantity, unitPrice, totalPrice);
}

private void CalculateTotalAmount()
{
    decimal totalAmount = 0m;
    foreach (DataGridViewRow row in invoiceDataGridView.Rows)
    {
        totalAmount += Convert.ToDecimal(row.Cells["totalPriceColumn"].Value ?? 0);
    }
    // Display the total amount accumulated
    lblTotalAmount.Text = $"{totalAmount:C2}";
}

private void btnAddItem_Click(object sender, EventArgs e)
{
    // Collect data from input controls
    string itemId = txtItemID.Text;
    string description = txtDescription.Text;
    int quantity = (int)numericUpDownQuantity.Value;
    decimal unitPrice;
    // Validate the collected data
    bool isUnitPriceValid = decimal.TryParse(txtUnitPrice.Text, out unitPrice);
    if (string.IsNullOrEmpty(itemId) || string.IsNullOrEmpty(description) || quantity <= 0 || !isUnitPriceValid || unitPrice <= 0)
    {
        MessageBox.Show("Please enter valid data for all fields.", "Invalid Data", MessageBoxButtons.OK, MessageBoxIcon.Warning);
        return;
    }
    // Add data to the DataGridView
    AddItemToInvoice(itemId, description, quantity, unitPrice);
    // Clear the input fields after adding the item to the grid
    txtItemID.Clear();
    txtDescription.Clear();
    txtUnitPrice.Clear();
    numericUpDownQuantity.Value = 0;
    CalculateTotalAmount();
}
public void AddItemToInvoice(string itemId, string description, int quantity, decimal unitPrice)
{
decimal totalPrice = quantity * unitPrice;
invoiceDataGridView.Rows.Add(itemId, description, quantity, unitPrice, totalPrice);
}
private void CalculateTotalAmount()
{
decimal totalAmount = 0m;
foreach (DataGridViewRow row in invoiceDataGridView.Rows)
{
totalAmount += Convert.ToDecimal(row.Cells["totalPriceColumn"].Value ?? 0);
}
// Display the total amount accumulated
lblTotalAmount.Text = $"{totalAmount:C2}";
}
private void btnAddItem_Click(object sender, EventArgs e)
{
// Collect data from input controls
string itemId = txtItemID.Text;
string description = txtDescription.Text;
int quantity = (int)numericUpDownQuantity.Value;
decimal unitPrice;
// Validate the collected data
bool isUnitPriceValid = decimal.TryParse(txtUnitPrice.Text, out unitPrice);
if (string.IsNullOrEmpty(itemId) || string.IsNullOrEmpty(description) || quantity <= 0 || !isUnitPriceValid || unitPrice <= 0)
{
MessageBox.Show("Please enter valid data for all fields.", "Invalid Data", MessageBoxButtons.OK, MessageBoxIcon.Warning);
return;
}
// Add data to the DataGridView
AddItemToInvoice(itemId, description, quantity, unitPrice);
// Clear the input fields after adding the item to the grid
txtItemID.Clear();
txtDescription.Clear();
txtUnitPrice.Clear();
numericUpDownQuantity.Value = 0;
CalculateTotalAmount();
}Imports System
Public Sub AddItemToInvoice(ByVal itemId As String, ByVal description As String, ByVal quantity As Integer, ByVal unitPrice As Decimal)
Dim totalPrice As Decimal = quantity * unitPrice
invoiceDataGridView.Rows.Add(itemId, description, quantity, unitPrice, totalPrice)
End Sub
Private Sub CalculateTotalAmount()
Dim totalAmount As Decimal = 0D
For Each row As DataGridViewRow In invoiceDataGridView.Rows
totalAmount += Convert.ToDecimal(If(row.Cells("totalPriceColumn").Value, 0))
Next row
' Display the total amount accumulated
lblTotalAmount.Text = $"{totalAmount:C2}"
End Sub
Private Sub btnAddItem_Click(ByVal sender As Object, ByVal e As EventArgs)
' Collect data from input controls
Dim itemId As String = txtItemID.Text
Dim description As String = txtDescription.Text
Dim quantity As Integer = CInt(Math.Truncate(numericUpDownQuantity.Value))
Dim unitPrice As Decimal = Nothing
' Validate the collected data
Dim isUnitPriceValid As Boolean = Decimal.TryParse(txtUnitPrice.Text, unitPrice)
If String.IsNullOrEmpty(itemId) OrElse String.IsNullOrEmpty(description) OrElse quantity <= 0 OrElse Not isUnitPriceValid OrElse unitPrice <= 0 Then
MessageBox.Show("Please enter valid data for all fields.", "Invalid Data", MessageBoxButtons.OK, MessageBoxIcon.Warning)
Return
End If
' Add data to the DataGridView
AddItemToInvoice(itemId, description, quantity, unitPrice)
' Clear the input fields after adding the item to the grid
txtItemID.Clear()
txtDescription.Clear()
txtUnitPrice.Clear()
numericUpDownQuantity.Value = 0
CalculateTotalAmount()
End SubGenerating the PDF Invoice
Upon clicking 'Generate Invoice,' the application executes the btnInvoice_Click event handler, where it constructs an HTML string using a StringBuilder. This string includes the customer's details and a styled HTML table populated with the invoice items from the DataGridView. IronPDF's renderer then converts this HTML into a PDF document, which is saved to a specified path. The application confirms the successful creation of the invoice with a message to the user.
private void btnInvoice_Click(object sender, EventArgs e)
{
    IronPdf.License.LicenseKey = "your-license-key"; // Replace with your IronPDF license key
    var customerName = txtName.Text;
    var customerEmail = txtEmail.Text;
    var customerAddress = txtAddress.Text;
    var customerPhone = txtPhone.Text;
    var htmlStringBuilder = new StringBuilder();
    htmlStringBuilder.Append("<html>");
    htmlStringBuilder.Append("<head>");
    htmlStringBuilder.Append("<title>Invoice</title>");
    htmlStringBuilder.Append(@"
        <style>
            body { font-family: 'Arial', sans-serif; }
            h1 { color: #333; text-align: center; }
            table { width: 100%; border-collapse: collapse; margin-top: 20px; }
            th, td { border: 1px solid #999; padding: 8px; text-align: left; }
            th { background-color: #f2f2f2; }
            tr:nth-child(even) { background-color: #f9f9f9; }
            h2 { text-align: right; margin-top: 20px; }
            .customer-info { line-height: 1.6; margin-bottom: 20px; }
            .customer-info p { margin: 0 0 10px 0; color: #333; }
            .customer-info label { font-weight: bold; }
        </style>");
    htmlStringBuilder.Append("</head>");
    htmlStringBuilder.Append("<body>");
    htmlStringBuilder.Append("<h1>Invoice</h1>");
    htmlStringBuilder.Append("<div class='customer-info'>");
    htmlStringBuilder.Append($"<p><strong>Customer Name:</strong> {customerName}</p>");
    htmlStringBuilder.Append($"<p><strong>Customer Email:</strong> {customerEmail}</p>");
    htmlStringBuilder.Append($"<p><strong>Customer Address:</strong> {customerAddress}</p>");
    htmlStringBuilder.Append($"<p><strong>Customer Phone:</strong> {customerPhone}</p>");
    htmlStringBuilder.Append("</div>");
    htmlStringBuilder.Append("<table><tr><th>Item ID</th><th>Description</th><th>Quantity</th><th>Unit Price</th><th>Total Price</th></tr>");
    foreach (DataGridViewRow row in invoiceDataGridView.Rows)
    {
        if (row.IsNewRow) continue;
        htmlStringBuilder.Append("<tr>");
        htmlStringBuilder.Append($"<td>{row.Cells["itemIdColumn"].Value}</td>");
        htmlStringBuilder.Append($"<td>{row.Cells["descriptionColumn"].Value}</td>");
        htmlStringBuilder.Append($"<td>{row.Cells["quantityColumn"].Value}</td>");
        htmlStringBuilder.Append($"<td>{row.Cells["unitPriceColumn"].Value:C2}</td>");
        htmlStringBuilder.Append($"<td>{row.Cells["totalPriceColumn"].Value:C2}</td>");
        htmlStringBuilder.Append("</tr>");
    }
    htmlStringBuilder.Append("</table>");
    htmlStringBuilder.Append($"<h2>Total Amount: {lblTotalAmount.Text}</h2>");
    htmlStringBuilder.Append("</body></html>");
    var renderer = new IronPdf.ChromePdfRenderer();
    var pdfDocument = renderer.RenderHtmlAsPdf(htmlStringBuilder.ToString());
    string savePath = Path.Combine($"F:\\Invoice_{DateTime.Now:yyyyMMddHHmmss}.pdf");
    pdfDocument.SaveAs(savePath);
    MessageBox.Show("The invoice has been successfully saved to your desktop.", "Invoice Saved", MessageBoxButtons.OK, MessageBoxIcon.Information);
}
private void btnInvoice_Click(object sender, EventArgs e)
{
IronPdf.License.LicenseKey = "your-license-key"; // Replace with your IronPDF license key
var customerName = txtName.Text;
var customerEmail = txtEmail.Text;
var customerAddress = txtAddress.Text;
var customerPhone = txtPhone.Text;
var htmlStringBuilder = new StringBuilder();
htmlStringBuilder.Append("<html>");
htmlStringBuilder.Append("<head>");
htmlStringBuilder.Append("<title>Invoice</title>");
htmlStringBuilder.Append(@"
<style>
body { font-family: 'Arial', sans-serif; }
h1 { color: #333; text-align: center; }
table { width: 100%; border-collapse: collapse; margin-top: 20px; }
th, td { border: 1px solid #999; padding: 8px; text-align: left; }
th { background-color: #f2f2f2; }
tr:nth-child(even) { background-color: #f9f9f9; }
h2 { text-align: right; margin-top: 20px; }
.customer-info { line-height: 1.6; margin-bottom: 20px; }
.customer-info p { margin: 0 0 10px 0; color: #333; }
.customer-info label { font-weight: bold; }
</style>");
htmlStringBuilder.Append("</head>");
htmlStringBuilder.Append("<body>");
htmlStringBuilder.Append("<h1>Invoice</h1>");
htmlStringBuilder.Append("<div class='customer-info'>");
htmlStringBuilder.Append($"<p><strong>Customer Name:</strong> {customerName}</p>");
htmlStringBuilder.Append($"<p><strong>Customer Email:</strong> {customerEmail}</p>");
htmlStringBuilder.Append($"<p><strong>Customer Address:</strong> {customerAddress}</p>");
htmlStringBuilder.Append($"<p><strong>Customer Phone:</strong> {customerPhone}</p>");
htmlStringBuilder.Append("</div>");
htmlStringBuilder.Append("<table><tr><th>Item ID</th><th>Description</th><th>Quantity</th><th>Unit Price</th><th>Total Price</th></tr>");
foreach (DataGridViewRow row in invoiceDataGridView.Rows)
{
if (row.IsNewRow) continue;
htmlStringBuilder.Append("<tr>");
htmlStringBuilder.Append($"<td>{row.Cells["itemIdColumn"].Value}</td>");
htmlStringBuilder.Append($"<td>{row.Cells["descriptionColumn"].Value}</td>");
htmlStringBuilder.Append($"<td>{row.Cells["quantityColumn"].Value}</td>");
htmlStringBuilder.Append($"<td>{row.Cells["unitPriceColumn"].Value:C2}</td>");
htmlStringBuilder.Append($"<td>{row.Cells["totalPriceColumn"].Value:C2}</td>");
htmlStringBuilder.Append("</tr>");
}
htmlStringBuilder.Append("</table>");
htmlStringBuilder.Append($"<h2>Total Amount: {lblTotalAmount.Text}</h2>");
htmlStringBuilder.Append("</body></html>");
var renderer = new IronPdf.ChromePdfRenderer();
var pdfDocument = renderer.RenderHtmlAsPdf(htmlStringBuilder.ToString());
string savePath = Path.Combine($"F:\\Invoice_{DateTime.Now:yyyyMMddHHmmss}.pdf");
pdfDocument.SaveAs(savePath);
MessageBox.Show("The invoice has been successfully saved to your desktop.", "Invoice Saved", MessageBoxButtons.OK, MessageBoxIcon.Information);
}Private Sub btnInvoice_Click(ByVal sender As Object, ByVal e As EventArgs)
IronPdf.License.LicenseKey = "your-license-key" ' Replace with your IronPDF license key
Dim customerName = txtName.Text
Dim customerEmail = txtEmail.Text
Dim customerAddress = txtAddress.Text
Dim customerPhone = txtPhone.Text
Dim htmlStringBuilder = New StringBuilder()
htmlStringBuilder.Append("<html>")
htmlStringBuilder.Append("<head>")
htmlStringBuilder.Append("<title>Invoice</title>")
htmlStringBuilder.Append("
<style>
body { font-family: 'Arial', sans-serif; }
h1 { color: #333; text-align: center; }
table { width: 100%; border-collapse: collapse; margin-top: 20px; }
th, td { border: 1px solid #999; padding: 8px; text-align: left; }
th { background-color: #f2f2f2; }
tr:nth-child(even) { background-color: #f9f9f9; }
h2 { text-align: right; margin-top: 20px; }
.customer-info { line-height: 1.6; margin-bottom: 20px; }
.customer-info p { margin: 0 0 10px 0; color: #333; }
.customer-info label { font-weight: bold; }
</style>")
htmlStringBuilder.Append("</head>")
htmlStringBuilder.Append("<body>")
htmlStringBuilder.Append("<h1>Invoice</h1>")
htmlStringBuilder.Append("<div class='customer-info'>")
htmlStringBuilder.Append($"<p><strong>Customer Name:</strong> {customerName}</p>")
htmlStringBuilder.Append($"<p><strong>Customer Email:</strong> {customerEmail}</p>")
htmlStringBuilder.Append($"<p><strong>Customer Address:</strong> {customerAddress}</p>")
htmlStringBuilder.Append($"<p><strong>Customer Phone:</strong> {customerPhone}</p>")
htmlStringBuilder.Append("</div>")
htmlStringBuilder.Append("<table><tr><th>Item ID</th><th>Description</th><th>Quantity</th><th>Unit Price</th><th>Total Price</th></tr>")
For Each row As DataGridViewRow In invoiceDataGridView.Rows
If row.IsNewRow Then
Continue For
End If
htmlStringBuilder.Append("<tr>")
htmlStringBuilder.Append($"<td>{row.Cells("itemIdColumn").Value}</td>")
htmlStringBuilder.Append($"<td>{row.Cells("descriptionColumn").Value}</td>")
htmlStringBuilder.Append($"<td>{row.Cells("quantityColumn").Value}</td>")
htmlStringBuilder.Append($"<td>{row.Cells("unitPriceColumn").Value:C2}</td>")
htmlStringBuilder.Append($"<td>{row.Cells("totalPriceColumn").Value:C2}</td>")
htmlStringBuilder.Append("</tr>")
Next row
htmlStringBuilder.Append("</table>")
htmlStringBuilder.Append($"<h2>Total Amount: {lblTotalAmount.Text}</h2>")
htmlStringBuilder.Append("</body></html>")
Dim renderer = New IronPdf.ChromePdfRenderer()
Dim pdfDocument = renderer.RenderHtmlAsPdf(htmlStringBuilder.ToString())
Dim savePath As String = Path.Combine($"F:\Invoice_{DateTime.Now:yyyyMMddHHmmss}.pdf")
pdfDocument.SaveAs(savePath)
MessageBox.Show("The invoice has been successfully saved to your desktop.", "Invoice Saved", MessageBoxButtons.OK, MessageBoxIcon.Information)
End SubRunning the Application and Generating Invoices
Once the Windows Forms application is developed and the IronPDF library is integrated, running the application and generating PDF invoices is a straightforward process. The user interacts with the application's user interface to enter data and produces the desired output. Here's how the process typically unfolds:
Launching the Application
Start the application by running it within Visual Studio or by executing the compiled executable file (.exe) directly from the Windows environment. The application's form displays, ready for user interaction.
Entering Invoice Data
Enter customer details in the designated text boxes at the top of the form, including the customer's name, address, email, and phone number. Add invoice items by filling out the 'Item ID,' 'Description,' 'Quantity,' and 'Unit Price' fields located in the 'Add Invoice Item' section of the form.
Click 'Add Item' to include the item in the invoice list. The DataGridView will update to show the new item, its details, and the calculated total price. Repeat the process to add all necessary items to the invoice. The 'Total Amount' label will dynamically update to reflect the cumulative total of the items listed.
Generating the PDF Invoice
Click 'Generate Invoice' once all items are added and customer information is complete. The application will compile the data into HTML format, styled with CSS. IronPDF takes over to convert the HTML string into a PDF document. It's rendered with the Chrome engine, ensuring high fidelity to modern web standards.
Viewing the Generated Invoice
After the PDF generation, the application saves the PDF file to a specified location, often within the same directory as the application or a user-defined path. A success message appears to notify the user that the PDF invoice has been successfully saved. Users can then navigate to the saved location to view or distribute the invoice.

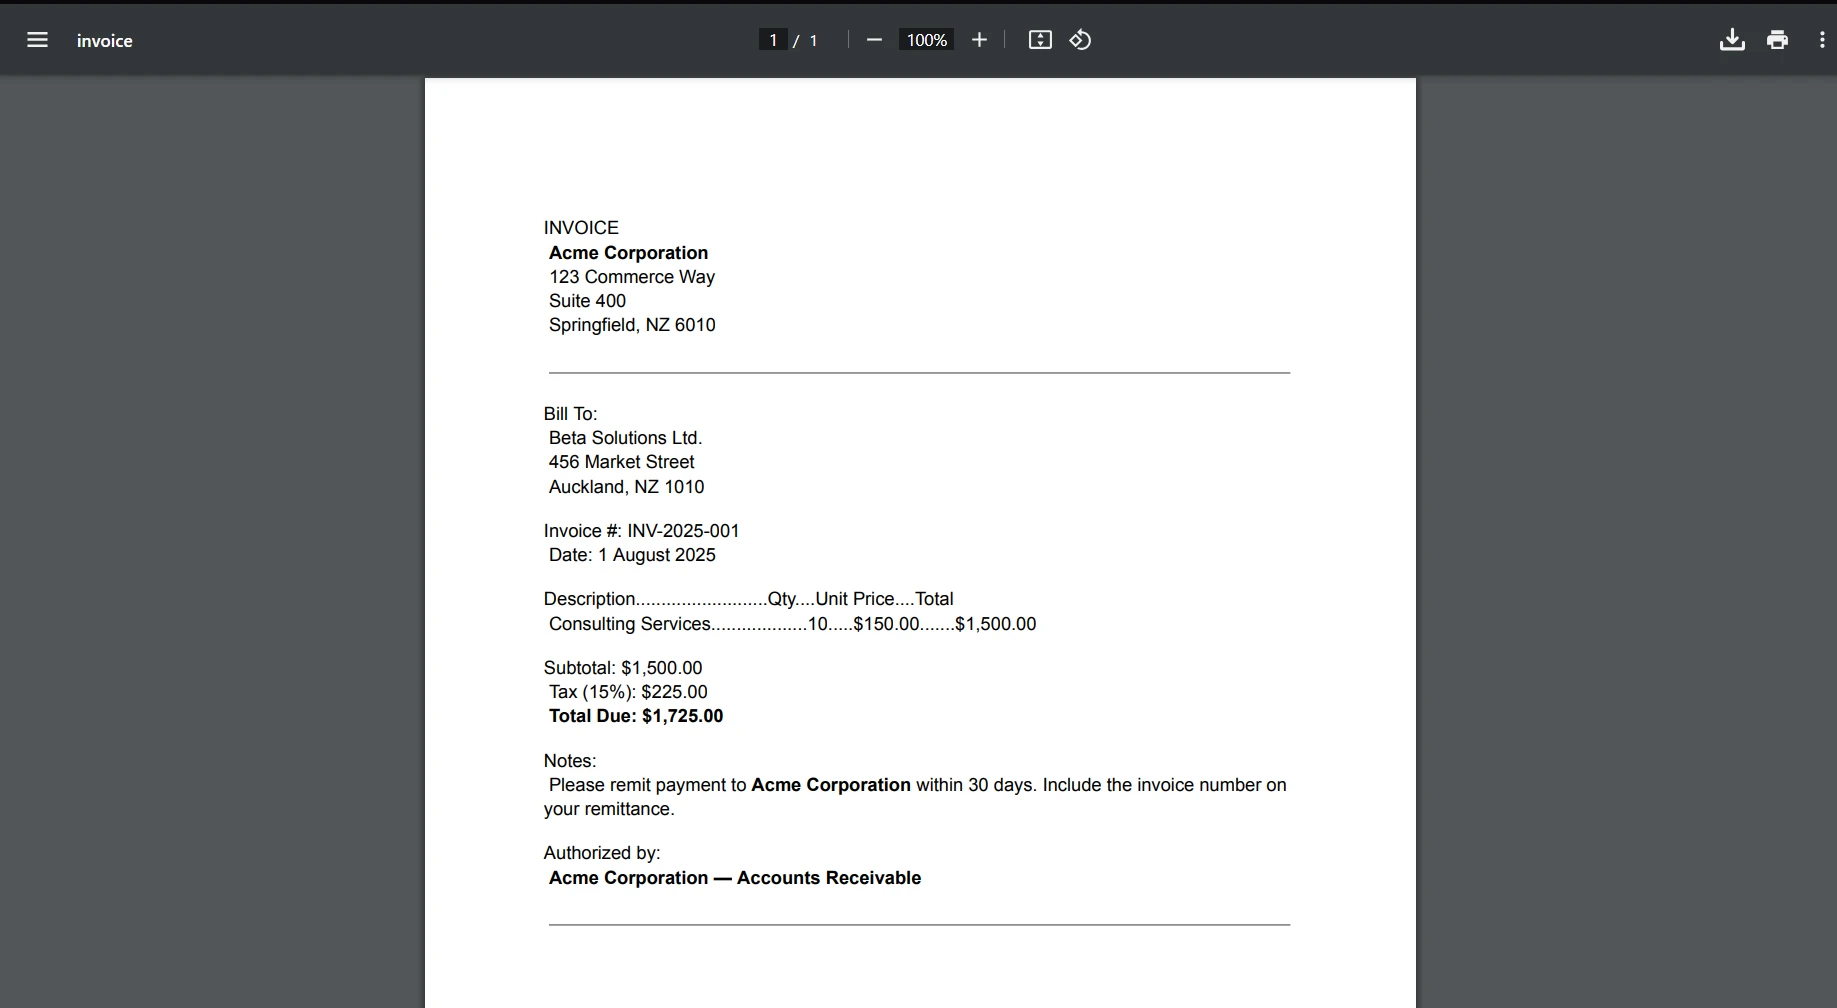
Output PDF
The output PDF displays the customer's information at the top, followed by a detailed table of purchased items, including descriptions, quantities, and prices. The total amount for the invoice is listed at the end of the document, clearly indicating the amount the customer needs to pay. The PDF is styled to be clean and professional, utilizing the CSS defined within the code to ensure the invoice is not only functional but also aesthetically pleasing.

Transforming the Windows Forms Project into an Executable
After thoroughly testing your Windows Forms application and ensuring all functionalities like data input, PDF generation, and output are working flawlessly, the next phase is to package your project into an executable (.exe) file. This conversion process is streamlined within the .NET framework, ensuring your application is ready for installation and use on Windows machines.
Here's a step-by-step approach to creating the executable:
- Build the Application: Go to the 'Build' menu and choose 'Build Solution.' This compiles the code into assemblies and performs necessary optimizations.

- Locate the Executable: Once the build is complete, navigate to the 'bin\Debug\net8.0' folder inside your project's directory. Here, you'll find the .exe file along with any other dependencies required to run your application.
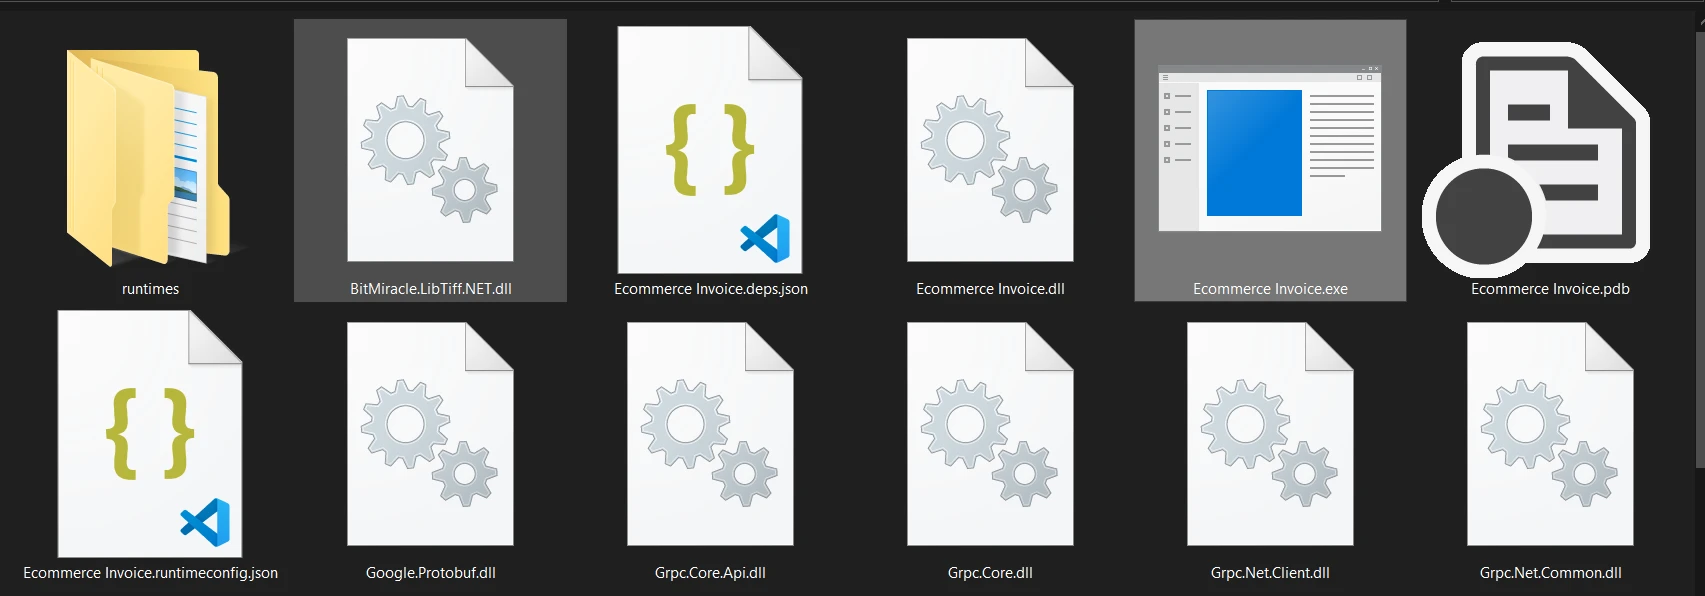
- Testing the Executable: It's good practice to run the .exe file on a different machine to confirm that it operates correctly outside of your development environment.
- Preparing for Distribution: For distribution, you can directly share the .exe file if no additional dependencies are needed. However, for a more professional approach, consider creating an installer using a setup project in Visual Studio or a third-party installer package like Inno Setup or WiX Toolset. An installer can manage the installation process, create shortcuts, and handle other complexities such as registering with the Windows Registry if needed.
By following these steps, your Windows Forms application is condensed into a single executable file, ready to be shared and utilized. This conversion marks the culmination of the development process, transitioning from a project on your development machine to deployable software that can be efficiently distributed and installed across a multitude of Windows environments.
Conclusion
In conclusion, the development of a Windows Forms application for generating PDF invoices using IronPDF and the .NET Framework exemplifies a practical application of software development principles. This project not only showcases the versatility and power of the .NET ecosystem but also demonstrates how developers can integrate third-party libraries like IronPDF to extend functionality and meet specific business needs.
By following the steps outlined, from setting up the user interface to implementing PDF generation and packaging the application into an executable, developers can create a functional, user-friendly application. This process highlights the importance of combining robust programming frameworks with innovative libraries to solve real-world problems, ultimately delivering a product that is both effective and efficient.
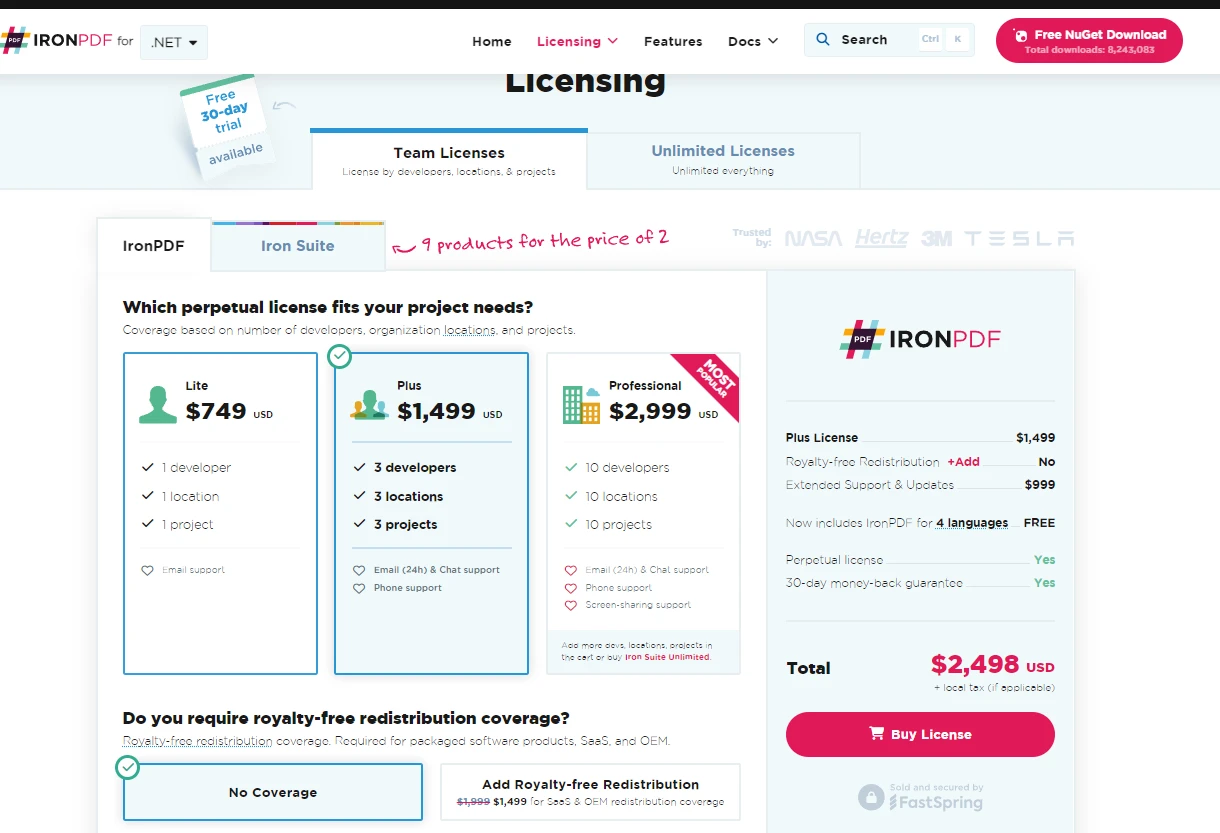
IronPDF generously provides a free trial for PDF generation features for developers to explore its features and determine how best it fits their needs. Once you've experienced the benefits and are ready to integrate IronPDF into your production environment, licenses start from affordable pricing options.
Frequently Asked Questions
How can I convert HTML to PDF in C#?
You can use IronPDF's RenderHtmlAsPdf method to convert HTML strings into PDFs. You can also convert HTML files into PDFs using RenderHtmlFileAsPdf.
What are the benefits of using .NET Core for cross-platform development?
.NET Core allows you to run applications on multiple platforms like Linux, macOS, and Windows, making it a versatile choice for developers who want to reach a broader audience with a single codebase.
How can I generate PDFs from a Windows Form application?
Using IronPDF, you can generate PDFs from a Windows Form application by integrating the library into your project and utilizing its methods to convert form data or HTML content into PDF documents.
What makes .NET an ideal framework for building web applications?
.NET, and specifically ASP.NET, provides a robust framework for building dynamic and scalable web applications. It offers built-in tools for server-side scripting, authentication, data handling, and more.
How can I enhance my .NET application with document generation capabilities?
Integrating a library like IronPDF into your .NET application can significantly enhance its document generation capabilities, allowing you to create, manipulate, and manage PDF files directly within your app.
Can .NET be used for mobile application development?
Yes, .NET supports mobile application development through the Xamarin framework, which is now part of .NET MAUI. This allows for the creation of cross-platform mobile apps with native performance on iOS, Android, and Windows.
What is the significance of the Common Language Runtime (CLR) in .NET?
The Common Language Runtime (CLR) is crucial in .NET as it manages the execution of programs by converting the compiled code into native machine code, ensuring compatibility across different operating systems.
How can I integrate PDF generation into my .NET project using NuGet?
You can integrate PDF generation into your .NET project by using NuGet to install a library like IronPDF. This makes adding PDF capabilities convenient and straightforward within Visual Studio.
What are the steps to create a PDF invoice generator using Windows Forms?
The process includes setting up a Windows Forms project, designing the interface, adding required libraries via NuGet, implementing logic for data input and invoice generation, and using IronPDF to convert invoice details into a PDF.