
How to Create Report in ASP .NET
Reports are essential for presenting data in a structured and visually appealing format. Whether it's sales data, analytics, or financial summaries, generating reports is a common requirement in web applications. Microsoft provides RDLC report services, which can be integrated into web applications using the Web Forms Report Viewer Control. However, the process can often be complex and time-consuming.
This is where IronPDF comes in. IronPDF is a versatile library that simplifies the generation of PDF reports in ASP.NET and other web frameworks, offering powerful features and ease of use. In this article, we'll explore how to create a report in ASP.NET using IronPDF.
How to Create Report in ASP.NET
- Create an ASP.NET Web App using Visual Studio
- Install IronPDF and IronPDF.Extensions.MVC.Core
- Instantiate ChromePdfRenderer object sender
- Call the RenderRazorViewToPdf method to convert the view to PDF
- Add "Content-Disposition" using Response.Headers.Append
- Create a Report using the File method with PDF.BinaryData
Introduction to IronPDF
IronPDF is a versatile library that simplifies the generation of PDF documents in ASP.NET and other web frameworks. Its rich feature set and intuitive APIs make it an ideal choice for developers looking to generate dynamic reports, invoices, receipts, and more directly from their web applications. With IronPDF, developers can effortlessly convert HTML, CSS, and even Razor views into high-quality PDF documents, enabling seamless integration of reporting functionality into their ASP.NET projects.
Features of IronPDF
- HTML to PDF Conversion: Easily convert HTML content, including CSS styles, into high-quality PDF documents.
- PDF Editing: Modify existing PDF documents by adding or removing text, images, and annotations.
- PDF Form Filling: Populate PDF forms dynamically with data from your web application.
- Barcode Generation: Generate barcodes and QR codes within PDF documents for product labels or inventory tracking.
- Watermarking: Add watermarks to PDF pages to protect sensitive information or brand documents.
- Encryption and Security: Secure PDF documents with encryption, passwords, and permissions settings.
Prerequisites
Before we begin, ensure you have the following prerequisites:
- Basic knowledge of ASP.NET development.
- Visual Studio is installed on your machine.
- IronPDF and IronPDF.Extensions.Mvc.Core
Steps to Create ASP.NET Project in Visual Studio
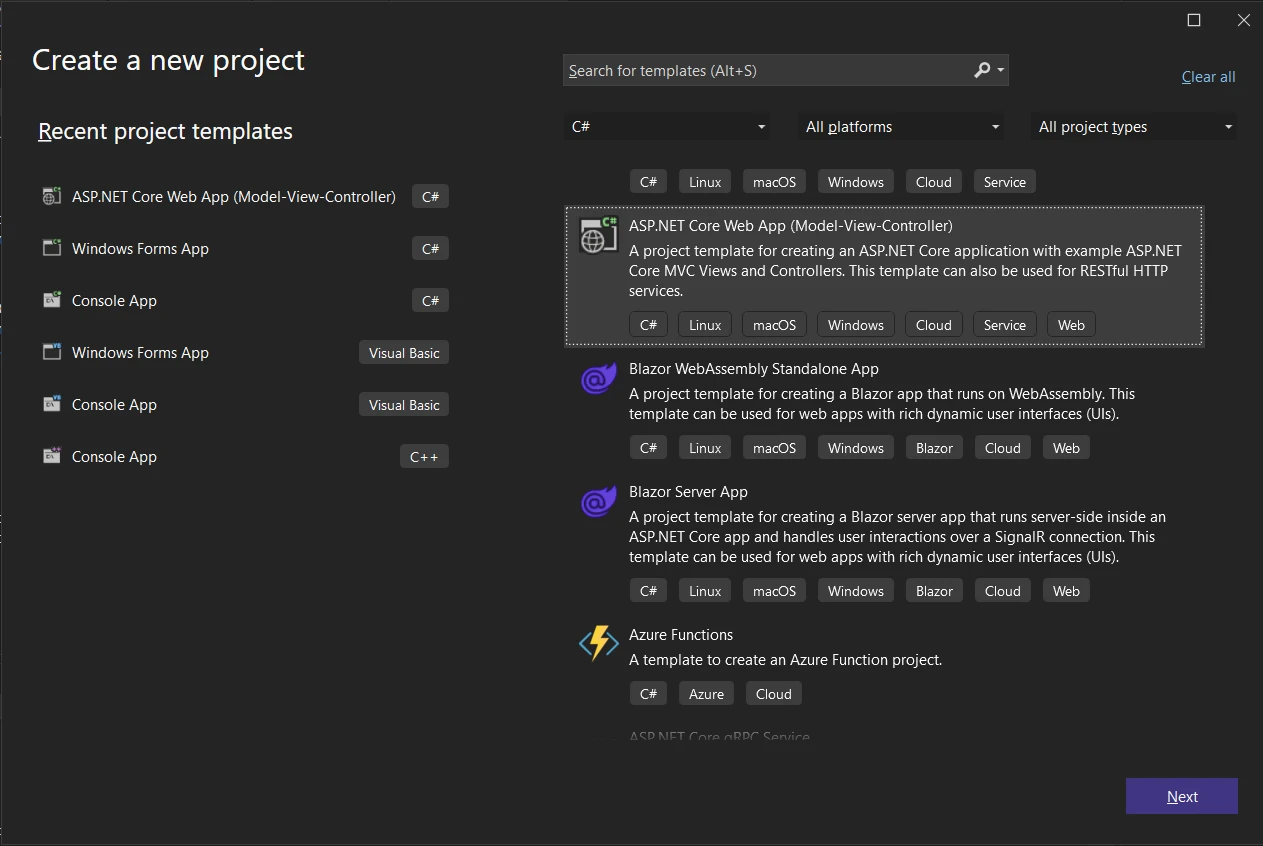
- Open Visual Studio and create a new ASP.NET Core project.
-
Choose the desired project template (e.g., MVC or Razor Pages).
-
Configure project settings such as project name, location, and framework version.
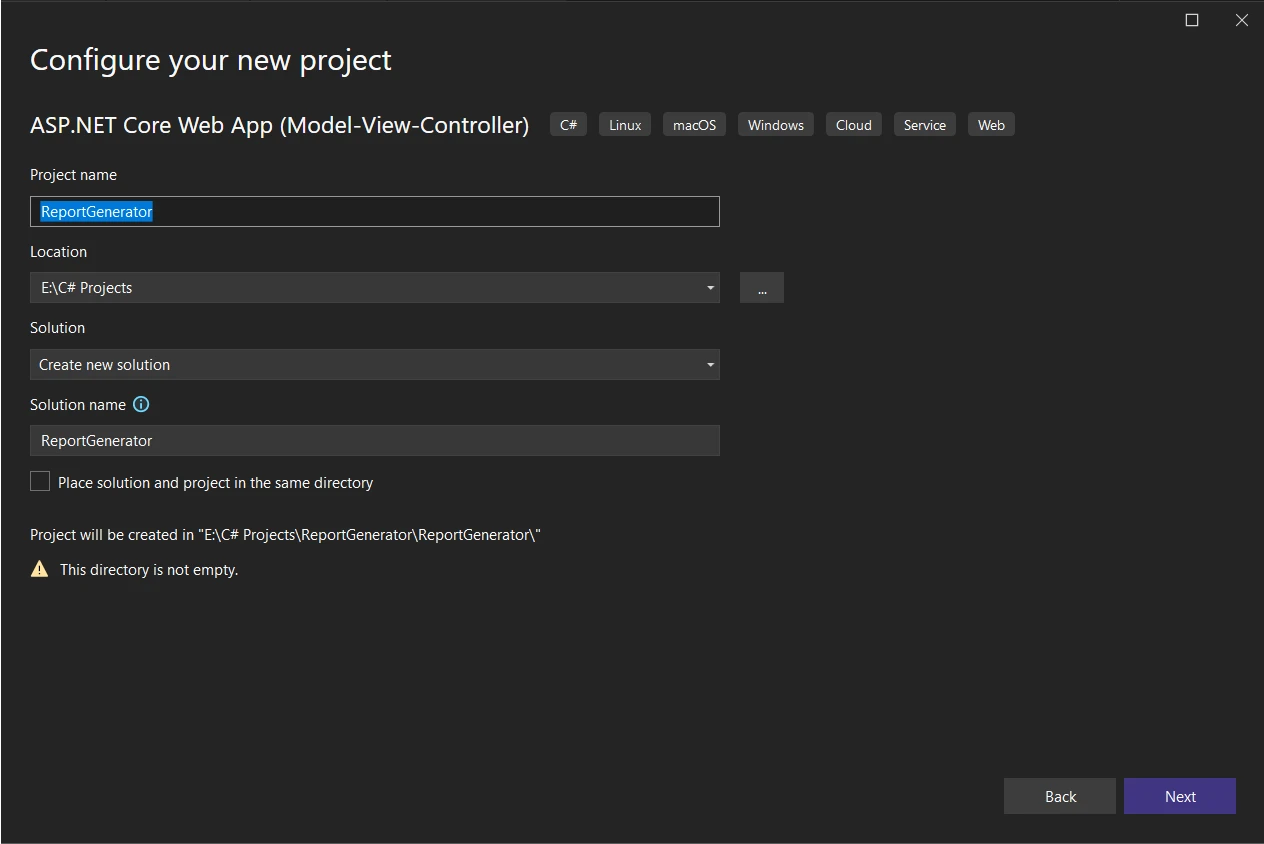
- Click "Create" to generate the project structure.
Installing IronPDF and IronPDF.Extensions.Mvc.Core
Next, let's install IronPDF and its MVC extension package using the NuGet Package Manager:
- Open the NuGet Package Manager for Solutions by right-clicking the Solution Explorer.
-
Search for "IronPDF" and "IronPDF.Extensions.Mvc.Core".
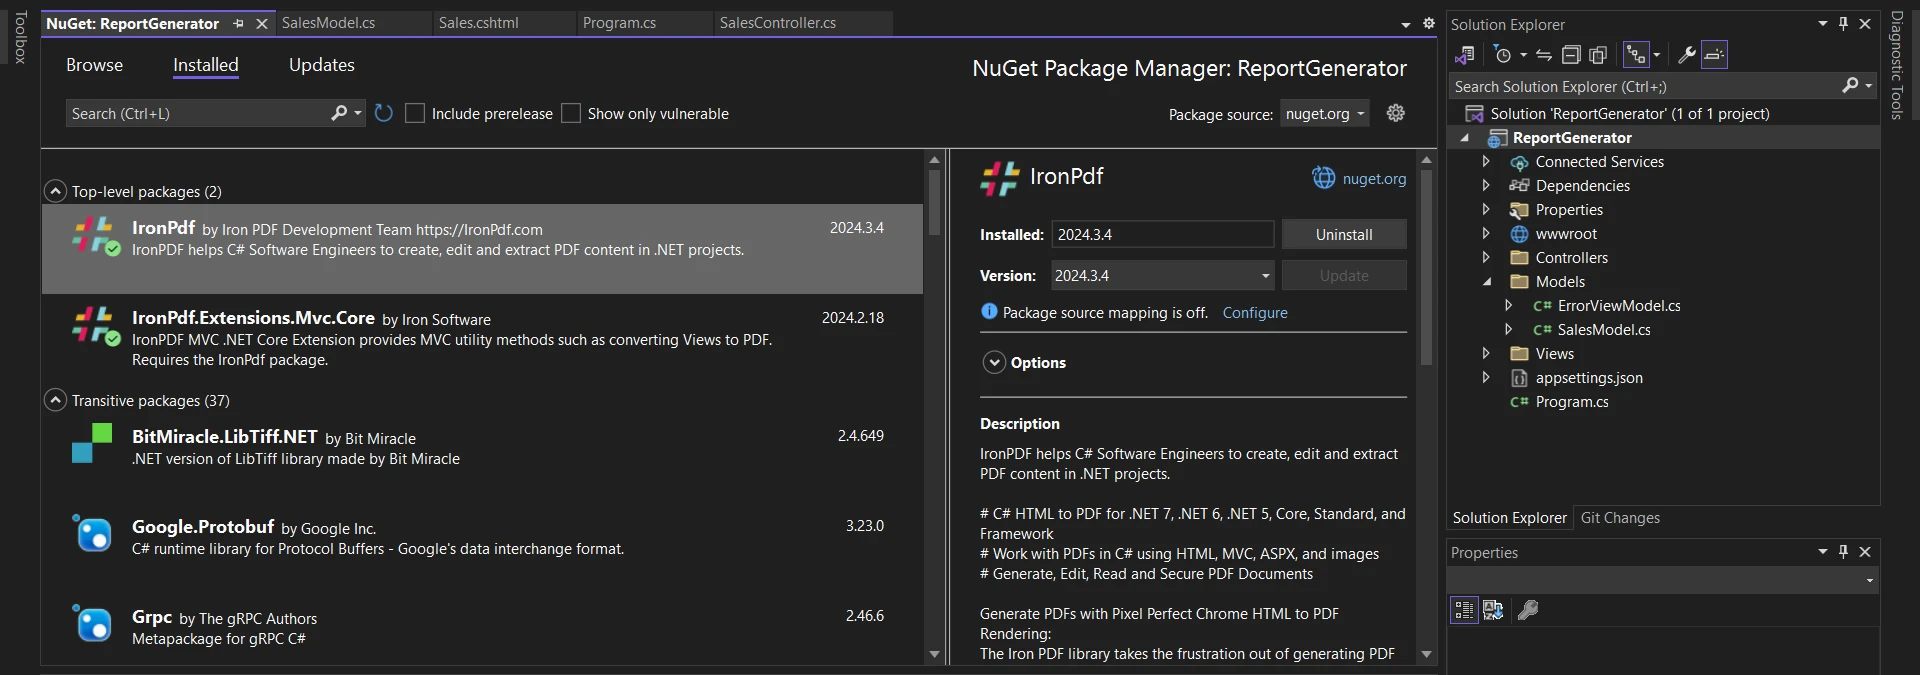
- Install both packages into your solution.
Steps to Create Report Viewer in ASP.NET Web Application
Now, let's dive into the steps to create a PDF report using IronPDF in our ASP.NET project. Before converting a view to a report, we need a Model, View, and Controller to create a data source for creating and downloading a new report in PDF format.
Step 1: Define a Model Class
First, create a model class (SalesModel.cs) to represent the sales data. This sample SalesModel class will include properties such as Date, ProductName, Quantity, UnitPrice, and TotalAmount. This is useful when retrieving information from a data source like Microsoft SQL Server or MySQL Server.
namespace ReportGenerator.Models
{
    public class SalesModel
    {
        public DateTime Date { get; set; }
        public string ProductName { get; set; }
        public int Quantity { get; set; }
        public decimal UnitPrice { get; set; }
        public decimal TotalAmount => Quantity * UnitPrice;
    }
}
namespace ReportGenerator.Models
{
public class SalesModel
{
public DateTime Date { get; set; }
public string ProductName { get; set; }
public int Quantity { get; set; }
public decimal UnitPrice { get; set; }
public decimal TotalAmount => Quantity * UnitPrice;
}
}Namespace ReportGenerator.Models
Public Class SalesModel
Public Property [Date]() As DateTime
Public Property ProductName() As String
Public Property Quantity() As Integer
Public Property UnitPrice() As Decimal
Public ReadOnly Property TotalAmount() As Decimal
Get
Return Quantity * UnitPrice
End Get
End Property
End Class
End NamespaceStep 2: Create a new Web Form View
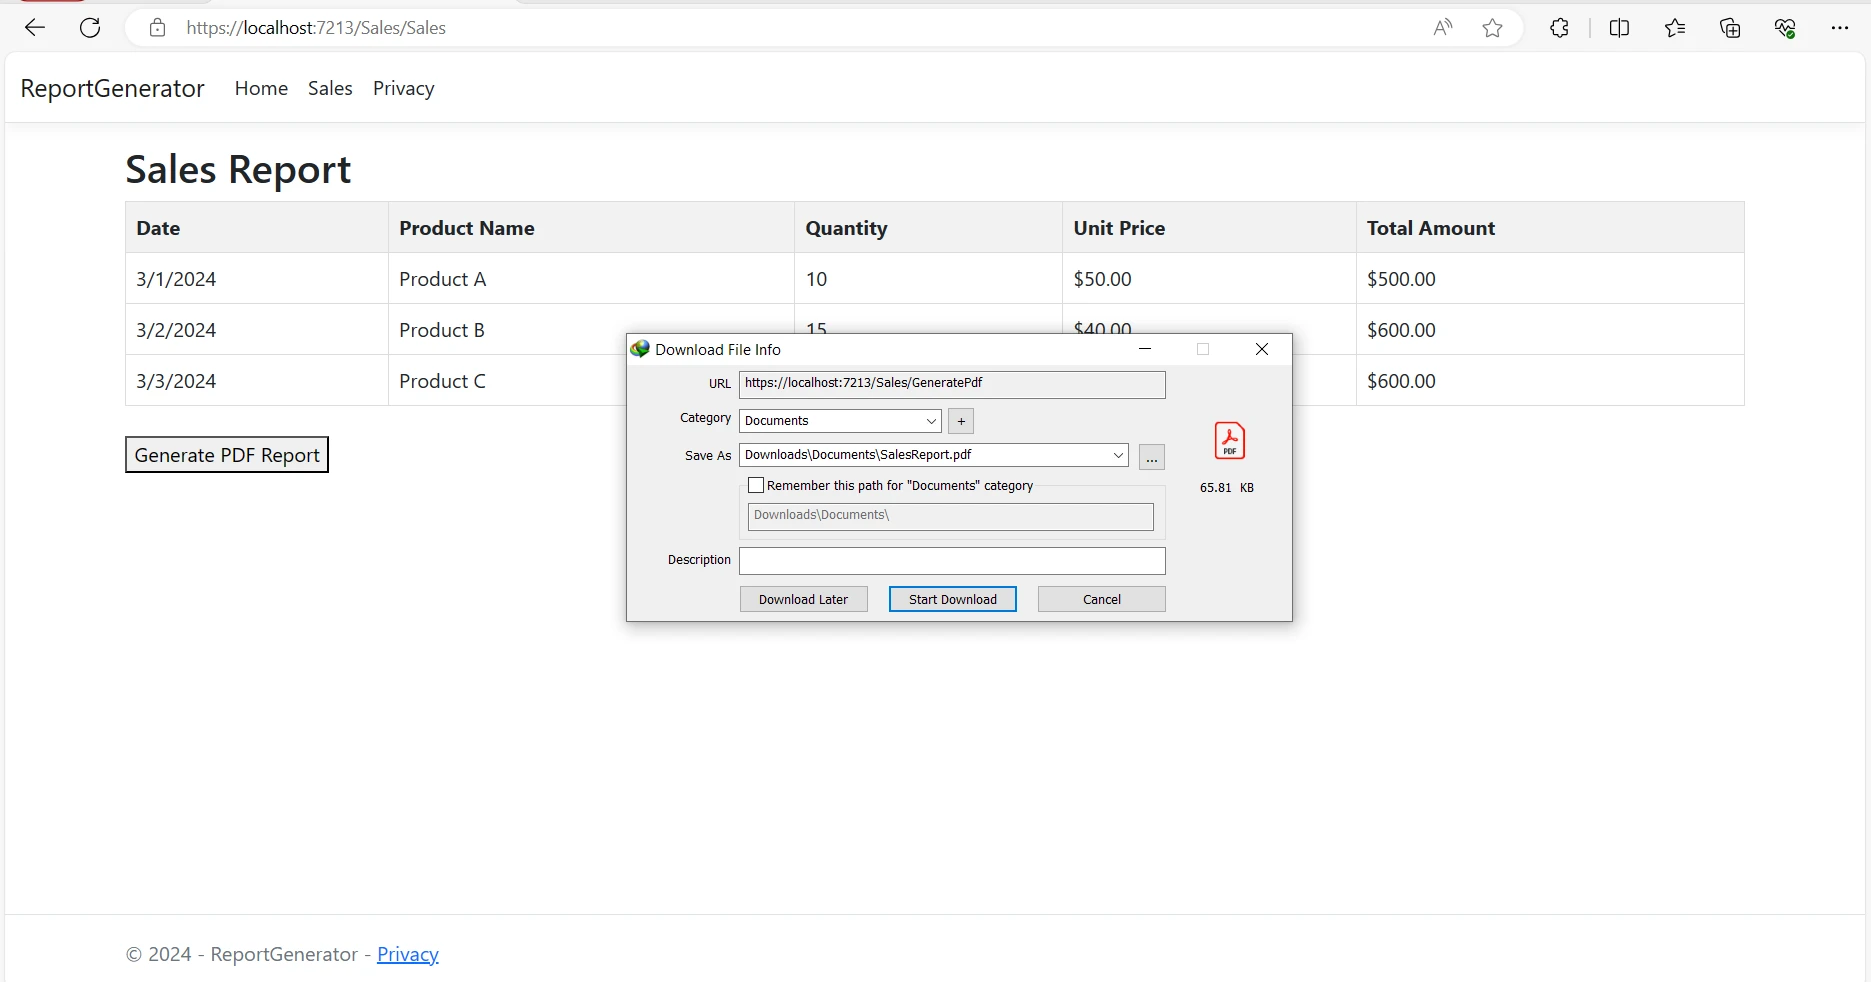
Next, create a Razor view (Sales.cshtml) to display the sales data in a tabular format and provide a button to generate the PDF report.
@model List<SalesModel>
<!DOCTYPE html>
<html>
<head>
    <title>Sales Report</title>
    <style>
        table {
            border-collapse: collapse;
            width: 100%;
        }
        th, td {
            border: 1px solid #dddddd;
            text-align: left;
            padding: 8px;
        }
        th {
            background-color: #f2f2f2;
        }
    </style>
</head>
<body>
    <h2>Sales Report</h2>
    <table>
        <tr>
            <th>Date</th>
            <th>Product Name</th>
            <th>Quantity</th>
            <th>Unit Price</th>
            <th>Total Amount</th>
        </tr>
        @foreach (var item in Model)
        {
            <tr>
                <td>@item.Date.ToShortDateString()</td>
                <td>@item.ProductName</td>
                <td>@item.Quantity</td>
                <td>@item.UnitPrice.ToString("C")</td>
                <td>@item.TotalAmount.ToString("C")</td>
            </tr>
        }
    </table>
    <br />
    @using (Html.BeginForm("GeneratePdf", "Sales", FormMethod.Post))
    {
        <button type="submit">Generate PDF Report</button>
    }
</body>
</html>
@model List<SalesModel>
<!DOCTYPE html>
<html>
<head>
    <title>Sales Report</title>
    <style>
        table {
            border-collapse: collapse;
            width: 100%;
        }
        th, td {
            border: 1px solid #dddddd;
            text-align: left;
            padding: 8px;
        }
        th {
            background-color: #f2f2f2;
        }
    </style>
</head>
<body>
    <h2>Sales Report</h2>
    <table>
        <tr>
            <th>Date</th>
            <th>Product Name</th>
            <th>Quantity</th>
            <th>Unit Price</th>
            <th>Total Amount</th>
        </tr>
        @foreach (var item in Model)
        {
            <tr>
                <td>@item.Date.ToShortDateString()</td>
                <td>@item.ProductName</td>
                <td>@item.Quantity</td>
                <td>@item.UnitPrice.ToString("C")</td>
                <td>@item.TotalAmount.ToString("C")</td>
            </tr>
        }
    </table>
    <br />
    @using (Html.BeginForm("GeneratePdf", "Sales", FormMethod.Post))
    {
        <button type="submit">Generate PDF Report</button>
    }
</body>
</html>Now, add the Sales as a menu item in _Layout.cshtml file found in the Views->Shared folder to create a report wizard view:
<!— Layout.cshtml —>
<li class="nav-item">
    <a class="nav-link text-dark" asp-area="" asp-controller="Sales" asp-action="Sales">Sales</a>
</li>
<!— Layout.cshtml —>
<li class="nav-item">
<a class="nav-link text-dark" asp-area="" asp-controller="Sales" asp-action="Sales">Sales</a>
</li>
Step 3: Registering the View Render Service
Including the registration of the view render service in the Program.cs file is crucial for dependency injection to work properly. Add the following code to the Program.cs file to register the IRazorViewRenderer service:
// Register the IRazorViewRenderer service
builder.Services.AddSingleton<IRazorViewRenderer, RazorViewRenderer>();
// Register the IRazorViewRenderer service
builder.Services.AddSingleton<IRazorViewRenderer, RazorViewRenderer>();' Register the IRazorViewRenderer service
builder.Services.AddSingleton(Of IRazorViewRenderer, RazorViewRenderer)()Step 4: Implement Web API Controller Class
Implement a controller (SalesController.cs) with actions to render the sales view and generate the PDF report. Inject the IRazorViewRenderer service provided by IronPDF into the controller constructor.
using ReportGenerator.Models;
namespace ReportGenerator.Controllers
{
    public class SalesController : Controller
    {
        private readonly IRazorViewRenderer _viewRenderService;
        private readonly List<SalesModel> salesData;

        public SalesController(IRazorViewRenderer viewRenderService)
        {
            _viewRenderService = viewRenderService;
            // Example data with sales information
            salesData = new List<SalesModel>
            {
                new SalesModel { Date = DateTime.Parse("2024-03-01"), ProductName = "Product A", Quantity = 10, UnitPrice = 50.00m },
                new SalesModel { Date = DateTime.Parse("2024-03-02"), ProductName = "Product B", Quantity = 15, UnitPrice = 40.00m },
                new SalesModel { Date = DateTime.Parse("2024-03-03"), ProductName = "Product C", Quantity = 20, UnitPrice = 30.00m }
                // Add more data as needed
            };
        }

        public IActionResult Sales()
        {
            // Renders the sales view with the sales data
            return View(salesData);
        }
    }
}
using ReportGenerator.Models;
namespace ReportGenerator.Controllers
{
public class SalesController : Controller
{
private readonly IRazorViewRenderer _viewRenderService;
private readonly List<SalesModel> salesData;
public SalesController(IRazorViewRenderer viewRenderService)
{
_viewRenderService = viewRenderService;
// Example data with sales information
salesData = new List<SalesModel>
{
new SalesModel { Date = DateTime.Parse("2024-03-01"), ProductName = "Product A", Quantity = 10, UnitPrice = 50.00m },
new SalesModel { Date = DateTime.Parse("2024-03-02"), ProductName = "Product B", Quantity = 15, UnitPrice = 40.00m },
new SalesModel { Date = DateTime.Parse("2024-03-03"), ProductName = "Product C", Quantity = 20, UnitPrice = 30.00m }
// Add more data as needed
};
}
public IActionResult Sales()
{
// Renders the sales view with the sales data
return View(salesData);
}
}
}Imports ReportGenerator.Models
Namespace ReportGenerator.Controllers
Public Class SalesController
Inherits Controller
Private ReadOnly _viewRenderService As IRazorViewRenderer
Private ReadOnly salesData As List(Of SalesModel)
Public Sub New(ByVal viewRenderService As IRazorViewRenderer)
_viewRenderService = viewRenderService
' Example data with sales information
salesData = New List(Of SalesModel) From {
New SalesModel With {
.Date = DateTime.Parse("2024-03-01"),
.ProductName = "Product A",
.Quantity = 10,
.UnitPrice = 50.00D
},
New SalesModel With {
.Date = DateTime.Parse("2024-03-02"),
.ProductName = "Product B",
.Quantity = 15,
.UnitPrice = 40.00D
},
New SalesModel With {
.Date = DateTime.Parse("2024-03-03"),
.ProductName = "Product C",
.Quantity = 20,
.UnitPrice = 30.00D
}
}
End Sub
Public Function Sales() As IActionResult
' Renders the sales view with the sales data
Return View(salesData)
End Function
End Class
End NamespaceIn the above code, inside the constructor, the IRazorViewRenderer service is assigned to the private field _viewRenderService. Additionally, the controller initializes a list named salesData containing instances of the SalesModel class, representing sales information for demonstration purposes.
The Sales() action method returns a view named "Sales", passing the salesData list as the model. This action is responsible for rendering the sales data in the associated view, allowing users to visualize the sales information in a tabular format or any other desired layout.

Step 5: Generate PDF Report
In the GeneratePdf action of the controller, use IronPDF's ChromePdfRenderer to render the Razor view to a PDF Report document. Set the appropriate response headers and return the PDF file to the client.
public FileContentResult GeneratePdf()
{
    // Set license key for IronPDF
    License.LicenseKey = "YOUR-LICENSE-KEY-HERE";

    // Initialize the ChromePdfRenderer
    ChromePdfRenderer renderer = new ChromePdfRenderer();

    // Render the Sales Razor view to a PDF document
    PdfDocument pdf = renderer.RenderRazorViewToPdf(_viewRenderService, "Views/Sales/Sales.cshtml", salesData);

    // Set HTTP response header to display the PDF inline
    Response.Headers.Append("Content-Disposition", "inline");

    // Return the PDF document as a FileContentResult
    return File(pdf.BinaryData, "application/pdf", "SalesReport.pdf");
}
public FileContentResult GeneratePdf()
{
// Set license key for IronPDF
License.LicenseKey = "YOUR-LICENSE-KEY-HERE";
// Initialize the ChromePdfRenderer
ChromePdfRenderer renderer = new ChromePdfRenderer();
// Render the Sales Razor view to a PDF document
PdfDocument pdf = renderer.RenderRazorViewToPdf(_viewRenderService, "Views/Sales/Sales.cshtml", salesData);
// Set HTTP response header to display the PDF inline
Response.Headers.Append("Content-Disposition", "inline");
// Return the PDF document as a FileContentResult
return File(pdf.BinaryData, "application/pdf", "SalesReport.pdf");
}Public Function GeneratePdf() As FileContentResult
' Set license key for IronPDF
License.LicenseKey = "YOUR-LICENSE-KEY-HERE"
' Initialize the ChromePdfRenderer
Dim renderer As New ChromePdfRenderer()
' Render the Sales Razor view to a PDF document
Dim pdf As PdfDocument = renderer.RenderRazorViewToPdf(_viewRenderService, "Views/Sales/Sales.cshtml", salesData)
' Set HTTP response header to display the PDF inline
Response.Headers.Append("Content-Disposition", "inline")
' Return the PDF document as a FileContentResult
Return File(pdf.BinaryData, "application/pdf", "SalesReport.pdf")
End FunctionLet's understand the workings of the above code in detail:
- License Key Setup:
- License.LicenseKey = "YOUR-LICENSE-KEY-HERE";
- This line sets the license key required for IronPDF. It's essential for using IronPDF functionalities within the application.
- Renderer Initialization:
- ChromePdfRenderer renderer = new ChromePdfRenderer();
- An instance of ChromePdfRenderer is created. This renderer is responsible for converting Razor views to PDF format using the Chromium browser engine.
- Rendering View to PDF:
- PdfDocument PDF = renderer.RenderRazorViewToPdf(_viewRenderService, "Views/Sales/Sales.cshtml", salesData);
- The RenderRazorViewToPdf() method of ChromePdfRenderer is invoked to render the specified Razor view (Views/Sales/Sales.cshtml) to a PDF document. The salesData variable serves as the model for the view.
- Content-Disposition Header:
- Response.Headers.Append("Content-Disposition", "inline");
- The HTTP response header Content-Disposition is set to "inline". This instructs the browser to display the PDF content directly to view reports within the browser window or tab when opened.
- Returning PDF File:
- return File(pdf.BinaryData, "application/pdf", "SalesReport.pdf");
- The PDF document content is returned as a FileContentResult. It includes the binary data of the PDF (pdf.BinaryData), specifies the MIME type as "application/pdf", and suggests the filename as "SalesReport.pdf".
Overall, this method efficiently orchestrates the process of generating a PDF report from a Razor view, making it suitable for integration within the ASP.NET application to enhance reporting capabilities.
For detailed information on how IronPDF eases the process of PDF report generation and other PDF-related tasks, please visit the documentation page.
Conclusion
In this article, we've explored how IronPDF simplifies the process of generating PDF reports in ASP.NET applications. By following the step-by-step guide provided above, you can quickly integrate IronPDF into your ASP.NET projects and generate dynamic PDF reports with ease.
With its rich feature set and seamless integration, IronPDF empowers developers to create professional-quality reports that meet the needs of their users and businesses.
IronPDF offers a free trial. Download the library from here and give it a try.
Frequently Asked Questions
How can I generate a PDF report in ASP.NET?
You can generate a PDF report in ASP.NET by using IronPDF. Start by setting up an ASP.NET web application in Visual Studio, then install IronPDF and its MVC extension. Use the ChromePdfRenderer class to convert Razor views into PDFs and utilize the File method to create the report.
What are the benefits of using a PDF library for ASP.NET?
Using a PDF library like IronPDF for ASP.NET simplifies the process of generating and managing PDF reports. It supports HTML to PDF conversion, PDF editing, form filling, barcode generation, and document security, making it versatile for various web application needs.
How do I convert Razor views to PDF in ASP.NET?
To convert Razor views to PDF in ASP.NET, you can use IronPDF's ChromePdfRenderer.RenderRazorViewToPdf method. This allows you to seamlessly integrate PDF generation within your ASP.NET applications.
What features does IronPDF offer for PDF report generation?
IronPDF offers features such as HTML to PDF conversion, PDF editing, form filling, barcode generation, watermarking, and document encryption and security. These features facilitate the creation of dynamic and secure PDF reports.
How can I secure PDF documents in ASP.NET?
IronPDF provides encryption and security features that allow developers to secure PDF documents with encryption, passwords, and permissions settings. This ensures that sensitive information remains protected in your ASP.NET applications.
Is there a free trial available for IronPDF?
Yes, IronPDF offers a free trial. You can download the library from the IronPDF website and explore its features for generating professional-quality PDF reports in your applications.
How do I add a watermark to a PDF in an ASP.NET application?
You can add a watermark to a PDF in an ASP.NET application using IronPDF. The library provides APIs for overlaying watermarks onto PDF documents, allowing you to protect sensitive information or brand your documents effectively.
What are the prerequisites for using IronPDF in my ASP.NET project?
Before using IronPDF, ensure you have a basic understanding of ASP.NET development and have Visual Studio installed. Additionally, you need to install IronPDF and its MVC extension in your project to utilize its features.
Where can I find more information about IronPDF?
For more detailed information about IronPDF and its capabilities, you can visit the documentation page on the IronPDF website. The documentation offers insights into setup, features, and sample code.
Is IronPDF compatible with .NET 10, and what advantages does it bring?
Yes, IronPDF fully supports .NET 10 across Web, Desktop, and Console project types. It takes advantage of .NET 10 runtime performance improvements (such as reduced heap allocations and faster JIT), C# language enhancements, and modern APIs. Developers can use methods like RenderHtmlAsPdf and RenderHtmlAsPdfAsync seamlessly in .NET 10 apps, benefiting from output speed, cross-platform deployment, and cleaner code.


