C# WebRTC(開発者向けの動作方法)
WebRTCとは、データ転送のための中間サーバーを必要とせず、初期の接続セットアップを除き、ウェブブラウザと他のプラットフォーム間で直接的なリアルタイムコミュニケーションを可能にする技術です。ビデオ、オーディオ、および一般的なデータをピア間で共有することをサポートし、リアルタイムコミュニケーションアプリケーションを開発するための強力なツールです。
このチュートリアルでは、C#を使用してWebRTCソリューションを作成する方法を紹介し、.NET Coreフレームワークに焦点を当て、シグナリングサーバーのセットアップ、TURNサーバーの理解、およびC#アプリケーションへのIronPDFの統合についての洞察を提供します。
環境のセットアップ
C#でWebRTCアプリケーションの開発を始めるには、開発環境をセットアップする必要があります。 これには、ウェブサイト、サービス、およびコンソールアプリを構築するためのクロスプラットフォーム版である.NET Coreをインストールする必要があります。.NET Coreをマイクロソフトの公式ウェブサイトからダウンロードしてインストールすることができます。インストールが完了したら、Visual StudioなどのC#開発用の人気のある統合開発環境(IDE)やお好みのエディタでコードを書くことができます。
新規コンソールアプリケーションの作成
まずは、新規コンソールアプリケーションプロジェクトをセットアップします。 ターミナルまたはコマンドラインインターフェイスを開き、プロジェクトを設置するディレクトリに移動します。 次に、以下のコマンドを実行します:
dotnet new console -n WebRTCSampledotnet new console -n WebRTCSampleこのコマンドは、WebRTCSampleという名前の新しいディレクトリを作成し、シンプルな"Hello World"コンソールアプリケーションをセットアップします。 プロジェクトディレクトリに移動し、WebRTCアプリのコーディングを開始する準備が整いました。
WebRTCとシグナリングの理解
WebRTCはリアルタイムコミュニケーションを可能にしますが、コミュニケーションの調整と制御メッセージの送信を行うためのメカニズム、つまりシグナリングが必要です。 シグナリングは、セッションの記述や接続確立のための候補情報などのコミュニケーションセッションに関するメタデータを交換するために使用されます。 C#アプリケーションは、WebSocketやREST APIなどの任意のメッセージ伝送機構を介してシグナリングを実装できます。
.NET Coreでのシグナリングサーバーの実装
シグナリングサーバーは、直接のピアツーピア接続が確立される前にピア間のメッセージ交換を仲介する役割を果たします。 .NET Coreでシグナリングサーバーを実装するには、WebSocket接続を処理するシンプルなウェブアプリを作成します。
using Microsoft.AspNetCore.Builder;
using Microsoft.AspNetCore.Hosting;
using Microsoft.Extensions.DependencyInjection;
using Microsoft.Extensions.Hosting;

public class Startup
{
    // Configures services for the web application.
    public void ConfigureServices(IServiceCollection services)
    {
        services.AddCors(options => options.AddDefaultPolicy(
            builder => builder.AllowAnyOrigin().AllowAnyMethod().AllowAnyHeader()));
        services.AddSignalR();
    }

    // Configures the HTTP request pipeline.
    public void Configure(IApplicationBuilder app, IWebHostEnvironment env)
    {
        if (env.IsDevelopment())
        {
            app.UseDeveloperExceptionPage();
        }
        app.UseCors();
        app.UseRouting();
        app.UseEndpoints(endpoints =>
        {
            endpoints.MapHub<SignalingHub>("/signal");
        });
    }
}
using Microsoft.AspNetCore.Builder;
using Microsoft.AspNetCore.Hosting;
using Microsoft.Extensions.DependencyInjection;
using Microsoft.Extensions.Hosting;
public class Startup
{
// Configures services for the web application.
public void ConfigureServices(IServiceCollection services)
{
services.AddCors(options => options.AddDefaultPolicy(
builder => builder.AllowAnyOrigin().AllowAnyMethod().AllowAnyHeader()));
services.AddSignalR();
}
// Configures the HTTP request pipeline.
public void Configure(IApplicationBuilder app, IWebHostEnvironment env)
{
if (env.IsDevelopment())
{
app.UseDeveloperExceptionPage();
}
app.UseCors();
app.UseRouting();
app.UseEndpoints(endpoints =>
{
endpoints.MapHub<SignalingHub>("/signal");
});
}
}このコードスニペットは、アプリにリアルタイムWeb機能を追加するためのライブラリであるSignalRを用いた基本的な.NET Coreアプリケーションを設定します。SignalRは、アプリケーションにリアルタイムWeb機能を追加するプロセスを簡素化し、シグナリングサーバーに適した選択肢となります。
WebRTCを用いたピア接続
シグナリングサーバーの設定が完了したら、次のステップはWebRTCを使用してクライアント間のピアツーピア接続を確立することです。 これには、各クライアントにRTCPeerConnectionオブジェクトを作成し、オファーとアンサーメッセージを交換し、接続の詳細を交渉することが含まれます。
ピア接続の作成
C#アプリケーション内では、主にシグナリング部分を管理し、ブラウザやReact Nativeのようなモバイルアプリ用プラットフォームを通じてWebRTC APIとやり取りすることがあります。以下は、Webクライアントからのピア接続を開始する方法の例です:
// Create a new RTCPeerConnection instance
const peerConnection = new RTCPeerConnection();

// Listen for ICE candidates and send them to the signaling server
peerConnection.onicecandidate = event => {
  if (event.candidate) {
    sendMessage('new-ice-candidate', event.candidate);
  }
};

// Handle incoming media streams
peerConnection.ontrack = event => {
  // Display the video or audio stream
};
// Create a new RTCPeerConnection instance
const peerConnection = new RTCPeerConnection();
// Listen for ICE candidates and send them to the signaling server
peerConnection.onicecandidate = event => {
if (event.candidate) {
sendMessage('new-ice-candidate', event.candidate);
}
};
// Handle incoming media streams
peerConnection.ontrack = event => {
// Display the video or audio stream
};このJavaScriptコードスニペットは、新しいピア接続の作成、ICE候補の処理、受信メディアストリームを表示するためのコールバックの設定を示しています。
オファーとアンサーの交換
接続を確立するには、一方のピアがオファーを作成し、もう一方がそれに応答してアンサーを返します。 これらは、前述のシグナリングサーバーを介して交換されます。
// Create an offer for the peer connection
async function createOffer() {
  const offer = await peerConnection.createOffer();
  await peerConnection.setLocalDescription(offer);
  sendMessage('offer', offer);
}

// Create an answer after receiving an offer
async function createAnswer(offer) {
  await peerConnection.setRemoteDescription(new RTCSessionDescription(offer));
  const answer = await peerConnection.createAnswer();
  await peerConnection.setLocalDescription(answer);
  sendMessage('answer', answer);
}
// Create an offer for the peer connection
async function createOffer() {
const offer = await peerConnection.createOffer();
await peerConnection.setLocalDescription(offer);
sendMessage('offer', offer);
}
// Create an answer after receiving an offer
async function createAnswer(offer) {
await peerConnection.setRemoteDescription(new RTCSessionDescription(offer));
const answer = await peerConnection.createAnswer();
await peerConnection.setLocalDescription(answer);
sendMessage('answer', answer);
}.NETアプリケーションへのWebRTCの統合
WebRTCのコア実装は通常、ブラウザやその他のクライアント側の環境で行われますが、.NETアプリケーションはシグナリングプロセスを促進し、セッション管理を行い、NATトラバーサルのためにTURNサーバーなどの他のサービスとやり取りすることができます。 デスクトップまたはサーバーサイドのアプリケーションの場合、Pion WebRTC(Go用のオープンソースライブラリ)などのライブラリをC#と組み合わせて使用したり、WebRTCトラフィックを処理したりすることができます。
アプリケーションの実行
あなたの.NET Coreアプリケーションを実行するには、ターミナルでプロジェクトディレクトリに移動し、以下のコマンドを実行します。
dotnet rundotnet runこのコマンドは、アプリケーションをコンパイルし、実装したシグナリングサーバーを起動させます。 ウェブクライアントは、シグナリングメッセージを交換するためにこのサーバーに接続できます。
IronPDFの紹介

IronPDFは、.NETアプリケーションにPDF生成および操作機能をもたらす多目的なライブラリであり、開発者がプログラムによってPDFドキュメントを作成、読み取り、編集することができます。 IronPDFは、HTMLからPDFの生成、フォームの記入、テキストの抽出、ドキュメントの保護など、多様なタスクをサポートしています。 これは、ユーザーデータやアプリケーション出力に基づいてレポート、請求書、動的なドキュメントを生成するために非常に有用です。
IronPDFの重要な機能の一つは、そのHTML to PDF機能であり、レイアウトとスタイルをそのまま保持します。 ウェブコンテンツからPDFを生成し、レポート、請求書、ドキュメンテーションに最適です。 HTMLファイル、URL、HTML文字列を簡単にPDFに変換することができます。
using IronPdf;

class Program
{
    static void Main(string[] args)
    {
        var renderer = new ChromePdfRenderer();

        // 1. Convert HTML String to PDF
        var htmlContent = "<h1>Hello, IronPDF!</h1><p>This is a PDF from an HTML string.</p>";
        var pdfFromHtmlString = renderer.RenderHtmlAsPdf(htmlContent);
        pdfFromHtmlString.SaveAs("HTMLStringToPDF.pdf");

        // 2. Convert HTML File to PDF
        var htmlFilePath = "path_to_your_html_file.html"; // Specify the path to your HTML file
        var pdfFromHtmlFile = renderer.RenderHtmlFileAsPdf(htmlFilePath);
        pdfFromHtmlFile.SaveAs("HTMLFileToPDF.pdf");

        // 3. Convert URL to PDF
        var url = "http://ironpdf.com"; // Specify the URL
        var pdfFromUrl = renderer.RenderUrlAsPdf(url);
        pdfFromUrl.SaveAs("URLToPDF.pdf");
    }
}
using IronPdf;
class Program
{
static void Main(string[] args)
{
var renderer = new ChromePdfRenderer();
// 1. Convert HTML String to PDF
var htmlContent = "<h1>Hello, IronPDF!</h1><p>This is a PDF from an HTML string.</p>";
var pdfFromHtmlString = renderer.RenderHtmlAsPdf(htmlContent);
pdfFromHtmlString.SaveAs("HTMLStringToPDF.pdf");
// 2. Convert HTML File to PDF
var htmlFilePath = "path_to_your_html_file.html"; // Specify the path to your HTML file
var pdfFromHtmlFile = renderer.RenderHtmlFileAsPdf(htmlFilePath);
pdfFromHtmlFile.SaveAs("HTMLFileToPDF.pdf");
// 3. Convert URL to PDF
var url = "http://ironpdf.com"; // Specify the URL
var pdfFromUrl = renderer.RenderUrlAsPdf(url);
pdfFromUrl.SaveAs("URLToPDF.pdf");
}
}IronPDFのインストール
プロジェクトでIronPDFを使用する前に、それを.NETアプリケーションに追加する必要があります。 これは、プロジェクト内の外部ライブラリを管理するプロセスを簡略化するNuGetパッケージマネージャーを使用して行うことができます。 IronPDFをインストールするには、NuGetパッケージマネージャーコンソールで次のコマンドを使用できます:
Install-Package IronPdf
ユースケース: IronPDFを使用したWebRTCアプリケーションでの会議議事録PDF生成
オンライン会議やバーチャルクラスルームを対象にしたリアルタイムコミュニケーションアプリケーションをWebRTCを使用して開発していると想像してください。 このアプリケーションは、ユーザーが音声およびビデオ通話を行い、画面を共有し、リアルタイムでドキュメントに協力することを可能にします。このアプリケーションの貴重な機能の一つに、会議の要点や決定事項、アクションアイテムを含む、会議議事録またはセッションの要約を自動的に生成し、配布することができることがあります。 ここでIronPDFが役立ちます。
実装手順
1.会議コンテンツのキャプチャ: WebRTC セッション全体を通じて、チャット メッセージ、共有メモ、強調表示されたアクション項目などのテキストベースのコンテンツがキャプチャされます。 これらの内容はHTML形式でフォーマットされ、スタイル設定と整理が容易になります(例:アクションアイテムにはリストを使用し、主要トピックには見出しを使用)。
- HTML テンプレートの生成:セッションの終了時に、キャプチャされたコンテンツは HTML テンプレートにフォーマットされます。 このテンプレートには、会議のタイトル、日付、参加者、異なる種類のコンテンツ(議論のポイント、決定事項、アクションアイテム)の構造化されたセクションが含まれます。
- HTML を PDF に変換:会議が終了し、HTML テンプレートが準備されたら、IronPDF を使用してこの HTML コンテンツを PDF ドキュメントに変換します。 この変換により、HTMLで定義されたスタイルとレイアウトがPDFに保持され、読みやすく、専門的な外観を持つ文書となります。
サンプルPDFコードの例はこちらです:
using IronPdf;

public class MeetingMinutesGenerator
{
    public static void GenerateMeetingMinutesPdf(string htmlContent, string outputPath)
    {
        // Initialize the HTML to PDF converter
        var renderer = new HtmlToPdf();
        renderer.PrintOptions.MarginTop = 40;
        renderer.PrintOptions.MarginBottom = 40;
        renderer.RenderingOptions.HtmlHeader = new HtmlHeaderFooter()
        {
            CenterText = "{pdf-title}",
            DrawDividerLine = true,
            FontSize = 12
        };
        renderer.RenderingOptions.HtmlFooter = new HtmlHeaderFooter()
        {
            LeftText = "{date} {time}",
            RightText = "Page {page} of {total-pages}",
            DrawDividerLine = true,
            FontSize = 12
        };
        // Convert the HTML content to a PDF document
        var pdfDocument = renderer.RenderHtmlAsPdf(htmlContent);
        // Save the PDF document
        pdfDocument.SaveAs(outputPath);
        Console.WriteLine("Meeting minutes PDF generated.");
    }
}
using IronPdf;
public class MeetingMinutesGenerator
{
public static void GenerateMeetingMinutesPdf(string htmlContent, string outputPath)
{
// Initialize the HTML to PDF converter
var renderer = new HtmlToPdf();
renderer.PrintOptions.MarginTop = 40;
renderer.PrintOptions.MarginBottom = 40;
renderer.RenderingOptions.HtmlHeader = new HtmlHeaderFooter()
{
CenterText = "{pdf-title}",
DrawDividerLine = true,
FontSize = 12
};
renderer.RenderingOptions.HtmlFooter = new HtmlHeaderFooter()
{
LeftText = "{date} {time}",
RightText = "Page {page} of {total-pages}",
DrawDividerLine = true,
FontSize = 12
};
// Convert the HTML content to a PDF document
var pdfDocument = renderer.RenderHtmlAsPdf(htmlContent);
// Save the PDF document
pdfDocument.SaveAs(outputPath);
Console.WriteLine("Meeting minutes PDF generated.");
}
}結論

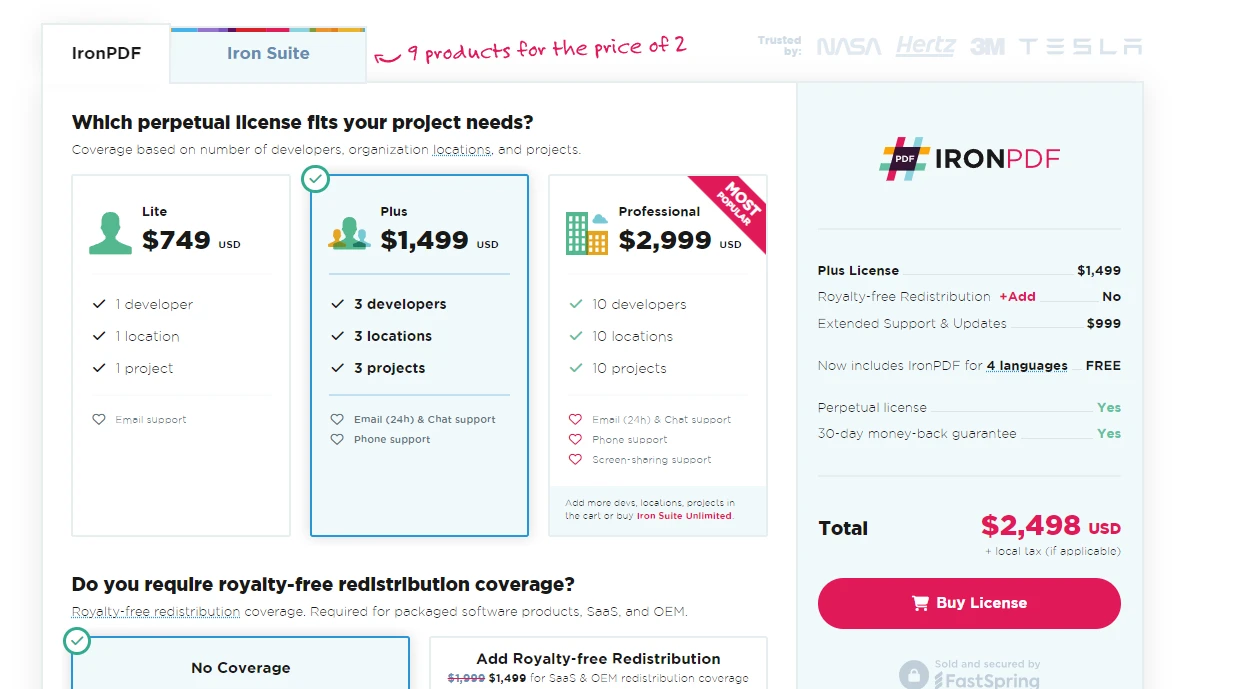
この記事では、C#および.NET Coreを使用して基本的なWebRTCアプリケーションを作成する方法を探りました。 開発環境の設定、新しいコンソールアプリケーションの作成、シグナリングサーバーの実装、およびリアルタイムコミュニケーションのためのピア接続の開始をカバーしました。 WebRTCは、リアルタイムコミュニケーションアプリケーションに無数の可能性を提供し、C#および.NET Coreを使用して、さまざまなプラットフォームやデバイスで動作する堅牢でスケーラブルなソリューションを構築することができます。 ライセンスと購入情報については、IronPDFライセンスページをご覧ください。 購入を決めたら、ライセンスは$799から始まります。
よくある質問
C# と .NET Core を使用した WebRTC のメリットは何ですか?
C# および .NET Core と組み合わせた WebRTC により、開発者は WebRTC と C# のプログラミング環境の強力な機能を活用したリアルタイム通信アプリケーションを作成できます。この組み合わせは、直接のピアツーピア データ転送をサポートし、IronPDF などの .NET ライブラリと統合して追加の機能を提供できます。
C# で WebRTC の開発環境をセットアップするにはどうすればよいですか?
C# で WebRTC の開発環境をセットアップするには、公式の Microsoft Web サイトから .NET Core SDK をインストールする必要があります。Visual Studio などの IDE を使用すると、コードを効率的に管理および記述できます。このセットアップにより、コンソール アプリケーションを作成し、WebRTC 機能を統合できます。
シグナリングサーバーは WebRTC アプリケーションでどのような役割を果たしますか?
シグナリングサーバーは、ピア間での制御メッセージとメタデータの交換を促進して接続を確立するため、WebRTC アプリケーションで重要です。直接のピアツーピア接続が行われる前に、セッション記述や候補情報の交渉に役立ちます。
どうすれば .NET Core を使用してシグナリングサーバーを作成できますか?
.NET Core を使用してシグナリングサーバーを作成するには、WebSocket 接続を管理する簡単な Web アプリケーションを開発できます。SignalR というリアルタイム Web 機能を追加するライブラリを利用すると、シグナリングサーバーの実装プロセスを効率化できます。
IronPDF は WebRTC アプリケーションで PDF を生成するためにどのように使用できますか?
IronPDF は HTML コンテンツから PDF を生成するために WebRTC アプリケーションに統合できます。これは、会議の議事録やセッションの概要などのドキュメントを作成するのに非常に役立ち、リアルタイム通信アプリケーションの機能を強化します。
WebRTC でピアツーピア接続を確立する手順にはどのようなものがありますか?
WebRTC でのピアツーピア接続の確立には、RTCPeerConnection オブジェクトの作成、オファーとアンサー メッセージの交換、および ICE 候補を使用した接続詳細の交渉が含まれます。このプロセスは、ピア間の直接通信を可能にするために不可欠です。
TURN サーバーは WebRTC 接続をどのように支援しますか?
TURN サーバーは、直接接続が不可能な場合に、特に制限のあるネットワーク環境でピア間のメディアを中継することによって WebRTC 接続を支援します。これは、NAT トラバーサルが必要な場合にも接続性を確保します。
HTML を .NET アプリケーションで PDF に変換できますか?
はい、IronPDF などのライブラリを使用して .NET アプリケーションで HTML を PDF に変換できます。RenderHtmlAsPdf などのメソッドを使用して、元のスタイルとレイアウトを維持しながら HTML コンテンツを PDF ドキュメントに変換できます。


