
npm 복제(개발자를 위한 작동 방식)
' replica ' NPM 패키지는 머신러닝 모델을 React 애플리케이션에 통합하기 위한 강력한 클라이언트 도구입니다. 이를 통해 개발자는 복잡한 백엔드 인프라를 관리할 필요 없이 사전 학습된 모델을 쉽게 사용하고 애플리케이션 내에서 직접 추론을 실행할 수 있습니다. React 프로젝트에서 replicate NPM 패키지를 사용하는 방법에 대한 개요는 다음과 같습니다. 또한 PDF 생성 라이브러리인 IronPDF 살펴보고 두 라이브러리를 결합하여 작동하는 애플리케이션을 만드는 방법을 보여드리겠습니다.
Replicate 소개
Replicate는 간단한 API를 통해 머신러닝 모델에 접근할 수 있도록 해주는 온라인 플랫폼입니다. 이 플랫폼은 이미지 생성, 텍스트 분석 등 다양한 분야의 모델을 호스팅합니다. 'replicate' NPM 패키지를 사용하면 개발자는 이러한 모델을 애플리케이션에 원활하게 통합할 수 있습니다.
시작하기
설치
React 애플리케이션에서 replicate을 사용하려면 먼저 패키지를 설치해야 합니다. npm이나 yarn을 사용하면 이 작업을 수행할 수 있습니다.
npm install replicatenpm install replicateor
yarn add replicateyarn add replicateAPI 키
Replicate API와 상호 작용하려면 API 키가 필요합니다. Replicate 웹사이트 에 가입하고 새 API 토큰을 생성하면 이 키를 얻을 수 있습니다.
기본 사용법
React 애플리케이션에서 replicate 패키지를 사용하는 단계별 가이드입니다.
1. 패키지를 임포트하고 클라이언트를 초기화합니다.
import Replicate from 'replicate';

// Initialize the Replicate client with your API token
const replicate = new Replicate({
  auth: 'YOUR_API_TOKEN'
});
import Replicate from 'replicate';
// Initialize the Replicate client with your API token
const replicate = new Replicate({
auth: 'YOUR_API_TOKEN'
});2. 추론을 실행합니다
텍스트를 기반으로 이미지를 생성하는 모델을 사용한다고 가정하면, 단 몇 줄의 코드로 아래와 같은 결과를 얻을 수 있습니다.
// Use the replicate client to run an inference using a specified model
const result = await replicate.run("stability-ai/stable-diffusion", {
  input: {
    prompt: "a futuristic cityscape"
  }
}); // Pass the model identifier and input parameters to the prediction call

// Log the result
console.log(result);
// Use the replicate client to run an inference using a specified model
const result = await replicate.run("stability-ai/stable-diffusion", {
input: {
prompt: "a futuristic cityscape"
}
}); // Pass the model identifier and input parameters to the prediction call
// Log the result
console.log(result);예시 애플리케이션
replicate 패키지의 사용법을 보여주기 위해 사용자가 텍스트 입력에 따라 이미지를 생성할 수 있는 간단한 React 애플리케이션을 만들어 보겠습니다.
1. 새 React 프로젝트를 설정합니다.
npx create-react-app replicate-example
cd replicate-example
npm install replicate
npx create-react-app replicate-example
cd replicate-example
npm install replicate2. 이미지 생성을 위한 컴포넌트를 생성합니다.
import React, { useState } from 'react';
import Replicate from 'replicate';

// Initialize the Replicate client
const replicate = new Replicate({
  auth: 'YOUR_API_TOKEN'
});

const ImageGenerator = () => {
  const [prompt, setPrompt] = useState('');
  const [image, setImage] = useState(null);

  // Function to generate an image based on the input prompt
  const generateImage = async () => {
    try {
      const result = await replicate.run("stability-ai/stable-diffusion", {
        input: { prompt }
      });
      setImage(result.output[0]);
    } catch (error) {
      console.error("Error generating image:", error);
      alert("Failed to generate image. Please try again.");
    }
  };

  return (
    <div>
      <h1>Image Generator</h1>
      <input
        type="text"
        value={prompt}
        onChange={(e) => setPrompt(e.target.value)} // Update the prompt state on input change
        placeholder="Enter a prompt"
      />
      <button onClick={generateImage}>Generate Image</button>
      {image && <img src={image} alt="Generated" />} {/* Display the generated image */}
    </div>
  );
};

export default ImageGenerator;
import React, { useState } from 'react';
import Replicate from 'replicate';
// Initialize the Replicate client
const replicate = new Replicate({
auth: 'YOUR_API_TOKEN'
});
const ImageGenerator = () => {
const [prompt, setPrompt] = useState('');
const [image, setImage] = useState(null);
// Function to generate an image based on the input prompt
const generateImage = async () => {
try {
const result = await replicate.run("stability-ai/stable-diffusion", {
input: { prompt }
});
setImage(result.output[0]);
} catch (error) {
console.error("Error generating image:", error);
alert("Failed to generate image. Please try again.");
}
};
return (
<div>
<h1>Image Generator</h1>
<input
type="text"
value={prompt}
onChange={(e) => setPrompt(e.target.value)} // Update the prompt state on input change
placeholder="Enter a prompt"
/>
<button onClick={generateImage}>Generate Image</button>
{image && <img src={image} alt="Generated" />} {/* Display the generated image */}
</div>
);
};
export default ImageGenerator;3. 애플리케이션에서 해당 구성 요소를 사용하십시오.
import React from 'react';
import ReactDOM from 'react-dom';
import './index.css';
import App from './App';
import ImageGenerator from './ImageGenerator';

ReactDOM.render(
  <React.StrictMode>
    <App />
    <ImageGenerator />
  </React.StrictMode>,
  document.getElementById('root')
);
import React from 'react';
import ReactDOM from 'react-dom';
import './index.css';
import App from './App';
import ImageGenerator from './ImageGenerator';
ReactDOM.render(
<React.StrictMode>
<App />
<ImageGenerator />
</React.StrictMode>,
document.getElementById('root')
);오류 처리
API를 사용할 때는 오류를 적절하게 처리하는 것이 매우 중요합니다. ImageGenerator 컴포넌트에서 보여준 대로 오류를 감지하고 표시하기 위해 generateImage 함수를 수정할 수 있습니다.
IronPDF 소개합니다
IronPDF 는 Node.js 애플리케이션에서 PDF 생성을 간소화하도록 설계된 다목적 npm 패키지입니다. 이 기능을 사용하면 HTML 콘텐츠 , URL 또는 기존 PDF 파일에서 PDF 문서를 생성할 수 있습니다. 송장, 보고서 또는 기타 유형의 문서를 생성해야 하는 경우 IronPDF 직관적인 API 와 포괄적인 기능 세트를 통해 프로세스를 간편하게 만들어 줍니다.
IronPDF 의 주요 기능
1. HTML을 PDF로 변환
HTML 콘텐츠를 PDF 문서로 간편하게 변환할 수 있으며, 웹 콘텐츠에서 동적 PDF를 생성하는 데 적합합니다.
2. URL을 PDF로 변환
URL에서 직접 PDF를 생성하여 웹 페이지 콘텐츠를 캡처하고 프로그램 방식으로 PDF 파일로 저장할 수 있습니다.
3. PDF 조작
기존 PDF 문서를 손쉽게 병합 , 분할 및 편집하세요. IronPDF 페이지 추가, 문서 분할, PDF 양식 생성 등 다양한 기능을 제공합니다.
4. PDF 보안
PDF 문서를 암호 로 암호화 하거나 디지털 서명을 적용하여 보안을 강화하고, 중요한 문서를 무단 접근으로부터 보호하세요.
5. 고품질 출력
텍스트, 이미지 및 서식을 정확하게 재현하여 고품질 PDF 문서를 생성하고, 생성된 PDF가 원본 콘텐츠와 동일하게 유지되도록 합니다.
6. 크로스 플랫폼 호환성
IronPDF는 Windows, Linux 및 macOS와 호환되므로 다양한 개발 환경에 적합합니다.
7. 간단한 적분
IronPDF의 npm 패키지를 사용하면 IronPDF Node.js 애플리케이션에 쉽게 통합할 수 있습니다. 잘 정리된 API를 통해 프로젝트에 PDF 생성 기능을 간편하게 통합할 수 있습니다.
웹 애플리케이션, 서버 측 스크립트 또는 명령줄 도구를 개발하든 IronPDF 사용하면 전문가 수준의 PDF 문서를 효율적이고 안정적으로 생성할 수 있습니다.
IronPDF 사용하여 PDF 문서를 생성하고 Recharts NPM 패키지를 활용하세요.
설치 종속성
먼저, 다음 명령어를 사용하여 새 Next.js 프로젝트를 생성하세요(아직 생성하지 않았다면). 여기를 참조하세요:
npx create-next-app@latest replicate-pdf --use-npm --example "https://github.com/vercel/next-learn/tree/main/basics/learn-starter"npx create-next-app@latest replicate-pdf --use-npm --example "https://github.com/vercel/next-learn/tree/main/basics/learn-starter"다음으로 프로젝트 디렉토리로 이동하세요.
cd replicate-pdfcd replicate-pdf필요한 패키지를 설치하세요:
yarn add @ironsoftware/ironpdf @ironsoftware/ironpdf-engine-windows-x64
yarn add replicate
yarn add @ironsoftware/ironpdf @ironsoftware/ironpdf-engine-windows-x64
yarn add replicatePDF 생성 API
첫 번째 단계는 PDF 문서를 생성하는 백엔드 API를 만드는 것입니다. IronPDF 서버 측에서만 실행되므로 사용자가 PDF를 생성하고자 할 때 호출할 API를 만들어야 합니다. 경로 pages/api/pdf/route.js에 파일을 생성하고 아래 내용을 추가하세요:
// pages/api/pdf.js
import { NextRequest, NextResponse } from 'next/server';
import { IronPdfGlobalConfig, PdfDocument } from "@ironsoftware/ironpdf";

// Apply your IronPDF license key
IronPdfGlobalConfig.getConfig().licenseKey = "your key";

// API handler for generating a PDF from a URL
export const GET = async (req) => {
    const { searchParams } = new URL(req.url);
    const name = searchParams.get("url");
    try {
        const pdf = await PdfDocument.fromUrl(name);
        const data = await pdf.saveAsBuffer();
        console.error('data PDF:', data);
        return new NextResponse(data, {
            status: 200,
            headers: {
                "content-type": "application/pdf",
                "Content-Disposition": "attachment; filename=awesomeIron.pdf",
            },
        });
    } catch (error) {
        console.error('Error generating PDF:', error);
        return NextResponse.json({ detail: "error" }, { status: 500 });
    }
};
// pages/api/pdf.js
import { NextRequest, NextResponse } from 'next/server';
import { IronPdfGlobalConfig, PdfDocument } from "@ironsoftware/ironpdf";
// Apply your IronPDF license key
IronPdfGlobalConfig.getConfig().licenseKey = "your key";
// API handler for generating a PDF from a URL
export const GET = async (req) => {
const { searchParams } = new URL(req.url);
const name = searchParams.get("url");
try {
const pdf = await PdfDocument.fromUrl(name);
const data = await pdf.saveAsBuffer();
console.error('data PDF:', data);
return new NextResponse(data, {
status: 200,
headers: {
"content-type": "application/pdf",
"Content-Disposition": "attachment; filename=awesomeIron.pdf",
},
});
} catch (error) {
console.error('Error generating PDF:', error);
return NextResponse.json({ detail: "error" }, { status: 500 });
}
};IronPDF 사용하려면 라이선스 키가 필요하며, 라이선스 페이지 에서 해당 키를 받아 위의 코드에 붙여넣으면 됩니다.
index.js에 아래 코드를 추가하세요
'use client';
import { useState, useEffect, useRef } from "react";
import Image from "next/image";

// Utility function to create a delay
const sleep = (ms) => new Promise((r) => setTimeout(r, ms));

export default function Home() {
  const [prediction, setPrediction] = useState(null);
  const [error, setError] = useState(null);
  const promptInputRef = useRef(null);

  // Focus input field on component mount
  useEffect(() => {
    promptInputRef.current.focus();
  }, []);

  // Handle form submission for image prediction
  const handleSubmit = async (e) => {
    e.preventDefault();

    // Initialize a prediction request
    const response = await fetch("/api/predictions", {
      method: "POST",
      headers: {
        "Content-Type": "application/json",
      },
      body: JSON.stringify({
        prompt: e.target.prompt.value,
      }),
    });

    let prediction = await response.json();
    if (response.status !== 201) {
      setError(prediction.detail);
      return;
    }

    // Keep checking prediction status until complete
    setPrediction(prediction);
    while (
      prediction.status !== "succeeded" &&
      prediction.status !== "failed"
    ) {
      await sleep(1000);
      const response = await fetch(`/api/predictions/${prediction.id}`);
      prediction = await response.json();
      if (response.status !== 200) {
        setError(prediction.detail);
        return;
      }
      console.log({ prediction });
      setPrediction(prediction);
    }
  };

  // Generate a PDF from the prediction result
  const generatePdf = async () => {
    try {
      const response = await fetch("/api/pdf?url=" + prediction.output[prediction.output.length - 1]);
      const blob = await response.blob();

      const url = window.URL.createObjectURL(new Blob([blob]));
      const link = document.createElement("a");
      link.href = url;
      link.setAttribute("download", "awesomeIron.pdf");

      document.body.appendChild(link);
      link.click();
      link.parentNode.removeChild(link);
    } catch (error) {
      console.error("Error generating PDF:", error);
    }
  };

  return (
    <div className="container max-w-2xl mx-auto p-5">
      <h1 className="py-6 text-center font-bold text-2xl">
        IronPDF: An Awesome Library for PDFs
      </h1>
      <p>Enter prompt to generate an image, then click "Go" to generate:</p>
      <form className="w-full flex" onSubmit={handleSubmit}>
        <input
          type="text"
          className="flex-grow"
          name="prompt"
          placeholder="Enter a prompt to display an image"
          ref={promptInputRef}
        />
        <button className="button" type="submit">
          Go!
        </button>
        <button className="pdfButton" type="button" onClick={generatePdf}>
          Generate PDF
        </button>
      </form>

      {error && <div>{error}</div>}
      {prediction && (
        <>
          {prediction.output && (
            <div className="image-wrapper mt-5">
              <Image
                fill
                src={prediction.output[prediction.output.length - 1]}
                alt="output"
                sizes="100vw"
              />
            </div>
          )}
          <p className="py-3 text-sm opacity-50">status: {prediction.status}</p>
        </>
      )}
    </div>
  );
}
'use client';
import { useState, useEffect, useRef } from "react";
import Image from "next/image";
// Utility function to create a delay
const sleep = (ms) => new Promise((r) => setTimeout(r, ms));
export default function Home() {
const [prediction, setPrediction] = useState(null);
const [error, setError] = useState(null);
const promptInputRef = useRef(null);
// Focus input field on component mount
useEffect(() => {
promptInputRef.current.focus();
}, []);
// Handle form submission for image prediction
const handleSubmit = async (e) => {
e.preventDefault();
// Initialize a prediction request
const response = await fetch("/api/predictions", {
method: "POST",
headers: {
"Content-Type": "application/json",
},
body: JSON.stringify({
prompt: e.target.prompt.value,
}),
});
let prediction = await response.json();
if (response.status !== 201) {
setError(prediction.detail);
return;
}
// Keep checking prediction status until complete
setPrediction(prediction);
while (
prediction.status !== "succeeded" &&
prediction.status !== "failed"
) {
await sleep(1000);
const response = await fetch(`/api/predictions/${prediction.id}`);
prediction = await response.json();
if (response.status !== 200) {
setError(prediction.detail);
return;
}
console.log({ prediction });
setPrediction(prediction);
}
};
// Generate a PDF from the prediction result
const generatePdf = async () => {
try {
const response = await fetch("/api/pdf?url=" + prediction.output[prediction.output.length - 1]);
const blob = await response.blob();
const url = window.URL.createObjectURL(new Blob([blob]));
const link = document.createElement("a");
link.href = url;
link.setAttribute("download", "awesomeIron.pdf");
document.body.appendChild(link);
link.click();
link.parentNode.removeChild(link);
} catch (error) {
console.error("Error generating PDF:", error);
}
};
return (
<div className="container max-w-2xl mx-auto p-5">
<h1 className="py-6 text-center font-bold text-2xl">
IronPDF: An Awesome Library for PDFs
</h1>
<p>Enter prompt to generate an image, then click "Go" to generate:</p>
<form className="w-full flex" onSubmit={handleSubmit}>
<input
type="text"
className="flex-grow"
name="prompt"
placeholder="Enter a prompt to display an image"
ref={promptInputRef}
/>
<button className="button" type="submit">
Go!
</button>
<button className="pdfButton" type="button" onClick={generatePdf}>
Generate PDF
</button>
</form>
{error && <div>{error}</div>}
{prediction && (
<>
{prediction.output && (
<div className="image-wrapper mt-5">
<Image
fill
src={prediction.output[prediction.output.length - 1]}
alt="output"
sizes="100vw"
/>
</div>
)}
<p className="py-3 text-sm opacity-50">status: {prediction.status}</p>
</>
)}
</div>
);
}코드 설명
1. 가져오기 명령
해당 코드는 외부 라이브러리에서 필요한 모듈을 가져오는 것으로 시작합니다.
"react"에서 가져온'useState','useEffect','useRef': 이는 각각 함수 컴포넌트가 상태를 관리하고, 부작용을 처리하며, DOM 요소에 대한 참조를 생성할 수 있게 해주는 React 훅입니다."next/image"에서 가져온'Image': 이는 최적화된 이미지 로딩을 위한 Next.js에서 제공하는 컴포넌트입니다."use client"문은 Next.js 애플리케이션 내에서 해당 컴포넌트를 클라이언트 측에 렌더링되도록 보장합니다.
2. 구성 요소 기능
Home 컴포넌트는 기본 내보내기로 정의됩니다. 컴포넌트 내에서는 useState 훅을 사용하여 여러 상태 변수(prediction, error)가 관리됩니다.
promptInputRef 참조는 useRef 훅을 사용하여 생성됩니다. 컴포넌트가 마운트될 때 useEffect 훅을 사용하여 promptInputRef에 포커스합니다.
handleSubmit 함수는 양식을 제출하는 비동기 함수입니다. API 엔드포인트(/api/predictions)에 프롬프트 값을 포함한 POST 요청을 보냅니다.
응답이 처리되고, 성공적이면 prediction 상태가 업데이트됩니다. 그러면 함수는 루프에 진입하여 예측이 성공하거나 실패할 때까지 주기적으로 예측 상태를 확인합니다.
generatePdf 메소드는 /api/pdf이라는 다른 API 엔드포인트에서 prediction 상태의 마지막 출력에 따라 PDF를 가져옵니다.
3. HTML 마크업
컴포넌트는 max-w-2xl, mx-auto, p-5 스타일링이 적용된 컨테이너 을 반환합니다. 컨테이너 내부에는 "IronPDF: An Awesome Library for PDFs"라는 텍스트가 있는 <h1> 요소가 있습니다.
전반적으로 이 코드는 사용자의 입력을 기반으로 예측을 처리하고 PDF를 생성하는 Next.js 애플리케이션의 일부인 것으로 보입니다. "use client" 구문은 Next.js에 특화된 것으로, 해당 구문이 사용된 컴포넌트가 클라이언트 측에서 렌더링되도록 보장합니다.
산출
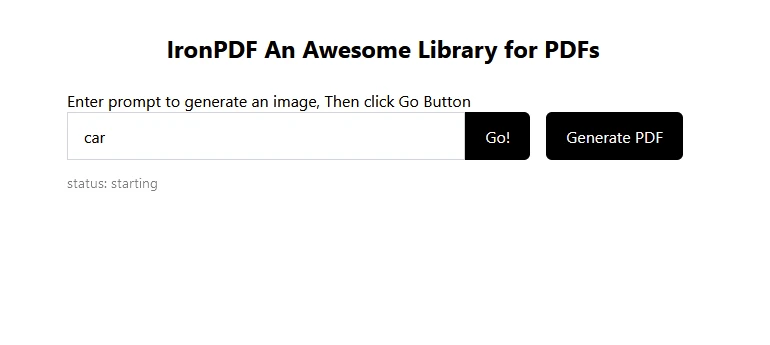
예측할 텍스트를 "car"로 입력하면 아래 이미지가 예측됩니다.
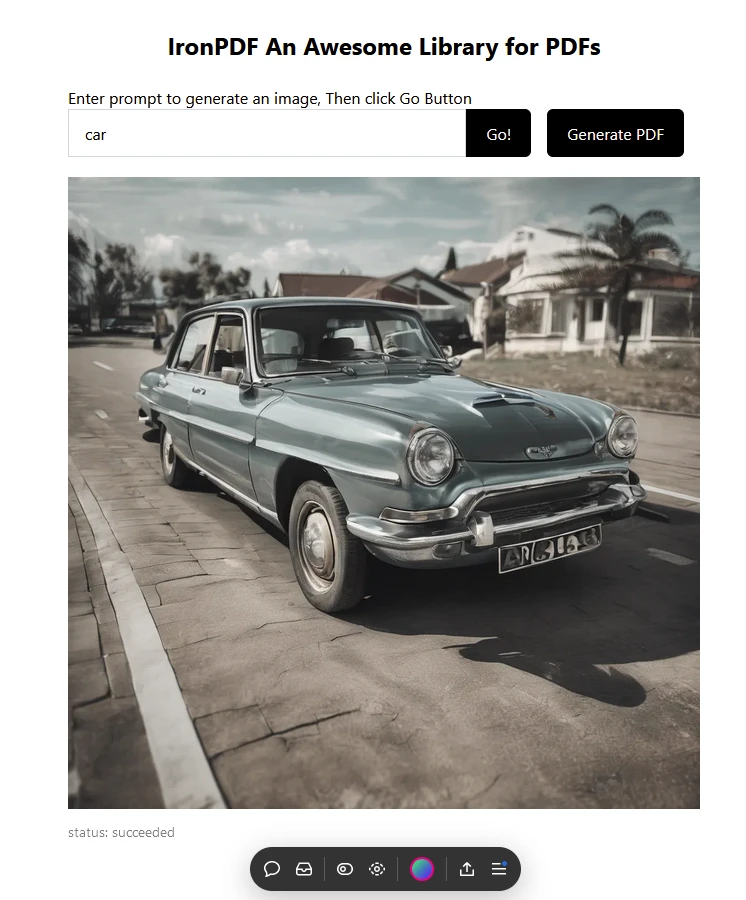
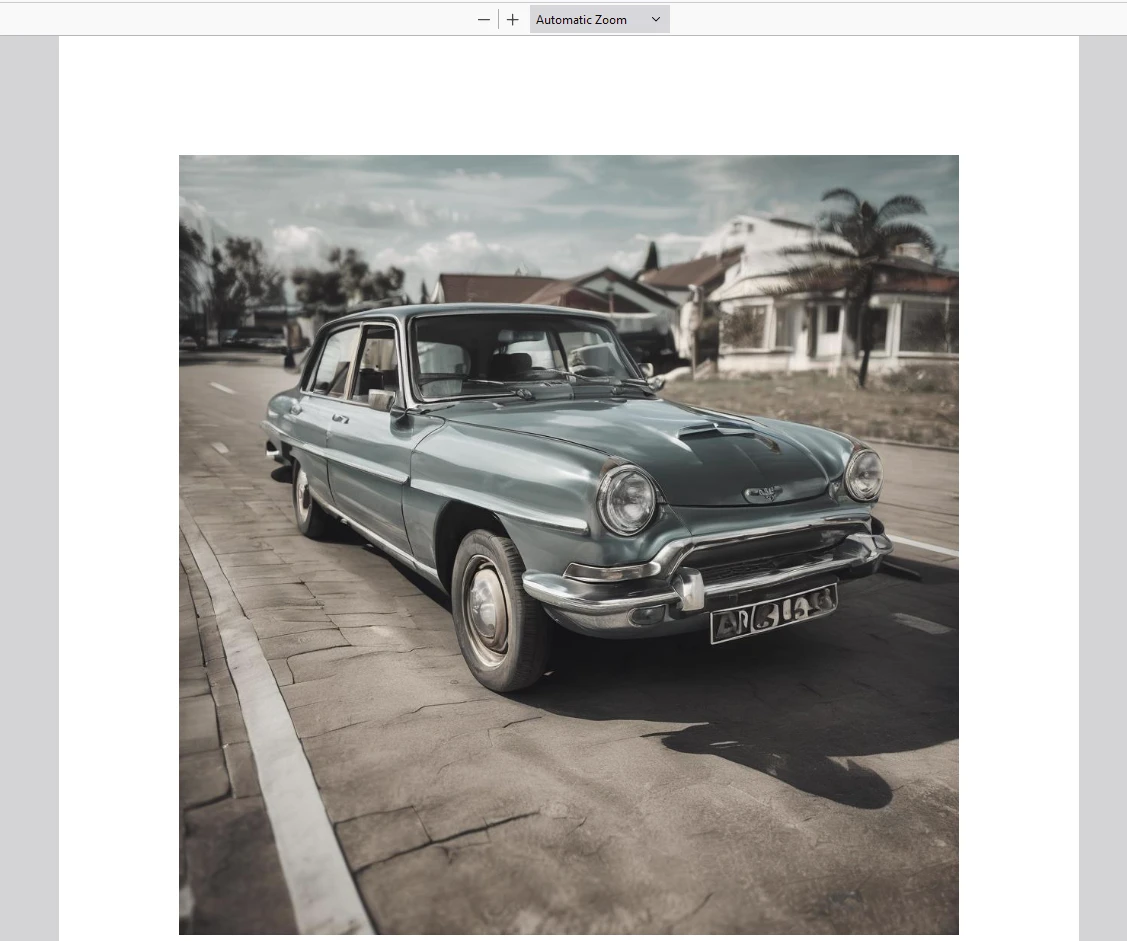
그런 다음 "PDF 생성"을 클릭하여 PDF 문서를 생성하십시오.
IronPDF 사용하여 생성된 출력 PDF
IronPDF 라이선스
자세한 내용은 IronPDF 라이선스 페이지를 참조하십시오.
아래 예시와 같이 라이선스 키를 애플리케이션에 입력하십시오.
import { IronPdfGlobalConfig, PdfDocument } from "@ironsoftware/ironpdf";
// Apply your IronPDF license key
IronPdfGlobalConfig.getConfig().licenseKey = "Add Your key here";
import { IronPdfGlobalConfig, PdfDocument } from "@ironsoftware/ironpdf";
// Apply your IronPDF license key
IronPdfGlobalConfig.getConfig().licenseKey = "Add Your key here";결론
[**replicate**](https://www.npmjs.com/package/replicate) NPM 패키지는 React 애플리케이션에서 강력한 기계 학습 모델을 활용하기 위한 편리한 방법을 제공합니다. 이 문서에 설명된 단계를 따르면 프로젝트에 이미지 생성 기능을 쉽게 통합할 수 있습니다. 이는 혁신적이고 상호작용적인 사용자 경험을 창출할 수 있는 광범위한 가능성을 열어줍니다.
Replicate 플랫폼에서 제공하는 다른 모델들을 살펴보고 애플리케이션의 기능을 더욱 확장해 보세요.
또한 IronPDF 는 PDF 생성 및 조작 기능을 제공하는 강력한 PDF 라이브러리이며, 반응형 차트를 PDF에 즉시 렌더링하는 기능도 갖추고 있습니다. 이를 통해 개발자는 단 몇 줄의 코드로 기능이 풍부한 차트 패키지를 앱에 통합할 수 있습니다. 이 두 라이브러리를 함께 사용하면 개발자는 최신 AI 기술을 활용하여 결과를 PDF 형식으로 안정적으로 저장할 수 있습니다.


