
replicate npm (Geliştiriciler İçin Nasıl Çalışır)
"replicate" NPM paketi, makine öğrenimi modellerini React uygulamalarına entegre etmek için güçlü bir müşteri aracıdır. Bu araç, geliştiricilerin önceden eğitilmiş modelleri kolayca kullanmalarına ve uygulamaları içinde doğrudan tahminler yürütmelerine olanak tanır, karmaşık backend altyapısını yönetmelerine gerek kalmadan. replicate NPM paketinin React projenizde nasıl kullanılacağına dair bir genel bakış. Ayrıca, bir PDF oluşturma kütüphanesi olan IronPDF'yi inceleyeceğiz ve her iki kütüphaneyi birleştirerek çalışan bir uygulama oluşturmayı göstereceğiz.
Replicate'e Giriş
Replicate, makine öğrenimi modellerine basit bir API aracılığıyla erişim sağlayan çevrimiçi bir platformdur. Görsel oluşturma, metin analizi ve daha fazlası gibi çeşitli alanlardan modeller barındırır. 'replicate' NPM paketini kullanarak, geliştiriciler bu modelleri uygulamalarına sorunsuz bir şekilde entegre edebilirler.
Başlarken
Kurulum
React uygulamanızda replicate kullanmak için önce paketi yüklemeniz gerekir. Bunu npm veya yarn kullanarak yapabilirsiniz:
npm install replicatenpm install replicateor
yarn add replicateyarn add replicateAPI Anahtarı
Replicate API ile etkileşime geçmek için bir API anahtarına ihtiyacınız olacak. Bu anahtarı Replicate web sitesine kaydolarak ve yeni bir API belirteci oluşturarak edinebilirsiniz.
Temel Kullanım
React uygulamasında replicate paketini kullanmak için adım adım kılavuz.
1. Paketi İçe Aktarın ve İstemciyi Başlatın
import Replicate from 'replicate';

// Initialize the Replicate client with your API token
const replicate = new Replicate({
  auth: 'YOUR_API_TOKEN'
});
import Replicate from 'replicate';
// Initialize the Replicate client with your API token
const replicate = new Replicate({
auth: 'YOUR_API_TOKEN'
});2. Bir Tahmin Yürütün
Metinden görsel oluşturmak için bir model kullanmak istediğinizi varsayalım, sadece birkaç satırlık kod ile aşağıda gösterilen sonucu elde edebilirsiniz:
// Use the replicate client to run an inference using a specified model
const result = await replicate.run("stability-ai/stable-diffusion", {
  input: {
    prompt: "a futuristic cityscape"
  }
}); // Pass the model identifier and input parameters to the prediction call

// Log the result
console.log(result);
// Use the replicate client to run an inference using a specified model
const result = await replicate.run("stability-ai/stable-diffusion", {
input: {
prompt: "a futuristic cityscape"
}
}); // Pass the model identifier and input parameters to the prediction call
// Log the result
console.log(result);Örnek Uygulama
Kullanıcıların metin girdilerine göre görseller oluşturmalarına izin veren basit bir React uygulaması oluşturarak replicate paketinin kullanımını gösterelim.
1. Yeni Bir React Projesi Kurun:
npx create-react-app replicate-example
cd replicate-example
npm install replicate
npx create-react-app replicate-example
cd replicate-example
npm install replicate2. Görsel Oluşturma İçin Bir Bileşen Oluşturun:
import React, { useState } from 'react';
import Replicate from 'replicate';

// Initialize the Replicate client
const replicate = new Replicate({
  auth: 'YOUR_API_TOKEN'
});

const ImageGenerator = () => {
  const [prompt, setPrompt] = useState('');
  const [image, setImage] = useState(null);

  // Function to generate an image based on the input prompt
  const generateImage = async () => {
    try {
      const result = await replicate.run("stability-ai/stable-diffusion", {
        input: { prompt }
      });
      setImage(result.output[0]);
    } catch (error) {
      console.error("Error generating image:", error);
      alert("Failed to generate image. Please try again.");
    }
  };

  return (
    <div>
      <h1>Image Generator</h1>
      <input
        type="text"
        value={prompt}
        onChange={(e) => setPrompt(e.target.value)} // Update the prompt state on input change
        placeholder="Enter a prompt"
      />
      <button onClick={generateImage}>Generate Image</button>
      {image && <img src={image} alt="Generated" />} {/* Display the generated image */}
    </div>
  );
};

export default ImageGenerator;
import React, { useState } from 'react';
import Replicate from 'replicate';
// Initialize the Replicate client
const replicate = new Replicate({
auth: 'YOUR_API_TOKEN'
});
const ImageGenerator = () => {
const [prompt, setPrompt] = useState('');
const [image, setImage] = useState(null);
// Function to generate an image based on the input prompt
const generateImage = async () => {
try {
const result = await replicate.run("stability-ai/stable-diffusion", {
input: { prompt }
});
setImage(result.output[0]);
} catch (error) {
console.error("Error generating image:", error);
alert("Failed to generate image. Please try again.");
}
};
return (
<div>
<h1>Image Generator</h1>
<input
type="text"
value={prompt}
onChange={(e) => setPrompt(e.target.value)} // Update the prompt state on input change
placeholder="Enter a prompt"
/>
<button onClick={generateImage}>Generate Image</button>
{image && <img src={image} alt="Generated" />} {/* Display the generated image */}
</div>
);
};
export default ImageGenerator;3. Bileşeni Uygulamanızda Kullanın:
import React from 'react';
import ReactDOM from 'react-dom';
import './index.css';
import App from './App';
import ImageGenerator from './ImageGenerator';

ReactDOM.render(
  <React.StrictMode>
    <App />
    <ImageGenerator />
  </React.StrictMode>,
  document.getElementById('root')
);
import React from 'react';
import ReactDOM from 'react-dom';
import './index.css';
import App from './App';
import ImageGenerator from './ImageGenerator';
ReactDOM.render(
<React.StrictMode>
<App />
<ImageGenerator />
</React.StrictMode>,
document.getElementById('root')
);Hataları Yönetme
API'lerle çalışırken, hataları nazikçe ele almak çok önemlidir. generateImage fonksiyonunu, yukarıdaki ImageGenerator bileşeninde gösterildiği gibi, hataları yakalamak ve görüntülemek için değiştirebilirsiniz.
IronPDF Tanıtımı
IronPDF, Node.js uygulamalarında PDF oluşturma sürecini basitleştirmek için tasarlanmış çok yönlü bir npm paketidir. HTML içerikten, URL'lerden veya mevcut PDF dosyalarından PDF belgeleri oluşturmanızı sağlar. Fatura, rapor veya diğer belge türlerini oluşturmanız gerektiğinde, IronPDF süreci sezgisel API'si ve kapsamlı özellik seti ile kolaylaştırır.
IronPDF'nin Ana Özellikleri
1. HTML'den PDF'ye Dönüşüm
HTML içeriğini PDF belgelerine kolayca dönüştürün, bu web içeriğinden dinamik PDF'ler oluşturmak için mükemmeldir.
2. URL'den PDF'ye Dönüşüm
URL'lerden doğrudan PDF oluşturun, bir web sayfası içeriğini yakalayıp PDF dosyalarına programlı olarak kaydetmenizi sağlar.
3. PDF Manipülasyonu
Mevcut PDF belgelerini birleştirin, bölün ve kolayca manipüle edin. IronPDF, sayfaları ekleme, belgeleri bölme, PDF formları oluşturma ve daha fazlası için işlevler sunar.
4. PDF Güvenlik
PDF belgelerinizi şifreleyerek güvence altına alın, şifrelerle veya dijital imzalar uygulayarak hassas belgelerinize yetkisiz erişimi önleyin.
5. Yüksek Kalite Çıktı
Metin, görseller ve formatlamanın doğru bir şekilde işlenmesiyle yüksek kaliteli PDF belgeleri üretin, böylece oluşturulan PDF'ler orijinal içeriğe sadık kalır.
6. Çapraz Platform Uyumluluğu
IronPDF'in Windows, Linux ve macOS ile uyumu, onu çeşitli geliştirme ortamları için uygun kılar.
7. Basit Entegrasyon
IronPDF'i npm paketi ile Node.js uygulamalarınıza kolayca entegre edin. İyi belgelenmiş API, proje üretkenliğinize PDF oluşturma yeteneklerini eklemeyi basitleştirir.
Bir web uygulaması, sunucu tarafı betiği veya komut satırı aracı geliştiriyor olun, IronPDF size profesyonel seviyede PDF belgeleri oluşturmanız için verimli ve güvenilir bir araç sunar.
IronPDF Kullanarak PDF Belgesi Oluşturun ve Recharts NPM Paketini Kullanın
Bağımlılıkları Kurun
Öncelikle, aşağıdaki komutu kullanarak (henüz yapmadıysanız) yeni bir Next.js projesi oluşturun. Buradan inceleyin:
npx create-next-app@latest replicate-pdf --use-npm --example "https://github.com/vercel/next-learn/tree/main/basics/learn-starter"npx create-next-app@latest replicate-pdf --use-npm --example "https://github.com/vercel/next-learn/tree/main/basics/learn-starter"Sonrasında, proje dizinine gidin:
cd replicate-pdfcd replicate-pdfGerekli paketleri kurun:
yarn add @ironsoftware/ironpdf @ironsoftware/ironpdf-engine-windows-x64
yarn add replicate
yarn add @ironsoftware/ironpdf @ironsoftware/ironpdf-engine-windows-x64
yarn add replicatePDF Oluşturma API'si
İlk adım, PDF belgesini oluşturacak bir backend API oluşturmaktır. IronPDF yalnızca sunucu tarafında çalıştığından, kullanıcılar PDF oluşturmak istediklerinde çağırmaları için bir API oluşturmalıyız. pages/api/pdf/route.js yolunda bir dosya oluşturun ve aşağıdaki içeriği ekleyin:
// pages/api/pdf.js
import { NextRequest, NextResponse } from 'next/server';
import { IronPdfGlobalConfig, PdfDocument } from "@ironsoftware/ironpdf";

// Apply your IronPDF license key
IronPdfGlobalConfig.getConfig().licenseKey = "your key";

// API handler for generating a PDF from a URL
export const GET = async (req) => {
    const { searchParams } = new URL(req.url);
    const name = searchParams.get("url");
    try {
        const pdf = await PdfDocument.fromUrl(name);
        const data = await pdf.saveAsBuffer();
        console.error('data PDF:', data);
        return new NextResponse(data, {
            status: 200,
            headers: {
                "content-type": "application/pdf",
                "Content-Disposition": "attachment; filename=awesomeIron.pdf",
            },
        });
    } catch (error) {
        console.error('Error generating PDF:', error);
        return NextResponse.json({ detail: "error" }, { status: 500 });
    }
};
// pages/api/pdf.js
import { NextRequest, NextResponse } from 'next/server';
import { IronPdfGlobalConfig, PdfDocument } from "@ironsoftware/ironpdf";
// Apply your IronPDF license key
IronPdfGlobalConfig.getConfig().licenseKey = "your key";
// API handler for generating a PDF from a URL
export const GET = async (req) => {
const { searchParams } = new URL(req.url);
const name = searchParams.get("url");
try {
const pdf = await PdfDocument.fromUrl(name);
const data = await pdf.saveAsBuffer();
console.error('data PDF:', data);
return new NextResponse(data, {
status: 200,
headers: {
"content-type": "application/pdf",
"Content-Disposition": "attachment; filename=awesomeIron.pdf",
},
});
} catch (error) {
console.error('Error generating PDF:', error);
return NextResponse.json({ detail: "error" }, { status: 500 });
}
};IronPDF bir lisans anahtarına ihtiyaç duyar, bunu lisans sayfasından alabilir ve yukarıdaki kodda kullanabilirsiniz.
index.js İçin Aşağıdaki Kodu Ekleyin
'use client';
import { useState, useEffect, useRef } from "react";
import Image from "next/image";

// Utility function to create a delay
const sleep = (ms) => new Promise((r) => setTimeout(r, ms));

export default function Home() {
  const [prediction, setPrediction] = useState(null);
  const [error, setError] = useState(null);
  const promptInputRef = useRef(null);

  // Focus input field on component mount
  useEffect(() => {
    promptInputRef.current.focus();
  }, []);

  // Handle form submission for image prediction
  const handleSubmit = async (e) => {
    e.preventDefault();

    // Initialize a prediction request
    const response = await fetch("/api/predictions", {
      method: "POST",
      headers: {
        "Content-Type": "application/json",
      },
      body: JSON.stringify({
        prompt: e.target.prompt.value,
      }),
    });

    let prediction = await response.json();
    if (response.status !== 201) {
      setError(prediction.detail);
      return;
    }

    // Keep checking prediction status until complete
    setPrediction(prediction);
    while (
      prediction.status !== "succeeded" &&
      prediction.status !== "failed"
    ) {
      await sleep(1000);
      const response = await fetch(`/api/predictions/${prediction.id}`);
      prediction = await response.json();
      if (response.status !== 200) {
        setError(prediction.detail);
        return;
      }
      console.log({ prediction });
      setPrediction(prediction);
    }
  };

  // Generate a PDF from the prediction result
  const generatePdf = async () => {
    try {
      const response = await fetch("/api/pdf?url=" + prediction.output[prediction.output.length - 1]);
      const blob = await response.blob();

      const url = window.URL.createObjectURL(new Blob([blob]));
      const link = document.createElement("a");
      link.href = url;
      link.setAttribute("download", "awesomeIron.pdf");

      document.body.appendChild(link);
      link.click();
      link.parentNode.removeChild(link);
    } catch (error) {
      console.error("Error generating PDF:", error);
    }
  };

  return (
    <div className="container max-w-2xl mx-auto p-5">
      <h1 className="py-6 text-center font-bold text-2xl">
        IronPDF: An Awesome Library for PDFs
      </h1>
      <p>Enter prompt to generate an image, then click "Go" to generate:</p>
      <form className="w-full flex" onSubmit={handleSubmit}>
        <input
          type="text"
          className="flex-grow"
          name="prompt"
          placeholder="Enter a prompt to display an image"
          ref={promptInputRef}
        />
        <button className="button" type="submit">
          Go!
        </button>
        <button className="pdfButton" type="button" onClick={generatePdf}>
          Generate PDF
        </button>
      </form>

      {error && <div>{error}</div>}
      {prediction && (
        <>
          {prediction.output && (
            <div className="image-wrapper mt-5">
              <Image
                fill
                src={prediction.output[prediction.output.length - 1]}
                alt="output"
                sizes="100vw"
              />
            </div>
          )}
          <p className="py-3 text-sm opacity-50">status: {prediction.status}</p>
        </>
      )}
    </div>
  );
}
'use client';
import { useState, useEffect, useRef } from "react";
import Image from "next/image";
// Utility function to create a delay
const sleep = (ms) => new Promise((r) => setTimeout(r, ms));
export default function Home() {
const [prediction, setPrediction] = useState(null);
const [error, setError] = useState(null);
const promptInputRef = useRef(null);
// Focus input field on component mount
useEffect(() => {
promptInputRef.current.focus();
}, []);
// Handle form submission for image prediction
const handleSubmit = async (e) => {
e.preventDefault();
// Initialize a prediction request
const response = await fetch("/api/predictions", {
method: "POST",
headers: {
"Content-Type": "application/json",
},
body: JSON.stringify({
prompt: e.target.prompt.value,
}),
});
let prediction = await response.json();
if (response.status !== 201) {
setError(prediction.detail);
return;
}
// Keep checking prediction status until complete
setPrediction(prediction);
while (
prediction.status !== "succeeded" &&
prediction.status !== "failed"
) {
await sleep(1000);
const response = await fetch(`/api/predictions/${prediction.id}`);
prediction = await response.json();
if (response.status !== 200) {
setError(prediction.detail);
return;
}
console.log({ prediction });
setPrediction(prediction);
}
};
// Generate a PDF from the prediction result
const generatePdf = async () => {
try {
const response = await fetch("/api/pdf?url=" + prediction.output[prediction.output.length - 1]);
const blob = await response.blob();
const url = window.URL.createObjectURL(new Blob([blob]));
const link = document.createElement("a");
link.href = url;
link.setAttribute("download", "awesomeIron.pdf");
document.body.appendChild(link);
link.click();
link.parentNode.removeChild(link);
} catch (error) {
console.error("Error generating PDF:", error);
}
};
return (
<div className="container max-w-2xl mx-auto p-5">
<h1 className="py-6 text-center font-bold text-2xl">
IronPDF: An Awesome Library for PDFs
</h1>
<p>Enter prompt to generate an image, then click "Go" to generate:</p>
<form className="w-full flex" onSubmit={handleSubmit}>
<input
type="text"
className="flex-grow"
name="prompt"
placeholder="Enter a prompt to display an image"
ref={promptInputRef}
/>
<button className="button" type="submit">
Go!
</button>
<button className="pdfButton" type="button" onClick={generatePdf}>
Generate PDF
</button>
</form>
{error && <div>{error}</div>}
{prediction && (
<>
{prediction.output && (
<div className="image-wrapper mt-5">
<Image
fill
src={prediction.output[prediction.output.length - 1]}
alt="output"
sizes="100vw"
/>
</div>
)}
<p className="py-3 text-sm opacity-50">status: {prediction.status}</p>
</>
)}
</div>
);
}Kod Açıklaması
1. İthalat Beyanları
Kod, önce gerekli modülleri dış kütüphanelerden içe aktararak başlar:
'useState','useEffect've'useRef'itibaren"react": Bunlar, React Hook'ları, durum yönetimi, yan etkileri ele alma ve DOM elemanlarına referans oluşturma için sıra sağlayan fonksiyon bileşenleridir.'Image'itibaren"next/image": Bu, Next.js tarafından sağlanan ve optimize edilmiş görüntü yükleme bileşenidir."use client"ifadesi, Next.js uygulamasındaki bir bileşenin istemci tarafında render edildiğini sağlar.
2. Bileşen Fonksiyonu
Home bileşeni varsayılan olarak export edilmiştir. Bileşen içinde, prediction, error gibi birkaç durum değişkeni useState hook'u kullanılarak yönetilir.
promptInputRef referansı useRef hook'u kullanılarak oluşturulur. useEffect hook'u, bileşen monte edildiğinde promptInputRef odaklanmak için kullanılır.
handleSubmit fonksiyonu, form gönderimini işleyen asenkron bir fonksiyondur. Bir API son noktasına (/api/predictions) bir giriş değeri ile POST isteği gönderir.
Yanıt işlenir ve başarılı olursa, prediction durumu güncellenir. Fonksiyon daha sonra bir döngüye girer, tahmin durumu başarılı ya da başarısız olana kadar periyodik olarak kontrol eder.
generatePdf metodu, prediction durumundaki son çıktıya dayanarak başka bir API son noktasından (/api/pdf) PDF getirir.
3. HTML İşaretlemesi
Bileşen, stil (max-w-2xl, mx-auto, p-5) ile birlikte bir konteyner <div> döndürür. Konteyner içinde, "IronPDF: PDFs için Muhteşem Bir Kütüphane" metniyle bir <h1> elemanı vardır.
Genel olarak, bu kod gibi görünen bir tahmin yönetimi ve kullanıcı girdilerine dayalı olarak kullanıcı tahminleri yapabilen bir uygulamanın parçası olan bir Next.js uygulaması gibi görünüyor. "use client" ifadesi, Next.js'ye özgü olup, bileşeni kullanıldığı yerde istemci tarafında görüntülenmesini sağlar.
Çıktı
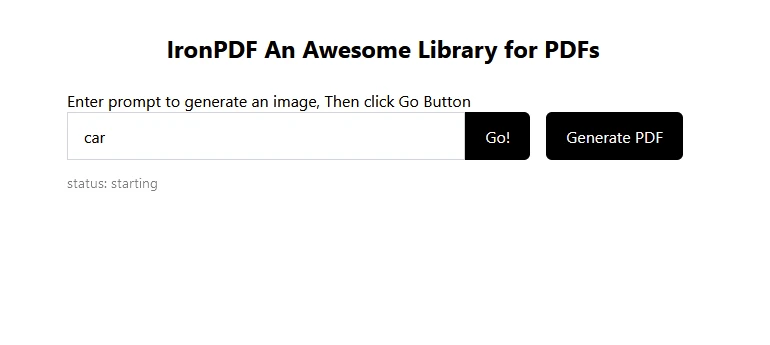
Tahmin için "araba" olarak metin girin, ardından aşağıda tahmin edilen görsel:
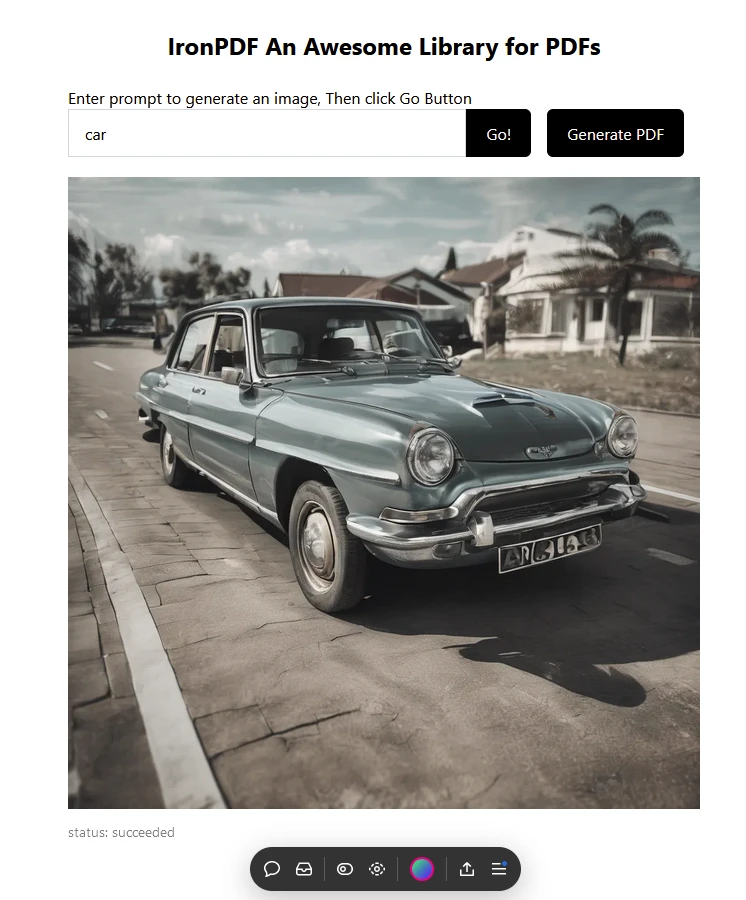
Daha sonra "PDF Oluştur" üzerine tıklayarak bir PDF dokümanı oluşturun.
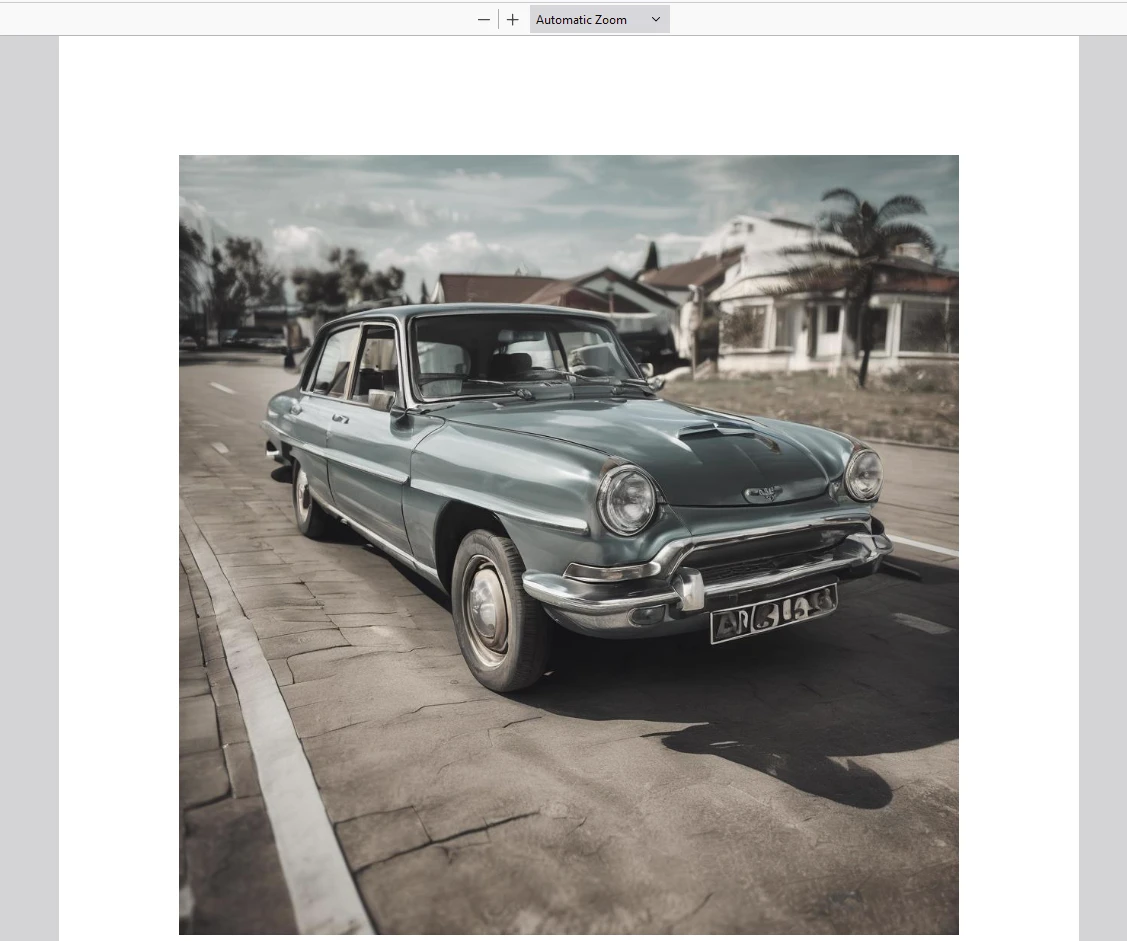
IronPDF Kullanılarak Oluşturulan Çıkış PDF'i
IronPDF Lisansı
IronPDF lisans sayfasını daha fazla bilgi için ziyaret edin.
Aşağıdaki örnekte gösterildiği gibi uygulamanıza Lisans Anahtarını yerleştirin:
import { IronPdfGlobalConfig, PdfDocument } from "@ironsoftware/ironpdf";
// Apply your IronPDF license key
IronPdfGlobalConfig.getConfig().licenseKey = "Add Your key here";
import { IronPdfGlobalConfig, PdfDocument } from "@ironsoftware/ironpdf";
// Apply your IronPDF license key
IronPdfGlobalConfig.getConfig().licenseKey = "Add Your key here";Sonuç
[**replicate**](https://www.npmjs.com/package/replicate) NPM paketi, React uygulamalarında güçlü makine öğrenme modellerinden yararlanmanın uygun bir yolunu sağlar. Bu makalede belirtilen adımları izle yerek, şık bir şekilde proje üretkenliğinizi artırabilirsiniz. Bu, yenilikçi ve etkileşimli kullanıcı deneyimleri oluşturmanız için geniş bir yelpaze olanak tanır.
Replicate platformunda mevcut diğer modelleri de keşfetmeyi unutmayın, böylece uygulamalarınızın işlevlerini daha da genişletebilirsiniz.
Ayrıca, IronPDF güçlü bir PDF kütüphanesidir, PDF oluşturma ve manipülasyon özellikleriyle birlikte PDF'lerde anında responsive chart'ları üretme yeteneği de sunar. Geliştiricilere, sadece birkaç satırlık kod ile uygulamalara özellik açısından zengin chart paketlerini entegre etme olanağı tanır. Bu iki kütüphane birlikte, geliştiricilere modern AI teknolojisi ile çalışmanın ve sonuçları güvenilir bir şekilde PDF biçiminde kaydetmenin yolunu sunar.


