next-auth NPM (Geliştiriciler İçin Nasıl Çalışır)
Kimlik doğrulama, modern web uygulamaları için son derece önemlidir; kullanıcıların verilerine ve özelliklerine güvenli bir şekilde erişim sağlamalarını güvence altına alır ve altyapı desteği sunar. NextAuth.js, Next.js ile sorunsuz bir şekilde çalışmak üzere tasarlanmış güçlü ve esnek bir kimlik doğrulama kütüphanesidir. Bu makale, kullanıcı verilerini kolayca korumak için bir Next.js projesinde NextAuth.js'i nasıl kurup kullanabileceğinizi keşfedecektir. Bu npm'in projeleriniz için sezgisel ve durumsuz kimlik doğrulama sağlamak amacıyla IronPDF kütüphanesi gibi diğer kütüphanelerle nasıl entegre edilebileceğini de göstereceğiz.
NextAuth.js Nedir?
NextAuth.js, Next.js uygulamaları için açık kaynaklı bir kimlik doğrulama kütüphanesidir ve web uygulamalarında kimlik doğrulamayı esnek ve güvenli bir şekilde uygulamak için bir yol sunar. NextAuth.js ile geliştiriciler, kullanıcı kimlik doğrulama ve oturum yönetiminin karmaşıklıklarını yönetmek zorunda kalmadan, Next.js projelerine kolaylıkla kimlik doğrulama entegrasyonu yapabilirler.
Paket, geliştiricilerin kimlik doğrulama akışlarını özelleştirmesine, API yollarını güvence altına almasına ve kullanıcı oturumlarını sorunsuz bir şekilde yönetmesine imkan tanıyan yüksek derecede yapılandırılabilir bir özelliğe sahiptir. Hesaplara erişimi yönetmek için prosedürlerinizi oluşturmanıza, JSON Web Token'larını şifreleyip çözmenize ve özel çerez güvenlik politikaları ve oturum öznitelikleri belirlemenize olanak tanıyan gelişmiş özellikler ile, hesaplara erişimi ve oturum doğrulama sıklığını düzenleyebilirsiniz.
Neden NextAuth.js'i Seçmelisiniz?
NextAuth.js birkaç avantaj sunar:
- Kullanım Kolaylığı: Minimum yapılandırmayla basit kurulum.
- Esneklik: OAuth, e-posta/şifre ve daha fazlası dahil olmak üzere çeşitli kimlik doğrulama sağlayıcılarını destekler.
- Güvenlik: Kullanıcı verilerini kendi veritabanınız için korumak amacıyla yerleşik güvenlik özellikleri.
- Genişletilebilirlik: Özel kimlik doğrulama ihtiyaçlarına uygun olarak kolayca genişletilebilir.
NextAuth.js npm ile Başlarken
Öncelikle, yeni bir Next.js projesi oluşturalım. Terminalinizi açın ve aşağıdaki komutu çalıştırın:
npx create-next-app@latest my-next-auth-app
cd my-next-auth-app
npx create-next-app@latest my-next-auth-app
cd my-next-auth-appSonra, NextAuth.js'i kurun:
npm install next-authnpm install next-authNextAuth.js Kurulumu
Kimlik doğrulama işlemi için bir API yolu için yeni bir dosya oluşturun. Kod dizini pages/api/auth içinde, aşağıdaki [...nextauth].js dosyasını oluşturun:
// pages/api/auth/[...nextauth].js
import NextAuth from 'next-auth';
import GitHubProvider from 'next-auth/providers/github';
import GoogleProvider from 'next-auth/providers/google';

// Configuring NextAuth to use GitHub and Google providers for authentication
export default NextAuth({
  providers: [
    GitHubProvider({
      clientId: process.env.GITHUB_ID,
      clientSecret: process.env.GITHUB_SECRET,
    }),
    GoogleProvider({
      clientId: process.env.GOOGLE_CLIENT_ID,
      clientSecret: process.env.GOOGLE_CLIENT_SECRET,
    }),
  ],
  secret: process.env.NEXTAUTH_SECRET, // Secret for encrypting tokens if needed
});
// pages/api/auth/[...nextauth].js
import NextAuth from 'next-auth';
import GitHubProvider from 'next-auth/providers/github';
import GoogleProvider from 'next-auth/providers/google';
// Configuring NextAuth to use GitHub and Google providers for authentication
export default NextAuth({
providers: [
GitHubProvider({
clientId: process.env.GITHUB_ID,
clientSecret: process.env.GITHUB_SECRET,
}),
GoogleProvider({
clientId: process.env.GOOGLE_CLIENT_ID,
clientSecret: process.env.GOOGLE_CLIENT_SECRET,
}),
],
secret: process.env.NEXTAUTH_SECRET, // Secret for encrypting tokens if needed
});Ortam Değişkenleri
Ortam değişkenlerinizi depolamak için projenizin kök dizininde bir .env.local dosyası oluşturun:
# Just make sure to fill out the variables with your actual information!
GITHUB_ID=your_github_client_id
GITHUB_SECRET=your_github_client_secret
GOOGLE_CLIENT_ID=your_google_client_id
GOOGLE_CLIENT_SECRET=your_google_client_secret
NEXTAUTH_SECRET=your_nextauth_secret
Uygulamanıza Kimlik Doğrulama Ekleme
Şimdi, uygulamanıza kimlik doğrulama ekleyelim. Kullanıcı bilgilerini göstermek için bir giriş butonu ve bir profil bileşeni oluşturun.
// components/LoginButton.js
import { signIn, signOut, useSession } from 'next-auth/react';

const LoginButton = () => {
  const { data: session, status } = useSession();
  const loading = status === "loading"; // Used to determine loading state
  return (
    <div>
      {!session && ( // Render sign-in buttons when session is not active
        <>
          <button onClick={() => signIn('github')}>Sign in with GitHub</button>
          <button onClick={() => signIn('google')}>Sign in with Google</button>
        </>
      )}
      {session && ( // Display user info and sign-out option when session is active
        <>
          <p>Signed in as {session.user.email}</p>
          <button onClick={() => signOut()}>Sign out</button>
        </>
      )}
    </div>
  );
};

export default LoginButton;
// components/LoginButton.js
import { signIn, signOut, useSession } from 'next-auth/react';
const LoginButton = () => {
const { data: session, status } = useSession();
const loading = status === "loading"; // Used to determine loading state
return (
<div>
{!session && ( // Render sign-in buttons when session is not active
<>
<button onClick={() => signIn('github')}>Sign in with GitHub</button>
<button onClick={() => signIn('google')}>Sign in with Google</button>
</>
)}
{session && ( // Display user info and sign-out option when session is active
<>
<p>Signed in as {session.user.email}</p>
<button onClick={() => signOut()}>Sign out</button>
</>
)}
</div>
);
};
export default LoginButton;Kod açıklaması
LoginButton bileşeni, Next.js uygulamasında NextAuth.js kullanarak kullanıcı kimlik doğrulamasını yönetir. useSession kancasını kullanarak bir kullanıcının oturum açmış olup olmadığını belirler. Kullanıcı kimlik doğrulaması yapılmadıysa, GitHub veya Google ile oturum açmalarına izin veren butonlar görüntüler. Kullanıcı kimlik doğrulaması yapıldıysa, e-posta adresiyle birlikte bir mesaj ve oturumu kapatmak için bir buton gösterir. Bu bileşen, bir oturum nesnesini manipüle ederek kullanıcı giriş ve çıkış işlemlerini yönetmek için basit bir arayüz sunar.
Rotaları Koruma
Sadece kimliği doğrulanmış kullanıcıların belirli sayfalara erişebilmesini sağlamak için, NextAuth.js'den getSession fonksiyonunu kullanın.
// pages/protected.js
import { getSession } from 'next-auth/react';

const ProtectedPage = ({ session }) => {
  if (!session) {
    return <p>You need to be authenticated to view this page.</p>;
  }
  return <p>Welcome, {session.user.email}!</p>;
};

export async function getServerSideProps(context) {
  const session = await getSession(context); // Fetch session data server-side
  return {
    props: { session },
  };
}

export default ProtectedPage;
// pages/protected.js
import { getSession } from 'next-auth/react';
const ProtectedPage = ({ session }) => {
if (!session) {
return <p>You need to be authenticated to view this page.</p>;
}
return <p>Welcome, {session.user.email}!</p>;
};
export async function getServerSideProps(context) {
const session = await getSession(context); // Fetch session data server-side
return {
props: { session },
};
}
export default ProtectedPage;Kod açıklaması
ProtectedPage bileşeni, sadece kimliği doğrulanmış kullanıcıların erişebilmesi için NextAuth.js kullanır. Sunucu tarafında kullanıcının oturum özelliklerini getServerSideProps ile alır ve bileşene bir prop olarak iletir. Kullanıcı kimliği doğrulanmadıysa, kimlik doğrulamanın gerektiğini belirten bir mesaj görüntüler. Kullanıcı kimliği doğrulandıysa, e-posta adreslerini göstererek onları karşılar. Bu kurulum, sayfanın içeriğine sadece oturum açmış kullanıcıların erişebilmesini sağlar.
IronPDF Tanıtımı
IronPDF, geliştiricilerin node.js projelerinde PDF oluşturmasına ve düzenlemesine olanak tanıyan güçlü bir node.js PDF kütüphanesidir. HTML'den PDF oluşturmanız, mevcut PDF'leri manipüle etmeniz veya web sayfalarını PDF formatına dönüştürmeniz gerektiğinde, IronPDF ihtiyaçlarınızı karşılar.

Başlıca Özellikler
HTML'den PDF'ye Dönüşüm
HTML içeriğini kolayca PDF belgelerine dönüştürün. Bu özellik, web içeriğinden dinamik PDF'ler oluşturmak için özellikle kullanışlıdır.
URL'den PDF'ye Dönüştürme
URL'lerden doğrudan PDF oluşturarak, web sayfalarının içeriğini yakalayabilir ve bunları programatik olarak PDF dosyaları olarak kaydedebilirsiniz.
PDF Manipülasyonu
Mevcut PDF belgelerini birleşik, parçalara ayırın ve kolayca manipüle edin. IronPDF, sayfaların eklenmesi, belgelerin bölünmesi ve daha fazlası gibi işlevler sunar.
PDF Güvenliği
PDF belgelerinizi parolalarla şifreleyerek veya dijital imzalar uygulayarak güvence altına alın. IronPDF, hassas belgelerinizi yetkisiz erişime karşı koruma seçenekleri sunar.
Yüksek Kaliteli Çıktı
Metin, görseller ve biçimlendirmeyi doğru şekilde render ederek yüksek kaliteli PDF belgeler üretilir. IronPDF, oluşturduğunuz PDF'lerin orijinal içeriğe sadık kalmasını sağlar.
Çapraz Platform Uyumluluğu
IronPDF, Windows, Linux ve macOS dahil olmak üzere çeşitli platformlarla uyumludur ve geniş bir geliştirme ortamı yelpazesine uygundur.
Basit Entegrasyon
IronPDF, npm paketi kullanarak Node.js uygulamalarınıza kolayca entegre edilir. API, iyi belgelenmiştir ve projelerinize PDF oluşturma yeteneklerini entegre etmeyi kolaylaştırır.
Kurulum
IronPDF paketini kurmak için aşağıdaki komutu kullanın:
yarn add @ironsoftware/ironpdf @ironsoftware/ironpdf-engine-windows-x64yarn add @ironsoftware/ironpdf @ironsoftware/ironpdf-engine-windows-x64IronPDF ve NextAuth.js kullanarak PDF Belgeleri Oluşturun
Bağımlılıkları Yükleyin: İlk önce yeni bir Next.js projesi (henüz yapmadıysanız) oluşturun ve aşağıdaki komutu kullanın:
npx create-next-app@latest nextauth-pdf --use-npm --example "https://github.com/vercel/next-learn/tree/main/basics/learn-starter"npx create-next-app@latest nextauth-pdf --use-npm --example "https://github.com/vercel/next-learn/tree/main/basics/learn-starter"Sonrasında, proje dizinine gidin:
cd nextauthcd nextauthGerekli paketleri kurun:
yarn add @ironsoftware/ironpdf @ironsoftware/ironpdf-engine-windows-x64
yarn add next-auth
yarn add @ironsoftware/ironpdf @ironsoftware/ironpdf-engine-windows-x64
yarn add next-authPDF Oluşturucu Oluşturma
PDF Oluşturma API'si: İlk adım, PDF belgesini oluşturmak için bir arka plan API oluşturmak. IronPDF yalnızca sunucu tarafında çalıştığı için, bir kullanıcının PDF oluşturmak istediğinde çağırabileceği bir API oluşturmamız gerekiyor. pages/api/pdf.js yolunda bir dosya oluşturun ve aşağıdaki içerikleri ekleyin:
// pages/api/pdf.js
import { IronPdf } from "@ironsoftware/ironpdf";
import { format } from 'date-fns'; // Import the format function for date formatting

// Apply your IronPDF license key
IronPdf.GlobalSettings.LicenseKey = "Your license key goes here";

export default async function handler(req, res) {
  try {
    const currentDate = new Date();
    const formattedDate = format(currentDate, 'MMMM do, yyyy');
    // Defining the HTML content for the PDF
    let content = "<h1>Demo React Hook Form and Generate PDF Using IronPDF</h1>";
    content += `<p>Date: ${currentDate}</p>`;
    content += `<p>Formatted Date: ${formattedDate}</p>`;
    // Convert HTML content to PDF
    const pdf = await IronPdf.HtmlToPdfDocument({ htmlContent: content });
    const data = await pdf.toBuffer(); // Convert the PDF to a buffer for response
    res.setHeader("Content-Type", "application/pdf");
    res.setHeader(
      "Content-Disposition",
      "attachment; filename=awesomeIron.pdf"
    );
    res.send(data); // Send the PDF file as a response
  } catch (error) {
    console.error("Error generating PDF:", error);
    res.status(500).end();
  }
}
// pages/api/pdf.js
import { IronPdf } from "@ironsoftware/ironpdf";
import { format } from 'date-fns'; // Import the format function for date formatting
// Apply your IronPDF license key
IronPdf.GlobalSettings.LicenseKey = "Your license key goes here";
export default async function handler(req, res) {
try {
const currentDate = new Date();
const formattedDate = format(currentDate, 'MMMM do, yyyy');
// Defining the HTML content for the PDF
let content = "<h1>Demo React Hook Form and Generate PDF Using IronPDF</h1>";
content += `<p>Date: ${currentDate}</p>`;
content += `<p>Formatted Date: ${formattedDate}</p>`;
// Convert HTML content to PDF
const pdf = await IronPdf.HtmlToPdfDocument({ htmlContent: content });
const data = await pdf.toBuffer(); // Convert the PDF to a buffer for response
res.setHeader("Content-Type", "application/pdf");
res.setHeader(
"Content-Disposition",
"attachment; filename=awesomeIron.pdf"
);
res.send(data); // Send the PDF file as a response
} catch (error) {
console.error("Error generating PDF:", error);
res.status(500).end();
}
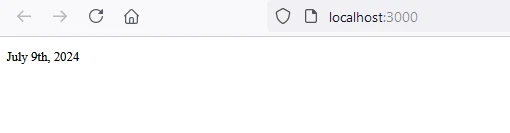
}Bu, IronPDF kütüphanesi kullanarak bir PDF dosyası oluşturan bir Next.js API rotası oluşturur. Bir başlık ve mevcut tarihi içeren bir HTML dizesi oluşturur, tarihi date-fns kullanarak biçimlendirir ve HTML'yi PDF'ye dönüştürür. Oluşturulan PDF, yanıt olarak indirilebilir bir dosya olarak döndürülür. Bu yaklaşım, raporlar, faturalar veya diğer belgeleri hızla oluşturmak için dinamik PDF oluşturmayı sunar, sunucu tarafı bir ortamda kullanışlıdır.
Şimdi, Next-Auth kullanarak ön yüz sitemize bir GIT Girişi ekleyelim. Bunun için, kullanıcının GitID ve gizlilik bilgilerini almamız gerekiyor. Git hesabınıza giriş yapın ve Geliştirici ayarlarına aşağıdaki gibi gidin:
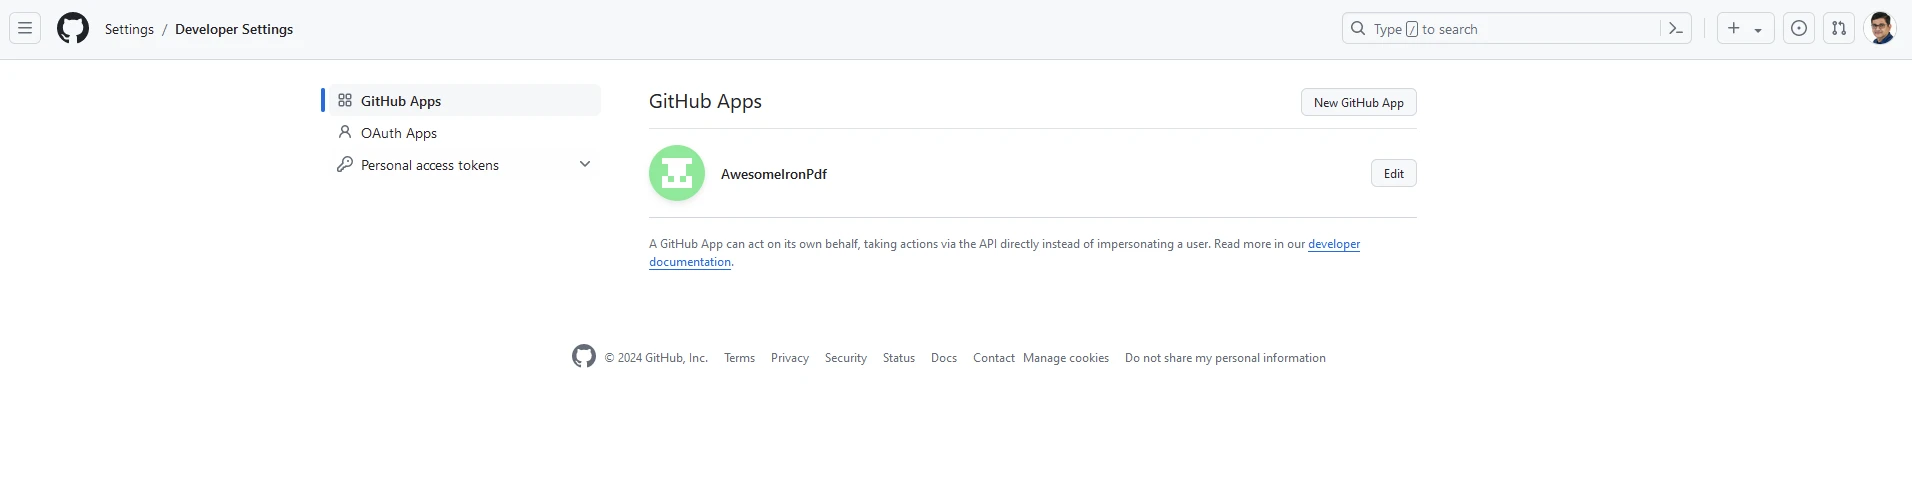
Yeni GitHub Uygulaması üzerine tıklayın ve web sitenizin detaylarını ekleyin:
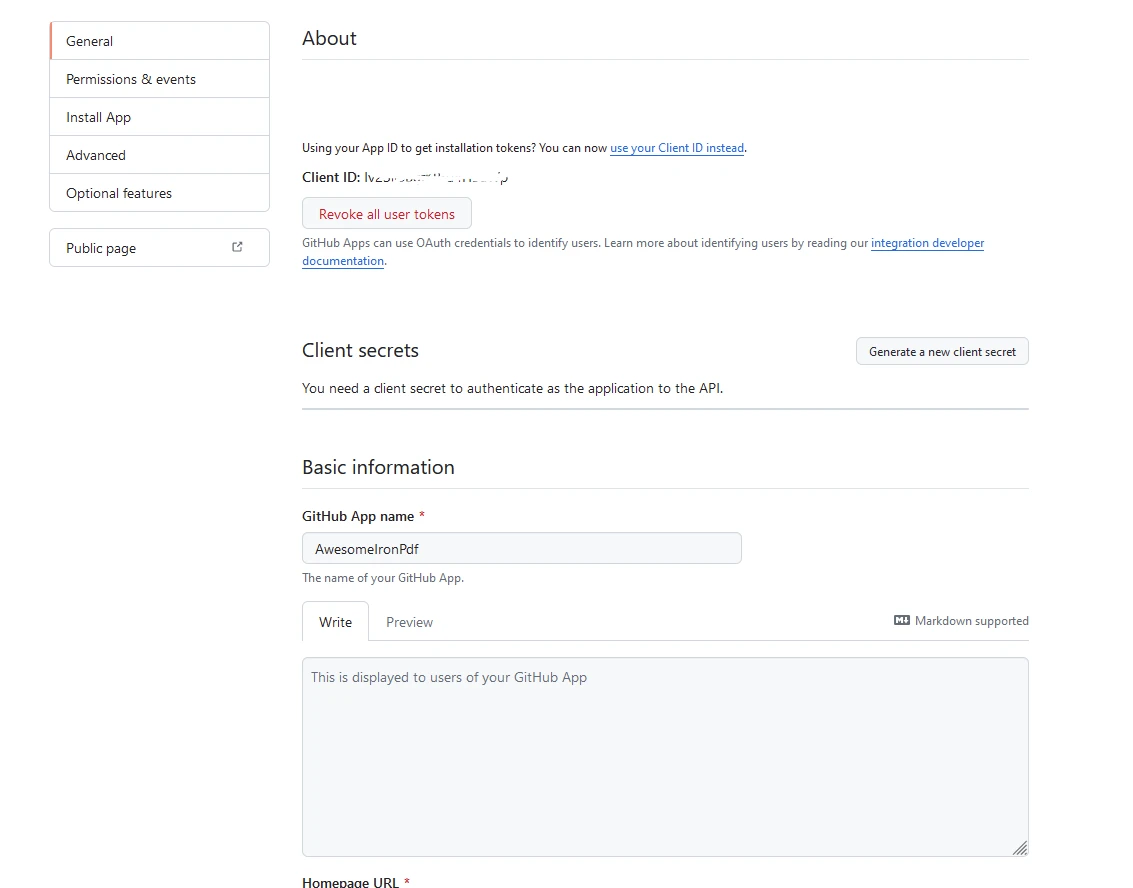
Uygulama Kimliği ve İstemci Kimliğini güvenli bir yerde saklayın. Ortam değişkenlerinizi depolamak için projenizin kök dizininde bir .env.local dosyası oluşturun:
# Here you can use the App and Client ID you just got from GitHub
GITHUB_ID=your_github_client_id
GITHUB_SECRET=your_github_client_secret
NEXTAUTH_SECRET=secret
Kimlik doğrulama işlemi için bir API yolu için yeni bir dosya oluşturun. Kod dizini pages/api/auth içinde şöyle bir [...nextauth].js dosyası oluşturun:
// pages/api/auth/[...nextauth].js
import NextAuth from 'next-auth';
import GitHubProvider from 'next-auth/providers/github';

// Setting up NextAuth with GitHub provider
export default NextAuth({
  providers: [
    GitHubProvider({
      clientId: process.env.GITHUB_ID,
      clientSecret: process.env.GITHUB_SECRET,
    }),
  ],
  secret: process.env.NEXTAUTH_SECRET,
});
// pages/api/auth/[...nextauth].js
import NextAuth from 'next-auth';
import GitHubProvider from 'next-auth/providers/github';
// Setting up NextAuth with GitHub provider
export default NextAuth({
providers: [
GitHubProvider({
clientId: process.env.GITHUB_ID,
clientSecret: process.env.GITHUB_SECRET,
}),
],
secret: process.env.NEXTAUTH_SECRET,
});Ve LoginButton.js adlı bir bileşen ekleyin. Aşağıdakileri içerecektir:
// components/LoginButton.js
import { useSession, signIn, signOut } from "next-auth/react"

export default function Component() {
  const { data: session } = useSession()
  if (session) { // Display sign-out button and user info when session is active
    return (
      <>
        Signed in as {session.user.email} <br />
        <button onClick={() => signOut()}>Sign out</button>
      </>
    )
  }
  return ( // Display sign-in button when not signed in
    <>
      Not signed in <br />
      <button onClick={() => signIn()}>Sign in</button>
    </>
  )
}
// components/LoginButton.js
import { useSession, signIn, signOut } from "next-auth/react"
export default function Component() {
const { data: session } = useSession()
if (session) { // Display sign-out button and user info when session is active
return (
<>
Signed in as {session.user.email} <br />
<button onClick={() => signOut()}>Sign out</button>
</>
)
}
return ( // Display sign-in button when not signed in
<>
Not signed in <br />
<button onClick={() => signIn()}>Sign in</button>
</>
)
}index.js dosyanızı aşağıdaki gibi değiştirin:
// pages/index.js
import Head from "next/head";
import styles from "../styles/Home.module.css";
import React, { useState, useEffect } from "react";
import { format } from "date-fns";
import LoginButton from "../components/LoginButton";
import { useSession } from "next-auth/react";

export default function Home() {
  const [text, setText] = useState("");
  const { data: session } = useSession();

  useEffect(() => {
    const currentDate = new Date();
    const formattedDate = format(currentDate, "MMMM do, yyyy");
    setText(formattedDate); // Set initial text state to formatted current date
  }, []);

  const generatePdf = async () => {
    try {
      const response = await fetch("/api/pdf-datefns?f=" + text);
      const blob = await response.blob();
      const url = window.URL.createObjectURL(new Blob([blob]));
      const link = document.createElement("a");
      link.href = url;
      link.setAttribute("download", "awesomeIron.pdf");
      document.body.appendChild(link);
      link.click();
      link.parentNode.removeChild(link); // Clean up after downloading
    } catch (error) {
      console.error("Error generating PDF:", error);
    }
  };

  const handleChange = (event) => {
    setText(event.target.value); // Update the text state with input value
  };

  return (
    <div className={styles.container}>
      <Head>
        <title>Generate PDF Using IronPDF</title>
        <link rel="icon" href="/favicon.ico" />
      </Head>
      <main>
        <h1>Demo Next Auth and Generate PDF Using IronPDF</h1>
        {!session && <LoginButton />}
        {session && (
          <>
            <p className="w-full text-center">
              <span className="px-4 text-xl border-gray-500">
                You are logged in enter URL to convert to PDF:
              </span>
              <input
                className="border border-gray-700 w-1/4"
                onChange={handleChange}
                placeholder="Enter URL here..."
              />
            </p>
            <button
              className="rounded-sm bg-blue-800 p-2 m-12 text-xl text-white"
              onClick={generatePdf}
            >
              Generate PDF
            </button>
          </>
        )}
      </main>
      <style jsx>{`
        main {
          padding: 5rem 0;
          flex: 1;
          display: flex;
          flex-direction: column;
          justify-content: center;
          align-items: center;
        }
        footer {
          width: 100%;
          height: 100px;
          border-top: 1px solid #eaeaea;
          display: flex;
          justify-content: center;
          align-items: center;
        }
        footer img {
          margin-left: 0.5rem;
        }
        footer a {
          display: flex;
          justify-content: center;
          align-items: center;
          text-decoration: none;
          color: inherit;
        }
        code {
          background: #fafafa;
          border-radius: 5px;
          padding: 0.75rem;
          font-size: 1.1rem;
          font-family:
            Menlo,
            Monaco,
            Lucida Console,
            Liberation Mono,
            DejaVu Sans Mono,
            Bitstream Vera Sans Mono,
            Courier New,
            monospace;
        }
      `}</style>
      <style jsx global>{`
        html,
        body {
          padding: 0;
          margin: 0;
          font-family:
            -apple-system,
            BlinkMacSystemFont,
            Segoe UI,
            Roboto,
            Oxygen,
            Ubuntu,
            Cantarell,
            Fira Sans,
            Droid Sans,
            Helvetica Neue,
            sans-serif;
        }
        * {
          box-sizing: border-box;
        }
      `}</style>
    </div>
  );
}
// pages/index.js
import Head from "next/head";
import styles from "../styles/Home.module.css";
import React, { useState, useEffect } from "react";
import { format } from "date-fns";
import LoginButton from "../components/LoginButton";
import { useSession } from "next-auth/react";
export default function Home() {
const [text, setText] = useState("");
const { data: session } = useSession();
useEffect(() => {
const currentDate = new Date();
const formattedDate = format(currentDate, "MMMM do, yyyy");
setText(formattedDate); // Set initial text state to formatted current date
}, []);
const generatePdf = async () => {
try {
const response = await fetch("/api/pdf-datefns?f=" + text);
const blob = await response.blob();
const url = window.URL.createObjectURL(new Blob([blob]));
const link = document.createElement("a");
link.href = url;
link.setAttribute("download", "awesomeIron.pdf");
document.body.appendChild(link);
link.click();
link.parentNode.removeChild(link); // Clean up after downloading
} catch (error) {
console.error("Error generating PDF:", error);
}
};
const handleChange = (event) => {
setText(event.target.value); // Update the text state with input value
};
return (
<div className={styles.container}>
<Head>
<title>Generate PDF Using IronPDF</title>
<link rel="icon" href="/favicon.ico" />
</Head>
<main>
<h1>Demo Next Auth and Generate PDF Using IronPDF</h1>
{!session && <LoginButton />}
{session && (
<>
<p className="w-full text-center">
<span className="px-4 text-xl border-gray-500">
You are logged in enter URL to convert to PDF:
</span>
<input
className="border border-gray-700 w-1/4"
onChange={handleChange}
placeholder="Enter URL here..."
/>
</p>
<button
className="rounded-sm bg-blue-800 p-2 m-12 text-xl text-white"
onClick={generatePdf}
>
Generate PDF
</button>
</>
)}
</main>
<style jsx>{`
main {
padding: 5rem 0;
flex: 1;
display: flex;
flex-direction: column;
justify-content: center;
align-items: center;
}
footer {
width: 100%;
height: 100px;
border-top: 1px solid #eaeaea;
display: flex;
justify-content: center;
align-items: center;
}
footer img {
margin-left: 0.5rem;
}
footer a {
display: flex;
justify-content: center;
align-items: center;
text-decoration: none;
color: inherit;
}
code {
background: #fafafa;
border-radius: 5px;
padding: 0.75rem;
font-size: 1.1rem;
font-family:
Menlo,
Monaco,
Lucida Console,
Liberation Mono,
DejaVu Sans Mono,
Bitstream Vera Sans Mono,
Courier New,
monospace;
}
`}</style>
<style jsx global>{`
html,
body {
padding: 0;
margin: 0;
font-family:
-apple-system,
BlinkMacSystemFont,
Segoe UI,
Roboto,
Oxygen,
Ubuntu,
Cantarell,
Fira Sans,
Droid Sans,
Helvetica Neue,
sans-serif;
}
* {
box-sizing: border-box;
}
`}</style>
</div>
);
}Kod Örneği Çıktısı
İlk sayfa
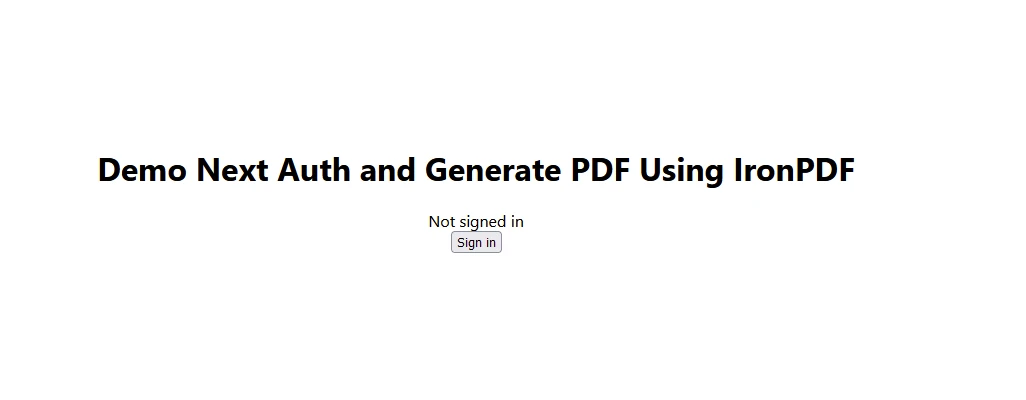
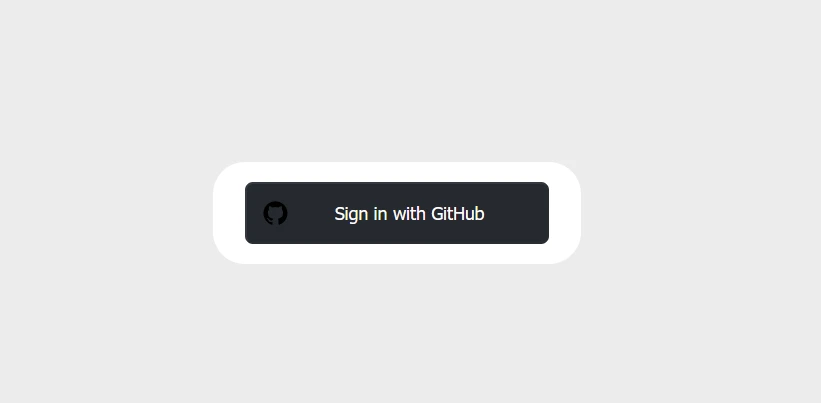
Giriş sayfası
Girişten Sonra
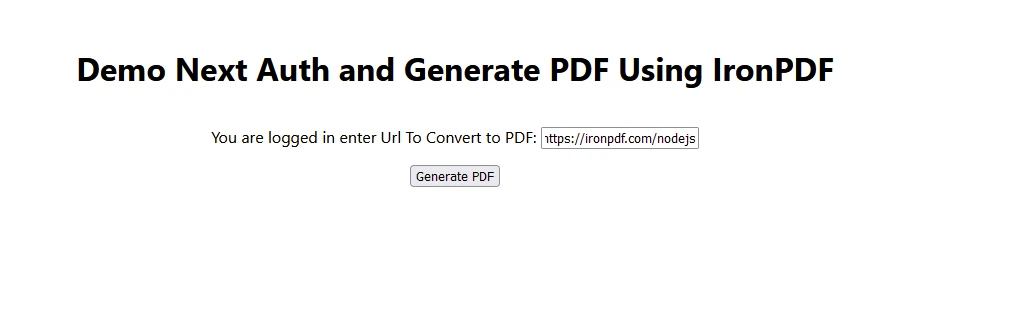
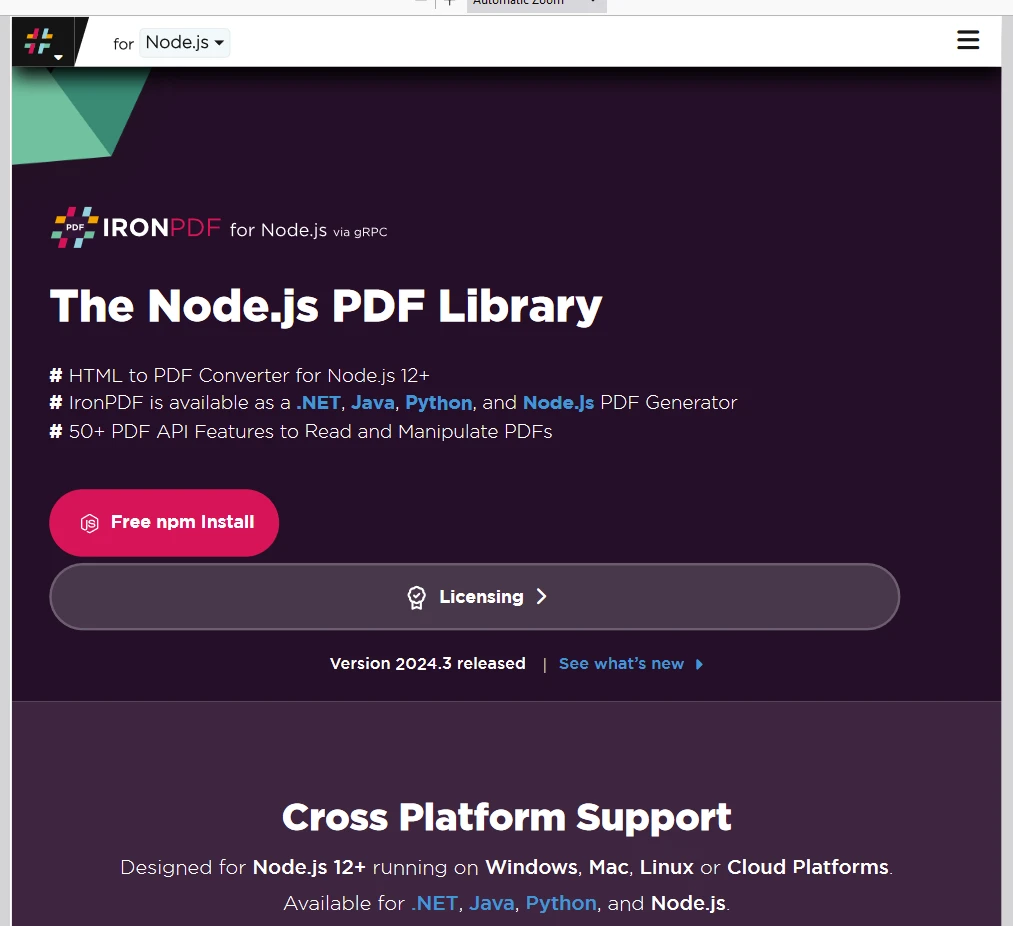
Üretilen PDF Çıktısı
IronPDF Lisansı
Aldığınız Lisans Anahtarını, kodunuzun başına aşağıdaki gibi koymayı unutmamalısınız:
// Adjust paths as necessary depending on how you import IronPDF
import { IronPdfGlobalConfig, PdfDocument } from "@ironsoftware/ironpdf";

// Apply your IronPDF license key
IronPdfGlobalConfig.getConfig().licenseKey = "Add Your key here";
// Adjust paths as necessary depending on how you import IronPDF
import { IronPdfGlobalConfig, PdfDocument } from "@ironsoftware/ironpdf";
// Apply your IronPDF license key
IronPdfGlobalConfig.getConfig().licenseKey = "Add Your key here";Sonuç
Sonuç olarak, NextAuth.js Next.js uygulamalarınıza kimlik doğrulama ekleme sürecini basitleştirir. Birden fazla sağlayıcı için destek ve sağlam güvenlik özellikleri ile kullanıcı kimlik doğrulaması yönetmek için harika bir seçimdir. Daha gelişmiş yapılandırmalar ve özellikler için her zaman NextAuth.js dökümantasyonunu inceleyebilirsiniz. Bunun üzerine, IronPDF Node.js, uygulamanıza güçlü PDF oluşturma ve manipülasyon yetenekleri sağlar ve modern uygulama geliştirme ile iyi bir şekilde entegre olur.