
next-auth NPM(開發者的使用方法)

身份驗證對現代網路應用至關重要,確保使用者可以安全地存取他們的資料和功能,並提供基礎設施支援。 NextAuth.js 是一個強大且靈活的身份驗證程式庫,設計上完美相容 Next.js。 本文將探討如何在 Next.js 專案中設置和使用 NextAuth.js,讓您可以輕鬆保障使用者資料。 我們還將向您展示如何將該 npm 與其他程式庫,如 IronPDF 程式庫結合使用,以便為您的專案提供直觀的無狀態身份驗證。
什麼是 NextAuth.js?
NextAuth.js 是一個開源的身份驗證程式庫,適用於 Next.js 應用,提供靈活且安全的方式在網頁應用中實現身份驗證。使用 NextAuth.js,開發者可以輕鬆地在他們的 Next.js 專案中整合身份驗證,而不必管理使用者身份驗證和會話管理的複雜性。
該程式包具有高度配置能力,允許開發者自定義身份驗證流程,保護 API 路由,並無縫處理使用者會話。 通過增強的功能,您可以建立管理帳戶存取權限的流程,編碼和解碼 JSON Web Tokens,並建立自定義的 Cookie 安全政策和會話屬性,這使您可以調節帳戶存取和會話驗證的頻率。
為何選擇 NextAuth.js?
NextAuth.js 提供了多項優點:
- 易用: 簡單設置,配置需求少。
- 靈活性: 支持多種身份驗證提供者,包括 OAuth、電子郵件/密碼等。
- 安全: 內建的安全功能可保護您自己資料庫的使用者資料。
- 可擴展性: 易於擴展以滿足自定義身份驗證需求。
開始使用 NextAuth.js npm
首先,我們來建立一個新的 Next.js 專案。 打開您的終端並運行:
npx create-next-app@latest my-next-auth-app
cd my-next-auth-app
npx create-next-app@latest my-next-auth-app
cd my-next-auth-app接下來,安裝 NextAuth.js:
npm install next-authnpm install next-auth設置 NextAuth.js
建立一個新的文件作為 API 路由來處理身份驗證。 在 pages/api/auth 目錄中,建立以下的 [...nextauth].js 文件:
// pages/api/auth/[...nextauth].js
import NextAuth from 'next-auth';
import GitHubProvider from 'next-auth/providers/github';
import GoogleProvider from 'next-auth/providers/google';

// Configuring NextAuth to use GitHub and Google providers for authentication
export default NextAuth({
  providers: [
    GitHubProvider({
      clientId: process.env.GITHUB_ID,
      clientSecret: process.env.GITHUB_SECRET,
    }),
    GoogleProvider({
      clientId: process.env.GOOGLE_CLIENT_ID,
      clientSecret: process.env.GOOGLE_CLIENT_SECRET,
    }),
  ],
  secret: process.env.NEXTAUTH_SECRET, // Secret for encrypting tokens if needed
});
// pages/api/auth/[...nextauth].js
import NextAuth from 'next-auth';
import GitHubProvider from 'next-auth/providers/github';
import GoogleProvider from 'next-auth/providers/google';
// Configuring NextAuth to use GitHub and Google providers for authentication
export default NextAuth({
providers: [
GitHubProvider({
clientId: process.env.GITHUB_ID,
clientSecret: process.env.GITHUB_SECRET,
}),
GoogleProvider({
clientId: process.env.GOOGLE_CLIENT_ID,
clientSecret: process.env.GOOGLE_CLIENT_SECRET,
}),
],
secret: process.env.NEXTAUTH_SECRET, // Secret for encrypting tokens if needed
});環境變數
在專案的根目錄建立一個 .env.local 文件來儲存您的環境變數:
# Just make sure to fill out the variables with your actual information!
GITHUB_ID=your_github_client_id
GITHUB_SECRET=your_github_client_secret
GOOGLE_CLIENT_ID=your_google_client_id
GOOGLE_CLIENT_SECRET=your_google_client_secret
NEXTAUTH_SECRET=your_nextauth_secret
為您的應用新增身份驗證
現在,讓我們將身份驗證加入到您的應用中。 建立一個登錄按鈕和一個用於顯示使用者資訊的個人資料組件。
// components/LoginButton.js
import { signIn, signOut, useSession } from 'next-auth/react';

const LoginButton = () => {
  const { data: session, status } = useSession();
  const loading = status === "loading"; // Used to determine loading state
  return (
    <div>
      {!session && ( // Render sign-in buttons when session is not active
        <>
          <button onClick={() => signIn('github')}>Sign in with GitHub</button>
          <button onClick={() => signIn('google')}>Sign in with Google</button>
        </>
      )}
      {session && ( // Display user info and sign-out option when session is active
        <>
          <p>Signed in as {session.user.email}</p>
          <button onClick={() => signOut()}>Sign out</button>
        </>
      )}
    </div>
  );
};

export default LoginButton;
// components/LoginButton.js
import { signIn, signOut, useSession } from 'next-auth/react';
const LoginButton = () => {
const { data: session, status } = useSession();
const loading = status === "loading"; // Used to determine loading state
return (
<div>
{!session && ( // Render sign-in buttons when session is not active
<>
<button onClick={() => signIn('github')}>Sign in with GitHub</button>
<button onClick={() => signIn('google')}>Sign in with Google</button>
</>
)}
{session && ( // Display user info and sign-out option when session is active
<>
<p>Signed in as {session.user.email}</p>
<button onClick={() => signOut()}>Sign out</button>
</>
)}
</div>
);
};
export default LoginButton;程式碼說明
LoginButton 組件在 Next.js 應用中使用 NextAuth.js 處理使用者身份驗證。 它使用 useSession hook 來判斷使用者是否已登錄。 如果使用者未認證,它將顯示按鈕,讓他們透過 GitHub 或 Google 登錄。 如果使用者已認證,它會顯示使用者的電子郵件和一個登出按鈕。 此組件提供了一個簡單的介面,通過操作會話物件管理使用者登錄和登出操作。
保護路由
要保護路由並確保只有經過身份驗證的使用者才能存取某些頁面,使用 NextAuth.js 的 getSession 函式。
// pages/protected.js
import { getSession } from 'next-auth/react';

const ProtectedPage = ({ session }) => {
  if (!session) {
    return <p>You need to be authenticated to view this page.</p>;
  }
  return <p>Welcome, {session.user.email}!</p>;
};

export async function getServerSideProps(context) {
  const session = await getSession(context); // Fetch session data server-side
  return {
    props: { session },
  };
}

export default ProtectedPage;
// pages/protected.js
import { getSession } from 'next-auth/react';
const ProtectedPage = ({ session }) => {
if (!session) {
return <p>You need to be authenticated to view this page.</p>;
}
return <p>Welcome, {session.user.email}!</p>;
};
export async function getServerSideProps(context) {
const session = await getSession(context); // Fetch session data server-side
return {
props: { session },
};
}
export default ProtectedPage;程式碼說明
Next.js 應用中的 ProtectedPage 組件使用 NextAuth.js 來限制只有已認證的使用者才能存取。 它在伺服器端使用 getServerSideProps 檢索使用者的會話屬性,並作為屬性傳遞給組件。 如果使用者未認證,該頁面將顯示需要身份驗證的提示資訊。 如果使用者已認證,它會顯示其電子郵件,以迎接使用者。 這種設置確保只有已登錄的使用者才能存取頁面的內容。
介紹IronPDF
IronPDF 是一個強大的 node.js PDF 程式庫,允許開發者在 node.js 專案中生成和編輯 PDF。 無論您需要從 HTML 建立 PDF,修改現有 PDF,或將網頁轉換為 PDF 格式,IronPDF 都能滿足您的需求。
主要功能
HTML到PDF的轉換
輕鬆將 HTML 內容轉換為 PDF 文件。 此功能特別適合從網頁內容生成動態 PDF。
URL轉換為PDF
直接從 URL 生成 PDF,允許您程式化地捕捉網頁內容並將其儲存為 PDF 檔案。
PDF 操作
輕鬆合併、分割和操作現有的 PDF 文件。 IronPDF 提供如新增頁面、分割文件等功能。
PDF 安全性
通過密碼加密或應用數位簽名來保護您的 PDF 文件。 IronPDF 提供選項來保護您的敏感文件免受未經授權的存取。
高品質輸出
生產高品質的 PDF 文件,以精確的文字、圖像和格式渲染。 IronPDF 確保您生成的 PDF 保持原始內容的忠實度。
跨平台相容性
IronPDF可以與多種平台相容,包括Windows,Linux和macOS,適合多種開發環境。
簡單整合
using npm 套件輕鬆將 IronPDF 整合到您的 Node.js 應用中。 API 文件完善,便於在您的專案中加入 PDF 生成功能。
安裝
要安裝 IronPDF 程式包,請使用以下命令:
yarn add @ironsoftware/ironpdf @ironsoftware/ironpdf-engine-windows-x64yarn add @ironsoftware/ironpdf @ironsoftware/ironpdf-engine-windows-x64使用 IronPDF 和 NextAuth.js 生成 PDF 文件
安裝相依項:首先,建立一個新的Next.js專案(如果您還沒有),使用以下命令:
npx create-next-app@latest nextauth-pdf --use-npm --example "https://github.com/vercel/next-learn/tree/main/basics/learn-starter"npx create-next-app@latest nextauth-pdf --use-npm --example "https://github.com/vercel/next-learn/tree/main/basics/learn-starter"接下來,導航至您的專案目錄:
cd nextauthcd nextauth安裝所需的套件:
yarn add @ironsoftware/ironpdf @ironsoftware/ironpdf-engine-windows-x64
yarn add next-auth
yarn add @ironsoftware/ironpdf @ironsoftware/ironpdf-engine-windows-x64
yarn add next-auth建立 PDF 生成器
PDF生成API:第一步是建立一個後端API來生成PDF文件。 由於IronPDF僅運行在伺服器端,我們需要建立一個使用者在需要生成PDF時調用的API。 在路徑 pages/api/pdf.js 中建立一個文件,並新增以下內容:
// pages/api/pdf.js
import { IronPdf } from "@ironsoftware/ironpdf";
import { format } from 'date-fns'; // Import the format function for date formatting

// Apply your IronPDF license key
IronPdf.GlobalSettings.LicenseKey = "Your license key goes here";

export default async function handler(req, res) {
  try {
    const currentDate = new Date();
    const formattedDate = format(currentDate, 'MMMM do, yyyy');
    // Defining the HTML content for the PDF
    let content = "<h1>Demo React Hook Form and Generate PDF Using IronPDF</h1>";
    content += `<p>Date: ${currentDate}</p>`;
    content += `<p>Formatted Date: ${formattedDate}</p>`;
    // Convert HTML content to PDF
    const pdf = await IronPdf.HtmlToPdfDocument({ htmlContent: content });
    const data = await pdf.toBuffer(); // Convert the PDF to a buffer for response
    res.setHeader("Content-Type", "application/pdf");
    res.setHeader(
      "Content-Disposition",
      "attachment; filename=awesomeIron.pdf"
    );
    res.send(data); // Send the PDF file as a response
  } catch (error) {
    console.error("Error generating PDF:", error);
    res.status(500).end();
  }
}
// pages/api/pdf.js
import { IronPdf } from "@ironsoftware/ironpdf";
import { format } from 'date-fns'; // Import the format function for date formatting
// Apply your IronPDF license key
IronPdf.GlobalSettings.LicenseKey = "Your license key goes here";
export default async function handler(req, res) {
try {
const currentDate = new Date();
const formattedDate = format(currentDate, 'MMMM do, yyyy');
// Defining the HTML content for the PDF
let content = "<h1>Demo React Hook Form and Generate PDF Using IronPDF</h1>";
content += `<p>Date: ${currentDate}</p>`;
content += `<p>Formatted Date: ${formattedDate}</p>`;
// Convert HTML content to PDF
const pdf = await IronPdf.HtmlToPdfDocument({ htmlContent: content });
const data = await pdf.toBuffer(); // Convert the PDF to a buffer for response
res.setHeader("Content-Type", "application/pdf");
res.setHeader(
"Content-Disposition",
"attachment; filename=awesomeIron.pdf"
);
res.send(data); // Send the PDF file as a response
} catch (error) {
console.error("Error generating PDF:", error);
res.status(500).end();
}
}這將建立一個 Next.js API 路由,使用 IronPDF 程式庫生成 PDF 文件。 它建立了一個包含標題和當前日期的HTML字串,使用 date-fns 格式化日期,並將HTML轉換成PDF。 生成的 PDF 隨後會作為下載文件返回響應。 此方法允許在伺服器端環境中動態生成 PDF,使其在製作報告、發票或其他文件時非常有用。
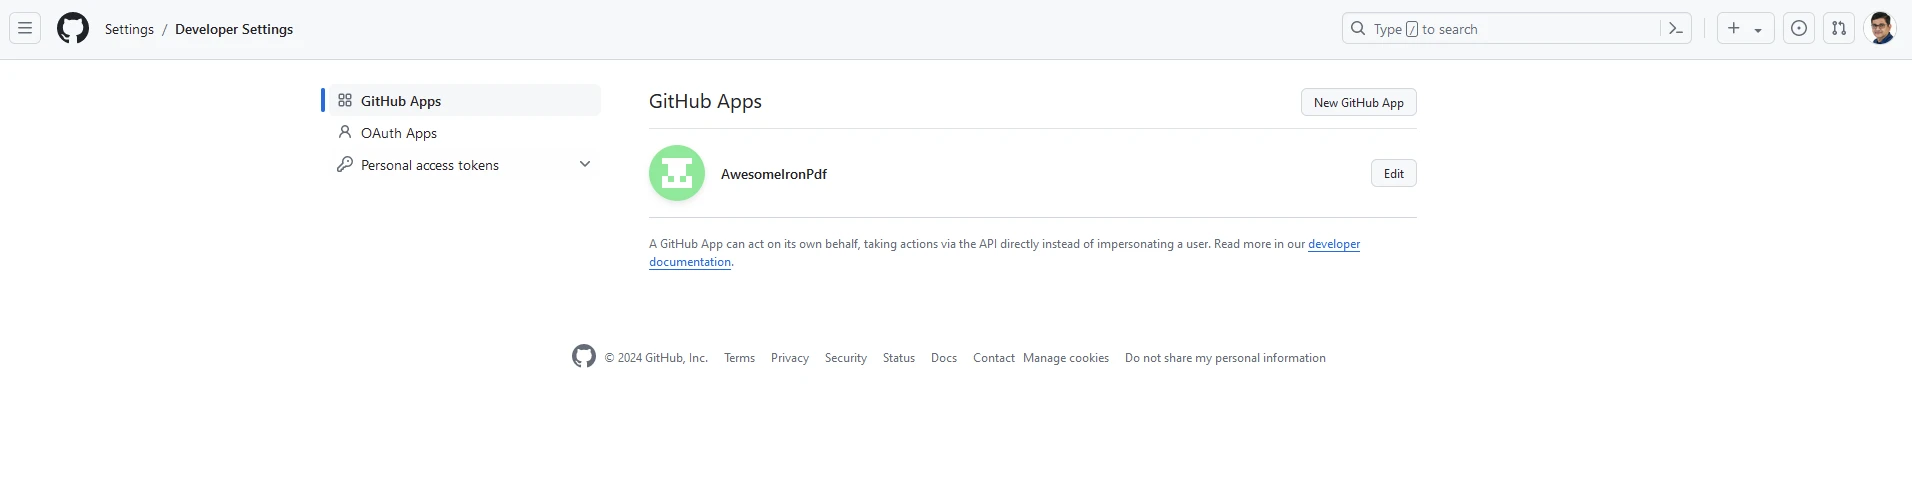
現在讓我們使用 Next-Auth 在我們的前端網站上新增 GIT 登錄。 為此,我們需要獲取使用者的 GitID 和密鑰。 登錄您的 Git 帳戶並如以下導航到開發者設置:
點擊 New GitHub App 並新增您的網站詳細資訊:
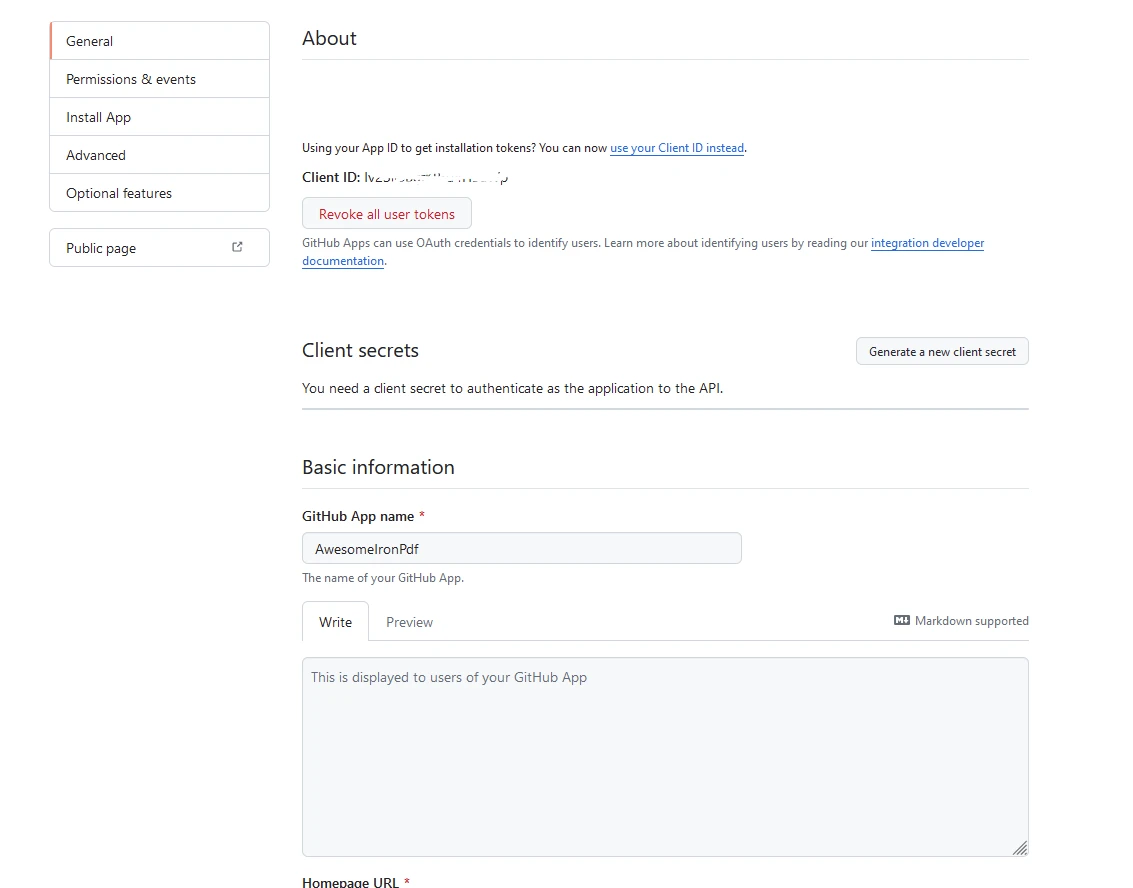
將應用ID和客戶ID儲存在安全的地方。 然後在專案的根目錄建立一個 .env.local 文件來儲存您的環境變數:
# Here you can use the App and Client ID you just got from GitHub
GITHUB_ID=your_github_client_id
GITHUB_SECRET=your_github_client_secret
NEXTAUTH_SECRET=secret
建立一個新的文件作為 API 路由來處理身份驗證。 在 pages/api/auth 目錄中按如下所示建立一個 [...nextauth].js 文件:
// pages/api/auth/[...nextauth].js
import NextAuth from 'next-auth';
import GitHubProvider from 'next-auth/providers/github';

// Setting up NextAuth with GitHub provider
export default NextAuth({
  providers: [
    GitHubProvider({
      clientId: process.env.GITHUB_ID,
      clientSecret: process.env.GITHUB_SECRET,
    }),
  ],
  secret: process.env.NEXTAUTH_SECRET,
});
// pages/api/auth/[...nextauth].js
import NextAuth from 'next-auth';
import GitHubProvider from 'next-auth/providers/github';
// Setting up NextAuth with GitHub provider
export default NextAuth({
providers: [
GitHubProvider({
clientId: process.env.GITHUB_ID,
clientSecret: process.env.GITHUB_SECRET,
}),
],
secret: process.env.NEXTAUTH_SECRET,
});並新增一個叫 LoginButton.js 的組件。 其中將包含以下內容:
// components/LoginButton.js
import { useSession, signIn, signOut } from "next-auth/react"

export default function Component() {
  const { data: session } = useSession()
  if (session) { // Display sign-out button and user info when session is active
    return (
      <>
        Signed in as {session.user.email} <br />
        <button onClick={() => signOut()}>Sign out</button>
      </>
    )
  }
  return ( // Display sign-in button when not signed in
    <>
      Not signed in <br />
      <button onClick={() => signIn()}>Sign in</button>
    </>
  )
}
// components/LoginButton.js
import { useSession, signIn, signOut } from "next-auth/react"
export default function Component() {
const { data: session } = useSession()
if (session) { // Display sign-out button and user info when session is active
return (
<>
Signed in as {session.user.email} <br />
<button onClick={() => signOut()}>Sign out</button>
</>
)
}
return ( // Display sign-in button when not signed in
<>
Not signed in <br />
<button onClick={() => signIn()}>Sign in</button>
</>
)
}按如下修改您的 index.js :
// pages/index.js
import Head from "next/head";
import styles from "../styles/Home.module.css";
import React, { useState, useEffect } from "react";
import { format } from "date-fns";
import LoginButton from "../components/LoginButton";
import { useSession } from "next-auth/react";

export default function Home() {
  const [text, setText] = useState("");
  const { data: session } = useSession();

  useEffect(() => {
    const currentDate = new Date();
    const formattedDate = format(currentDate, "MMMM do, yyyy");
    setText(formattedDate); // Set initial text state to formatted current date
  }, []);

  const generatePdf = async () => {
    try {
      const response = await fetch("/api/pdf-datefns?f=" + text);
      const blob = await response.blob();
      const url = window.URL.createObjectURL(new Blob([blob]));
      const link = document.createElement("a");
      link.href = url;
      link.setAttribute("download", "awesomeIron.pdf");
      document.body.appendChild(link);
      link.click();
      link.parentNode.removeChild(link); // Clean up after downloading
    } catch (error) {
      console.error("Error generating PDF:", error);
    }
  };

  const handleChange = (event) => {
    setText(event.target.value); // Update the text state with input value
  };

  return (
    <div className={styles.container}>
      <Head>
        <title>Generate PDF Using IronPDF</title>
        <link rel="icon" href="/favicon.ico" />
      </Head>
      <main>
        <h1>Demo Next Auth and Generate PDF Using IronPDF</h1>
        {!session && <LoginButton />}
        {session && (
          <>
            <p className="w-full text-center">
              <span className="px-4 text-xl border-gray-500">
                You are logged in enter URL to convert to PDF:
              </span>
              <input
                className="border border-gray-700 w-1/4"
                onChange={handleChange}
                placeholder="Enter URL here..."
              />
            </p>
            <button
              className="rounded-sm bg-blue-800 p-2 m-12 text-xl text-white"
              onClick={generatePdf}
            >
              Generate PDF
            </button>
          </>
        )}
      </main>
      <style jsx>{`
        main {
          padding: 5rem 0;
          flex: 1;
          display: flex;
          flex-direction: column;
          justify-content: center;
          align-items: center;
        }
        footer {
          width: 100%;
          height: 100px;
          border-top: 1px solid #eaeaea;
          display: flex;
          justify-content: center;
          align-items: center;
        }
        footer img {
          margin-left: 0.5rem;
        }
        footer a {
          display: flex;
          justify-content: center;
          align-items: center;
          text-decoration: none;
          color: inherit;
        }
        code {
          background: #fafafa;
          border-radius: 5px;
          padding: 0.75rem;
          font-size: 1.1rem;
          font-family:
            Menlo,
            Monaco,
            Lucida Console,
            Liberation Mono,
            DejaVu Sans Mono,
            Bitstream Vera Sans Mono,
            Courier New,
            monospace;
        }
      `}</style>
      <style jsx global>{`
        html,
        body {
          padding: 0;
          margin: 0;
          font-family:
            -apple-system,
            BlinkMacSystemFont,
            Segoe UI,
            Roboto,
            Oxygen,
            Ubuntu,
            Cantarell,
            Fira Sans,
            Droid Sans,
            Helvetica Neue,
            sans-serif;
        }
        * {
          box-sizing: border-box;
        }
      `}</style>
    </div>
  );
}
// pages/index.js
import Head from "next/head";
import styles from "../styles/Home.module.css";
import React, { useState, useEffect } from "react";
import { format } from "date-fns";
import LoginButton from "../components/LoginButton";
import { useSession } from "next-auth/react";
export default function Home() {
const [text, setText] = useState("");
const { data: session } = useSession();
useEffect(() => {
const currentDate = new Date();
const formattedDate = format(currentDate, "MMMM do, yyyy");
setText(formattedDate); // Set initial text state to formatted current date
}, []);
const generatePdf = async () => {
try {
const response = await fetch("/api/pdf-datefns?f=" + text);
const blob = await response.blob();
const url = window.URL.createObjectURL(new Blob([blob]));
const link = document.createElement("a");
link.href = url;
link.setAttribute("download", "awesomeIron.pdf");
document.body.appendChild(link);
link.click();
link.parentNode.removeChild(link); // Clean up after downloading
} catch (error) {
console.error("Error generating PDF:", error);
}
};
const handleChange = (event) => {
setText(event.target.value); // Update the text state with input value
};
return (
<div className={styles.container}>
<Head>
<title>Generate PDF Using IronPDF</title>
<link rel="icon" href="/favicon.ico" />
</Head>
<main>
<h1>Demo Next Auth and Generate PDF Using IronPDF</h1>
{!session && <LoginButton />}
{session && (
<>
<p className="w-full text-center">
<span className="px-4 text-xl border-gray-500">
You are logged in enter URL to convert to PDF:
</span>
<input
className="border border-gray-700 w-1/4"
onChange={handleChange}
placeholder="Enter URL here..."
/>
</p>
<button
className="rounded-sm bg-blue-800 p-2 m-12 text-xl text-white"
onClick={generatePdf}
>
Generate PDF
</button>
</>
)}
</main>
<style jsx>{`
main {
padding: 5rem 0;
flex: 1;
display: flex;
flex-direction: column;
justify-content: center;
align-items: center;
}
footer {
width: 100%;
height: 100px;
border-top: 1px solid #eaeaea;
display: flex;
justify-content: center;
align-items: center;
}
footer img {
margin-left: 0.5rem;
}
footer a {
display: flex;
justify-content: center;
align-items: center;
text-decoration: none;
color: inherit;
}
code {
background: #fafafa;
border-radius: 5px;
padding: 0.75rem;
font-size: 1.1rem;
font-family:
Menlo,
Monaco,
Lucida Console,
Liberation Mono,
DejaVu Sans Mono,
Bitstream Vera Sans Mono,
Courier New,
monospace;
}
`}</style>
<style jsx global>{`
html,
body {
padding: 0;
margin: 0;
font-family:
-apple-system,
BlinkMacSystemFont,
Segoe UI,
Roboto,
Oxygen,
Ubuntu,
Cantarell,
Fira Sans,
Droid Sans,
Helvetica Neue,
sans-serif;
}
* {
box-sizing: border-box;
}
`}</style>
</div>
);
}程式碼範例的輸出
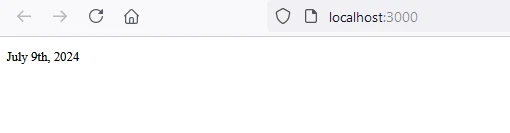
首頁
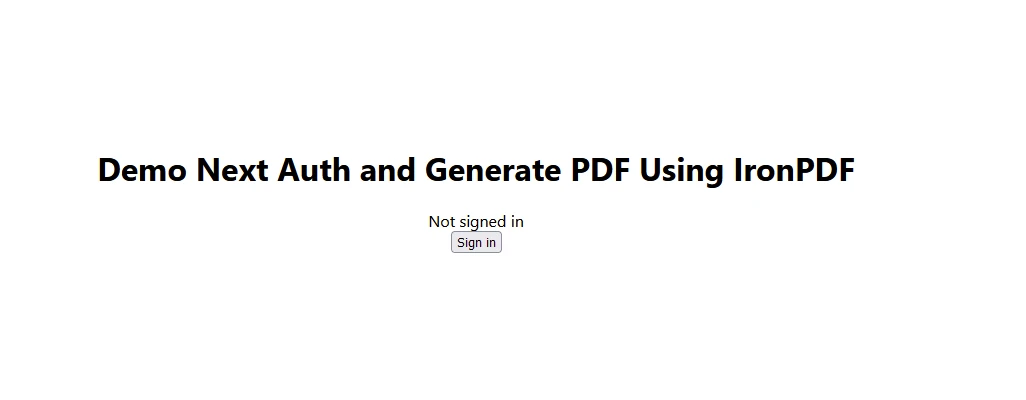
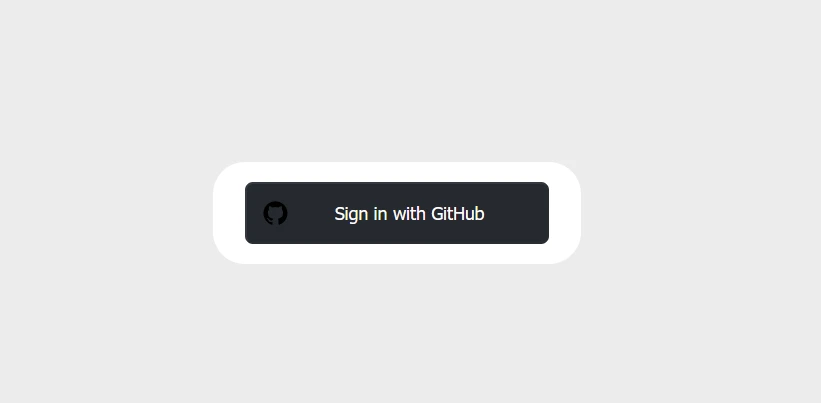
登錄頁面
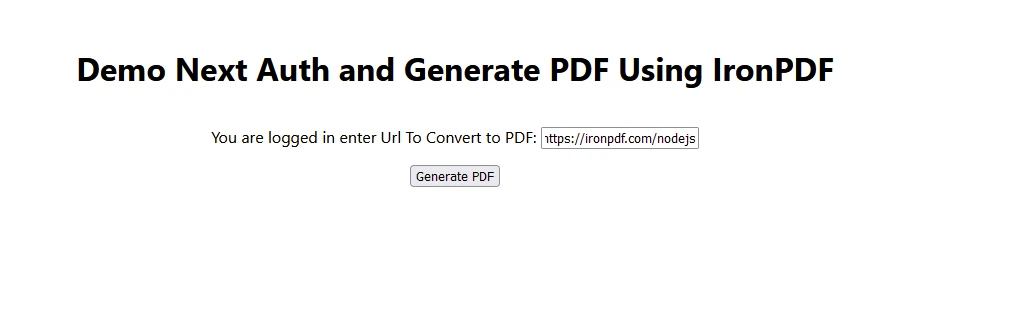
登錄後
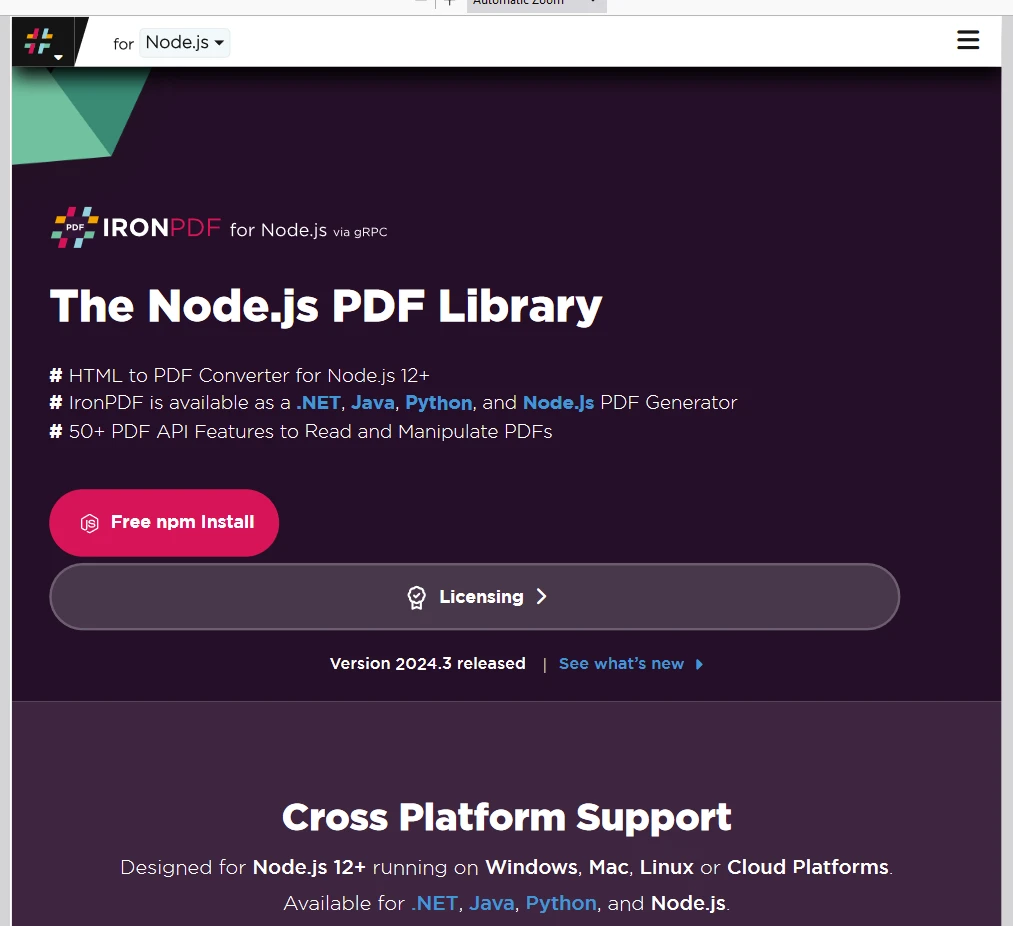
輸出的生成的 PDF
IronPDF 授權
務必記得將您收到的授權金鑰放置在程式碼的開頭,如下所示:
// Adjust paths as necessary depending on how you import IronPDF
import { IronPdfGlobalConfig, PdfDocument } from "@ironsoftware/ironpdf";

// Apply your IronPDF license key
IronPdfGlobalConfig.getConfig().licenseKey = "Add Your key here";
// Adjust paths as necessary depending on how you import IronPDF
import { IronPdfGlobalConfig, PdfDocument } from "@ironsoftware/ironpdf";
// Apply your IronPDF license key
IronPdfGlobalConfig.getConfig().licenseKey = "Add Your key here";結論
總結來說,NextAuth.js 簡化了將身份驗證加入到您的 Next.js 應用中的過程。 支持多個提供者及強大的安全功能,它是處理使用者身份驗證的絕佳選擇。 您可以隨時探索 NextAuth.js 文件以獲取更多高級配置和功能。 此外,IronPDF Node.js 為您的應用提供強大的 PDF 生成和操作功能,並能很好地與現代應用開發整合。






 免費開始
免費開始 免費開始
免費開始 預訂免費直播演示