
tailwind npm (How It Works For Developers)
Tailwind CSS is a popular utility-first CSS framework that enables quickly designing HTML pages. It is highly customizable and works seamlessly with React, a powerful JavaScript library for building user interfaces. In this article, we'll guide you through the process of integrating Tailwind CSS into a React project using npm. Also, we will look into IronPDF PDF generation library to generate PDF from Website URLs.
What is Tailwind CSS?
Tailwind CSS is a utility-first CSS framework that allows you to create applications more efficiently. With Tailwind, you can control layout, color, spacing, typography, shadows, and more using utility classes directly in your HTML. The best part? You won’t need to write custom CSS!
If you’re tired of wrestling with traditional semantic class names, give Tailwind CSS a try—you might wonder how you ever worked with CSS any other way!
Below are the steps to integrate Tailwind CSS into a React application.
Step 1: Create a React Project
Create React App using the following command. This tool sets up a new React project with a sensible default configuration.
npx create-react-app my-tailwind-react-app
cd my-tailwind-react-app
npx create-react-app my-tailwind-react-app
cd my-tailwind-react-appStep 2: Install Tailwind CSS
Install Tailwind CSS and its dependencies using npm. Open your terminal and run the following command:
npm install -D tailwindcss postcss autoprefixernpm install -D tailwindcss postcss autoprefixerStep 3: Initialize Tailwind CSS
Next, you need to initialize Tailwind CSS to create the default configuration files. Run the following command:
npx tailwindcss init -pnpx tailwindcss init -pThis will create two new files in your project: tailwind.config.js and postcss.config.js.
Step 4: Configure Tailwind CSS
Open the tailwind.config.js config file and set the purge option to remove unused CSS in production. This helps keep your final CSS bundle small. You can also define the dark mode class name and the path to custom modules here.
// tailwind.config.js
module.exports = {
  purge: ['./src/**/*.{js,jsx,ts,tsx}', './public/index.html'],
  darkMode: false, // or 'media' or 'class'
  theme: {
    extend: {},
  },
  variants: {
    extend: {},
  },
  plugins: [],
}
// tailwind.config.js
module.exports = {
purge: ['./src/**/*.{js,jsx,ts,tsx}', './public/index.html'],
darkMode: false, // or 'media' or 'class'
theme: {
extend: {},
},
variants: {
extend: {},
},
plugins: [],
}Step 5: Create a Tailwind CSS File
Create a new file named src/tailwind.css and add the following content to it:
@tailwind base;
@tailwind components;
@tailwind utilities;
Step 6: Import Tailwind CSS in Your React Project
Open the src/index.js file and import the Tailwind CSS file you just created:
import React from 'react';
import ReactDOM from 'react-dom';
import './index.css'; // Existing CSS imports
import App from './App';
import './tailwind.css'; // Tailwind CSS import

ReactDOM.render(
  <React.StrictMode>
    <App />
  </React.StrictMode>,
  document.getElementById('root')
);
import React from 'react';
import ReactDOM from 'react-dom';
import './index.css'; // Existing CSS imports
import App from './App';
import './tailwind.css'; // Tailwind CSS import
ReactDOM.render(
<React.StrictMode>
<App />
</React.StrictMode>,
document.getElementById('root')
);Step 7: Start Using Tailwind CSS
Now you can start using Tailwind CSS classes in your React components code. Open the src/App.js file and modify it as follows:
import React from 'react';

function App() {
  return (
    <div className="text-center min-h-screen flex items-center justify-center">
      <header className="bg-blue-500 text-white p-8 rounded">
        <h1 className="text-4xl font-bold">Welcome to Tailwind CSS in React</h1>
        <p className="mt-4">This is a sample application using Tailwind CSS with React.</p>
      </header>
    </div>
  );
}

export default App;
import React from 'react';
function App() {
return (
<div className="text-center min-h-screen flex items-center justify-center">
<header className="bg-blue-500 text-white p-8 rounded">
<h1 className="text-4xl font-bold">Welcome to Tailwind CSS in React</h1>
<p className="mt-4">This is a sample application using Tailwind CSS with React.</p>
</header>
</div>
);
}
export default App;Step 8: Run Your React Project
Finally, start your development server to see Tailwind CSS in action:
npm startnpm startYour application should now be running with Tailwind CSS integrated. You can begin using Tailwind's utility classes to style your React components easily.
Introduction to IronPDF
IronPDF is a popular library used for generating, editing, and converting PDF documents in various programming environments. The IronPDF NPM package is specifically designed for Node.js applications.
Here are some key features and details about the IronPDF NPM package:
Key Features
HTML to PDF Conversion
Convert HTML content into PDF documents effortlessly. This feature is particularly useful for generating dynamic PDFs from web content.
URL to PDF Conversion
Generate PDFs directly from URLs, allowing you to capture the content of web pages and save them as PDF files programmatically.
PDF Manipulation
Merge, split, and manipulate existing PDF documents with ease. IronPDF provides functionalities such as appending pages, splitting documents, customizing PDFs, and more.
PDF Security
Secure your PDF documents by encrypting them with passwords or applying digital signatures. IronPDF offers options to protect your sensitive documents from unauthorized access.
High-Quality Output
Produce high-quality PDF documents with precise rendering of text, images, and formatting. IronPDF ensures that your generated PDFs maintain fidelity to the original content.
Cross-Platform Compatibility
IronPDF is compatible with various platforms, including Windows, Linux, and macOS, making it suitable for a wide range of development environments.
Simple Integration
Easily integrate IronPDF into your Node.js applications using its npm package. The API is well-documented, making it straightforward to incorporate PDF generation capabilities into your projects.
Installation
To install the IronPDF NPM package, use the following command:
npm i @ironsoftware/ironpdf
Generate PDF Document using IronPDF and use Tailwind NPM package
Setup a Next.js project
Install Dependencies: First, create a new Next.js project (if you haven’t already) using the following command. Please refer to the setup page.
npx create-next-app@latest tailwind-pdf --use-npm --example "https://github.com/vercel/next-learn/tree/main/basics/learn-starter"npx create-next-app@latest tailwind-pdf --use-npm --example "https://github.com/vercel/next-learn/tree/main/basics/learn-starter"Next, navigate to your project directory:
cd tailwind-pdfcd tailwind-pdfInstall the required packages:
yarn add @ironsoftware/ironpdf @ironsoftware/ironpdf-engine-windows-x64
yarn add -D tailwindcss postcss autoprefixer
npx tailwindcss init -p
yarn add @ironsoftware/ironpdf @ironsoftware/ironpdf-engine-windows-x64
yarn add -D tailwindcss postcss autoprefixer
npx tailwindcss init -pThe above statements will create a tailwind.config.js file as below:
/** @type {import('tailwindcss').Config} */
module.exports = {
  content: [
    "./app/**/*.{js,ts,jsx,tsx,mdx}",
    "./pages/**/*.{js,ts,jsx,tsx,mdx}",
    "./components/**/*.{js,ts,jsx,tsx,mdx}",
    // Or if using `src` directory:
    "./src/**/*.{js,ts,jsx,tsx,mdx}",
  ],
  theme: {
    extend: {},
  },
  plugins: [],
}
/** @type {import('tailwindcss').Config} */
module.exports = {
content: [
"./app/**/*.{js,ts,jsx,tsx,mdx}",
"./pages/**/*.{js,ts,jsx,tsx,mdx}",
"./components/**/*.{js,ts,jsx,tsx,mdx}",
// Or if using `src` directory:
"./src/**/*.{js,ts,jsx,tsx,mdx}",
],
theme: {
extend: {},
},
plugins: [],
}Add the following code to the global.css file:
@tailwind base;
@tailwind components;
@tailwind utilities;
Open or create _app.js file and include the global.css file as shown below:
// These styles apply to every route in the application
import '@/styles/globals.css'

export default function App({ Component, pageProps }) {
  return <Component {...pageProps} />
}
// These styles apply to every route in the application
import '@/styles/globals.css'
export default function App({ Component, pageProps }) {
return <Component {...pageProps} />
}Create a PDF
Now, let’s create a simple example of generating a PDF using IronPDF. In your Next.js component (e.g., pages/index.tsx), add the following code:
PDF Generation API: The first step is to create a backend API to generate the PDF document. Since IronPDF only runs server-side, we need to create an API call when a user wants to generate a PDF. Create a file in the path pages/api/pdf.js and add the content below.
IronPDF requires a license key, which you can get from the license page and place it in the code below.
// pages/api/pdf.js
import { IronPdfGlobalConfig, PdfDocument } from "@ironsoftware/ironpdf";

// Apply your IronPDF license key
IronPdfGlobalConfig.getConfig().licenseKey = "Your license key";

export default async function handler(req, res) {
    try {
        const url = req.query.url;
        const pdf = await PdfDocument.fromUrl(url);
        const data = await pdf.saveAsBuffer();
        console.error('Data PDF:', data);
        res.setHeader('Content-Type', 'application/pdf');
        res.setHeader('Content-Disposition', 'attachment; filename=awesomeIron.pdf');
        res.send(data);
    } catch (error) {
        console.error('Error generating PDF:', error);
        res.status(500).end();
    }
}
// pages/api/pdf.js
import { IronPdfGlobalConfig, PdfDocument } from "@ironsoftware/ironpdf";
// Apply your IronPDF license key
IronPdfGlobalConfig.getConfig().licenseKey = "Your license key";
export default async function handler(req, res) {
try {
const url = req.query.url;
const pdf = await PdfDocument.fromUrl(url);
const data = await pdf.saveAsBuffer();
console.error('Data PDF:', data);
res.setHeader('Content-Type', 'application/pdf');
res.setHeader('Content-Disposition', 'attachment; filename=awesomeIron.pdf');
res.send(data);
} catch (error) {
console.error('Error generating PDF:', error);
res.status(500).end();
}
}Now modify the index.js code to use the Tailwind CSS:
import Head from 'next/head';
import { useState } from "react";

export default function Home() {
    const [textInput, setTextInput] = useState('');

    // Function to generate PDF from the given URL
    const generatePdf = async () => {
        try {
            const response = await fetch('/api/pdf?url=' + textInput);
            const blob = await response.blob();
            const url = window.URL.createObjectURL(new Blob([blob]));
            const link = document.createElement('a');
            link.href = url;
            link.setAttribute('download', 'example.pdf');
            document.body.appendChild(link);
            link.click();
            link.parentNode.removeChild(link);
        } catch (error) {
            console.error('Error generating PDF:', error);
        }
    };

    // Handle change in text input for URL
    const handleChange = (event) => {
        setTextInput(event.target.value);
    }

    return (
        <div>
            <Head>
                <title>Demo Tailwind and Generate PDF From IronPDF</title>
                <link rel="icon" href="/favicon.ico" />
            </Head>
            <main className='text-center'>
                <h1 className='text-blue-500 text-4xl p-6 mt-12' >
                    Demo Tailwind and Generate PDF From IronPDF
                </h1>
                <p className='w-full text-center'>
                    <span className='px-4 text-xl border-gray-500'>
                        Enter URL To Convert to PDF:
                    </span>{" "}
                </p>
                <input
                    type="text"
                    className="border p-2 m-4"
                    value={textInput}
                    onChange={handleChange}
                    placeholder="Enter URL here"
                />
                <button
                    className='rounded-sm bg-blue-800 p-2 m-12 text-xl text-white'
                    onClick={generatePdf}
                >
                    Generate PDF
                </button>
            </main>
        </div>
    );
}
import Head from 'next/head';
import { useState } from "react";
export default function Home() {
const [textInput, setTextInput] = useState('');
// Function to generate PDF from the given URL
const generatePdf = async () => {
try {
const response = await fetch('/api/pdf?url=' + textInput);
const blob = await response.blob();
const url = window.URL.createObjectURL(new Blob([blob]));
const link = document.createElement('a');
link.href = url;
link.setAttribute('download', 'example.pdf');
document.body.appendChild(link);
link.click();
link.parentNode.removeChild(link);
} catch (error) {
console.error('Error generating PDF:', error);
}
};
// Handle change in text input for URL
const handleChange = (event) => {
setTextInput(event.target.value);
}
return (
<div>
<Head>
<title>Demo Tailwind and Generate PDF From IronPDF</title>
<link rel="icon" href="/favicon.ico" />
</Head>
<main className='text-center'>
<h1 className='text-blue-500 text-4xl p-6 mt-12' >
Demo Tailwind and Generate PDF From IronPDF
</h1>
<p className='w-full text-center'>
<span className='px-4 text-xl border-gray-500'>
Enter URL To Convert to PDF:
</span>{" "}
</p>
<input
type="text"
className="border p-2 m-4"
value={textInput}
onChange={handleChange}
placeholder="Enter URL here"
/>
<button
className='rounded-sm bg-blue-800 p-2 m-12 text-xl text-white'
onClick={generatePdf}
>
Generate PDF
</button>
</main>
</div>
);
}Now run the application using the command:
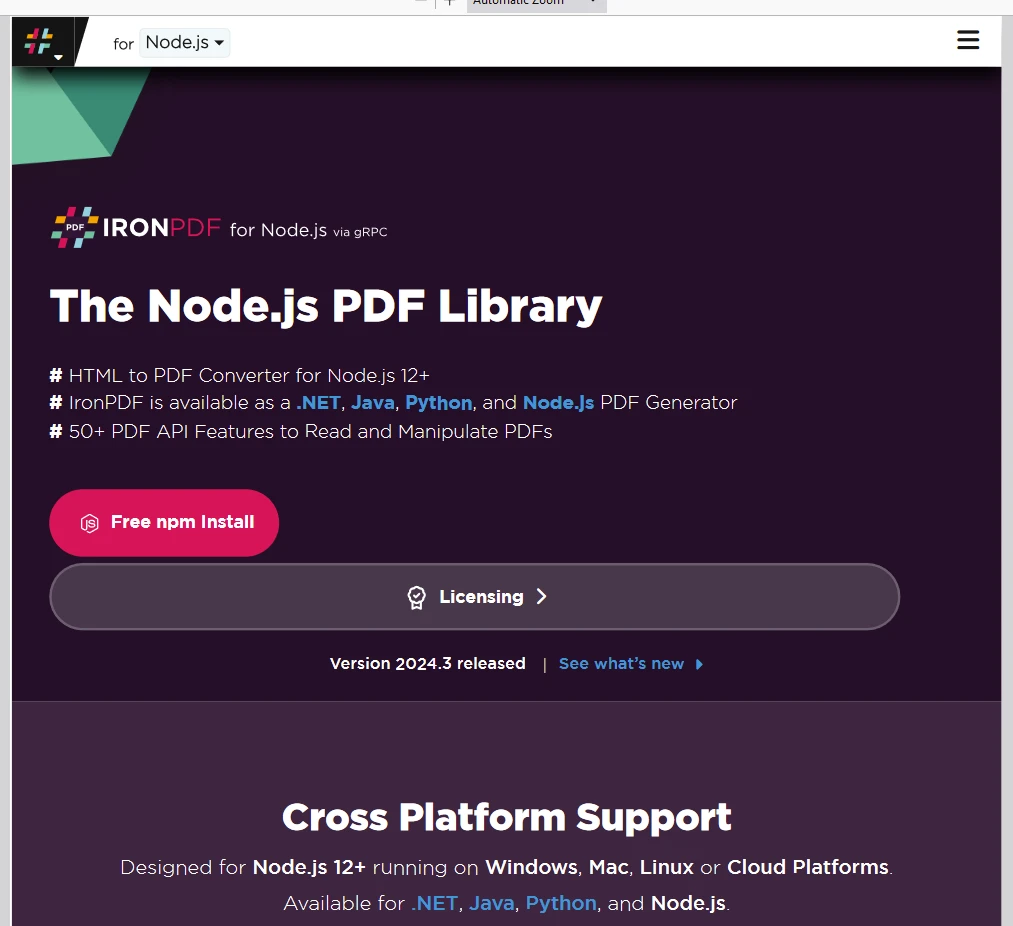
yarn devyarn devOUTPUT for Tailwind CSS and IronPDF
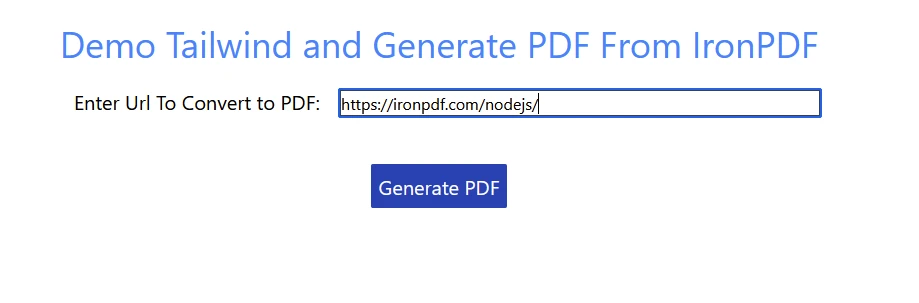
Click the "Generate PDF" button to generate the PDF from the given URL.
IronPDF License
IronPDF page.
Place the License Key here:
import { IronPdfGlobalConfig, PdfDocument } from "@ironsoftware/ironpdf";
// Apply your IronPDF license key
IronPdfGlobalConfig.getConfig().licenseKey = "Add Your key here";
import { IronPdfGlobalConfig, PdfDocument } from "@ironsoftware/ironpdf";
// Apply your IronPDF license key
IronPdfGlobalConfig.getConfig().licenseKey = "Add Your key here";Conclusion
Integrating Tailwind CSS into a React project with npm is straightforward. By following these steps, you can quickly set up Tailwind CSS and start using its utility-first classes to build responsive and customizable UIs. Tailwind CSS's flexibility and powerful customization options make it an excellent choice for React developers looking to streamline their styling process. IronPDF is a versatile PDF generation package which helps developers easily integrate into enterprise apps. Mastering both of these technologies can enable developers to create modern, feature-rich applications.
For more information on how to get started with IronPDF and reference code examples for different ways to incorporate it in your project, please visit the code examples and documentation page. IronPDF offers support and update options for all perpetual license holders. It also offers 24/5 technical support during the trial period.
Note that no credit card information or account creation is required for the free-trial license, just a valid email address.


