
replicate npm(開發者的使用方法)
' replicate ' NPM 套件是一個功能強大的用戶端工具,用於將機器學習模型整合到 React 應用程式中。 它允許開發人員輕鬆使用預訓練模型,並直接在應用程式中運行推理,而無需管理複雜的後端基礎架構。 以下概述如何在 React 專案中使用replicate NPM 套件。 此外,我們將探索 PDF 生成庫IronPDF ,並示範如何將這兩個庫結合起來以建立一個功能齊全的應用程式。
複製簡介
Replicate是一個線上平台,它透過簡單的 API 提供對機器學習模型的存取。 它託管了來自各個領域的模型,例如圖像生成、文字分析等等。 透過使用"replicate"NPM 套件,開發人員可以無縫地將這些模型整合到他們的應用程式中。
入門
安裝
要在你的 React 應用程式中使用 replicate,你首先需要安裝該軟體包。 您可以使用 npm 或 yarn 來實現:
npm install replicatenpm install replicate或者
yarn add replicateyarn add replicateAPI金鑰
您需要一個 API 金鑰才能與 Replicate API 互動。 您可以透過在Replicate 網站上註冊並建立新的 API 令牌來取得此金鑰。
基本用法
以下是在 React 應用程式中使用 replicate 套件的逐步指南。
1. 導入軟體包並初始化客戶端
imp或者t Replicate from 'replicate';

// Initialize the Replicate client with your API token
const replicate = new Replicate({
  auth: 'YOUR_API_TOKEN'
});
imp或者t Replicate from 'replicate';
// Initialize the Replicate client with your API token
const replicate = new Replicate({
auth: 'YOUR_API_TOKEN'
});2. 進行推理
假設你想使用模型從文字產生圖像,只需幾行程式碼,即可得到如下所示的結果:
// Use the replicate client to run an inference using a specified model
const result = await replicate.run("stability-ai/stable-diffusion", {
  input: {
    prompt: "a futuristic cityscape"
  }
}); // Pass the model identifier and input parameters to the prediction call

// Log the result
console.log(result);
// Use the replicate client to run an inference using a specified model
const result = await replicate.run("stability-ai/stable-diffusion", {
input: {
prompt: "a futuristic cityscape"
}
}); // Pass the model identifier and input parameters to the prediction call
// Log the result
console.log(result);範例應用
讓我們創建一個簡單的 React 應用程序,允許用戶根據文字提示生成圖像,以演示 replicate 包的用法。
1.建立一個新的 React 專案:
npx create-react-app replicate-example
cd replicate-example
npm install replicate
npx create-react-app replicate-example
cd replicate-example
npm install replicate2.創建一個用於圖像生成的組件:
imp或者t React, { useState } from 'react';
imp或者t Replicate from 'replicate';

// Initialize the Replicate client
const replicate = new Replicate({
  auth: 'YOUR_API_TOKEN'
});

const ImageGenerat或者 = () => {
  const [prompt, setPrompt] = useState('');
  const [image, setImage] = useState(null);

  // Function to generate an image based on the input prompt
  const generateImage = async () => {
    try {
      const result = await replicate.run("stability-ai/stable-diffusion", {
        input: { prompt }
      });
      setImage(result.output[0]);
    } catch (err或者) {
      console.err或者("Err或者 generating image:", err或者);
      alert("Failed to generate image. Please try again.");
    }
  };

  return (
    <div>
      <h1>Image Generat或者</h1>
      <input
        type="text"
        value={prompt}
        onChange={(e) => setPrompt(e.target.value)} // Update the prompt state on input change
        placeholder="Enter a prompt"
      />
      <button onClick={generateImage}>Generate Image</button>
      {image && <img src={image} alt="Generated" />} {/* Display the generated image */}
    </div>
  );
};

exp或者t default ImageGenerat或者;
imp或者t React, { useState } from 'react';
imp或者t Replicate from 'replicate';
// Initialize the Replicate client
const replicate = new Replicate({
auth: 'YOUR_API_TOKEN'
});
const ImageGenerat或者 = () => {
const [prompt, setPrompt] = useState('');
const [image, setImage] = useState(null);
// Function to generate an image based on the input prompt
const generateImage = async () => {
try {
const result = await replicate.run("stability-ai/stable-diffusion", {
input: { prompt }
});
setImage(result.output[0]);
} catch (err或者) {
console.err或者("Err或者 generating image:", err或者);
alert("Failed to generate image. Please try again.");
}
};
return (
<div>
<h1>Image Generat或者</h1>
<input
type="text"
value={prompt}
onChange={(e) => setPrompt(e.target.value)} // Update the prompt state on input change
placeholder="Enter a prompt"
/>
<button onClick={generateImage}>Generate Image</button>
{image && <img src={image} alt="Generated" />} {/* Display the generated image */}
</div>
);
};
exp或者t default ImageGenerat或者;3.在您的應用程式中使用該元件:
imp或者t React from 'react';
imp或者t ReactDOM from 'react-dom';
imp或者t './index.css';
imp或者t App from './App';
imp或者t ImageGenerat或者 from './ImageGenerat或者';

ReactDOM.render(
  <React.StrictMode>
    <App />
    <ImageGenerat或者 />
  </React.StrictMode>,
  document.getElementById('root')
);
imp或者t React from 'react';
imp或者t ReactDOM from 'react-dom';
imp或者t './index.css';
imp或者t App from './App';
imp或者t ImageGenerat或者 from './ImageGenerat或者';
ReactDOM.render(
<React.StrictMode>
<App />
<ImageGenerat或者 />
</React.StrictMode>,
document.getElementById('root')
);錯誤處理
在使用 API 時,優雅地處理錯誤至關重要。 您可以修改 generateImage 函數來捕獲和顯示錯誤,如上面的 ImageGenerat或者 元件所示。
IronPDF簡介
IronPDF是一個功能強大的 npm 包,旨在簡化Node.js應用程式中的 PDF 生成。 它允許您從HTML 內容、 URL或現有 PDF 文件建立 PDF 文件。 無論您需要產生發票、報告或其他類型的文檔, IronPDF憑藉其直覺的API和全面的功能集,都能讓整個過程變得輕鬆簡單。
IronPDF的主要特點
1. HTML 轉 PDF
輕鬆將 HTML 內容轉換為 PDF 文檔,非常適合從網頁內容產生動態 PDF。
2. URL 轉 PDF
直接從 URL 建立 PDF,使您能夠捕獲網頁內容並以程式設計方式將其儲存為 PDF 檔案。
3. PDF 處理
輕鬆合併、分割和操作現有 PDF 文件。 IronPDF提供追加頁面、分割文件、建立 PDF 表單等功能。
4. PDF 安全性
使用密碼加密或套用數位簽章來保護您的 PDF 文檔,防止敏感文檔被未經授權的存取。
5. 高品質輸出
產生高品質的 PDF 文件,準確呈現文字、圖像和格式,確保產生的 PDF 與原始內容保持一致。
6. 跨平台相容性
IronPDF 與 Windows、Linux 和 macOS 相容,使其適用於各種開發環境。
7. 簡易集成
使用IronPDF的 npm 包,即可輕鬆地將其整合到您的Node.js應用程式中。 完善的 API 文件簡化了將 PDF 生成功能整合到專案中的過程。
無論您是開發 Web 應用程式、伺服器端腳本或命令列工具, IronPDF都能協助您有效率且可靠地建立專業級 PDF 文件。
使用IronPDF產生 PDF 文件並使用 Recharts NPM 套件
安裝依賴項
首先,使用以下命令建立一個新的 Next.js 專案(如果您還沒有建立)。 請參考此處:
npx create-next-app@latest replicate-pdf --use-npm --example "https://github.com/vercel/next-learn/tree/main/basics/learn-starter"npx create-next-app@latest replicate-pdf --use-npm --example "https://github.com/vercel/next-learn/tree/main/basics/learn-starter"接下來,導航到您的專案目錄:
cd replicate-pdfcd replicate-pdf安裝所需軟體包:
yarn add @ironsoftware/ironpdf @ironsoftware/ironpdf-engine-windows-x64
yarn add replicate
yarn add @ironsoftware/ironpdf @ironsoftware/ironpdf-engine-windows-x64
yarn add replicatePDF 產生 API
第一步是建立後端 API 來產生 PDF 文件。 由於IronPDF只能在伺服器端運行,我們需要建立一個 API,以便在使用者想要產生 PDF 時呼叫。 在路徑 pages/api/pdf/route.js 處建立文件,並新增以下內容:
// pages/api/pdf.js
imp或者t { NextRequest, NextResponse } from 'next/server';
imp或者t { IronPdfGlobalConfig, PdfDocument } from "@ironsoftware/ironpdf";

// Apply your IronPDF license key
IronPdfGlobalConfig.getConfig().licenseKey = "your key";

// API handler f或者 generating a PDF from a URL
exp或者t const GET = async (req) => {
    const { searchParams } = new URL(req.url);
    const name = searchParams.get("url");
    try {
        const pdf = await PdfDocument.fromUrl(name);
        const data = await pdf.saveAsBuffer();
        console.err或者('data PDF:', data);
        return new NextResponse(data, {
            status: 200,
            headers: {
                "content-type": "application/pdf",
                "Content-Disposition": "attachment; filename=awesomeIron.pdf",
            },
        });
    } catch (err或者) {
        console.err或者('Err或者 generating PDF:', err或者);
        return NextResponse.json({ detail: "err或者" }, { status: 500 });
    }
};
// pages/api/pdf.js
imp或者t { NextRequest, NextResponse } from 'next/server';
imp或者t { IronPdfGlobalConfig, PdfDocument } from "@ironsoftware/ironpdf";
// Apply your IronPDF license key
IronPdfGlobalConfig.getConfig().licenseKey = "your key";
// API handler f或者 generating a PDF from a URL
exp或者t const GET = async (req) => {
const { searchParams } = new URL(req.url);
const name = searchParams.get("url");
try {
const pdf = await PdfDocument.fromUrl(name);
const data = await pdf.saveAsBuffer();
console.err或者('data PDF:', data);
return new NextResponse(data, {
status: 200,
headers: {
"content-type": "application/pdf",
"Content-Disposition": "attachment; filename=awesomeIron.pdf",
},
});
} catch (err或者) {
console.err或者('Err或者 generating PDF:', err或者);
return NextResponse.json({ detail: "err或者" }, { status: 500 });
}
};IronPDF需要許可證金鑰,您可以從許可證頁面取得該金鑰並將其放置在上面的程式碼中。
將以下程式碼加入 index.js
'use client';
imp或者t { useState, useEffect, useRef } from "react";
imp或者t Image from "next/image";

// Utility function to create a delay
const sleep = (ms) => new Promise((r) => setTimeout(r, ms));

exp或者t default function Home() {
  const [prediction, setPrediction] = useState(null);
  const [err或者, setErr或者] = useState(null);
  const promptInputRef = useRef(null);

  // Focus input field on component mount
  useEffect(() => {
    promptInputRef.current.focus();
  }, []);

  // Handle f或者m submission f或者 image prediction
  const handleSubmit = async (e) => {
    e.preventDefault();

    // Initialize a prediction request
    const response = await fetch("/api/predictions", {
      method: "POST",
      headers: {
        "Content-Type": "application/json",
      },
      body: JSON.stringify({
        prompt: e.target.prompt.value,
      }),
    });

    let prediction = await response.json();
    if (response.status !== 201) {
      setErr或者(prediction.detail);
      return;
    }

    // Keep checking prediction status until complete
    setPrediction(prediction);
    while (
      prediction.status !== "succeeded" &&
      prediction.status !== "failed"
    ) {
      await sleep(1000);
      const response = await fetch(`/api/predictions/${prediction.id}`);
      prediction = await response.json();
      if (response.status !== 200) {
        setErr或者(prediction.detail);
        return;
      }
      console.log({ prediction });
      setPrediction(prediction);
    }
  };

  // Generate a PDF from the prediction result
  const generatePdf = async () => {
    try {
      const response = await fetch("/api/pdf?url=" + prediction.output[prediction.output.length - 1]);
      const blob = await response.blob();

      const url = window.URL.createObjectURL(new Blob([blob]));
      const link = document.createElement("a");
      link.href = url;
      link.setAttribute("download", "awesomeIron.pdf");

      document.body.appendChild(link);
      link.click();
      link.parentNode.removeChild(link);
    } catch (err或者) {
      console.err或者("Err或者 generating PDF:", err或者);
    }
  };

  return (
    <div className="container max-w-2xl mx-auto p-5">
      <h1 className="py-6 text-center font-bold text-2xl">
        IronPDF: An Awesome Library f或者 PDFs
      </h1>
      <p>Enter prompt to generate an image, then click "Go" to generate:</p>
      <f或者m className="w-full flex" onSubmit={handleSubmit}>
        <input
          type="text"
          className="flex-grow"
          name="prompt"
          placeholder="Enter a prompt to display an image"
          ref={promptInputRef}
        />
        <button className="button" type="submit">
          Go!
        </button>
        <button className="pdfButton" type="button" onClick={generatePdf}>
          Generate PDF
        </button>
      </f或者m>

      {err或者 && <div>{err或者}</div>}
      {prediction && (
        <>
          {prediction.output && (
            <div className="image-wrapper mt-5">
              <Image
                fill
                src={prediction.output[prediction.output.length - 1]}
                alt="output"
                sizes="100vw"
              />
            </div>
          )}
          <p className="py-3 text-sm opacity-50">status: {prediction.status}</p>
        </>
      )}
    </div>
  );
}
'use client';
imp或者t { useState, useEffect, useRef } from "react";
imp或者t Image from "next/image";
// Utility function to create a delay
const sleep = (ms) => new Promise((r) => setTimeout(r, ms));
exp或者t default function Home() {
const [prediction, setPrediction] = useState(null);
const [err或者, setErr或者] = useState(null);
const promptInputRef = useRef(null);
// Focus input field on component mount
useEffect(() => {
promptInputRef.current.focus();
}, []);
// Handle f或者m submission f或者 image prediction
const handleSubmit = async (e) => {
e.preventDefault();
// Initialize a prediction request
const response = await fetch("/api/predictions", {
method: "POST",
headers: {
"Content-Type": "application/json",
},
body: JSON.stringify({
prompt: e.target.prompt.value,
}),
});
let prediction = await response.json();
if (response.status !== 201) {
setErr或者(prediction.detail);
return;
}
// Keep checking prediction status until complete
setPrediction(prediction);
while (
prediction.status !== "succeeded" &&
prediction.status !== "failed"
) {
await sleep(1000);
const response = await fetch(`/api/predictions/${prediction.id}`);
prediction = await response.json();
if (response.status !== 200) {
setErr或者(prediction.detail);
return;
}
console.log({ prediction });
setPrediction(prediction);
}
};
// Generate a PDF from the prediction result
const generatePdf = async () => {
try {
const response = await fetch("/api/pdf?url=" + prediction.output[prediction.output.length - 1]);
const blob = await response.blob();
const url = window.URL.createObjectURL(new Blob([blob]));
const link = document.createElement("a");
link.href = url;
link.setAttribute("download", "awesomeIron.pdf");
document.body.appendChild(link);
link.click();
link.parentNode.removeChild(link);
} catch (err或者) {
console.err或者("Err或者 generating PDF:", err或者);
}
};
return (
<div className="container max-w-2xl mx-auto p-5">
<h1 className="py-6 text-center font-bold text-2xl">
IronPDF: An Awesome Library f或者 PDFs
</h1>
<p>Enter prompt to generate an image, then click "Go" to generate:</p>
<f或者m className="w-full flex" onSubmit={handleSubmit}>
<input
type="text"
className="flex-grow"
name="prompt"
placeholder="Enter a prompt to display an image"
ref={promptInputRef}
/>
<button className="button" type="submit">
Go!
</button>
<button className="pdfButton" type="button" onClick={generatePdf}>
Generate PDF
</button>
</f或者m>
{err或者 && <div>{err或者}</div>}
{prediction && (
<>
{prediction.output && (
<div className="image-wrapper mt-5">
<Image
fill
src={prediction.output[prediction.output.length - 1]}
alt="output"
sizes="100vw"
/>
</div>
)}
<p className="py-3 text-sm opacity-50">status: {prediction.status}</p>
</>
)}
</div>
);
}程式碼解釋
1. 導入聲明
程式碼首先從外部庫導入必要的模組:
'useEffect'和'useRef'來自"react":這些是 React Hooks,分別允許函數元件管理狀態、處理副作用和建立對 DOM 元素的參考。'Image'來自"next/image": 這是 Next.js 提供的用於最佳化映像載入的元件。"use client"語句確保使用它的元件在 Next.js 應用程式的用戶端呈現。
2. 組件功能
Home 元件定義為預設導出。 元件內部有幾個狀態變數(err或者),使用 useState 鉤子進行管理。
使用 useRef 鉤子建立引用 (promptInputRef)。 useEffect hook 用於在組件掛載時聚焦於 promptInputRef。
handleSubmit 函數是一個非同步函數,用於處理表單提交。 它會向 API 端點 (/api/predictions) 發送 POST 請求,並帶有提示值。
回應將被處理,如果成功,則 prediction 狀態將被更新。 然後函數進入循環,定期檢查預測狀態,直到預測成功或失敗。
generatePdf 方法根據 prediction 狀態下的最後一個輸出,從另一個 API 端點 (/api/pdf) 取得 PDF。
3. HTML 標記
此元件傳回一個帶有樣式(p-5)的容器。 容器內有一個 <h1> 元素,其文字為"IronPDF:一個很棒的 PDF 庫"。
總的來說,這段程式碼似乎是 Next.js 應用程式的一部分,用於處理預測並根據使用者輸入生成 PDF。 "use client"語句是Next.js特有的,它確保使用該語句的元件進行客戶端渲染。
輸出
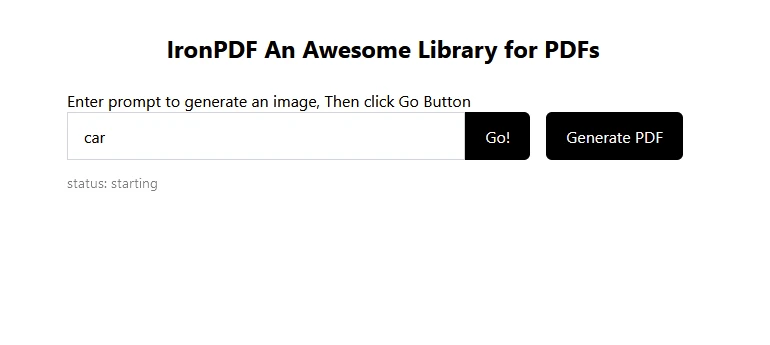
輸入要預測的文字"car",則會預測出下圖:
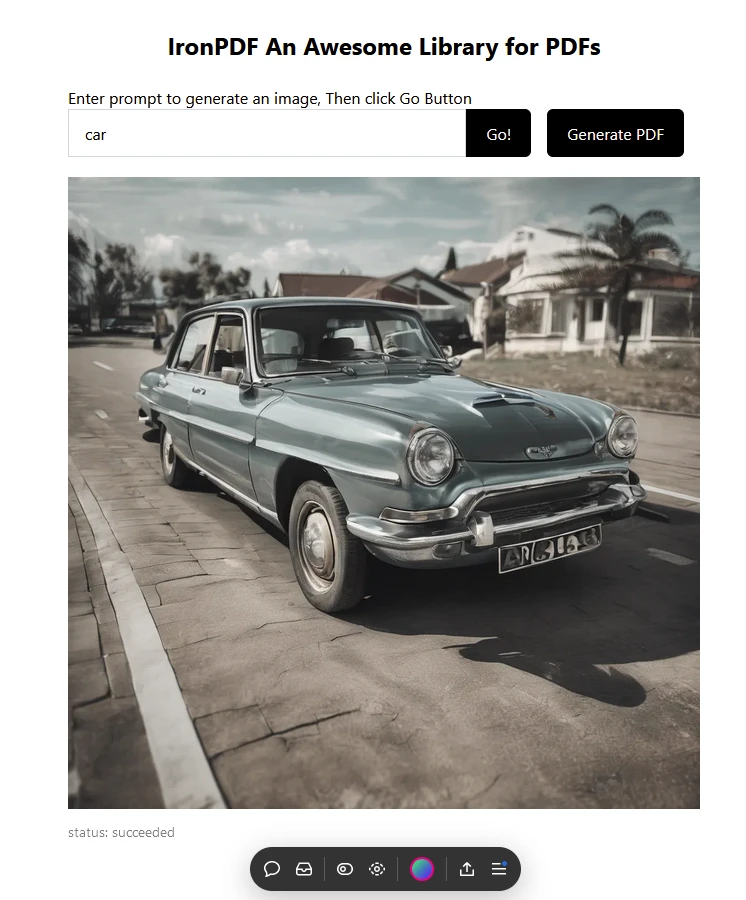
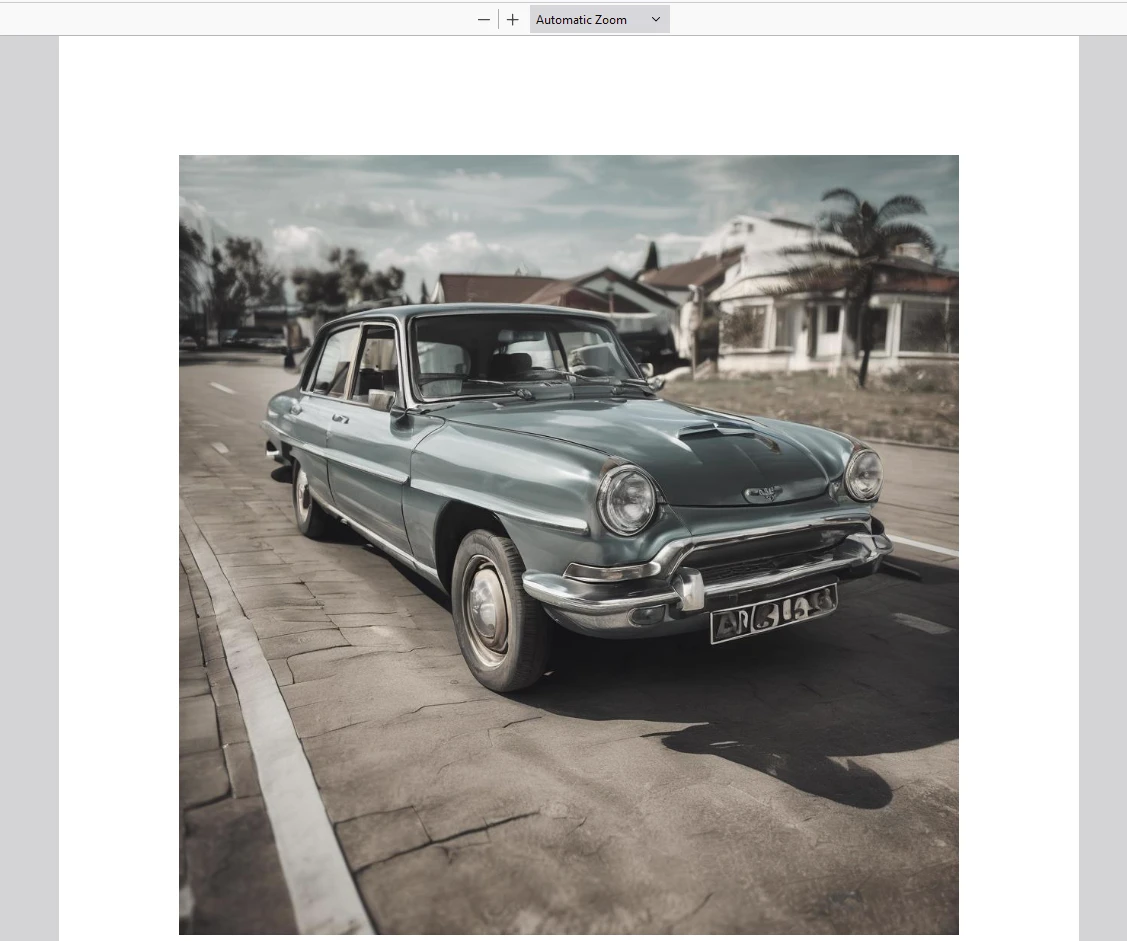
然後點選"生成 PDF"以建立 PDF 文件。
使用IronPDF產生輸出 PDF 文件
IronPDF許可
請造訪IronPDF許可頁面以了解更多資訊。
請按照以下範例所示,將許可證密鑰放入您的應用程式中:
imp或者t { IronPdfGlobalConfig, PdfDocument } from "@ironsoftware/ironpdf";
// Apply your IronPDF license key
IronPdfGlobalConfig.getConfig().licenseKey = "Add Your key here";
imp或者t { IronPdfGlobalConfig, PdfDocument } from "@ironsoftware/ironpdf";
// Apply your IronPDF license key
IronPdfGlobalConfig.getConfig().licenseKey = "Add Your key here";結論
[**replicate**](https://www.npmjs.com/package/replicate) NPM 套件提供了一種在 React 應用程式中利用強大的機器學習模型的便捷方法。 按照本文所述的步驟,您可以輕鬆地將圖像生成功能整合到您的專案中。 這為創造創新和互動式的使用者體驗開闢了廣闊的可能性。
請記住探索Replicate平台上的其他模型,以進一步擴展應用程式的功能。
此外, IronPDF是一個功能強大的 PDF 庫,具有 PDF 生成和操作功能,以及在 PDF 中即時渲染響應式圖表的功能。 它使開發人員能夠僅用幾行程式碼將功能豐富的圖表包整合到應用程式中。 這兩個函式庫結合起來,可以讓開發者使用現代人工智慧技術,並將結果可靠地儲存為 PDF 檔案。


