FluentEmail C# (개발자를 위한 작동 방식)
오늘날 디지털 시대에 이메일은 비즈니스 및 개인 간의 의사 소통의 초석으로 남아 있습니다. ASP.NET Core 애플리케이션에 강력한 이메일 기능을 통합하는 것은 알림 자동화, 뉴스레터 발송, 고객 상호 작용 촉진에 필수적입니다. FluentEmail은 .NET을 위한 강력한 라이브러리로, Mailgun API 키와 결합하여 개발자에게 신뢰성과 확장성을 갖춘 이메일 기능 강화를 위한 원활한 솔루션을 제공합니다. 이 기사 후반부에서는 PDF 문서를 생성하고 관리하기 위해 ironsoftware.com의 IronPDF Library도 살펴보겠습니다.
FluentEmail은 .NET 애플리케이션 내에서 프로그래밍 방식으로 여러 이메일을 전송하는 프로세스를 단순화합니다. 직관적이고 유창한 인터페이스를 제공하여 이메일 메시지를 구성하고 첨부 파일을 관리하며 수신자 목록을 처리합니다. 이 라이브러리는 SMTP 설정의 복잡성을 추상화하고 Mailgun을 포함한 여러 템플릿 렌더러 제공자와 테스트 이메일 서비스 제공자를 지원합니다.
FluentEmail.NET은 .NET Core 생태계에서 이메일 전송을 위한 인기 있는 라이브러리로, Razor 이메일 템플릿과 동적 이메일 본문 생성을 위한 Liquid 템플릿을 지원합니다. FluentEmail.NET에서 Razor 템플릿 렌더러를 사용하면 Razor 문법의 힘을 활용하여 잘 형식화된 동적 이메일 콘텐츠를 생성하고 레이아웃 파일을 해결할 수 있습니다.
여기에서는 ASP.NET Core Razor 템플릿을 사용하여 FluentEmail.NET을 사용하는 기본 가이드를 제공합니다.
1단계: FluentEmail 설치하기
우선 Install-Package 명령어나 .NET add package 명령어를 사용하여 FluentEmail 패키지와 Razor 템플릿 렌더러 패키지를 설치해야 합니다.
# Install packages using the Package Manager Console
Install-Package FluentEmail.Core
Install-Package FluentEmail.Razor

# Or install packages using the .NET CLI
dotnet add package FluentEmail.Core
dotnet add package FluentEmail.Razor
# Install packages using the Package Manager Console
Install-Package FluentEmail.Core
Install-Package FluentEmail.Razor
# Or install packages using the .NET CLI
dotnet add package FluentEmail.Core
dotnet add package FluentEmail.Razor2단계: Razor 템플릿 생성하기
이메일 본문을 위한 Razor 템플릿을 생성하세요. 이것은 HTML과 유효한 Razor 코드 구문을 포함하는 .cshtml 파일일 수 있습니다. 예를 들어, EmailTemplate.cshtml이라는 파일을 만드십시오:
@model YourNamespace.EmailViewModel
<!DOCTYPE html>
<html>
<head>
    <title>Email Template</title>
</head>
<body>
    <h1>Hello, @Model.Name!</h1>
    <p>This is a sample email template.</p>
</body>
</html>
@model YourNamespace.EmailViewModel
<!DOCTYPE html>
<html>
<head>
<title>Email Template</title>
</head>
<body>
<h1>Hello, @Model.Name!</h1>
<p>This is a sample email template.</p>
</body>
</html>YourNamespace.EmailViewModel을(를) 실제 네임스페이스와 뷰 모델 또는 해당 템플릿에 전달할 도메인 모델의 클래스 이름으로 바꾸십시오.
3단계: Razor 렌더러로 FluentEmail 설정하기
Razor 렌더러를 사용하도록 FluentEmail을 설정하고 필요한 종속성을 제공합니다:
using FluentEmail.Core;
using FluentEmail.Razor;

public void ConfigureFluentEmail()
{
    // Set up the Razor renderer
    Email.DefaultRenderer = new RazorRenderer();

    // Set up SMTP sender address
    Email.DefaultSender = new SmtpSender(new SmtpClient("smtp.yourserver.com"));
}
using FluentEmail.Core;
using FluentEmail.Razor;
public void ConfigureFluentEmail()
{
// Set up the Razor renderer
Email.DefaultRenderer = new RazorRenderer();
// Set up SMTP sender address
Email.DefaultSender = new SmtpSender(new SmtpClient("smtp.yourserver.com"));
}Imports FluentEmail.Core
Imports FluentEmail.Razor
Public Sub ConfigureFluentEmail()
' Set up the Razor renderer
Email.DefaultRenderer = New RazorRenderer()
' Set up SMTP sender address
Email.DefaultSender = New SmtpSender(New SmtpClient("smtp.yourserver.com"))
End Sub4단계: 이메일 렌더링 및 전송하기
응용프로그램 코드에서 원하는 모델로 Razor 템플릿을 렌더링하고 이메일을 전송합니다:
using FluentEmail.Core;
using FluentEmail.Razor;

public void SendEmail()
{
    // Specify the template file
    var template = "EmailTemplate.cshtml";

    // Create the email
    var email = Email
        .From("sender@example.com") // Set the sender's email address
        .To("recipient@example.com") // Set the recipient's email address
        .Subject("Sample Email"); // Set the email subject

    // Define the model to pass to the template
    var model = new EmailViewModel { Name = "John Doe" };

    // Render the template with the model
    email.UsingTemplateFromFile(template, model);

    // Send the email
    email.Send();
}
using FluentEmail.Core;
using FluentEmail.Razor;
public void SendEmail()
{
// Specify the template file
var template = "EmailTemplate.cshtml";
// Create the email
var email = Email
.From("sender@example.com") // Set the sender's email address
.To("recipient@example.com") // Set the recipient's email address
.Subject("Sample Email"); // Set the email subject
// Define the model to pass to the template
var model = new EmailViewModel { Name = "John Doe" };
// Render the template with the model
email.UsingTemplateFromFile(template, model);
// Send the email
email.Send();
}Imports FluentEmail.Core
Imports FluentEmail.Razor
Public Sub SendEmail()
' Specify the template file
Dim template = "EmailTemplate.cshtml"
' Create the email
Dim email = Email.From("sender@example.com").To("recipient@example.com").Subject("Sample Email") ' Set the email subject
' Define the model to pass to the template
Dim model = New EmailViewModel With {.Name = "John Doe"}
' Render the template with the model
email.UsingTemplateFromFile(template, model)
' Send the email
email.Send()
End SubEmailViewModel이(가) Razor 템플릿에 정의된 모델 (EmailTemplate.cshtml)과 일치하는지 확인하십시오. 이 모델은 Razor 템플릿에서 참조하는 속성을 포함해야 합니다(예: @Model.Name).
Mailgun API 키 통합하기
Mailgun은 안정성, 배달률, 풍부한 기능으로 잘 알려진 인기 있는 이메일 서비스 제공자입니다. Mailgun API 키를 FluentEmail에 통합하여 개발자들은 Mailgun의 인프라를 활용하여 이메일을 효율적으로 안전하게 보낼 수 있습니다.
Mailgun API 키와 FluentEmail 통합 단계
-
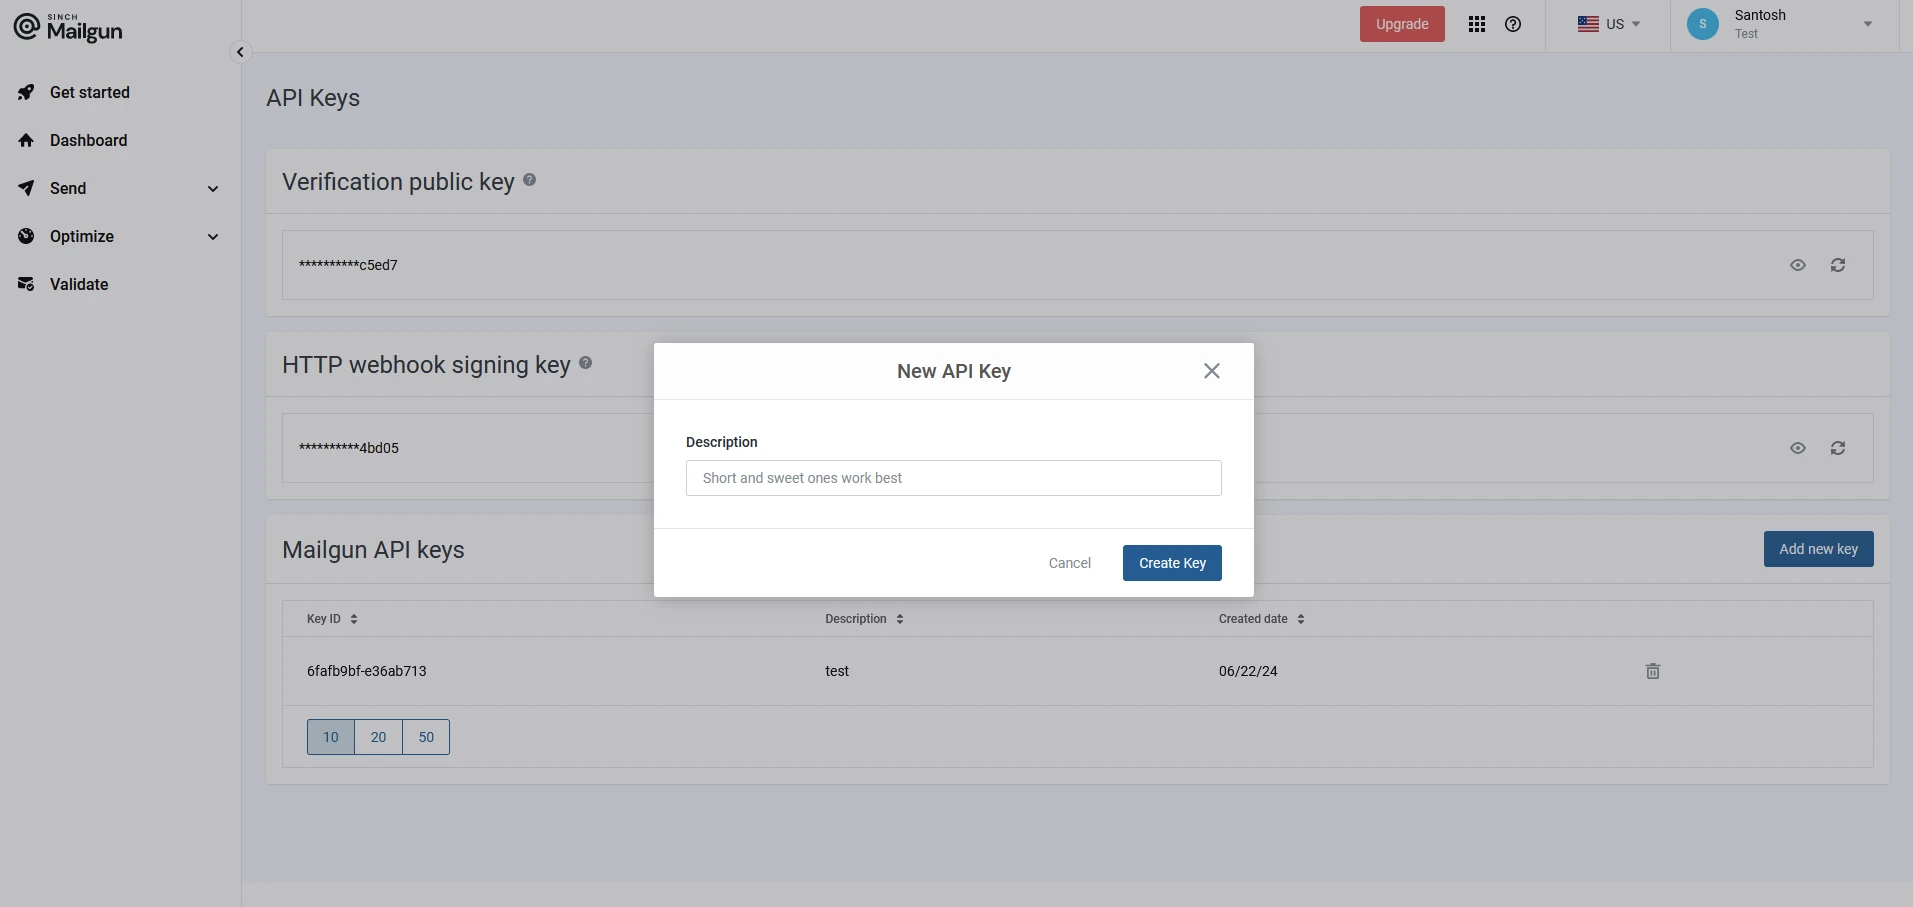
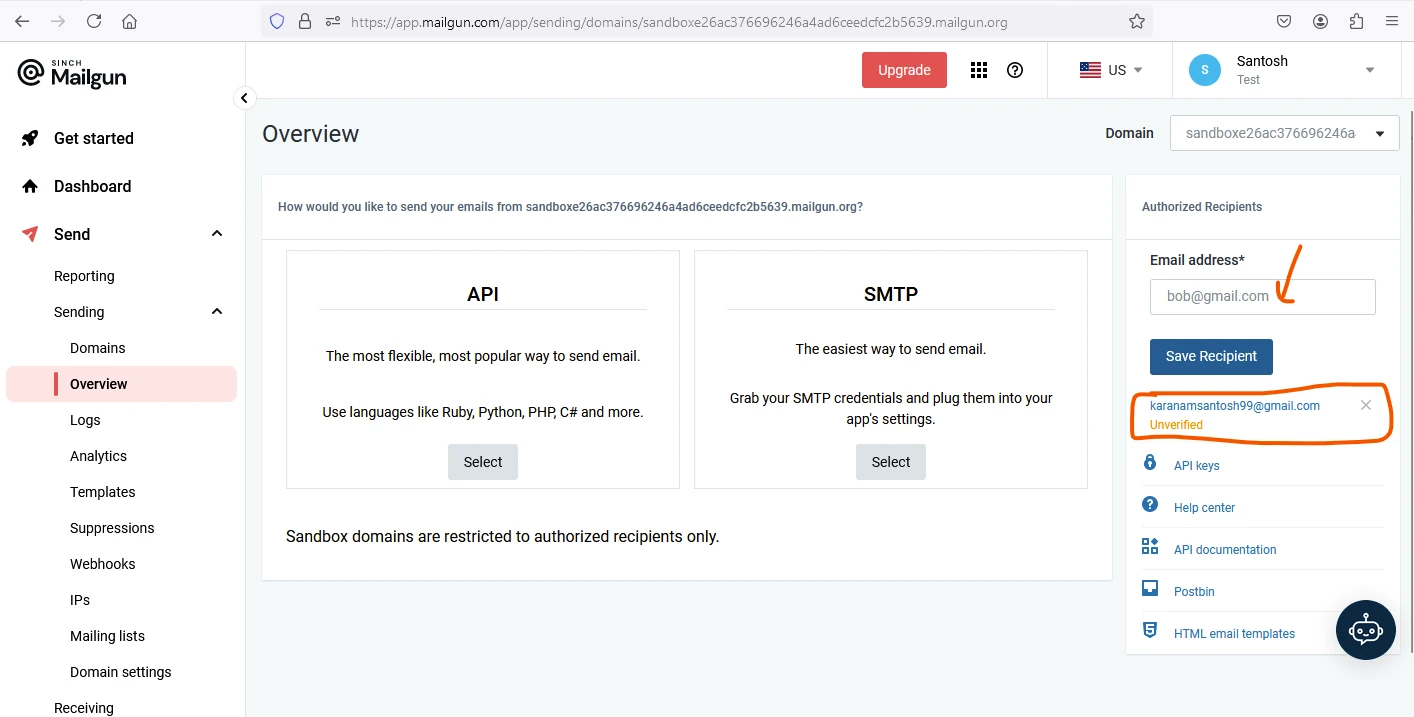
Mailgun API 키 획득:
- 아직 가입하지 않았다면 Mailgun 계정을 만드세요.
- Mailgun 대시보드로 이동하여 새 API 키를 만듭니다. 설명을 제공합니다.
-
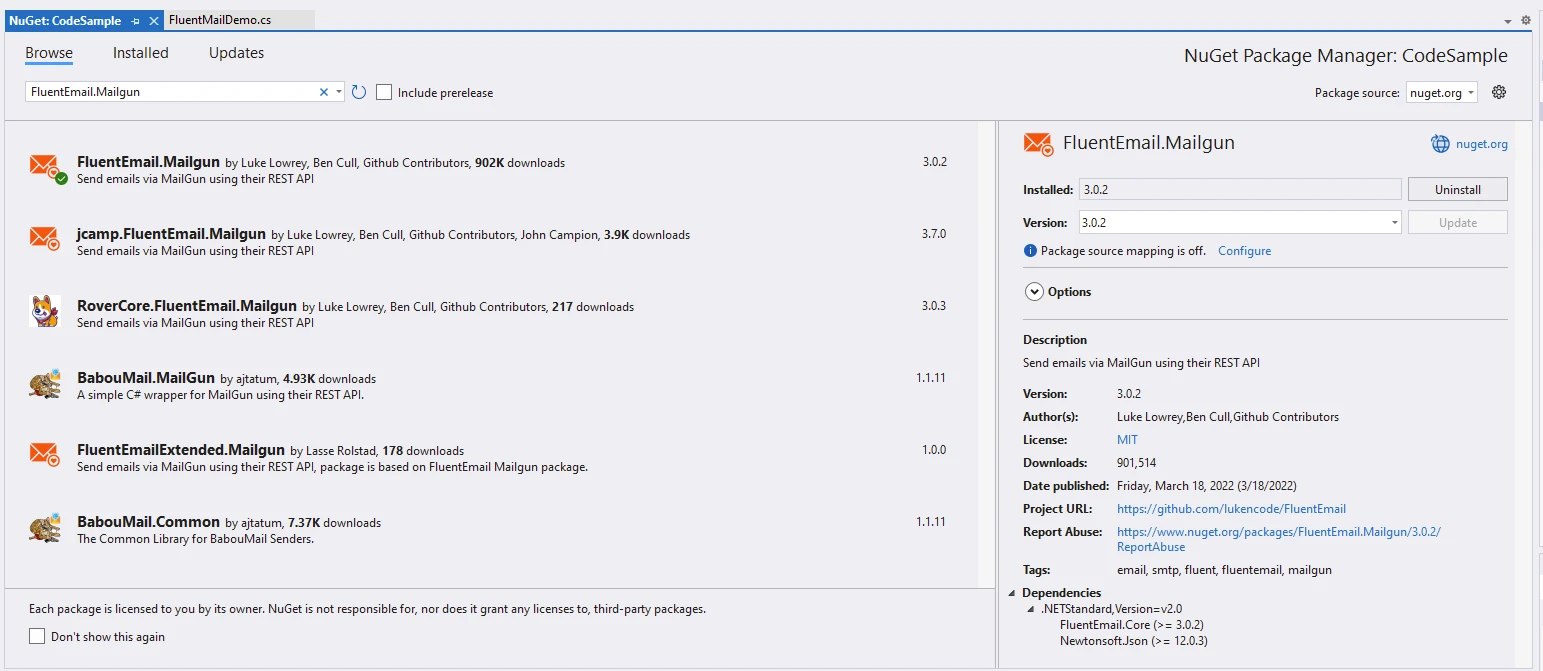
FluentEmail Install-Package:
Visual Studio에서 NuGet 패키지 관리자 또는 패키지 관리자 콘솔을 사용하여 FluentMail을 설치합니다:
# Install the FluentEmail.Mailgun package
Install-Package FluentEmail.Mailgun
# Install the FluentEmail.Mailgun package
Install-Package FluentEmail.Mailgun또는 Visual Studio에서:

- Mailgun API 키로 FluentEmail 구성:
API 키를 구성하여 FluentEmail을 이메일 서비스 제공자 또는 SMTP 발신자로 Mailgun을 사용하도록 설정합니다:
using FluentEmail.Core;
using FluentEmail.Mailgun;

// Create an instance of MailgunSender
var sender = new MailgunSender("your-domain.com", "your-mailgun-api-key");

// Set the default sender for all emails
Email.DefaultSender = sender;
using FluentEmail.Core;
using FluentEmail.Mailgun;
// Create an instance of MailgunSender
var sender = new MailgunSender("your-domain.com", "your-mailgun-api-key");
// Set the default sender for all emails
Email.DefaultSender = sender;Imports FluentEmail.Core
Imports FluentEmail.Mailgun
' Create an instance of MailgunSender
Private sender = New MailgunSender("your-domain.com", "your-mailgun-api-key")
' Set the default sender for all emails
Email.DefaultSender = sender-
이메일 작성 및 전송:
FluentEmail의 유창한 인터페이스를 사용하여 이메일을 작성하고 전송합니다:
var email = Email
    .From("sender@example.com")
    .To("recipient@example.com")
    .Subject("Your Subject Here")
    .Body("Hello, this is a test email sent via FluentMail and Mailgun!")
    .Send();
var email = Email
.From("sender@example.com")
.To("recipient@example.com")
.Subject("Your Subject Here")
.Body("Hello, this is a test email sent via FluentMail and Mailgun!")
.Send();Dim email = Email _
.From("sender@example.com") _
.To("recipient@example.com") _
.Subject("Your Subject Here") _
.Body("Hello, this is a test email sent via FluentMail and Mailgun!") _
.Send()-
고급 구성:
- FluentEmail의 유창한 API를 사용하여 첨부 파일, HTML 형식, CC/BCC 수신자, 이메일 헤더 등 이메일 설정을 사용자 정의하십시오.
FluentEmail과 Mailgun 사용의 이점
- 단순성: FluentEmail은 SMTP 설정의 복잡성을 추상화하여 최소한의 설정으로 이메일을 쉽게 보낼 수 있습니다.
- 신뢰성: Mailgun의 인프라를 활용하여 높은 배달률과 강력한 이메일 처리 기능을 제공합니다.
- 확장성: Mailgun의 확장 가능한 인프라를 통해 소규모 애플리케이션과 Enterprise 수준 솔루션 모두에 적합한 이메일 전송 요구를 손쉽게 확장하십시오.
- 풍부한 기능: 추적, 분석 및 고급 이메일 유효성 검사 등의 Mailgun 기능을 활용하여 이메일 캠페인을 최적화하십시오.
IronPDF 소개
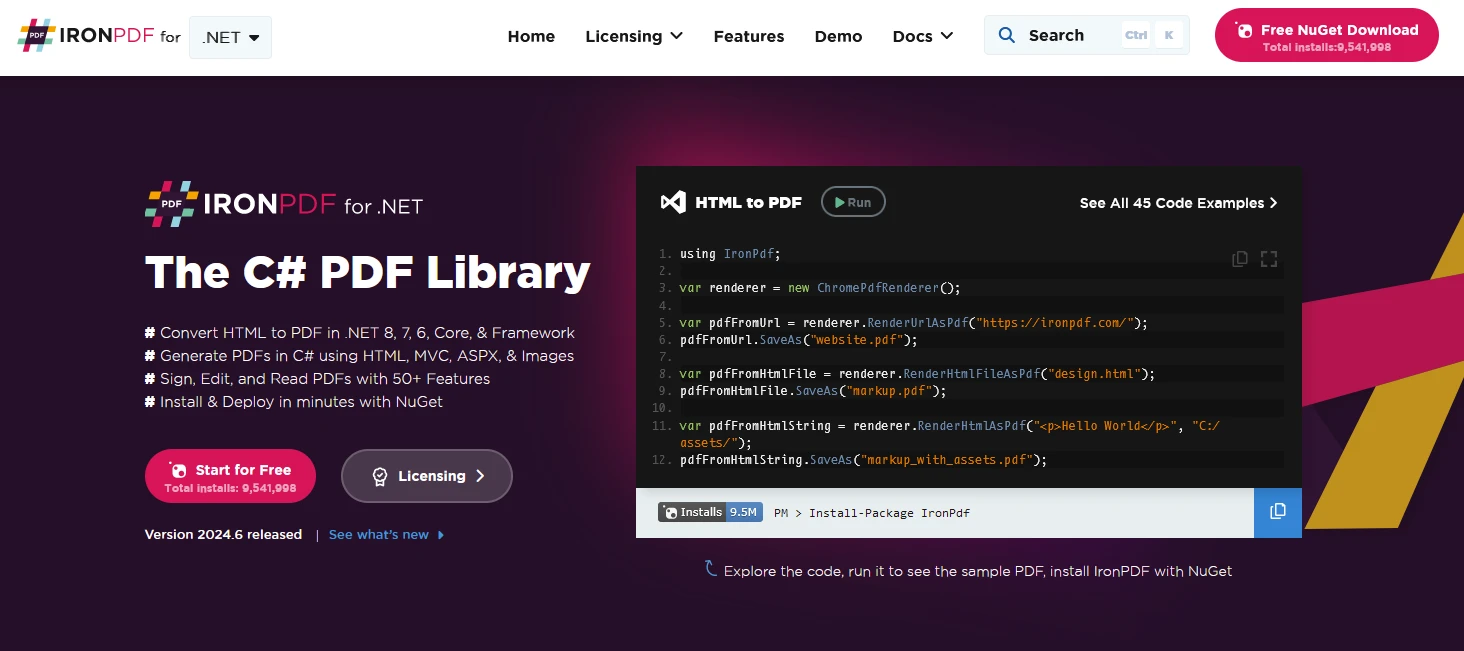
IronPDF는 Node.js PDF 라이브러리로 .NET 프로젝트에서 PDF 문서를 생성, 관리 및 콘텐츠를 추출할 수 있습니다. 다음은 몇 가지 주요 기능입니다:
-
HTML을 PDF로 변환:
- HTML, CSS 및 JavaScript 콘텐츠를 PDF 문서로 변환합니다.
- Chrome 렌더링 엔진으로 픽셀 단위의 완벽한 PDF를 만듭니다.
- URL, HTML 파일 또는 HTML 문자열을 입력값으로 사용하여 PDF를 생성합니다.
- 이미지 및 콘텐츠 변환:
- 이미지를 PDF로 변환하고 그 반대로 변환합니다.
- 기존 PDF 문서에서 텍스트와 이미지를 추출합니다.
- JPG, PNG 등 다양한 이미지 포맷을 지원합니다.
-
편집 및 조작:
- PDF의 속성, 보안 및 권한을 설정합니다.
- 디지털 서명을 추가합니다.
- 메타데이터 및 개정 기록을 편집합니다.
IronPDF는 원래 레이아웃과 스타일을 정확히 보존하여 HTML을 PDF로 변환하는 데 탁월합니다. 보고서, 송장 및 설명서와 같은 웹 기반 콘텐츠에서 PDF를 생성하는 데 완벽합니다. HTML 파일, URL 및 원시 HTML 문자열에 대한 지원으로 IronPDF는 고품질의 PDF 문서를 쉽게 생성합니다.
using IronPdf;

class Program
{
    static void Main(string[] args)
    {
        // Create a ChromePdfRenderer instance
        var renderer = new ChromePdfRenderer();

        // 1. Convert HTML String to PDF
        var htmlContent = "<h1>Hello, IronPDF!</h1><p>This is a PDF from an HTML string.</p>";
        var pdfFromHtmlString = renderer.RenderHtmlAsPdf(htmlContent);
        pdfFromHtmlString.SaveAs("HTMLStringToPDF.pdf");

        // 2. Convert HTML File to PDF
        var htmlFilePath = "path_to_your_html_file.html"; // Specify the path to your HTML file
        var pdfFromHtmlFile = renderer.RenderHtmlFileAsPdf(htmlFilePath);
        pdfFromHtmlFile.SaveAs("HTMLFileToPDF.pdf");

        // 3. Convert URL to PDF
        var url = "http://ironpdf.com"; // Specify the URL
        var pdfFromUrl = renderer.RenderUrlAsPdf(url);
        pdfFromUrl.SaveAs("URLToPDF.pdf");
    }
}
using IronPdf;
class Program
{
static void Main(string[] args)
{
// Create a ChromePdfRenderer instance
var renderer = new ChromePdfRenderer();
// 1. Convert HTML String to PDF
var htmlContent = "<h1>Hello, IronPDF!</h1><p>This is a PDF from an HTML string.</p>";
var pdfFromHtmlString = renderer.RenderHtmlAsPdf(htmlContent);
pdfFromHtmlString.SaveAs("HTMLStringToPDF.pdf");
// 2. Convert HTML File to PDF
var htmlFilePath = "path_to_your_html_file.html"; // Specify the path to your HTML file
var pdfFromHtmlFile = renderer.RenderHtmlFileAsPdf(htmlFilePath);
pdfFromHtmlFile.SaveAs("HTMLFileToPDF.pdf");
// 3. Convert URL to PDF
var url = "http://ironpdf.com"; // Specify the URL
var pdfFromUrl = renderer.RenderUrlAsPdf(url);
pdfFromUrl.SaveAs("URLToPDF.pdf");
}
}Imports IronPdf
Friend Class Program
Shared Sub Main(ByVal args() As String)
' Create a ChromePdfRenderer instance
Dim renderer = New ChromePdfRenderer()
' 1. Convert HTML String to PDF
Dim htmlContent = "<h1>Hello, IronPDF!</h1><p>This is a PDF from an HTML string.</p>"
Dim pdfFromHtmlString = renderer.RenderHtmlAsPdf(htmlContent)
pdfFromHtmlString.SaveAs("HTMLStringToPDF.pdf")
' 2. Convert HTML File to PDF
Dim htmlFilePath = "path_to_your_html_file.html" ' Specify the path to your HTML file
Dim pdfFromHtmlFile = renderer.RenderHtmlFileAsPdf(htmlFilePath)
pdfFromHtmlFile.SaveAs("HTMLFileToPDF.pdf")
' 3. Convert URL to PDF
Dim url = "http://ironpdf.com" ' Specify the URL
Dim pdfFromUrl = renderer.RenderUrlAsPdf(url)
pdfFromUrl.SaveAs("URLToPDF.pdf")
End Sub
End ClassIronPDF와 FluentEmail .NET을 사용하여 Mailgun 발신자와 함께 PDF 문서 생성
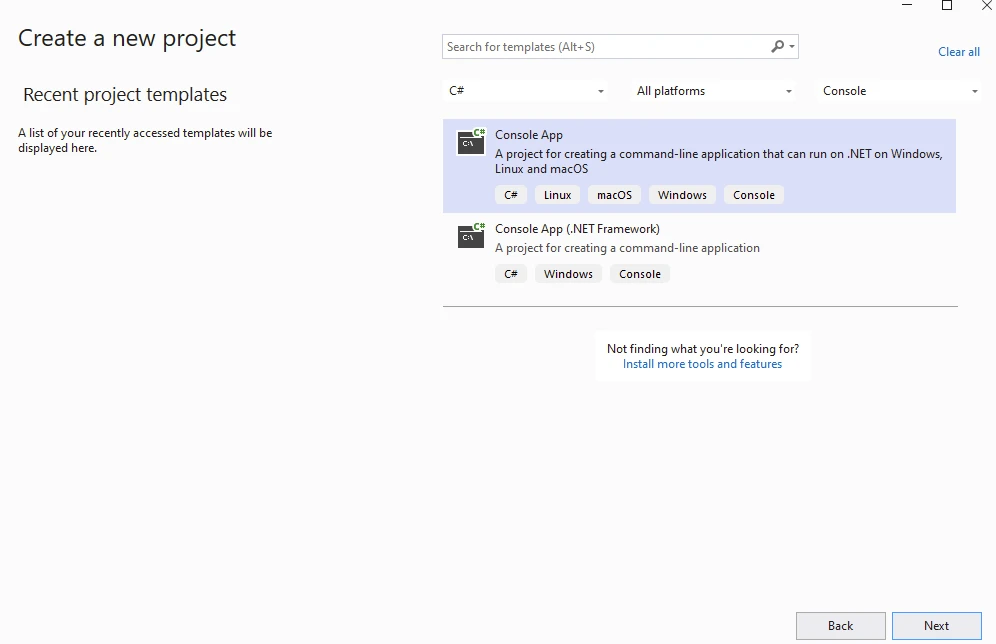
먼저, 아래와 같이 Visual Studio를 사용하여 콘솔 애플리케이션을 만듭니다.
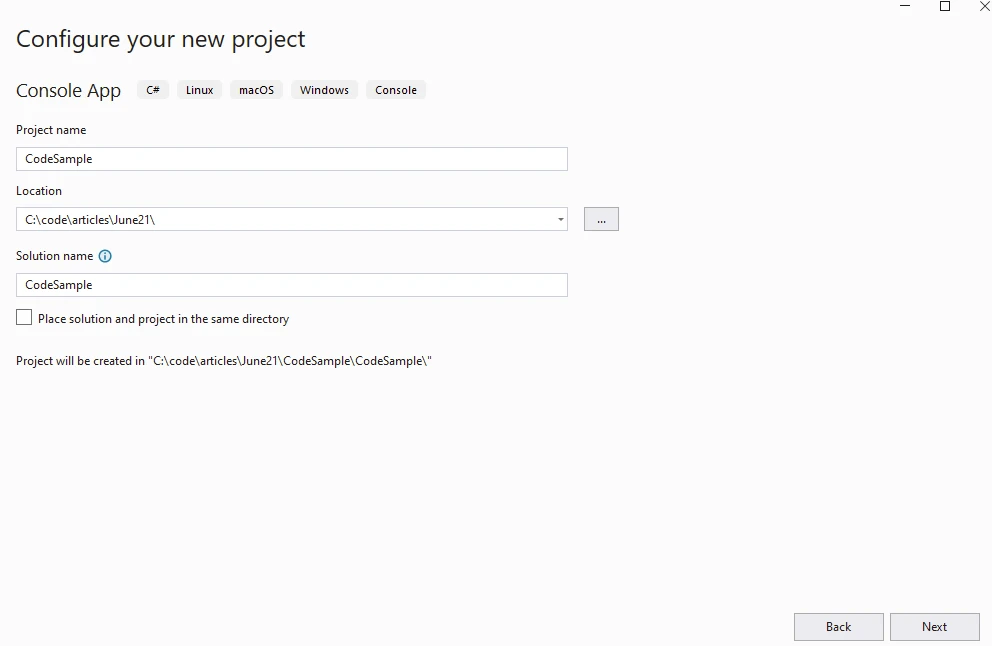
프로젝트 이름을 제공합니다.
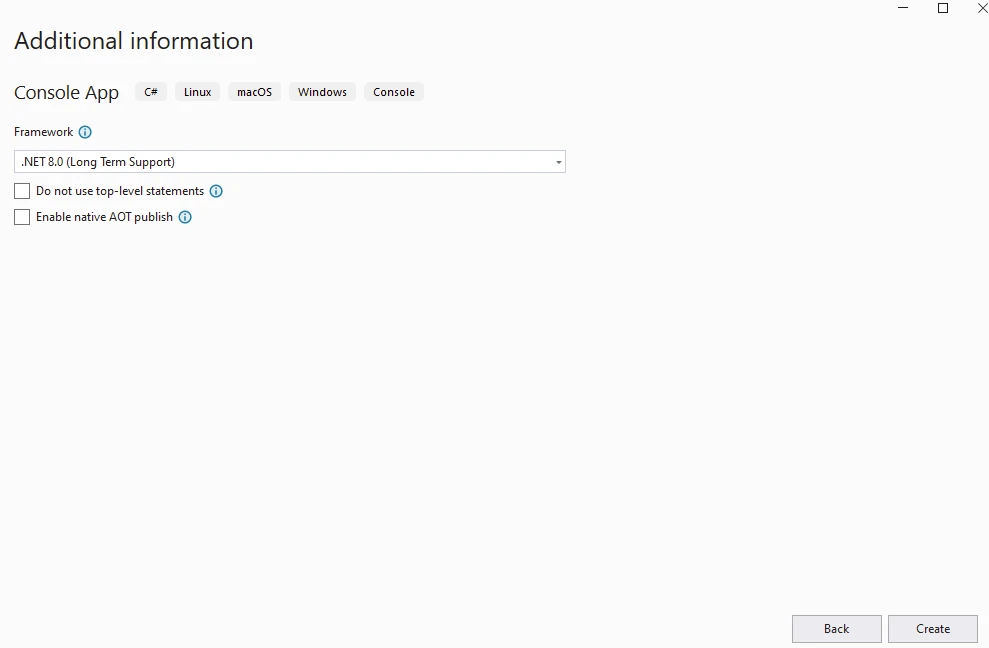
.NET 버전을 제공합니다.
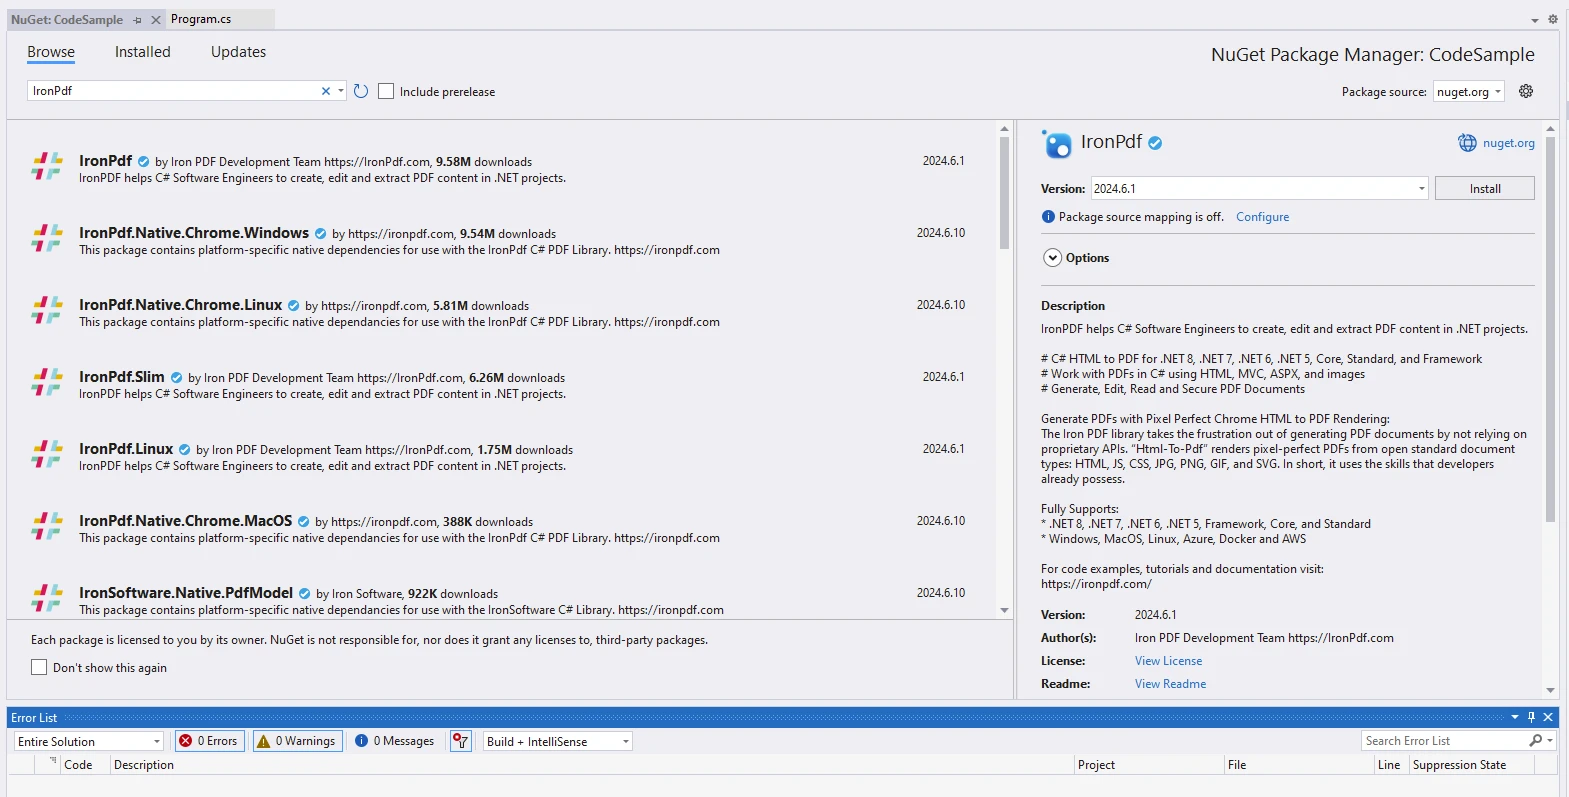
IronPDF 패키지를 설치하십시오.
FluentEmail Mailgun 설치.
무료 체험판에 이메일 메시지를 수신하려면, 수신자 이메일을 아래에서처럼 Mailgun 등록 대시보드에 등록해야 합니다.
using FluentEmail.Core;
using FluentEmail.Mailgun;
using IronPdf;
using System;
using System.IO;

namespace CodeSample
{
    public static class FluentMailDemo
    {
        public static void Execute()
        {
            // Instantiate Renderer
            var renderer = new ChromePdfRenderer();

            // HTML Content to be converted into PDF and used in Email
            var content = "<h1>Demo FluentEmail with Mailgun and IronPDF</h1>";
            content += "<h2>Create MailgunSender</h2>";
            content += "<p>1. Get API key from app.mailgun.com</p>";

            var domain = "your-domain.com"; // Use your Mailgun domain
            var sender = new MailgunSender(domain, "your-mailgun-api-key"); // Use your Mailgun API key
            Email.DefaultSender = sender;

            content += "<h2>Prepare Email</h2>";
            content += $"<p>Sender: example@{domain}</p>";
            content += $"<p>Receiver: recipient@example.com</p>";
            content += $"<p>Subject: Checkout the New Awesome IronPDF Library from Iron Software</p>";
            content += $"<p>Body: IronPDF is the leading C# PDF library for generating & editing PDFs. It has friendly API and allows developers to rapidly deliver high quality PDFs from HTML in .NET projects.</p>";

            // Render HTML content to PDF
            var pdf = renderer.RenderHtmlAsPdf(content);

            // Export the PDF to a file
            pdf.SaveAs("AwesomeFluentEmailAndIron.pdf");

            // Compose and send the email
            var email = Email
                .From($"example@{domain}")
                .To("recipient@example.com")
                .Subject("Checkout the New Awesome IronPDF Library from Iron Software")
                .Body("IronPDF is the leading C# PDF library for generating & editing PDFs. It has a friendly API and allows developers to rapidly deliver high quality PDFs from HTML in .NET projects.")
                .Attach(new FluentEmail.Core.Models.Attachment
                {
                    Data = File.OpenRead("AwesomeFluentEmailAndIron.pdf"),
                    Filename = "AwesomeFluentEmailAndIron.pdf",
                    ContentType = "application/pdf"
                })
                .Send();

            Console.WriteLine($"Is Send Success: {email.Successful}");
        }
    }
}
using FluentEmail.Core;
using FluentEmail.Mailgun;
using IronPdf;
using System;
using System.IO;
namespace CodeSample
{
public static class FluentMailDemo
{
public static void Execute()
{
// Instantiate Renderer
var renderer = new ChromePdfRenderer();
// HTML Content to be converted into PDF and used in Email
var content = "<h1>Demo FluentEmail with Mailgun and IronPDF</h1>";
content += "<h2>Create MailgunSender</h2>";
content += "<p>1. Get API key from app.mailgun.com</p>";
var domain = "your-domain.com"; // Use your Mailgun domain
var sender = new MailgunSender(domain, "your-mailgun-api-key"); // Use your Mailgun API key
Email.DefaultSender = sender;
content += "<h2>Prepare Email</h2>";
content += $"<p>Sender: example@{domain}</p>";
content += $"<p>Receiver: recipient@example.com</p>";
content += $"<p>Subject: Checkout the New Awesome IronPDF Library from Iron Software</p>";
content += $"<p>Body: IronPDF is the leading C# PDF library for generating & editing PDFs. It has friendly API and allows developers to rapidly deliver high quality PDFs from HTML in .NET projects.</p>";
// Render HTML content to PDF
var pdf = renderer.RenderHtmlAsPdf(content);
// Export the PDF to a file
pdf.SaveAs("AwesomeFluentEmailAndIron.pdf");
// Compose and send the email
var email = Email
.From($"example@{domain}")
.To("recipient@example.com")
.Subject("Checkout the New Awesome IronPDF Library from Iron Software")
.Body("IronPDF is the leading C# PDF library for generating & editing PDFs. It has a friendly API and allows developers to rapidly deliver high quality PDFs from HTML in .NET projects.")
.Attach(new FluentEmail.Core.Models.Attachment
{
Data = File.OpenRead("AwesomeFluentEmailAndIron.pdf"),
Filename = "AwesomeFluentEmailAndIron.pdf",
ContentType = "application/pdf"
})
.Send();
Console.WriteLine($"Is Send Success: {email.Successful}");
}
}
}Imports FluentEmail.Core
Imports FluentEmail.Mailgun
Imports IronPdf
Imports System
Imports System.IO
Namespace CodeSample
Public Module FluentMailDemo
Public Sub Execute()
' Instantiate Renderer
Dim renderer = New ChromePdfRenderer()
' HTML Content to be converted into PDF and used in Email
Dim content = "<h1>Demo FluentEmail with Mailgun and IronPDF</h1>"
content &= "<h2>Create MailgunSender</h2>"
content &= "<p>1. Get API key from app.mailgun.com</p>"
Dim domain = "your-domain.com" ' Use your Mailgun domain
Dim sender = New MailgunSender(domain, "your-mailgun-api-key") ' Use your Mailgun API key
Email.DefaultSender = sender
content &= "<h2>Prepare Email</h2>"
content &= $"<p>Sender: example@{domain}</p>"
content &= $"<p>Receiver: recipient@example.com</p>"
content &= $"<p>Subject: Checkout the New Awesome IronPDF Library from Iron Software</p>"
content &= $"<p>Body: IronPDF is the leading C# PDF library for generating & editing PDFs. It has friendly API and allows developers to rapidly deliver high quality PDFs from HTML in .NET projects.</p>"
' Render HTML content to PDF
Dim pdf = renderer.RenderHtmlAsPdf(content)
' Export the PDF to a file
pdf.SaveAs("AwesomeFluentEmailAndIron.pdf")
' Compose and send the email
Dim email = Email.From($"example@{domain}").To("recipient@example.com").Subject("Checkout the New Awesome IronPDF Library from Iron Software").Body("IronPDF is the leading C# PDF library for generating & editing PDFs. It has a friendly API and allows developers to rapidly deliver high quality PDFs from HTML in .NET projects.").Attach(New FluentEmail.Core.Models.Attachment With {
.Data = File.OpenRead("AwesomeFluentEmailAndIron.pdf"),
.Filename = "AwesomeFluentEmailAndIron.pdf",
.ContentType = "application/pdf"
}).Send()
Console.WriteLine($"Is Send Success: {email.Successful}")
End Sub
End Module
End Namespace코드 설명
- FluentEmail과 Mailgun 통합:
- FluentEmail.Core: 이메일 작성과 전송을 위한 유창한 인터페이스를 제공합니다.
- FluentEmail.Mailgun: 이메일 전송을 위한 Mailgun과의 통합을 가능하게 합니다.
- ChromePdfRenderer:
- 이는 HTML 콘텐츠를 PDF 문서로 렌더링하기 위해 IronPDF 라이브러리에서 ChromePdfRenderer 인스턴스임을 가정합니다.
-
콘텐츠 준비:
- HTML 콘텐츠 (
content)가 준비되며, 여기에는 IronPDF에 대한 세부 정보가 포함됩니다. 이 콘텐츠는 PDF (renderer.RenderHtmlAsPdf(content)) 생성과 이메일 본문에 모두 사용됩니다.
- HTML 콘텐츠 (
-
MailgunSender 설정:
MailgunSender은(는) Mailgun API 자격 증명(도메인 및 API 키)으로 초기화됩니다.Email.DefaultSender은 이 발신자로 설정되며, 모든 후속 이메일은 Mailgun을 사용하여 전송됩니다.
-
PDF 생성 및 첨부:
- HTML 콘텐츠 (
content)는 IronPDF의RenderHtmlAsPdf메서드를 사용하여 PDF (pdf)로 렌더링됩니다. - 생성된 PDF는 'AwesomeFluentEmailAndIron.pdf'로 저장됩니다.
- HTML 콘텐츠 (
- 이메일 작성 및 전송:
- FluentEmail의 유창한 API를 사용하여 이메일이 작성됩니다:
- 발신자의 도메인을 사용하여 'From' 주소가 설정됩니다.
- 수신자의 이메일로 'To' 주소가 설정됩니다.
- 이메일의 제목과 본문이 정의됩니다.
- 'AwesomeFluentEmailAndIron.pdf' PDF 파일이 이메일에 첨부됩니다.
- 이메일은
.Send()을(를) 사용하여 전송되며, 성공 상태 (email.Successful)가 콘솔에 출력됩니다.
- 이메일은
-
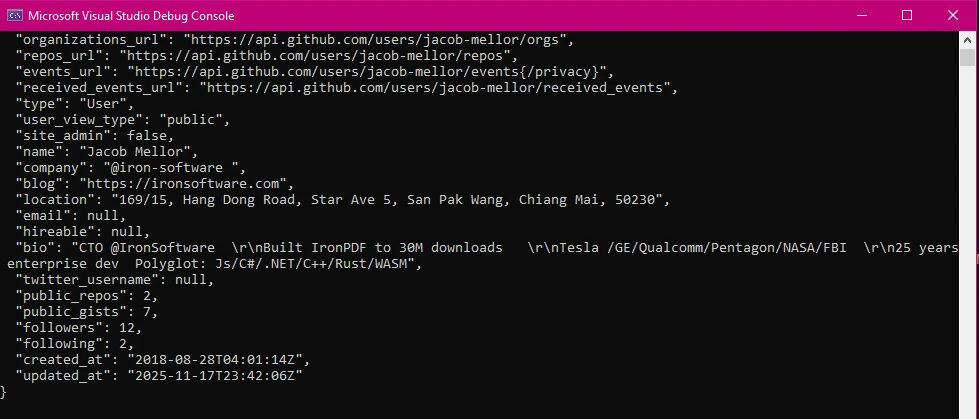
콘솔 출력:
- 이메일 전송 시도 후 코드에서 이메일이 성공적으로 전송되었는지 여부를 출력합니다 (
Is Send Success: true/false).
- 이메일 전송 시도 후 코드에서 이메일이 성공적으로 전송되었는지 여부를 출력합니다 (
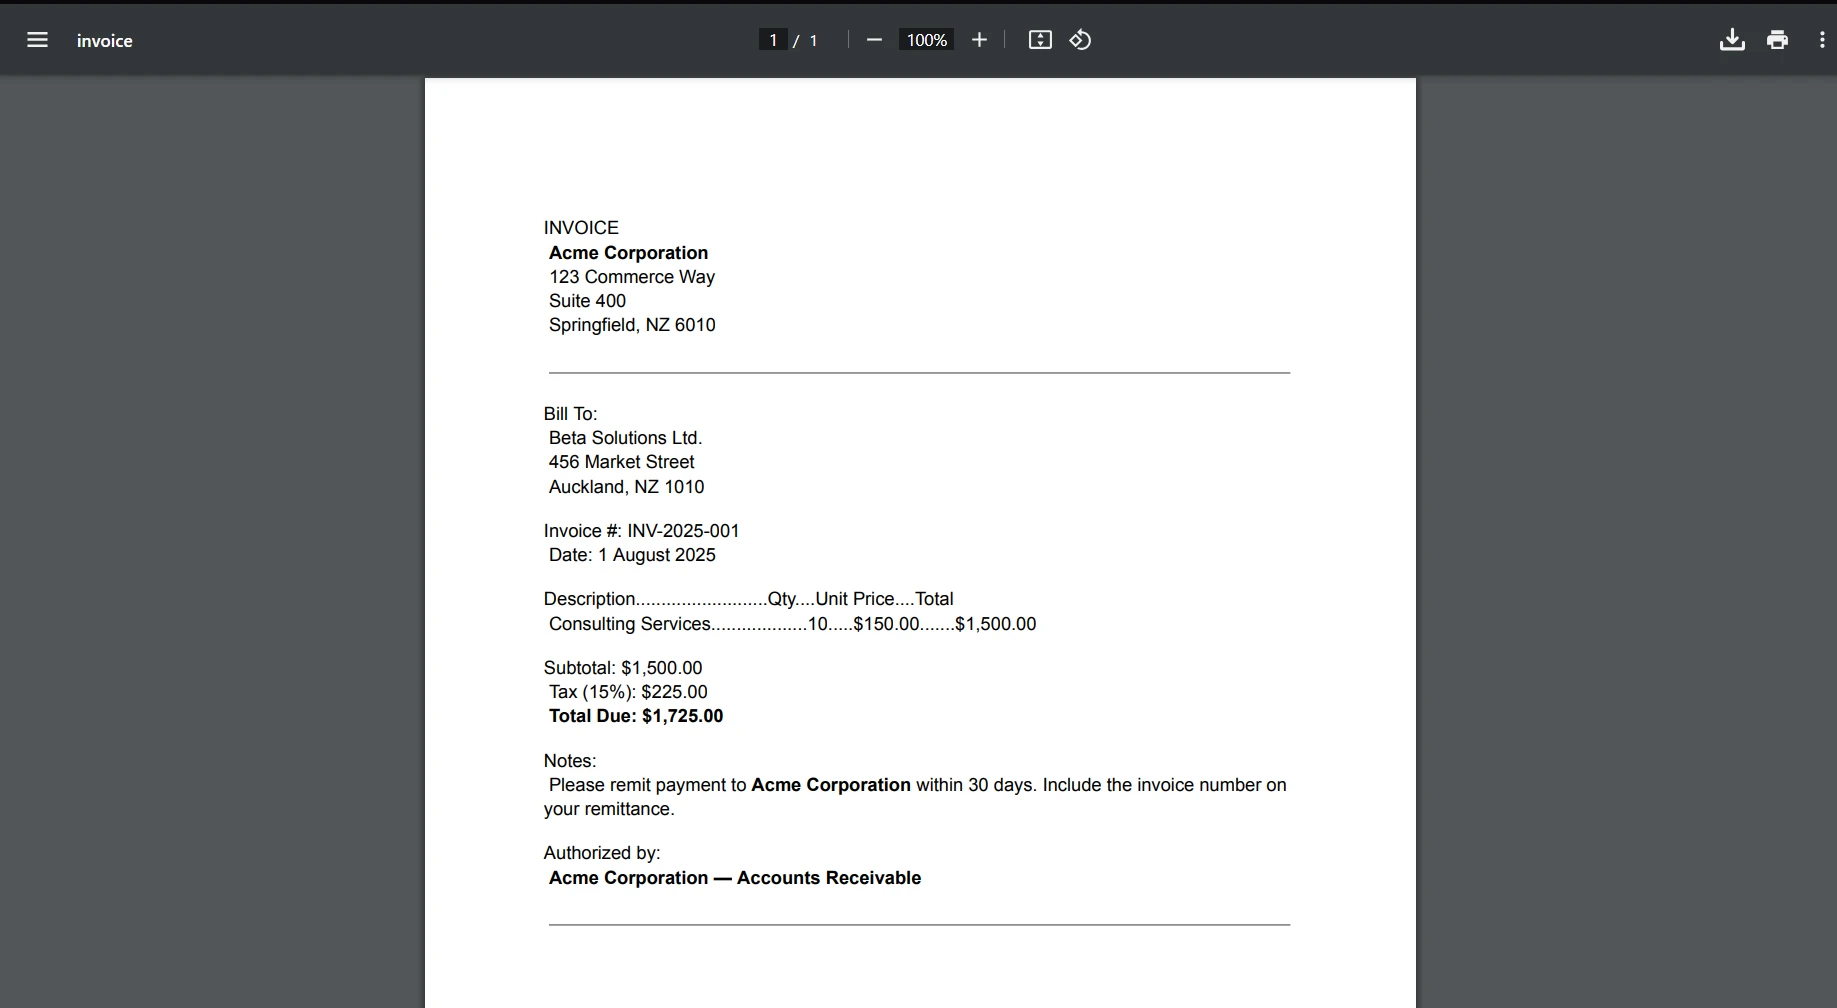
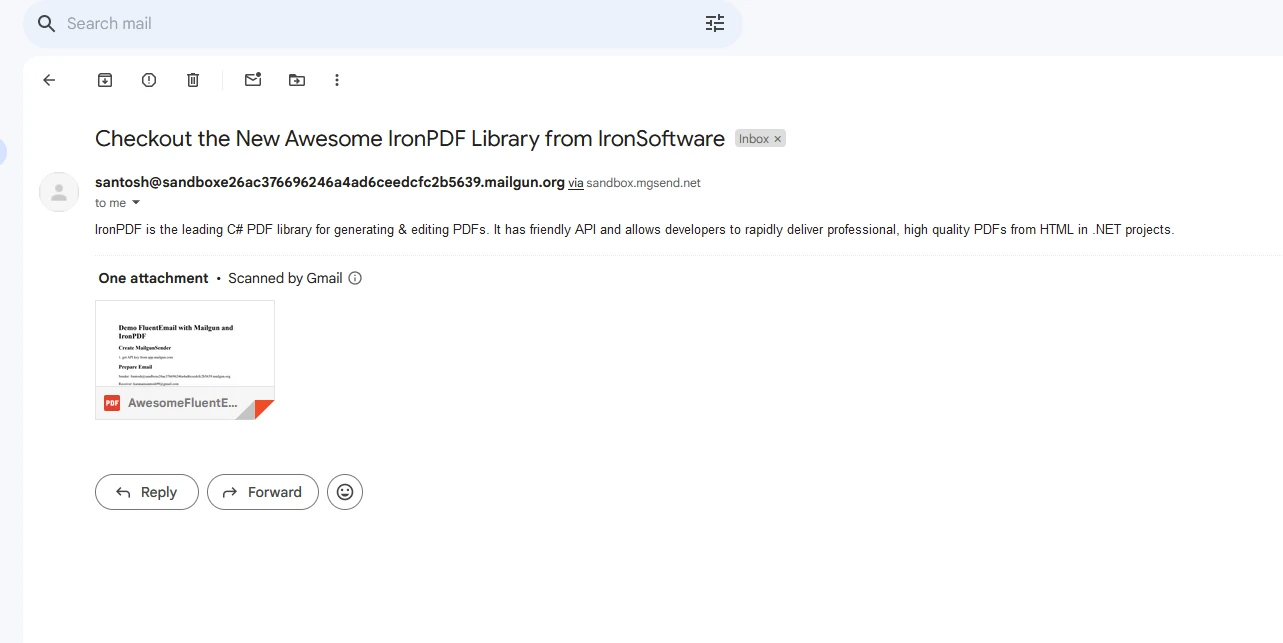
출력 이메일 메시지
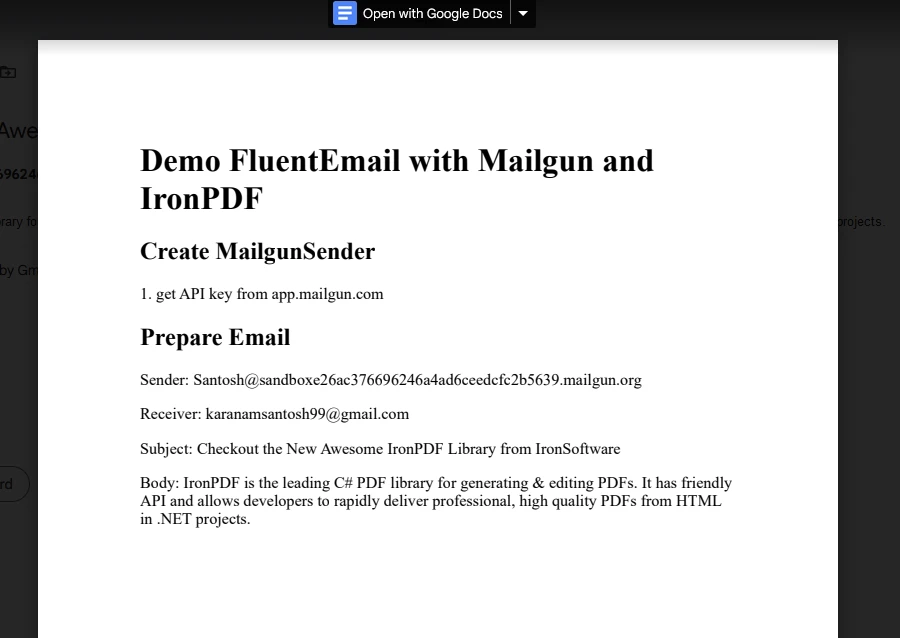
첨부된 PDF
IronPDF 라이선스
IronPDF 패키지는 실행 및 PDF 생성에 라이선스가 필요합니다. 패키지를 접근하기 전에 애플리케이션 시작 부분에 아래 코드를 추가하십시오.
IronPdf.License.LicenseKey = "IRONPDF-LICENSE-KEY";IronPdf.License.LicenseKey = "IRONPDF-LICENSE-KEY";Imports IronPdf
IronPdf.License.LicenseKey = "IRONPDF-LICENSE-KEY"체험판 라이선스는 IronPDF 라이선스 및 체험판에서 이용 가능합니다.
결론
Mailgun API 키와 결합된 FluentEmail은 .NET 개발자에게 애플리케이션 내에서 이메일 기능을 간소화할 수 있는 기능을 제공합니다. 트랜잭션 이메일, 뉴스레터 또는 알림을 전송할 때, 이 통합은 신뢰성, 확장성, 사용 용이성을 보장합니다. 이메일 전송의 복잡함을 추상화함으로써, FluentEmail은 개발자가 Mailgun의 강력한 이메일 인프라를 활용하면서 견고한 애플리케이션을 구축하는 데 집중할 수 있게 해줍니다. FluentEmail과 Mailgun의 힘으로 여러분의 .NET 애플리케이션의 이메일 커뮤니케이션 기능을 오늘 향상시키십시오.
IronPDF는 한편으로 .NET 애플리케이션 내 PDF 문서를 생성, 편집 및 변환하기 위한 강력한 C# 라이브러리입니다. HTML을 PDF로 변환하는 데 뛰어나며, 포괄적인 PDF 조작 능력을 제공하고, .NET Framework와 원활하게 통합되어 안전하고 다재다능한 PDF 처리 솔루션을 제공합니다.
자주 묻는 질문
Razor 템플릿을 사용하여 .NET 응용 프로그램에서 이메일을 보내는 방법은 무엇인가요?
FluentEmail을 사용하여 .NET 응용 프로그램에서 Razor 템플릿으로 이메일을 보낼 수 있습니다. 먼저 NuGet 또는 .NET CLI를 사용하여 FluentEmail과 Razor 렌더러 패키지를 설치하세요. 그런 다음 Razor 렌더러를 구성하고 FluentEmail 인터페이스를 사용하여 Razor 템플릿 지원을 통해 이메일을 작성하고 보냅니다.
Mailgun을 .NET 이메일 라이브러리에 통합하는 방법은 무엇인가요?
FluentEmail과 Mailgun을 통합하려면 Mailgun 대시보드에서 API 키를 얻으세요. 그런 다음 `FluentEmail.Mailgun` 패키지를 설치하고 Mailgun을 이메일 서비스 제공업체로 구성하여 Mailgun의 인프라를 통해 효율적으로 이메일을 보낼 수 있습니다.
.NET에서 이메일 기능을 위해 FluentEmail을 사용하는 장점은 무엇인가요?
FluentEmail은 이메일 작성을 위한 유창한 인터페이스를 제공하고, Razor 및 Liquid 템플릿을 통해 동적 콘텐츠를 지원하며, SMTP 구성을 단순화하고 Mailgun과 통합하여 신뢰할 수 있고 확장 가능한 이메일 전달을 제공합니다.
ASP.NET Core에서 .NET 라이브러리를 사용하여 이메일 알림을 자동화할 수 있나요?
네, FluentEmail을 사용하여 ASP.NET Core에서 이메일 알림을 자동화할 수 있습니다. Razor 템플릿과 Mailgun 통합을 활용하여 거래 이메일, 뉴스레터 및 알림을 쉽게 자동화할 수 있습니다.
.NET에서 FluentEmail을 사용하여 이메일 첨부 파일을 처리하는 방법은 무엇인가요?
FluentEmail을 사용하면 이메일을 작성할 때 첨부 파일을 추가하여 이메일 첨부 파일을 쉽게 관리할 수 있습니다. 이 라이브러리는 이메일 콘텐츠와 함께 첨부 파일이 전송되도록 파일을 이메일에 첨부하는 메서드를 제공합니다.
IronPDF는 .NET 응용 프로그램의 PDF 기능을 어떻게 향상시키나요?
IronPDF는 HTML을 PDF로 변환하고, 콘텐츠를 추출하고, 포괄적인 PDF 편집 기능을 제공하여 PDF 기능을 향상시킵니다. Chrome 렌더링 엔진을 사용하여 개발자가 HTML에서 PDF를 생성하고 콘텐츠를 추출하며 PDF를 효율적으로 수정할 수 있도록 합니다.
.NET 응용 프로그램에서 HTML을 PDF로 변환하기 위한 필수 단계는 무엇인가요?
IronPDF를 사용하여 .NET 응용 프로그램에서 HTML을 PDF로 변환하려면 `ChromePdfRenderer` 클래스를 사용하여 HTML 콘텐츠를 PDF 문서로 렌더링 할 수 있습니다. 이 PDF는 파일로 저장하거나 필요에 따라 추가로 조작할 수 있습니다.
.NET 응용 프로그램에서 이메일에 PDF를 첨부하는 방법은 무엇인가요?
.NET 애플리케이션에서 이메일에 PDF를 첨부하려면 먼저 IronPDF를 사용하여 PDF를 생성합니다. PDF가 생성되면 FluentEmail을 사용하여 이메일을 작성하고 파일 첨부를 위한 사용 가능한 메서드를 사용하여 PDF 파일을 첨부한 후 이메일을 보냅니다.
.NET 라이브러리를 사용하여 PDF에서 콘텐츠를 추출할 수 있습니까?
네, IronPDF를 사용하면 PDF에서 콘텐츠를 추출할 수 있습니다. 라이브러리는 PDF 문서에서 텍스트와 이미지를 읽는 메서드를 제공하여 추가 처리 또는 분석을 위한 콘텐츠 추출을 가능하게 합니다.