

업데이트됨 2026년 4월 21일
JavaScript PDF 편집기 (개발자 튜토리얼)
이 심층 가이드에서는 IronPDF가 제공하는 강력한 기능을 활용하여 JavaScript PDF 편집기를 구축하는 복잡한 과정을 자세히 살펴보겠습니다.
더 읽어보기

React 애플리케이션에서 PDF 문서를 생성하는 방법에 대한 튜토리얼에 오신 것을 환영합니다! 이 튜토리얼에서는 다양한 PDF 생성 라이브러리를 탐구하고, React 컴포넌트에서 직접 PDF 파일을 생성할 수 있는 인기 있는 jsPDF 라이브러리를 사용하는 방법을 배울 것입니다. 자, 그럼 바로 시작해 볼까요!
PDF(Portable Document Format)는 문서의 레이아웃과 서식을 유지하면서 문서를 공유하고 인쇄하는 데 널리 사용되는 파일 형식입니다. React 웹 개발자라면 React 애플리케이션에서 직접 송장, 보고서 또는 판매 계약서와 같은 PDF 문서를 생성해야 하는 상황에 직면할 수 있습니다.
React 애플리케이션에서 PDF 문서를 생성하는 것은 특히 처음 접하는 경우 어려운 작업일 수 있습니다. 다행히도, 이 과정을 상당히 간소화해주는 여러 타사 라이브러리를 활용할 수 있습니다. 각 라이브러리는 서로 다른 사용 사례에 맞춰 고유한 기능과 유틸리티를 제공합니다. 이 라이브러리들을 좀 더 자세히 살펴보겠습니다.
jsPDF는 JavaScript에서 PDF 파일을 생성하기 위해 개발자들 사이에서 널리 인기 있는 라이브러리입니다. 이 제품의 주요 장점 중 하나는 단순함입니다. 구문과 사용법이 매우 간단하여 HTML 콘텐츠를 순식간에 PDF 파일로 변환할 수 있습니다.
이 라이브러리를 통해 글꼴 크기와 색상 변경에서 페이지 방향 및 크기 조정에 이르기까지 PDF의 형식과 레이아웃을 제어할 수 있습니다. jsPDF는 브라우저 및 서버 환경 모두에서 작동하는 강력한 솔루션으로, 다양한 JavaScript 애플리케이션에 훌륭한 선택이 됩니다.
pdfmake는 순수 JavaScript로 클라이언트/서버 사이드 PDF 인쇄 솔루션으로 두각을 나타냅니다. 이 라이브러리는 포괄적인 API와 유연한 레이아웃 옵션 덕분에 복잡한 PDF를 생성하는 데 탁월한 선택입니다. pdfmake를 통해 간단한 JavaScript 객체를 사용하여 문서 내용과 구조를 정의한 다음, 이를 유효한 PDF 문서로 변환할 수 있습니다.
React-PDF는 React 컴포넌트를 사용하여 PDF 파일을 생성하기 위한 강력한 기능을 제공하는 독특한 라이브러리입니다. JavaScript 객체에 문서 구조를 수동으로 작성하는 대신, 재사용 가능한 컴포넌트와 속성을 사용하여 일반적인 React 애플리케이션을 구축하는 것처럼 PDF를 생성할 수 있습니다. IronPDF 웹사이트에는 React-PDF 라이브러리를 사용하여 PDF를 생성하는 방법에 대한 튜토리얼이 있습니다.
세 개의 라이브러리 모두 React에서 PDF 문서를 생성하기 위한 강력한 도구를 제공하지만, 우리는 커뮤니티에서 널리 채택되고 간단하며 유연한 jsPDF를 이 튜토리얼에서 사용할 것입니다. 이 제품은 초보자에게 낮은 진입 장벽을 제공하며, 강력한 기능 세트를 갖추고 있어 다양한 사용 사례에 적합한 선택입니다. jsPDF와 함께 탐구할 원칙들은 여러분에게 PDF를 생성하기 위한 견고한 기초를 제공할 것이며, 프로젝트가 요구할 경우 다른 라이브러리를 더 쉽게 습득할 수 있게 해줄 것입니다.
이 튜토리얼을 시작하기 전에, 원활한 진행을 위해 필요한 도구와 지식을 충분히 갖추었는지 확인하는 것이 중요합니다. 이 튜토리얼을 진행하기 위한 필수 조건은 다음과 같습니다.
무엇보다 먼저, 사용자 인터페이스, 특히 단일 페이지 애플리케이션 구축에 널리 사용되는 JavaScript 라이브러리인 React에 대한 기본적인 이해가 있어야 합니다. React에서 JSX(JavaScript XML), 컴포넌트, 상태, 속성과 같은 개념에 익숙해야 합니다.
React 애플리케이션을 개발하려면 컴퓨터에 개발 환경을 구축해야 합니다. 여기에는 텍스트 편집기 또는 통합 개발 환경(IDE)이 포함됩니다. Visual Studio Code, Atom, Sublime Text와 같은 텍스트 편집기는 모두 좋은 선택입니다.
프로젝트와 그 종속성을 관리하기 위해 Node.js 와 npm(Node Package Manager)을 사용할 것입니다. 컴퓨터에 Node.js 설치되어 있는지 확인하십시오. Node.js 는 서버에서 JavaScript 실행할 수 있도록 해주는 JavaScript 런타임입니다. npm이 설치되어 있으므로 프로젝트에 필요한 라이브러리를 관리할 수 있습니다.
Node.js 와 npm이 설치되었는지 확인하려면 다음 터미널 명령어를 실행하세요.
node -v
npm -v다음 명령어를 실행하면 시스템에 설치된 Node.js 및 npm의 버전이 각각 표시됩니다. Node.js가 설치되어 있지 않거나 버전이 오래된 경우, 공식 다운로드 페이지 에서 최신 장기 지원(LTS) 버전의 Node.js 다운로드하여 설치해야 합니다.
먼저 React 프로젝트를 설정해 보겠습니다. 터미널을 열고 프로젝트를 생성하려는 디렉토리로 이동하세요. 다음 명령어를 실행하여 새로운 React 애플리케이션을 생성하세요.
npx create-react-app pdf-from-react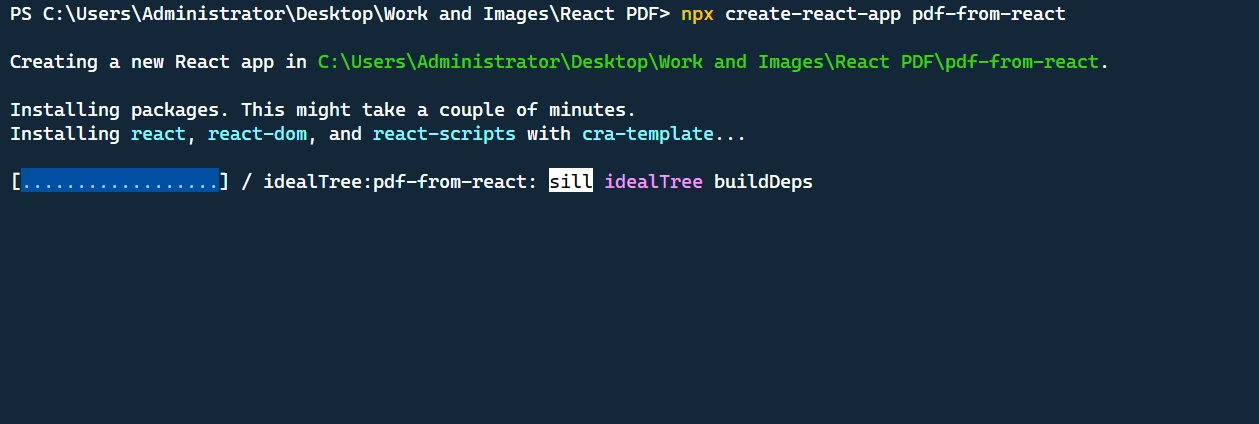
이 명령은 기본 React 프로젝트 구조를 가진 pdf-from-react라는 새 디렉토리를 생성합니다.
다음으로 프로젝트 디렉토리로 이동합니다.
cd pdf-from-react이제 코드 편집기에서 프로젝트를 열고 구현을 진행할 수 있습니다.
먼저 필요한 패키지를 설치해야 합니다. 다음 터미널 명령을 사용하여 react, react-dom, @mui/material, 및 jspdf를 설치합니다.
npm install jspdf @mui/material @emotion/react @emotion/styled @mui/icons-material먼저 애플리케이션에 필요한 종속성을 가져옵니다. 이 라이브러리에는 Material-UI의 다양한 컴포넌트와 PDF 생성 라이브러리 jsPDF, 그리고 스타일링 유틸리티가 포함됩니다.
import React, { useState } from "react";
import "./App.css";
import {
  Button,
  TextField,
  Box,
  Container,
  Typography,
  Table,
  TableBody,
  TableCell,
  TableContainer,
  TableHead,
  TableRow,
  Paper,
  IconButton,
  Snackbar,
  Alert,
} from "@mui/material";
import Grid from "@mui/material/Grid";
import DeleteIcon from "@mui/icons-material/Delete";
import jsPDF from "jspdf";
import { styled } from "@mui/material/styles";
import { tableCellClasses } from "@mui/material/TableCell";우리의 앱에 일관된 크로스 브라우저 동작을 추가하기 위해 MUI 라이브러리의 styled 유틸리티를 사용하여 StyledTableCell 및 StyledTableRow를 생성했습니다.
const StyledTableCell = styled(TableCell)(({ theme }) => ({
[`&.${tableCellClasses.head}`]: {
backgroundColor: theme.palette.common.black,
color: theme.palette.common.white,
},
[`&.${tableCellClasses.body}`]: {
fontSize: 14,
},
}));
const StyledTableRow = styled(TableRow)(({ theme }) => ({
"&:nth-of-type(odd)": {
backgroundColor: theme.palette.action.hover,
},
"&:last-child td, &:last-child th": {
border: 0,
},
}));우리 애플리케이션의 주요 컴포넌트는 App 컴포넌트입니다. 고객의 데이터를 추적하기 위한 customerName 및 customerAddress, 인보이스 항목 목록을 추적하는 items, 필요시 오류 메시지를 표시하는 error의 네 가지 상태 변수가 있습니다.
function App() {
// State variables
const [customerName, setCustomerName] = useState("");
const [customerAddress, setCustomerAddress] = useState("");
const [items, setItems] = useState([{ name: "", quantity: "", price: "" }]);
const [error, setError] = useState(false);이 코드 블록에서는 항목 세부 정보 변경, 새 항목 추가 및 항목 삭제와 같은 사용자 상호 작용을 처리하는 함수를 정의했습니다. handleItemChange 함수는 사용자가 수정한 항목의 속성을 업데이트합니다. addItem 함수는 목록에 새 항목을 추가합니다. deleteItem 함수는 목록에서 항목을 제거합니다.
const handleItemChange = (index, event) => {
let newItems = [...items];
newItems[index][event.target.name] = event.target.value;
setItems(newItems);
};
const addItem = () => {
setItems([...items, { name: "", quantity: "", price: "" }]);
};
const deleteItem = (index) => {
let newItems = [...items];
newItems.splice(index, 1);
setItems(newItems);
};다음은 generateInvoice 함수 코드입니다:
// Generate invoice
const generateInvoice = () => {
// Validate the input fields
if (
!customerName ||
!customerAddress ||
items.some((item) => !item.name || !item.quantity || !item.price)
) {
setError(true);
return;
}
// Create a new jsPDF instance
let doc = new jsPDF("p", "pt");
// Add invoice header
doc.setFontSize(24);
doc.text("Invoice", 40, 60);
doc.setFontSize(10);
doc.text("Invoice Number: 123456", 40, 90);
doc.text("Date: " + new Date().toDateString(), 40, 110);
doc.text(`Customer Name: ${customerName}`, 40, 130);
doc.text(`Customer Address: ${customerAddress}`, 40, 150);
// Add items section
doc.setFontSize(14);
doc.text("Items:", 40, 200);
doc.line(40, 210, 550, 210);
// Add item details
doc.setFontSize(12);
let yOffset = 240;
let total = 0;
items.forEach((item) => {
let itemTotal = item.quantity * item.price;
total += itemTotal;
doc.text(`Item: ${item.name}`, 40, yOffset);
doc.text(`Quantity: ${item.quantity}`, 200, yOffset);
doc.text(`Price: $${item.price}`, 300, yOffset);
doc.text(`Total: $${itemTotal}`, 400, yOffset);
yOffset += 20;
});
// Add total
doc.line(40, yOffset, 550, yOffset);
doc.setFontSize(14);
doc.text(`Total: $${total}`, 400, yOffset + 30);
// Save the generated PDF as "invoice.pdf"
doc.save("invoice.pdf");
// Reset error state
setError(false);
};generateInvoice 함수에서 먼저 입력 필드에 대한 검사를 수행하여 고객 이름, 고객 주소, 그리고 항목 세부 사항이 작성되었는지 확인합니다. 이 필드들 중 일부라도 비어있을 경우, 우리는 error 상태를 true로 설정하고 빨리 반환합니다.
다음으로, new jsPDF("p", "pt")를 호출하여 jsPDF의 새 인스턴스를 생성합니다. 첫 번째 인수 "p"는 페이지 방향을 세로 방향으로 지정하며, 두 번째 인수 "pt""는 측정 단위를 포인트로 지정합니다.
그다음에는 PDF 문서에 내용을 추가하기 시작합니다. doc.setFontSize를 사용하여 글꼴 크기를 설정하고, doc.text 메서드를 사용하여 페이지의 특정 좌표에 텍스트를 추가합니다. 송장 제목, 송장 번호, 날짜, 고객 이름 및 고객 주소를 포함한 송장 헤더를 추가합니다.
헤더 후에, 글꼴 크기를 설정하고 doc.line를 사용하여 항목과 헤더를 구분하기 위해 줄을 추가하여 "항목" 섹션을 추가합니다. 다음으로, 우리는 items 배열의 각 항목을 반복하면서 수량을 가격과 곱하여 각 항목의 총 가격을 계산합니다. 우리는 모든 항목 총액의 합계로 total 변수를 업데이트합니다.
각 항목에 대해, 우리는 doc.text를 사용하여 PDF 문서에 항목 이름, 수량, 가격, 항목 총액을 추가합니다. 우리는 각 항목에 대해 다음 줄로 이동하기 위해 yOffset 변수를 증가시킵니다. 마지막으로, 우리는 항목과 총액을 구분하기 위해 줄을 추가하고 문서 오른쪽 하단에 총액을 추가하기 위해 doc.text를 사용합니다.
내용이 추가되면, 우리는 doc.save("invoice.pdf")를 사용하여 생성된 PDF를 사용자 컴퓨터에 "invoice.pdf"로 저장합니다. 마지막으로, 이전의 유효성 검사 오류를 지우기 위해 error 상태를 false로 재설정합니다.
JSX 코드를 포함하는 return 문장은 렌더링 프로세스를 처리합니다. 여기에는 고객 이름과 주소를 입력하는 필드, 품목 세부 정보를 입력하는 표, 품목 추가 및 송장 생성 버튼, 유효성 검사 오류를 표시하는 오류 스낵바가 포함됩니다.
여기에는 기본 구성 요소를 만들기 위해 Material-UI 라이브러리의 Button, TextField, Box, Container, Typography, Table, TableBody, TableCell, TableContainer, TableHead, TableRow, Paper, IconButton, Snackbar, Alert와 같은 컴포넌트를 사용합니다. 이러한 구성 요소는 폼 필드, 테이블, 버튼 및 오류 알림을 만드는 데 사용됩니다.
return (
<Container maxWidth="md">
<Box sx={{my: 4}}>
<Typography variant="h3" component="h1" gutterBottom>
Create Invoice
</Typography>
{/* Customer Name and Address fields */}
<Grid container spacing={3}>
<Grid item xs={6}>
<TextField
label="Customer Name"
fullWidth
margin="normal"
value={customerName}
onChange={(e) => setCustomerName(e.target.value)}
/>
</Grid>
<Grid item xs={6}>
<TextField
label="Customer Address"
fullWidth
margin="normal"
value={customerAddress}
onChange={(e) => setCustomerAddress(e.target.value)}
/>
</Grid>
</Grid>
{/* Items table */}
<TableContainer component={Paper}>
<Table sx={{minWidth: 700}} aria-label="invoice table">
<TableHead>
<TableRow>
<StyledTableCell>Item Name</StyledTableCell>
<StyledTableCell align="left">Quantity</StyledTableCell>
<StyledTableCell align="left">Price</StyledTableCell>
<StyledTableCell align="left">Action</StyledTableCell>
</TableRow>
</TableHead>
<TableBody>
{items.map((item, index) => (
<StyledTableRow key={index}>
<StyledTableCell component="th" scope="row">
<TextField
fullWidth
value={item.name}
onChange={(event) => handleItemChange(index, event)}
name="name"
/>
</StyledTableCell>
<StyledTableCell align="right">
<TextField
fullWidth
value={item.quantity}
onChange={(event) => handleItemChange(index, event)}
name="quantity"
/>
</StyledTableCell>
<StyledTableCell align="right">
<TextField
fullWidth
value={item.price}
onChange={(event) => handleItemChange(index, event)}
name="price"
/>
</StyledTableCell>
<StyledTableCell align="right">
<IconButton onClick={() => deleteItem(index)}>
<DeleteIcon />
</IconButton>
</StyledTableCell>
</StyledTableRow>
))}
</TableBody>
</Table>
</TableContainer>
{/* Buttons */}
<Box mt={2} display="flex" gap={2}>
<Button variant="contained" onClick={addItem}>
Add Item
</Button>
<Button variant="outlined" color="success" onClick={generateInvoice}>
Generate Invoice
</Button>
</Box>
</Box>
{/* Error Snackbar */}
<Snackbar
open={error}
autoHideDuration={6000}
onClose={() => setError(false)}
anchorOrigin={{vertical: "top", horizontal: "right"}}
>
<Alert onClose={() => setError(false)} severity="error">
Please fill in all required fields.
</Alert>
</Snackbar>
</Container>
);여기에 여러분이 프로젝트에 복사하여 붙여넣을 수 있는 완전한 App.js 코드입니다:
import React, { useState } from "react";
import "./App.css";
import {
  Button,
  TextField,
  Box,
  Container,
  Typography,
  Table,
  TableBody,
  TableCell,
  TableContainer,
  TableHead,
  TableRow,
  Paper,
  IconButton,
  Snackbar,
  Alert,
} from "@mui/material";
import Grid from "@mui/material/Grid";
import DeleteIcon from "@mui/icons-material/Delete";
import jsPDF from "jspdf";
import { styled } from "@mui/material/styles";
import { tableCellClasses } from "@mui/material/TableCell";
const StyledTableCell = styled(TableCell)(({ theme }) => ({
  [`&.${tableCellClasses.head}`]: {
    backgroundColor: theme.palette.common.black,
    color: theme.palette.common.white,
  },
  [`&.${tableCellClasses.body}`]: {
    fontSize: 14,
  },
}));

const StyledTableRow = styled(TableRow)(({ theme }) => ({
  "&:nth-of-type(odd)": {
    backgroundColor: theme.palette.action.hover,
  },
  "&:last-child td, &:last-child th": {
    border: 0,
  },
}));
function App() {
  // State variables
  const [customerName, setCustomerName] = useState("");
  const [customerAddress, setCustomerAddress] = useState("");
  const [items, setItems] = useState([{ name: "", quantity: "", price: "" }]);
  const [error, setError] = useState(false);
// Event handler for item changes
const handleItemChange = (index, event) => {
let newItems = [...items];
newItems[index][event.target.name] = event.target.value;
setItems(newItems);
};
// Add new item to the list
const addItem = () => {
setItems([...items, { name: "", quantity: "", price: "" }]);
};
// Delete an item from the list
const deleteItem = (index) => {
let newItems = [...items];
newItems.splice(index, 1);
setItems(newItems);
};
// Generate invoice
const generateInvoice = () => {
  // Validate the input fields
  if (
    !customerName ||
    !customerAddress ||
    items.some((item) => !item.name || !item.quantity || !item.price)
  ) {
    setError(true);
    return;
  }

  // Create a new jsPDF instance
  let doc = new jsPDF("p", "pt");

  // Add invoice header
  doc.setFontSize(24);
  doc.text("Invoice", 40, 60);
  doc.setFontSize(10);
  doc.text("Invoice Number: 123456", 40, 90);
  doc.text("Date: " + new Date().toDateString(), 40, 110);
  doc.text(`Customer Name: ${customerName}`, 40, 130);
  doc.text(`Customer Address: ${customerAddress}`, 40, 150);

  // Add items section
  doc.setFontSize(14);
  doc.text("Items:", 40, 200);
  doc.line(40, 210, 550, 210);

  // Add item details
  doc.setFontSize(12);
  let yOffset = 240;
  let total = 0;

  items.forEach((item) => {
    let itemTotal = item.quantity * item.price;
    total += itemTotal;

    doc.text(`Item: ${item.name}`, 40, yOffset);
    doc.text(`Quantity: ${item.quantity}`, 200, yOffset);
    doc.text(`Price: $${item.price}`, 300, yOffset);
    doc.text(`Total: $${itemTotal}`, 400, yOffset);

    yOffset += 20;
  });

  // Add total
  doc.line(40, yOffset, 550, yOffset);
  doc.setFontSize(14);
  doc.text(`Total: $${total}`, 400, yOffset + 30);

  // Save the generated PDF as "invoice.pdf"
  doc.save("invoice.pdf");

  // Reset error state
  setError(false);
};
return (
  <Container maxWidth="md">
    <Box sx={{my: 4}}>
      <Typography variant="h3" component="h1" gutterBottom>
        Create Invoice
      </Typography>

      {/* Customer Name and Address fields */}
      <Grid container spacing={3}>
        <Grid item xs={6}>
          <TextField
            label="Customer Name"
            fullWidth
            margin="normal"
            value={customerName}
            onChange={(e) => setCustomerName(e.target.value)}
          />
        </Grid>
        <Grid item xs={6}>
          <TextField
            label="Customer Address"
            fullWidth
            margin="normal"
            value={customerAddress}
            onChange={(e) => setCustomerAddress(e.target.value)}
          />
        </Grid>
      </Grid>

      {/* Items table */}
      <TableContainer component={Paper}>
        <Table sx={{minWidth: 700}} aria-label="invoice table">
          <TableHead>
            <TableRow>
              <StyledTableCell>Item Name</StyledTableCell>
              <StyledTableCell align="left">Quantity</StyledTableCell>
              <StyledTableCell align="left">Price</StyledTableCell>
              <StyledTableCell align="left">Action</StyledTableCell>
            </TableRow>
          </TableHead>
          <TableBody>
            {items.map((item, index) => (
              <StyledTableRow key={index}>
                <StyledTableCell component="th" scope="row">
                  <TextField
                    fullWidth
                    value={item.name}
                    onChange={(event) => handleItemChange(index, event)}
                    name="name"
                  />
                </StyledTableCell>
                <StyledTableCell align="right">
                  <TextField
                    fullWidth
                    value={item.quantity}
                    onChange={(event) => handleItemChange(index, event)}
                    name="quantity"
                  />
                </StyledTableCell>
                <StyledTableCell align="right">
                  <TextField
                    fullWidth
                    value={item.price}
                    onChange={(event) => handleItemChange(index, event)}
                    name="price"
                  />
                </StyledTableCell>
                <StyledTableCell align="right">
                  <IconButton onClick={() => deleteItem(index)}>
                    <DeleteIcon />
                  </IconButton>
                </StyledTableCell>
              </StyledTableRow>
            ))}
          </TableBody>
        </Table>
      </TableContainer>

      {/* Buttons */}
      <Box mt={2} display="flex" gap={2}>
        <Button variant="contained" onClick={addItem}>
          Add Item
        </Button>
        <Button variant="outlined" color="success" onClick={generateInvoice}>
          Generate Invoice
        </Button>
      </Box>
    </Box>

    {/* Error Snackbar */}
    <Snackbar
      open={error}
      autoHideDuration={6000}
      onClose={() => setError(false)}
      anchorOrigin={{vertical: "top", horizontal: "right"}}
    >
      <Alert onClose={() => setError(false)} severity="error">
        Please fill in all required fields.
      </Alert>
    </Snackbar>
  </Container>
);
}
export default App;여기에 App.css 코드가 있습니다:
@import url('https://fonts.googleapis.com/css2?family=Poppins:wght@400;700&display=swap');
.App {
  text-align: center;
}

.App-logo {
  height: 40vmin;
  pointer-events: none;
}

@media (prefers-reduced-motion: no-preference) {
  .App-logo {
    animation: App-logo-spin infinite 20s linear;
  }
}

h1,
h2,
h3,
h4,
h5,
h6 {
  font-weight: bold;
  /* This is the weight for bold in Poppins */
  color: #FF6347;
  /* This is the color Tomato. Replace with your preferred color */
}

body {
  font-family: 'Poppins', sans-serif;
  background-color: #E9F8F4;
}

.App-header {
  background-color: #282c34;
  min-height: 100vh;
  display: flex;
  flex-direction: column;
  align-items: center;
  justify-content: center;
  font-size: calc(10px + 2vmin);
  color: white;
}

.App-link {
  color: #61dafb;
}

@keyframes App-logo-spin {
  from {
    transform: rotate(0deg);
  }
  to {
    transform: rotate(360deg);
  }
}PDF 생성 기능을 테스트하려면 터미널에서 다음 명령어를 실행하세요.
npm start개발 서버가 시작되며, http://localhost:3000에서 브라우저에서 애플리케이션을 볼 수 있습니다.
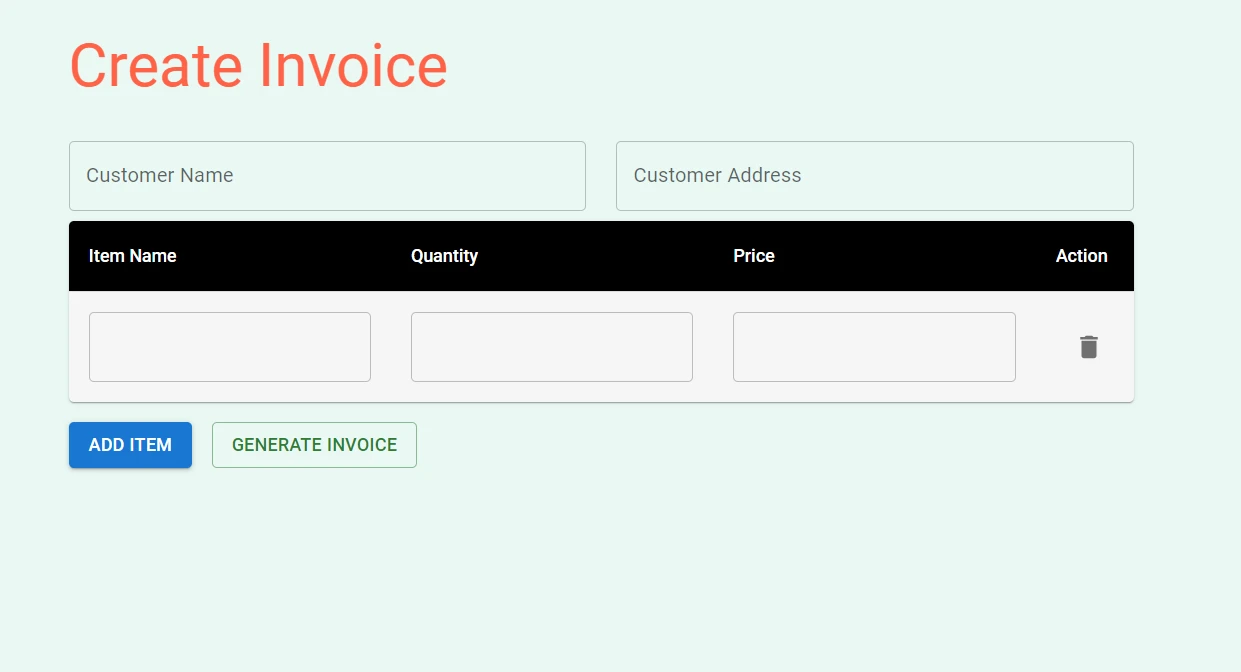
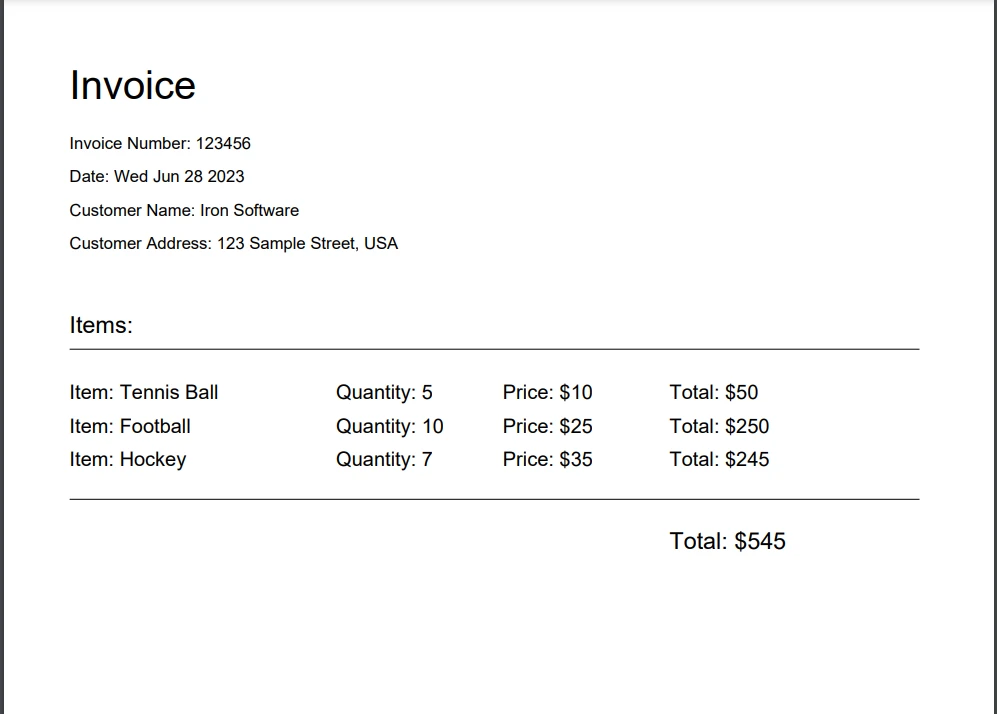
고객 이름, 주소 및 품목 정보를 입력란에 입력하고 "송장 생성" 버튼을 클릭하십시오. PDF 파일이 컴퓨터로 다운로드되며, 파일을 열어 생성된 청구서의 전체 페이지를 볼 수 있습니다.
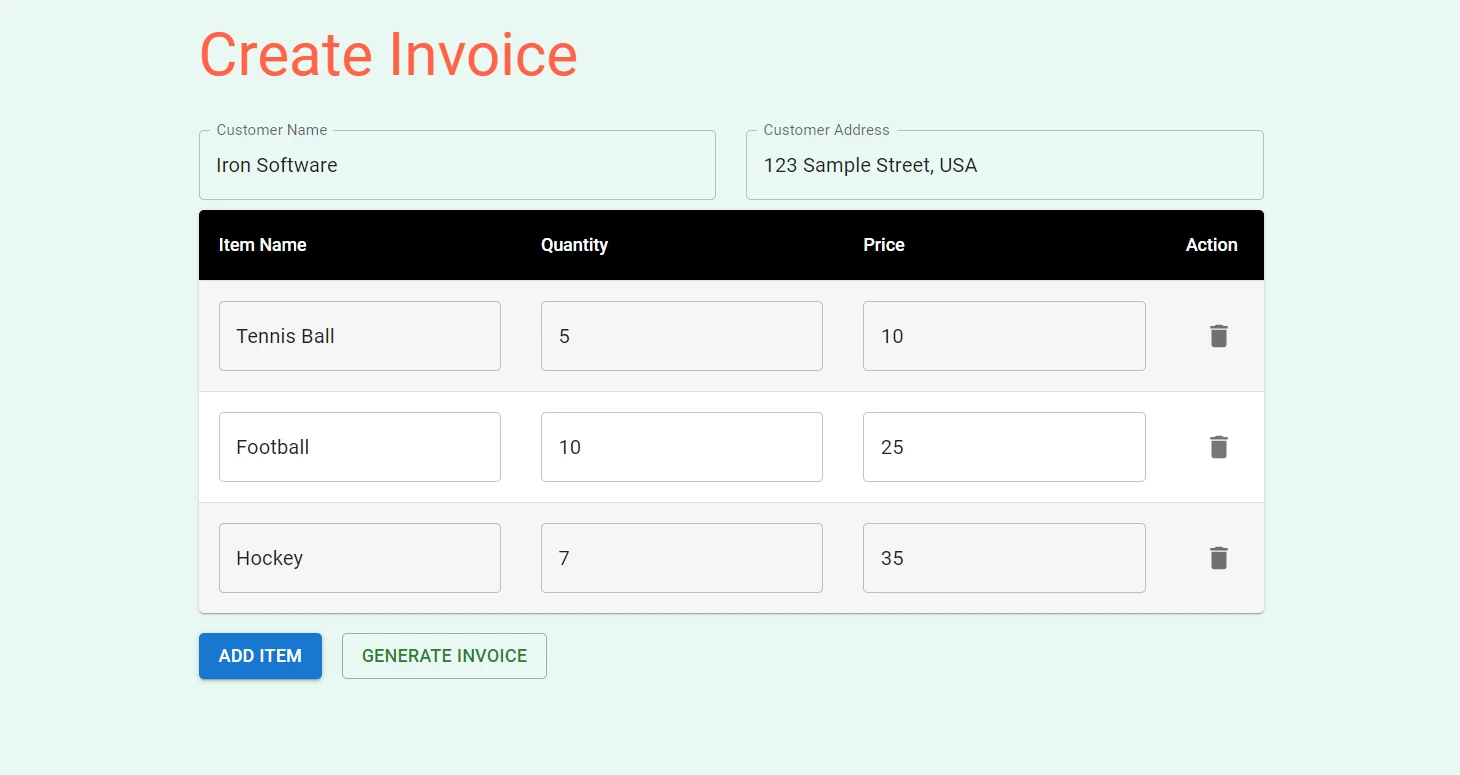
"송장 생성" 버튼을 클릭하면 PDF 파일이 생성됩니다.
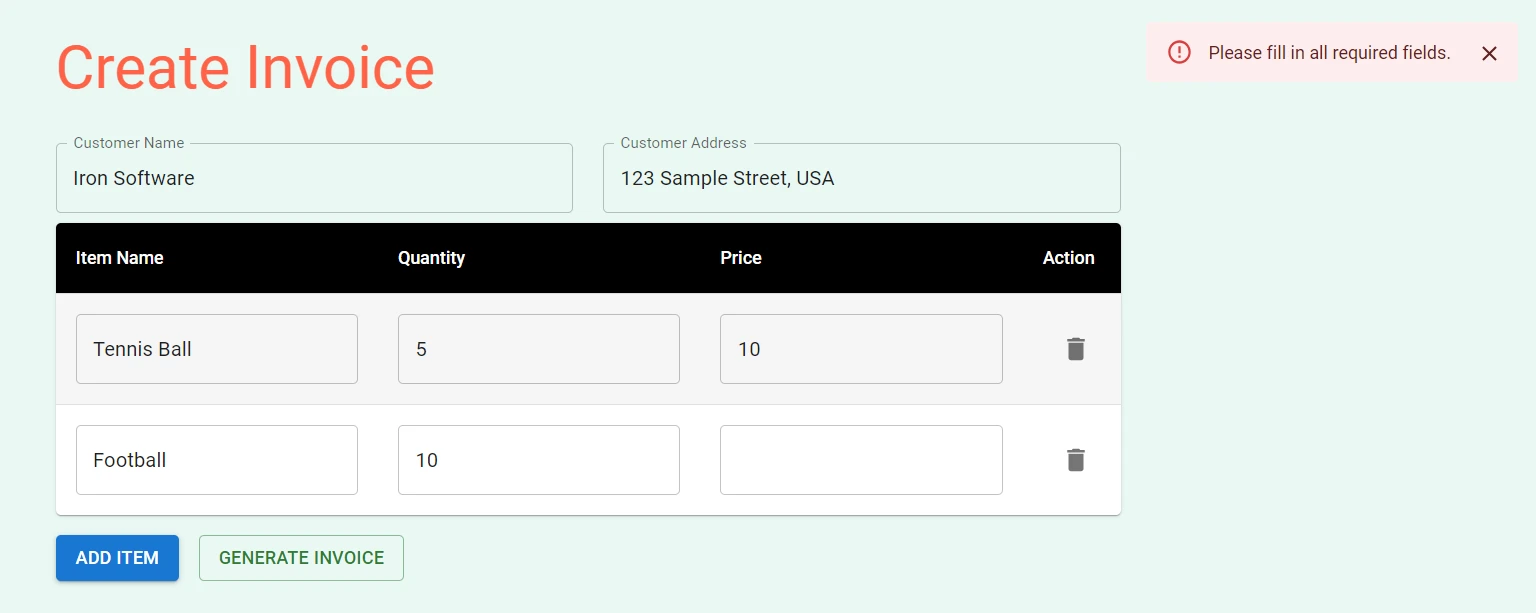
만약 어떤 필드라도 비워둔 채 PDF를 생성하려고 하면, 오른쪽 상단에 오류 메시지가 표시됩니다.
IronPDF Node.js용 는 정확성, 사용 편의성 및 속도 면에서 뛰어난 종합적인 Node.js PDF 라이브러리입니다. React를 사용하면 HTML, URL 및 이미지에서 직접 PDF를 생성, 편집 및 서식 지정하는 데 필요한 다양한 기능을 제공합니다. IronPDF Windows, MacOS, Linux, Docker, Azure 및 AWS와 같은 클라우드 플랫폼을 포함한 다양한 플랫폼을 지원하여 플랫폼 간 호환성을 보장합니다. 사용자 친화적인 API를 통해 개발자는 PDF 생성 및 조작 기능을 Node.js 프로젝트에 빠르게 통합할 수 있습니다.
IronPDF Node.js 의 주요 특징으로는 픽셀 단위까지 완벽한 렌더링, 다양한 서식 옵션, 그리고 PDF 병합 및 분할, 주석 추가, PDF 양식 생성과 같은 고급 편집 기능이 있습니다.
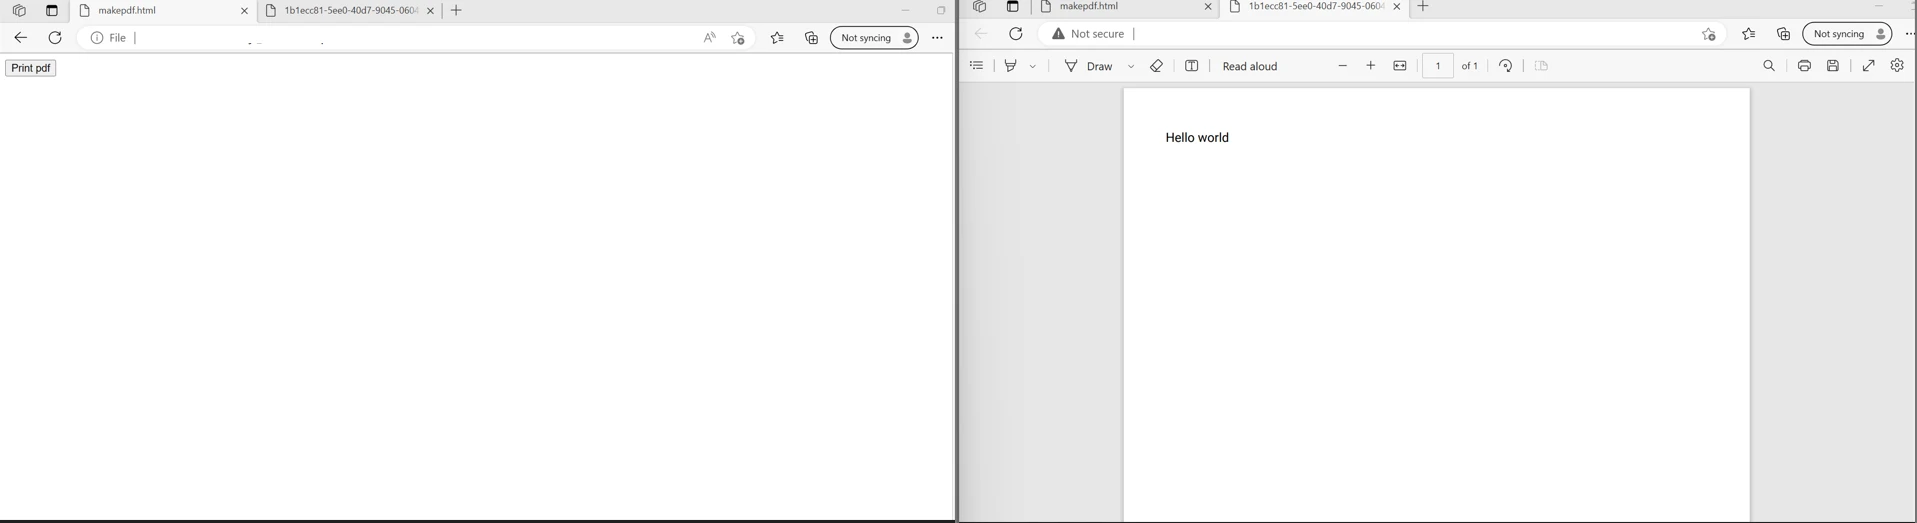
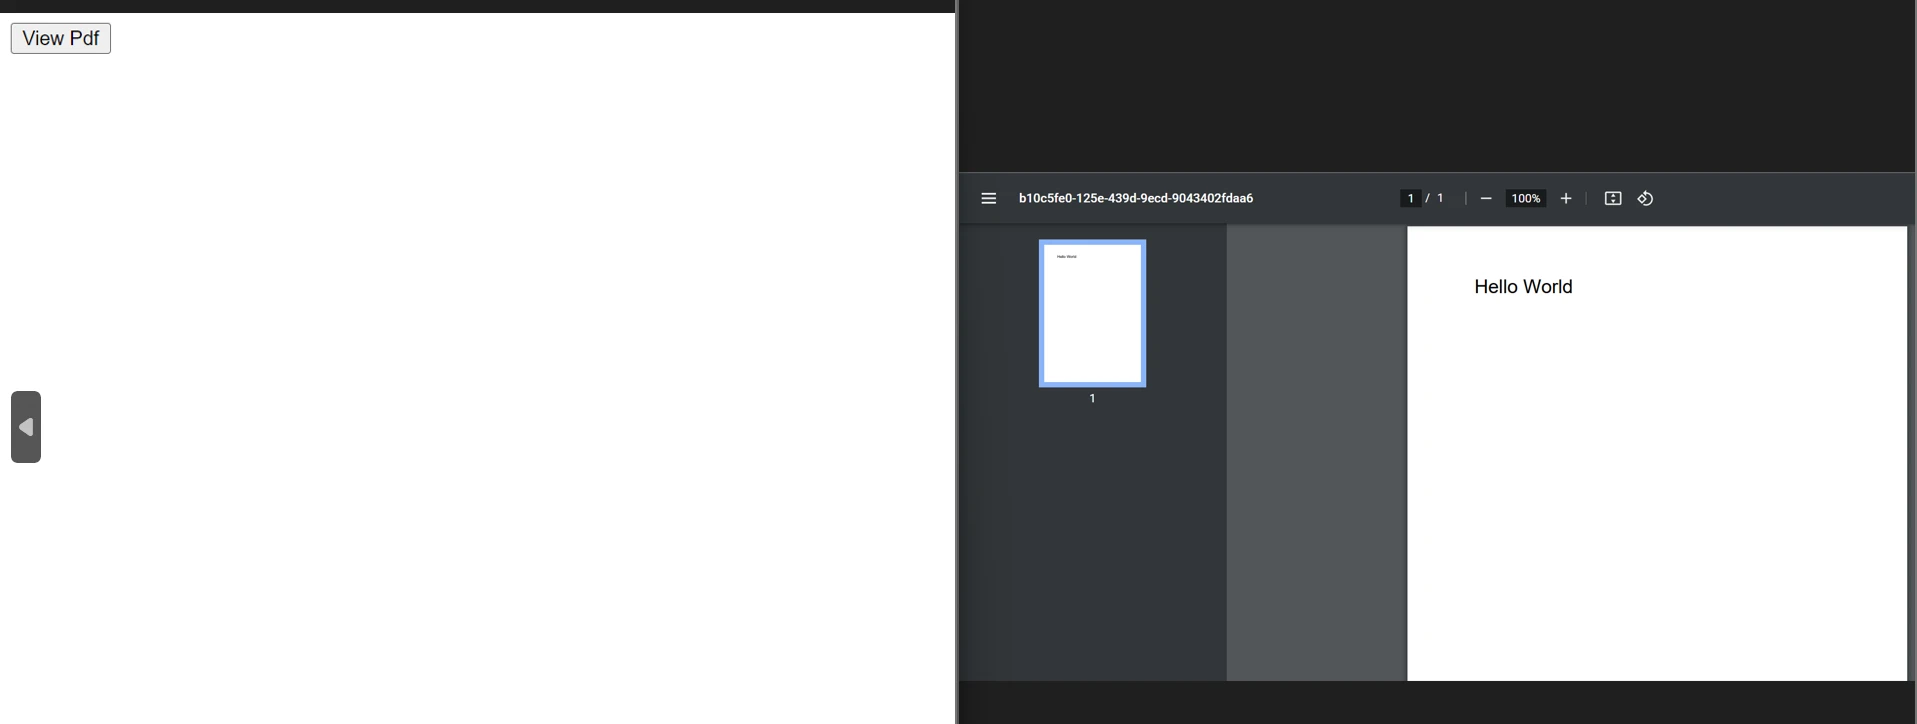
다음은 HTML 파일 , HTML 문자열 및 URL 에서 PDF 문서를 생성하는 예입니다.
import { PdfDocument } from "@ironsoftware/ironpdf";

(async () => {
  const pdfFromUrl = await PdfDocument.fromUrl("https://getbootstrap.com/");
  await pdfFromUrl.saveAs("website.pdf");

  const pdfFromHtmlFile = await PdfDocument.fromHtml("design.html");
  await pdfFromHtmlFile.saveAs("markup.pdf");

  const pdfFromHtmlString = await PdfDocument.fromHtml("<p>Hello World</p>");
  await pdfFromHtmlString.saveAs("markup_with_assets.pdf");
})();PDF 관련 작업에 대한 더 많은 코드 예제를 보려면 IronPDF 코드 예제 페이지를 방문하세요.
결론적으로, React 애플리케이션에서 PDF를 생성하는 것은 결코 어렵지 않습니다. 적절한 도구와 명확한 이해만 있다면, 아름답고 잘 구성된 PDF 문서를 손쉽게 생성할 수 있습니다. 우리는 각각의 강점과 독특한 기능을 가지고 있는 jsPDF, pdfmake, 그리고 React-PDF와 같은 다양한 라이브러리를 탐구했습니다.
IronPDF는 JavaScript 프레임워크 및 라이브러리와의 간편한 통합 프로세스, 훌륭한 문서 , 그리고 신속한 기술 지원을 통해 개발자들이 빠르게 개발을 시작할 수 있도록 지원하므로 Node.js 애플리케이션에서 전문가 수준의 PDF를 생성하는 데 최적의 선택입니다.
IronPDF 모든 기능을 무료로 체험해 볼 수 있는 평가판을 제공합니다. 이 기능은 C# .NET , Java , Python 과 같은 다른 언어에서도 사용할 수 있습니다. 자세한 내용은 IronPDF 웹사이트를 방문하세요.

커티스 차우는 칼턴 대학교에서 컴퓨터 과학 학사 학위를 취득했으며, Node.js, TypeScript, JavaScript, React를 전문으로 하는 프론트엔드 개발자입니다. 직관적이고 미적으로 뛰어난 사용자 인터페이스를 만드는 데 열정을 가진 그는 최신 프레임워크를 활용하고, 잘 구성되고 시각적으로 매력적인 매뉴얼을 제작하는 것을 즐깁니다.

IronPDF는 IRON SUITE 의 일부입니다.
10개의 .NET API 제품, 당신의 사무 문서를 위해

PDF 파일을 HTML처럼 빠르게 변환해야 할 때.