Blazor PDF Generator
- Create, import, and export PDF documents using C# and .NET
- Supports all .NET 10 technologies, including Blazor
- Add the IronPDF library to your Blazor Server App and start using it now
Try IronPDF’s .NET PDF Library
@using IronPdf;
public void ExportData()
{
try
{
string fileName = "Demo.pdf";
var Renderer = new IronPdf.ChromePdfRenderer();
var pdf = Renderer.RenderUrlAsPdf("https://localhost:7018/fetchdata");
JSRuntime.InvokeVoidAsync("saveAsFile", fileName, Convert.ToBase64String(pdf.Stream.ToArray()));
}
catch (Exception ex)
{
}
}
Imports IronPdf
Public Sub ExportData()
Try
Dim fileName As String = "Demo.pdf"
Dim Renderer = New IronPdf.ChromePdfRenderer()
Dim pdf = Renderer.RenderUrlAsPdf("https://localhost:7018/fetchdata")
JSRuntime.InvokeVoidAsync("saveAsFile", fileName, Convert.ToBase64String(pdf.Stream.ToArray()))
Catch ex As Exception
End Try
End SubIronPDF allows developers to create PDF documents easily in C#, F#, and VB.NET for .NET Core and .NET Framework.

In this example, we show that a PDF document can be rendered from any HTML. This allows us to create PDFs that closely match the branding of existing websites.
You can choose simple HTML like the above or incorporate CSS, images, and JavaScript.
This HTML to PDF conversion process also allows PDF design to be delegated to web designers, rather than being tasked to back-end coders.
IronPDF uses a pixel-perfect Chrome rendering engine to turn your HTML5 with CSS3 and JavaScript support into PDF documents. This can take the form of strings, external files, or external URLs, all of which can be rendered to PDF easily using IronPDF.
using IronPdf;
// Disable local disk access or cross-origin requests
Installation.EnableWebSecurity = true;
// Instantiate Renderer
var renderer = new ChromePdfRenderer();
// Create a PDF from a HTML string using C#
var pdf = renderer.RenderHtmlAsPdf("<h1>Hello World</h1>");
// Export to a file or Stream
pdf.SaveAs("output.pdf");
// Advanced Example with HTML Assets
// Load external html assets: Images, CSS and JavaScript.
// An optional BasePath 'C:\site\assets\' is set as the file location to load assets from
var myAdvancedPdf = renderer.RenderHtmlAsPdf("<img src='icons/iron.png'>", @"C:\site\assets\");
myAdvancedPdf.SaveAs("html-with-assets.pdf");
Imports IronPdf
' Disable local disk access or cross-origin requests
Installation.EnableWebSecurity = True
' Instantiate Renderer
Dim renderer As New ChromePdfRenderer()
' Create a PDF from a HTML string using C#
Dim pdf = renderer.RenderHtmlAsPdf("<h1>Hello World</h1>")
' Export to a file or Stream
pdf.SaveAs("output.pdf")
' Advanced Example with HTML Assets
' Load external html assets: Images, CSS and JavaScript.
' An optional BasePath 'C:\site\assets\' is set as the file location to load assets from
Dim myAdvancedPdf = renderer.RenderHtmlAsPdf("<img src='icons/iron.png'>", "C:\site\assets\")
myAdvancedPdf.SaveAs("html-with-assets.pdf")With IronPDF, you can create new PDF documents from simple HTML strings within your .NET project, and IronPDF is able to be used in C#, F#, and VB.NET. Thanks to the use of the ChromePdfRenderer class, you can be sure that any PDF documents you render from HTML strings will come out pixel-perfect. With IronPDF's powerful HTML to PDF conversion features, you create high-quality PDF files tailored to fit your personal needs.
The 4 Steps to Converting HTML String to PDF
- Import the IronPDF library.
- Initialize a new
ChromePdfRendererobject. - Use the
RenderHtmlAsPdfmethod. - Save the PDF using
PdfDocument.SaveAs.
See the code example below for more details:
The first step to converting an HTML string to a PDF in C# is ensuring that you have the IronPDF library properly set up and working within your project. By including using IronPdf, we make sure we can access the classes needed from the IronPDF library to carry out HTML to PDF conversion. The next line, Installation.EnableWebSecurity = true, is conceptually used to disable local disk access or cross-origin requests, ensuring secure operations. (Note: This line was missing from the example but usually pertains to configuration settings to secure PDF rendering operations.)
The example demonstrates how to create an instance of ChromePdfRenderer which handles the conversion of HTML to PDF. The RenderHtmlAsPdf method is used to convert a simple HTML string ("<h1>Hello World</h1>") into a PDF document. This document is saved to the disk using the SaveAs method.
In the advanced example, IronPDF is shown to handle HTML content containing external assets such as images, CSS, and JavaScript. To load these assets, the optional BasePath parameter is used, specifying the directory containing the required files. The resulting PDF, which includes the external assets, is saved using the same SaveAs method. This code example highlights IronPDF's ability to handle both basic and complex HTML content, making it an efficient tool for generating PDFs programmatically.
using IronPdf;
// Instantiate Renderer
var renderer = new ChromePdfRenderer();
// Create a PDF from a URL or local file path
var pdf = renderer.RenderUrlAsPdf("https://ironpdf.com/");
// Export to a file or Stream
pdf.SaveAs("url.pdf");
Imports IronPdf
' Instantiate Renderer
Dim renderer As New ChromePdfRenderer()
' Create a PDF from a URL or local file path
Dim pdf = renderer.RenderUrlAsPdf("https://ironpdf.com/")
' Export to a file or Stream
pdf.SaveAs("url.pdf")IronPDF makes it very straightforward to render HTML from existing URLs as PDF documents. There is a very high level of support for JavaScript, images, forms, and CSS.
Rendering PDFs from ASP.NET URLs that accept query string variables can facilitate smooth PDF development as a collaborative effort between designers and coders.
Steps to Convert URL to PDF in C#
- Download the IronPDF URL to PDF Conversion Library
- Install the library with NuGet to test its features
- Render PDFs from ASP.NET URLs that accept query string variables using
IronPDF - Create a PDF document directly from a URL with
IronPDF - View and validate your PDF output document easily.
using IronPdf;
using IronPdf.Engines.Chrome;
// Instantiate Renderer
var renderer = new ChromePdfRenderer();
// Many rendering options to use to customize!
renderer.RenderingOptions.SetCustomPaperSizeInInches(12.5, 20);
renderer.RenderingOptions.PrintHtmlBackgrounds = true;
renderer.RenderingOptions.PaperOrientation = IronPdf.Rendering.PdfPaperOrientation.Landscape;
renderer.RenderingOptions.Title = "My PDF Document Name";
renderer.RenderingOptions.EnableJavaScript = true;
renderer.RenderingOptions.WaitFor.RenderDelay(50); // in milliseconds
renderer.RenderingOptions.CssMediaType = IronPdf.Rendering.PdfCssMediaType.Screen;
renderer.RenderingOptions.FitToPaperMode = FitToPaperModes.Zoom;
renderer.RenderingOptions.Zoom = 100;
renderer.RenderingOptions.CreatePdfFormsFromHtml = true;
// Supports margin customization!
renderer.RenderingOptions.MarginTop = 40; //millimeters
renderer.RenderingOptions.MarginLeft = 20; //millimeters
renderer.RenderingOptions.MarginRight = 20; //millimeters
renderer.RenderingOptions.MarginBottom = 40; //millimeters
// Can set FirstPageNumber if you have a cover page
renderer.RenderingOptions.FirstPageNumber = 1; // use 2 if a cover page will be appended
// Settings have been set, we can render:
renderer.RenderHtmlFileAsPdf("assets/wikipedia.html").SaveAs("output/my-content.pdf");
Imports IronPdf
Imports IronPdf.Engines.Chrome
' Instantiate Renderer
Dim renderer = New ChromePdfRenderer()
' Many rendering options to use to customize!
renderer.RenderingOptions.SetCustomPaperSizeInInches(12.5, 20)
renderer.RenderingOptions.PrintHtmlBackgrounds = True
renderer.RenderingOptions.PaperOrientation = IronPdf.Rendering.PdfPaperOrientation.Landscape
renderer.RenderingOptions.Title = "My PDF Document Name"
renderer.RenderingOptions.EnableJavaScript = True
renderer.RenderingOptions.WaitFor.RenderDelay(50) ' in milliseconds
renderer.RenderingOptions.CssMediaType = IronPdf.Rendering.PdfCssMediaType.Screen
renderer.RenderingOptions.FitToPaperMode = FitToPaperModes.Zoom
renderer.RenderingOptions.Zoom = 100
renderer.RenderingOptions.CreatePdfFormsFromHtml = True
' Supports margin customization!
renderer.RenderingOptions.MarginTop = 40 'millimeters
renderer.RenderingOptions.MarginLeft = 20 'millimeters
renderer.RenderingOptions.MarginRight = 20 'millimeters
renderer.RenderingOptions.MarginBottom = 40 'millimeters
' Can set FirstPageNumber if you have a cover page
renderer.RenderingOptions.FirstPageNumber = 1 ' use 2 if a cover page will be appended
' Settings have been set, we can render:
renderer.RenderHtmlFileAsPdf("assets/wikipedia.html").SaveAs("output/my-content.pdf")IronPDF aims to be as flexible as possible for the developer.
In this C# PDF Generation Tutorial Example, we show the balance between providing an API that automates internal functionality and providing one that gives you control.
IronPDF supports many customizations for generated PDF files, including page sizing, page margins, header/footer content, content scaling, CSS rulesets, and JavaScript execution.
We want developers to be able to control how Chrome turns a web page into a PDF. The ChromePdfRenderer Class Overview makes this possible.
Examples of settings available on the ChromePdfRenderer class include settings for margins, headers, footers, paper size, and form creation.
- The code example above demonstrates how to create a PDF document from a web page using the IronPDF library.
- This involves setting up a
rendererwith specific options like paper size, margins, header, and footer. - The
ChromePdfRendererclass is used torenderthe URL to a PDF. - The resulting PDF document is then saved to a file named "output.pdf".
using IronPdf;
private void Form1_Load(object sender, EventArgs e)
{
//Changes the ASPX output into a pdf instead of HTML
IronPdf.AspxToPdf.RenderThisPageAsPdf();
}
Imports IronPdf
Private Sub Form1_Load(sender As Object, e As EventArgs) Handles MyBase.Load
'Changes the ASPX output into a pdf instead of HTML
AspxToPdf.RenderThisPageAsPdf()
End SubUsing the IronPDF library, ASP.NET web pages can be rendered to PDF instead of HTML by adding a single line of code to the Page_Load event.
This example shows how IronPDF can produce complex, data-driven PDFs that are designed and tested as HTML first for simplicity.
IronPDF's ASPX to PDF Conversion functionality allows you to call a single method within an ASPX page and have it return a PDF instead of HTML.
You can code the PDF to either display "in-browser," or to behave as a file download.
Learn How to Render ASPX Pages as PDFs with IronPDFusing IronPdf;
// Instantiate Renderer
var renderer = new ChromePdfRenderer();
// Create a PDF from an existing HTML file using C#
var pdf = renderer.RenderHtmlFileAsPdf("example.html");
// Export to a file or Stream
pdf.SaveAs("output.pdf");
Imports IronPdf
' Instantiate Renderer
Dim renderer As New ChromePdfRenderer()
' Create a PDF from an existing HTML file using VB
Dim pdf = renderer.RenderHtmlFileAsPdf("example.html")
' Export to a file or Stream
pdf.SaveAs("output.pdf")IronPDF is a powerful .NET library capable of converting HTML files into high-quality PDF files. With IronPDF, you can render HTML files to PDF in just a couple of lines, and thanks to its support for modern web standards, the resulting PDF files will come out pixel-perfect. Leveraging IronPDF's powerful HTML file to PDF feature is easy thanks to its use of the ChromePdfRenderer class, which handles the conversion of HTML to PDF with ease.
Steps to Convert HTML Files to PDF with IronPDF
- Install the C# IronPDF library to convert HTML to PDF
using IronPdf;var renderer = new ChromePdfRenderer();var pdf = renderer.RenderHtmlFileAsPdf("example.html");pdf.SaveAs("output.pdf");
This code creates a new PDF file that has been rendered from an HTML file. To do this, we must first ensure that the IronPDF library is installed and included within your project through the using IronPdf line. Next, initialize the ChromePdfRenderer class, which provides the functionality to render HTML content as a PDF. This class ensures that the original quality of the HTML file is not lost in the conversion process.
Once the renderer is instantiated, you can convert an existing HTML file into a PDF using the RenderHtmlFileAsPdf method. In this example, the HTML file "example.html" is passed to the method, creating a PDF object. Finally, to save the generated PDF, use the SaveAs method, specifying the desired file name and location. This simple process allows you to easily generate PDFs from HTML files in your C# applications.
using IronPdf;
var PdfOptions = new IronPdf.ChromePdfRenderOptions()
{
CreatePdfFormsFromHtml = true,
EnableJavaScript = false,
Title = "My ASPX Page Rendered as a PDF"
//.. many more options available
};
AspxToPdf.RenderThisPageAsPdf(AspxToPdf.FileBehavior.Attachment, "MyPdfFile.pdf", PdfOptions);
Imports IronPdf
Dim PdfOptions = New IronPdf.ChromePdfRenderOptions() With {
.CreatePdfFormsFromHtml = True,
.EnableJavaScript = False,
.Title = "My ASPX Page Rendered as a PDF"
'.. many more options available
}
AspxToPdf.RenderThisPageAsPdf(AspxToPdf.FileBehavior.Attachment, "MyPdfFile.pdf", PdfOptions)This example demonstrates how the user can change PDF print options to turn a form into HTML.
IronPDF's ASPX to PDF Conversion Guide functionality has many options available for rendering HTML to PDF from a string or a file.
Two options of particular importance are:
- Allowing developers to specify if
HTMLforms should be rendered as interactivePDFforms during conversion. - Allowing developers to specify if the
PDFshould be displayed "in browser," or as a file download.
PDF with IronPDFusing IronPdf;
using System.IO;
using System.Linq;
// One or more images as IEnumerable. This example selects all JPEG images in a specific 'assets' folder.
var imageFiles = Directory.EnumerateFiles("assets").Where(f => f.EndsWith(".jpg") || f.EndsWith(".jpeg"));
// Converts the images to a PDF and save it.
ImageToPdfConverter.ImageToPdf(imageFiles).SaveAs("composite.pdf");
// Also see PdfDocument.RasterizeToImageFiles() method to flatten a PDF to images or thumbnails
Imports IronPdf
Imports System.IO
Imports System.Linq
' One or more images as IEnumerable. This example selects all JPEG images in a specific 'assets' folder.
Dim imageFiles = Directory.EnumerateFiles("assets").Where(Function(f) f.EndsWith(".jpg") OrElse f.EndsWith(".jpeg"))
' Converts the images to a PDF and save it.
ImageToPdfConverter.ImageToPdf(imageFiles).SaveAs("composite.pdf")
' Also see PdfDocument.RasterizeToImageFiles() method to flatten a PDF to images or thumbnailsGiven a single image located on a computer at C:\images\example.png, you can quickly convert it into a PDF document by calling the IronPdf.ImageToPdfConverter.ImageToPdf method with its file path:
You can also convert multiple images into a single PDF document by passing a collection of image paths to ImageToPdfConverter.ImageToPdf:
To explore more about converting images to PDFs using IronPDF for enhancing your applications, or to discover the entire suite of developer tools offered by Iron Software, including IronBarcode, IronOCR, and more, visit the Iron Software website.
Learn to Convert Images to PDF with IronPDFSystem.IO.Directory.EnumerateFiles
ImageToPdfConverter.ImageToPdf
using IronPdf;
using System;
// Instantiate Renderer
var renderer = new IronPdf.ChromePdfRenderer();
// Build a footer using html to style the text
// mergeable fields are:
// {page} {total-pages} {url} {date} {time} {html-title} & {pdf-title}
renderer.RenderingOptions.HtmlFooter = new HtmlHeaderFooter()
{
MaxHeight = 15, //millimeters
HtmlFragment = "<center><i>{page} of {total-pages}<i></center>",
DrawDividerLine = true
};
// Use sufficient MarginBottom to ensure that the HtmlFooter does not overlap with the main PDF page content.
renderer.RenderingOptions.MarginBottom = 25; //mm
// Build a header using an image asset
// Note the use of BaseUrl to set a relative path to the assets
renderer.RenderingOptions.HtmlHeader = new HtmlHeaderFooter()
{
MaxHeight = 20, //millimeters
HtmlFragment = "<img src='logo.png'>",
BaseUrl = new Uri(@"C:\assets\images\").AbsoluteUri
};
// Use sufficient MarginTop to ensure that the HtmlHeader does not overlap with the main PDF page content.
renderer.RenderingOptions.MarginTop = 25; //mm
Imports IronPdf
Imports System
' Instantiate Renderer
Dim renderer = New IronPdf.ChromePdfRenderer()
' Build a footer using html to style the text
' mergeable fields are:
' {page} {total-pages} {url} {date} {time} {html-title} & {pdf-title}
renderer.RenderingOptions.HtmlFooter = New HtmlHeaderFooter() With {
.MaxHeight = 15, 'millimeters
.HtmlFragment = "<center><i>{page} of {total-pages}<i></center>",
.DrawDividerLine = True
}
' Use sufficient MarginBottom to ensure that the HtmlFooter does not overlap with the main PDF page content.
renderer.RenderingOptions.MarginBottom = 25 'mm
' Build a header using an image asset
' Note the use of BaseUrl to set a relative path to the assets
renderer.RenderingOptions.HtmlHeader = New HtmlHeaderFooter() With {
.MaxHeight = 20, 'millimeters
.HtmlFragment = "<img src='logo.png'>",
.BaseUrl = New Uri("C:\assets\images\").AbsoluteUri
}
' Use sufficient MarginTop to ensure that the HtmlHeader does not overlap with the main PDF page content.
renderer.RenderingOptions.MarginTop = 25 'mmHTML headers and footers provide a flexible method for creating dynamic headers and footers for your PDF documents. By adding headers and footers through this method, developers have complete control over how their headers and footers look, as they are rendered as independent HTML documents capable of containing their own assets and stylesheets.
Steps to Add Custom HTML Headers and Footers in a PDF with IronPDF
To begin with, you first need to create an instance of the ChromePdfRenderer class, which handles the rendering of HTML content into a pixel-perfect PDF document.
Next, define a footer using the HtmlHeaderFooter class, where you specify the MaxHeight, HTML content for the footer (which in our case includes page numbering), and base URL for image resolution. The footer is styled to display centered page information.
To avoid overlap between the footer and the PDF's main content, set a bottom margin using the MarginBottom property. Similarly, create a header that includes an image (such as a logo) by using the HtmlHeaderFooter class. Here we have set up a BaseUrl to the directory containing your image asset, allowing for proper image resolution during rendering.
Finally, use the MarginTop property to set a top margin that prevents overlap between the header and the content. This example demonstrates how easy it is to implement custom HTML headers and footers in your PDF documents with IronPDF.
using IronPdf;
// Initiate PDF Renderer
var renderer = new ChromePdfRenderer();
// Add a header to every page easily
renderer.RenderingOptions.FirstPageNumber = 1; // use 2 if a cover page will be appended
renderer.RenderingOptions.TextHeader.DrawDividerLine = true;
renderer.RenderingOptions.TextHeader.CenterText = "{url}";
renderer.RenderingOptions.TextHeader.Font = IronSoftware.Drawing.FontTypes.Helvetica;
renderer.RenderingOptions.TextHeader.FontSize = 12;
renderer.RenderingOptions.MarginTop = 25; //create 25mm space for header
// Add a footer too
renderer.RenderingOptions.TextFooter.DrawDividerLine = true;
renderer.RenderingOptions.TextFooter.Font = IronSoftware.Drawing.FontTypes.Arial;
renderer.RenderingOptions.TextFooter.FontSize = 10;
renderer.RenderingOptions.TextFooter.LeftText = "{date} {time}";
renderer.RenderingOptions.TextFooter.RightText = "{page} of {total-pages}";
renderer.RenderingOptions.MarginTop = 25; //create 25mm space for footer
// Mergeable fields are:
// {page} {total-pages} {url} {date} {time} {html-title} & {pdf-title}
Imports IronPdf
' Initiate PDF Renderer
Dim renderer = New ChromePdfRenderer()
' Add a header to every page easily
renderer.RenderingOptions.FirstPageNumber = 1 ' use 2 if a cover page will be appended
renderer.RenderingOptions.TextHeader.DrawDividerLine = True
renderer.RenderingOptions.TextHeader.CenterText = "{url}"
renderer.RenderingOptions.TextHeader.Font = IronSoftware.Drawing.FontTypes.Helvetica
renderer.RenderingOptions.TextHeader.FontSize = 12
renderer.RenderingOptions.MarginTop = 25 'create 25mm space for header
' Add a footer too
renderer.RenderingOptions.TextFooter.DrawDividerLine = True
renderer.RenderingOptions.TextFooter.Font = IronSoftware.Drawing.FontTypes.Arial
renderer.RenderingOptions.TextFooter.FontSize = 10
renderer.RenderingOptions.TextFooter.LeftText = "{date} {time}"
renderer.RenderingOptions.TextFooter.RightText = "{page} of {total-pages}"
renderer.RenderingOptions.MarginTop = 25 'create 25mm space for footer
' Mergeable fields are:
' {page} {total-pages} {url} {date} {time} {html-title} & {pdf-title}There are two methods through which headers and footers may be added to a PDF document. They can either be added as a classic text format, with the option to merge in dynamic data. Or, they can be added through the much more flexible HTML format, which allows developers to render dynamic headers and footers through their HTML content.
Steps to Add Headers and Footers to PDFs with IronPDF
Today we will be looking at how you can add classic text headers and footers into your PDF documents in just a few simple steps. The first step towards adding customized headers and footers into your PDF documents is to ensure that the IronPdf library is included in your project with the using IronPdf; statement. Then, instantiate the ChromePdfRenderer, which provides the functionality to render your HTML content in pixel-perfect PDF documents.
Next, configure the header settings. The FirstPageNumber property allows you to specify the starting page number, accommodating for a cover page if needed. The TextHeader properties enable you to customize the appearance, such as drawing a divider line, centering text (in this case, the document URL), selecting the font type and size, and creating a margin at the top of the page for the header.
After configuring the header, set up the footer using the TextFooter properties. Similar to the header, you can draw a divider line, choose the font type and size, and include dynamic content like the current date, time, and page numbers with total pages. Finally, a margin is created at the bottom of the page to accommodate the footer.
By following these steps, you can enhance your PDF documents with informative headers and footers that improve their professionalism and readability.
Discover How to Add Headers and Footers with IronPDFusing IronPdf;
using System.Collections.Generic;
// Instantiate Renderer
var renderer = new ChromePdfRenderer();
// Join Multiple Existing PDFs into a single document
var pdfs = new List<PdfDocument>();
pdfs.Add(PdfDocument.FromFile("A.pdf"));
pdfs.Add(PdfDocument.FromFile("B.pdf"));
pdfs.Add(PdfDocument.FromFile("C.pdf"));
var pdf = PdfDocument.Merge(pdfs);
pdf.SaveAs("merged.pdf");
// Add a cover page
pdf.PrependPdf(renderer.RenderHtmlAsPdf("<h1>Cover Page</h1><hr>"));
// Remove the last page from the PDF and save again
pdf.RemovePage(pdf.PageCount - 1);
pdf.SaveAs("merged.pdf");
// Copy pages 5-7 and save them as a new document.
pdf.CopyPages(4, 6).SaveAs("excerpt.pdf");
foreach (var eachPdf in pdfs)
{
eachPdf.Dispose();
}
Imports IronPdf
Imports System.Collections.Generic
' Instantiate Renderer
Dim renderer = New ChromePdfRenderer()
' Join Multiple Existing PDFs into a single document
Dim pdfs = New List(Of PdfDocument)()
pdfs.Add(PdfDocument.FromFile("A.pdf"))
pdfs.Add(PdfDocument.FromFile("B.pdf"))
pdfs.Add(PdfDocument.FromFile("C.pdf"))
Dim pdf = PdfDocument.Merge(pdfs)
pdf.SaveAs("merged.pdf")
' Add a cover page
pdf.PrependPdf(renderer.RenderHtmlAsPdf("<h1>Cover Page</h1><hr>"))
' Remove the last page from the PDF and save again
pdf.RemovePage(pdf.PageCount - 1)
pdf.SaveAs("merged.pdf")
' Copy pages 5-7 and save them as a new document.
pdf.CopyPages(4, 6).SaveAs("excerpt.pdf")
For Each eachPdf In pdfs
eachPdf.Dispose()
NextIronPDF offers 50+ features for reading and editing PDFs. The most popular are merging PDFs, cloning pages, and extracting text from rotated content.
IronPDF also allows its users to add watermarks, rotate pages, add annotations, digitally sign PDF pages, create new PDF documents, attach cover pages, customize PDF sizes, and much more when generating and formatting PDF files. Moreover, it supports conversion of PDFs into all conventional image file types, including JPG, BMP, JPEG, GIF, PNG, TIFF, etc.
Read the C# PDF editing tutorial to learn how to make full use of IronPDF to modify PDF documents to best suit project requirements.
How to Edit PDF files in C#
- Install the C# library that can edit PDF files
- Utilize
FromFilemethod to import multiple PDF files - Access and modify PDF file using intuitive APIs in C#
- Save the updated version as a new PDF using C#
- View the newly edited PDF document
using IronPdf;
// Open an Encrypted File, alternatively create a new PDF from Html
var pdf = PdfDocument.FromFile("encrypted.pdf", "password");
// Get file metadata
System.Collections.Generic.List<string> metadatakeys = pdf.MetaData.Keys(); // returns {"Title", "Creator", ...}
// Remove file metadata
pdf.MetaData.RemoveMetaDataKey("Title");
metadatakeys = pdf.MetaData.Keys(); // return {"Creator", ...} // title was deleted
// Edit file metadata
pdf.MetaData.Author = "Satoshi Nakamoto";
pdf.MetaData.Keywords = "SEO, Friendly";
pdf.MetaData.ModifiedDate = System.DateTime.Now;
// The following code makes a PDF read only and will disallow copy & paste and printing
pdf.SecuritySettings.RemovePasswordsAndEncryption();
pdf.SecuritySettings.MakePdfDocumentReadOnly("secret-key");
pdf.SecuritySettings.AllowUserAnnotations = false;
pdf.SecuritySettings.AllowUserCopyPasteContent = false;
pdf.SecuritySettings.AllowUserFormData = false;
pdf.SecuritySettings.AllowUserPrinting = IronPdf.Security.PdfPrintSecurity.FullPrintRights;
// Change or set the document encryption password
pdf.SecuritySettings.OwnerPassword = "top-secret"; // password to edit the pdf
pdf.SecuritySettings.UserPassword = "sharable"; // password to open the pdf
pdf.SaveAs("secured.pdf");
Imports IronPdf
' Open an Encrypted File, alternatively create a new PDF from Html
Dim pdf = PdfDocument.FromFile("encrypted.pdf", "password")
' Get file metadata
Dim metadatakeys As System.Collections.Generic.List(Of String) = pdf.MetaData.Keys() ' returns {"Title", "Creator", ...}
' Remove file metadata
pdf.MetaData.RemoveMetaDataKey("Title")
metadatakeys = pdf.MetaData.Keys() ' return {"Creator", ...} ' title was deleted
' Edit file metadata
pdf.MetaData.Author = "Satoshi Nakamoto"
pdf.MetaData.Keywords = "SEO, Friendly"
pdf.MetaData.ModifiedDate = System.DateTime.Now
' The following code makes a PDF read only and will disallow copy & paste and printing
pdf.SecuritySettings.RemovePasswordsAndEncryption()
pdf.SecuritySettings.MakePdfDocumentReadOnly("secret-key")
pdf.SecuritySettings.AllowUserAnnotations = False
pdf.SecuritySettings.AllowUserCopyPasteContent = False
pdf.SecuritySettings.AllowUserFormData = False
pdf.SecuritySettings.AllowUserPrinting = IronPdf.Security.PdfPrintSecurity.FullPrintRights
' Change or set the document encryption password
pdf.SecuritySettings.OwnerPassword = "top-secret" ' password to edit the pdf
pdf.SecuritySettings.UserPassword = "sharable" ' password to open the pdf
pdf.SaveAs("secured.pdf")IronPDF provides developers with strong PDF security options, supporting the customization and setting of PDF metadata, passwords, permissions, and more. With IronPDF's passwords, security, and metadata options, you can create custom permissions and security levels to fit the needs of your PDF document. This is done thanks to the use of classes such as the SecuritySettings and MetaData classes. Some options include limiting the PDF documents to be unprintable, setting them to read-only, and 128-bit encryption, and password protection of your PDF documents.
Setting custom metadata works by implementing the MetaData class to access the various PDF metadata options, and setting them with your customized values. This includes changing the author, keywords, modified data, and more. Setting custom security settings includes the ability to set custom user and owner passwords, printing permissions, read-only mode, and more.
5 Steps to setting PDF passwords, metadata, and security
var pdf = PdfDocument.FromFile("encrypted.pdf", "password");System.Collections.Generic.List<string> metadatakeys = pdf.MetaData.Keys;var metadatakeys = pdf.MetaData.Keys;pdf.MetaData.Author = "Satoshi Nakamoto";pdf.SecuritySettings.MakePdfDocumentReadOnly("secret-key");
In order to begin customizing the security of your PDF documents, you must first load an existing PDF or create a new one. Here, we have loaded an existing password-protected PDF document, where we have input the password needed to open the PDF document. Once the PDF is loaded, we then use pdf.MetaData.Keys to get the PDF's current metadata. To remove existing PDF metadata values, use the RemoveMetaDataKey method. To begin setting new metadata values, use pdf.MetaData.metadataField (e.g., pdf.MetaData.Keywords), and then just assign the new value to it. Metadata fields such as Title and Keywords take string values, whereas the ModifiedDate field takes datetime values.
Next, we have set new security settings using the SecuritySettings class. As you can see, there are a variety of settings that you can set here. This gives you full control over the permissions and security levels for each PDF document you work with. To access these settings, you just need to make sure you use pdf.SecuritySettings, followed by the setting you want to adjust. For example, the MakePdfDocumentReadOnly method sets the PDF document to be read-only, encrypting the content at 128-bit. Other options for SecuritySettings include:
AllowUserAnnotations: Controls whether or not users can annotate the PDF.AllowUserPrinting: Controls printing permissions for the document.AllowUserFormData: Sets the permissions for whether users can fill in forms.OwnerPassword: Sets the owner password for the PDF, which is used to disable or enable the other security settings.UserPassword: Sets the user password for the PDF, which must be entered in order to open or print the document.
Once you have set the custom metadata, passwords, and security settings for your PDF document, use the pdf.SaveAs method to save your PDF to a specified location.
using IronPdf;
// Stamps a Watermark onto a new or existing PDF
var renderer = new ChromePdfRenderer();
var pdf = renderer.RenderUrlAsPdf("https://www.nuget.org/packages/IronPdf");
pdf.ApplyWatermark("<h2 style='color:red'>SAMPLE</h2>", 30, IronPdf.Editing.VerticalAlignment.Middle, IronPdf.Editing.HorizontalAlignment.Center);
pdf.SaveAs("watermarked.pdf");
Imports IronPdf
' Stamps a Watermark onto a new or existing PDF
Dim renderer = New ChromePdfRenderer()
Dim pdf = renderer.RenderUrlAsPdf("https://www.nuget.org/packages/IronPdf")
pdf.ApplyWatermark("<h2 style='color:red'>SAMPLE</h2>", 30, IronPdf.Editing.VerticalAlignment.Middle, IronPdf.Editing.HorizontalAlignment.Center)
pdf.SaveAs("watermarked.pdf")IronPDF provides methods to 'watermark' PDF documents with HTML.
Using the ApplyWatermark method, developers can add an HTML-based watermark to a PDF file. As shown in the example above, the HTML code for the watermark goes as the first argument to the method. Additional arguments to ApplyWatermark control the opacity, rotation, and alignment of the watermark.
Use the ApplyWatermark method for a quick way to overlay an HTML watermark on a PDF. For example, use ApplyWatermark to:
- Add HTML (text or image) watermarks to PDFs
- Apply the watermark across the pages of the PDF
- Set the opacity of the watermark
- Adjust the rotation and alignment of the watermark
How to Add Watermarks to PDF Files in C#
- Download and install the IronPDF library from NuGet.
- Create a new
PdfDocumentor use an existingPdfDocumentfile. - Call the
ApplyWatermarkmethod to add watermarks to the PDF. - Export the PDF file by calling
SaveAs.
Example C# Code to Apply a Watermark Using IronPDF
Ensure you have installed the IronPDF library in your project. You can find more detailed instructions on the IronPDF NuGet package page.
Explanation of the Code:
- We start by importing the
IronPdflibrary, which provides all necessary classes and methods for PDF manipulation. - A PDF document is created or loaded using
PdfDocument.FromFile, specifying the file path of the existing PDF. - HTML content is defined for the watermark. In this case, the watermark displays "Confidential" with specific styling.
- The
ApplyWatermarkmethod is used to overlay the watermark on the PDF. Its arguments allow for customization:- The first argument is the HTML content of the watermark.
opacity: Determines the transparency of the watermark.- The vertical and horizontal alignment arguments position the watermark on the page.
- Finally, the
SaveAsmethod exports the modified PDF to a new file.
In conclusion, the IronPDF ApplyWatermark method allows for straightforward watermarking of PDF documents using HTML. This approach is flexible, accommodating various customization needs for positioning, styling, and opacity of watermarks.
using IronPdf;
// With IronPDF, we can easily merge 2 PDF files using one as a background or foreground
var renderer = new ChromePdfRenderer();
var pdf = renderer.RenderUrlAsPdf("https://www.nuget.org/packages/IronPdf");
pdf.AddBackgroundPdf(@"MyBackground.pdf");
pdf.AddForegroundOverlayPdfToPage(0, @"MyForeground.pdf", 0);
pdf.SaveAs("complete.pdf");
Imports IronPdf
' With IronPDF, we can easily merge 2 PDF files using one as a background or foreground
Dim renderer = New ChromePdfRenderer()
Dim pdf = renderer.RenderUrlAsPdf("https://www.nuget.org/packages/IronPdf")
pdf.AddBackgroundPdf("MyBackground.pdf")
pdf.AddForegroundOverlayPdfToPage(0, "MyForeground.pdf", 0)
pdf.SaveAs("complete.pdf")You may want to use a specific background and foreground as you create and render your PDF documents in IronPDF. In such a case, you can use an existing or rendered PDF as the background or foreground for another PDF document. This is particularly useful for design consistency and templating.
This example shows you how to use a PDF document as the background or foreground of another PDF document.
You can do this in C# by loading or creating a multi-page PDF as an IronPdf.PdfDocument object.
You can add backgrounds using PdfDocument.AddBackgroundPdf. For more details on background insertion methods, refer to the IronPDF.PdfDocument background documentation; it describes several background insertion methods and their overrides. This adds a background to each page of your working PDF. The background is copied from a page in another PDF document.
You can add foregrounds, also known as "Overlays," using PdfDocument.AddForegroundOverlayPdfToPage. For detailed information on foreground insertion methods, consult the IronPDF.PdfDocument overlay documentation.
This code illustrates how to integrate additional design elements on top of a base PDF using IronPDF. Always refer to the official documentation for more advanced techniques and additional options.
Explore our Guide on Adding Backgrounds and Foregroundsusing IronPdf;
using System;
// Step 1. Creating a PDF with editable forms from HTML using form and input tags
// Radio Button and Checkbox can also be implemented with input type 'radio' and 'checkbox'
const string formHtml = @"
<html>
<body>
<h2>Editable PDF Form</h2>
<form>
First name: <br> <input type='text' name='firstname' value=''> <br>
Last name: <br> <input type='text' name='lastname' value=''> <br>
<br>
<p>Please specify your gender:</p>
<input type='radio' id='female' name='gender' value= 'Female'>
<label for='female'>Female</label> <br>
<br>
<input type='radio' id='male' name='gender' value='Male'>
<label for='male'>Male</label> <br>
<br>
<input type='radio' id='non-binary/other' name='gender' value='Non-Binary / Other'>
<label for='non-binary/other'>Non-Binary / Other</label>
<br>
<p>Please select all medical conditions that apply:</p>
<input type='checkbox' id='condition1' name='Hypertension' value='Hypertension'>
<label for='condition1'> Hypertension</label><br>
<input type='checkbox' id='condition2' name='Heart Disease' value='Heart Disease'>
<label for='condition2'> Heart Disease</label><br>
<input type='checkbox' id='condition3' name='Stoke' value='Stoke'>
<label for='condition3'> Stoke</label><br>
<input type='checkbox' id='condition4' name='Diabetes' value='Diabetes'>
<label for='condition4'> Diabetes</label><br>
<input type='checkbox' id='condition5' name='Kidney Disease' value='Kidney Disease'>
<label for='condition5'> Kidney Disease</label><br>
</form>
</body>
</html>";
// Instantiate Renderer
var renderer = new ChromePdfRenderer();
renderer.RenderingOptions.CreatePdfFormsFromHtml = true;
renderer.RenderHtmlAsPdf(formHtml).SaveAs("BasicForm.pdf");
// Step 2. Reading and Writing PDF form values.
var FormDocument = PdfDocument.FromFile("BasicForm.pdf");
// Set and Read the value of the "firstname" field
var FirstNameField = FormDocument.Form.FindFormField("firstname");
FirstNameField.Value = "Minnie";
Console.WriteLine("FirstNameField value: {0}", FirstNameField.Value);
// Set and Read the value of the "lastname" field
var LastNameField = FormDocument.Form.FindFormField("lastname");
LastNameField.Value = "Mouse";
Console.WriteLine("LastNameField value: {0}", LastNameField.Value);
FormDocument.SaveAs("FilledForm.pdf");
Imports IronPdf
Imports System
' Step 1. Creating a PDF with editable forms from HTML using form and input tags
' Radio Button and Checkbox can also be implemented with input type 'radio' and 'checkbox'
Const formHtml As String = "
<html>
<body>
<h2>Editable PDF Form</h2>
<form>
First name: <br> <input type='text' name='firstname' value=''> <br>
Last name: <br> <input type='text' name='lastname' value=''> <br>
<br>
<p>Please specify your gender:</p>
<input type='radio' id='female' name='gender' value= 'Female'>
<label for='female'>Female</label> <br>
<br>
<input type='radio' id='male' name='gender' value='Male'>
<label for='male'>Male</label> <br>
<br>
<input type='radio' id='non-binary/other' name='gender' value='Non-Binary / Other'>
<label for='non-binary/other'>Non-Binary / Other</label>
<br>
<p>Please select all medical conditions that apply:</p>
<input type='checkbox' id='condition1' name='Hypertension' value='Hypertension'>
<label for='condition1'> Hypertension</label><br>
<input type='checkbox' id='condition2' name='Heart Disease' value='Heart Disease'>
<label for='condition2'> Heart Disease</label><br>
<input type='checkbox' id='condition3' name='Stoke' value='Stoke'>
<label for='condition3'> Stoke</label><br>
<input type='checkbox' id='condition4' name='Diabetes' value='Diabetes'>
<label for='condition4'> Diabetes</label><br>
<input type='checkbox' id='condition5' name='Kidney Disease' value='Kidney Disease'>
<label for='condition5'> Kidney Disease</label><br>
</form>
</body>
</html>"
' Instantiate Renderer
Dim renderer = New ChromePdfRenderer()
renderer.RenderingOptions.CreatePdfFormsFromHtml = True
renderer.RenderHtmlAsPdf(formHtml).SaveAs("BasicForm.pdf")
' Step 2. Reading and Writing PDF form values.
Dim FormDocument = PdfDocument.FromFile("BasicForm.pdf")
' Set and Read the value of the "firstname" field
Dim FirstNameField = FormDocument.Form.FindFormField("firstname")
FirstNameField.Value = "Minnie"
Console.WriteLine("FirstNameField value: {0}", FirstNameField.Value)
' Set and Read the value of the "lastname" field
Dim LastNameField = FormDocument.Form.FindFormField("lastname")
LastNameField.Value = "Mouse"
Console.WriteLine("LastNameField value: {0}", LastNameField.Value)
FormDocument.SaveAs("FilledForm.pdf")Your business is spending too much on yearly subscriptions for PDF security and compliance. Consider IronSecureDoc, a Comprehensive PDF Security Solution, which provides solutions for managing SaaS services like digital signing, redaction, encryption, and protection, all for a one-time payment. Explore IronSecureDoc Documentation.
You can create editable PDF documents with IronPDF as easily as a normal document. The PdfForm class is a collection of user-editable form fields within a PDF document. It can be implemented into your PDF render to make it a form or an editable document.
This example shows you how to create editable PDF forms in IronPDF.
PDFs with editable forms can be created from HTML simply by adding <form>, <input>, and <textarea> tags to the document parts.
The PdfDocument.Form.FindFormField method can be used to read and write the value of any form field. The field's name attribute is given to that field in your HTML.
The PdfDocument.Form object can be used in two ways:
- Populating Default Values: This can be used to set a default value for form fields that will be displayed in PDF viewers like Adobe Reader.
- Reading User Input: After the user fills in the form, the form fields can be accessed and the data read back into your application.
In the example above, we first import the IronPdf library and define the HTML structure of a simple form with input fields for first name and last name, radio buttons for gender, and checkboxes for medical conditions. Using the ChromePdfRenderer with CreatePdfFormsFromHtml enabled, we convert this HTML content into a PDF document.
The rendered PDF is first saved as "BasicForm.pdf". The PdfDocument.Form object is then used to access and manipulate the form fields - here we set values for the first name and last name fields. Finally, the populated document is saved as "FilledForm.pdf", allowing it to be stored or shared with embedded editable fields.
using IronPdf;
using IronSoftware.Drawing;
var pdf = PdfDocument.FromFile("Example.pdf");
// Extract all pages to a folder as image files
pdf.RasterizeToImageFiles(@"C:\image\folder\*.png");
// Dimensions and page ranges may be specified
pdf.RasterizeToImageFiles(@"C:\image\folder\example_pdf_image_*.jpg", 100, 80);
// Extract all pages as AnyBitmap objects
AnyBitmap[] pdfBitmaps = pdf.ToBitmap();
Imports IronPdf
Imports IronSoftware.Drawing
Dim pdf = PdfDocument.FromFile("Example.pdf")
' Extract all pages to a folder as image files
pdf.RasterizeToImageFiles("C:\image\folder\*.png")
' Dimensions and page ranges may be specified
pdf.RasterizeToImageFiles("C:\image\folder\example_pdf_image_*.jpg", 100, 80)
' Extract all pages as AnyBitmap objects
Dim pdfBitmaps As AnyBitmap() = pdf.ToBitmap()To convert a PDF document to images, call IronPDF's RasterizeToImageFiles method on a PdfDocument object. A PDF document can be loaded using the PdfDocument.FromFile method or one of the available PDF generation methods for .NET Core.
RasterizeToImageFiles renders each page of the PDF as a rasterized image. The first argument specifies the naming pattern to use for each image. Optional arguments can be used to customize the quality and dimensions for each image. Another option allows the method to convert selected pages from the PDF into images.
Line 13 of the featured code example demonstrates the ToBitmap method. Call this method on any PdfDocument object to quickly convert the PDF into AnyBitmap objects that can be saved to files or manipulated as needed.
How to Convert a PDF to Images in C#
- Install the PDF to image C# library
- Import existing PDF file with
FromFilemethod - Convert PDF to image using
RasterizeToImageFilesmethod - Specify save directory and image size
- Check the output images
using IronPdf;
using IronPdf.Signing;
// Cryptographically sign an existing PDF in 1 line of code!
new IronPdf.Signing.PdfSignature("Iron.p12", "123456").SignPdfFile("any.pdf");
/***** Advanced example for more control *****/
// Step 1. Create a PDF
var renderer = new ChromePdfRenderer();
var doc = renderer.RenderHtmlAsPdf("<h1>Testing 2048 bit digital security</h1>");
// Step 2. Create a Signature.
// You may create a .pfx or .p12 PDF signing certificate using Adobe Acrobat Reader.
// Read: https://helpx.adobe.com/acrobat/using/digital-ids.html
var signature = new IronPdf.Signing.PdfSignature("Iron.pfx", "123456")
{
// Step 3. Optional signing options and a handwritten signature graphic
SigningContact = "support@ironsoftware.com",
SigningLocation = "Chicago, USA",
SigningReason = "To show how to sign a PDF"
};
//Step 3. Sign the PDF with the PdfSignature. Multiple signing certificates may be used
doc.Sign(signature);
//Step 4. The PDF is not signed until saved to file, steam or byte array.
doc.SaveAs("signed.pdf");
Imports IronPdf
Imports IronPdf.Signing
' Cryptographically sign an existing PDF in 1 line of code!
Call (New IronPdf.Signing.PdfSignature("Iron.p12", "123456")).SignPdfFile("any.pdf")
'/***** Advanced example for more control *****/
' Step 1. Create a PDF
Dim renderer = New ChromePdfRenderer()
Dim doc = renderer.RenderHtmlAsPdf("<h1>Testing 2048 bit digital security</h1>")
' Step 2. Create a Signature.
' You may create a .pfx or .p12 PDF signing certificate using Adobe Acrobat Reader.
' Read: https://helpx.adobe.com/acrobat/using/digital-ids.html
Dim signature = New IronPdf.Signing.PdfSignature("Iron.pfx", "123456") With {
' Step 3. Optional signing options and a handwritten signature graphic
.SigningContact = "support@ironsoftware.com",
.SigningLocation = "Chicago, USA",
.SigningReason = "To show how to sign a PDF"
}
'Step 3. Sign the PDF with the PdfSignature. Multiple signing certificates may be used
doc.Sign(signature)
'Step 4. The PDF is not signed until saved to file, steam or byte array.
doc.SaveAs("signed.pdf")Your business is spending too much on yearly subscriptions for PDF security and compliance. Consider IronSecureDoc, which provides solutions for managing SaaS services like digital signing, redaction, encryption, and protection, all for a one-time payment. Explore IronSecureDoc documentation.
Digitally signing a PDF document helps ensure the document's integrity by providing a method of adding authentication to the PDF itself. With IronPDF, you have several options when it comes to signing a new or existing PDF file. These include digitally signing the PDF document with a certificate, adding a graphical handwritten version of your signature to the PDF, stamping an image of the certificate on the PDF, or simply creating a signature form field on the PDF to prompt user signing.
Steps to Digitally Signing a PDF with IronPDF
The first step in this process is to either load in or create the PDF we want to sign. For this example, we create a new ChromePdfRenderer instance. This is IronPDF's powerful rendering engine used to render HTML, CSS, and JavaScript to PDF without losing quality. We then use the RenderHtmlAsPdf method to render our HTML string into a high-quality PDF document ready to be signed. The resulting PDF is stored in the doc variable.
Next, we need to create our signature. For this example, we sign our PDF document with a certificate. PdfSignature represents the digital signature object for signing the PDF, and it requires the path to the .pfx file we want to use for the signature and the password to access this file. We have included three optional properties: SigningContact adds an email or contact information to the signature metadata, SigningLocation represents where the document is signed, and SigningReason provides the reason for the document being signed.
Next, we sign the PDF document with the PdfSignature object we created. By calling the Sign method, we apply the signature to the PDF document in one easy line. Multiple signing certificates can be applied to the PDF document using this method.
Finally, we save the signed PDF document using the SaveAs method, which saves the PDF to the specified file location.

What is IronPDF?
IronPDF is a .NET PDF library that enables programmers to easily create, edit, and export PDF files for .NET Core and .NET Framework in C#, F#, and VB.NET. IronPDF automates the creation of PDFs from prepared documents. Web forms, local HTML pages, and other web pages can all be converted to PDF using IronPDF. It can also create contracts, reports, quotes, invoices, and other paperwork as PDF reports/documents. It works with web forms, MVC, ASP.NET, ASP.NET Core, and Web APIs on the .NET Framework and .NET Core.
In addition to having a powerful, inbuilt HTML-to-PDF conversion engine (which can produce perfect PDF documents from HTML5, JavaScript, and CSS), IronPDF includes numerous PDF manipulation functions. Creating interactive PDF documents, filling out and submitting interactive forms, merging and splitting PDF files, extracting text and images from PDF files, searching text in PDF files, rasterizing PDF pages to images, and converting PDF files are all examples of activities that IronPDF can perform on PDF documents.
What is Blazor?
Blazor can execute client-side C# code directly in the browser by using WebAssembly. Since WebAssembly supports .NET technologies, Blazor can reuse source code and libraries from the backend in front-end applications developed with it. Blazor can also execute client-side business logic on the server. Using SignalR, a real-time messaging framework, client UI events are sent to the server. The necessary UI updates are transmitted to the client and incorporated into the DOM once execution is finished.
Using Blazor Hybrid, developers can create cross-platform, native client apps using .NET MAUI and existing Blazor UI components. Developers can also incorporate the same UI components across desktop, web, and mobile environments without losing access to the native features of either platform. Developers can also use Blazor Hybrid to update existing WPF and Windows Forms apps.
Blazor uses open web standards without relying on using plug-ins or code translation. All current web browsers, including those on mobile devices, support the Blazor server technology.

How IronPDF works with Blazor
IronPDF for Blazor allows users to create, import, and export PDF documents using C# and VB.NET. The library also supports the .NET Framework, .NET Core, and .NET Standard. IronPDF provides two ways to edit a PDF: one that uses native PDF elements, and another that enables editing as a flow document.
Performance
The IronPDF library for Blazor provides unmatched performance and optimal memory consumption; it decodes photos as needed, compresses content using FlateDecode encryption, and embeds font subsets by containing only the most frequently used glyphs.
Interactive Forms
Use textboxes, radio buttons, list boxes, and other similar controls to add interactivity to PDF documents. In this way, users can update and fill out data in the PDF document as needed. Once the forms are complete, they can be flattened to remove the interactive fields while retaining their contents. This is useful in preventing subsequent alterations to the document.
Encryption
PDF documents can be encrypted with a password to safeguard confidential information from unauthorized access.
Text Properties
When producing or updating a PDF document, you can customize the appearance of textual and graphical elements thanks to a rich API. Stylistic controls, including fill, text, stroke, font, text size, and many more, can be used to effortlessly satisfy any design requirements.

How IronPDF Creates and Displays PDF Documents
IronPDF can convert webpages to PDFs with the help of the RenderHtmlAsPdf method. This method can accept a string containing a webpage’s HTML markup. In this way, the content can be styled inline as desired before being fed into the method. Additional code can enable users to receive the PDF file as a download to their client computer.
Similarly, the RenderUrlAsPdf method transforms the HTML content from a URL into PDF content, including any references to any JavaScript and CSS. IronPDF generates PDFs from HTML with high accuracy, ensuring 100% resemblance to the original web page. The library can handle complex web page designs containing charts, graphs, images, tables, etc., A separate method allows for accessory customizations on the PDF document. Possible customizations include changes to page sizes, margin sizes, header/footer content, etc.
Once a PDF document has been generated, client-side JavaScript can be used to display the document in the browser client.
Why Blazor Supports IronPDF
IronPDF has been developed using the latest .NET technology, thereby allowing it to work within Blazor seamlessly without the need for complex integrations.
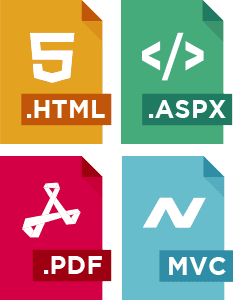
IronPDF supports many file types, including HTML, ASPX, cshtml, and Razor. Razor is a file format used in Blazor for embedding .NET source code into web pages. Its syntax consists of Razor markup, C#, and HTML.

Try It With NuGet Now
The benefits are clear! With IronPDF, you can do so much more, so much easier. Our product is perfect for anyone who needs to make, manage and edit a library of PDFs, including businesses in real estate, publishing, finance, and enterprise. The prices of our solution are also very competitive.Ready to see what IronPDF can do for your projects and business? Try it out now
Supports:

IronPDF Licensing
Free for development purposes. Deployment licenses from $749.
Licensing IronPDF for DeploymentPDF C# / VB Tutorials for .NET


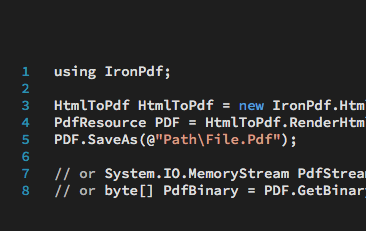
Tutorial | CSharp and VB .NET HTML to PDF
Let's create PDFs in .NET, without the need for complex programtic design layout or APIs…
View Jean's HTML To PDF Tutorial
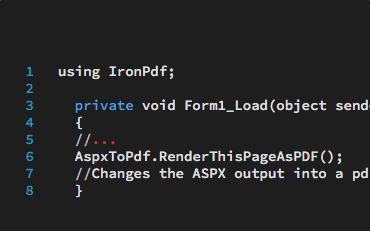
Tutorial | ASPX to PDF in ASP.NET
See how easy it is to convert ASPX pages into PDF documents using C# or VB .NET…
See Jacob's ASPX To PDF Tutorial
Tutorial | Create PDFs with VB.NET
See how I use IronPDF to create PDF documents within my VB .NET projects…
See Veronica's VB .NET TutorialThousands of developers use IronPDF for...
Accounting and Finance Systems
- # Receipts
- # Reporting
- # Invoice Printing

Business Digitization
- # Documentation
- # Ordering & Labelling
- # Paper Replacement

Enterprise Content Management
- # Content Production
- # Document Management
- # Content Distribution

Data and Reporting Applications
- # Performance Tracking
- # Trend Mapping
- # Reports


Developers working within Companies, Government departments and as freelancers use IronPDF.
IronPDF is constantly supported as a leading .NET PDF Library









Product Links
- - Create, read, and edit PDFs. HTML to PDF for .NET.
- - Edit DOCX Word Files. No Office Interop required.

- - Edit Excel & CSV files. No Office Interop required.
- - Create, read, and edit presentations. No Office Interop required.
- - OCR (extract text from images) in 125 languages.

- - Read and write QR & Barcodes.

- - Read and write QR codes.
- - Zip and unzip archives.
- - Print documents in .NET applications.

- - Scrape structured data from websites.

Ready to Get Started?
Nuget Downloads 20,389,208|Version:2026.8just released

When you need your PDF to look like HTML, fast.