
Multer Node.js(開發者的使用方法)

管理檔案上傳和產生PDF文件是當前線上開發環境中許多應用程式的標準要求。 總結IronPDF和Multer在Node.js環境中的能力,提供了一個強大的解決方案,以有效地處理這些需求。
Multer是Node.js的一個中介軟體,使處理multipart/form-data(主要用於檔案上傳)變得更簡單。 由於其極大的彈性,開發者可以指定檔案大小限制、儲存選項和檔案過濾,以保證安全和有效的檔案上傳。 Multer是希望輕鬆整合檔案上傳功能到其應用程式中的開發者的首選,因為它可以輕鬆與Express.js整合。
反之,IronPDF是一個強大的PDF建立程式庫,使程式設計師可以使用HTML文字建立PDF文件。 憑藉其許多功能,包括對JavaScript執行、CSS樣式和字體及圖片嵌入的支持,它是將動態網頁資訊轉換為專業外觀PDF的完美工具。
我們將通過展示如何在Node.js應用程式中設置和利用IronPDF來建立PDF文件以及Multer來管理文件上傳,來展示這兩個強大工具之間的流暢合作。
Multer Node.js是什麼?
Multer是一個Node.js中介軟體,使處理multipart/form-data(主要用於文件上傳)變得更簡單。 它為在網頁應用中處理文件上傳能力提供了一個可靠的方法,並且可以輕鬆與Express.js搭配使用。 為了確保只有授權的文件型別被上傳,Multer為開發者提供了指定文件大小限制、配置儲存選項以及應用文件過濾的能力。
它通過支持磁碟和記憶體儲存來給伺服器管理文件帶來靈活性。 Multer也非常適合需要一次提交多個文件的表單,因為它能夠處理一次上傳的多個文件。 總而言之,Multer簡化了文件上傳過程,提高了Node.js應用程式安全有效地處理使用者上傳內容的能力。
Multer在Node.js中的功能
文件儲存選項
- Multer具備直接將上傳的文件存入磁碟的能力。 磁碟儲存引擎允許您提供文件名和目錄位置。 這對於需要將文件保存以供日後使用的應用程式特別有用。
- 記憶體儲存:Multer具備將文件以緩衝物件形式儲存在記憶體中的能力,用於暫時使用。 這在不需要將文件保存在磁碟上並且可以立即處理的情況下非常有用。
文件大小限制
Multer允許您為上傳的文件設置大小限制,這可以透過防止上傳過大的文件來幫助保護伺服器性能並有效管理儲存資源。 您可以使用限制選項來實現這一點。
文件過濾
Multer具備fileFilter選項,允許您管理哪些文件可以被接受。 不符合規定的文件可以被該功能拒絕,也可以驗證文件的MIME型別和其他屬性。 這保證了只有特定型別的文件如文件和圖片被提交。
處理多個文件
Multer可以管理單次上傳的多個文件。 路由可以設置成接受包含文件或文件陣列的多個字段。 這對於使用者必須同時上傳多個文件的表格來說很有用,例如支持文件和個人資料圖片。
可自定義的儲存引擎
除了內建的磁碟和記憶體儲存解決方案,Multer允許您設計新的儲存引擎。 為了獲得最佳靈活性,您可以為管理文件上傳設計您自己的邏輯,包括保存位置和方式。
與Express的輕鬆整合
Multer被設計成可以輕鬆與Express.js整合。 透過在Express路由中作為中介軟體使用它,新增文件上傳功能到您的網頁應用變得簡單。
自動處理多部分資料
透過自動解析multipart/form-data,Multer簡化了在您伺服器端程式碼中處理文件上傳的過程,使上傳的文件和表單資料可用於req物件。
單個和多個文件上傳
Multer提供了多種方式(單個、陣列和字段)來管理一個或多個文件的上傳。 單個方法每請求處理一個文件,陣列方法支持多個擁有相同字段名稱的文件,字段方法可以處理擁有不同字段名稱的多個文件。
建立和配置Multer Node.js JS
可以使用以下步驟在Node.js應用程式中構建和設置Multer:
安裝依賴項
安裝Multer和Express是第一步。可以使用npm完成這一步:
npm install multer
npm install express
npm install multer
npm install express配置Multer
在您的.js文件中配置Multer以處理文件上傳。以下是詳細的說明範例:
const express = require('express');
const multer = require('multer');
const path = require('path');
const fs = require('fs');

// Initialize Express
const app = express();

// Set up storage configuration for Multer
const storage = multer.diskStorage({
  destination: (req, file, cb) => {
    cb(null, 'uploads/'); // Directory to save uploaded files
  },
  filename: (req, file, cb) => {
    const uniqueSuffix = Date.now() + '-' + Math.round(Math.random() * 1E9);
    cb(null, file.fieldname + '-' + uniqueSuffix + path.extname(file.originalname)); // Unique filename
  }
});

// Configure file filter function to allow only certain file types
const fileFilter = (req, file, cb) => {
  const allowedFileTypes = /jpeg|jpg|png|gif/;
  const mimetype = allowedFileTypes.test(file.mimetype);
  const extname = allowedFileTypes.test(path.extname(file.originalname).toLowerCase());
  if (mimetype && extname) {
    return cb(null, true);
  } else {
    cb(new Error('Only images are allowed!'));
  }
};

// Initialize Multer with storage, file size limit, and file filter options
const upload = multer({
  storage: storage,
  limits: { fileSize: 1024 * 1024 * 5 }, // 5 MB file size limit
  fileFilter: fileFilter
});

// Single file upload route
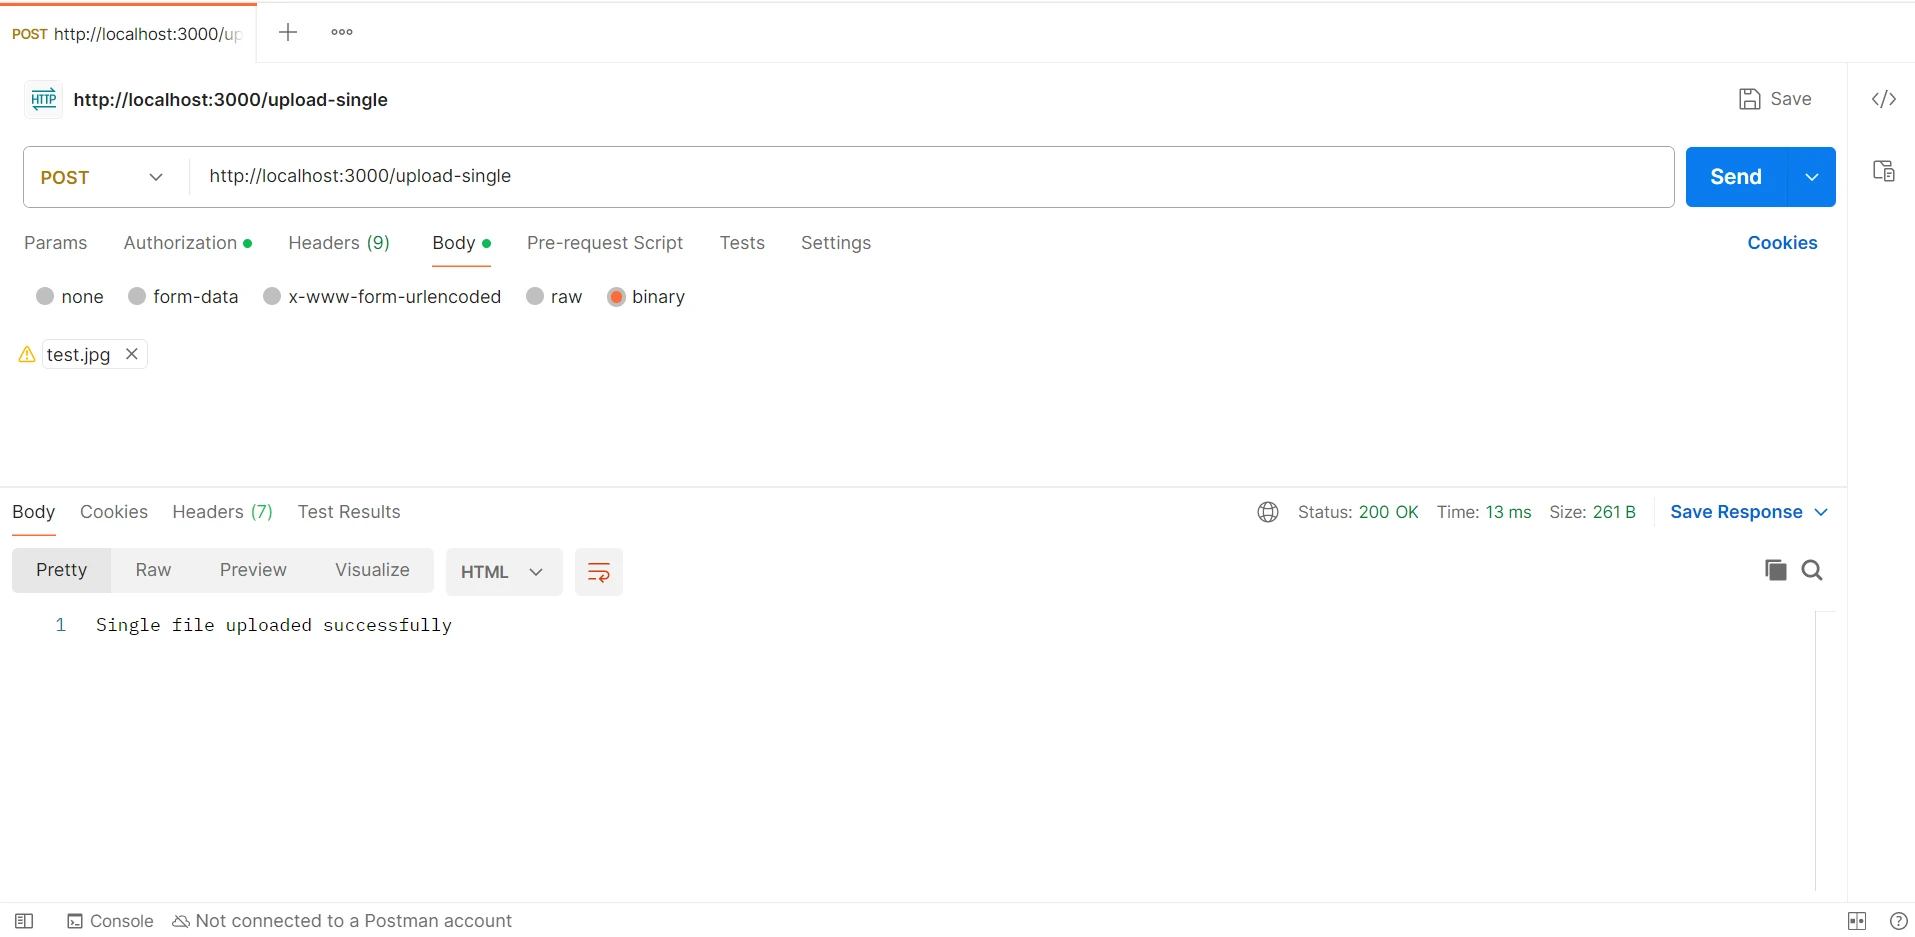
app.post('/upload-single', upload.single('profilePic'), (req, res) => {
  try {
    res.send('Single file uploaded successfully');
  } catch (err) {
    res.status(400).send({ error: err.message });
  }
});

// Multiple files upload route
app.post('/upload-multiple', upload.array('photos', 5), (req, res) => {
  try {
    res.send('Multiple files uploaded successfully');
  } catch (err) {
    res.status(400).send({ error: err.message });
  }
});

// Error handling middleware
app.use((err, req, res, next) => {
  if (err) {
    res.status(400).send({ error: err.message });
  }
});

// Start the server
const PORT = process.env.PORT || 3000;
app.listen(PORT, () => {
  console.log(`Server is running on port ${PORT}`);
});
const express = require('express');
const multer = require('multer');
const path = require('path');
const fs = require('fs');
// Initialize Express
const app = express();
// Set up storage configuration for Multer
const storage = multer.diskStorage({
destination: (req, file, cb) => {
cb(null, 'uploads/'); // Directory to save uploaded files
},
filename: (req, file, cb) => {
const uniqueSuffix = Date.now() + '-' + Math.round(Math.random() * 1E9);
cb(null, file.fieldname + '-' + uniqueSuffix + path.extname(file.originalname)); // Unique filename
}
});
// Configure file filter function to allow only certain file types
const fileFilter = (req, file, cb) => {
const allowedFileTypes = /jpeg|jpg|png|gif/;
const mimetype = allowedFileTypes.test(file.mimetype);
const extname = allowedFileTypes.test(path.extname(file.originalname).toLowerCase());
if (mimetype && extname) {
return cb(null, true);
} else {
cb(new Error('Only images are allowed!'));
}
};
// Initialize Multer with storage, file size limit, and file filter options
const upload = multer({
storage: storage,
limits: { fileSize: 1024 * 1024 * 5 }, // 5 MB file size limit
fileFilter: fileFilter
});
// Single file upload route
app.post('/upload-single', upload.single('profilePic'), (req, res) => {
try {
res.send('Single file uploaded successfully');
} catch (err) {
res.status(400).send({ error: err.message });
}
});
// Multiple files upload route
app.post('/upload-multiple', upload.array('photos', 5), (req, res) => {
try {
res.send('Multiple files uploaded successfully');
} catch (err) {
res.status(400).send({ error: err.message });
}
});
// Error handling middleware
app.use((err, req, res, next) => {
if (err) {
res.status(400).send({ error: err.message });
}
});
// Start the server
const PORT = process.env.PORT || 3000;
app.listen(PORT, () => {
console.log(`Server is running on port ${PORT}`);
});
配置儲存系統
- destination: 指示上傳文件將要儲存的資料夾。
- filename: 在建立基於時間戳和隨機數的唯一文件名時保留原始文件擴展名。
- File Filter: 一個驗證上傳文件型別的選項。 在此範例中,只允許jpeg,jpg,png或gif擴展名的圖片文件。
初始化Multer:
- storage: 描述儲存的設置。
- limits: 定義允許的最大文件大小(在此範例中為5 MB)。
- fileFilter: 使用文件過濾功能。
開始使用IronPDF
當使用IronPDF來製作PDF文件,並用Multer來處理文件上傳時,建立了管理使用者生成內容並將其轉換為精美PDF的強大解決方案。 以下可以找到如何在Node.js應用程式中安裝和結合這兩個程式庫的說明。
什麼是IronPDF?
IronPDF是一組應用程式庫,設計來輔助建立、編輯和管理PDF文件。 使用此應用程式,開發人員可以從HTML文件中提取文字和圖像,新增標題和水印,合併數個PDF頁面,並執行多種其他操作。 IronPDF全面的文件和使用者友好的API使得開發人員可以輕鬆自動生成高品質的PDF文件。 IronPDF包含了所有提高文件工作流程並在多種情境下提供一流使用者體驗的特性和功能,比如建立文件製作、報告和發票。
IronPDF的功能
將任何形式的HTML文字(包括CSS和JavaScript)轉換為PDF是一種快速簡便的方法。
PDF文件合併: 為了使文件管理任務更容易,將多個PDF文件合併為單個PDF文件。
文字和圖片提取: 從PDF文件中取出文字和圖片,供進一步的資料處理或分析使用。
水印: 出於安全或品牌考量,可以在PDF頁面上新增文字或圖片水印。
新增標題和頁尾: PDF文件的標題和頁尾允許您以自訂資訊或頁碼。
安裝IronPDF
使用Node套件管理器安裝必要的Node.js套件以啟用IronPDF功能。
npm i @ironsoftware/ironpdf
整合Multer與IronPDF於Node.js
修改app.js以設置IronPDF以建立PDF及Multer以處理文件上傳。
const express = require('express');
const multer = require('multer');
const path = require('path');
const IronPdf = require('@ironsoftware/ironpdf');
const document = IronPdf.PdfDocument;
var config = IronPdf.IronPdfGlobalConfig;

// Initialize Express
const app = express();

// Set up Multer storage configuration
const storage = multer.diskStorage({
  destination: (req, file, cb) => {
    cb(null, 'uploads/'); // Directory to save uploaded files
  },
  filename: (req, file, cb) => {
    cb(null, `${Date.now()}-${file.originalname}`); // Unique filename
  }
});

const upload = multer({ storage: storage });

// Single file upload route
app.post('/upload-single', upload.single('file'), async (req, res) => {
  try {
    // Read the uploaded file
    const filePath = path.join(__dirname, 'uploads', req.file.filename);

    // Create HTML content for PDF
    const htmlContent = `
      <html>
        <head>
          <title>Uploaded File Content</title>
        </head>
        <body>
          <h1>Uploaded File Content</h1>
          <img src="${filePath}" alt="image" width="500" height="600">
        </body>
      </html>
    `;

    // Initialize IronPDF
    const pdf = await document.fromHtml(htmlContent);

    // Save PDF to file
    const pdfPath = path.join(__dirname, 'uploads', `${Date.now()}-output.pdf`);
    await pdf.saveAs(pdfPath);

    // Respond to the client
    res.send(`File uploaded and PDF generated successfully! <a href="/download-pdf?path=${pdfPath}">Download PDF</a>`);
  } catch (err) {
    res.status(500).send({ error: err.message });
  }
});

// Route to download generated PDF
app.get('/download-pdf', (req, res) => {
  const filename = req.query.path;
  res.download(filename);
});

// Start the server
const PORT = process.env.PORT || 3000;
app.listen(PORT, () => {
  console.log(`Server is running on port ${PORT}`);
});
const express = require('express');
const multer = require('multer');
const path = require('path');
const IronPdf = require('@ironsoftware/ironpdf');
const document = IronPdf.PdfDocument;
var config = IronPdf.IronPdfGlobalConfig;
// Initialize Express
const app = express();
// Set up Multer storage configuration
const storage = multer.diskStorage({
destination: (req, file, cb) => {
cb(null, 'uploads/'); // Directory to save uploaded files
},
filename: (req, file, cb) => {
cb(null, `${Date.now()}-${file.originalname}`); // Unique filename
}
});
const upload = multer({ storage: storage });
// Single file upload route
app.post('/upload-single', upload.single('file'), async (req, res) => {
try {
// Read the uploaded file
const filePath = path.join(__dirname, 'uploads', req.file.filename);
// Create HTML content for PDF
const htmlContent = `
<html>
<head>
<title>Uploaded File Content</title>
</head>
<body>
<h1>Uploaded File Content</h1>
<img src="${filePath}" alt="image" width="500" height="600">
</body>
</html>
`;
// Initialize IronPDF
const pdf = await document.fromHtml(htmlContent);
// Save PDF to file
const pdfPath = path.join(__dirname, 'uploads', `${Date.now()}-output.pdf`);
await pdf.saveAs(pdfPath);
// Respond to the client
res.send(`File uploaded and PDF generated successfully! <a href="/download-pdf?path=${pdfPath}">Download PDF</a>`);
} catch (err) {
res.status(500).send({ error: err.message });
}
});
// Route to download generated PDF
app.get('/download-pdf', (req, res) => {
const filename = req.query.path;
res.download(filename);
});
// Start the server
const PORT = process.env.PORT || 3000;
app.listen(PORT, () => {
console.log(`Server is running on port ${PORT}`);
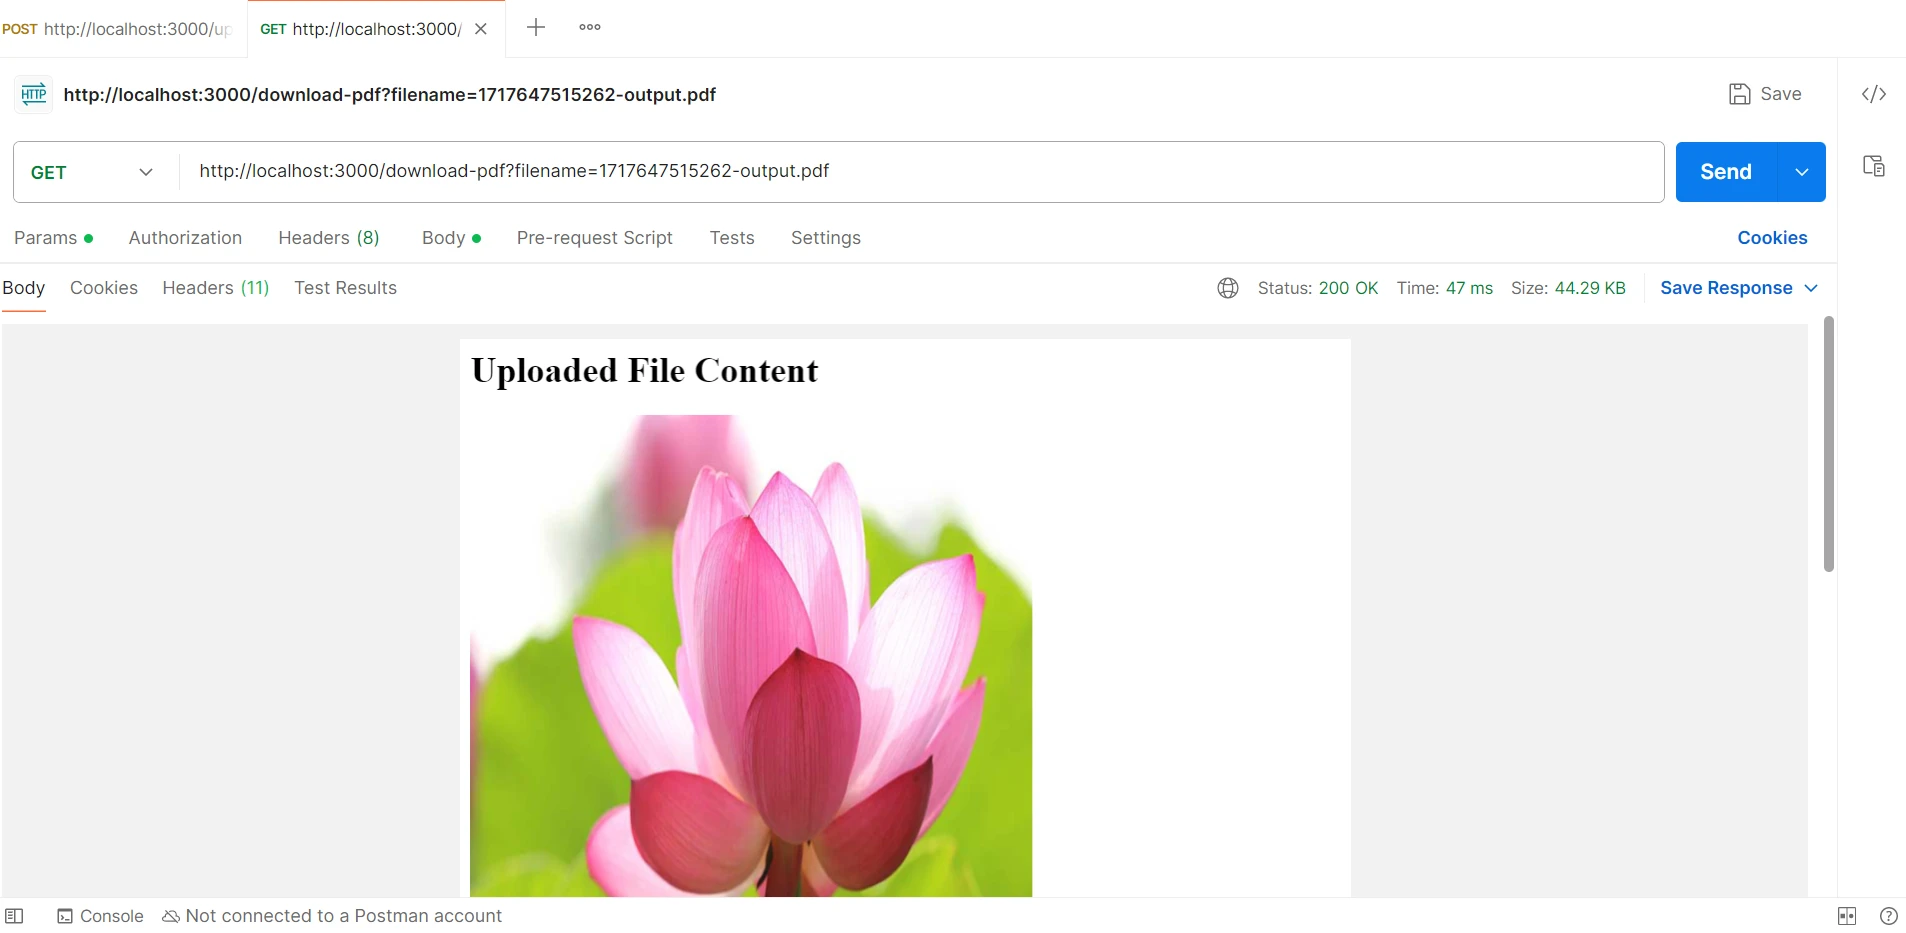
});我們在Node.js程式碼中整合了Multer和IronPDF,以構建一個可靠的系統來管理文件上傳並生成PDF文件。 使用Express框架,我們配置Multer來處理multipart/form-data文件上傳,為每個上傳的文件賦予唯一的文件名和目錄位置。 Multer透過/upload-single路由保存使用者上傳的文件,伺服器檢查那些文件的內容。
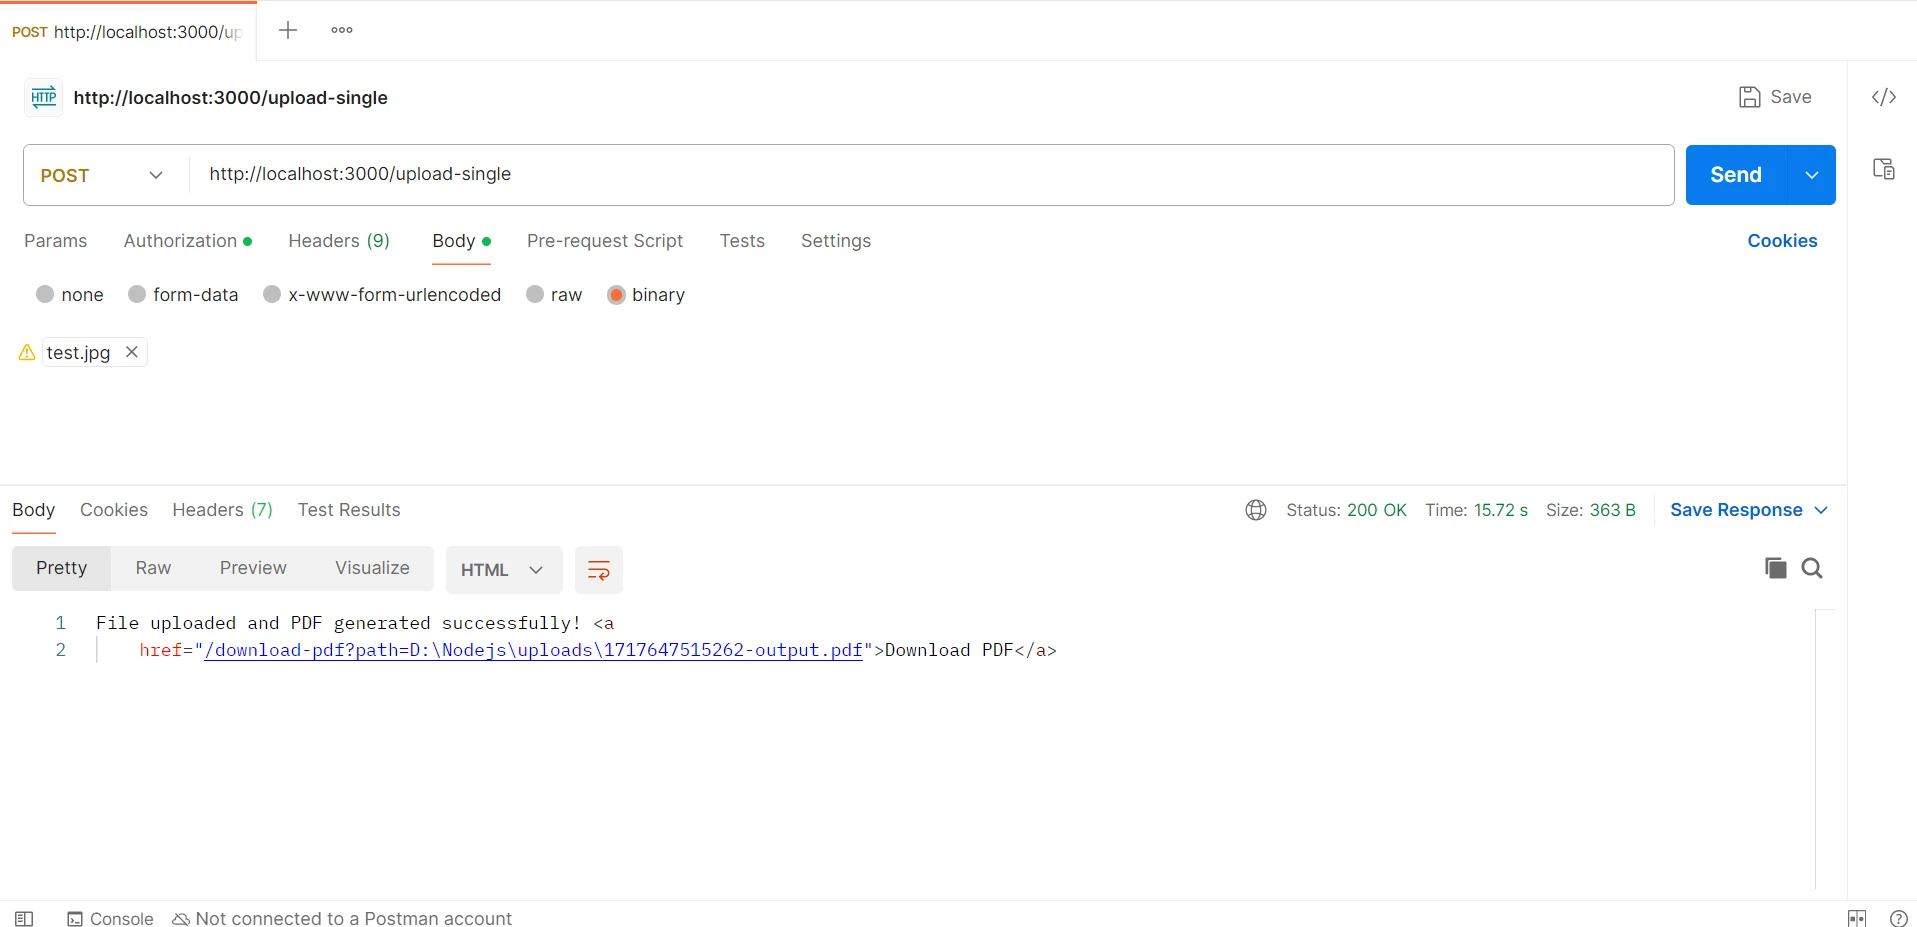
然後,此內容被整合到一個基本的HTML模板中。 此HTML被送入IronPDF中,進而建立了一個PDF文件,該文件被儲存在上傳目錄中。 最後,伺服器提供了一個下載生成的PDF的連結。 此整合展示了Multer如何有效處理文件上傳,以及IronPDF如何將這些上傳轉換為高品質PDF,以便在Node.js應用程式中提供流暢文件管理和文件建立。
結論
總之,在Node.js應用程式中整合Multer來進行文件上傳和IronPDF來生成PDF,提供了一個完整的使用者生成內容現isering並將其轉換為精美文件的解決方案。 透過大小限制、文件過濾和文件儲存配置等功能,Multer使得管理文件上傳變得更簡單。 另一方面,IronPDF提供了定制化選擇和對多種樣式元素的支援,從而使得HTML資訊轉換成高品質PDF文件成為可能。
這兩個程式庫可以結合起來建立靈活的應用程式,讓使用者能上傳文件並自動將其轉換為令人賞心悅目的PDF文件。 此整合透過簡化生成發票、證書、報告等的過程來提高文件生成操作的效率並提升使用者體驗。
透過將IronPDF整合到您的企業應用開發堆疊中,為客戶和最終使用者提供功能豐富的高端軟體解決方案變得更加容易。 而且,這一強大的基礎將促進專案、後端系統和過程改進。
了解更多其他Iron Software產品。 由於它們豐富的文件、活躍的線上開發者社區和頻繁的更新,這些技術是現代軟體開發專案的絕佳選擇。






 免費開始
免費開始 免費開始
免費開始 預訂免費直播演示