C# Timer (How It Works For Developers)
Timer classes in C# are powerful tools for scheduling the execution of code at specified intervals. Whether you're developing a Windows Form application or a Console App, understanding how to use a timer can greatly enhance your application's functionality. This tutorial will walk you through the basics of using timers in C#, including how to set them up, handle their events, and ensure they run smoothly in your application. We'll also discuss how to use IronPDF for Automated PDF Generation in C# Applications to automate our PDF generation using Timer in C#.
Introduction to Timer Classes in C#
C# offers several timer classes, each suited for different tasks and environments. The most commonly used timer classes are System.Timers.Timer for server-based timers and System.Windows.Forms.Timer for Windows Forms applications. Understanding the role of event handlers is crucial when working with timer classes, as these handlers dictate the actions performed at each significant moment dictated by the timer, such as the tick or elapsed event time intervals.
Setting Up a New Timer
Configuring the time interval of your timer is foundational to its operation, determining how frequently the timer's event handlers are invoked and thereby controlling the rhythm of the application's time-sensitive functions. To use a timer in your C# application, especially when developing Windows Forms applications, you start by adding the System.Windows.Forms.Timer component from the toolbox onto your form, or by programmatically creating a timer object for more flexibility.
var timer = new System.Timers.Timer(); // Create a new timer
timer.Interval = 2000; // Sets the timer interval to tick every 2 seconds
var timer = new System.Timers.Timer(); // Create a new timer
timer.Interval = 2000; // Sets the timer interval to tick every 2 secondsDim timer = New System.Timers.Timer() ' Create a new timer
timer.Interval = 2000 ' Sets the timer interval to tick every 2 secondsThis simple setup creates a timer that ticks every 2 seconds. However, for the timer to perform actions, you need to connect it to an event handler.
Handling the Elapsed Event
By attaching an elapsed event handler to the Elapsed event of a System.Timers.Timer, you ensure your application can perform tasks at each interval, effectively responding to time-based triggers. This event is raised every time the timer's interval has elapsed. You attach a handler to this event to specify what should happen when the timer ticks:
timer.Elapsed += OnTimedEvent;timer.Elapsed += OnTimedEvent;timer.Elapsed += OnTimedEventIn the above code, OnTimedEvent is a method you define that will be called whenever the timer's Elapsed event is triggered.
Creating an Event Handler
In defining a timer event handler, you craft a method that executes in response to the timer's tick events, allowing for precise control over actions taken at predefined intervals. An event handler for a timer's Elapsed event typically looks like this:
static void OnTimedEvent(Object source, System.Timers.ElapsedEventArgs e)
{
    Console.WriteLine("The Elapsed event was raised at {0:HH:mm:ss.fff}", e.SignalTime);
}
static void OnTimedEvent(Object source, System.Timers.ElapsedEventArgs e)
{
Console.WriteLine("The Elapsed event was raised at {0:HH:mm:ss.fff}", e.SignalTime);
}Shared Sub OnTimedEvent(ByVal source As Object, ByVal e As System.Timers.ElapsedEventArgs)
Console.WriteLine("The Elapsed event was raised at {0:HH:mm:ss.fff}", e.SignalTime)
End SubThis method simply prints the current time to the console whenever the timer elapses, demonstrating how to respond to the timer event.
Starting and Stopping the Timer
After setting up the timer and its event handler, you need to start the timer. You do this by setting its Enabled property to true or by calling the Start method:
timer.Enabled = true; // or timer.Start();timer.Enabled = true; // or timer.Start();timer.Enabled = True ' or timer.Start();To stop the timer, you can set Enabled to false or call the Stop method. This is crucial for preventing your application from running unnecessary operations when they're not needed.
Using Timers in a Windows Forms Application
The System.Windows.Forms.Timer is a valuable Windows forms component designed to integrate seamlessly with the event-driven model of Windows Forms applications, facilitating regular actions without compromising the responsiveness of the user interface.
Example: Adding a Timer to a Form
In a Windows Forms application, you can drag a timer control from the toolbox onto your form, or create it programmatically like so:
System.Windows.Forms.Timer myTimer = new System.Windows.Forms.Timer();
myTimer.Interval = 1000; // 1 second interval
myTimer.Tick += new EventHandler(TimerEventProcessor);
myTimer.Start();
System.Windows.Forms.Timer myTimer = new System.Windows.Forms.Timer();
myTimer.Interval = 1000; // 1 second interval
myTimer.Tick += new EventHandler(TimerEventProcessor);
myTimer.Start();Dim myTimer As New System.Windows.Forms.Timer()
myTimer.Interval = 1000 ' 1 second interval
AddHandler myTimer.Tick, AddressOf TimerEventProcessor
myTimer.Start()Here, TimerEventProcessor is an event handler that will be called every time the Tick event occurs, which is similar to the Elapsed event in System.Timers.Timer.
Advanced Timer Management
Thread Safety with Timers
When working with timers, it's crucial to understand the threading model of your application. The System.Timers.Timer and System.Threading.Timer execute their callbacks on a thread pool thread, allowing for parallel execution. However, this can lead to thread safety issues if your callback method modifies shared data or interacts with user interface elements. To safely update UI elements from a timer's callback, you must marshal the call back to the UI thread using techniques specific to your application's type (e.g., using Invoke or BeginInvoke in Windows Forms).
High-Precision Timing
For applications requiring high-precision timing (e.g., multimedia applications or games), the System.Diagnostics.Stopwatch class can be more appropriate than a timer for measuring elapsed time with high accuracy. Although not a timer itself, the Stopwatch class can be used in conjunction with a timer to achieve precise time measurements.
Practical Examples
Example: Implementing a Countdown Timer
A common scenario where a timer is useful is creating a countdown timer. This can be done by setting a timer interval to one second (1000 milliseconds) and decreasing a counter every time the timer elapses. When the counter reaches zero, the timer stops, signaling the end of the countdown.
using System;

namespace CountdownApp
{
    class Program
    {
        static int countdownTime = 10; // Countdown from 10 seconds

        public static void Main(string[] args) // Main method
        {
            StartCountdown();
            Console.ReadLine(); // Prevent console from closing immediately
        }

        static void StartCountdown()
        {
            var timer = new System.Timers.Timer(1000); // Tick every second
            timer.Elapsed += UpdateCountdown;
            timer.Enabled = true;
        }

        static void UpdateCountdown(Object source, System.Timers.ElapsedEventArgs e)
        {
            if (countdownTime > 0)
            {
                Console.WriteLine(countdownTime-- + " seconds remaining");
            }
            else
            {
                Console.WriteLine("Countdown finished!");
                ((System.Timers.Timer)source).Stop(); // Stop the timer
            }
        }
    }
}
using System;
namespace CountdownApp
{
class Program
{
static int countdownTime = 10; // Countdown from 10 seconds
public static void Main(string[] args) // Main method
{
StartCountdown();
Console.ReadLine(); // Prevent console from closing immediately
}
static void StartCountdown()
{
var timer = new System.Timers.Timer(1000); // Tick every second
timer.Elapsed += UpdateCountdown;
timer.Enabled = true;
}
static void UpdateCountdown(Object source, System.Timers.ElapsedEventArgs e)
{
if (countdownTime > 0)
{
Console.WriteLine(countdownTime-- + " seconds remaining");
}
else
{
Console.WriteLine("Countdown finished!");
((System.Timers.Timer)source).Stop(); // Stop the timer
}
}
}
}Imports System
Namespace CountdownApp
Friend Class Program
Private Shared countdownTime As Integer = 10 ' Countdown from 10 seconds
Public Shared Sub Main(ByVal args() As String) ' Main method
StartCountdown()
Console.ReadLine() ' Prevent console from closing immediately
End Sub
Private Shared Sub StartCountdown()
Dim timer = New System.Timers.Timer(1000) ' Tick every second
AddHandler timer.Elapsed, AddressOf UpdateCountdown
timer.Enabled = True
End Sub
Private Shared Sub UpdateCountdown(ByVal source As Object, ByVal e As System.Timers.ElapsedEventArgs)
If countdownTime > 0 Then
'INSTANT VB WARNING: An assignment within expression was extracted from the following statement:
'ORIGINAL LINE: Console.WriteLine(countdownTime-- + " seconds remaining");
Console.WriteLine(countdownTime & " seconds remaining")
countdownTime -= 1
Else
Console.WriteLine("Countdown finished!")
DirectCast(source, System.Timers.Timer).Stop() ' Stop the timer
End If
End Sub
End Class
End NamespaceHere is the output of the above code:
Example: Scheduling Regular Database Checks
Timers can be used to perform regular checks on a database, such as querying for new data or cleaning up old records. This example sets up a timer to query a database every hour:
private static void SetupDatabaseCheckTimer()
{
    var timer = new System.Timers.Timer(3600000); // Set to 1 hour
    timer.Elapsed += CheckDatabase;
    timer.Enabled = true;
}

private static void CheckDatabase(Object source, System.Timers.ElapsedEventArgs e)
{
    // Perform database operations here
    Console.WriteLine("Database checked at " + e.SignalTime);
}
private static void SetupDatabaseCheckTimer()
{
var timer = new System.Timers.Timer(3600000); // Set to 1 hour
timer.Elapsed += CheckDatabase;
timer.Enabled = true;
}
private static void CheckDatabase(Object source, System.Timers.ElapsedEventArgs e)
{
// Perform database operations here
Console.WriteLine("Database checked at " + e.SignalTime);
}Private Shared Sub SetupDatabaseCheckTimer()
Dim timer = New System.Timers.Timer(3600000) ' Set to 1 hour
AddHandler timer.Elapsed, AddressOf CheckDatabase
timer.Enabled = True
End Sub
Private Shared Sub CheckDatabase(ByVal source As Object, ByVal e As System.Timers.ElapsedEventArgs)
' Perform database operations here
Console.WriteLine("Database checked at " & e.SignalTime)
End SubIntroduction to IronPDF
IronPDF - Easily Generate PDF from HTML and ASPX is particularly praised for its ease of use in generating PDFs from HTML or URLs, essentially allowing your application to "print" any HTML Content as a PDF Document. This is incredibly useful for generating reports, invoices, or any web content that needs to be presented in a standardized format. IronPDF also supports advanced features such as CSS styles, JavaScript, and custom fonts, ensuring that the generated PDFs maintain the fidelity of the web content.
A prominent feature of IronPDF is its HTML to PDF Conversion capability, preserving layouts and styles. It generates PDFs from web content, which is ideal for reports, invoices, and documentation. HTML files, URLs, and HTML strings can be easily converted to PDFs.
using IronPdf;

class Program
{
    static void Main(string[] args)
    {
        var renderer = new ChromePdfRenderer();

        // 1. Convert HTML String to PDF
        var htmlContent = "<h1>Hello, IronPDF!</h1><p>This is a PDF from an HTML string.</p>";
        var pdfFromHtmlString = renderer.RenderHtmlAsPdf(htmlContent);
        pdfFromHtmlString.SaveAs("HTMLStringToPDF.pdf");

        // 2. Convert HTML File to PDF
        var htmlFilePath = "path_to_your_html_file.html"; // Specify the path to your HTML file
        var pdfFromHtmlFile = renderer.RenderHtmlFileAsPdf(htmlFilePath);
        pdfFromHtmlFile.SaveAs("HTMLFileToPDF.pdf");

        // 3. Convert URL to PDF
        var url = "http://ironpdf.com"; // Specify the URL
        var pdfFromUrl = renderer.RenderUrlAsPdf(url);
        pdfFromUrl.SaveAs("URLToPDF.pdf");
    }
}
using IronPdf;
class Program
{
static void Main(string[] args)
{
var renderer = new ChromePdfRenderer();
// 1. Convert HTML String to PDF
var htmlContent = "<h1>Hello, IronPDF!</h1><p>This is a PDF from an HTML string.</p>";
var pdfFromHtmlString = renderer.RenderHtmlAsPdf(htmlContent);
pdfFromHtmlString.SaveAs("HTMLStringToPDF.pdf");
// 2. Convert HTML File to PDF
var htmlFilePath = "path_to_your_html_file.html"; // Specify the path to your HTML file
var pdfFromHtmlFile = renderer.RenderHtmlFileAsPdf(htmlFilePath);
pdfFromHtmlFile.SaveAs("HTMLFileToPDF.pdf");
// 3. Convert URL to PDF
var url = "http://ironpdf.com"; // Specify the URL
var pdfFromUrl = renderer.RenderUrlAsPdf(url);
pdfFromUrl.SaveAs("URLToPDF.pdf");
}
}Imports IronPdf
Friend Class Program
Shared Sub Main(ByVal args() As String)
Dim renderer = New ChromePdfRenderer()
' 1. Convert HTML String to PDF
Dim htmlContent = "<h1>Hello, IronPDF!</h1><p>This is a PDF from an HTML string.</p>"
Dim pdfFromHtmlString = renderer.RenderHtmlAsPdf(htmlContent)
pdfFromHtmlString.SaveAs("HTMLStringToPDF.pdf")
' 2. Convert HTML File to PDF
Dim htmlFilePath = "path_to_your_html_file.html" ' Specify the path to your HTML file
Dim pdfFromHtmlFile = renderer.RenderHtmlFileAsPdf(htmlFilePath)
pdfFromHtmlFile.SaveAs("HTMLFileToPDF.pdf")
' 3. Convert URL to PDF
Dim url = "http://ironpdf.com" ' Specify the URL
Dim pdfFromUrl = renderer.RenderUrlAsPdf(url)
pdfFromUrl.SaveAs("URLToPDF.pdf")
End Sub
End ClassInstalling IronPDF
You can install IronPDF using NuGet Package Manager by executing this command:
Install-Package IronPdf
Example
Imagine you have a requirement to generate a daily report in PDF format, containing data that is updated each day. For simplicity, we'll generate a basic HTML report and convert it to PDF using IronPDF every 24 hours. In your C# application, you'll set up a System.Timers.Timer to trigger every 24 hours. It's important to note that the interval is set in milliseconds, so 24 hours is represented as 24 * 60 * 60 * 1000 milliseconds.
using System;
using System.Timers;
using IronPdf;
using Timer = System.Timers.Timer;

class Program
{
    static void Main(string[] args)
    {
        // Set up the timer for 24 hours
        Timer timer = new Timer(24 * 60 * 60 * 1000);
        timer.Elapsed += OnTimedEvent;
        timer.AutoReset = true;
        timer.Enabled = true;

        Console.WriteLine("Press Enter to exit the program.");
        Console.ReadLine();
    }

    private static void OnTimedEvent(Object source, ElapsedEventArgs e)
    {
        GeneratePdfReport();
    }

    private static void GeneratePdfReport()
    {
        var renderer = new HtmlToPdf();
        var pdf = renderer.RenderHtmlAsPdf("<h1>Daily Report</h1><p>This is the automated daily report.</p>");
        string outputPath = $"f:\\DailyReport_{DateTime.Now:yyyyMMdd}.pdf";
        pdf.SaveAs(outputPath);
        Console.WriteLine($"Generated PDF report at {outputPath}");
    }
}
using System;
using System.Timers;
using IronPdf;
using Timer = System.Timers.Timer;
class Program
{
static void Main(string[] args)
{
// Set up the timer for 24 hours
Timer timer = new Timer(24 * 60 * 60 * 1000);
timer.Elapsed += OnTimedEvent;
timer.AutoReset = true;
timer.Enabled = true;
Console.WriteLine("Press Enter to exit the program.");
Console.ReadLine();
}
private static void OnTimedEvent(Object source, ElapsedEventArgs e)
{
GeneratePdfReport();
}
private static void GeneratePdfReport()
{
var renderer = new HtmlToPdf();
var pdf = renderer.RenderHtmlAsPdf("<h1>Daily Report</h1><p>This is the automated daily report.</p>");
string outputPath = $"f:\\DailyReport_{DateTime.Now:yyyyMMdd}.pdf";
pdf.SaveAs(outputPath);
Console.WriteLine($"Generated PDF report at {outputPath}");
}
}Imports System
Imports System.Timers
Imports IronPdf
Imports Timer = System.Timers.Timer
Friend Class Program
Shared Sub Main(ByVal args() As String)
' Set up the timer for 24 hours
Dim timer As New Timer(24 * 60 * 60 * 1000)
AddHandler timer.Elapsed, AddressOf OnTimedEvent
timer.AutoReset = True
timer.Enabled = True
Console.WriteLine("Press Enter to exit the program.")
Console.ReadLine()
End Sub
Private Shared Sub OnTimedEvent(ByVal source As Object, ByVal e As ElapsedEventArgs)
GeneratePdfReport()
End Sub
Private Shared Sub GeneratePdfReport()
Dim renderer = New HtmlToPdf()
Dim pdf = renderer.RenderHtmlAsPdf("<h1>Daily Report</h1><p>This is the automated daily report.</p>")
Dim outputPath As String = $"f:\DailyReport_{DateTime.Now:yyyyMMdd}.pdf"
pdf.SaveAs(outputPath)
Console.WriteLine($"Generated PDF report at {outputPath}")
End Sub
End ClassOutput
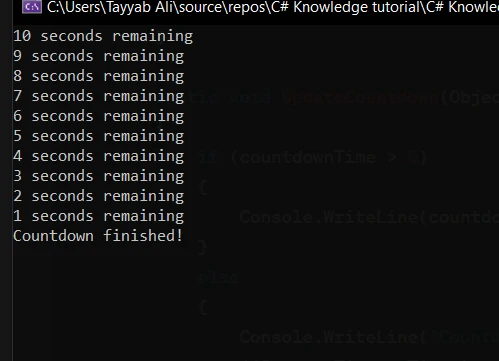
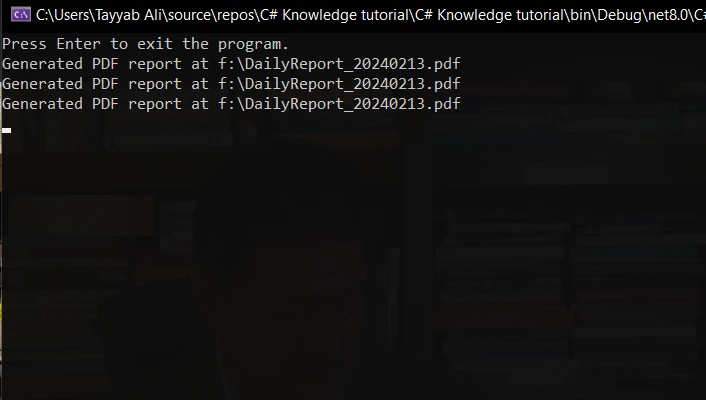
Once you run the code, it'll show the following output in the console. Here I've modified the code for fast output so, I use a 10-second timer.
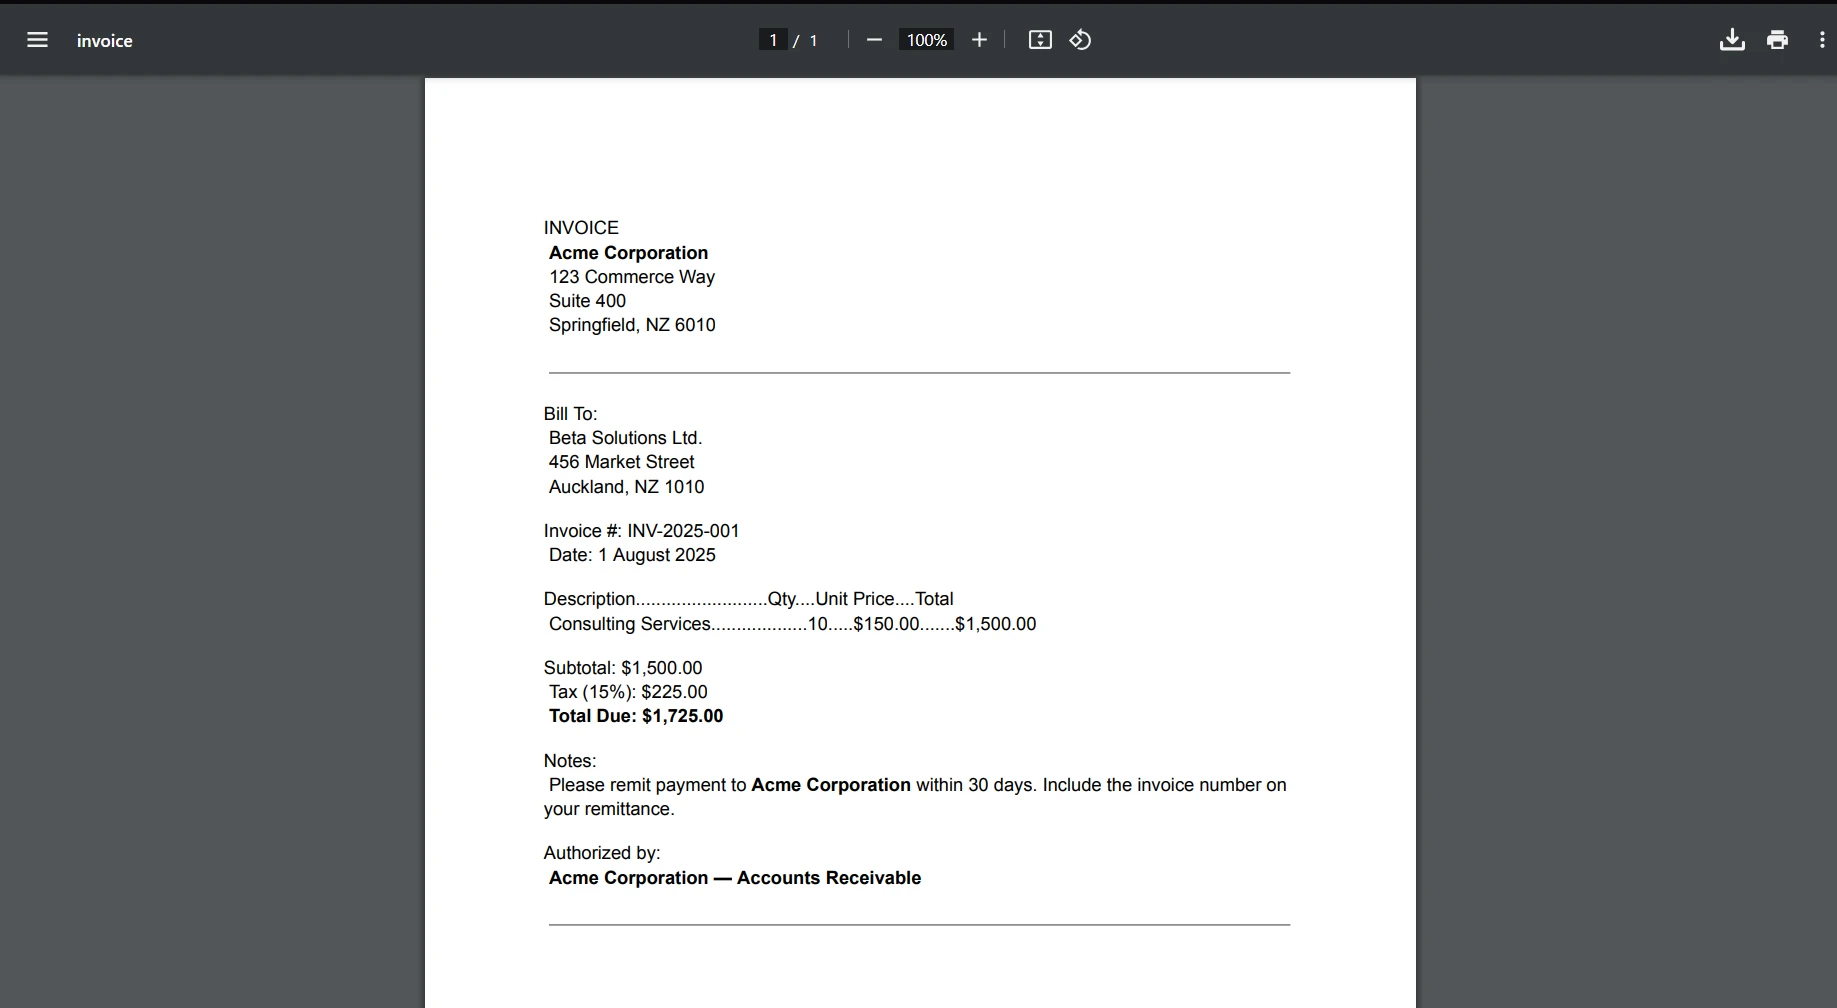
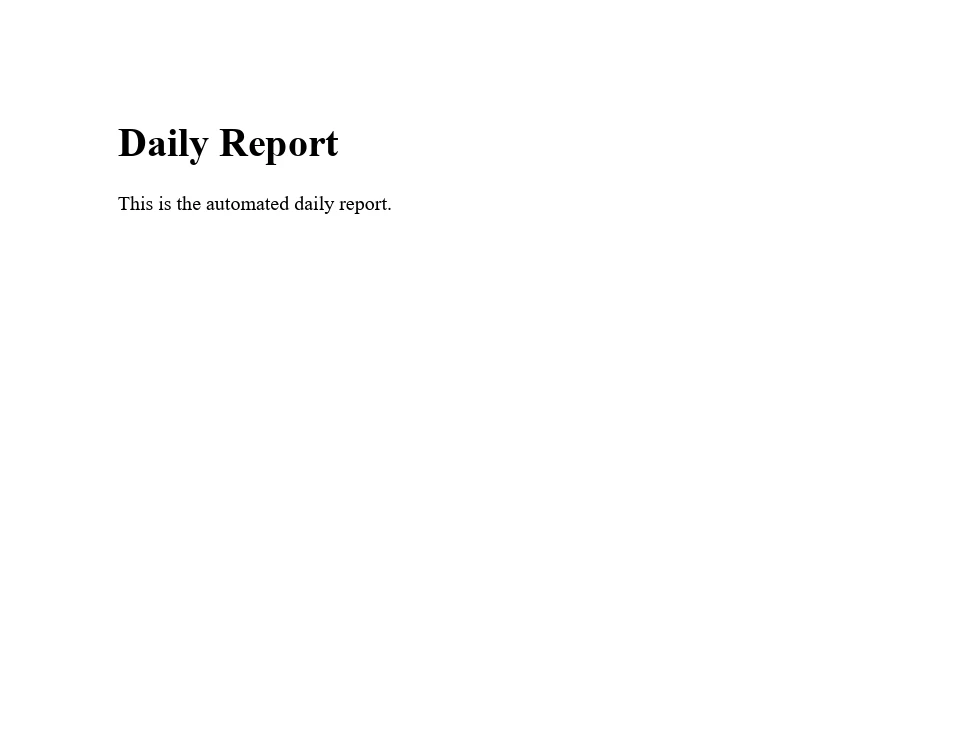
Here is the generated PDF:
Conclusion

In conclusion, integrating C# timers with IronPDF presents a powerful approach to automate the generation and management of PDF documents in .NET applications. Through the examples provided, we've explored how to set up a C# timer to trigger PDF generation tasks at regular intervals, whether for frequent testing purposes or scheduled report generation.
Using C# timers, we can precisely control when our PDF-related tasks are executed, allowing for regular updates, report generation, or any task that needs to occur on a schedule. IronPDF enhances this capability by providing a straightforward and efficient way to create, manipulate, and save PDF documents based on dynamic content, HTML, or even web pages.
IronPDF offers a free trial with Licensing Information, with licenses available for full access and support. This provides a cost-effective way to implement comprehensive PDF functionalities in your .NET applications.
Frequently Asked Questions
What are the main timer classes available in C#?
C# provides several timer classes, including System.Timers.Timer for server-based applications and System.Windows.Forms.Timer for Windows Forms applications, each serving different threading and execution requirements.
How can you convert HTML to PDF in C#?
You can convert HTML to PDF in C# by using IronPDF's RenderHtmlAsPdf method, which supports advanced features like CSS and JavaScript, making it ideal for generating reports and invoices.
How do you set up and manage timers in C# applications?
To set up a timer in a C# application, create an instance of a timer class, specify its interval, and attach an event handler to its Elapsed or Tick event, allowing you to execute code at regular intervals.
What are the benefits of using timers in C# applications?
Timers in C# are beneficial for automating tasks such as scheduling regular database checks, implementing countdown timers, and triggering automated processes like PDF generation.
How can IronPDF automate PDF generation in C#?
IronPDF can automate PDF generation by using C# timers to trigger the PDF creation process at scheduled intervals, such as generating daily reports or invoices.
How do you handle threading issues with System.Timers.Timer?
System.Timers.Timer executes callbacks on a thread pool thread, which can lead to thread safety issues. Proper management involves ensuring that UI updates are marshaled back to the UI thread using techniques like Invoke or BeginInvoke.
How can you update UI components from a timer's event in C#?
To update UI components from a timer's event in C#, you must marshal the call back to the UI thread, often using the Invoke or BeginInvoke methods in Windows Forms applications.
How can timers enhance functionality in C# applications?
Timers can enhance functionality by allowing tasks to be scheduled at specific intervals, improving the efficiency and responsiveness of applications through automation.
How can you install and use IronPDF in a C# project?
IronPDF can be installed in a C# project using the NuGet Package Manager with the command: Install-Package IronPdf. After installation, you can use its methods to convert HTML to PDF and automate PDF generation.
What practical examples demonstrate the use of timers in C#?
Practical examples of timers in C# include implementing countdown timers, scheduling regular database updates, and using IronPDF to automate daily PDF report generation.