Datatables .NET (How It Works For Developers)
ASP.NET developers often seek efficient ways to present tabular data or HTML tables with advanced features such as sorting, searching, and pagination. DataTables.NET is a powerful jQuery, JavaScript library, and highly flexible tool that facilitates the creation of interactive and feature-rich tables in web applications. In this article, we'll explore how to integrate DataTables.NET distribution files, a table-enhancing library for server-side processing into an ASP.NET project to enhance the presentation and user experience of tabular data.
How to use DataTables in an ASP.NET Web Application?
- Create ASP.NET Web Application
- Add DataTables Client-Side styling package
- Install Entity Framework Core Packages, only the core software
- Add Model Class, Controller, and Razor Page
- Add JavaScript code in the JS File
- Set up Configuration
- Build and Run the Program
- Export Data into an Excel file using IronXL for Excel Data Export
What is DataTables.NET?
DataTables.NET is a jQuery JavaScript library that allows you to create and manipulate interactive tables in .NET applications. It is based on the jQuery DataTables plug-in, which provides comprehensive API features like pagination, sorting, filtering, and scrolling for dynamic as well as static HTML tables. It is a table-enhancing library that can work with various data sources, such as SQL databases, AJAX, or in-memory objects.
Server Side Processing
Consider a scenario where you have an API endpoint delivering a vast dataset of products. The standard approach involves jQuery DataTables making an AJAX call to this API, obtaining a list of products in JSON format, and rendering an HTML table. This is known as client-side processing, which is efficient for smaller datasets, typically ranging from 100 to 1000 records. However, what happens when the dataset expands to 10,000 records or more?
When dealing with a substantial number of records, it becomes impractical to send the entire dataset to the browser in one go. Transmitting 10,000 records at once is not only wasteful in terms of bandwidth but also strains browser resources. In such cases, an alternative approach, server-side processing, becomes crucial for optimizing performance.
In server-side processing, rather than sending the entire dataset, the API transmits data in manageable chunks, typically paginated with around 50 records per page. By doing this, the load time is significantly improved, as jQuery DataTables now loads a modest number of records (~50) instead of dealing with the entire dataset at once. This approach reduces CPU and bandwidth usage, creating a more efficient interaction between the API and the DataTable.
In this article, we will explore the implementation of server-side processing in an ASP.NET Razor Page application, demonstrating how to efficiently handle and display extensive datasets while enhancing the overall performance of your web application.
Getting Started with DataTables.NET in ASP.NET 8
To get started we need to add the DataTables.NET Client Side Library to our project. This article will use the ASP.NET Core Web App (Razor Pages) project with .NET 8. You may use any Web App Project as per your requirements.
To add a Client-Side Library, right-click on Solution>Add> Client Side Library, and search for data tables as shown below.
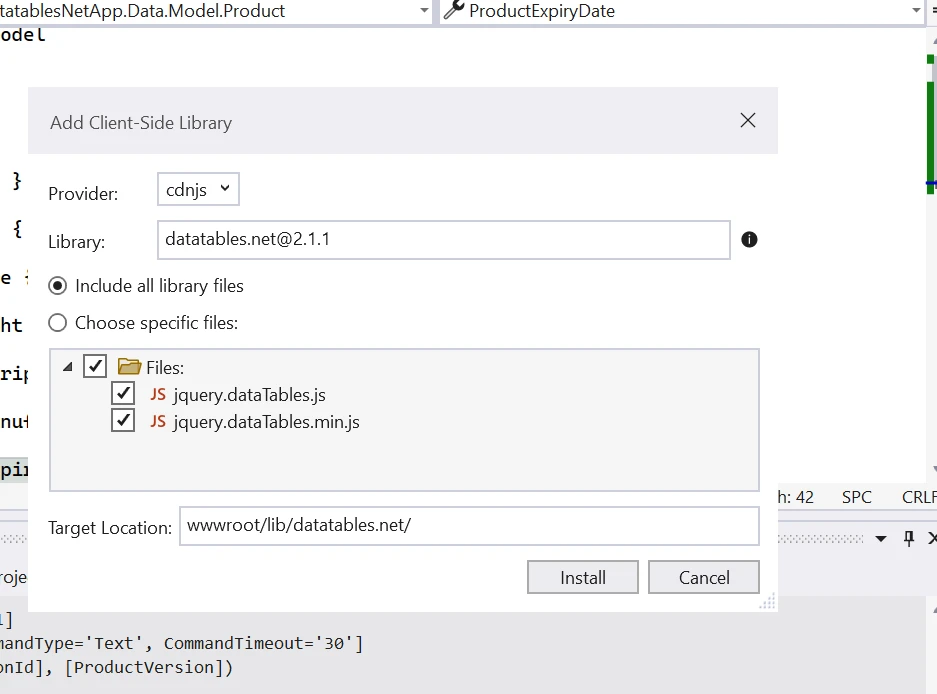
Now, we need to add Model Class, DB Context, Controller, HTML table, and AJAX Call.
But before that, we need to install EntityFramework Nuget Packages to connect our application with the Database. This article will use the Code First Approach, you may use Database first as per your preference.
Install the following locally hosted packages:
- Microsoft.EntityFrameworkCore
- Microsoft.EntityFrameworkCore.Design
- Microsoft.EntityFrameworkCore.SqlServer
- Microsoft.EntityFrameworkCore.Tools
Install the above package by using the install-package command from the NuGet Package Manager Console, or install it from the NuGet Package Manager solution by searching it.
Add Model Class
I am using Product Model Class for this example, you may use it as per your requirement.
public class Product
{
    public int Id { get; set; }
    public string ProductName { get; set; } = string.Empty;
    public string ProductPrice { get; set; } = string.Empty;
    public string ProductWeight { get; set; } = string.Empty;
    public string ProductDescription { get; set; } = string.Empty;
    public DateTime ProductManufacturingDate { get; set; }
    public DateTime ProductExpiryDate { get; set; }
}
public class Product
{
public int Id { get; set; }
public string ProductName { get; set; } = string.Empty;
public string ProductPrice { get; set; } = string.Empty;
public string ProductWeight { get; set; } = string.Empty;
public string ProductDescription { get; set; } = string.Empty;
public DateTime ProductManufacturingDate { get; set; }
public DateTime ProductExpiryDate { get; set; }
}Add ApplicationDBContext Class
public class ApplicationDBContext : DbContext
{
    public ApplicationDBContext(DbContextOptions<ApplicationDBContext> options) : base(options)
    {
    }
    public DbSet<Product> Products { get; set; }
}
public class ApplicationDBContext : DbContext
{
public ApplicationDBContext(DbContextOptions<ApplicationDBContext> options) : base(options)
{
}
public DbSet<Product> Products { get; set; }
}Add Advanced Interaction Controls
We will add the ProductDatatables.js inside the wwwroot/js folder for adding advanced controls such as pagination, search, etc.
// Initialize the DataTables plugin for the HTML element with 'productDatatable' ID
$(document).ready(function () {
    $("#productDatatable").DataTable({
        "processing": true, // Enable processing indicator
        "serverSide": true, // Enable server-side processing
        "ajax": {
            "url": "/api/Product", // API endpoint for fetching product data
            "type": "POST",
            "datatype": "json"
        },
        "columnDefs": [{
            // Define properties for columns
            "targets": [0],
            "visible": false, // Hide the 'Id' column
            "searchable": false // Disable searching for the 'Id' column
        }],
        "columns": [
            { "data": "id", "name": "Id", "autoWidth": true },
            { "data": "productName", "name": "ProductName", "autoWidth": true },
            { "data": "productPrice", "name": "ProductPrice", "autoWidth": true },
            { "data": "productWeight", "name": "ProductWeight", "autoWidth": true },
            { "data": "productDescription", "name": "ProductDescription", "autoWidth": true },
            { "data": "productManufacturingDate", "name": "ProductManufacturingDate", "autoWidth": true },
            { "data": "productExpiryDate", "name": "ProductExpiryDate", "autoWidth": true },
            {
                // Add a 'Delete' button with an onclick event for deleting the product
                "render": function (data, type, row) {
                    return "<a href='#' class='btn btn-danger' onclick=DeleteProduct('" + row.id + "');>Delete</a>";
                }
            }
        ]
    });
});
// Initialize the DataTables plugin for the HTML element with 'productDatatable' ID
$(document).ready(function () {
$("#productDatatable").DataTable({
"processing": true, // Enable processing indicator
"serverSide": true, // Enable server-side processing
"ajax": {
"url": "/api/Product", // API endpoint for fetching product data
"type": "POST",
"datatype": "json"
},
"columnDefs": [{
// Define properties for columns
"targets": [0],
"visible": false, // Hide the 'Id' column
"searchable": false // Disable searching for the 'Id' column
}],
"columns": [
{ "data": "id", "name": "Id", "autoWidth": true },
{ "data": "productName", "name": "ProductName", "autoWidth": true },
{ "data": "productPrice", "name": "ProductPrice", "autoWidth": true },
{ "data": "productWeight", "name": "ProductWeight", "autoWidth": true },
{ "data": "productDescription", "name": "ProductDescription", "autoWidth": true },
{ "data": "productManufacturingDate", "name": "ProductManufacturingDate", "autoWidth": true },
{ "data": "productExpiryDate", "name": "ProductExpiryDate", "autoWidth": true },
{
// Add a 'Delete' button with an onclick event for deleting the product
"render": function (data, type, row) {
return "<a href='#' class='btn btn-danger' onclick=DeleteProduct('" + row.id + "');>Delete</a>";
}
}
]
});
});Now, we need to add an HTML table.
Add HTML table
Write the following code in the index.cshtml file to add a static HTML page.
@page
@model IndexModel
@{
    ViewData["Title"] = "Home page";
}
<link href="~/lib/datatables/css/dataTables.bootstrap4.min.css" rel="stylesheet" />
<div class="container">
    <br />
    <div style="width:90%; margin:0 auto;">
        <table id="productDatatable" class="table table-striped table-bordered dt-responsive nowrap" width="100%" cellspacing="0">
            <thead>
                <tr>
                    <th>Id</th>
                    <th>Product Name</th>
                    <th>Product Price</th>
                    <th>Product Weight</th>
                    <th>Product Description</th>
                    <th>Product Manufacturing Date</th>
                    <th>Product Expiry Date</th>
                    <th>Actions</th>
                </tr>
            </thead>
        </table>
    </div>
</div>

@section Scripts {
    <script src="~/lib/datatables/js/jquery.dataTables.min.js"></script>
    <script src="~/lib/datatables/js/dataTables.bootstrap4.min.js"></script>
    <script src="~/js/ProductDatatable.js"></script>
}
We need to add the controller.
Add Product Controller
Add Product Controller for creating endpoint and direct pull requests.
[Route("api/[controller]")]
[ApiController]
public class ProductController : ControllerBase
{
    private readonly ApplicationDBContext context;
    public ProductController(ApplicationDBContext context)
    {
        this.context = context;
    }

    [HttpPost]
    public IActionResult GetProducts()
    {
        try
        {
            var draw = Request.Form["draw"].FirstOrDefault();
            var start = Request.Form["start"].FirstOrDefault();
            var length = Request.Form["length"].FirstOrDefault();
            var searchValue = Request.Form["search[value]"].FirstOrDefault();
            int pageSize = length != null ? Convert.ToInt32(length) : 0;
            int skip = start != null ? Convert.ToInt32(start) : 0;
            int recordsTotal = 0;
            var productData = context.Products.ToLis();

            // Filtering data based on provided search value
            if (!string.IsNullOrEmpty(searchValue))
            {
                productData = productData.Where(m => m.ProductName.Contains(searchValue)
                                            || m.ProductDescription.Contains(searchValue)
                                            || m.Id.ToString().Contains(searchValue)).ToList();
            }

            recordsTotal = productData.Count();
            var data = productData.Skip(skip).Take(pageSize).ToList();
            var jsonData = new { draw = draw, recordsFiltered = recordsTotal, recordsTotal = recordsTotal, data = data };
            return Ok(jsonData);
        }
        catch (Exception)
        {
            throw;
        }
    }
}
[Route("api/[controller]")]
[ApiController]
public class ProductController : ControllerBase
{
private readonly ApplicationDBContext context;
public ProductController(ApplicationDBContext context)
{
this.context = context;
}
[HttpPost]
public IActionResult GetProducts()
{
try
{
var draw = Request.Form["draw"].FirstOrDefault();
var start = Request.Form["start"].FirstOrDefault();
var length = Request.Form["length"].FirstOrDefault();
var searchValue = Request.Form["search[value]"].FirstOrDefault();
int pageSize = length != null ? Convert.ToInt32(length) : 0;
int skip = start != null ? Convert.ToInt32(start) : 0;
int recordsTotal = 0;
var productData = context.Products.ToLis();
// Filtering data based on provided search value
if (!string.IsNullOrEmpty(searchValue))
{
productData = productData.Where(m => m.ProductName.Contains(searchValue)
|| m.ProductDescription.Contains(searchValue)
|| m.Id.ToString().Contains(searchValue)).ToList();
}
recordsTotal = productData.Count();
var data = productData.Skip(skip).Take(pageSize).ToList();
var jsonData = new { draw = draw, recordsFiltered = recordsTotal, recordsTotal = recordsTotal, data = data };
return Ok(jsonData);
}
catch (Exception)
{
throw;
}
}
}Here, we have implemented pagination & searching on the server side.
Now, we need to set up our database and add configuration to the Program.cs class. If you are using .NET 5 or a lower version, you may need to do it in Startup.cs class.
First of all, add the following Connection String in the appsettings.json file.
"ConnectionStrings": {
   "ProductDB": "Server=localserver\\SQLEXPRESS;Database=ProductDB;Trusted_Connection=True;MultipleActiveResultSets=true;TrustServerCertificate=True;"
}
Now add the following code to the Program.cs class.
public static void Main(string[] args)
{
    var builder = WebApplication.CreateBuilder(args);
    builder.Services.AddDbContext<ApplicationDBContext>(options =>
    {
         options.UseSqlServer(builder.Configuration.GetConnectionString("ProductDB"));
    });
    builder.Services.AddControllers();
    // Add services to the container.
    builder.Services.AddRazorPages();
    var app = builder.Build();
    // Configure the HTTP request pipeline.
    if (!app.Environment.IsDevelopment())
    {
         app.UseExceptionHandler("/Error");
         // The default HSTS value is 30 days.
         app.UseHsts();
    }
    app.UseHttpsRedirection();
    app.UseStaticFiles();
    app.UseRouting();
    app.UseAuthorization();
    app.MapControllers();
    app.MapRazorPages();
    app.Run();
}
public static void Main(string[] args)
{
var builder = WebApplication.CreateBuilder(args);
builder.Services.AddDbContext<ApplicationDBContext>(options =>
{
options.UseSqlServer(builder.Configuration.GetConnectionString("ProductDB"));
});
builder.Services.AddControllers();
// Add services to the container.
builder.Services.AddRazorPages();
var app = builder.Build();
// Configure the HTTP request pipeline.
if (!app.Environment.IsDevelopment())
{
app.UseExceptionHandler("/Error");
// The default HSTS value is 30 days.
app.UseHsts();
}
app.UseHttpsRedirection();
app.UseStaticFiles();
app.UseRouting();
app.UseAuthorization();
app.MapControllers();
app.MapRazorPages();
app.Run();
}We need to run the migration, as we are using a code-first approach.
Run the following command in the Package Manager Console.
Add-Migration initAdd-Migration initThe above command will create a migration. Now we need to apply these migrations to our database. Run the following command in the Package Manager Console.
Update-DatabaseUpdate-DatabaseThe above command will create tables in our database. Add dummy data in the Product Table; you may generate random data from Mockaroo.
Now, build and run this application.
Output
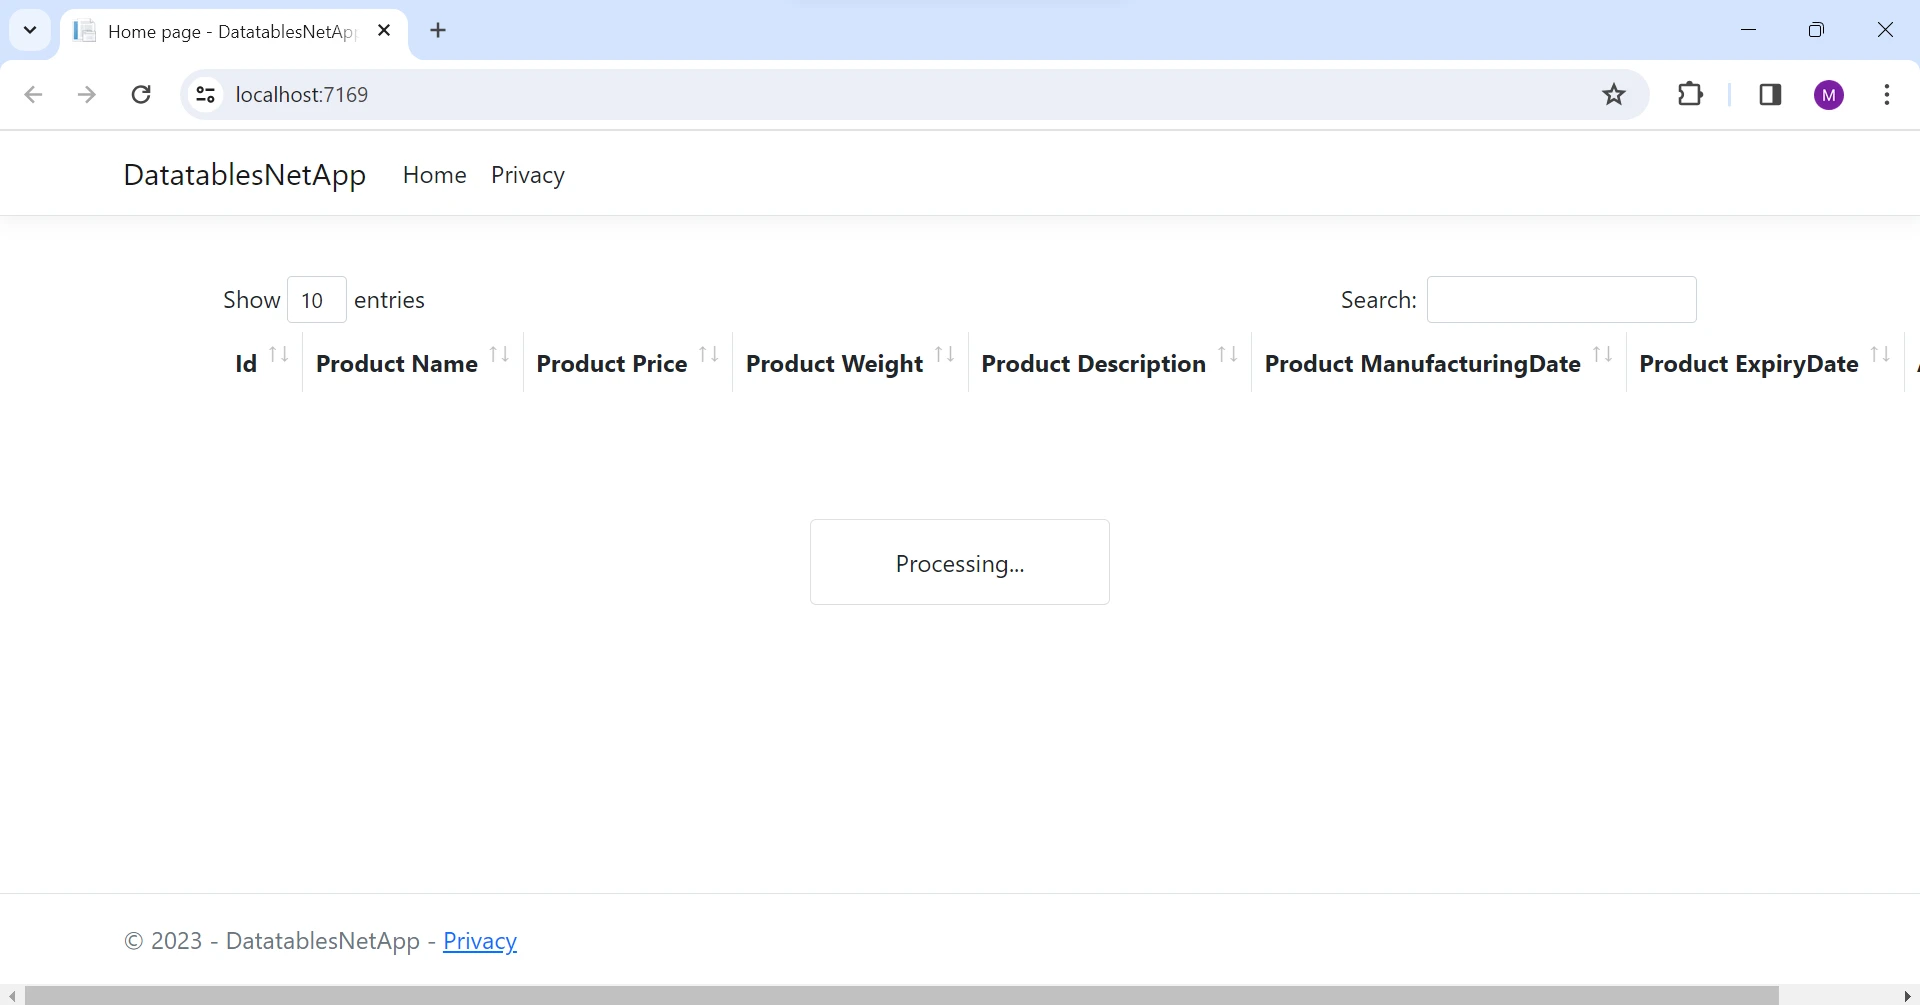
We can see, that we have a very interactive UI with advanced interaction controls.
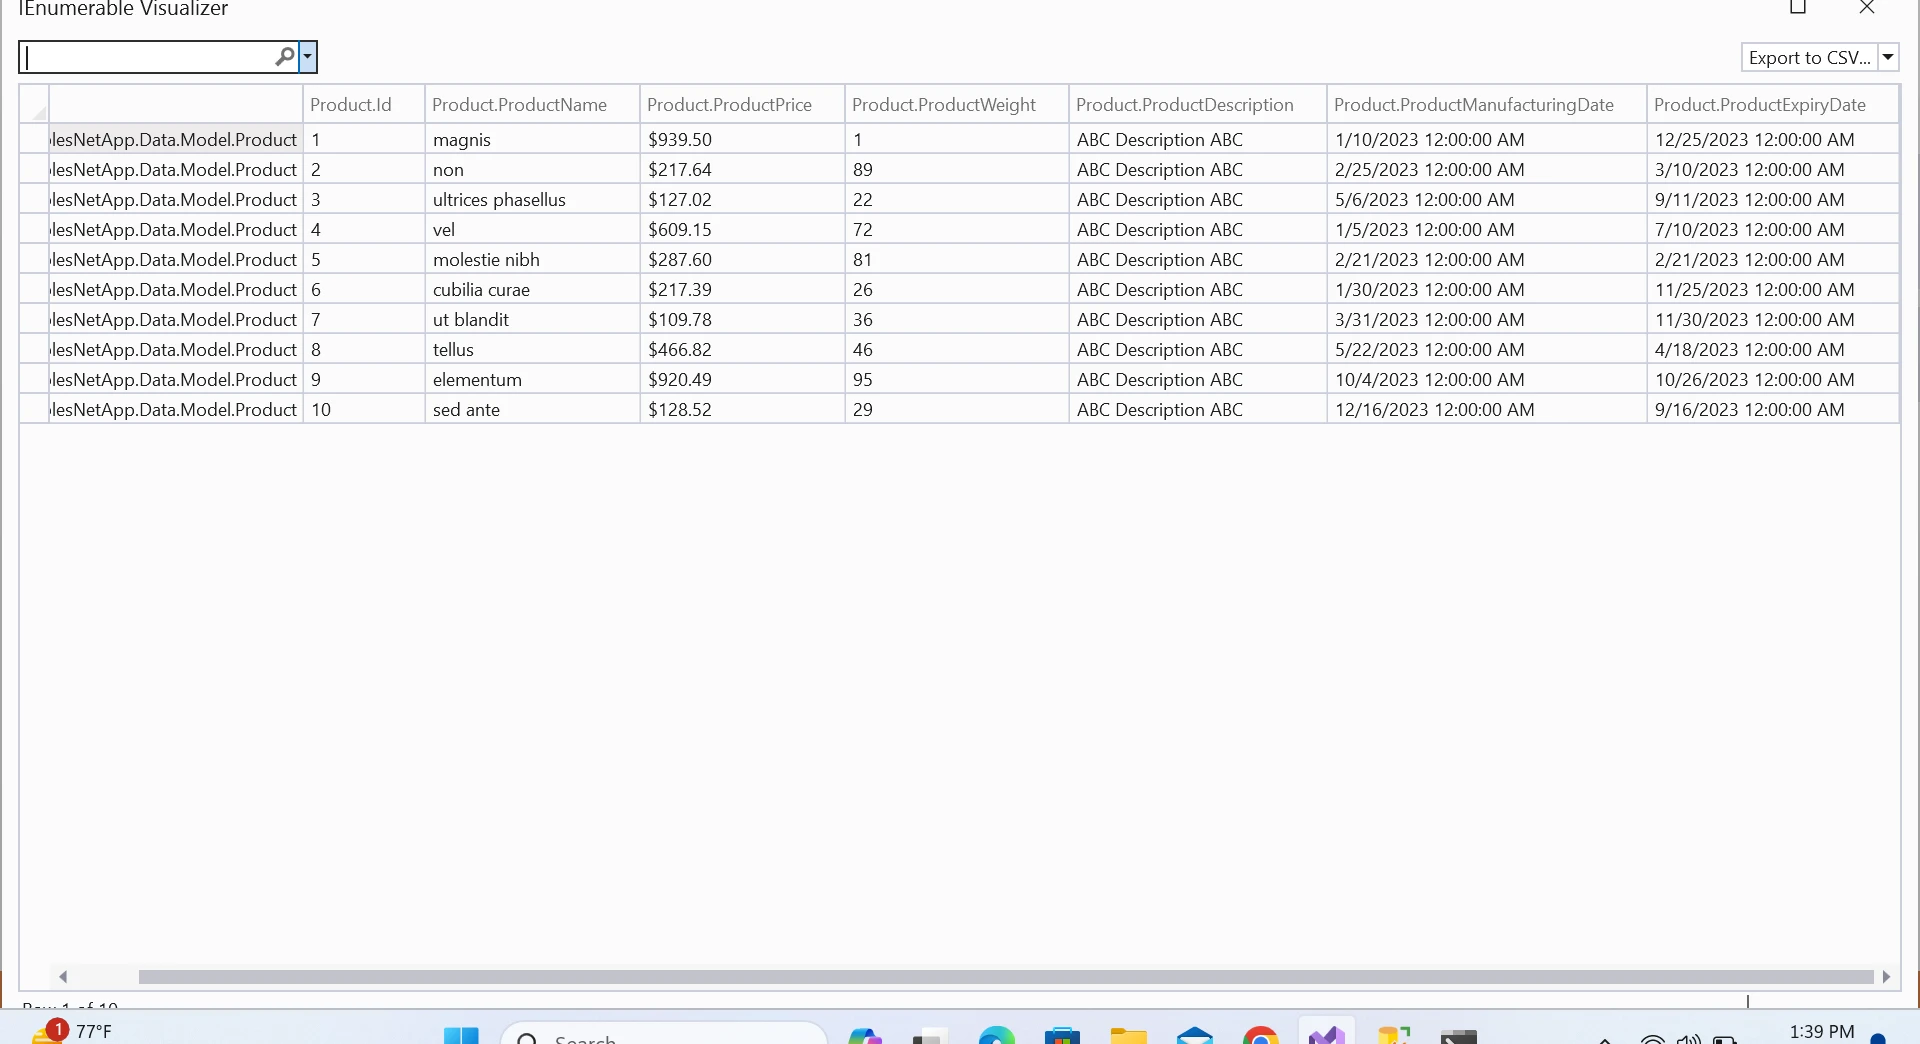
Now, pagination is implemented on the server side as shown below.
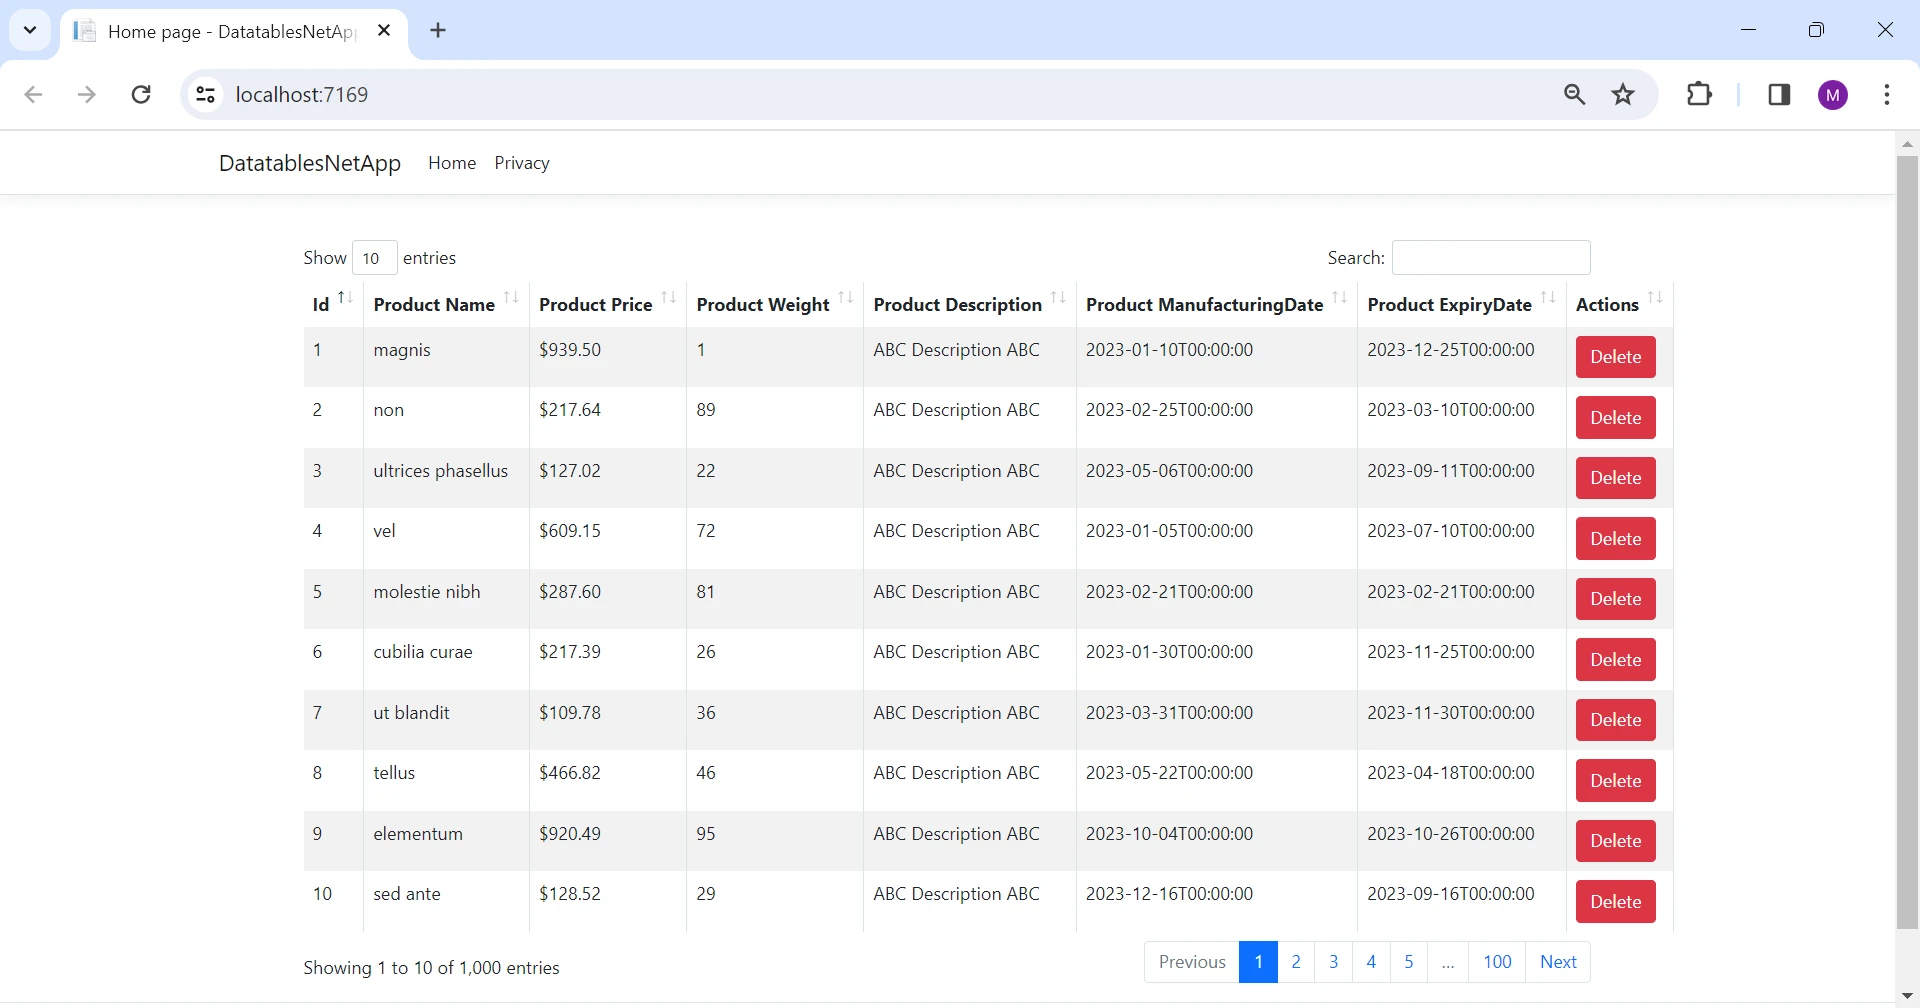
Output UI
The data is then rendered on the Client Side with rich UI Control.
You can explore more from the DataTables.NET documentation by clicking explore DataTables.NET documentation.
Introduction of IronXL
IronXL - Excel Library for .NET is a library that allows you to work with Excel files in .NET applications. It can create Excel spreadsheets, read CSV files, edit Excel files, and export to Excel in various formats, such as XLS, XLSX, CSV, and TSV. It does not require Microsoft Office or Excel Interop to be installed. It supports .NET 8, 7, 6, 5, Core, Framework, and Azure.
We often have a requirement to export data into Excel or CSV files. IronXL is the best choice in this case. Now, we will write a code to export our data into an Excel file.
Install IronXL
Install the IronXL library in our project by entering the following command in the Package Manager Console.
Install-Package IronPdf
This will install IronXL and the required dependencies in our project.
Export Data to Excel
Let's write a code to convert our Product list into an Excel File.
public void ExportToExcel(List<Product> productList)
{
    WorkBook wb = WorkBook.Create(ExcelFileFormat.XLSX); // Create a new workbook instance
    WorkSheet ws = wb.DefaultWorkSheet; // Access the default worksheet
    int rowCount = 1;

    // Iterate over the product list and fill the worksheet
    foreach (Product product in productList)
    {
        ws["A" + rowCount].Value = product.Id.ToString();
        ws["B" + rowCount].Value = product.ProductName;
        ws["C" + rowCount].Value = product.ProductDescription;
        ws["D" + rowCount].Value = product.ProductPrice;
        ws["E" + rowCount].Value = product.ProductWeight;
        ws["F" + rowCount].Value = product.ProductManufacturingDate;
        ws["G" + rowCount].Value = product.ProductExpiryDate;
        rowCount++;
    }
    wb.SaveAs("product.xlsx"); // Save the workbook as an Excel file
}
public void ExportToExcel(List<Product> productList)
{
WorkBook wb = WorkBook.Create(ExcelFileFormat.XLSX); // Create a new workbook instance
WorkSheet ws = wb.DefaultWorkSheet; // Access the default worksheet
int rowCount = 1;
// Iterate over the product list and fill the worksheet
foreach (Product product in productList)
{
ws["A" + rowCount].Value = product.Id.ToString();
ws["B" + rowCount].Value = product.ProductName;
ws["C" + rowCount].Value = product.ProductDescription;
ws["D" + rowCount].Value = product.ProductPrice;
ws["E" + rowCount].Value = product.ProductWeight;
ws["F" + rowCount].Value = product.ProductManufacturingDate;
ws["G" + rowCount].Value = product.ProductExpiryDate;
rowCount++;
}
wb.SaveAs("product.xlsx"); // Save the workbook as an Excel file
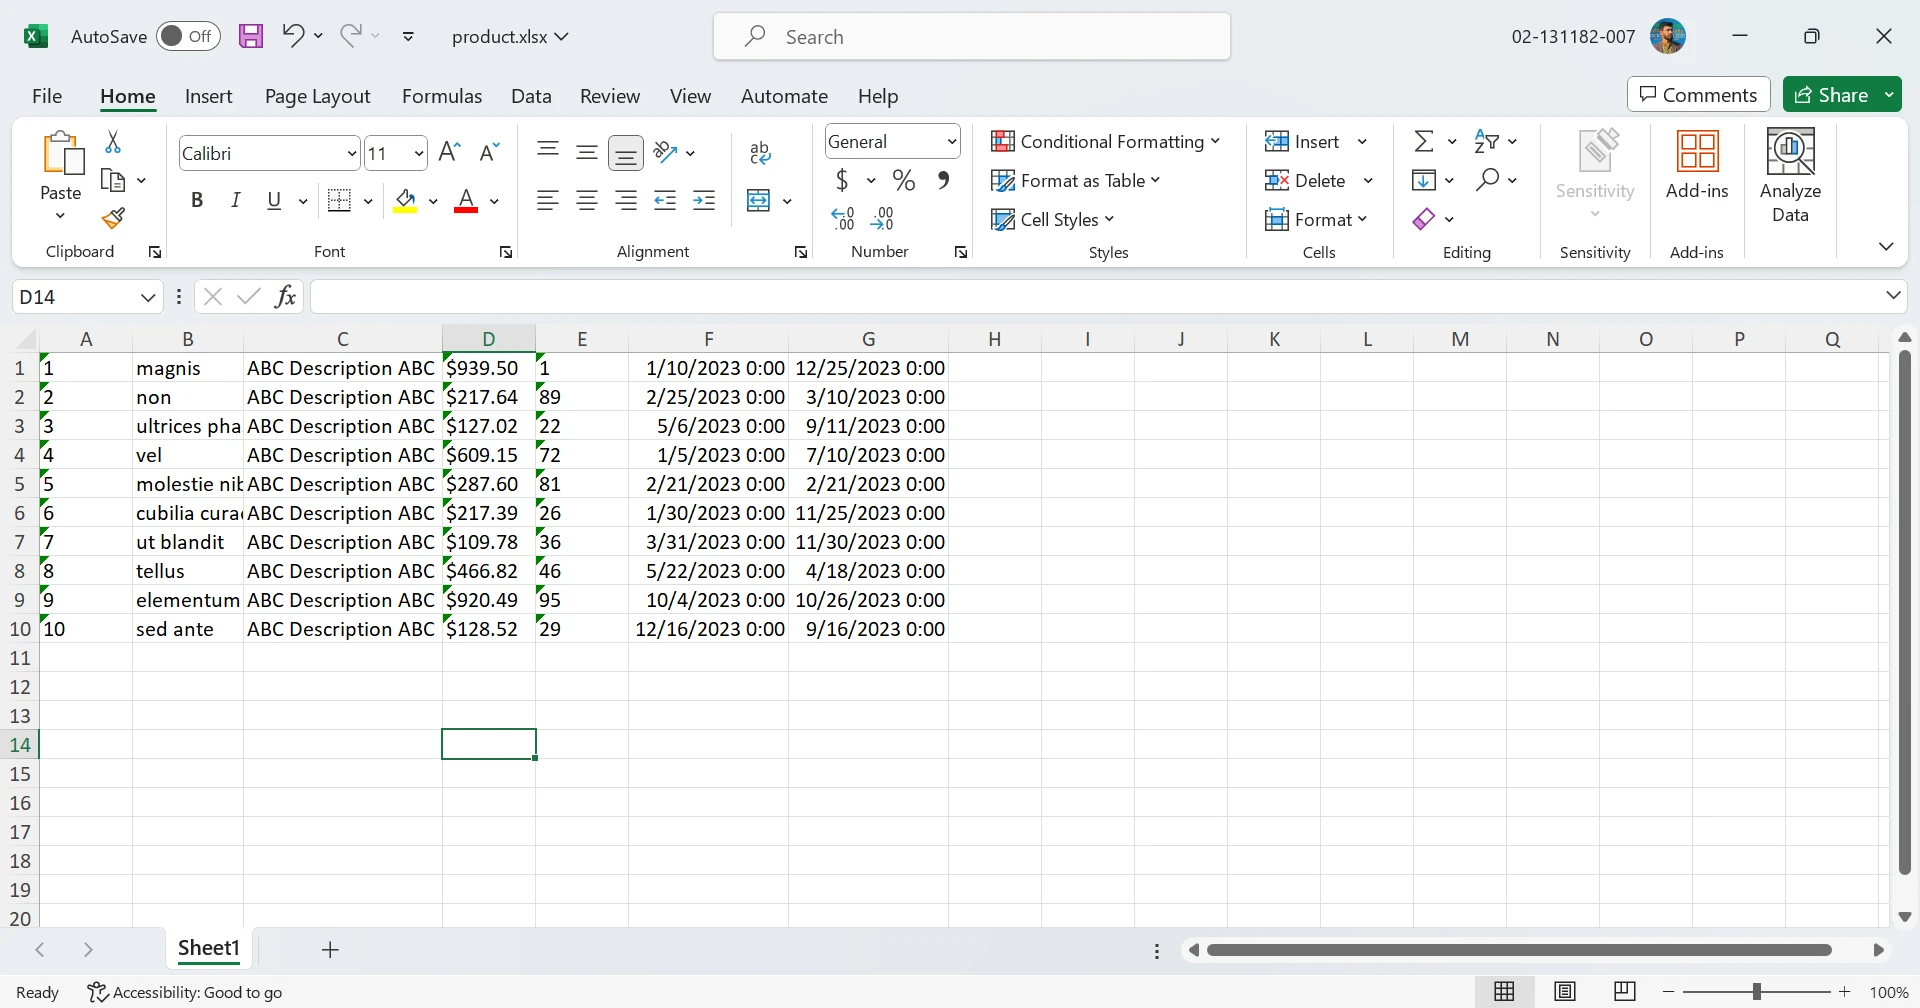
}We have created an Excel file from the list in a very simple and easy way.
IronXL provides comprehensive tutorials on creating XLSX files, code examples for reading Excel, and API documentation to use its comprehensive API in the best way possible.
In optimizing ASP.NET performance, we exclusively rely on Only Core Software, ensuring a lean and efficient development environment. Utilizing DataTables.NET as locally hosted packages further enhances responsiveness, minimizing external dependencies for streamlined data handling and Excel exportation. Additionally, contributing code efficiently becomes seamless within this optimized and self-contained ecosystem.
IronPDF is a solution designed to convert webpages, URLs, and HTML into PDF documents. The generated PDFs retain the original formatting and stylistic elements of the source webpages. This tool is particularly effective for creating PDF renditions of web-based content such as reports and invoices.
using IronPdf;

class Program
{
    static void Main(string[] args)
    {
        var renderer = new ChromePdfRenderer();

        // 1. Convert HTML String to PDF
        var htmlContent = "<h1>Hello, IronPDF!</h1><p>This is a PDF from an HTML string.</p>";
        var pdfFromHtmlString = renderer.RenderHtmlAsPdf(htmlContent);
        pdfFromHtmlString.SaveAs("HTMLStringToPDF.pdf");

        // 2. Convert HTML File to PDF
        var htmlFilePath = "path_to_your_html_file.html"; // Specify the path to your HTML file
        var pdfFromHtmlFile = renderer.RenderHtmlFileAsPdf(htmlFilePath);
        pdfFromHtmlFile.SaveAs("HTMLFileToPDF.pdf");

        // 3. Convert URL to PDF
        var url = "http://ironpdf.com"; // Specify the URL
        var pdfFromUrl = renderer.RenderUrlAsPdf(url);
        pdfFromUrl.SaveAs("URLToPDF.pdf");
    }
}
using IronPdf;
class Program
{
static void Main(string[] args)
{
var renderer = new ChromePdfRenderer();
// 1. Convert HTML String to PDF
var htmlContent = "<h1>Hello, IronPDF!</h1><p>This is a PDF from an HTML string.</p>";
var pdfFromHtmlString = renderer.RenderHtmlAsPdf(htmlContent);
pdfFromHtmlString.SaveAs("HTMLStringToPDF.pdf");
// 2. Convert HTML File to PDF
var htmlFilePath = "path_to_your_html_file.html"; // Specify the path to your HTML file
var pdfFromHtmlFile = renderer.RenderHtmlFileAsPdf(htmlFilePath);
pdfFromHtmlFile.SaveAs("HTMLFileToPDF.pdf");
// 3. Convert URL to PDF
var url = "http://ironpdf.com"; // Specify the URL
var pdfFromUrl = renderer.RenderUrlAsPdf(url);
pdfFromUrl.SaveAs("URLToPDF.pdf");
}
}Conclusion
In summary, leveraging DataTables.NET for server-side processing in ASP.NET distribution repo projects proves to be a good strategy for handling substantial datasets efficiently. This approach ensures optimized performance by transmitting data in manageable chunks, mitigating bandwidth usage, and enhancing user experience. The integration of IronXL further extends the application's capabilities, enabling effortless export of tabular data to Excel for comprehensive data analysis and reporting.
By adopting these technologies, developers can create web applications that strike a balance between rich interactivity and resource efficiency, providing users with a seamless and responsive experience, especially in scenarios where large datasets are involved. IronXL offers various licensing options for IronXL, depending on the number of developers, projects, and redistribution needs. The licenses are perpetual and include free support and updates.
Frequently Asked Questions
How do I integrate DataTables.NET into an ASP.NET project?
To integrate DataTables.NET into an ASP.NET project, you need to create an ASP.NET Web Application, add DataTables Client-Side styling packages, install Entity Framework Core Packages, add Model Classes, Controllers, and Razor Pages, configure JavaScript for server-side processing, and then build and run your project.
What is server-side processing in DataTables.NET?
Server-side processing in DataTables.NET involves transmitting data in manageable chunks from the server to the client, rather than loading the entire dataset at once. This improves performance by reducing load times and minimizing CPU and bandwidth usage, especially with large datasets.
Why is server-side processing important in DataTables.NET?
Server-side processing is crucial for optimizing performance when handling large datasets. It allows the server to send only the necessary data to the client, reducing the load on the browser and improving overall efficiency.
How can I export tabular data to Excel in an ASP.NET application?
You can use the IronXL library to export tabular data to Excel in an ASP.NET application. IronXL allows you to create and manipulate Excel files directly from your data lists without needing Microsoft Office or Excel Interop.
How do I set up a Client-Side Library in ASP.NET for DataTables?
To set up a Client-Side Library in ASP.NET, right-click on your Solution in Visual Studio, select 'Add', then choose 'Client-Side Library'. You can search for and add the desired library, such as DataTables, which will enhance your project's functionality.
What are the steps to configure DataTables.NET for server-side processing?
To configure DataTables.NET for server-side processing, ensure you have set up a Model Class, DB Context, Controller, and HTML table. You also need to make an AJAX call and configure the server-side processing logic in your JavaScript files to handle data fetching and manipulation.
How do filtering and pagination work with DataTables.NET?
Filtering and pagination in DataTables.NET are managed through server-side processing. The server filters data based on search criteria and manages pagination by sending data chunks to the client, ensuring efficient data handling.


