Dotnetopenauth .NET Core (개발자를 위한 작동 방식)
DotNetOpenAuth .NET Core는 .NET Core에 맞게 적응된 오리지널 DotNetOpenAuth 라이브러리의 버전으로, 강력한 공개 API를 제공합니다. 이 라이브러리는 OAuth2 및 OpenID를 사용하여 .NET 애플리케이션에 인증을 추가하는 데 도움을 줍니다. IronPDF는 .NET에서 PDF 파일을 생성, 읽기 및 편집할 수 있는 라이브러리입니다. .NET 애플리케이션에서 보고서와 송장 같은 문서를 직접 생성하는 데 유용합니다.
웹 및 데스크톱 애플리케이션과 같은 다양한 유형의 프로젝트에서 DotNetOpenAuth .NET Core 및 IronPDF를 사용하여 코드를 공유하고 새로운 기능을 구현할 수 있습니다. 자신의 소프트웨어에서 인증 및 PDF 문서 관리를 처리하려는 개발자에게 필수적입니다.
DotNetOpenAuth .NET Core 시작하기
.NET 프로젝트에서 DotNetOpenAuth .NET Core 설정하기
Microsoft 기술의 지원을 받아, 자신의 .NET 프로젝트에서 DotNetOpenAuth .NET Core를 사용하기 시작하려면 다음 단계를 따르세요:
- Visual Studio에서 프로젝트를 엽니다.
- 솔루션 탐색기로 이동하세요.
- 프로젝트 이름을 오른쪽 클릭하세요.
Manage NuGet Packages을 선택합니다.- NuGet 패키지 관리자에서
DotNetOpenAuth.NetCore및 기타 NuGet 패키지를 검색합니다. - 프로젝트에 추가하려면
Install을 클릭합니다.
이 작업은 프로젝트에 DotNetOpenAuth .NET Core 라이브러리를 추가하여 인증 기능 통합을 지원합니다.
DotNetOpenAuth .NET Core를 사용한 기본 코드 예제
다음은 DotNetOpenAuth .NET Core를 사용하여 애플리케이션에서 OAuth2 인증을 설정하는 방법을 보여주는 간단한 예제입니다:
using DotNetOpenAuth.OAuth2;

// Initialize the OAuth2 client with the authorization server details
var client = new WebServerClient(new AuthorizationServerDescription
{
    TokenEndpoint = new Uri("https://your-auth-server.com/token"),
    AuthorizationEndpoint = new Uri("https://your-auth-server.com/authorize")
}, "your-client-id", "your-client-secret");

// Start the authentication process and get the authorization state
IAuthorizationState state = client.ProcessUserAuthorization();
if (state != null && state.IsAuthorized)
{
    // Authorized successfully, now you can access protected resources
}
using DotNetOpenAuth.OAuth2;
// Initialize the OAuth2 client with the authorization server details
var client = new WebServerClient(new AuthorizationServerDescription
{
TokenEndpoint = new Uri("https://your-auth-server.com/token"),
AuthorizationEndpoint = new Uri("https://your-auth-server.com/authorize")
}, "your-client-id", "your-client-secret");
// Start the authentication process and get the authorization state
IAuthorizationState state = client.ProcessUserAuthorization();
if (state != null && state.IsAuthorized)
{
// Authorized successfully, now you can access protected resources
}Imports DotNetOpenAuth.OAuth2
' Initialize the OAuth2 client with the authorization server details
Private client = New WebServerClient(New AuthorizationServerDescription With {
.TokenEndpoint = New Uri("https://your-auth-server.com/token"),
.AuthorizationEndpoint = New Uri("https://your-auth-server.com/authorize")
}, "your-client-id", "your-client-secret")
' Start the authentication process and get the authorization state
Private state As IAuthorizationState = client.ProcessUserAuthorization()
If state IsNot Nothing AndAlso state.IsAuthorized Then
' Authorized successfully, now you can access protected resources
End If이 코드 스니펫은 DotNetOpenAuth .NET Core를 사용하여 OAuth2 클라이언트를 설정하고, 인증 서버에 연결하고, 사용자 인증을 처리합니다.
DotNetOpenAuth .NET Core 기능 구현하기
OpenID Connect 통합하기
DotNetOpenAuth .NET Core를 사용하여 OpenID Connect를 통합하려면 다음 기본 접근 방식을 따를 수 있습니다:
using DotNetOpenAuth.OAuth2;

// Configure the OpenID Connect client with authority details
var openIdClient = new WebServerClient(new AuthorizationServerDescription
{
    TokenEndpoint = new Uri("https://your-openid-provider.com/token"),
    AuthorizationEndpoint = new Uri("https://your-openid-provider.com/authorize")
}, "your-client-id");

// Redirect user for authentication
Uri authUri = openIdClient.GetAuthorizationRequestUri("openid email profile");
Response.Redirect(authUri.AbsoluteUri);
using DotNetOpenAuth.OAuth2;
// Configure the OpenID Connect client with authority details
var openIdClient = new WebServerClient(new AuthorizationServerDescription
{
TokenEndpoint = new Uri("https://your-openid-provider.com/token"),
AuthorizationEndpoint = new Uri("https://your-openid-provider.com/authorize")
}, "your-client-id");
// Redirect user for authentication
Uri authUri = openIdClient.GetAuthorizationRequestUri("openid email profile");
Response.Redirect(authUri.AbsoluteUri);Imports DotNetOpenAuth.OAuth2
' Configure the OpenID Connect client with authority details
Private openIdClient = New WebServerClient(New AuthorizationServerDescription With {
.TokenEndpoint = New Uri("https://your-openid-provider.com/token"),
.AuthorizationEndpoint = New Uri("https://your-openid-provider.com/authorize")
}, "your-client-id")
' Redirect user for authentication
Private authUri As Uri = openIdClient.GetAuthorizationRequestUri("openid email profile")
Response.Redirect(authUri.AbsoluteUri)이 코드는 OpenID Connect 클라이언트를 구성하고 사용자를 OpenID 제공자의 인증 페이지로 리디렉션합니다.
액세스 토큰 처리하기
DotNetOpenAuth .NET Core로 액세스 토큰을 처리하는 방법은 다음과 같습니다:
// After the user is authenticated, process the authorization response to retrieve the token
IAuthorizationState authState = openIdClient.ProcessUserAuthorization();
if (authState != null && authState.IsAuthorized)
{
    // Access token is available, and you can use it to make authenticated requests
    string accessToken = authState.AccessToken;
}
// After the user is authenticated, process the authorization response to retrieve the token
IAuthorizationState authState = openIdClient.ProcessUserAuthorization();
if (authState != null && authState.IsAuthorized)
{
// Access token is available, and you can use it to make authenticated requests
string accessToken = authState.AccessToken;
}' After the user is authenticated, process the authorization response to retrieve the token
Dim authState As IAuthorizationState = openIdClient.ProcessUserAuthorization()
If authState IsNot Nothing AndAlso authState.IsAuthorized Then
' Access token is available, and you can use it to make authenticated requests
Dim accessToken As String = authState.AccessToken
End If이 스니펫은 사용자 인증 응답을 처리하여 액세스 토큰을 수신하고 사용할 수 있게 합니다.
토큰 새로 고침하기
토큰이 만료될 때 새로 고치려면 다음 코드를 사용하세요:
// Check if the access token is expired and refresh it
if (authState.AccessTokenExpirationUtc <= DateTime.UtcNow)
{
    if (openIdClient.RefreshAuthorization(authState))
    {
        // Token refreshed successfully
    }
}
// Check if the access token is expired and refresh it
if (authState.AccessTokenExpirationUtc <= DateTime.UtcNow)
{
if (openIdClient.RefreshAuthorization(authState))
{
// Token refreshed successfully
}
}' Check if the access token is expired and refresh it
If authState.AccessTokenExpirationUtc <= DateTime.UtcNow Then
If openIdClient.RefreshAuthorization(authState) Then
' Token refreshed successfully
End If
End If이 코드는 현재 토큰이 만료되었는지 확인하고 새로 고치려고 시도합니다.
토큰 취소하기
토큰을 취소해야 하는 경우, 아래에서 보이는 것처럼 구현하세요:
// Revoke the access token
bool success = openIdClient.RevokeAuthorization(authState);
if (success)
{
    // Token revoked successfully
}
// Revoke the access token
bool success = openIdClient.RevokeAuthorization(authState);
if (success)
{
// Token revoked successfully
}' Revoke the access token
Dim success As Boolean = openIdClient.RevokeAuthorization(authState)
If success Then
' Token revoked successfully
End If이 스니펫은 인증을 취소하여, 실질적으로 액세스 토큰을 무효화합니다.
토큰 요청 사용자 정의하기
추가 매개변수를 추가하는 등 특정 요구 사항에 맞게 토큰 요청을 사용자 정의하려면:
// Customize the token request with additional parameters
var additionalParams = new Dictionary<string, string>
{
    {"custom_parameter", "value"}
};
IAuthorizationState customizedState = openIdClient.ProcessUserAuthorization(additionalParams);
if (customizedState != null && customizedState.IsAuthorized)
{
    // Token request customized and processed successfully
}
// Customize the token request with additional parameters
var additionalParams = new Dictionary<string, string>
{
{"custom_parameter", "value"}
};
IAuthorizationState customizedState = openIdClient.ProcessUserAuthorization(additionalParams);
if (customizedState != null && customizedState.IsAuthorized)
{
// Token request customized and processed successfully
}' Customize the token request with additional parameters
Dim additionalParams = New Dictionary(Of String, String) From {
{"custom_parameter", "value"}
}
Dim customizedState As IAuthorizationState = openIdClient.ProcessUserAuthorization(additionalParams)
If customizedState IsNot Nothing AndAlso customizedState.IsAuthorized Then
' Token request customized and processed successfully
End If이 코드는 토큰 요청에 사용자 지정 매개변수를 추가하며, 이는 인증 서버의 특정 요구 사항을 처리하는 데 유용할 수 있습니다.
IronPDF와 함께하는 DotNetOpenAuth .NET Core
IronPDF는 개발자가 .NET 환경에서 PDF 파일을 생성, 읽기, 조작할 수 있도록 하는 종합 라이브러리입니다. HTML 또는 직접적으로 URL에서 PDF를 생성하기에 특히 유용하며, 이는 보고서 작성, 송장 생성 또는 웹 페이지를 정적 형태로 저장하는 데 유용합니다. DotNetOpenAuth .NET Core와 통합하면 이러한 기능이 인증된 사용자에게만 안전하게 접근 가능하게 됩니다.
IronPDF를 DotNetOpenAuth .NET Core와 병합한 사용 사례
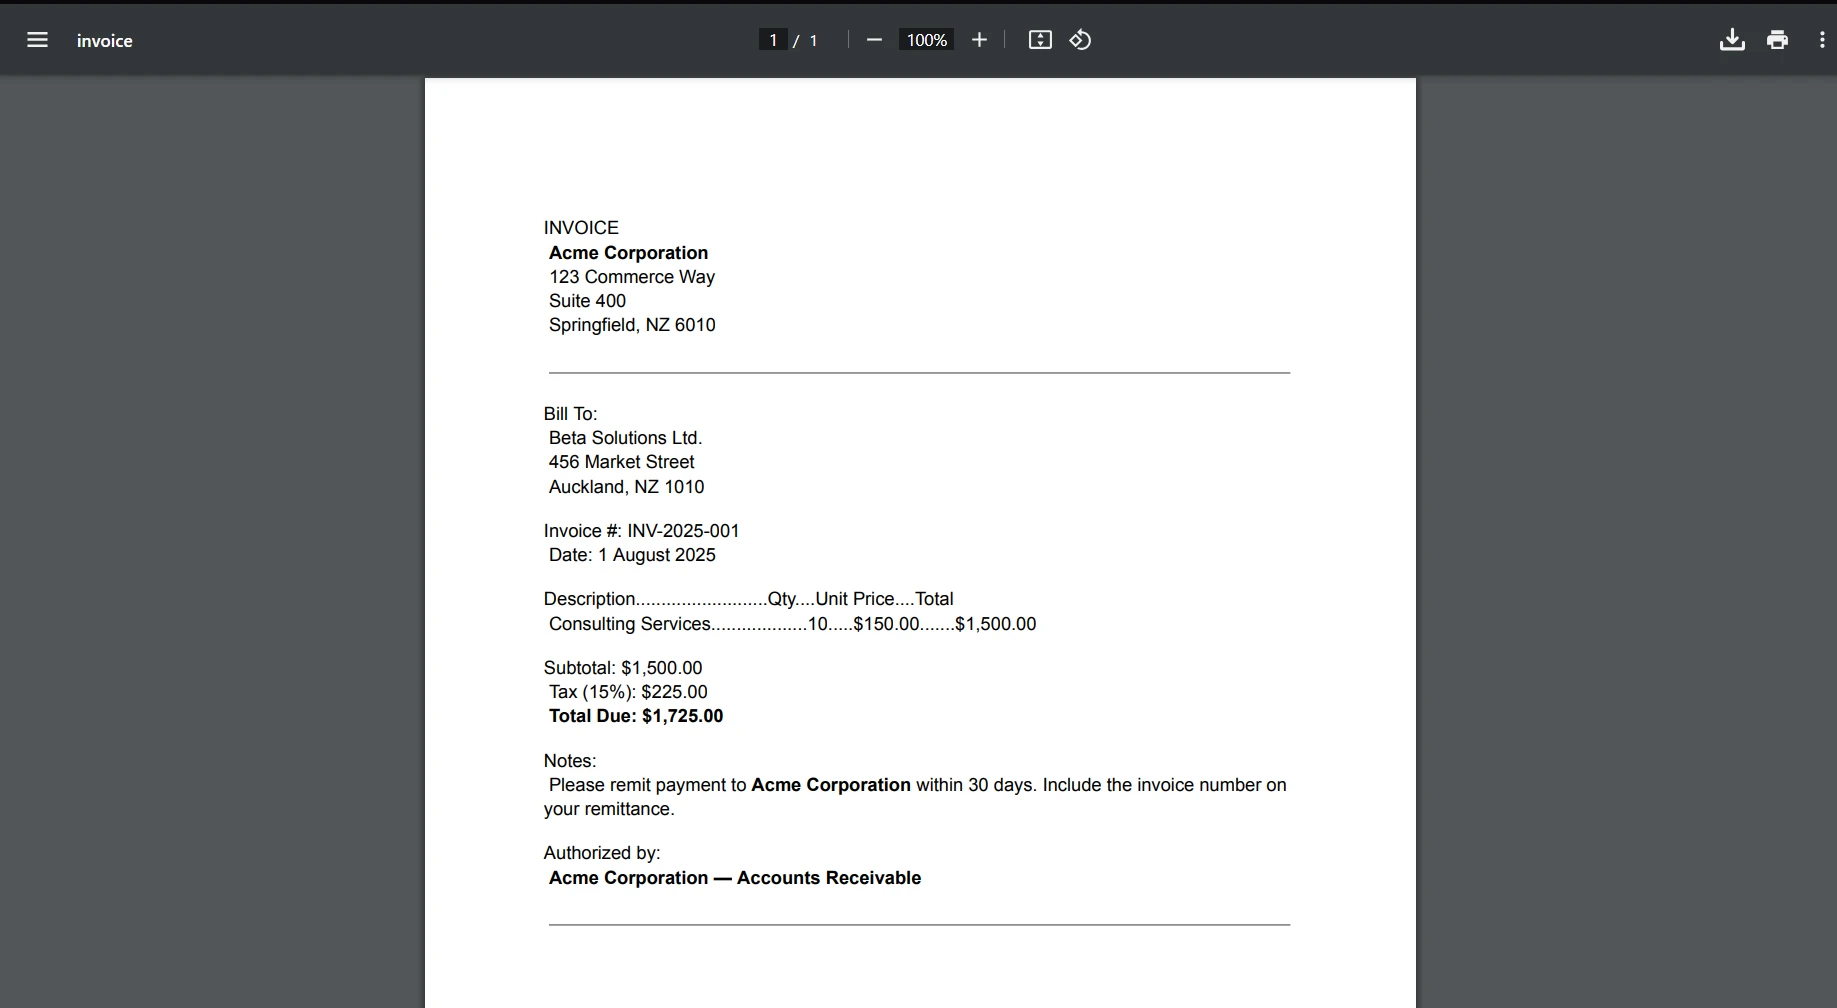
IronPDF를 DotNetOpenAuth .NET Core와 병합하는 실제 사용 사례는 인증된 사용자가 맞춤형 보고서를 생성하고 다운로드할 필요가 있는 웹 애플리케이션입니다. 예를 들어, 사용자가 귀하의 애플리케이션에 로그인하여 PDF 형식으로 금융 보고서에 접근하는 시나리오를 상상해보세요. DotNetOpenAuth는 사용자가 올바르게 인증되고 권한이 부여되어 문서에 접근할 수 있도록 보장하고, IronPDF는 이러한 개인화된 PDF의 생성 및 전달을 처리합니다.
사용 사례의 코드 예제
이것을 구현하는 방법을 보여주는 완전한 코드 예제를 살펴보겠습니다. .NET Core에서 사용자를 인증한 후 IronPDF를 사용하여 PDF 보고서를 생성하는 간단한 웹 API를 만들어보겠습니다:
using IronPdf;
using Microsoft.AspNetCore.Mvc;
using Microsoft.AspNetCore.Authorization;

[Route("api/[controller]")]
[ApiController]
public class ReportController : ControllerBase
{
    [Authorize]
    [HttpGet("download-pdf")]
    public IActionResult DownloadPdfReport()
    {
        // Authentication is handled by DotNetOpenAuth .NET Core
        var currentUser = HttpContext.User.Identity.Name;

        // Generate PDF content using IronPDF
        var Renderer = new ChromePdfRenderer();
        var PDF = Renderer.RenderHtmlAsPdf($"<h1>Report for {currentUser}</h1><p>This is your personalized financial report.</p>");

        // Set file name and content type for the PDF
        var outputFileName = $"Report-{currentUser}.pdf";
        Response.Headers.Add("Content-Disposition", $"attachment; filename={outputFileName}");
        Response.ContentType = "application/pdf";

        // Return the generated PDF file
        return File(PDF.Stream.ToArray(), "application/pdf");
    }
}
using IronPdf;
using Microsoft.AspNetCore.Mvc;
using Microsoft.AspNetCore.Authorization;
[Route("api/[controller]")]
[ApiController]
public class ReportController : ControllerBase
{
[Authorize]
[HttpGet("download-pdf")]
public IActionResult DownloadPdfReport()
{
// Authentication is handled by DotNetOpenAuth .NET Core
var currentUser = HttpContext.User.Identity.Name;
// Generate PDF content using IronPDF
var Renderer = new ChromePdfRenderer();
var PDF = Renderer.RenderHtmlAsPdf($"<h1>Report for {currentUser}</h1><p>This is your personalized financial report.</p>");
// Set file name and content type for the PDF
var outputFileName = $"Report-{currentUser}.pdf";
Response.Headers.Add("Content-Disposition", $"attachment; filename={outputFileName}");
Response.ContentType = "application/pdf";
// Return the generated PDF file
return File(PDF.Stream.ToArray(), "application/pdf");
}
}Imports IronPdf
Imports Microsoft.AspNetCore.Mvc
Imports Microsoft.AspNetCore.Authorization
<Route("api/[controller]")>
<ApiController>
Public Class ReportController
Inherits ControllerBase
<Authorize>
<HttpGet("download-pdf")>
Public Function DownloadPdfReport() As IActionResult
' Authentication is handled by DotNetOpenAuth .NET Core
Dim currentUser = HttpContext.User.Identity.Name
' Generate PDF content using IronPDF
Dim Renderer = New ChromePdfRenderer()
Dim PDF = Renderer.RenderHtmlAsPdf($"<h1>Report for {currentUser}</h1><p>This is your personalized financial report.</p>")
' Set file name and content type for the PDF
Dim outputFileName = $"Report-{currentUser}.pdf"
Response.Headers.Add("Content-Disposition", $"attachment; filename={outputFileName}")
Response.ContentType = "application/pdf"
' Return the generated PDF file
Return File(PDF.Stream.ToArray(), "application/pdf")
End Function
End Class이 예제에서는 [Authorize] 속성을 사용하여 인증된 사용자만 PDF 생성 엔드포인트에 접근할 수 있도록 합니다. IronPDF의 ChromePdfRenderer 클래스는 HTML 콘텐츠에서 PDF를 생성하는 데 사용되며, 이 경우 사용자의 이름을 동적으로 개인화합니다.

결론
DotNetOpenAuth .NET Core를 IronPDF와 통합하면 .NET 애플리케이션의 보안과 기능을 향상시키는 강력한 솔루션을 제공합니다. 이러한 기술을 활용함으로써 민감한 데이터를 효과적으로 보호하고 동적 PDF 생성을 통해 개인화된 사용자 경험을 제공할 수 있습니다.
IronPDF는 다양한 기능을 제공할 뿐만 아니라 개발자 친화적이며 .NET 애플리케이션 내에서 PDF 파일을 생성하고 관리하는 간단한 접근법을 제공합니다. 프로젝트에 IronPDF를 도입할 계획이라면 IronPDF의 공식 웹사이트를 방문하여 무료 체험판 및 라이선스 옵션을 탐색하는 것이 좋습니다.
자주 묻는 질문
DotNetOpenAuth .NET Core는 무엇에 사용되나요?
DotNetOpenAuth .NET Core는 .NET 애플리케이션에 OAuth2 및 OpenID 인증 기능을 통합하여 웹 및 데스크톱 환경에서 안전한 인증 프로세스를 가능하게 하는 데 사용됩니다.
.NET 애플리케이션에 OAuth2 인증을 어떻게 추가할 수 있나요?
OAuth2 인증을 추가하려면 DotNetOpenAuth .NET Core를 사용하여 인증 서버 세부 정보를 통해 WebServerClient를 초기화한 다음, 사용자를 인증 프로세스로 안내하고 그들의 인증 응답을 처리합니다.
인증을 통해 .NET 애플리케이션에서 PDF를 생성할 수 있나요?
예, DotNetOpenAuth .NET Core를 인증에 통합하고 IronPDF를 PDF 생성에 통합하여 개인 맞춤형 보고서 및 청구서와 같이 안전하고 인증된 PDF 문서를 생성할 수 있습니다.
.NET 애플리케이션에서 액세스 토큰을 어떻게 관리하나요?
DotNetOpenAuth .NET Core는 인증 응답을 처리하여 액세스 토큰을 수신하고 이를 사용하여 안전하고 인증된 요청을 가능하게 합니다.
.NET Core에서 액세스 토큰을 어떻게 갱신하나요?
.NET Core에서 액세스 토큰을 갱신하려면, 토큰의 만료 여부를 확인하고 `RefreshAuthorization` 메서드를 사용하여 새로운 토큰을 얻어 지속적인 안전한 접근을 보장합니다.
PDF 생성과 DotNetOpenAuth를 통합하는 이점은 무엇인가요?
DotNetOpenAuth를 PDF 생성과 통합하면, 민감한 문서에 대한 안전한 접근이 가능하여 인증된 사용자가 맞춤형 PDF를 생성하고 다운로드할 수 있게 합니다.
.NET 애플리케이션에서 토큰을 어떻게 폐기하나요?
DotNetOpenAuth .NET Core의 `RevokeAuthorization` 메서드를 구현하여 토큰을 무효화하여, 이후의 비인가 요청을 방지합니다.
.NET 인증에서 토큰 요청을 어떻게 사용자 지정할 수 있나요?
특정 요구 사항에 맞게 토큰 처리 코드에 추가 매개변수를 추가하여 토큰 요청을 사용자 지정할 수 있습니다.
.NET 프로젝트에서 OpenID Connect를 설정하는 데 필요한 단계는 무엇인가요?
OpenID Connect를 설정하려면 필요한 권한 세부 정보를 사용하여 OpenID Connect 클라이언트를 구성하고, 사용자가 OpenID 공급자를 통해 인증할 수 있도록 안내하여 DotNetOpenAuth .NET Core와 통합합니다.