如何在 React 中創建 PDF 文件
歡迎來到從 React 應用程式創建 PDF 文件的教學! 在本教學中,我們將探索多種程式庫來生成 PDF,並學習如何使用受歡迎的 jsPDF 程式庫直接從您的 React 組件創建 PDF 文件。 那麼,讓我們深入學習並開始吧!
PDF(可攜式文檔格式)是一種廣泛使用的文件格式,用於共享和打印文件,同時保留其佈局和格式。 作為一名 React 網頁開發人員,您可能會遇到需要從您的 React 應用程式中直接生成 PDF 文件的情況,例如發票、報告或銷售合同。
選擇 React PDF 程式庫
在 React 應用程式中創建 PDF 文件可能是一項艱鉅的任務,特別是當您對這個領域不熟悉時。 幸運的是,我們有多個第三方程式庫可以供使用,大大簡化了此過程。 每個程式庫都有其獨特的功能和工具,適用於不同的使用案例。 讓我們更詳細地探索這些程式庫。
jsPDF
jsPDF 是開發人員間使用廣泛的程式庫,用於從 JavaScript 生成 PDF 文件。 其中一個主要賣點是其簡單性。 它的語法和使用非常簡單,允許您在短時間內將 HTML 內容轉換為 PDF 文件。
它允許您控制 PDF 的格式和佈局,包括更改字體大小和顏色,調整頁面方向和尺寸。jsPDF 是一個在瀏覽器和伺服器環境中均可運行的強大解決方案,是廣泛適用於各類 JavaScript 應用程式的理想選擇。
pdfmake
pdfmake 以純 JavaScript 實現的客戶端/伺服器端 PDF 打印解決方案而聞名。 由於其全面的 API 和靈活的佈局選項,這個程式庫是創建更復雜 PDF 文件的理想選擇。 使用 pdfmake,您可以使用簡單的 JavaScript 對象定義文檔內容和結構,然後將其轉換為有效的 PDF 文檔。
React-PDF
React-PDF 是一個獨特的程式庫,提供了使用 React 組件創建 PDF 文件的強大功能。 您無需手動在 JavaScript 對象中編寫文檔結構,可以像構建典型的 React 應用程式一樣使用可重用的組件和屬性來創建您的 PDF。 IronPDF 網站有關於使用 React-PDF 程式庫創建 PDF 的教學。
為什麼選擇 jsPDF?
儘管這三個程式庫都提供強大的工具來在 React 中生成 PDF 文件,但由於其簡單性、靈活性以及在社群中的廣泛應用,我們將在本教學中使用 jsPDF。 它為初學者提供較低的入門門檻,其強大的功能集使其成為許多使用案例的合適選擇。 我們將使用 jsPDF 探索的原則將為您提供生成 PDF 的堅實基礎,並且如果您的專案需要,您將更容易接受其他程式庫。
先決條件
在我們深入本教程之前,請確保您已充分準備好必要的工具和知識,以便順利跟蹤教學内容。 本教學的先決條件如下:
基本的 React 理解
首先,您應對 React 擁有基本的理解,這是一個用於構建用戶界面,尤其是單頁應用程式的流行 JavaScript 程式庫。 您應熟悉如 JSX(JavaScript XML)、組件、狀態以及 React 中的屬性等概念。
開發環境
您還應在您的計算機上設置一個用於構建 React 應用程式的開發環境。 這包括文本編輯器或集成開發環境(IDE)。 像 Visual Studio Code,Atom 或 Sublime Text 這樣的文本編輯器都是不錯的選擇。
Node.js 和 npm
為了管理我們的專案及其依賴項,我們將使用 Node.js 和 npm(Node 包管理器)。 確保您已在您的計算機上安裝了 Node.js。 Node.js 是一個 JavaScript 運行時,允許我们在伺服器上運行 JavaScript。 它附帶 npm 已安裝,因此您可以管理專案所需的程式庫。
您可以運行以下終端命令檢查是否安裝了 Node.js 和 npm:
node -v
npm -v
node -v
npm -v這些命令將分別顯示您系統上安裝的 Node.js 和 npm 的版本。 如果您尚未安裝它們或者版本過舊,您應從他們的官方下載頁面下載並安裝最新的長期支持(LTS)版本的 Node.js。
步驟 1:設置專案
讓我們從設置我們的 React 專案開始。 打開您的終端並導航到您希望創建專案的目錄。 運行以下命令以創建一個新的 React 應用程式:
npx create-react-app pdf-from-reactnpx create-react-app pdf-from-react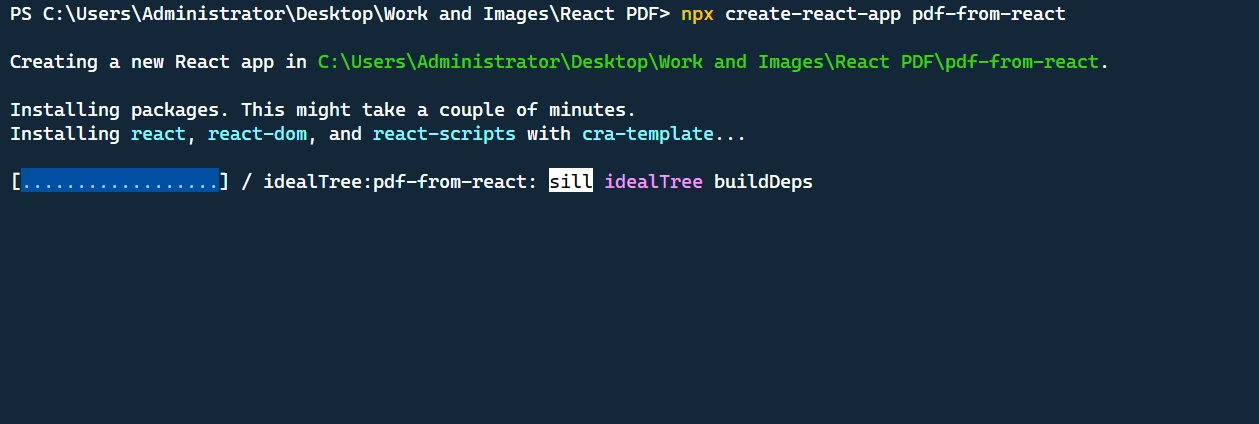
這個命令將創建一個名為 pdf-from-react 的新目錄,其中包含基本的 React 項目結構。
接下來,導航到專案目錄:
cd pdf-from-reactcd pdf-from-react現在,我們可以在代碼編輯器中打開專案並開始實現了。
步驟 2:添加必要的依賴
首先,我們需要安裝必要的套件。 使用以下終端命令安裝 @mui/material 和 jspdf。
npm install jspdf @mui/material @emotion/react @emotion/styled @mui/icons-materialnpm install jspdf @mui/material @emotion/react @emotion/styled @mui/icons-material步驟 3:構建 PDF 生成功能
匯入程式庫
我們首先進行了應用程式所需依賴項的匯入。 這包括來自 Material-UI 程式庫的各種組件、用於生成 PDF 的 jsPDF 程式庫以及樣式工具。
import React, { useState } from "react";
import "./App.css";
import {
  Button,
  TextField,
  Box,
  Container,
  Typography,
  Table,
  TableBody,
  TableCell,
  TableContainer,
  TableHead,
  TableRow,
  Paper,
  IconButton,
  Snackbar,
  Alert,
} from "@mui/material";
import Grid from "@mui/material/Grid";
import DeleteIcon from "@mui/icons-material/Delete";
import jsPDF from "jspdf";
import { styled } from "@mui/material/styles";
import { tableCellClasses } from "@mui/material/TableCell";
import React, { useState } from "react";
import "./App.css";
import {
Button,
TextField,
Box,
Container,
Typography,
Table,
TableBody,
TableCell,
TableContainer,
TableHead,
TableRow,
Paper,
IconButton,
Snackbar,
Alert,
} from "@mui/material";
import Grid from "@mui/material/Grid";
import DeleteIcon from "@mui/icons-material/Delete";
import jsPDF from "jspdf";
import { styled } from "@mui/material/styles";
import { tableCellClasses } from "@mui/material/TableCell";創建樣式化的組件
為了給我們的應用加入一致的跨瀏覽器行為,我們使用 MUI 程式庫中的 styled 工具來創建 StyledTableCell 和 StyledTableRow。
const StyledTableCell = styled(TableCell)(({ theme }) => ({
[`&.${tableCellClasses.head}`]: {
backgroundColor: theme.palette.common.black,
color: theme.palette.common.white,
},
[`&.${tableCellClasses.body}`]: {
fontSize: 14,
},
}));
const StyledTableRow = styled(TableRow)(({ theme }) => ({
"&:nth-of-type(odd)": {
backgroundColor: theme.palette.action.hover,
},
"&:last-child td, &:last-child th": {
border: 0,
},
}));const StyledTableCell = styled(TableCell)(({ theme }) => ({
[`&.${tableCellClasses.head}`]: {
backgroundColor: theme.palette.common.black,
color: theme.palette.common.white,
},
[`&.${tableCellClasses.body}`]: {
fontSize: 14,
},
}));
const StyledTableRow = styled(TableRow)(({ theme }) => ({
"&:nth-of-type(odd)": {
backgroundColor: theme.palette.action.hover,
},
"&:last-child td, &:last-child th": {
border: 0,
},
}));創建應用程式組件
我們應用程式的主要組件是 App 組件。 我們有四個狀態變量:customerName 和 customerAddress 用於跟踪客戶的數據,items 用於跟踪發票中的項目列表,而 error 用於在需要時顯示錯誤消息。
function App() {
// State variables
const [customerName, setCustomerName] = useState("");
const [customerAddress, setCustomerAddress] = useState("");
const [items, setItems] = useState([{ name: "", quantity: "", price: "" }]);
const [error, setError] = useState(false);function App() {
// State variables
const [customerName, setCustomerName] = useState("");
const [customerAddress, setCustomerAddress] = useState("");
const [items, setItems] = useState([{ name: "", quantity: "", price: "" }]);
const [error, setError] = useState(false);處理用戶輸入
在這段代碼塊中,我們定義了處理用戶互動的函數:修改項目詳情、添加新項目以及刪除項目。 handleItemChange 函數當用戶修改項目時更新項目的屬性。 addItem 函數添加新項目到列表。deleteItem 函數從列表中刪除一個項目。
const handleItemChange = (index, event) => {
let newItems = [...items];
newItems[index][event.target.name] = event.target.value;
setItems(newItems);
};
const addItem = () => {
setItems([...items, { name: "", quantity: "", price: "" }]);
};
const deleteItem = (index) => {
let newItems = [...items];
newItems.splice(index, 1);
setItems(newItems);
};const handleItemChange = (index, event) => {
let newItems = [...items];
newItems[index][event.target.name] = event.target.value;
setItems(newItems);
};
const addItem = () => {
setItems([...items, { name: "", quantity: "", price: "" }]);
};
const deleteItem = (index) => {
let newItems = [...items];
newItems.splice(index, 1);
setItems(newItems);
};生成發票
下面是 generateInvoice 函數的代碼:
// Generate invoice
const generateInvoice = () => {
// Validate the input fields
if (
!customerName ||
!customerAddress ||
items.some((item) => !item.name || !item.quantity || !item.price)
) {
setError(true);
return;
}
// Create a new jsPDF instance
let doc = new jsPDF("p", "pt");
// Add invoice header
doc.setFontSize(24);
doc.text("Invoice", 40, 60);
doc.setFontSize(10);
doc.text("Invoice Number: 123456", 40, 90);
doc.text("Date: " + new Date().toDateString(), 40, 110);
doc.text(`Customer Name: ${customerName}`, 40, 130);
doc.text(`Customer Address: ${customerAddress}`, 40, 150);
// Add items section
doc.setFontSize(14);
doc.text("Items:", 40, 200);
doc.line(40, 210, 550, 210);
// Add item details
doc.setFontSize(12);
let yOffset = 240;
let total = 0;
items.forEach((item) => {
let itemTotal = item.quantity * item.price;
total += itemTotal;
doc.text(`Item: ${item.name}`, 40, yOffset);
doc.text(`Quantity: ${item.quantity}`, 200, yOffset);
doc.text(`Price: $${item.price}`, 300, yOffset);
doc.text(`Total: $${itemTotal}`, 400, yOffset);
yOffset += 20;
});
// Add total
doc.line(40, yOffset, 550, yOffset);
doc.setFontSize(14);
doc.text(`Total: $${total}`, 400, yOffset + 30);
// Save the generated PDF as "invoice.pdf"
doc.save("invoice.pdf");
// Reset error state
setError(false);
};// Generate invoice
const generateInvoice = () => {
// Validate the input fields
if (
!customerName ||
!customerAddress ||
items.some((item) => !item.name || !item.quantity || !item.price)
) {
setError(true);
return;
}
// Create a new jsPDF instance
let doc = new jsPDF("p", "pt");
// Add invoice header
doc.setFontSize(24);
doc.text("Invoice", 40, 60);
doc.setFontSize(10);
doc.text("Invoice Number: 123456", 40, 90);
doc.text("Date: " + new Date().toDateString(), 40, 110);
doc.text(`Customer Name: ${customerName}`, 40, 130);
doc.text(`Customer Address: ${customerAddress}`, 40, 150);
// Add items section
doc.setFontSize(14);
doc.text("Items:", 40, 200);
doc.line(40, 210, 550, 210);
// Add item details
doc.setFontSize(12);
let yOffset = 240;
let total = 0;
items.forEach((item) => {
let itemTotal = item.quantity * item.price;
total += itemTotal;
doc.text(`Item: ${item.name}`, 40, yOffset);
doc.text(`Quantity: ${item.quantity}`, 200, yOffset);
doc.text(`Price: $${item.price}`, 300, yOffset);
doc.text(`Total: $${itemTotal}`, 400, yOffset);
yOffset += 20;
});
// Add total
doc.line(40, yOffset, 550, yOffset);
doc.setFontSize(14);
doc.text(`Total: $${total}`, 400, yOffset + 30);
// Save the generated PDF as "invoice.pdf"
doc.save("invoice.pdf");
// Reset error state
setError(false);
};在 generateInvoice 函數中,我們首先對輸入欄進行驗證,以確保客戶名稱、客戶地址和項目細節均已填寫。 如果這些欄位中有任意一個為空,我們將 error 狀態設置為 true 並提前返回。
接下來,我們通過調用 new jsPDF("p", "pt") 創建一個新的 jsPDF 實例。 第一個參數 "p" 指定頁面方向為縱向,第二個參數 "pt"" 指定測量單位為點。
然後我們開始向 PDF 文件添加內容。 我們使用 doc.setFontSize 設置字體大小,並使用 doc.text 方法在頁面的特定坐標上添加文本。 我們添加了發票頭部,包括標題、發票號碼、日期、客戶名稱和客戶地址。
在標籤頭部之後,我們透過設置字體大小並使用 doc.line 添加一條線來分隔項目與標籤,從而添加"項目"部分。 接下來,我們遍歷 items 陣列中的每個項目,通過將數量乘以價格來計算每個項目的總價。我們將所有項目總價的和更新到 total 變量中。
對於每一個項目,我們使用 doc.text 將項目名稱、數量、價格以及項目總價添加到 PDF 文件中。 我們遞增 yOffset 變量,以便每個項目移動到下一行。 最後,我們添加一條線以分隔項目與總計,並使用 doc.text 在文件的右下角添加總金額。
一旦內容添加完畢,我們使用 doc.save("invoice.pdf") 將生成的 PDF 保存為用戶計算機上的"invoice.pdf"。 最後,我們將 error 狀態重置為 false 以清除任何先前的驗證錯誤。
步驟 4:渲染用戶介面
return 語句包含處理渲染過程的 JSX 代碼。 它包含客戶姓名和地址的輸入欄位、輸入項目詳細信息的表格、添加項目和生成發票的按鈕以及顯示驗證錯誤的錯誤 Snackbar。
它使用 Material-UI 程式庫中的組件,例如 Snackbar 和 Alert 來創建基本組件。 這些組件用於創建表單欄位、表格、按鈕和錯誤通知。
return (
<Container maxWidth="md">
<Box sx={{ my: 4 }}>
<Typography variant="h3" component="h1" gutterBottom>
Create Invoice
</Typography>
{/* Customer Name and Address fields */}
<Grid container spacing={3}>
<Grid item xs={6}>
<TextField
label="Customer Name"
fullWidth
margin="normal"
value={customerName}
onChange={(e) => setCustomerName(e.target.value)}
/>
</Grid>
<Grid item xs={6}>
<TextField
label="Customer Address"
fullWidth
margin="normal"
value={customerAddress}
onChange={(e) => setCustomerAddress(e.target.value)}
/>
</Grid>
</Grid>
{/* Items table */}
<TableContainer component={Paper}>
<Table sx={{ minWidth: 700 }} aria-label="invoice table">
<TableHead>
<TableRow>
<StyledTableCell>Item Name</StyledTableCell>
<StyledTableCell align="left">Quantity</StyledTableCell>
<StyledTableCell align="left">Price</StyledTableCell>
<StyledTableCell align="left">Action</StyledTableCell>
</TableRow>
</TableHead>
<TableBody>
{items.map((item, index) => (
<StyledTableRow key={index}>
<StyledTableCell component="th" scope="row">
<TextField
fullWidth
value={item.name}
onChange={(event) => handleItemChange(index, event)}
name="name"
/>
</StyledTableCell>
<StyledTableCell align="right">
<TextField
fullWidth
value={item.quantity}
onChange={(event) => handleItemChange(index, event)}
name="quantity"
/>
</StyledTableCell>
<StyledTableCell align="right">
<TextField
fullWidth
value={item.price}
onChange={(event) => handleItemChange(index, event)}
name="price"
/>
</StyledTableCell>
<StyledTableCell align="right">
<IconButton onClick={() => deleteItem(index)}>
<DeleteIcon />
</IconButton>
</StyledTableCell>
</StyledTableRow>
))}
</TableBody>
</Table>
</TableContainer>
{/* Buttons */}
<Box mt={2} display="flex" gap={2}>
<Button variant="contained" onClick={addItem}>
Add Item
</Button>
<Button variant="outlined" color="success" onClick={generateInvoice}>
Generate Invoice
</Button>
</Box>
</Box>
{/* Error Snackbar */}
<Snackbar
open={error}
autoHideDuration={6000}
onClose={() => setError(false)}
anchorOrigin={{ vertical: "top", horizontal: "right" }}
>
<Alert onClose={() => setError(false)} severity="error">
Please fill in all required fields.
</Alert>
</Snackbar>
</Container>
);return (
<Container maxWidth="md">
<Box sx={{ my: 4 }}>
<Typography variant="h3" component="h1" gutterBottom>
Create Invoice
</Typography>
{/* Customer Name and Address fields */}
<Grid container spacing={3}>
<Grid item xs={6}>
<TextField
label="Customer Name"
fullWidth
margin="normal"
value={customerName}
onChange={(e) => setCustomerName(e.target.value)}
/>
</Grid>
<Grid item xs={6}>
<TextField
label="Customer Address"
fullWidth
margin="normal"
value={customerAddress}
onChange={(e) => setCustomerAddress(e.target.value)}
/>
</Grid>
</Grid>
{/* Items table */}
<TableContainer component={Paper}>
<Table sx={{ minWidth: 700 }} aria-label="invoice table">
<TableHead>
<TableRow>
<StyledTableCell>Item Name</StyledTableCell>
<StyledTableCell align="left">Quantity</StyledTableCell>
<StyledTableCell align="left">Price</StyledTableCell>
<StyledTableCell align="left">Action</StyledTableCell>
</TableRow>
</TableHead>
<TableBody>
{items.map((item, index) => (
<StyledTableRow key={index}>
<StyledTableCell component="th" scope="row">
<TextField
fullWidth
value={item.name}
onChange={(event) => handleItemChange(index, event)}
name="name"
/>
</StyledTableCell>
<StyledTableCell align="right">
<TextField
fullWidth
value={item.quantity}
onChange={(event) => handleItemChange(index, event)}
name="quantity"
/>
</StyledTableCell>
<StyledTableCell align="right">
<TextField
fullWidth
value={item.price}
onChange={(event) => handleItemChange(index, event)}
name="price"
/>
</StyledTableCell>
<StyledTableCell align="right">
<IconButton onClick={() => deleteItem(index)}>
<DeleteIcon />
</IconButton>
</StyledTableCell>
</StyledTableRow>
))}
</TableBody>
</Table>
</TableContainer>
{/* Buttons */}
<Box mt={2} display="flex" gap={2}>
<Button variant="contained" onClick={addItem}>
Add Item
</Button>
<Button variant="outlined" color="success" onClick={generateInvoice}>
Generate Invoice
</Button>
</Box>
</Box>
{/* Error Snackbar */}
<Snackbar
open={error}
autoHideDuration={6000}
onClose={() => setError(false)}
anchorOrigin={{ vertical: "top", horizontal: "right" }}
>
<Alert onClose={() => setError(false)} severity="error">
Please fill in all required fields.
</Alert>
</Snackbar>
</Container>
);完整的 App.js 和 App.css 代碼
這是完整的 App.js 代碼,您可以將其複製並粘貼到您的專案中:
import React, { useState } from "react";
import "./App.css";
import {
  Button,
  TextField,
  Box,
  Container,
  Typography,
  Table,
  TableBody,
  TableCell,
  TableContainer,
  TableHead,
  TableRow,
  Paper,
  IconButton,
  Snackbar,
  Alert,
} from "@mui/material";
import Grid from "@mui/material/Grid";
import DeleteIcon from "@mui/icons-material/Delete";
import jsPDF from "jspdf";
import { styled } from "@mui/material/styles";
import { tableCellClasses } from "@mui/material/TableCell";
const StyledTableCell = styled(TableCell)(({ theme }) => ({
  [`&.${tableCellClasses.head}`]: {
    backgroundColor: theme.palette.common.black,
    color: theme.palette.common.white,
  },
  [`&.${tableCellClasses.body}`]: {
    fontSize: 14,
  },
}));

const StyledTableRow = styled(TableRow)(({ theme }) => ({
  "&:nth-of-type(odd)": {
    backgroundColor: theme.palette.action.hover,
  },
  "&:last-child td, &:last-child th": {
    border: 0,
  },
}));
function App() {
// State variables
const [customerName, setCustomerName] = useState("");
const [customerAddress, setCustomerAddress] = useState("");
const [items, setItems] = useState([{ name: "", quantity: "", price: "" }]);
const [error, setError] = useState(false);
// Event handler for item changes
const handleItemChange = (index, event) => {
let newItems = [...items];
newItems[index][event.target.name] = event.target.value;
setItems(newItems);
};
// Add new item to the list
const addItem = () => {
setItems([...items, { name: "", quantity: "", price: "" }]);
};
// Delete an item from the list
const deleteItem = (index) => {
let newItems = [...items];
newItems.splice(index, 1);
setItems(newItems);
};
// Generate invoice
const generateInvoice = () => {
// Validate the input fields
if (
!customerName ||
!customerAddress ||
items.some((item) => !item.name || !item.quantity || !item.price)
) {
setError(true);
return;
}
// Create a new jsPDF instance
let doc = new jsPDF("p", "pt");
// Add invoice header
doc.setFontSize(24);
doc.text("Invoice", 40, 60);
doc.setFontSize(10);
doc.text("Invoice Number: 123456", 40, 90);
doc.text("Date: " + new Date().toDateString(), 40, 110);
doc.text(`Customer Name: ${customerName}`, 40, 130);
doc.text(`Customer Address: ${customerAddress}`, 40, 150);
// Add items section
doc.setFontSize(14);
doc.text("Items:", 40, 200);
doc.line(40, 210, 550, 210);
// Add item details
doc.setFontSize(12);
let yOffset = 240;
let total = 0;
items.forEach((item) => {
let itemTotal = item.quantity * item.price;
total += itemTotal;
doc.text(`Item: ${item.name}`, 40, yOffset);
doc.text(`Quantity: ${item.quantity}`, 200, yOffset);
doc.text(`Price: $${item.price}`, 300, yOffset);
doc.text(`Total: $${itemTotal}`, 400, yOffset);
yOffset += 20;
});
// Add total
doc.line(40, yOffset, 550, yOffset);
doc.setFontSize(14);
doc.text(`Total: $${total}`, 400, yOffset + 30);
// Save the generated PDF as "invoice.pdf"
doc.save("invoice.pdf");
// Reset error state
setError(false);
};
return (
<Container maxWidth="md">
<Box sx={{ my: 4 }}>
<Typography variant="h3" component="h1" gutterBottom>
Create Invoice
</Typography>
{/* Customer Name and Address fields */}
<Grid container spacing={3}>
<Grid item xs={6}>
<TextField
label="Customer Name"
fullWidth
margin="normal"
value={customerName}
onChange={(e) => setCustomerName(e.target.value)}
/>
</Grid>
<Grid item xs={6}>
<TextField
label="Customer Address"
fullWidth
margin="normal"
value={customerAddress}
onChange={(e) => setCustomerAddress(e.target.value)}
/>
</Grid>
</Grid>
{/* Items table */}
<TableContainer component={Paper}>
<Table sx={{ minWidth: 700 }} aria-label="invoice table">
<TableHead>
<TableRow>
<StyledTableCell>Item Name</StyledTableCell>
<StyledTableCell align="left">Quantity</StyledTableCell>
<StyledTableCell align="left">Price</StyledTableCell>
<StyledTableCell align="left">Action</StyledTableCell>
</TableRow>
</TableHead>
<TableBody>
{items.map((item, index) => (
<StyledTableRow key={index}>
<StyledTableCell component="th" scope="row">
<TextField
fullWidth
value={item.name}
onChange={(event) => handleItemChange(index, event)}
name="name"
/>
</StyledTableCell>
<StyledTableCell align="right">
<TextField
fullWidth
value={item.quantity}
onChange={(event) => handleItemChange(index, event)}
name="quantity"
/>
</StyledTableCell>
<StyledTableCell align="right">
<TextField
fullWidth
value={item.price}
onChange={(event) => handleItemChange(index, event)}
name="price"
/>
</StyledTableCell>
<StyledTableCell align="right">
<IconButton onClick={() => deleteItem(index)}>
<DeleteIcon />
</IconButton>
</StyledTableCell>
</StyledTableRow>
))}
</TableBody>
</Table>
</TableContainer>
{/* Buttons */}
<Box mt={2} display="flex" gap={2}>
<Button variant="contained" onClick={addItem}>
Add Item
</Button>
<Button variant="outlined" color="success" onClick={generateInvoice}>
Generate Invoice
</Button>
</Box>
</Box>
{/* Error Snackbar */}
<Snackbar
open={error}
autoHideDuration={6000}
onClose={() => setError(false)}
anchorOrigin={{ vertical: "top", horizontal: "right" }}
>
<Alert onClose={() => setError(false)} severity="error">
Please fill in all required fields.
</Alert>
</Snackbar>
</Container>
);
}
export default App;import React, { useState } from "react";
import "./App.css";
import {
Button,
TextField,
Box,
Container,
Typography,
Table,
TableBody,
TableCell,
TableContainer,
TableHead,
TableRow,
Paper,
IconButton,
Snackbar,
Alert,
} from "@mui/material";
import Grid from "@mui/material/Grid";
import DeleteIcon from "@mui/icons-material/Delete";
import jsPDF from "jspdf";
import { styled } from "@mui/material/styles";
import { tableCellClasses } from "@mui/material/TableCell";
const StyledTableCell = styled(TableCell)(({ theme }) => ({
  [`&.${tableCellClasses.head}`]: {
    backgroundColor: theme.palette.common.black,
    color: theme.palette.common.white,
  },
  [`&.${tableCellClasses.body}`]: {
    fontSize: 14,
  },
}));

const StyledTableRow = styled(TableRow)(({ theme }) => ({
  "&:nth-of-type(odd)": {
    backgroundColor: theme.palette.action.hover,
  },
  "&:last-child td, &:last-child th": {
    border: 0,
  },
}));
function App() {
  // State variables
  const [customerName, setCustomerName] = useState("");
  const [customerAddress, setCustomerAddress] = useState("");
  const [items, setItems] = useState([{ name: "", quantity: "", price: "" }]);
  const [error, setError] = useState(false);
// Event handler for item changes
const handleItemChange = (index, event) => {
let newItems = [...items];
newItems[index][event.target.name] = event.target.value;
setItems(newItems);
};
// Add new item to the list
const addItem = () => {
setItems([...items, { name: "", quantity: "", price: "" }]);
};
// Delete an item from the list
const deleteItem = (index) => {
let newItems = [...items];
newItems.splice(index, 1);
setItems(newItems);
};
// Generate invoice
const generateInvoice = () => {
  // Validate the input fields
  if (
    !customerName ||
    !customerAddress ||
    items.some((item) => !item.name || !item.quantity || !item.price)
  ) {
    setError(true);
    return;
  }

  // Create a new jsPDF instance
  let doc = new jsPDF("p", "pt");

  // Add invoice header
  doc.setFontSize(24);
  doc.text("Invoice", 40, 60);
  doc.setFontSize(10);
  doc.text("Invoice Number: 123456", 40, 90);
  doc.text("Date: " + new Date().toDateString(), 40, 110);
  doc.text(`Customer Name: ${customerName}`, 40, 130);
  doc.text(`Customer Address: ${customerAddress}`, 40, 150);

  // Add items section
  doc.setFontSize(14);
  doc.text("Items:", 40, 200);
  doc.line(40, 210, 550, 210);

  // Add item details
  doc.setFontSize(12);
  let yOffset = 240;
  let total = 0;

  items.forEach((item) => {
    let itemTotal = item.quantity * item.price;
    total += itemTotal;

    doc.text(`Item: ${item.name}`, 40, yOffset);
    doc.text(`Quantity: ${item.quantity}`, 200, yOffset);
    doc.text(`Price: $${item.price}`, 300, yOffset);
    doc.text(`Total: $${itemTotal}`, 400, yOffset);

    yOffset += 20;
  });

  // Add total
  doc.line(40, yOffset, 550, yOffset);
  doc.setFontSize(14);
  doc.text(`Total: $${total}`, 400, yOffset + 30);

  // Save the generated PDF as "invoice.pdf"
  doc.save("invoice.pdf");

  // Reset error state
  setError(false);
};
return (
  <Container maxWidth="md">
    <Box sx={{ my: 4 }}>
      <Typography variant="h3" component="h1" gutterBottom>
        Create Invoice
      </Typography>

      {/* Customer Name and Address fields */}
      <Grid container spacing={3}>
        <Grid item xs={6}>
          <TextField
            label="Customer Name"
            fullWidth
            margin="normal"
            value={customerName}
            onChange={(e) => setCustomerName(e.target.value)}
          />
        </Grid>
        <Grid item xs={6}>
          <TextField
            label="Customer Address"
            fullWidth
            margin="normal"
            value={customerAddress}
            onChange={(e) => setCustomerAddress(e.target.value)}
          />
        </Grid>
      </Grid>

      {/* Items table */}
      <TableContainer component={Paper}>
        <Table sx={{ minWidth: 700 }} aria-label="invoice table">
          <TableHead>
            <TableRow>
              <StyledTableCell>Item Name</StyledTableCell>
              <StyledTableCell align="left">Quantity</StyledTableCell>
              <StyledTableCell align="left">Price</StyledTableCell>
              <StyledTableCell align="left">Action</StyledTableCell>
            </TableRow>
          </TableHead>
          <TableBody>
            {items.map((item, index) => (
              <StyledTableRow key={index}>
                <StyledTableCell component="th" scope="row">
                  <TextField
                    fullWidth
                    value={item.name}
                    onChange={(event) => handleItemChange(index, event)}
                    name="name"
                  />
                </StyledTableCell>
                <StyledTableCell align="right">
                  <TextField
                    fullWidth
                    value={item.quantity}
                    onChange={(event) => handleItemChange(index, event)}
                    name="quantity"
                  />
                </StyledTableCell>
                <StyledTableCell align="right">
                  <TextField
                    fullWidth
                    value={item.price}
                    onChange={(event) => handleItemChange(index, event)}
                    name="price"
                  />
                </StyledTableCell>
                <StyledTableCell align="right">
                  <IconButton onClick={() => deleteItem(index)}>
                    <DeleteIcon />
                  </IconButton>
                </StyledTableCell>
              </StyledTableRow>
            ))}
          </TableBody>
        </Table>
      </TableContainer>

      {/* Buttons */}
      <Box mt={2} display="flex" gap={2}>
        <Button variant="contained" onClick={addItem}>
          Add Item
        </Button>
        <Button variant="outlined" color="success" onClick={generateInvoice}>
          Generate Invoice
        </Button>
      </Box>
    </Box>

    {/* Error Snackbar */}
    <Snackbar
      open={error}
      autoHideDuration={6000}
      onClose={() => setError(false)}
      anchorOrigin={{ vertical: "top", horizontal: "right" }}
    >
      <Alert onClose={() => setError(false)} severity="error">
        Please fill in all required fields.
      </Alert>
    </Snackbar>
  </Container>
);
}
export default App;這是 App.css 代碼:
@import url('https://fonts.googleapis.com/css2?family=Poppins:wght@400;700&display=swap');
.App {
  text-align: center;
}

.App-logo {
  height: 40vmin;
  pointer-events: none;
}

@media (prefers-reduced-motion: no-preference) {
  .App-logo {
    animation: App-logo-spin infinite 20s linear;
  }
}

h1,
h2,
h3,
h4,
h5,
h6 {
  font-weight: bold;
  /* This is the weight for bold in Poppins */
  color: #FF6347;
  /* This is the color Tomato. Replace with your preferred color */
}

body {
  font-family: 'Poppins', sans-serif;
  background-color: #E9F8F4;
}

.App-header {
  background-color: #282c34;
  min-height: 100vh;
  display: flex;
  flex-direction: column;
  align-items: center;
  justify-content: center;
  font-size: calc(10px + 2vmin);
  color: white;
}

.App-link {
  color: #61dafb;
}

@keyframes App-logo-spin {
  from {
    transform: rotate(0deg);
  }
  to {
    transform: rotate(360deg);
  }
}
步驟 5:測試應用程式
要測試 PDF 的生成功能,在終端中運行以下命令:
npm startnpm start這將啟動開發伺服器,您可以在瀏覽器中查看應用程式,位於 http://localhost:3000。
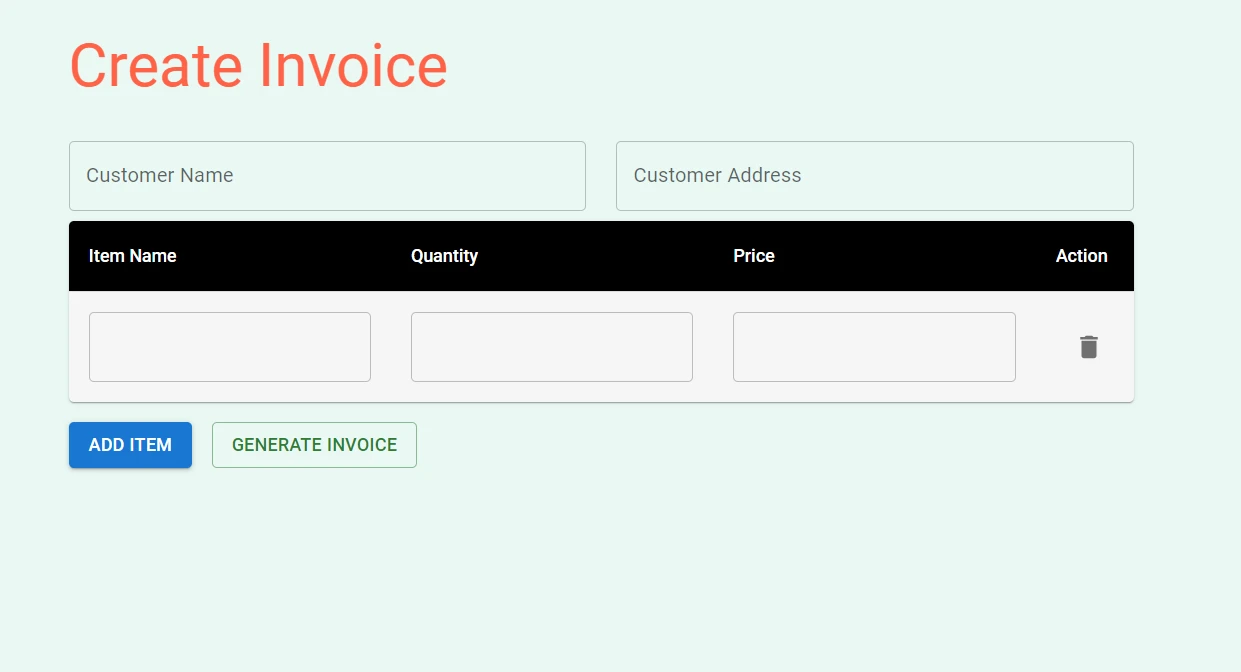
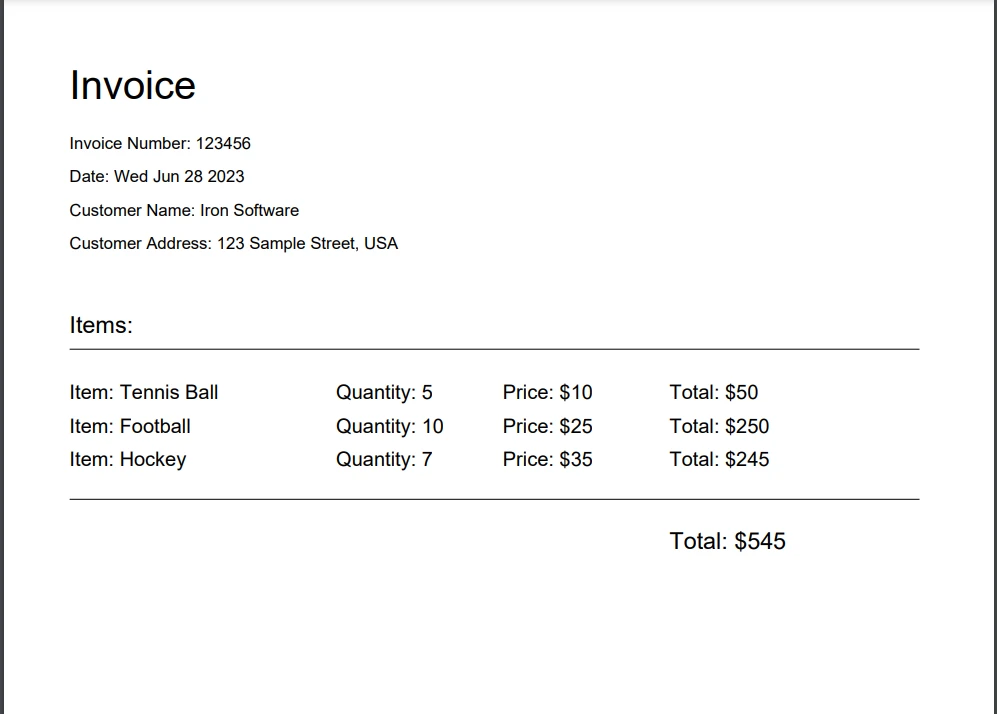
在輸入欄位中填入客戶名稱、地址和項目詳細信息,然後點擊"生成發票"按鈕。 PDF 文件將被下載到您的計算機上,您可以將其打開以查看生成發票的完整頁面視圖。
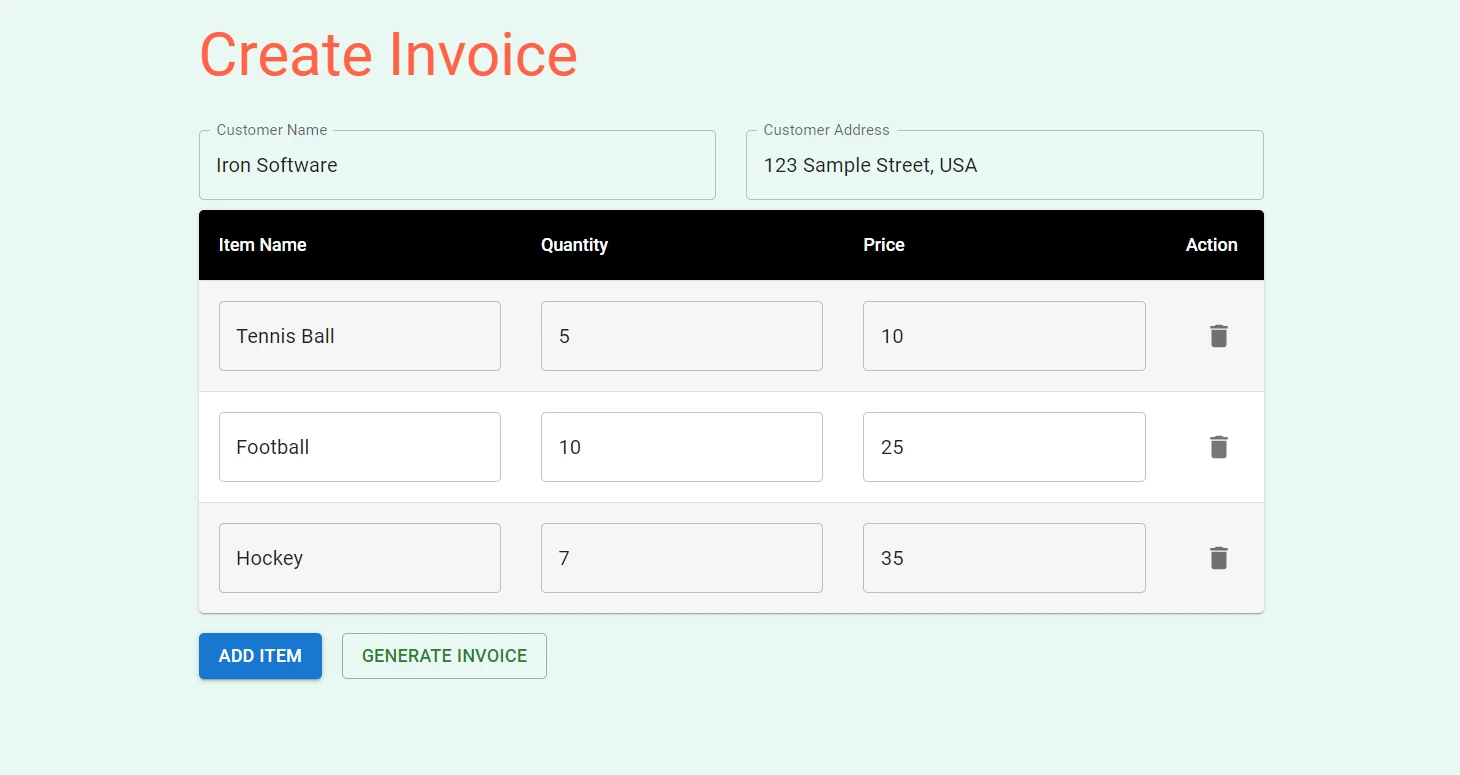
當您點擊"生成發票"按鈕時,將生成 PDF 文件。
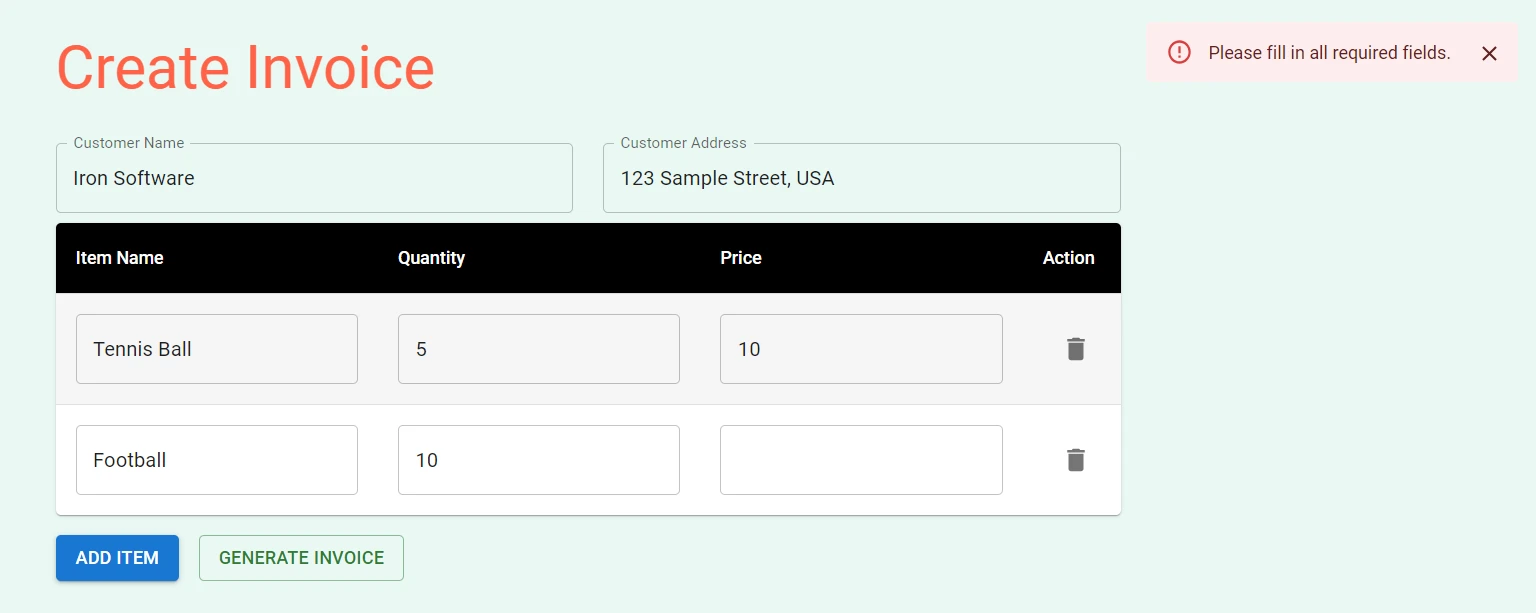
如果您嘗試生成任意一個空字段的 PDF,在右上方將顯示錯誤消息。
IronPDF - Node.js PDF 程式庫
IronPDF for Node.js 是一個全方位的 Node.js PDF 程式庫,在準確性、易用性和速度方面表現出色。 它提供了豐富的功能來直接從HTML、URL和React中的圖像生成、編輯和格式化PDF。 支持包括Windows、MacOS、Linux、Docker和像Azure和AWS等雲平台,各種平台的兼容性得以保證。 其用戶友好的API允許開發人員快速將PDF生成和操作整合到Node.js專案中。
IronPDF Node.js 的顯著特點包括:像素完美的呈現、豐富的格式化選項和高級編輯功能,如合并和拆分 PDF、添加註解以及創建 PDF 表格。
以下是一個從 HTML 文件、HTML 字串和 URL 生成 PDF 文檔的示例:
import { PdfDocument } from "@ironsoftware/ironpdf";
(async () => {
const pdfFromUrl = await PdfDocument.fromUrl("https://getbootstrap.com/");
await pdfFromUrl.saveAs("website.pdf");
const pdfFromHtmlFile = await PdfDocument.fromHtml("design.html");
await pdfFromHtmlFile.saveAs("markup.pdf");
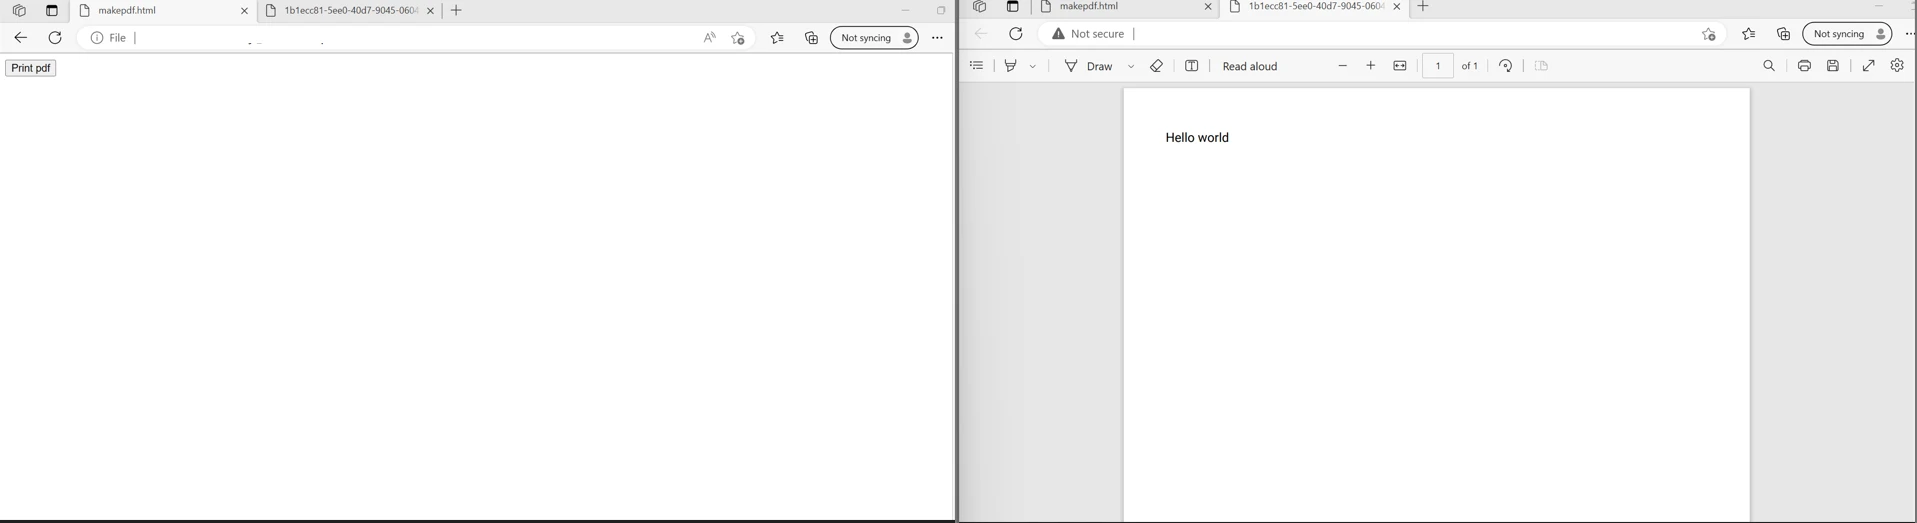
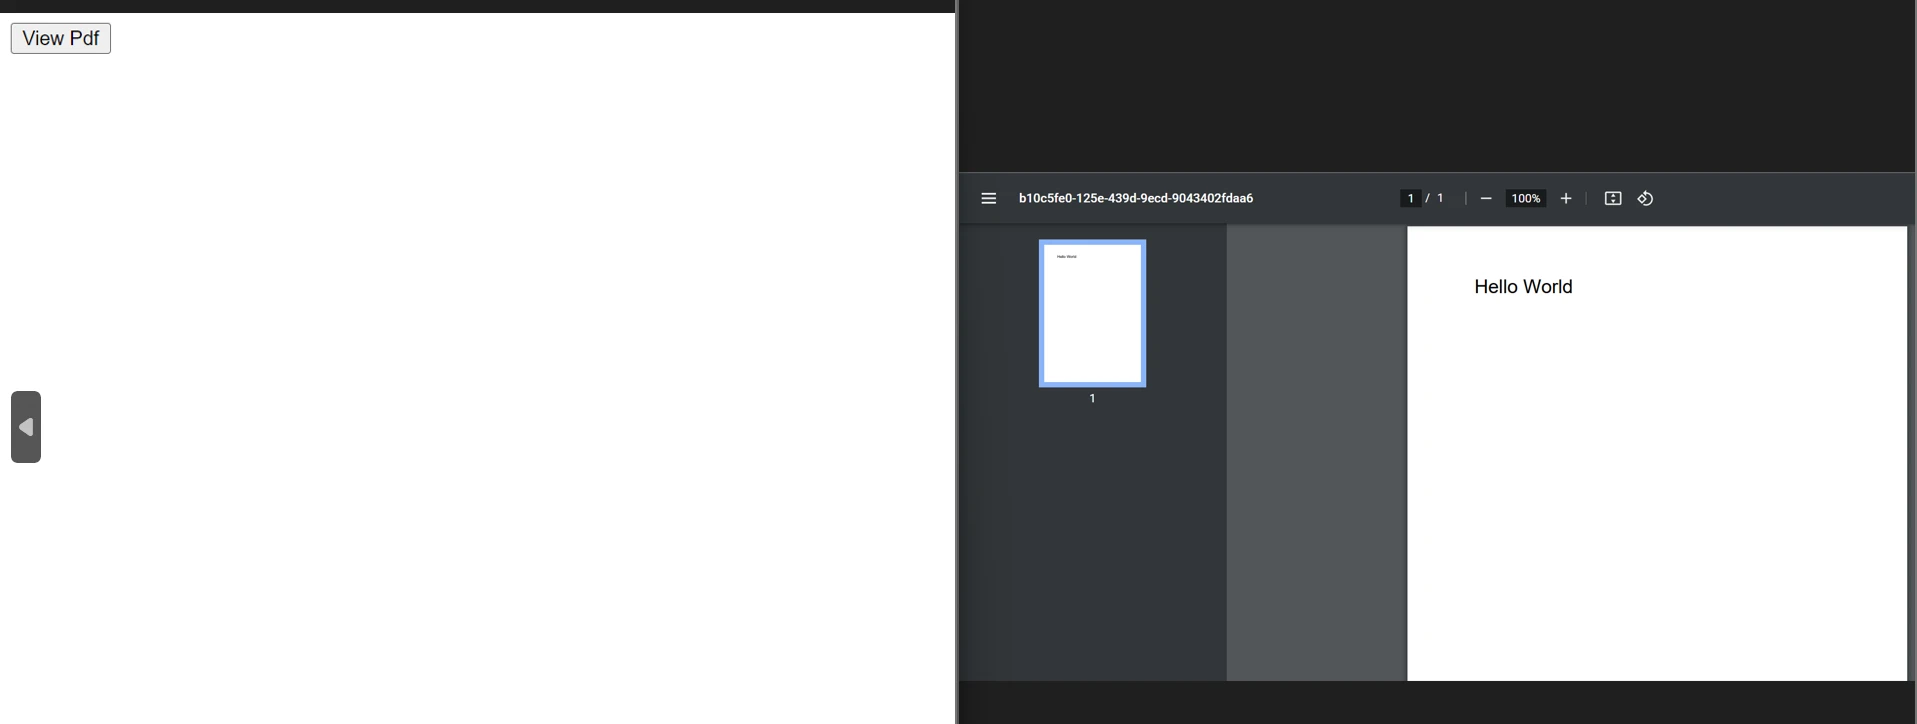
const pdfFromHtmlString = await PdfDocument.fromHtml("<p>Hello World</p>");
await pdfFromHtmlString.saveAs("markup_with_assets.pdf");
})();import { PdfDocument } from "@ironsoftware/ironpdf";
(async () => {
const pdfFromUrl = await PdfDocument.fromUrl("https://getbootstrap.com/");
await pdfFromUrl.saveAs("website.pdf");
const pdfFromHtmlFile = await PdfDocument.fromHtml("design.html");
await pdfFromHtmlFile.saveAs("markup.pdf");
const pdfFromHtmlString = await PdfDocument.fromHtml("<p>Hello World</p>");
await pdfFromHtmlString.saveAs("markup_with_assets.pdf");
})();如需更多 PDF 相關任務的代碼示例,請訪問此 IronPDF 代碼示例頁面。
結論
總之,在 React 應用程式中創建 PDF 並不必令人生畏。 擁有正確的工具和明確的理解,您可以輕鬆生成美觀且結構良好的 PDF 文檔。 我們探索了如 pdfmake 和 React-PDF 等多種程式庫,每個都有其自身的優勢和獨特功能。
透過 IronPDF 針對 JavaScript 框架和程式庫的簡化整合流程,優秀的文件以及及時的技術支援,開發人員可以快速上手,使其成為在 Node.js 應用程式中生成專業級 PDF 的首選。
IronPDF 提供其全部功能的免費試用。 它也適用於其他語言,如C# .NET, Java 和 Python。 欲知詳情,請訪問 IronPDF 網站。