IronPDF의 가장 강력하고 인기 있는 기능은 HTML, CSS 및 JavaScript 원본에서 고품질 PDF를 생성할 수 있는 기능입니다. 이 튜토리얼은 Node.js 개발자가 IronPDF를 활용하여 HTML을 PDF로 변환하는 기능을 자신의 프로젝트에 통합하는 데 도움이 되는 포괄적인 입문서입니다.
IronPDF는 개발자가 강력하고 안정적인 PDF 처리 기능을 소프트웨어 애플리케이션에 빠르고 쉽게 구현할 수 있도록 지원하는 고급 API 라이브러리입니다. IronPDF는 다양한 프로그래밍 언어 로 제공됩니다. .NET , Java 및 Python 에서 PDF를 생성하는 방법에 대한 자세한 내용은 공식 문서 페이지를 참조하십시오. 이 튜토리얼에서는 Node.js 프로젝트에 적용되는 사용법을 다룹니다.
참고해 주세요IronPDF 엔진 설치는 선택 사항입니다. @ironpdf는 처음 실행 시 NPM에서 브라우저와 운영 체제에 맞는 바이너리를 자동으로 다운로드하고 설치합니다. 하지만 인터넷 접속이 제한되거나, 줄어들었거나, 원치 않는 상황에서는 이 바이너리를 명시적으로 설치하는 것이 필수적입니다.
라이선스 키 적용(선택 사항)
기본적으로 IronPDF는 생성하거나 수정하는 모든 문서에 제목이 포함된 배경 워터마크를 삽입합니다.
워터마크 없는 PDF 문서를 생성하려면 ironpdf.com/nodejs/licensing/에서 라이선스 키를 받으세요.
워터마크 브랜딩 없이 IronPDF를 사용하려면 전역 IronPdfGlobalConfig 객체의 licenseKey 속성에 유효한 라이선스 키를 설정해야 합니다. 이 기능을 구현하는 데 사용된 소스 코드는 아래와 같습니다.
import { IronPdfGlobalConfig } from "@ironsoftware/ironpdf";

// Get the global config object
var config = IronPdfGlobalConfig.getConfig();

// Set the license key for IronPDF
config.licenseKey = "{YOUR-LICENSE-KEY-HERE}";
import { IronPdfGlobalConfig } from "@ironsoftware/ironpdf";

// Get the global config object
var config = IronPdfGlobalConfig.getConfig();

// Set the license key for IronPDF
config.licenseKey = "{YOUR-LICENSE-KEY-HERE}";
[{i:(최상의 성능과 올바른 기능을 보장하기 위해 다른 라이브러리 기능을 사용하기 전에 라이선스 키 및 기타 전역 구성 설정을 설정해야 합니다.
이 튜토리얼의 다음 섹션에서는 라이선스 키가 있고, 해당 키를 _config.js_라는 별도의 JavaScript 파일에 설정했다고 가정합니다. IronPDF 기능을 사용할 때마다 이 스크립트를 가져옵니다.
import { PdfDocument } from "@ironsoftware/ironpdf";
import './config.js'; // Import the configuration script
// ...
import { PdfDocument } from "@ironsoftware/ironpdf";
import './config.js'; // Import the configuration script
// ...
JAVASCRIPT
HTML을 PDF로 변환
IronPDF 라이브러리의 Node.js 버전은 HTML 콘텐츠에서 PDF 파일을 생성하는 세 가지 방법을 제공합니다.
HTML 코드 문자열에서
로컬 HTML 파일에서
온라인 웹사이트에서
이 섹션에서는 세 가지 방법을 모두 자세히 설명합니다.
HTML 문자열에서 PDF 파일 생성
PdfDocument.fromHtml는 원시 웹 페이지 마크업 문자열에서 PDF를 생성할 수 있는 메서드입니다.
이 방법은 세 가지 접근 방식 중 가장 유연성이 뛰어납니다. 이는 HTML 문자열의 데이터가 텍스트 파일, 데이터 스트림, HTML 템플릿, 생성된 HTML 데이터 등 사실상 어디에서든 가져올 수 있기 때문입니다.
아래 코드 예제는 PdfDocument.fromHtml 메서드를 실제로 사용하는 방법을 보여줍니다.
import { PdfDocument } from "@ironsoftware/ironpdf";
import './config.js'; // Import the configuration script

// Create a PDF from the HTML String "Hello world!"
const pdf = await PdfDocument.fromHtml("<h1>Hello from IronPDF!</h1>");

// Save the PDF document to the file system.
await pdf.saveAs("html-string-to-pdf.pdf");
JAVASCRIPT
위에서 보셨듯이, 우리는 레벨 1 헤드라인 요소의 마크업 코드가 포함된 텍스트 문자열을 사용하여 PdfDocument.fromHtml 메서드를 호출합니다.
PdfDocument.fromHtml는 PdfDocument 클래스의 인스턴스로 확인되는 Promise를 반환합니다. PdfDocument는 도서관이 특정 소스 콘텐츠에서 생성한 PDF 파일을 나타냅니다. 이 클래스는 IronPDF의 핵심 기능 대부분의 기반을 형성하며, 중요한 PDF 생성 및 편집 사용 사례를 지원합니다.
마지막으로, saveAs 메서드를 PdfDocument에 사용하여 파일을 디스크에 저장합니다. 저장된 PDF 파일은 아래와 같습니다.
The PDF generated from the HTML string "<h1>Hello from IronPDF!</h1>". PdfDocument.fromHtml가 생성하는 PDF 파일은 웹 페이지 콘텐츠와 똑같이 나타납니다.
HTML 파일에서 PDF 파일 생성
PdfDocument.fromHtml는 HTML 문자열에서만 작동하는 것이 아닙니다. 이 메서드는 로컬 HTML 문서의 경로도 인수로 받습니다.
다음 코드는 샘플 문서 전체를 PDF로 변환합니다. HTML 문자열 대신 유효한 샘플 파일 경로를 사용하여 PdfDocument.fromHtml를 호출합니다.
import { PdfDocument } from "@ironsoftware/ironpdf";
import './config.js'; // Import the configuration script

// Render a PDF from an HTML File
const pdf = await PdfDocument.fromHtml("./sample2.html");

// Save the PDF document to the same folder as our project.
await pdf.saveAs("html-file-to-pdf-1.pdf");
JAVASCRIPT
생성된 PDF 파일의 내용을 아래에 첨부했습니다. IronPDF는 원본 HTML 문서의 모양뿐만 아니라 링크, 양식 및 기타 일반적인 상호 작용 요소의 기능까지 그대로 유지한다는 점에 유의하십시오.
이 PDF 파일은 이전 코드 예제를 기반으로 생성되었습니다. 이전 이미지와 비교해 보면 놀라운 유사성을 알 수 있습니다!
샘플 페이지의 소스 코드를 살펴보셨다면, 코드가 훨씬 더 복잡하다는 것을 알 수 있을 것입니다. 이 웹페이지는 단락, 순서 없는 목록, 줄 바꿈, 가로선, 하이퍼링크, 이미지 등 더 다양한 HTML 요소를 사용하며, 쿠키 설정을 위한 스크립트도 일부 포함하고 있습니다.
IronPDF는 우리가 지금까지 사용해 온 것보다 훨씬 더 복잡한 웹 콘텐츠를 렌더링할 수 있습니다. 이를 설명하기 위해 다음 페이지를 살펴보겠습니다.
Puppeteer에 대한 기사입니다. Puppeteer는 헤드리스 브라우저 인스턴스를 사용하여 Chrome을 프로그래밍 방식으로 제어할 수 있는 기능으로 인기를 얻은 Node 라이브러리입니다.
위 그림은 Puppeteer Node 라이브러리에 대해 작성된 기사의 일부입니다. Puppeteer는 Node 개발자가 서버 측 또는 클라이언트 측에서 다양한 브라우저 작업을 자동화하는 데 사용하는 헤드리스 브라우저 세션을 실행합니다(서버 측 HTML PDF 생성 포함).
새 페이지는 수많은 에셋(CSS 파일, 이미지, 스크립트 파일 등)을 사용하며 훨씬 더 복잡한 레이아웃을 채택하고 있습니다. 다음 예시에서는 이 페이지의 저장된 사본(원본 에셋 포함)을 픽셀 단위까지 완벽한 PDF로 변환해 보겠습니다.
아래 코드 조각은 페이지가 "sample4.html"이라는 이름으로 프로젝트와 동일한 디렉토리에 저장되었다고 가정합니다.
import { PdfDocument } from "@ironsoftware/ironpdf";
import './config.js'; // Import the configuration script

// Render a PDF from even more complex HTML code.
PdfDocument.fromHtml("./sample4.html").then(async (pdf) => {
    return await pdf.saveAs("html-file-to-pdf-2.pdf");
});
import { PdfDocument } from "@ironsoftware/ironpdf";
import './config.js'; // Import the configuration script

// Render a PDF from even more complex HTML code.
PdfDocument.fromHtml("./sample4.html").then(async (pdf) => {
    return await pdf.saveAs("html-file-to-pdf-2.pdf");
});
JAVASCRIPT
다음 이미지는 위 코드 조각의 실행 결과를 보여줍니다.
구글 크롬에서 보기 좋으면 PDF로 변환했을 때도 보기 좋을 것입니다. 여기에는 CSS와 JavaScript를 많이 사용하는 페이지 디자인이 포함됩니다.
URL에서 PDF 파일 생성
IronPDF는 크기와 복잡성에 관계없이 모든 HTML 문자열 및 HTML 파일을 변환할 수 있습니다. 하지만 문자열이나 파일에서 가져온 원시 마크업만 사용해야 하는 것은 아닙니다. IronPDF는 URL에서 HTML을 요청할 수도 있습니다.
import { PdfDocument } from "@ironsoftware/ironpdf";
import './config.js'; // Import the configuration script

// Convert the Web Page to a pixel-perfect PDF file.
const pdf = await PdfDocument.fromUrl("https://en.wikipedia.org/wiki/PDF");

// Save the document.
await pdf.saveAs("url-to-pdf.pdf");
import { PdfDocument } from "@ironsoftware/ironpdf";
import './config.js'; // Import the configuration script

// Convert the Web Page to a pixel-perfect PDF file.
const pdf = await PdfDocument.fromUrl("https://en.wikipedia.org/wiki/PDF");

// Save the document.
await pdf.saveAs("url-to-pdf.pdf");
JAVASCRIPT
위에서 우리는 PdfDocument.fromUrl를 사용하여 몇 줄의 코드만으로 웹 페이지를 PDF로 변환했습니다. IronPDF는 웹 주소의 HTML 코드를 자동으로 추출하여 매끄럽게 렌더링해 줍니다. HTML 파일이나 텍스트 문자열은 필요하지 않습니다!
fromZip 메서드를 호출할 때는 첫 번째 인수에 유효한 zip 파일 경로를 지정하고, 두 번째 인수로 변환하려는 zip 파일 내의 HTML 파일 이름을 mainHtmlFile 속성에 설정하는 JSON 객체를 제공해야 합니다.
압축 폴더 안의 index.html 파일도 같은 방식으로 변환합니다.
import { PdfDocument } from "@ironsoftware/ironpdf";
import './config.js'; // Import the configuration script

// Render the HTML from a zip archive
PdfDocument.fromZip("./html-zip.zip", {
  mainHtmlFile: "index.html"
}).then(async (pdf) => {
  return await pdf.saveAs("html-zip-to-pdf.pdf");
});
import { PdfDocument } from "@ironsoftware/ironpdf";
import './config.js'; // Import the configuration script

// Render the HTML from a zip archive
PdfDocument.fromZip("./html-zip.zip", {
  mainHtmlFile: "index.html"
}).then(async (pdf) => {
  return await pdf.saveAs("html-zip-to-pdf.pdf");
});
JAVASCRIPT
 PdfDocument.fromZip 함수를 사용한 PDF 생성. 이 함수는 ZIP 파일에 포함된 HTML 코드와 그 안에 포함된 자산들을 성공적으로 렌더링합니다.
고급 HTML-PDF 변환 옵션
ChromePdfRenderOptions 인터페이스를 사용하면 Node 개발자가 라이브러리의 HTML 렌더링 동작을 수정할 수 있습니다. 여기에 노출된 속성을 통해 PDF를 렌더링하기 전에 PDF의 모양을 세부적으로 사용자 지정할 수 있습니다. 또한, 이러한 기능들을 통해 특정 HTML-PDF 변환 예외 상황을 처리할 수 있습니다.
IronPDF는 처음에 몇 가지 기본값을 사용하여 새 PDF를 렌더링합니다. defaultChromePdfRenderOptions 함수를 호출하여 이러한 사전 설정 값을 직접 확인할 수 있습니다.
import { defaultChromePdfRenderOptions } from "@ironsoftware/ironpdf";

// Retrieve a ChromePdfRenderOptions object with default settings.
var options = defaultChromePdfRenderOptions();
import { defaultChromePdfRenderOptions } from "@ironsoftware/ironpdf";

// Retrieve a ChromePdfRenderOptions object with default settings.
var options = defaultChromePdfRenderOptions();
JAVASCRIPT
이 섹션에서는 ChromePdfRenderOptions 인터페이스를 사용해야 하는 가장 일반적인 HTML-to-PDF 렌더링 사용 사례를 간략하게 살펴보겠습니다.
각 하위 섹션은 미리 설정된 값으로 시작하여 목표 결과를 달성하기 위해 필요에 따라 수정됩니다.
PDF 생성 출력 사용자 지정
사용자 지정 머리글 및 바닥글 추가
textHeader 및 textFooter 속성을 사용하면 새로 렌더링된 PDF에 사용자 지정 머리글 및/또는 바닥글 콘텐츠를 첨부할 수 있습니다.
아래 예시는 텍스트 콘텐츠로 만든 사용자 지정 헤더와 푸터를 사용하여 Google 검색 홈페이지의 PDF 버전을 생성합니다. 본문 내용과 구분하기 위해 구분선을 사용합니다. 또한 헤더와 푸터에 서로 다른 글꼴을 사용하여 구분을 더욱 명확하게 합니다.
import { PdfDocument, defaultChromePdfRenderOptions, AffixFonts } from "@ironsoftware/ironpdf";
import './config.js'; // Import the configuration script

// Initialize render options with default settings
var options = defaultChromePdfRenderOptions();

// Build a Custom Text-Based Header
options.textHeader = {
  centerText: "https://www.adobe.com",
  dividerLine: true,
  font: AffixFonts.CourierNew,
  fontSize: 12,
  leftText: "URL to PDF"
};

// Build a custom Text-Based Footer
options.textFooter = {
  centerText: "IronPDF for Node.js",
  dividerLine: true,
  fontSize: 14,
  font: AffixFonts.Helvetica,
  rightText: "HTML to PDF in Node.js"
};

// Render a PDF from a URL
PdfDocument.fromUrl("https://www.google.com/", { renderOptions: options }).then(async (pdf) => {
  return await pdf.saveAs("add-custom-headers-footers-1.pdf");
});
JAVASCRIPT
소스 코드를 실행하면 다음과 같은 PDF 파일이 생성됩니다.
 구글 홈페이지를 기반으로 PDF 형식의 새 페이지가 생성되었습니다. 추가적인 머리글과 바닥글이 포함된 점에 유의하십시오.
헤더와 푸터의 레이아웃, 위치 및 콘텐츠를 더욱 세밀하게 제어하려면 텍스트 대신 원시 HTML을 사용하여 정의할 수도 있습니다.
다음 코드 블록에서는 HTML을 사용하여 헤더와 푸터에 더 풍부한 콘텐츠를 포함시킵니다. 헤더 부분에서 페이지 URL을 굵게 표시하고 가운데 정렬합니다. 푸터에 로고를 삽입하고 가운데 정렬합니다.
import { PdfDocument, defaultChromePdfRenderOptions } from "@ironsoftware/ironpdf";
import './config.js'; // Import the configuration script

// Initialize render options with default settings
var options = defaultChromePdfRenderOptions();

// Define a rich HTML header
options.htmlHeader = {
  htmlFragment: "<strong>https://www.google.com/</strong>",
  dividerLine: true,
  dividerLineColor: "blue",
  loadStylesAndCSSFromMainHtmlDocument: true,
};

// Define a rich HTML footer
options.htmlFooter = {
  htmlFragment: "<img src='logo.png' alt='IronPDF for Node.js' style='display: block; width: 150px; height: auto; margin-left: auto; margin-right: auto;'>",
  dividerLine: true,
  loadStylesAndCSSFromMainHtmlDocument: true
};

// Render a PDF from a URL
await PdfDocument.fromUrl("https://www.google.com/", { renderOptions: options }).then(async (pdf) => {
  return await pdf.saveAs("add-html-headers-footers.pdf");
});
JAVASCRIPT
아래 이미지는 이러한 변경의 결과를 보여줍니다.
 Node.js용 IronPDF는 HTML 페이지를 PDF로 변환하는 동안 사용자 정의 설정을 적용할 수 있습니다.
여백, 페이지 크기, 페이지 방향 및 색상을 설정합니다.
IronPDF는 새로 변환된 PDF에 대해 사용자 지정 페이지 여백, 페이지 크기 및 페이지 방향을 정의할 수 있는 추가 설정을 지원합니다.
import { PdfDocument, defaultChromePdfRenderOptions, PaperSize, FitToPaperModes, PdfPaperOrientation } from "@ironsoftware/ironpdf";
import './config.js'; // Import the configuration script

// Initialize render options with default settings
var options = defaultChromePdfRenderOptions();

// Set top, left, right, and bottom page margins in millimeters.
options.margin = {
  top: 50,
  bottom: 50,
  left: 60,
  right: 60
};
options.paperSize = PaperSize.A5;
options.fitToPaperMode = FitToPaperModes.FitToPage;
options.paperOrientation = PdfPaperOrientation.Landscape;
options.grayScale = true;

// Create a PDF from the Google.com Home Page
PdfDocument.fromUrl("https://www.google.com/", { renderOptions: options }).then(async (pdf) => {
  return await pdf.saveAs("set-margins-and-page-size.pdf");
});
JAVASCRIPT
위 코드 블록에서는 IronPDF를 사용하여 Google 홈페이지 PDF를 가로 방향, 회색조, 최소 50mm 여백으로 생성하도록 설정합니다. 또한 A5 용지 크기에 맞게 내용을 조정했습니다.
동적 웹 페이지에서 PDF 생성
웹 페이지 로드 시 즉시 사용 가능하고 렌더링되지 않는 콘텐츠를 포함하는 웹 페이지의 경우, 특정 조건이 충족될 때까지 해당 페이지 콘텐츠의 렌더링을 일시 중지해야 할 수 있습니다.
예를 들어, 개발자는 페이지가 로드된 후 15초가 지나서야 콘텐츠가 나타나는 PDF를 생성하고 싶을 수 있습니다. 또 다른 경우에는, 이 동일한 콘텐츠가 복잡한 클라이언트 측 코드가 실행된 후에만 나타날 수도 있습니다.
이러한 두 가지 예외적인 경우(및 그 외 여러 경우)를 처리하기 위해 IronPDF의 Node 릴리스에서는 WaitFor 메커니즘을 정의합니다. 개발자는 특정 이벤트가 발생할 때 IronPDF의 Chrome 렌더링 엔진이 페이지 콘텐츠를 변환하도록 지시하기 위해 이 속성을 설정에 포함할 수 있습니다.
다음 코드 블록은 IronPDF가 홈페이지 콘텐츠를 PDF로 캡처하기 전에 20초 동안 대기하도록 설정합니다.
import { PdfDocument, defaultChromePdfRenderOptions, WaitForType } from "@ironsoftware/ironpdf";
import './config.js'; // Import the configuration script

// Configure the Chrome Renderer to wait until 20 seconds has passed
// before rendering the web page as a PDF.
var options = defaultChromePdfRenderOptions();
options.waitFor = {
  type: WaitForType.RenderDelay,
  delay: 20000
}
PdfDocument.fromUrl("https://ironpdf.com/nodejs/", { renderOptions: options }).then(async (pdf) => {
  return await pdf.saveAs("waitfor-renderdelay.pdf");
});
JAVASCRIPT
다음 코드 블록은 IronPDF가 인기 있는 SEO 텍스트 편집기 에서 요소가 성공적으로 선택될 때까지 기다리도록 구성합니다.
import { PdfDocument, defaultChromePdfRenderOptions, WaitForType } from "@ironsoftware/ironpdf";
import './config.js'; // Import the configuration script

// Configure the Chrome Renderer to wait up to 20 seconds for a specific element to appear
var options = defaultChromePdfRenderOptions();
options.waitFor = {
  type: WaitForType.HtmlElement,
  htmlQueryStr: "div.ProseMirror",
  maxWaitTime: 20000,
}
PdfDocument.fromUrl("https://app.surferseo.com/drafts/s/V7VkcdfgFz-dpkldsfHDGFFYf4jjSvvjsdf", { renderOptions: options }).then(async (pdf) => {
  return await pdf.saveAs("waitfor-htmlelement.pdf");
});
JAVASCRIPT
HTML 템플릿에서 PDF 생성
이 튜토리얼의 마지막 부분에서는 이전 섹션에서 소개한 모든 지식을 적용하여 매우 실용적인 자동화 작업, 즉 HTML 템플릿을 사용하여 하나 이상의 PDF 파일을 생성하는 작업을 수행해 보겠습니다.
이 섹션에서 사용할 템플릿은 아래와 같습니다. 이 양식은 공개적으로 접근 가능한 송장 템플릿을 기반으로 수정되었으며, 대체 가능한 콘텐츠를 위한 자리 표시자 태그(예: {회사명}, {이름}, {송장 번호} 등)를 포함합니다.
송장 양식 예시입니다. PDF로 생성하기 전에 이 템플릿에 동적 데이터를 추가하는 JavaScript 코드를 추가로 작성할 것입니다.
다음 소스 코드 블록에서는 HTML 템플릿을 새 PdfDocument 객체에 로드하고, 정의한 자리 표시자를 더미 테스트 데이터로 바꾸고, 마지막으로 PdfDocument 객체를 파일 시스템에 저장합니다.
import { PdfDocument } from "@ironsoftware/ironpdf";
import './config.js'; // Import the configuration script

/**
 * Loads an HTML template from the file system.
 */
async function getTemplateHtml(fileLocation) {
  // Return promise for loading template file
  return PdfDocument.fromFile(fileLocation);
}

/**
 * Save the PDF document at a given location.
 */
async function generatePdf(pdf, location) {
  return pdf.saveAs(location);
}

/**
 * Use the PdfDocument.replaceText method to replace
 * a specified placeholder with a provided value.
 */
async function addTemplateData(pdf, key, value) {
  return pdf.replaceText(key, value);
}

// Path to the template file
const template = "./sample-invoice.html";

// Load the template, replace placeholders, and save the PDF
getTemplateHtml(template).then(async (doc) => {
    // Replace placeholders with real data
    await addTemplateData(doc, "{FULL-NAME}", "Lizbeth Presland");
    await addTemplateData(doc, "{ADDRESS}", "678 Manitowish Alley, Portland, OG");
    await addTemplateData(doc, "{PHONE-NUMBER}", "(763) 894-4345");
    await addTemplateData(doc, "{INVOICE-NUMBER}", "787");
    await addTemplateData(doc, "{INVOICE-DATE}", "August 28, 2023");
    await addTemplateData(doc, "{AMOUNT-DUE}", "13,760.13");
    await addTemplateData(doc, "{RECIPIENT}", "Celestyna Farmar");
    await addTemplateData(doc, "{COMPANY-NAME}", "BrainBook");
    await addTemplateData(doc, "{TOTAL}", "13,760.13");
    await addTemplateData(doc, "{AMOUNT-PAID}", "0.00");
    await addTemplateData(doc, "{BALANCE-DUE}", "13,760.13");
    await addTemplateData(doc, "{ITEM}", "Training Sessions");
    await addTemplateData(doc, "{DESCRIPTION}", "60 Minute instruction");
    await addTemplateData(doc, "{RATE}", "3,440.03");
    await addTemplateData(doc, "{QUANTITY}", "4");
    await addTemplateData(doc, "{PRICE}", "13,760.13");
    return doc;
}).then(async (doc) => await generatePdf(doc, "html-template-to-pdf.pdf"));
JAVASCRIPT
위 소스 코드는 세 가지 비동기 헬퍼 함수를 정의합니다.
getTemplateHtml: PdfDocument.fromHtml 메서드를 사용하여 HTML 템플릿을 새 PdfDocument 객체에 로드합니다.
addTemplateData: PdfDocument.replaceText 메서드를 사용하여 제공된 자리 표시자(키라고 함)를 대체 데이터 값으로 바꿉니다.
generatePdf: 지정된 파일 위치에 PdfDocument를 저장합니다.
또한, HTML 템플릿 파일의 위치를 저장하기 위해 const template 변수를 선언합니다. 위 소스 코드에서 생성된 PDF는 아래와 같습니다.
 HTML 템플릿에 정의된 자리 표시자를 실제 데이터로 대체하여 새 PDF 문서를 생성했습니다. 이 문서에서는 CSS 스타일과 레이아웃을 그대로 유지하여, 만약 CSS 교체가 전혀 이루어지지 않았을 경우 예상되는 스타일과 레이아웃을 그대로 보여줍니다.
추가 자료
이 튜토리얼은 IronPDF의 고급 API 함수로 가능한 기능 중 극히 일부만을 다뤘습니다. 지식과 이해를 넓히기 위해 다음과 같은 관련 주제들을 공부하는 것을 고려해 보세요.
PdfGenerator 클래스: 이 클래스는 HTML, URL, Zip 아카이브 및 기타 소스 미디어에서 PdfDocument 객체를 생성하기 위한 전용 유틸리티 클래스입니다. 이 클래스는 PdfDocument 클래스에 정의된 PDF 렌더링 함수를 사용하는 것에 대한 실행 가능한 대안을 제공합니다.
HttpLoginCredentials: 특정 쿠키가 필요하거나 비밀번호로 보호된 웹 페이지에서 PDF를 생성해야 하는 경우 이 참조 자료가 매우 유용할 것입니다.
자주 묻는 질문
Node.js를 사용하여 서식을 손실하지 않고 HTML을 PDF로 변환하는 방법은 무엇인가요?
Node.js에서는 IronPDF를 사용하여 `PdfDocument.fromHtml` 과 같은 메서드를 활용하면 HTML 문자열과 파일을 PDF 형식으로 정확하게 렌더링하여 서식을 손실 없이 HTML을 PDF로 변환할 수 있습니다.
Node.js용 IronPDF를 설치하는 데에는 어떤 단계가 포함되나요?
Node.js 프로젝트에 IronPDF를 설치하려면 `npm install @ironsoftware/ironpdf` 명령을 실행하세요. 이렇게 하면 IronPDF 패키지가 프로젝트의 종속성에 추가되어 PDF 처리 기능을 사용할 수 있게 됩니다.
Node.js를 사용하여 웹 URL에서 PDF를 생성하는 방법은 무엇인가요?
IronPDF에서 `PdfDocument.fromUrl` 메서드를 사용하면 웹 페이지의 URL을 제공하여 웹 페이지를 PDF로 직접 변환할 수 있습니다. 이 메서드는 콘텐츠를 가져와 PDF 형식으로 렌더링합니다.
IronPDF에서 PDF 출력 형식을 사용자 지정하는 방법에는 어떤 것들이 있나요?
IronPDF는 PDF 출력 설정을 사용자 지정할 수 있는 `ChromePdfRenderOptions` 인터페이스를 제공합니다. 이 인터페이스를 통해 페이지 크기, 방향, 여백 등의 설정을 조정하고 동적 콘텐츠를 포함할 수 있습니다.
IronPDF를 사용하여 PDF 문서에 머리글과 바닥글을 추가하려면 어떻게 해야 하나요?
IronPDF에서 PDF에 머리글과 바닥글을 추가하려면 `ChromePdfRenderOptions` 에서 제공되는 `textHeader` 및 `textFooter` 속성을 활용하십시오. 이를 통해 각 페이지의 상단과 하단에 사용자 지정 텍스트를 포함할 수 있습니다.
Node.js를 사용하여 ZIP 압축 파일에 있는 HTML 파일을 PDF로 변환하는 것이 가능할까요?
예, IronPDF는 `PdfDocument.fromZip` 메서드를 사용하여 zip 압축 파일 내의 HTML 파일을 PDF로 변환하는 기능을 지원하므로 여러 HTML 파일을 일괄 처리할 수 있습니다.
IronPDF로 생성한 PDF 파일에서 워터마크를 제거하려면 어떻게 해야 하나요?
IronPDF로 생성한 PDF에서 워터마크를 제거하려면 애플리케이션 내에 유효한 라이선스 키를 적용해야 합니다. 이는 `IronPdf.License.LicenseKey` 메서드를 사용하여 수행할 수 있습니다.
비동기 웹 콘텐츠를 PDF로 변환할 때 어떻게 처리해야 하나요?
IronPDF는 비동기 콘텐츠를 관리하는 `WaitFor` 메커니즘을 제공하여 PDF 렌더링 프로세스가 시작되기 전에 모든 동적 요소가 완전히 로드되도록 보장합니다.
IronPDF는 비밀번호로 보호된 웹 페이지를 PDF로 변환할 수 있습니까?
예, `ChromePdfRenderOptions` 내의 `HttpLoginCredentials` 를 사용하면 암호로 보호된 웹 페이지에 액세스하고 PDF로 변환하는 데 필요한 자격 증명을 입력할 수 있습니다.
HTML을 PDF로 변환할 때 레이아웃이 유지되지 않으면 어떻게 해야 하나요?
레이아웃 요구 사항에 맞는 적절한 `ChromePdfRenderOptions` 사용하고 있는지 확인하십시오. 페이지 크기, 방향 및 여백과 같은 설정을 조정하면 변환된 PDF에서 원하는 레이아웃을 유지하는 데 도움이 될 수 있습니다.
IronPDF는 .NET 10 환경에서 HTML을 PDF로 변환하는 기능을 완벽하게 지원합니까?
예, IronPDF는 `ChromePdfRenderer` 와 같은 클래스를 사용하여 HTML을 PDF로 변환하는 데 .NET 10을 지원하며, `RenderHtmlAsPdf` , `RenderHtmlFileAsPdf` , `RenderUrlAsPdf` 메서드를 제공하고 CSS3, JavaScript, 이미지 및 외부 자산을 지원합니다. 이는 IronPDF의 .NET PDF 라이브러리 기능 관련 문서에 명시적으로 확인되어 있습니다.
커티스 차우는 칼턴 대학교에서 컴퓨터 과학 학사 학위를 취득했으며, Node.js, TypeScript, JavaScript, React를 전문으로 하는 프론트엔드 개발자입니다. 직관적이고 미적으로 뛰어난 사용자 인터페이스를 만드는 데 열정을 가진 그는 최신 프레임워크를 활용하고, 잘 구성되고 시각적으로 매력적인 매뉴얼을 제작하는 것을 즐깁니다.
커티스는 개발 분야 외에도 사물 인터넷(IoT)에 깊은 관심을 가지고 있으며, 하드웨어와 소프트웨어를 통합하는 혁신적인 방법을 연구합니다. 여가 시간에는 게임을 즐기거나 디스코드 봇을 만들면서 기술에 대한 애정과 창의성을 결합합니다.


 워터마크 없는 PDF 문서를 생성하려면 ironpdf.com/nodejs/licensing/에서 라이선스 키를 받으세요.
 The PDF generated from the HTML string "
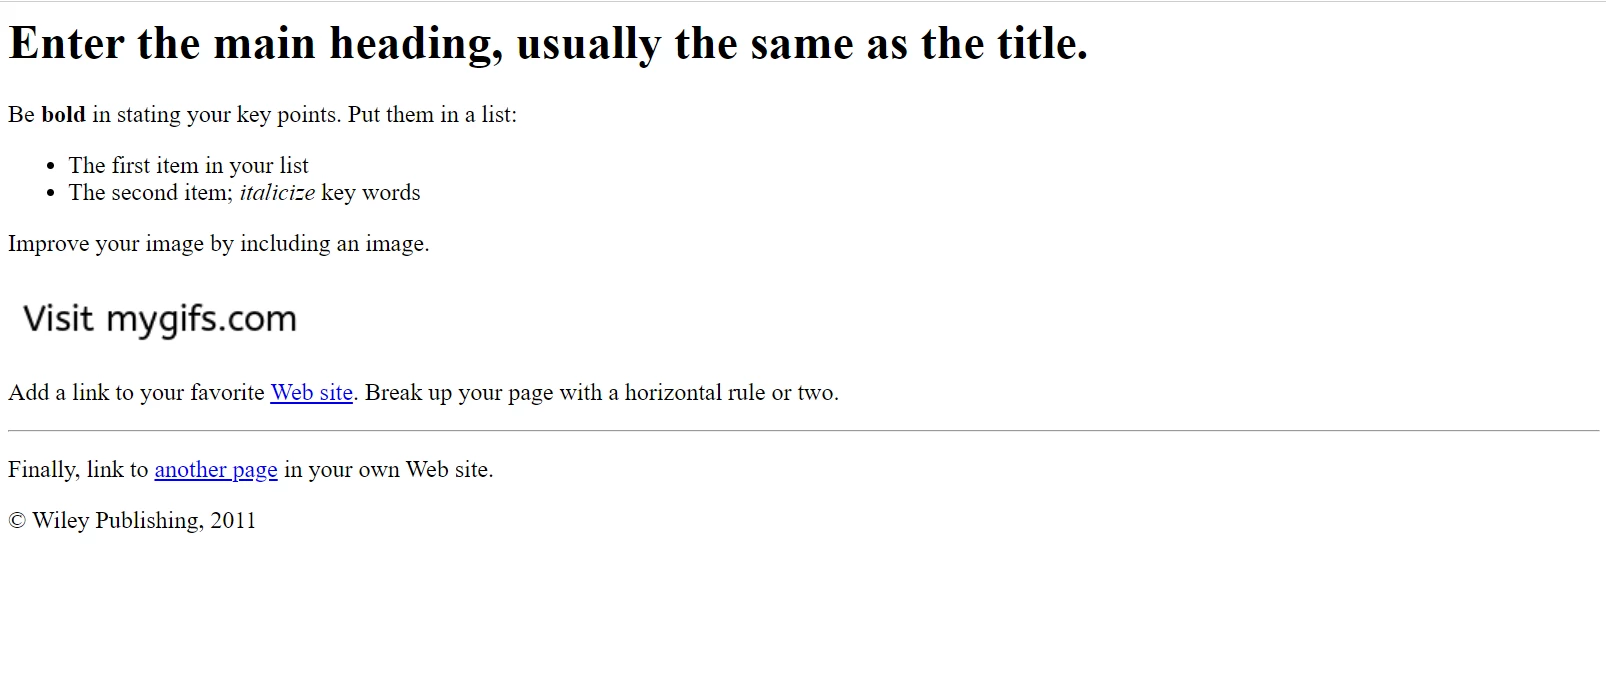 구글 크롬에서 보이는 샘플 HTML 페이지입니다. 파일 샘플 웹사이트에서 이 페이지와 유사한 페이지를 다운로드하세요.
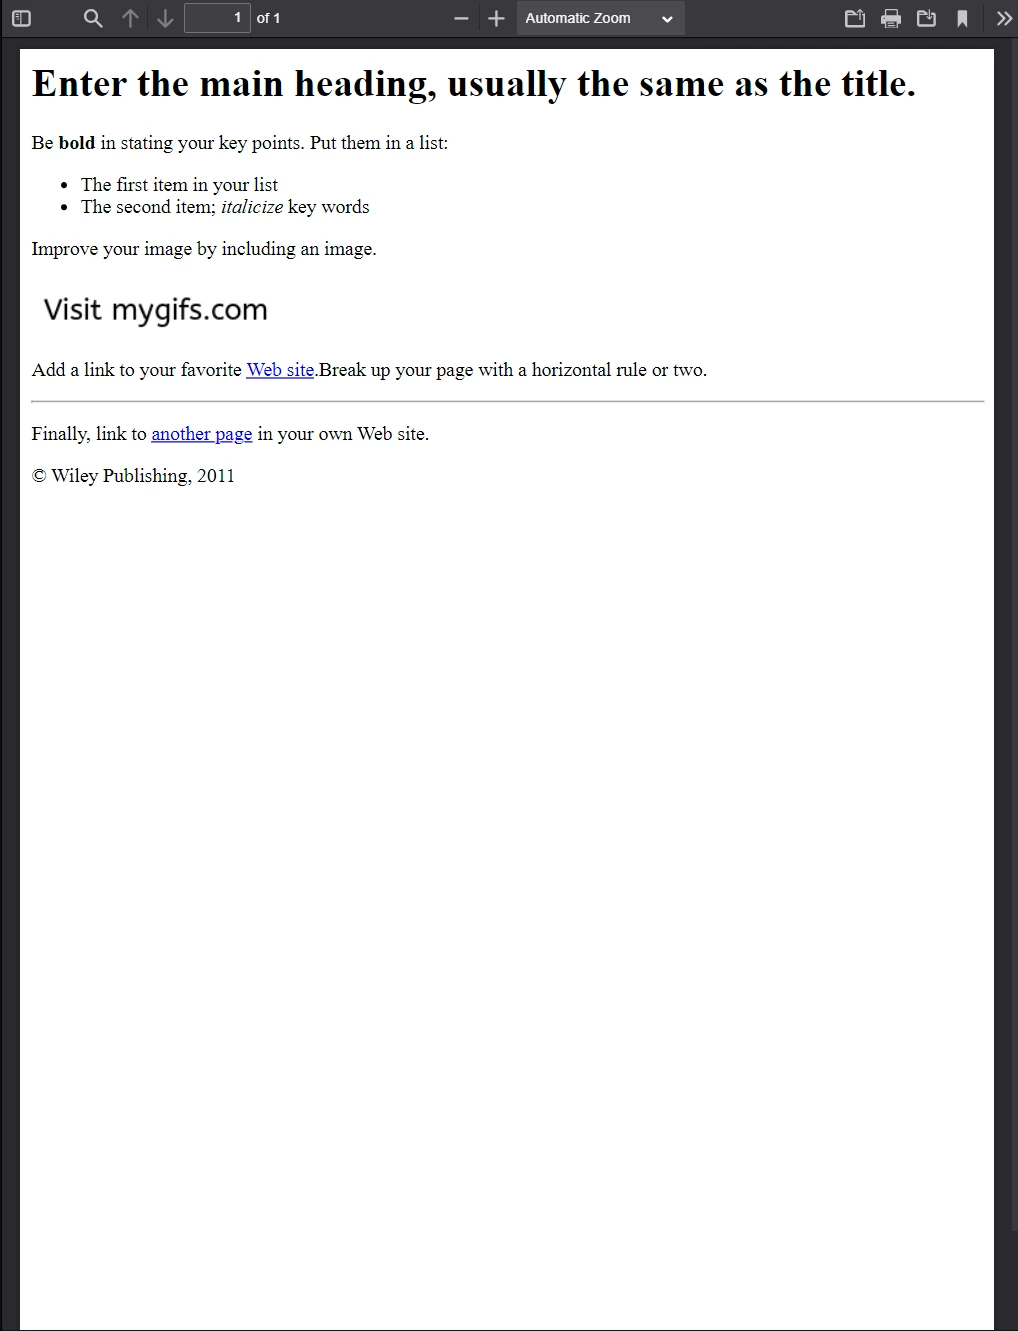 이 PDF 파일은 이전 코드 예제를 기반으로 생성되었습니다. 이전 이미지와 비교해 보면 놀라운 유사성을 알 수 있습니다!
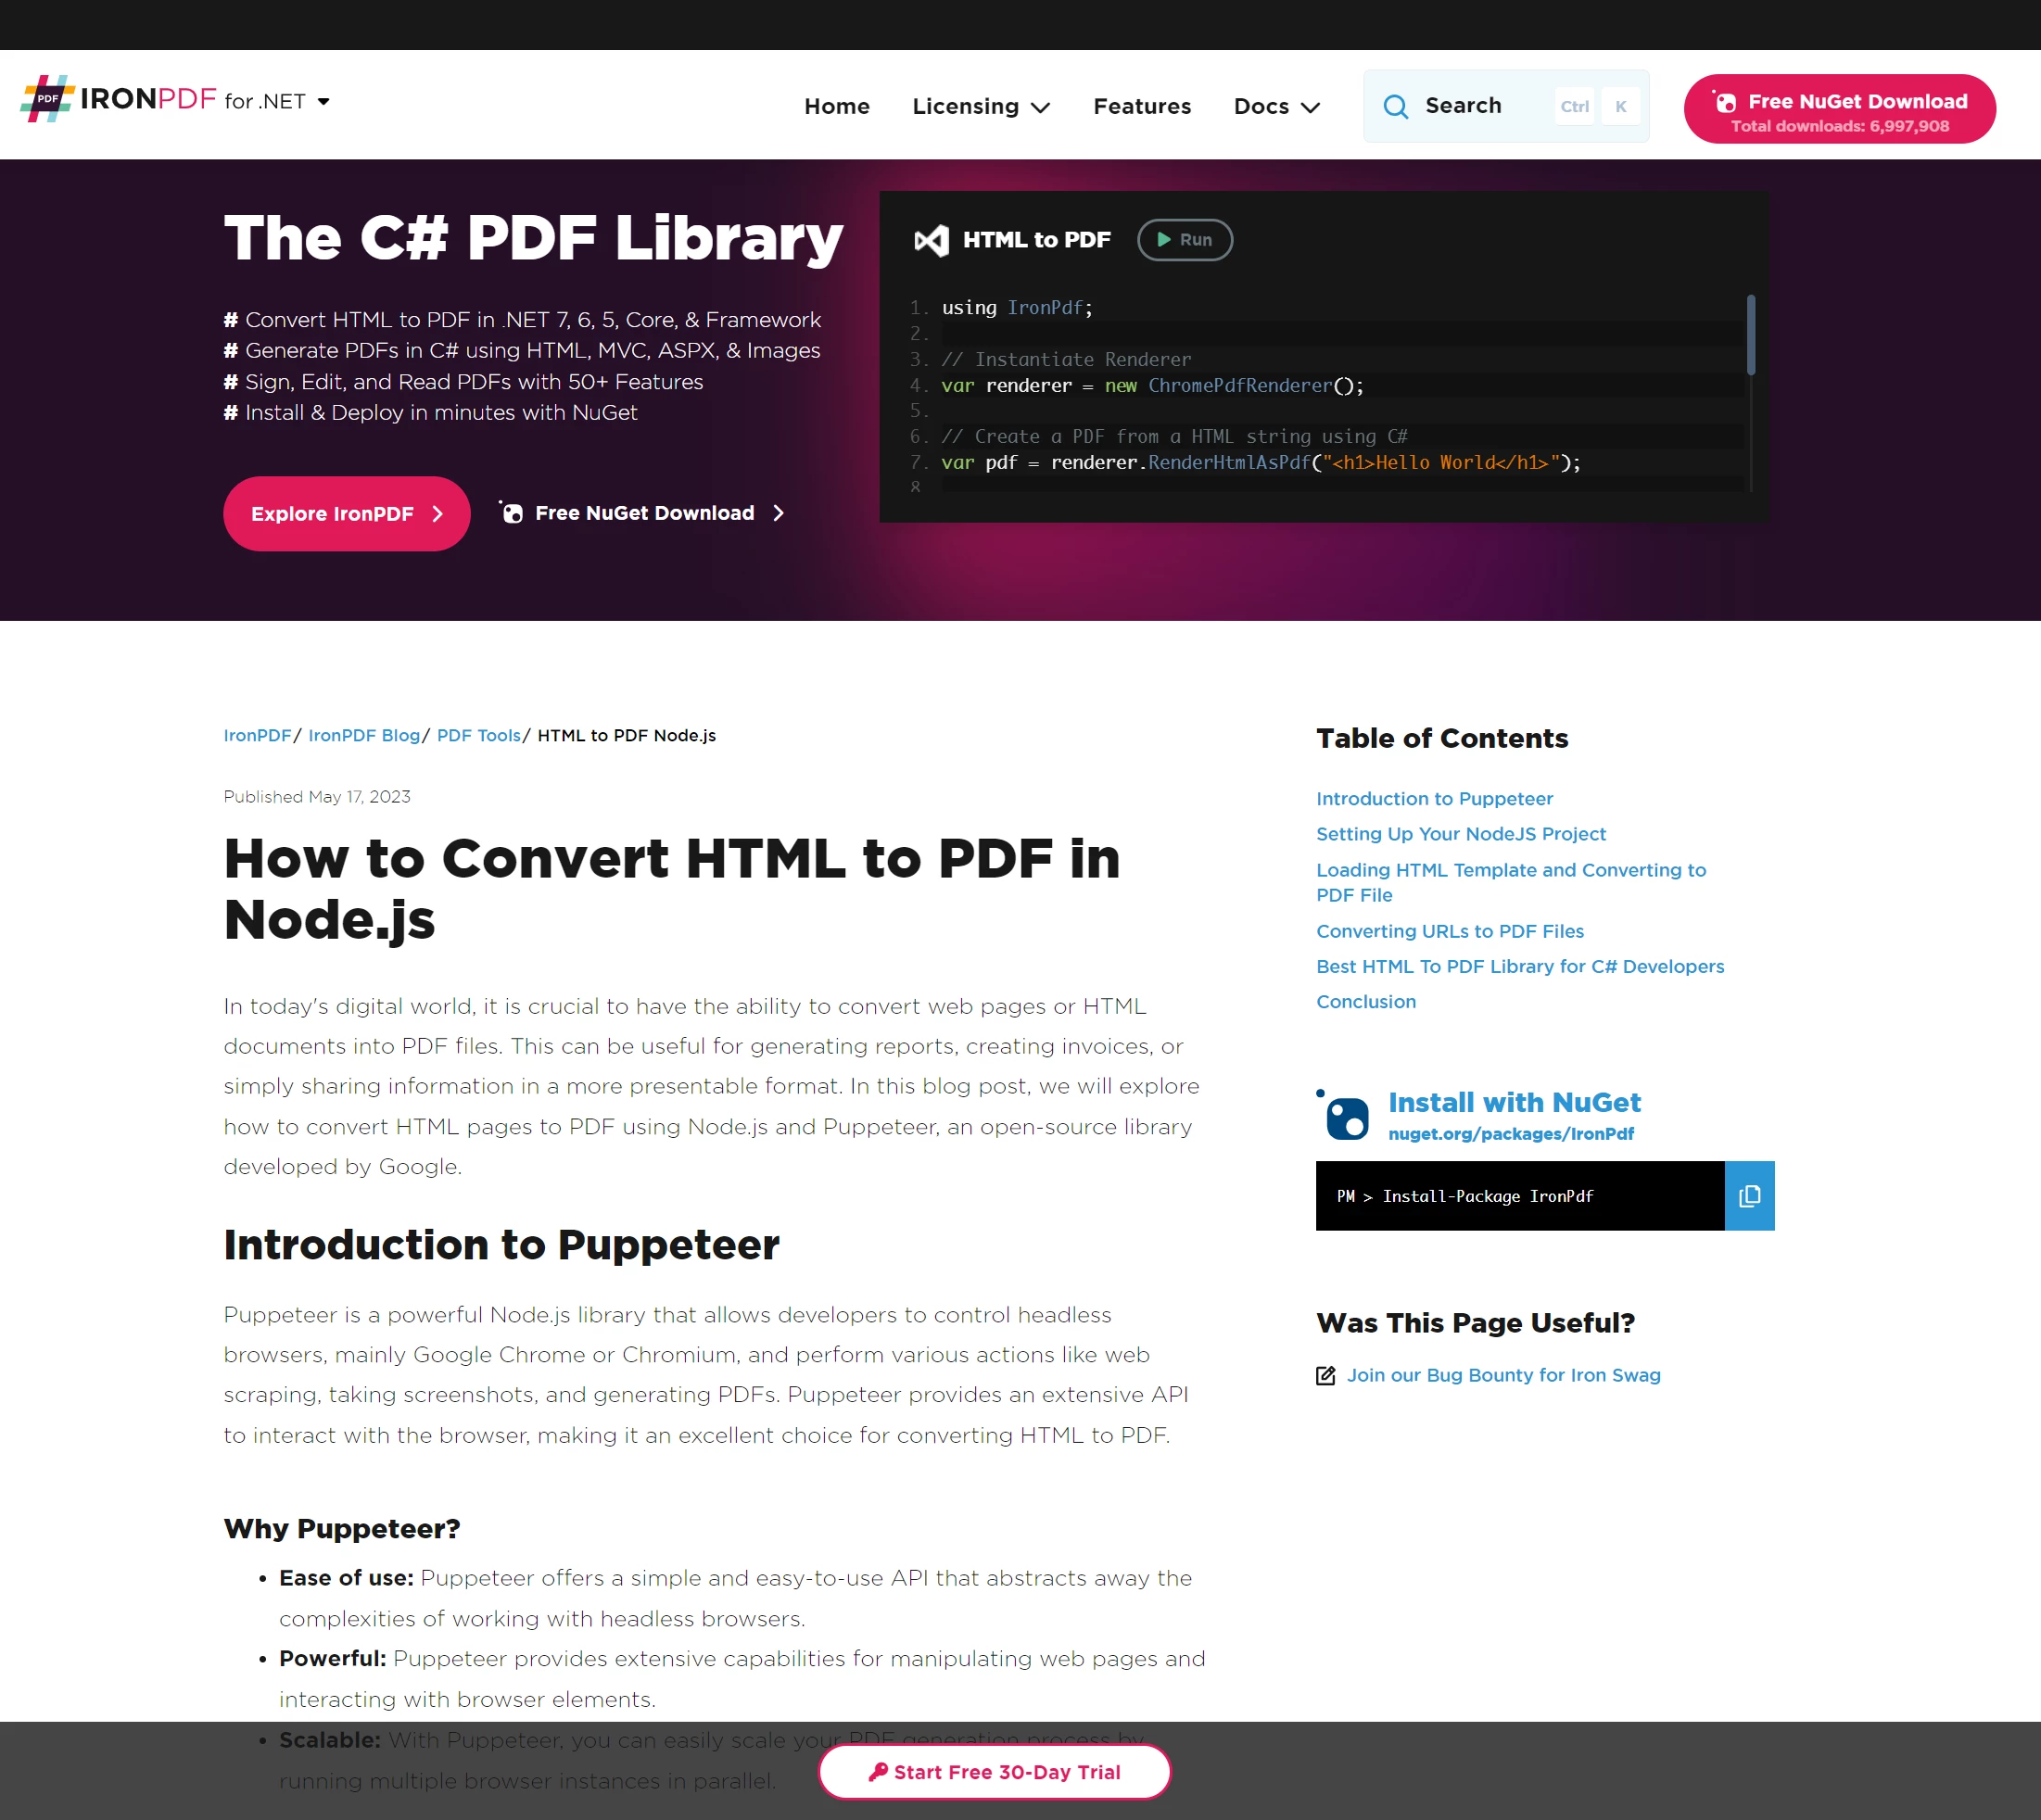 Puppeteer에 대한 기사입니다. Puppeteer는 헤드리스 브라우저 인스턴스를 사용하여 Chrome을 프로그래밍 방식으로 제어할 수 있는 기능으로 인기를 얻은 Node 라이브러리입니다.
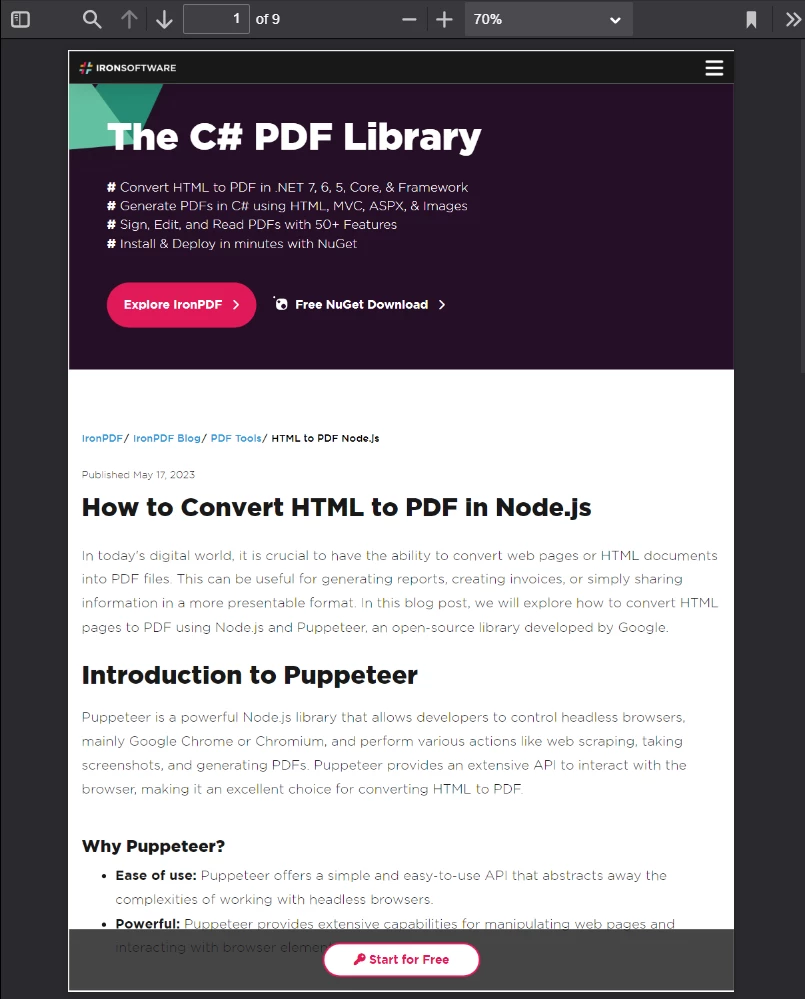 구글 크롬에서 보기 좋으면 PDF로 변환했을 때도 보기 좋을 것입니다. 여기에는 CSS와 JavaScript를 많이 사용하는 페이지 디자인이 포함됩니다.
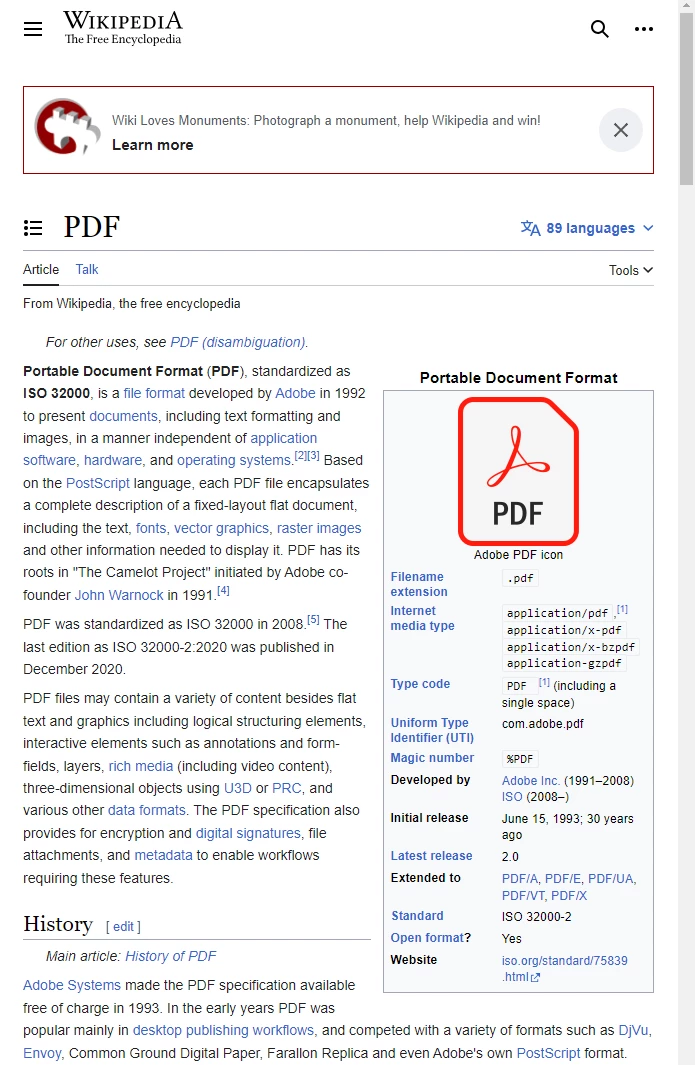 표준을 준수하는 웹 브라우저에서 보이는 PDF 형식에 대한 위키백과 문서입니다.
 가상의 HTML 압축 파일 안에 있는 샘플 이미지입니다.
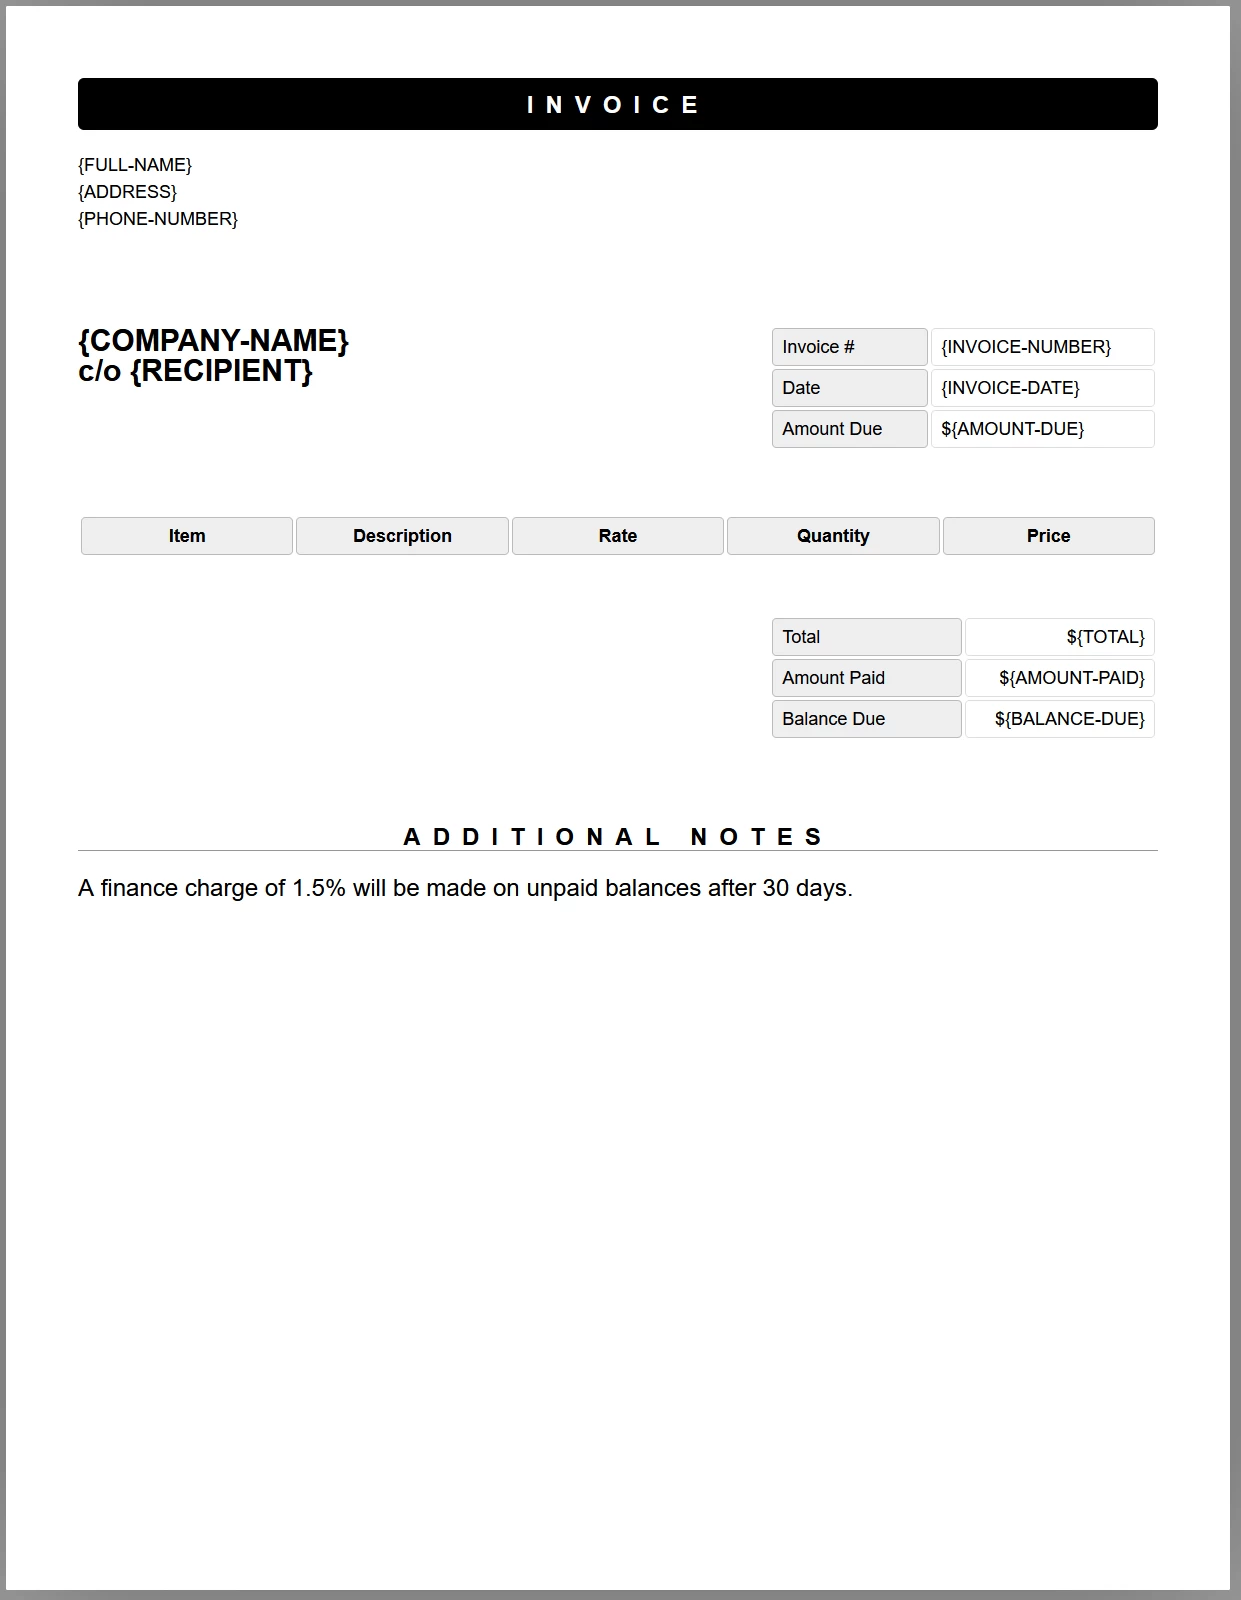 송장 양식 예시입니다. PDF로 생성하기 전에 이 템플릿에 동적 데이터를 추가하는 JavaScript 코드를 추가로 작성할 것입니다.


