Sendgrid .NET(開發者使用指南)
SendGrid 是 Twilio SendGrid 的一部分,提供基於雲端的服務,幫助客戶簡單地發送電子郵件,簡化溝通流程。 當您建立 SendGrid 帳戶時,您就可以使用 SMTP 中繼和 API 金鑰等功能,讓您有效率地傳送電子郵件訊息。 SMTP 中繼是此流程的核心,因為它允許您的電子郵件從您的伺服器透過 SendGrid 的系統傳送。 認證網域功能可驗證您的網域。 由於 SendGrid 是開放原始碼,您可以存取其 GitHub repo 並協助修改。
在本指南中,我們的目標是解開 SendGrid .NET 的特性和功能,引導您完成初始設置、基本操作和更多進階功能。 無論您是想透過程式碼發送第一封電子郵件,或是想優化您的電子郵件宣傳活動,這篇文章都是您掌握 SendGrid .NET 及其與 IronPDF for PDF 操作整合的起點。
開始使用 SendGrid .NET
首先,您需要在專案中設定 SendGrid .NET。 首先安裝 SendGrid .NET 套件。 請使用 NuGet Package Manager 來完成。 開啟 Visual Studio,然後開啟 Package Manager Console。 鍵入以下指令:
Install-Package SendGrid

此指令將 SendGrid 加入您的專案。 安裝完成後,設定您的 SendGrid 帳戶。 您需要一個 API 金鑰。 前往 SendGrid 網站。 如果您沒有帳號,請建立帳號。 登入後,導覽至"設定"。 尋找 API 關鍵字。 按一下 建立 API 金鑰。 命名並選擇存取層級。 複製 API 金鑰。 您將在您的應用程式中使用。
基本程式碼範例
現在,我們來傳送一封電子郵件。 建立 SendGridClient 的新實體。 將您的 API 金鑰傳給建構器。 然後,建立 SendGridMessage。 設定寄件者和收件者的電子郵件地址。 新增主旨和電子郵件內容。 最後,使用 SendGridClient 傳送訊息。 以下是一個基本範例:
using SendGrid;
using SendGrid.Helpers.Mail;
using System.Threading.Tasks;

// Asynchronous method to send an email using SendGrid
static async Task SendEmailAsync()
{
    // Initialize a SendGrid client with your API key
    var client = new SendGridClient("your_api_key");

    // Create a new email message
    var message = new SendGridMessage()
    {
        From = new EmailAddress("your_email@example.com", "Your Name"),
        Subject = "Hello World from SendGrid",
        PlainTextContent = "This is a test email.",
        HtmlContent = "<strong>This is a test email.</strong>"
    };

    // Add a recipient to your email message
    message.AddTo(new EmailAddress("recipient_email@example.com", "Recipient Name"));

    // Send the email and retrieve the response
    var response = await client.SendEmailAsync(message);
}
using SendGrid;
using SendGrid.Helpers.Mail;
using System.Threading.Tasks;
// Asynchronous method to send an email using SendGrid
static async Task SendEmailAsync()
{
// Initialize a SendGrid client with your API key
var client = new SendGridClient("your_api_key");
// Create a new email message
var message = new SendGridMessage()
{
From = new EmailAddress("your_email@example.com", "Your Name"),
Subject = "Hello World from SendGrid",
PlainTextContent = "This is a test email.",
HtmlContent = "<strong>This is a test email.</strong>"
};
// Add a recipient to your email message
message.AddTo(new EmailAddress("recipient_email@example.com", "Recipient Name"));
// Send the email and retrieve the response
var response = await client.SendEmailAsync(message);
}此代碼會傳送一封簡單的電子郵件。 它展示了使用 SendGrid .NET 的基本知識。 您可以從這裡擴充使用更多的功能。
實現 SendGrid .NET 的功能。
使用自訂 HTML 內容發送電子郵件
若要傳送 HTML 內容的電子郵件,您首先要建立 HTML。 然後,使用 SendGridMessage 設定 HtmlContent。 這可讓您設計豐富的電子郵件。 方法如下
using SendGrid;
using SendGrid.Helpers.Mail;
using System.Threading.Tasks;

// Asynchronous method to send an email with custom HTML content
static async Task SendCustomHtmlEmailAsync()
{
    // Initialize a SendGrid client with your API key
    var client = new SendGridClient("your_api_key");

    // Create a new email message with rich HTML content
    var message = new SendGridMessage()
    {
        From = new EmailAddress("your_email@example.com", "Your Name"),
        Subject = "Custom HTML Content",
        HtmlContent = "<html><body><h1>This is a Heading</h1><p>This is a paragraph.</p></body></html>"
    };

    // Add a recipient to your email message
    message.AddTo(new EmailAddress("recipient_email@example.com", "Recipient Name"));

    // Send the email and retrieve the response
    var response = await client.SendEmailAsync(message);
}
using SendGrid;
using SendGrid.Helpers.Mail;
using System.Threading.Tasks;
// Asynchronous method to send an email with custom HTML content
static async Task SendCustomHtmlEmailAsync()
{
// Initialize a SendGrid client with your API key
var client = new SendGridClient("your_api_key");
// Create a new email message with rich HTML content
var message = new SendGridMessage()
{
From = new EmailAddress("your_email@example.com", "Your Name"),
Subject = "Custom HTML Content",
HtmlContent = "<html><body><h1>This is a Heading</h1><p>This is a paragraph.</p></body></html>"
};
// Add a recipient to your email message
message.AddTo(new EmailAddress("recipient_email@example.com", "Recipient Name"));
// Send the email and retrieve the response
var response = await client.SendEmailAsync(message);
}使用 SendGrid SMTP 服務
有時候,您可能會偏好使用 SMTP 來傳送電子郵件。 SendGrid 也支援這一點。 在 SendGrid 中配置您的 SMTP 設定。 然後,在您的應用程式中使用這些設定。 此方法需要使用 SendGrid 伺服器的詳細資料設定 SMTP 客戶端。 以下是基本設定:
using System.Net;
using System.Net.Mail;

// Method to send an email using SendGrid's SMTP service
void SendSmtpEmail()
{
    // Configure SMTP client with SendGrid's server details
    using (var client = new SmtpClient("smtp.sendgrid.net")
    {
        Port = 587,
        Credentials = new NetworkCredential("apikey", "your_sendgrid_apikey"),
        EnableSsl = true,
    })
    {
        // Create a new mail message
        var mailMessage = new MailMessage
        {
            From = new MailAddress("your_email@example.com"),
            Subject = "Test SMTP Email",
            Body = "This is a test email sent via SMTP.",
            IsBodyHtml = true,
        };

        // Add a recipient to the mail message
        mailMessage.To.Add("recipient_email@example.com");

        // Send the email
        client.Send(mailMessage);
    }
}
using System.Net;
using System.Net.Mail;
// Method to send an email using SendGrid's SMTP service
void SendSmtpEmail()
{
// Configure SMTP client with SendGrid's server details
using (var client = new SmtpClient("smtp.sendgrid.net")
{
Port = 587,
Credentials = new NetworkCredential("apikey", "your_sendgrid_apikey"),
EnableSsl = true,
})
{
// Create a new mail message
var mailMessage = new MailMessage
{
From = new MailAddress("your_email@example.com"),
Subject = "Test SMTP Email",
Body = "This is a test email sent via SMTP.",
IsBodyHtml = true,
};
// Add a recipient to the mail message
mailMessage.To.Add("recipient_email@example.com");
// Send the email
client.Send(mailMessage);
}
}管理電子郵件廣告系列
SendGrid .NET 允許管理電子郵件活動。 透過 API 建立、傳送和追蹤活動。 如需詳細的活動管理,請參閱 SendGrid 的 API 文件。 此功能已超越基本的電子郵件傳送,但對行銷工作很有價值。
處理退回的電子郵件和垃圾郵件報告
處理退件和垃圾郵件報告至關重要。 SendGrid .NET 為這些事件提供 webhooks。 在您的 SendGrid 面板中設定 webhooks。 然後,在您的應用程式中處理這些事件。 這可讓您的電子郵件清單保持乾淨,並提高傳達率。
驗證網域
網域驗證對於電子郵件的傳送非常重要。 它可以驗證您的網域所有權。在 SendGrid 中,透過儀表板設定網域驗證。 這涉及到 DNS 記錄的新增。 一旦經過驗證,電子郵件對收件者和電子郵件供應商而言會顯得更值得信賴。
將 IronPDF 與 SendGrid 整合。
IronPDF 簡介
 。
。
Explore IronPDF capabilities 是一個函式庫,可讓開發人員在 .NET 應用程式中建立、編輯和擷取 PDF 內容。 它提供了以程式化方式處理 PDF 檔案的直接方法。 它可以讓您更輕鬆地使用 PDF 檔案,而不需要深厚的 PDF 規格知識。 透過 IronPDF,開發人員可以使用 IronPDF anchors 將 HTML 轉換為 PDF、編輯現有的 PDF,以及擷取內容。
將 IronPDF 與 SendGrid C&num 合併的使用案例;。
在商業應用程式中,需要動態產生財務報告、發票或個人化文件,並透過電子郵件傳送給客戶或利害關係人。 IronPDF 可用來從範本或資料來源建立這些文件,並將其轉換成 PDF 格式。 之後,使用 SendGrid 的 C# 用戶端,就可以將這些 PDF 文件附加到電子郵件中,並自動發送給預期的收件人。
IronPDF 擅長於 HTML 至 PDF 的轉換,可確保精確保留原始版面與樣式。 它非常適合從網頁內容(如報告、發票和文件)建立 PDF。 IronPDF 支援 HTML 檔案、URL 和原始 HTML 字串,可輕鬆製作高品質的 PDF 文件。
using IronPdf;

class Program
{
    static void Main(string[] args)
    {
        var renderer = new ChromePdfRenderer();

        // 1. Convert HTML String to PDF
        var htmlContent = "<h1>Hello, IronPDF!</h1><p>This is a PDF from an HTML string.</p>";
        var pdfFromHtmlString = renderer.RenderHtmlAsPdf(htmlContent);
        pdfFromHtmlString.SaveAs("HTMLStringToPDF.pdf");

        // 2. Convert HTML File to PDF
        var htmlFilePath = "path_to_your_html_file.html"; // Specify the path to your HTML file
        var pdfFromHtmlFile = renderer.RenderHtmlFileAsPdf(htmlFilePath);
        pdfFromHtmlFile.SaveAs("HTMLFileToPDF.pdf");

        // 3. Convert URL to PDF
        var url = "http://ironpdf.com"; // Specify the URL
        var pdfFromUrl = renderer.RenderUrlAsPdf(url);
        pdfFromUrl.SaveAs("URLToPDF.pdf");
    }
}
using IronPdf;
class Program
{
static void Main(string[] args)
{
var renderer = new ChromePdfRenderer();
// 1. Convert HTML String to PDF
var htmlContent = "<h1>Hello, IronPDF!</h1><p>This is a PDF from an HTML string.</p>";
var pdfFromHtmlString = renderer.RenderHtmlAsPdf(htmlContent);
pdfFromHtmlString.SaveAs("HTMLStringToPDF.pdf");
// 2. Convert HTML File to PDF
var htmlFilePath = "path_to_your_html_file.html"; // Specify the path to your HTML file
var pdfFromHtmlFile = renderer.RenderHtmlFileAsPdf(htmlFilePath);
pdfFromHtmlFile.SaveAs("HTMLFileToPDF.pdf");
// 3. Convert URL to PDF
var url = "http://ironpdf.com"; // Specify the URL
var pdfFromUrl = renderer.RenderUrlAsPdf(url);
pdfFromUrl.SaveAs("URLToPDF.pdf");
}
}安裝 IronPdf 函式庫
要使用 IronPDF,首先需要安裝 NuGet 套件。 首先,打開 NuGet Package Manager 主控台,然後執行此指令:
Install-Package IronPdf
包含詳細資訊和步驟的用例程式碼範例
第 1 步:使用 IronPDF 生成 PDF.
首先,我們會產生 PDF 文件。 我們將以 HTML 字串為例,建立一個簡單的 PDF。
using IronPdf;

// Instantiates a new HtmlToPdf object
var Renderer = new HtmlToPdf();

// Constructs a PDF from an HTML string
var PDF = Renderer.RenderHtmlAsPdf("<h1>Hello World</h1>");

// Define the output path for the PDF file
var outputPath = "example.pdf";

// Saves the generated PDF to the specified path
PDF.SaveAs(outputPath);
using IronPdf;
// Instantiates a new HtmlToPdf object
var Renderer = new HtmlToPdf();
// Constructs a PDF from an HTML string
var PDF = Renderer.RenderHtmlAsPdf("<h1>Hello World</h1>");
// Define the output path for the PDF file
var outputPath = "example.pdf";
// Saves the generated PDF to the specified path
PDF.SaveAs(outputPath);步驟 2:設定 SendGrid
確保您已安裝 SendGrid NuGet 套件:
Install-Package SendGrid
然後,在您的應用程式中配置 SendGrid。 您需要從 SendGrid 帳戶中取得 API 金鑰。
using SendGrid;
using SendGrid.Helpers.Mail;

// Initialize SendGrid client with your API key
var apiKey = "your_sendgrid_api_key";
var client = new SendGridClient(apiKey);
using SendGrid;
using SendGrid.Helpers.Mail;
// Initialize SendGrid client with your API key
var apiKey = "your_sendgrid_api_key";
var client = new SendGridClient(apiKey);步驟 3:建立並傳送附有 PDF 附件的電子郵件
現在,建立電子郵件訊息,並附上先前產生的 PDF。 最後,透過 SendGrid 傳送電子郵件。
using System;
using System.IO;
using System.Threading.Tasks;
using SendGrid;
using SendGrid.Helpers.Mail;

// Asynchronous method to create and send an email with a PDF attachment
async Task SendEmailWithPdfAttachmentAsync()
{
    // Define sender and recipient email addresses
    var from = new EmailAddress("your_email@example.com", "Your Name");
    var subject = "Sending with SendGrid is Fun";
    var to = new EmailAddress("recipient_email@example.com", "Recipient Name");
    var plainTextContent = "Hello, Email!";
    var htmlContent = "<strong>Hello, Email!</strong>";

    // Create a new email message
    var msg = MailHelper.CreateSingleEmail(from, to, subject, plainTextContent, htmlContent);

    // Attach the PDF
    var bytes = File.ReadAllBytes("example.pdf");
    var file = Convert.ToBase64String(bytes);
    msg.AddAttachment("example.pdf", file);

    // Send the email and retrieve the response
    var response = await client.SendEmailAsync(msg);
}
using System;
using System.IO;
using System.Threading.Tasks;
using SendGrid;
using SendGrid.Helpers.Mail;
// Asynchronous method to create and send an email with a PDF attachment
async Task SendEmailWithPdfAttachmentAsync()
{
// Define sender and recipient email addresses
var from = new EmailAddress("your_email@example.com", "Your Name");
var subject = "Sending with SendGrid is Fun";
var to = new EmailAddress("recipient_email@example.com", "Recipient Name");
var plainTextContent = "Hello, Email!";
var htmlContent = "<strong>Hello, Email!</strong>";
// Create a new email message
var msg = MailHelper.CreateSingleEmail(from, to, subject, plainTextContent, htmlContent);
// Attach the PDF
var bytes = File.ReadAllBytes("example.pdf");
var file = Convert.ToBase64String(bytes);
msg.AddAttachment("example.pdf", file);
// Send the email and retrieve the response
var response = await client.SendEmailAsync(msg);
}本代碼範例說明如何產生一個簡單的 PDF 文件,將其附加到電子郵件,並透過 SendGrid 傳送。 這是一個簡單直接的過程,在 .NET 應用程式中分別整合 IronPDF 和 SendGrid 的文件產生和電子郵件功能。
結論
 。
。
總之,本指南提供了在 .NET 應用程式中整合 SendGrid .NET 的電子郵件服務和 IronPDF 的 PDF 文件管理的全面概述。 透過遵循概述的步驟,開發人員可以有效率地透過客製化 HTML 內容和 SMTP 服務選項實現電子郵件發送功能,並管理電子郵件活動。
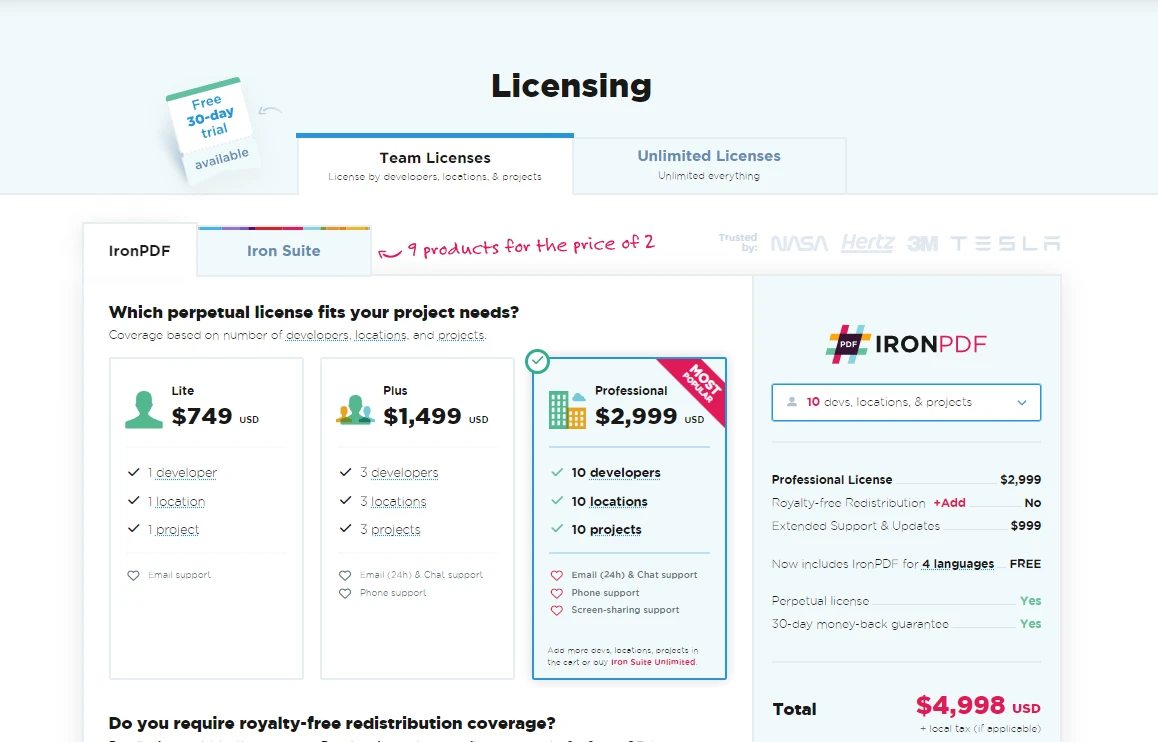
此外,整合 IronPDF 後,可動態產生 PDF 文件並透過電子郵件寄送,例如財務報告或發票,展示合併這些功能強大的函式庫的實用案例。 有興趣探索這些功能的開發人員,可以先利用 IronPDF免費試用版,然後再取得授權。 IronPDF 授權細節和定價選項從 $799 開始。
常見問題解答
如何在我的專案中設定 SendGrid .NET?
在 Visual Studio 中,透過 NuGet 套件管理器安裝 SendGrid 套件,即可設定 SendGrid .NET。安裝完成後,建立 SendGrid 帳戶並產生 API 金鑰,即可開始傳送電子郵件。
使用 SendGrid .NET 發送電子郵件需要哪些步驟?
使用您的 API 金鑰呼叫 SendGridClient,建構一個包含必要的寄件者和收件者詳細資料的 SendGridMessage,然後使用 SendGridClient 的 SendEmailAsync 方法傳送訊息。
如何使用 SendGrid .NET 傳送包含 HTML 程式碼的電子郵件?
若要傳送包含 HTML 內容的電子郵件,請在傳送電子郵件之前將 SendGridMessage 的HtmlContent屬性設定為您的自訂 HTML 內容。
是否可以在 .NET 應用程式中將 SMTP 與 SendGrid 結合使用?
是的,您可以透過將 SMTP 用戶端配置為 SendGrid 的 SMTP 伺服器詳細信息,並使用您的 API 金鑰作為憑證,將 SMTP 與 SendGrid 結合使用。
如何在.NET中產生用於電子郵件附件的PDF文件?
您可以使用 IronPDF 的ChromePdfRenderer將 HTML 內容轉換為 PDF 文件,然後使用SaveAs方法儲存該文件,從而產生 PDF 文件。
如何使用 SendGrid 將 PDF 檔案附加到電子郵件中?
將 PDF 轉換為位元組數組,將其編碼為 base64 字串,然後使用 SendGridMessage 的AddAttachment方法將 PDF 附加到您的電子郵件中。
使用 SendGrid 時,網域身份驗證為何如此重要?
網域認證至關重要,因為它能驗證您對網域的所有權,提高電子郵件送達率,並確保收件者認為您的電子郵件值得信賴。
IronPDF 如何增強 .NET 應用程式中 SendGrid 的功能?
IronPDF 允許開發人員創建和操作 PDF 文檔,這些文檔可以與 SendGrid 集成,將生成的 PDF 作為電子郵件附件發送,從而增強文檔管理功能。
使用 SendGrid 管理電子郵件行銷活動有哪些好處?
SendGrid 透過其 API 提供強大的功能,用於建立、發送和追蹤電子郵件活動,並提供 SendGrid API 文件中概述的詳細管理選項。
如何在 SendGrid 中處理退信和垃圾郵件舉報?
使用 SendGrid 的 Webhook 功能來處理退信和垃圾郵件舉報。這些 Webhook 可以通知您的應用程式有關電子郵件投遞問題,方便您進行有效管理。


