.NET 소프트웨어 개발 (개발자를 위한 작동 원리)
.NET Framework 소프트웨어 개발은 Microsoft에서 지원하는 강력하고 다재다능한 프레임워크로 .NET 개발자가 다양한 플랫폼, 운영 체제 및 장치를 아우르는 견고하고 고품질의 애플리케이션을 만들 수 있게 합니다. 이 소프트웨어 개발 프레임워크는 웹, 데스크톱 및 모바일 애플리케이션을 .NET 플랫폼에서 효율적으로 빌드할 수 있는 도구, 라이브러리 및 API를 제공하도록 설계되었습니다.
C#, Visual Basic 및 F#을 포함한 다수의 프로그래밍 언어에 대한 지원 덕분에 .NET 개발은 개발자가 자신의 선호하는 언어로 작업하면서 .NET Core 에코시스템의 풍부한 기능을 누릴 수 있도록 유연성을 확장합니다. 이번 튜토리얼에서는 IronPDF가 .NET 개발을 향상시키는 방법을 실질적인 문제 해결을 위해 살펴보겠습니다.
.NET 소프트웨어 개발의 생태계 이해하기
.NET 에코시스템은 광범위하고 포괄적인 플랫폼으로, 다양한 운영 체제 간의 애플리케이션 개발을 용이하게 하기 위해 설계된 여러 구성 요소와 기술을 포함합니다. 기본적으로 .NET Framework와 .NET Core는 .NET 응용 프로그램을 실행하기 위한 주요 엔진으로, 코드 실행을 관리하고 메모리 관리, 타입 안전성, 예외 처리 등과 같은 서비스를 제공하는 공통 언어 런타임 (CLR)을 제공합니다.
공통 언어 런타임 (CLR)
CLR은 .NET 아키텍처의 중요한 요소로, 다양한 운영 체제 간 .NET 코드 실행을 가능하게 합니다. 공통 중간 언어 (CIL)를 호스트 머신에서 직접 실행할 수 있는 네이티브 머신 코드로 컴파일합니다. 이 프로세스는 .NET 응용 프로그램이 주요 모바일 운영 체제부터 Windows 웹 서버까지 다양한 플랫폼에서 원활하게 실행될 수 있도록 합니다.
크로스 플랫폼 프레임워크
.NET Core는 Linux, macOS 및 Windows에서 .NET 응용 프로그램을 실행할 수 있는 크로스 플랫폼 프레임워크로 부상합니다. 이러한 적응력으로 인해 .NET은 다양한 장치와 플랫폼에서 더 넓은 청중에게 도달하려는 개발자에게 매력적인 선택이 됩니다. .NET Core를 통해 응용 프로그램은 지원되는 운영 체제에서 개발 및 배포될 수 있으며, 방대한 .NET 커뮤니티의 강력한 지원을 받으며 .NET 소프트웨어 개발의 범위와 유연성을 향상시킵니다.
통합 개발 환경 (IDE)
Visual Studio는 .NET 개발을 위한 프리미어 통합 개발 환경 (IDE)으로 두드러집니다. .NET 응용 프로그램의 코드 작성, 디버깅 및 배포를 위한 강력한 도구를 개발자에게 제공합니다. Visual Studio는 다양한 프로그래밍 언어를 지원하고 웹, 데스크톱 및 모바일 애플리케이션을 구축하기 위한 다양한 기능을 제공하여 .NET 개발자에게 없어서는 안 될 도구입니다.
.NET으로 애플리케이션 빌드하기
.NET 플랫폼에서 애플리케이션을 생성하는 것은 Visual Basic과 같은 프레임워크가 제공하는 다양한 도구, 라이브러리 및 프로그래밍 언어를 활용하는 것을 포함하며, 종합적인 생태계를 보여줍니다. 이러한 다양성은 소프트웨어 개발자가 웹 및 데스크탑 애플리케이션부터 클라우드 기반 및 모바일 솔루션까지 다양한 유형의 .NET 앱을 빌드할 수 있게 합니다.
ASP.NET을 사용한 웹 개발
ASP.NET은 .NET Framework의 핵심 부분으로, 동적 웹 페이지와 애플리케이션을 빌드하기 위해 특별히 설계되었습니다. 이를 통해 개발자는 방대한 트래픽을 처리할 수 있는 반응형 및 확장성 높은 웹 애플리케이션을 만들 수 있습니다. ASP.NET의 오픈 소스 버전인 ASP.NET Core는 크로스 플랫폼 웹 애플리케이션을 구축하기 위한 추가 기능을 제공하여 Windows, Linux, macOS에서 웹 앱을 개발하고 배포할 수 있게 합니다.
데스크탑 애플리케이션 개발
.NET은 데스크탑 애플리케이션을 만드는 두 가지 주요 접근 방식을 제공합니다: Windows Forms와 Windows Presentation Foundation (WPF). Windows Forms는 풍부한 그래픽 사용자 인터페이스를 갖춘 데스크탑 앱을 간단하게 만들어주고, WPF는 XAML (확장 가능 애플리케이션 마크업 언어)을 사용하여 고급 그래픽 및 애니메이션을 갖춘 시각적으로 매력적인 사용자 인터페이스 개발을 가능하게 합니다.
모바일 애플리케이션 개발
모바일 개발을 위해 .NET은 이제 .NET MAUI (멀티 플랫폼 앱 UI)로 통합된 Xamarin 프레임워크를 통해 주요 모바일 운영 체제로의 범위를 확장합니다. 이 접근 방식은 iOS, Android, Windows 전반에 걸쳐 코드를 재사용하여 본격적인 성능 및 사용자 경험을 제공하는 모바일 애플리케이션을 만드는 과정을 단순화합니다.
클라우드 및 마이크로서비스
.NET은 또한 클라우드에서 실행되는 애플리케이션 개발에 적합합니다. Azure 및 다른 클라우드 플랫폼의 지원을 통해 개발자는 클라우드 컴퓨팅 리소스를 활용하는 확장 가능하고 분산된 애플리케이션을 빌드할 수 있습니다. ASP.NET Core는 경량, 모듈식 및 독립적으로 배포 가능한 서비스로서, 클라우드 환경 내에서 확장할 수 있는 마이크로서비스 개발에 중요한 역할을 합니다.
머신 러닝 및 AI
.NET 생태계는 ML.NET이라는 머신 러닝 프레임워크를 포함하여 개발자가 .NET 애플리케이션에 사용자 정의 머신 러닝 모델을 통합할 수 있게 합니다. 이 통합은 AI의 힘을 활용하여 예측 분석, 자연어 처리 등을 수행할 수 있는 지능형 애플리케이션을 만드는 가능성을 제공합니다.
IronPDF로 .NET 소프트웨어 개발 강화하기
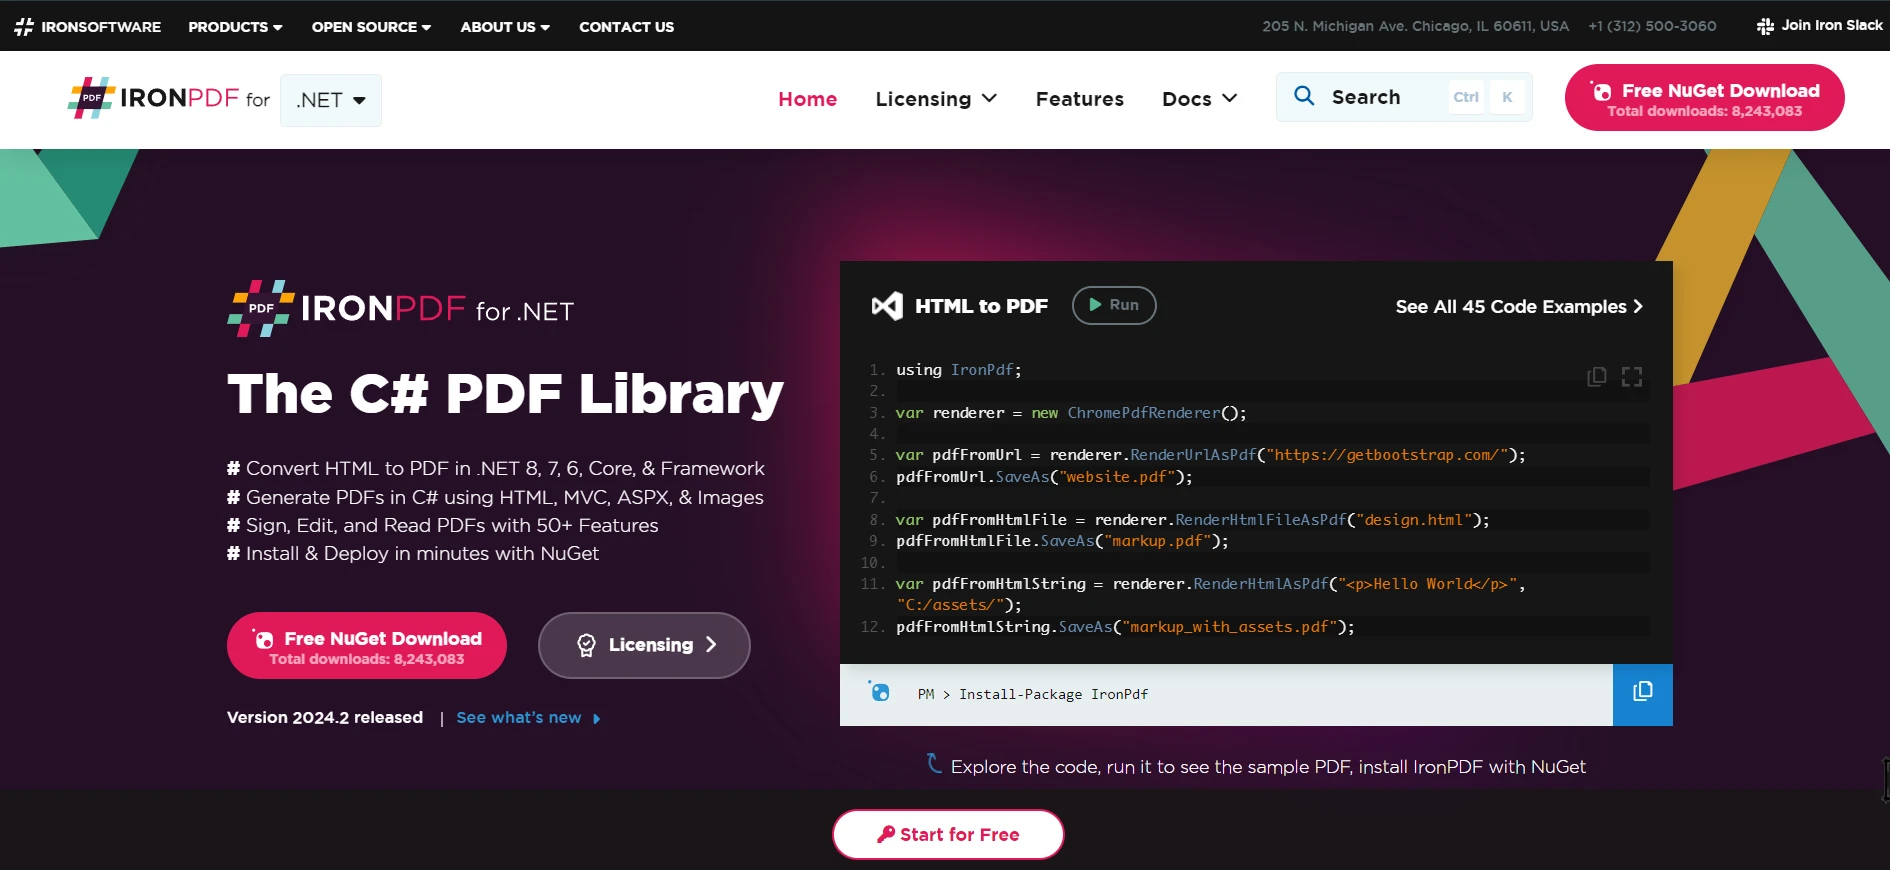
.NET 소프트웨어 개발의 활발한 생태계 내에서, 애플리케이션 내에서 PDF 문서를 직접 생성, 조작 및 관리할 수 있는 기능은 중요한 이점을 제공합니다. IronPDF는 .NET 개발자를 위해 설계된 견고한 라이브러리로, Windows Forms로 구축된 애플리케이션을 포함하여 .NET 애플리케이션에서 PDF를 생성할 수 있는 효율적인 방법을 제공합니다.
.NET 애플리케이션에서 IronPDF의 역할
IronPDF는 .NET 생태계의 유연성과 강력함을 보여주는 증거로, 개발자에게 HTML, 이미지, 텍스트 및 ASP.NET 웹 페이지에서 PDF 문서를 생성할 수 있는 직관적인 API를 제공합니다. 이 기능은 청구서, 보고서 또는 사용자 지정 문서의 동적 생성이 필요한 상황, 예를 들어 데스크탑 애플리케이션 내에서 유용합니다.
IronPDF를 사용한 Windows Form 청구서 생성기 빌드
청구서를 생성하는 Windows Form 애플리케이션은 IronPDF와 결합된 .NET 소프트웨어 개발의 실용적 적용을 보여줍니다. 이 애플리케이션은 사용자가 고객 정보, 구매 항목 및 가격과 같은 세부정보를 입력한 후 한 번의 클릭으로 전문적인 PDF 청구서를 생성할 수 있게 합니다.
Windows Forms 프로젝트 설정 및 UI 디자인하기
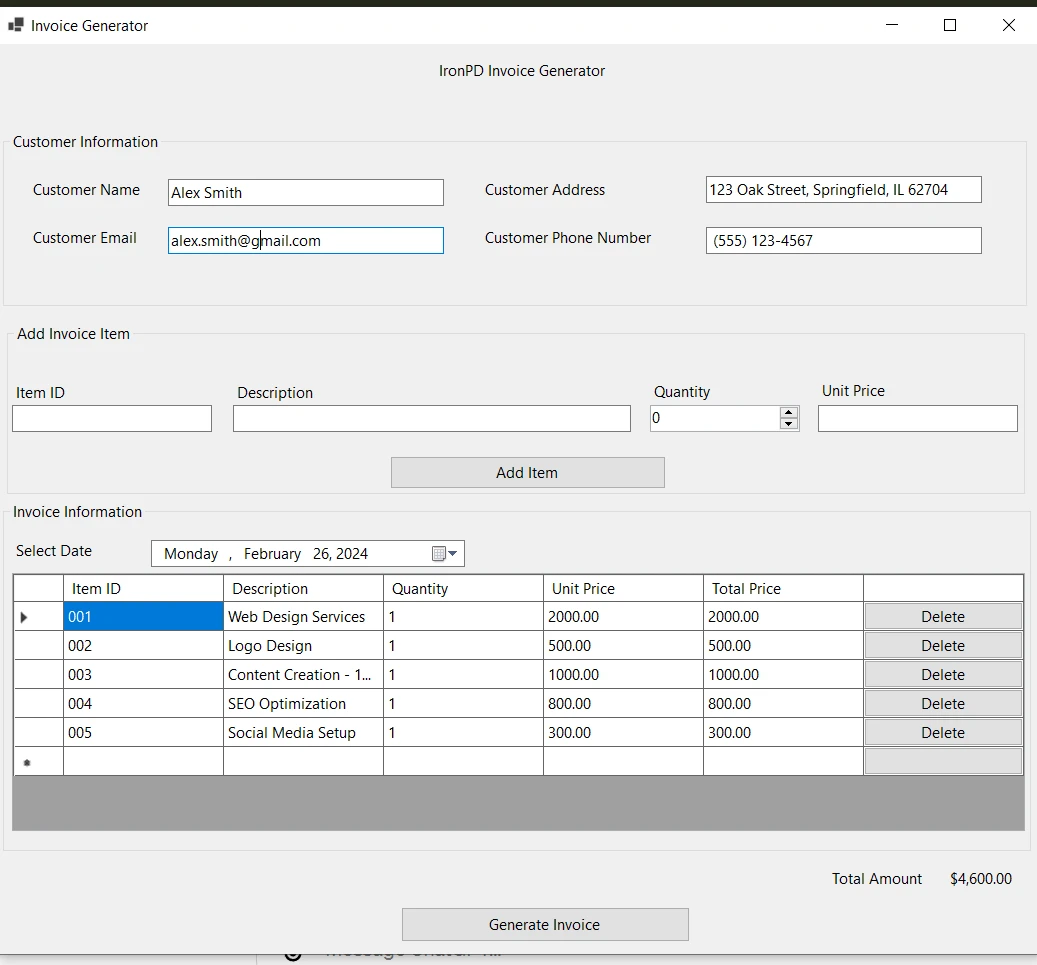
Visual Studio에서 새로운 Windows Forms 프로젝트를 생성하여 시작하십시오. 이것이 청구서 생성기의 사용자 인터페이스를 제작할 기초입니다. 고객 및 항목 세부 정보에 대한 필수 입력 필드를 포함한 양식을 디자인하고, PDF 생성을 위한 버튼을 추가합니다. 이것이 우리의 청구서 생성기 UI입니다:
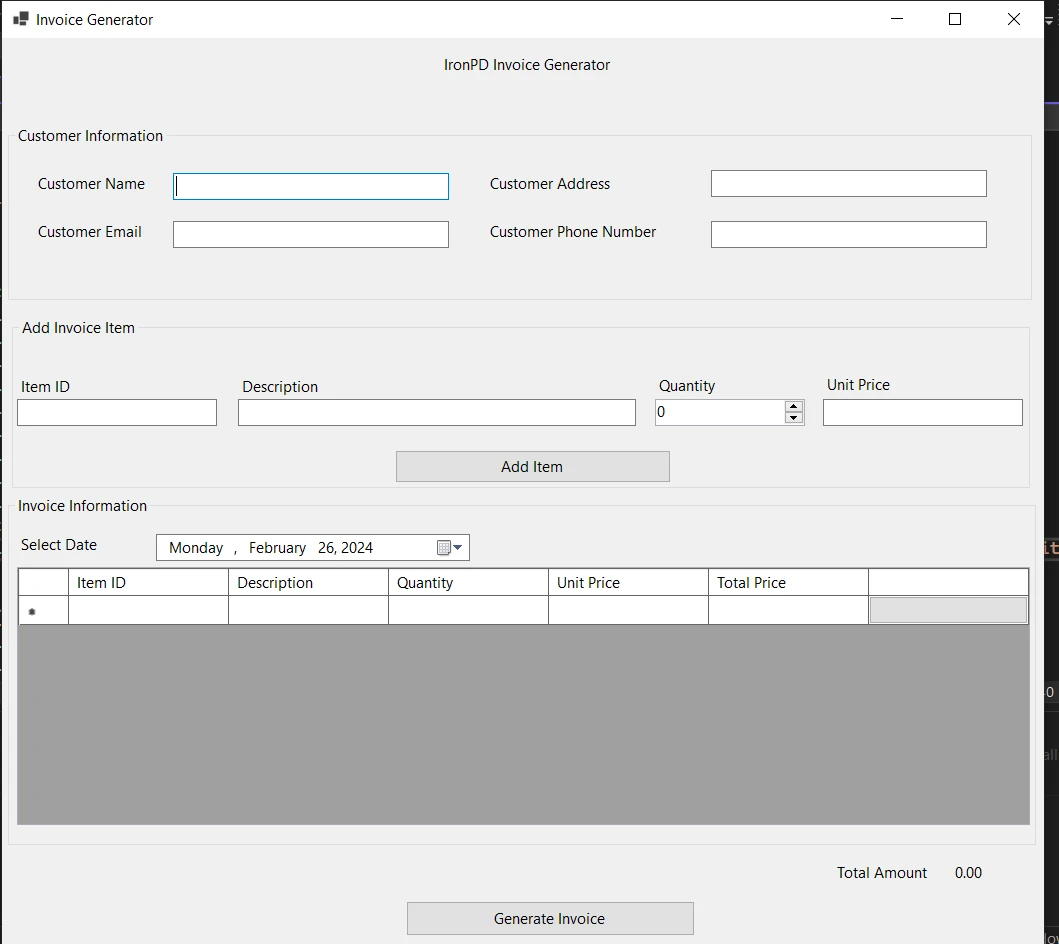
Windows Forms 애플리케이션의 사용자 인터페이스는 사용 편의성과 기능성을 보장하기 위해 세심하게 설계되었습니다. 'Invoice Generator'라는 제목의 메인 창은 매끄러운 사용자 경험을 위해 여러 섹션으로 나뉩니다.
고객 정보 섹션
양식 상단에는 '고객 이름', '고객 주소', '고객 이메일', '고객 전화번호' 필드가 포함되어 있습니다. 이 영역은 생성된 청구서에 두드러지게 표시될 필수 고객 세부 정보를 캡처하는 데 전념하고 있습니다.
청구서 항목 추가
고객 정보 바로 아래에는 '청구서 항목 추가'라는 레이블이 붙은 영역이 있습니다. 여기에서 사용자는 '항목 ID', '설명', '수량' 및 '단가'와 같은 개별 항목의 세부 정보를 입력할 수 있습니다. '항목 추가' 버튼이 이 필드 옆에 위치하여 사용자가 입력된 항목을 아래의 청구서 목록에 추가할 수 있게 합니다.
청구서 항목 목록
양식의 중앙 부분에는 '청구서 정보' 섹션이 있으며, 여기에 입력된 항목들이 추가되면 테이블이 표시됩니다. 테이블 열은 '항목 ID', '설명', '수량', '단가' 및 '총 가격'을 포함하며, 마지막 열은 수량과 단가를 기반으로 자동으로 계산됩니다. '날짜 선택'이라는 제목의 날짜 선택기는 사용자가 청구서 날짜를 지정할 수 있게 하여 문서의 구체성을 더합니다.
청구서 작업
폼 하단에 상대하여 '총 금액' 라벨이 표시되며, 항목이 추가되거나 제거될 때 동적으로 업데이트됩니다. 사용자가 청구서의 총 가치를 실시간으로 파악할 수 있게 합니다. 추가적으로, '청구서 생성' 버튼은 애플리케이션이 IronPDF 라이브러리를 사용하여 입력된 데이터를 기반으로 청구서의 PDF 버전을 생성하도록 합니다.
이 사용자 인터페이스는 기능적일 뿐만 아니라 직관적이며, 사용자가 학습 곡선 없이 애플리케이션과 쉽게 상호 작용할 수 있게 합니다. 인보이스 생성을 위한 모든 필요한 정보를 제공하며, 데이터 입력에서 PDF 생성까지의 명확하고 간단한 경로를 제공합니다.
프로젝트에 IronPDF 추가하기
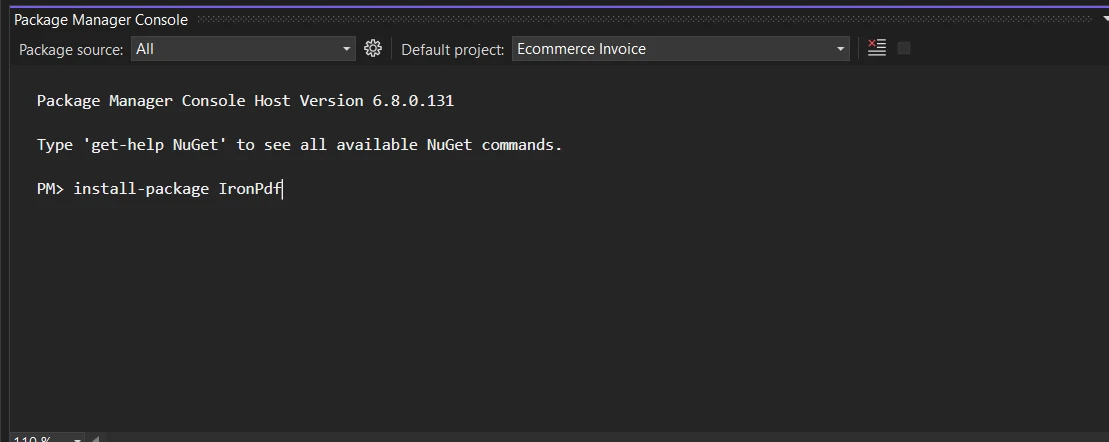
프로젝트가 설정되면 다음 단계는 IronPDF를 도입하는 것입니다. 이 작업은 NuGet, Visual Studio의 통합 NuGet 패키지 관리자를 통해 수행되며, 이는 IronPDF를 프로젝트에 손쉽게 추가할 수 있게 해줍니다. 패키지 관리자 콘솔에서 다음 명령을 실행하십시오:
Install-Package IronPdf
이 명령은 IronPDF를 설치하고 프로젝트에서 사용할 수 있도록 합니다.
인보이스 생성 구현
Windows Forms 애플리케이션의 핵심은 사용자 입력을 처리하고, 데이터를 구조화된 형식으로 조직하며, 실질적인 문서를 생성할 수 있는 능력입니다. 여기서는 PDF 형식의 인보이스입니다. 기능성은 애플리케이션 코드베이스 내 일련의 체계적인 단계에 기반을 두고 있습니다.
데이터 그리드 뷰 설정
폼이 초기화될 때 애플리케이션은 SetupDataGridViewColumns를 호출하여 인보이스 항목이 표시될 데이터 구조를 설정합니다. 항목 ID, 설명, 수량, 단가, 총 가격에 대한 열이 생성되며, 총 가격은 자동으로 계산되므로 읽기 전용 필드입니다. 추가적으로, 인보이스 내용에 대한 사용자 제어를 향상시키기 위해 항목 삭제 버튼 열이 추가됩니다.
private void SetupDataGridViewColumns()
{
    invoiceDataGridView.Columns.Clear(); // Clear existing columns if any
    // Add columns specifying the details to be displayed in the invoice
    invoiceDataGridView.Columns.Add("itemIdColumn", "Item ID");
    invoiceDataGridView.Columns.Add("descriptionColumn", "Description");
    invoiceDataGridView.Columns.Add("quantityColumn", "Quantity");
    invoiceDataGridView.Columns.Add("unitPriceColumn", "Unit Price");
    invoiceDataGridView.Columns.Add("totalPriceColumn", "Total Price");
    // Set the Total Price column to read-only as it will be calculated automatically
    invoiceDataGridView.Columns["totalPriceColumn"].ReadOnly = true;
    // Add a button column for delete action
    DataGridViewButtonColumn deleteButtonColumn = new DataGridViewButtonColumn();
    deleteButtonColumn.HeaderText = "";
    deleteButtonColumn.Name = "deleteButtonColumn";
    deleteButtonColumn.Text = "Delete";
    deleteButtonColumn.UseColumnTextForButtonValue = true; // Set the button text to "Delete"
    // Add the delete button column to the DataGridView
    invoiceDataGridView.Columns.Add(deleteButtonColumn);
}

public Form1()
{
    InitializeComponent();
    SetupDataGridViewColumns();
    // Wire up the CellClick event to a handler to manage deletion of items
    invoiceDataGridView.CellClick += invoiceDataGridView_CellClick;
}

private void invoiceDataGridView_CellClick(object sender, DataGridViewCellEventArgs e)
{
    // If the clicked cell is part of the button column and not the header row
    if (e.ColumnIndex == invoiceDataGridView.Columns["deleteButtonColumn"].Index && e.RowIndex >= 0)
    {
        // Confirm delete operation
        if (MessageBox.Show("Are you sure you want to delete this item?", "Confirm Delete", MessageBoxButtons.YesNo, MessageBoxIcon.Question) == DialogResult.Yes)
        {
            // Remove the row from the DataGridView
            invoiceDataGridView.Rows.RemoveAt(e.RowIndex);
        }
    }
}
private void SetupDataGridViewColumns()
{
invoiceDataGridView.Columns.Clear(); // Clear existing columns if any
// Add columns specifying the details to be displayed in the invoice
invoiceDataGridView.Columns.Add("itemIdColumn", "Item ID");
invoiceDataGridView.Columns.Add("descriptionColumn", "Description");
invoiceDataGridView.Columns.Add("quantityColumn", "Quantity");
invoiceDataGridView.Columns.Add("unitPriceColumn", "Unit Price");
invoiceDataGridView.Columns.Add("totalPriceColumn", "Total Price");
// Set the Total Price column to read-only as it will be calculated automatically
invoiceDataGridView.Columns["totalPriceColumn"].ReadOnly = true;
// Add a button column for delete action
DataGridViewButtonColumn deleteButtonColumn = new DataGridViewButtonColumn();
deleteButtonColumn.HeaderText = "";
deleteButtonColumn.Name = "deleteButtonColumn";
deleteButtonColumn.Text = "Delete";
deleteButtonColumn.UseColumnTextForButtonValue = true; // Set the button text to "Delete"
// Add the delete button column to the DataGridView
invoiceDataGridView.Columns.Add(deleteButtonColumn);
}
public Form1()
{
InitializeComponent();
SetupDataGridViewColumns();
// Wire up the CellClick event to a handler to manage deletion of items
invoiceDataGridView.CellClick += invoiceDataGridView_CellClick;
}
private void invoiceDataGridView_CellClick(object sender, DataGridViewCellEventArgs e)
{
// If the clicked cell is part of the button column and not the header row
if (e.ColumnIndex == invoiceDataGridView.Columns["deleteButtonColumn"].Index && e.RowIndex >= 0)
{
// Confirm delete operation
if (MessageBox.Show("Are you sure you want to delete this item?", "Confirm Delete", MessageBoxButtons.YesNo, MessageBoxIcon.Question) == DialogResult.Yes)
{
// Remove the row from the DataGridView
invoiceDataGridView.Rows.RemoveAt(e.RowIndex);
}
}
}Private Sub SetupDataGridViewColumns()
invoiceDataGridView.Columns.Clear() ' Clear existing columns if any
' Add columns specifying the details to be displayed in the invoice
invoiceDataGridView.Columns.Add("itemIdColumn", "Item ID")
invoiceDataGridView.Columns.Add("descriptionColumn", "Description")
invoiceDataGridView.Columns.Add("quantityColumn", "Quantity")
invoiceDataGridView.Columns.Add("unitPriceColumn", "Unit Price")
invoiceDataGridView.Columns.Add("totalPriceColumn", "Total Price")
' Set the Total Price column to read-only as it will be calculated automatically
invoiceDataGridView.Columns("totalPriceColumn").ReadOnly = True
' Add a button column for delete action
Dim deleteButtonColumn As New DataGridViewButtonColumn()
deleteButtonColumn.HeaderText = ""
deleteButtonColumn.Name = "deleteButtonColumn"
deleteButtonColumn.Text = "Delete"
deleteButtonColumn.UseColumnTextForButtonValue = True ' Set the button text to "Delete"
' Add the delete button column to the DataGridView
invoiceDataGridView.Columns.Add(deleteButtonColumn)
End Sub
'INSTANT VB WARNING: The following constructor is declared outside of its associated class:
'ORIGINAL LINE: public Form1()
Public Sub New()
InitializeComponent()
SetupDataGridViewColumns()
' Wire up the CellClick event to a handler to manage deletion of items
AddHandler invoiceDataGridView.CellClick, AddressOf invoiceDataGridView_CellClick
End Sub
Private Sub invoiceDataGridView_CellClick(ByVal sender As Object, ByVal e As DataGridViewCellEventArgs)
' If the clicked cell is part of the button column and not the header row
If e.ColumnIndex = invoiceDataGridView.Columns("deleteButtonColumn").Index AndAlso e.RowIndex >= 0 Then
' Confirm delete operation
If MessageBox.Show("Are you sure you want to delete this item?", "Confirm Delete", MessageBoxButtons.YesNo, MessageBoxIcon.Question) = DialogResult.Yes Then
' Remove the row from the DataGridView
invoiceDataGridView.Rows.RemoveAt(e.RowIndex)
End If
End If
End Sub청구서 항목 추가
사용자가 항목의 세부 정보를 입력하고 '항목 추가'를 클릭하면 btnAddItem_Click 이벤트가 입력 데이터를 수집하고 유효성을 검사한 후 AddItemToInvoice를 호출합니다. 이 메서드는 입력 값으로 새로운 행을 DataGridView에 추가하고, 항목의 총 가격을 계산하여 폼 하단에 표시되는 총 인보이스 금액을 업데이트합니다.
public void AddItemToInvoice(string itemId, string description, int quantity, decimal unitPrice)
{
    decimal totalPrice = quantity * unitPrice;
    invoiceDataGridView.Rows.Add(itemId, description, quantity, unitPrice, totalPrice);
}

private void CalculateTotalAmount()
{
    decimal totalAmount = 0m;
    foreach (DataGridViewRow row in invoiceDataGridView.Rows)
    {
        totalAmount += Convert.ToDecimal(row.Cells["totalPriceColumn"].Value ?? 0);
    }
    // Display the total amount accumulated
    lblTotalAmount.Text = $"{totalAmount:C2}";
}

private void btnAddItem_Click(object sender, EventArgs e)
{
    // Collect data from input controls
    string itemId = txtItemID.Text;
    string description = txtDescription.Text;
    int quantity = (int)numericUpDownQuantity.Value;
    decimal unitPrice;
    // Validate the collected data
    bool isUnitPriceValid = decimal.TryParse(txtUnitPrice.Text, out unitPrice);
    if (string.IsNullOrEmpty(itemId) || string.IsNullOrEmpty(description) || quantity <= 0 || !isUnitPriceValid || unitPrice <= 0)
    {
        MessageBox.Show("Please enter valid data for all fields.", "Invalid Data", MessageBoxButtons.OK, MessageBoxIcon.Warning);
        return;
    }
    // Add data to the DataGridView
    AddItemToInvoice(itemId, description, quantity, unitPrice);
    // Clear the input fields after adding the item to the grid
    txtItemID.Clear();
    txtDescription.Clear();
    txtUnitPrice.Clear();
    numericUpDownQuantity.Value = 0;
    CalculateTotalAmount();
}
public void AddItemToInvoice(string itemId, string description, int quantity, decimal unitPrice)
{
decimal totalPrice = quantity * unitPrice;
invoiceDataGridView.Rows.Add(itemId, description, quantity, unitPrice, totalPrice);
}
private void CalculateTotalAmount()
{
decimal totalAmount = 0m;
foreach (DataGridViewRow row in invoiceDataGridView.Rows)
{
totalAmount += Convert.ToDecimal(row.Cells["totalPriceColumn"].Value ?? 0);
}
// Display the total amount accumulated
lblTotalAmount.Text = $"{totalAmount:C2}";
}
private void btnAddItem_Click(object sender, EventArgs e)
{
// Collect data from input controls
string itemId = txtItemID.Text;
string description = txtDescription.Text;
int quantity = (int)numericUpDownQuantity.Value;
decimal unitPrice;
// Validate the collected data
bool isUnitPriceValid = decimal.TryParse(txtUnitPrice.Text, out unitPrice);
if (string.IsNullOrEmpty(itemId) || string.IsNullOrEmpty(description) || quantity <= 0 || !isUnitPriceValid || unitPrice <= 0)
{
MessageBox.Show("Please enter valid data for all fields.", "Invalid Data", MessageBoxButtons.OK, MessageBoxIcon.Warning);
return;
}
// Add data to the DataGridView
AddItemToInvoice(itemId, description, quantity, unitPrice);
// Clear the input fields after adding the item to the grid
txtItemID.Clear();
txtDescription.Clear();
txtUnitPrice.Clear();
numericUpDownQuantity.Value = 0;
CalculateTotalAmount();
}Imports System
Public Sub AddItemToInvoice(ByVal itemId As String, ByVal description As String, ByVal quantity As Integer, ByVal unitPrice As Decimal)
Dim totalPrice As Decimal = quantity * unitPrice
invoiceDataGridView.Rows.Add(itemId, description, quantity, unitPrice, totalPrice)
End Sub
Private Sub CalculateTotalAmount()
Dim totalAmount As Decimal = 0D
For Each row As DataGridViewRow In invoiceDataGridView.Rows
totalAmount += Convert.ToDecimal(If(row.Cells("totalPriceColumn").Value, 0))
Next row
' Display the total amount accumulated
lblTotalAmount.Text = $"{totalAmount:C2}"
End Sub
Private Sub btnAddItem_Click(ByVal sender As Object, ByVal e As EventArgs)
' Collect data from input controls
Dim itemId As String = txtItemID.Text
Dim description As String = txtDescription.Text
Dim quantity As Integer = CInt(Math.Truncate(numericUpDownQuantity.Value))
Dim unitPrice As Decimal = Nothing
' Validate the collected data
Dim isUnitPriceValid As Boolean = Decimal.TryParse(txtUnitPrice.Text, unitPrice)
If String.IsNullOrEmpty(itemId) OrElse String.IsNullOrEmpty(description) OrElse quantity <= 0 OrElse Not isUnitPriceValid OrElse unitPrice <= 0 Then
MessageBox.Show("Please enter valid data for all fields.", "Invalid Data", MessageBoxButtons.OK, MessageBoxIcon.Warning)
Return
End If
' Add data to the DataGridView
AddItemToInvoice(itemId, description, quantity, unitPrice)
' Clear the input fields after adding the item to the grid
txtItemID.Clear()
txtDescription.Clear()
txtUnitPrice.Clear()
numericUpDownQuantity.Value = 0
CalculateTotalAmount()
End SubPDF 인보이스 생성
'인보이스 생성'을 클릭하면 애플리케이션은 btnInvoice_Click 이벤트 핸들러를 실행하여 StringBuilder를 사용하여 HTML 문자열을 구성합니다. 이 문자열에는 고객의 세부 정보와 DataGridView에서 가져온 인보이스 항목으로 채워진 스타일이 적용된 HTML 테이블이 포함됩니다. IronPDF의 렌더러는 이 HTML을 PDF 문서로 변환하여 지정된 경로에 저장합니다. 애플리케이션은 사용자에게 인보이스가 성공적으로 생성되었음을 메시지로 확인합니다.
private void btnInvoice_Click(object sender, EventArgs e)
{
    IronPdf.License.LicenseKey = "your-license-key"; // Replace with your IronPDF license key
    var customerName = txtName.Text;
    var customerEmail = txtEmail.Text;
    var customerAddress = txtAddress.Text;
    var customerPhone = txtPhone.Text;
    var htmlStringBuilder = new StringBuilder();
    htmlStringBuilder.Append("<html>");
    htmlStringBuilder.Append("<head>");
    htmlStringBuilder.Append("<title>Invoice</title>");
    htmlStringBuilder.Append(@"
        <style>
            body { font-family: 'Arial', sans-serif; }
            h1 { color: #333; text-align: center; }
            table { width: 100%; border-collapse: collapse; margin-top: 20px; }
            th, td { border: 1px solid #999; padding: 8px; text-align: left; }
            th { background-color: #f2f2f2; }
            tr:nth-child(even) { background-color: #f9f9f9; }
            h2 { text-align: right; margin-top: 20px; }
            .customer-info { line-height: 1.6; margin-bottom: 20px; }
            .customer-info p { margin: 0 0 10px 0; color: #333; }
            .customer-info label { font-weight: bold; }
        </style>");
    htmlStringBuilder.Append("</head>");
    htmlStringBuilder.Append("<body>");
    htmlStringBuilder.Append("<h1>Invoice</h1>");
    htmlStringBuilder.Append("<div class='customer-info'>");
    htmlStringBuilder.Append($"<p><strong>Customer Name:</strong> {customerName}</p>");
    htmlStringBuilder.Append($"<p><strong>Customer Email:</strong> {customerEmail}</p>");
    htmlStringBuilder.Append($"<p><strong>Customer Address:</strong> {customerAddress}</p>");
    htmlStringBuilder.Append($"<p><strong>Customer Phone:</strong> {customerPhone}</p>");
    htmlStringBuilder.Append("</div>");
    htmlStringBuilder.Append("<table><tr><th>Item ID</th><th>Description</th><th>Quantity</th><th>Unit Price</th><th>Total Price</th></tr>");
    foreach (DataGridViewRow row in invoiceDataGridView.Rows)
    {
        if (row.IsNewRow) continue;
        htmlStringBuilder.Append("<tr>");
        htmlStringBuilder.Append($"<td>{row.Cells["itemIdColumn"].Value}</td>");
        htmlStringBuilder.Append($"<td>{row.Cells["descriptionColumn"].Value}</td>");
        htmlStringBuilder.Append($"<td>{row.Cells["quantityColumn"].Value}</td>");
        htmlStringBuilder.Append($"<td>{row.Cells["unitPriceColumn"].Value:C2}</td>");
        htmlStringBuilder.Append($"<td>{row.Cells["totalPriceColumn"].Value:C2}</td>");
        htmlStringBuilder.Append("</tr>");
    }
    htmlStringBuilder.Append("</table>");
    htmlStringBuilder.Append($"<h2>Total Amount: {lblTotalAmount.Text}</h2>");
    htmlStringBuilder.Append("</body></html>");
    var renderer = new IronPdf.ChromePdfRenderer();
    var pdfDocument = renderer.RenderHtmlAsPdf(htmlStringBuilder.ToString());
    string savePath = Path.Combine($"F:\\Invoice_{DateTime.Now:yyyyMMddHHmmss}.pdf");
    pdfDocument.SaveAs(savePath);
    MessageBox.Show("The invoice has been successfully saved to your desktop.", "Invoice Saved", MessageBoxButtons.OK, MessageBoxIcon.Information);
}
private void btnInvoice_Click(object sender, EventArgs e)
{
IronPdf.License.LicenseKey = "your-license-key"; // Replace with your IronPDF license key
var customerName = txtName.Text;
var customerEmail = txtEmail.Text;
var customerAddress = txtAddress.Text;
var customerPhone = txtPhone.Text;
var htmlStringBuilder = new StringBuilder();
htmlStringBuilder.Append("<html>");
htmlStringBuilder.Append("<head>");
htmlStringBuilder.Append("<title>Invoice</title>");
htmlStringBuilder.Append(@"
<style>
body { font-family: 'Arial', sans-serif; }
h1 { color: #333; text-align: center; }
table { width: 100%; border-collapse: collapse; margin-top: 20px; }
th, td { border: 1px solid #999; padding: 8px; text-align: left; }
th { background-color: #f2f2f2; }
tr:nth-child(even) { background-color: #f9f9f9; }
h2 { text-align: right; margin-top: 20px; }
.customer-info { line-height: 1.6; margin-bottom: 20px; }
.customer-info p { margin: 0 0 10px 0; color: #333; }
.customer-info label { font-weight: bold; }
</style>");
htmlStringBuilder.Append("</head>");
htmlStringBuilder.Append("<body>");
htmlStringBuilder.Append("<h1>Invoice</h1>");
htmlStringBuilder.Append("<div class='customer-info'>");
htmlStringBuilder.Append($"<p><strong>Customer Name:</strong> {customerName}</p>");
htmlStringBuilder.Append($"<p><strong>Customer Email:</strong> {customerEmail}</p>");
htmlStringBuilder.Append($"<p><strong>Customer Address:</strong> {customerAddress}</p>");
htmlStringBuilder.Append($"<p><strong>Customer Phone:</strong> {customerPhone}</p>");
htmlStringBuilder.Append("</div>");
htmlStringBuilder.Append("<table><tr><th>Item ID</th><th>Description</th><th>Quantity</th><th>Unit Price</th><th>Total Price</th></tr>");
foreach (DataGridViewRow row in invoiceDataGridView.Rows)
{
if (row.IsNewRow) continue;
htmlStringBuilder.Append("<tr>");
htmlStringBuilder.Append($"<td>{row.Cells["itemIdColumn"].Value}</td>");
htmlStringBuilder.Append($"<td>{row.Cells["descriptionColumn"].Value}</td>");
htmlStringBuilder.Append($"<td>{row.Cells["quantityColumn"].Value}</td>");
htmlStringBuilder.Append($"<td>{row.Cells["unitPriceColumn"].Value:C2}</td>");
htmlStringBuilder.Append($"<td>{row.Cells["totalPriceColumn"].Value:C2}</td>");
htmlStringBuilder.Append("</tr>");
}
htmlStringBuilder.Append("</table>");
htmlStringBuilder.Append($"<h2>Total Amount: {lblTotalAmount.Text}</h2>");
htmlStringBuilder.Append("</body></html>");
var renderer = new IronPdf.ChromePdfRenderer();
var pdfDocument = renderer.RenderHtmlAsPdf(htmlStringBuilder.ToString());
string savePath = Path.Combine($"F:\\Invoice_{DateTime.Now:yyyyMMddHHmmss}.pdf");
pdfDocument.SaveAs(savePath);
MessageBox.Show("The invoice has been successfully saved to your desktop.", "Invoice Saved", MessageBoxButtons.OK, MessageBoxIcon.Information);
}Private Sub btnInvoice_Click(ByVal sender As Object, ByVal e As EventArgs)
IronPdf.License.LicenseKey = "your-license-key" ' Replace with your IronPDF license key
Dim customerName = txtName.Text
Dim customerEmail = txtEmail.Text
Dim customerAddress = txtAddress.Text
Dim customerPhone = txtPhone.Text
Dim htmlStringBuilder = New StringBuilder()
htmlStringBuilder.Append("<html>")
htmlStringBuilder.Append("<head>")
htmlStringBuilder.Append("<title>Invoice</title>")
htmlStringBuilder.Append("
<style>
body { font-family: 'Arial', sans-serif; }
h1 { color: #333; text-align: center; }
table { width: 100%; border-collapse: collapse; margin-top: 20px; }
th, td { border: 1px solid #999; padding: 8px; text-align: left; }
th { background-color: #f2f2f2; }
tr:nth-child(even) { background-color: #f9f9f9; }
h2 { text-align: right; margin-top: 20px; }
.customer-info { line-height: 1.6; margin-bottom: 20px; }
.customer-info p { margin: 0 0 10px 0; color: #333; }
.customer-info label { font-weight: bold; }
</style>")
htmlStringBuilder.Append("</head>")
htmlStringBuilder.Append("<body>")
htmlStringBuilder.Append("<h1>Invoice</h1>")
htmlStringBuilder.Append("<div class='customer-info'>")
htmlStringBuilder.Append($"<p><strong>Customer Name:</strong> {customerName}</p>")
htmlStringBuilder.Append($"<p><strong>Customer Email:</strong> {customerEmail}</p>")
htmlStringBuilder.Append($"<p><strong>Customer Address:</strong> {customerAddress}</p>")
htmlStringBuilder.Append($"<p><strong>Customer Phone:</strong> {customerPhone}</p>")
htmlStringBuilder.Append("</div>")
htmlStringBuilder.Append("<table><tr><th>Item ID</th><th>Description</th><th>Quantity</th><th>Unit Price</th><th>Total Price</th></tr>")
For Each row As DataGridViewRow In invoiceDataGridView.Rows
If row.IsNewRow Then
Continue For
End If
htmlStringBuilder.Append("<tr>")
htmlStringBuilder.Append($"<td>{row.Cells("itemIdColumn").Value}</td>")
htmlStringBuilder.Append($"<td>{row.Cells("descriptionColumn").Value}</td>")
htmlStringBuilder.Append($"<td>{row.Cells("quantityColumn").Value}</td>")
htmlStringBuilder.Append($"<td>{row.Cells("unitPriceColumn").Value:C2}</td>")
htmlStringBuilder.Append($"<td>{row.Cells("totalPriceColumn").Value:C2}</td>")
htmlStringBuilder.Append("</tr>")
Next row
htmlStringBuilder.Append("</table>")
htmlStringBuilder.Append($"<h2>Total Amount: {lblTotalAmount.Text}</h2>")
htmlStringBuilder.Append("</body></html>")
Dim renderer = New IronPdf.ChromePdfRenderer()
Dim pdfDocument = renderer.RenderHtmlAsPdf(htmlStringBuilder.ToString())
Dim savePath As String = Path.Combine($"F:\Invoice_{DateTime.Now:yyyyMMddHHmmss}.pdf")
pdfDocument.SaveAs(savePath)
MessageBox.Show("The invoice has been successfully saved to your desktop.", "Invoice Saved", MessageBoxButtons.OK, MessageBoxIcon.Information)
End Sub애플리케이션 실행 및 인보이스 생성
Windows Forms 애플리케이션이 개발되고 IronPDF 라이브러리가 통합되면 애플리케이션을 실행하고 PDF 인보이스를 생성하는 과정은 간단합니다. 사용자는 애플리케이션의 사용자 인터페이스와 상호 작용하여 데이터를 입력하고 원하는 출력을 생성합니다. 프로세스가 일반적으로 다음과 같이 진행됩니다:
애플리케이션 실행
Visual Studio 내에서 또는 Windows 환경에서 직접 실행 파일(.exe)을 실행하여 애플리케이션을 시작하십시오. 애플리케이션의 폼이 표시되어 사용자 상호작용이 준비된 상태입니다.
인보이스 데이터 입력
고객 세부 정보 입력을 위해 폼 상단의 지정된 텍스트 상자에 고객의 이름, 주소, 이메일, 전화번호를 입력하십시오. 인보이스 항목을 추가하려면 폼의 '인보이스 항목 추가' 섹션에 있는 '항목 ID', '설명', '수량', '단가' 필드를 채우십시오.
'항목 추가' 클릭하여 인보이스 목록에 항목을 포함합니다. DataGridView가 새 항목, 그 세부 사항 및 계산된 총 가격을 표시하도록 업데이트됩니다. 필요한 모든 항목을 인보이스에 추가하려면 이 과정을 반복하십시오. '총 금액' 레이블은 목록에 있는 항목의 누적 합계를 반영하도록 동적으로 업데이트될 것입니다.
PDF 인보이스 생성
'인보이스 생성' 클릭하여 모든 항목이 추가되고 고객 정보가 완료되면 클릭하십시오. 애플리케이션이 CSS로 스타일링된 HTML 형식으로 데이터를 컴파일합니다. IronPDF가 HTML 문자열을 PDF 문서로 변환합니다. Chrome 엔진으로 렌더링되어 현대 웹 표준에 높은 충실도로 적용됩니다.
생성된 인보이스 보기
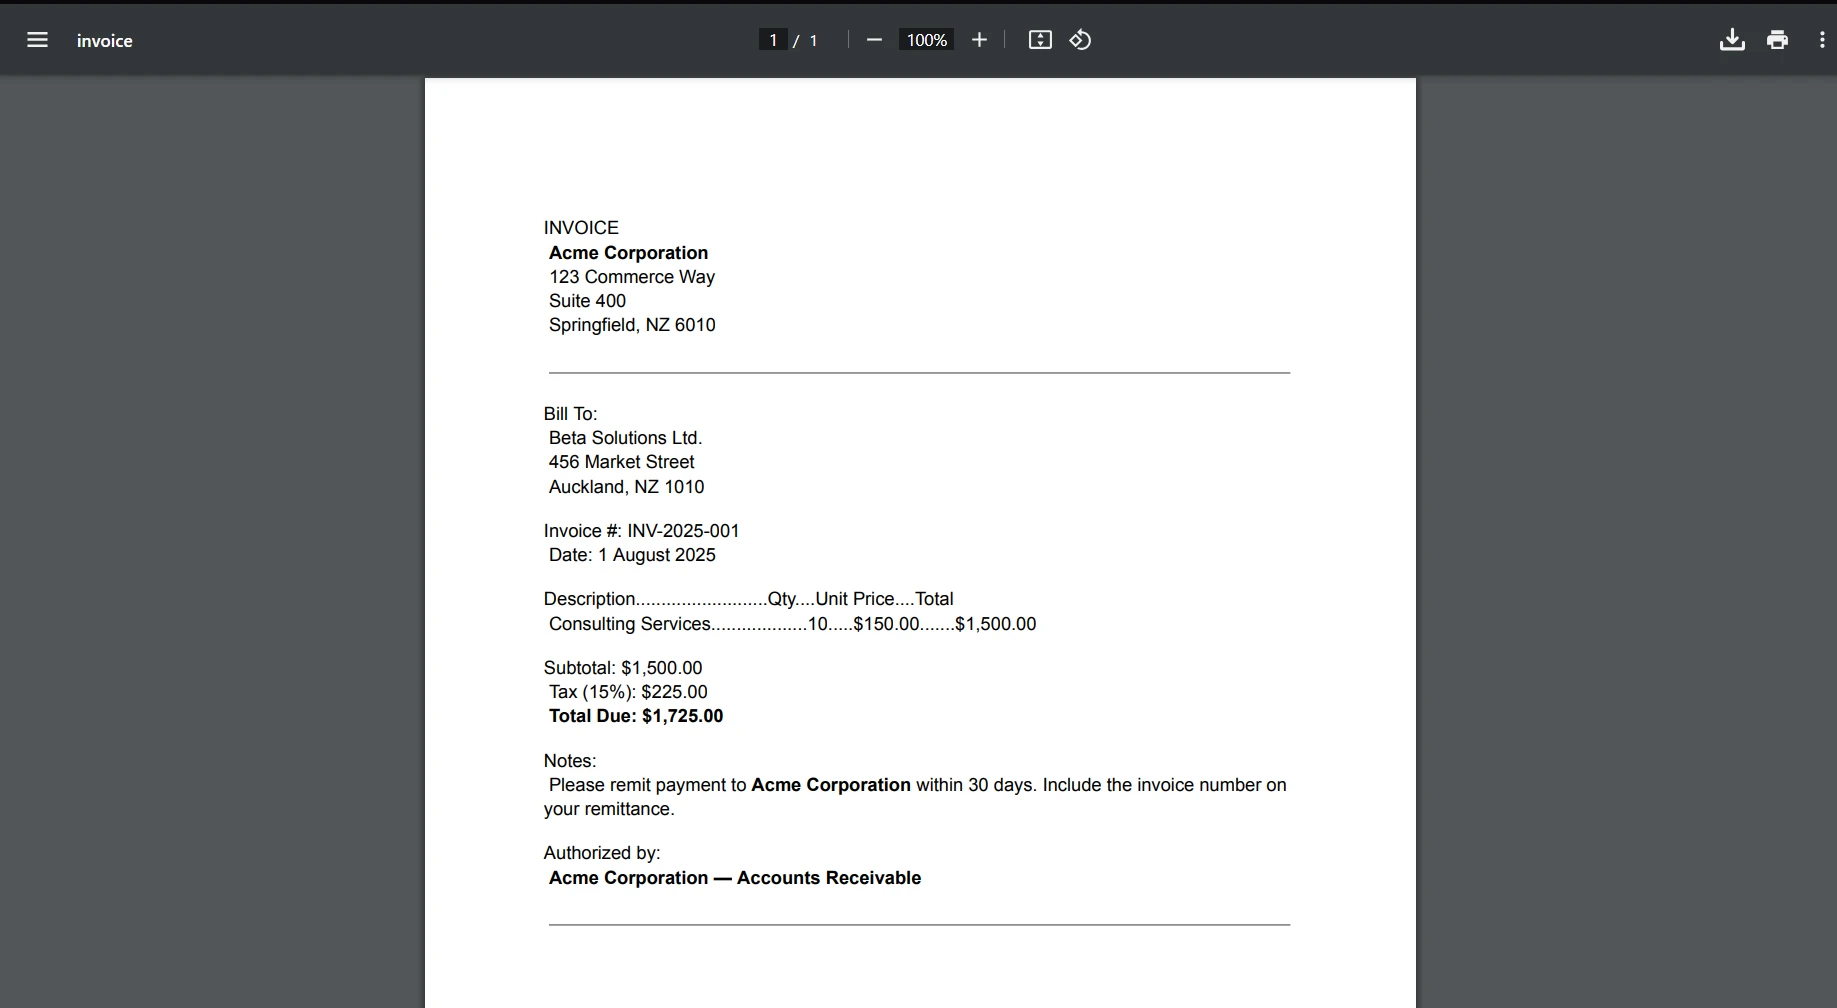
PDF 생성 후 애플리케이션이 PDF 파일을 지정된 위치에 저장합니다. 일반적으로 애플리케이션과 같은 디렉토리 또는 사용자 정의 경로 내에 저장됩니다. 성공 메시지가 나타나 사용자에게 PDF 인보이스가 성공적으로 저장되었음을 알립니다. 사용자는 저장된 위치로 이동하여 인보이스를 보거나 배포할 수 있습니다.

PDF 출력
출력 PDF는 문서 맨 위의 고객 정보를 표시하고, 설명, 수량, 가격을 포함하여 구매한 항목에 대한 세부적인 테이블이 이어집니다. 인보이스의 총 금액이 문서의 끝에 나열되어 고객이 지불해야 할 금액을 명확히 나타냅니다. PDF는 스타일이 깔끔하고 전문적으로 디자인되어 인보이스가 실용적일 뿐만 아니라 미적으로도 뛰어나도록 CSS로 정의됩니다.

Windows Forms 프로젝트를 실행 파일로 변환하기
Windows Forms 애플리케이션을 철저히 테스트하고 데이터 입력, PDF 생성 및 출력과 같은 모든 기능이 완벽하게 작동하는지 확인한 후에는 프로젝트를 실행 파일(.exe)로 패키징하는 다음 단계로 넘어가야 합니다. 이 변환 프로세스는 .NET Framework 내에서 간소화되어 애플리케이션이 Windows 기기에서 설치 및 사용 준비가 되도록 합니다.
다음은 실행 파일을 만드는 단계별 접근 방식입니다:
- 애플리케이션 빌드: '빌드' 메뉴로 이동하여 '솔루션 빌드'를 선택합니다. 이렇게 하면 코드가 어셈블리로 컴파일되고 필요한 최적화가 수행됩니다.

- 실행 파일 찾기: 빌드가 완료되면 프로젝트 디렉토리 내의 'bin\Debug\net8.0' 폴더로 이동합니다. 여기에서 .exe 파일과 애플리케이션을 실행하는 데 필요한 다른 종속 파일들을 찾을 수 있습니다.
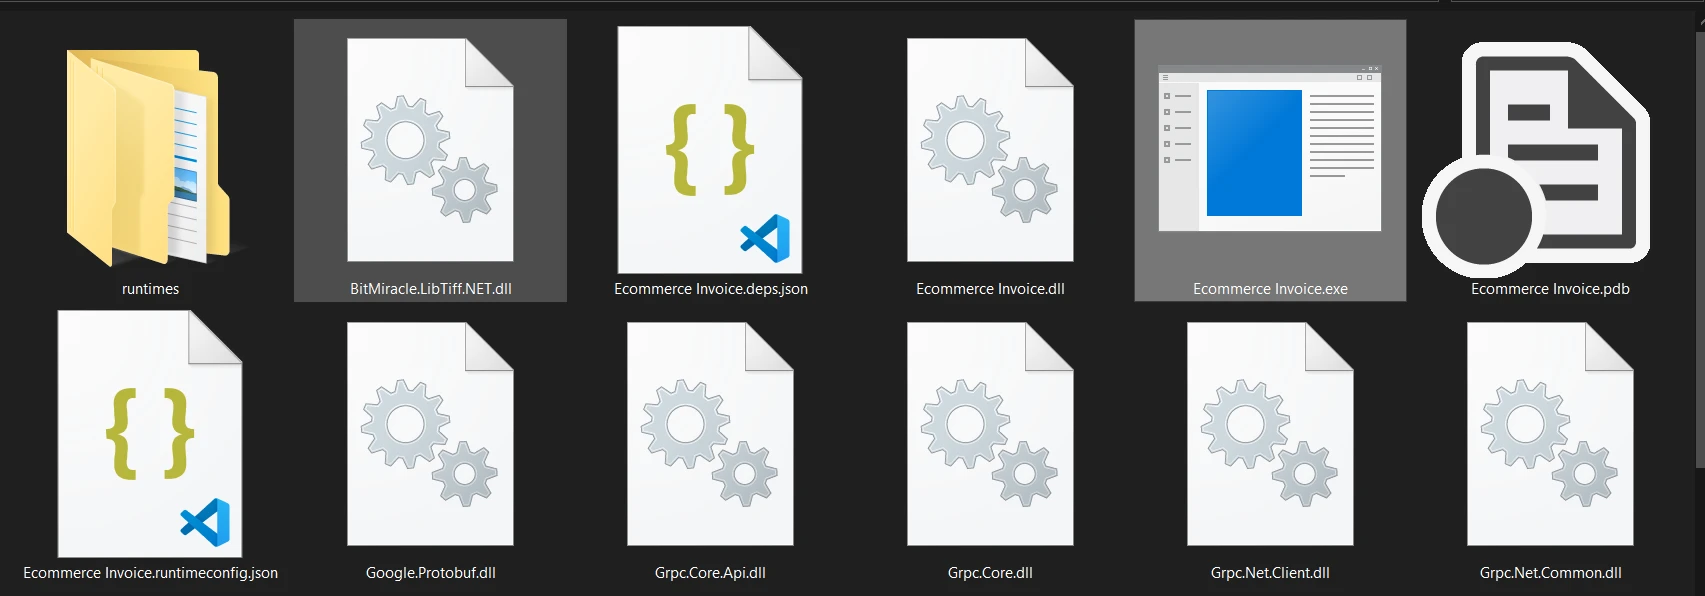
- 실행 파일 테스트: 개발 환경 외부에서 올바르게 작동함을 확인하기 위해 다른 기기에서 .exe 파일을 실행하는 것이 좋습니다.
- 배포 준비: 추가적인 종속 파일이 필요하지 않은 경우 .exe 파일을 직접 공유할 수 있습니다. 그러나 보다 전문적인 접근 방식을 위해 Visual Studio의 설정 프로젝트 또는 Inno Setup 또는 WiX Toolset과 같은 타사 설치 프로그램 패키지를 사용하여 설치 프로그램을 만드는 것을 고려하십시오. 설치 프로그램은 설치 프로세스를 관리하고, 바로 가기를 생성하며, 필요한 경우 Windows 레지스트리에 등록하는 등 다른 복잡한 작업을 처리할 수 있습니다.
이러한 단계를 따르면 Windows Forms 애플리케이션이 단일 실행 파일로 압축되어 공유 및 활용 준비가 완료됩니다. 이 변환은 개발 프로세스의 정점을 표시하며 개발 기기에서 프로젝트로부터 효율적으로 배포되고 설치될 수 있는 소프트웨어로의 전환을 나타냅니다.
결론
결론적으로, IronPDF와 .NET Framework를 사용하여 PDF 인보이스를 생성하는 Windows Forms 애플리케이션 개발은 소프트웨어 개발 원칙의 실용적인 응용 예시입니다. 이 프로젝트는 .NET 생태계의 다양성과 강력함을 보여줄 뿐만 아니라 IronPDF와 같은 타사 라이브러리를 통합하여 기능을 확장하고 특정 비즈니스 요구를 충족할 수 있음을 보여줍니다.
설정된 사용자 인터페이스에서 PDF 생성 구현 및 애플리케이션을 실행 파일로 패키징하는 과정을 따름으로써, 개발자는 기능적이고 사용자 친화적인 애플리케이션을 만들 수 있습니다. 이 과정은 견고한 프로그래밍 프레임워크와 혁신적인 라이브러리를 결합하여 실제 문제를 해결하는 중요성을 강조하며, 궁극적으로 효과적이고 효율적인 제품을 제공합니다.
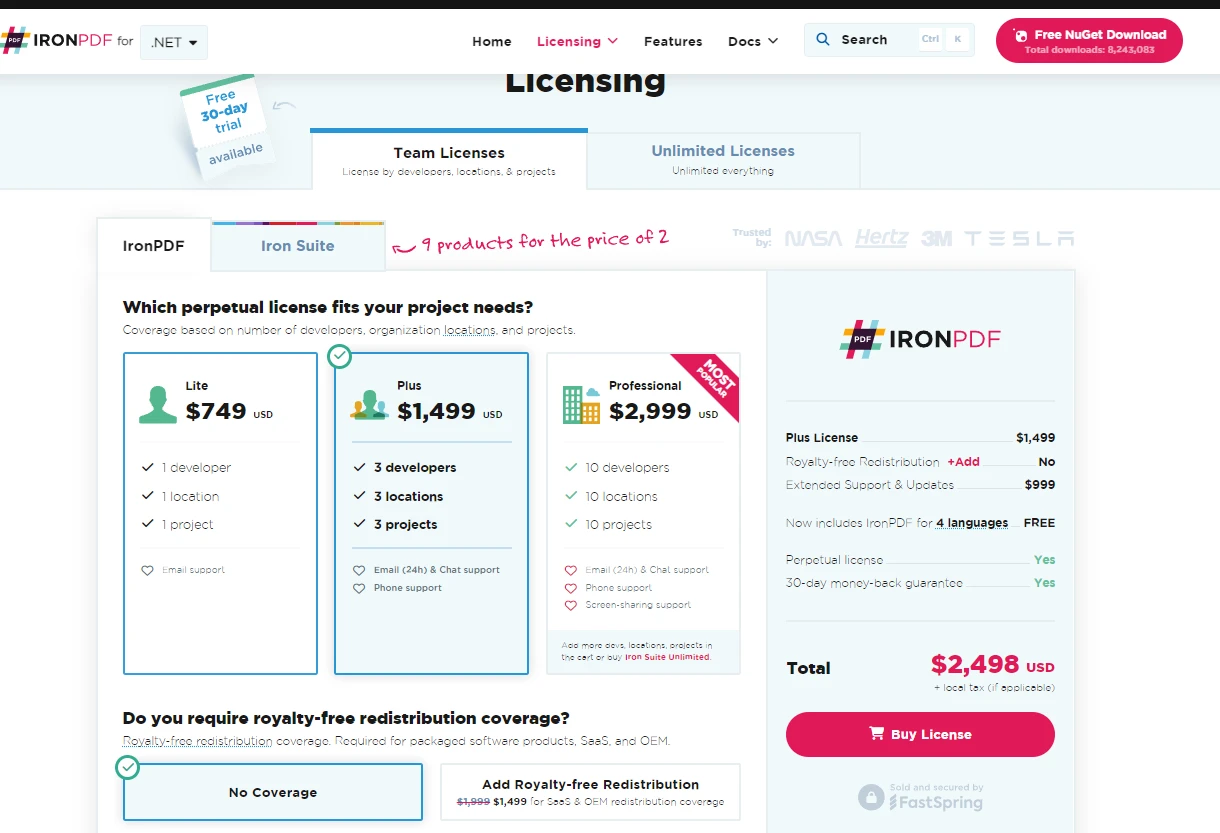
IronPDF은 PDF 생성 기능에 대한 무료 체험판을 개발자에게 제공하여 기능을 탐색하고 그들의 요구에 가장 잘 맞는 방법을 결정할 수 있게 합니다. 혜택을 경험하고 IronPDF를 실제 환경에 통합할 준비가 되면 라이선스는 저렴한 가격 옵션에서 시작됩니다.
자주 묻는 질문
C#에서 HTML을 PDF로 변환하는 방법은 무엇인가요?
IronPDF의 RenderHtmlAsPdf 메서드를 사용하여 HTML 문자열을 PDF로 변환할 수 있습니다. 또한 RenderHtmlFileAsPdf 사용하여 HTML 파일을 PDF로 변환할 수도 있습니다.
크로스 플랫폼 개발에 있어 .NET Core를 사용하는 이점은 무엇입니까?
.NET Core는 Linux, macOS 및 Windows와 같은 여러 플랫폼에서 애플리케이션을 실행할 수 있으므로 단일 코드베이스로 더 넓은 청중에게 도달하려는 개발자에게 다재다능한 선택입니다.
Windows Form 애플리케이션에서 PDF를 어떻게 생성할 수 있습니까?
IronPDF를 사용하면 라이브러리를 프로젝트에 통합하고 폼 데이터 또는 HTML 콘텐츠를 PDF 문서로 변환하는 방법을 사용하여 Windows Form 애플리케이션에서 PDF를 생성할 수 있습니다.
웹 애플리케이션을 빌드하는 데 있어 .NET은 이상적인 프레임워크로 무엇이 만드나요?
.NET, 특히 ASP.NET은 동적이고 확장 가능한 웹 애플리케이션을 빌드하기 위한 강력한 프레임워크를 제공합니다. 서버 측 스크립팅, 인증, 데이터 처리 등을 위한 내장 도구를 제공합니다.
.NET 애플리케이션을 문서 생성 기능으로 어떻게 개선할 수 있습니까?
IronPDF와 같은 라이브러리를 .NET 애플리케이션에 통합하면 문서 생성 기능이 크게 향상되어 애플리케이션 내에서 PDF 파일을 직접 생성, 조작 및 관리할 수 있습니다.
.NET은 모바일 애플리케이션 개발에 사용할 수 있습니까?
예, .NET은 이제 .NET MAUI의 일부인 Xamarin 프레임워크를 통해 모바일 애플리케이션 개발을 지원합니다. 이를 통해 iOS, Android 및 Windows에서 네이티브 성능을 가진 크로스 플랫폼 모바일 앱을 만들 수 있습니다.
.NET에서 공통 언어 런타임(CLR)의 중요성은 무엇입니까?
공통 언어 런타임(CLR)은 컴파일된 코드를 네이티브 머신 코드로 변환함으로써 프로그램의 실행을 관리함으로써 .NET에서 중요합니다. 이는 다양한 운영 체제 간의 호환성을 보장합니다.
NuGet을 사용하여 .NET 프로젝트 내에서 어떻게 PDF 생성을 통합할 수 있습니까?
NuGet을 사용하여 IronPDF와 같은 라이브러리를 설치함으로써 .NET 프로젝트 내에서 PDF 생성을 통합할 수 있습니다. 이는 Visual Studio 내에서 PDF 기능을 간편하고 직관적으로 추가할 수 있게 만듭니다.
Windows Form을 사용하여 PDF 인보이스 생성기를 생성하는 단계는 무엇입니까?
프로세스는 Windows Form 프로젝트 설정, 인터페이스 디자인, NuGet을 통한 필요한 라이브러리 추가, 데이터 입력 및 인보이스 생성 논리 구현, IronPDF를 사용하여 인보이스 세부사항을 PDF로 변환하는 것을 포함합니다.