


Test in a live environment
Test in production without watermarks.
Works wherever you need it to.

using IronPdf;
private void Form1_Load(object sender, EventArgs e)
{
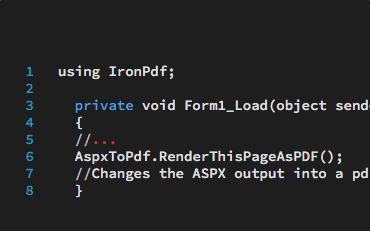
//Changes the ASPX output into a pdf instead of HTML
IronPdf.AspxToPdf.RenderThisPageAsPdf();
}Imports IronPdf
Private Sub Form1_Load(ByVal sender As Object, ByVal e As EventArgs)
'Changes the ASPX output into a pdf instead of HTML
IronPdf.AspxToPdf.RenderThisPageAsPdf()
End SubInstall-Package IronPdf
Using the IronPDF library, ASP.NET web pages can be rendered to PDF instead of HTML by adding a single line of code to the Form_Load event.
This example shows how IronPDF can produce complex, data-driven PDFs that are designed and tested as HTML first for simplicity.
IronPDF's ASPX to PDF Conversion functionality allows you to call a single method within an ASPX page and have it return a PDF instead of HTML.
You can code the PDF to either display "in-browser," or to behave as a file download.
using IronPdf;

var PdfOptions = new IronPdf.ChromePdfRenderOptions()
{
    CreatePdfFormsFromHtml = true,
    EnableJavaScript = false,
    Title = "My ASPX Page Rendered as a PDF"
    //.. many more options available
};

AspxToPdf.RenderThisPageAsPdf(AspxToPdf.FileBehavior.Attachment, "MyPdfFile.pdf", PdfOptions);
Imports IronPdf
Private PdfOptions = New IronPdf.ChromePdfRenderOptions() With {
.CreatePdfFormsFromHtml = True,
.EnableJavaScript = False,
.Title = "My ASPX Page Rendered as a PDF"
}
AspxToPdf.RenderThisPageAsPdf(AspxToPdf.FileBehavior.Attachment, "MyPdfFile.pdf", PdfOptions)Install-Package IronPdf
This example demonstrates how the user can change PDF print options to turn a form into HTML.
IronPDF's ASPX to PDF Conversion Guide functionality has many options available for rendering HTML to PDF from a string or a file.
Two options of particular importance are:
HTML forms should be rendered as interactive PDF forms during conversion.PDF should be displayed "in browser," or as a file download.using IronPdf;
// Disable local disk access or cross-origin requests
Installation.EnableWebSecurity = true;
// Instantiate Renderer
var renderer = new ChromePdfRenderer();
// Create a PDF from a HTML string using C#
var pdf = renderer.RenderHtmlAsPdf("<h1>Hello World</h1>");
// Export to a file or Stream
pdf.SaveAs("output.pdf");
// Advanced Example with HTML Assets
// Load external html assets: Images, CSS and JavaScript.
// An optional BasePath 'C:\site\assets\' is set as the file location to load assets from
var myAdvancedPdf = renderer.RenderHtmlAsPdf("<img src='icons/iron.png'>", @"C:\site\assets\");
myAdvancedPdf.SaveAs("html-with-assets.pdf");Imports IronPdf
' Disable local disk access or cross-origin requests
Installation.EnableWebSecurity = True
' Instantiate Renderer
Dim renderer = New ChromePdfRenderer()
' Create a PDF from a HTML string using C#
Dim pdf = renderer.RenderHtmlAsPdf("<h1>Hello World</h1>")
' Export to a file or Stream
pdf.SaveAs("output.pdf")
' Advanced Example with HTML Assets
' Load external html assets: Images, CSS and JavaScript.
' An optional BasePath 'C:\site\assets\' is set as the file location to load assets from
Dim myAdvancedPdf = renderer.RenderHtmlAsPdf("<img src='icons/iron.png'>", "C:\site\assets\")
myAdvancedPdf.SaveAs("html-with-assets.pdf")Install-Package IronPdf
With IronPDF, you can create new PDF documents from simple HTML strings within your .NET project, and IronPDF is able to be used in C#, F#, and VB.NET. Thanks to the use of the ChromePdfRenderer class, you can be sure that any PDF documents you render from HTML strings will come out pixel-perfect. With IronPDF's powerful HTML to PDF conversion features, you create high-quality PDF files tailored to fit your personal needs.
ChromePdfRenderer object.RenderHtmlAsPdf method.PdfDocument.SaveAs.See the code example below for more details:
The first step to converting an HTML string to a PDF in C# is ensuring that you have the IronPDF library properly set up and working within your project. By including using IronPdf, we make sure we can access the classes needed from the IronPDF library to carry out HTML to PDF conversion. The next line, Installation.EnableWebSecurity = true, is conceptually used to disable local disk access or cross-origin requests, ensuring secure operations. (Note: This line was missing from the example but usually pertains to configuration settings to secure PDF rendering operations.)
The example demonstrates how to create an instance of ChromePdfRenderer which handles the conversion of HTML to PDF. The RenderHtmlAsPdf method is used to convert a simple HTML string ("<h1>Hello World</h1>") into a PDF document. This document is saved to the disk using the SaveAs method.
In the advanced example, IronPDF is shown to handle HTML content containing external assets such as images, CSS, and JavaScript. To load these assets, the optional BasePath parameter is used, specifying the directory containing the required files. The resulting PDF, which includes the external assets, is saved using the same SaveAs method. This code example highlights IronPDF's ability to handle both basic and complex HTML content, making it an efficient tool for generating PDFs programmatically.
using IronPdf;

// Instantiate Renderer
var renderer = new ChromePdfRenderer();

// Create a PDF from a URL or local file path
var pdf = renderer.RenderUrlAsPdf("https://ironpdf.com/");

// Export to a file or Stream
pdf.SaveAs("url.pdf");
Imports IronPdf
' Instantiate Renderer
Private renderer = New ChromePdfRenderer()
' Create a PDF from a URL or local file path
Private pdf = renderer.RenderUrlAsPdf("https://ironpdf.com/")
' Export to a file or Stream
pdf.SaveAs("url.pdf")Install-Package IronPdf
IronPDF makes it very straightforward to render HTML from existing URLs as PDF documents. There is a very high level of support for JavaScript, images, forms, and CSS.
Rendering PDFs from ASP.NET URLs that accept query string variables can facilitate smooth PDF development as a collaborative effort between designers and coders.
IronPDFIronPDFusing IronPdf;
// Instantiate Renderer
var renderer = new ChromePdfRenderer();
// Create a PDF from an existing HTML file using C#
var pdf = renderer.RenderHtmlFileAsPdf("example.html");
// Export to a file or Stream
pdf.SaveAs("output.pdf");Imports IronPdf
' Instantiate Renderer
Private renderer = New ChromePdfRenderer()
' Create a PDF from an existing HTML file using C#
Private pdf = renderer.RenderHtmlFileAsPdf("example.html")
' Export to a file or Stream
pdf.SaveAs("output.pdf")Install-Package IronPdf
IronPDF is a powerful .NET library capable of converting HTML files into high-quality PDF files. With IronPDF, you can render HTML files to PDF in just a couple of lines, and thanks to its support for modern web standards, the resulting PDF files will come out pixel-perfect. Leveraging IronPDF’s powerful HTML file to PDF feature is easy thanks to its use of the ChromePdfRenderer class, which handles the conversion of HTML to PDF with ease.
using IronPdf;var renderer = new ChromePdfRenderer();var pdf = renderer.RenderHtmlFileAsPdf("example.html");pdf.SaveAs("output.pdf");This code creates a new PDF file that has been rendered from an HTML file. To do this, we must first ensure that the IronPDF library is installed and included within your project through the using IronPdf line. Next, initialize the ChromePdfRenderer class, which provides the functionality to render HTML content as a PDF. This class ensures that the original quality of the HTML file is not lost in the conversion process.
Once the renderer is instantiated, you can convert an existing HTML file into a PDF using the RenderHtmlFileAsPdf method. In this example, the HTML file “example.html” is passed to the method, creating a PDF object. Finally, to save the generated PDF, use the SaveAs method, specifying the desired file name and location. This simple process allows you to easily generate PDFs from HTML files in your C# applications.
using IronPdf;
using IronPdf.Engines.Chrome;

// Instantiate Renderer
var renderer = new ChromePdfRenderer();

// Many rendering options to use to customize!
renderer.RenderingOptions.SetCustomPaperSizeInInches(12.5, 20);
renderer.RenderingOptions.PrintHtmlBackgrounds = true;
renderer.RenderingOptions.PaperOrientation = IronPdf.Rendering.PdfPaperOrientation.Landscape;
renderer.RenderingOptions.Title = "My PDF Document Name";
renderer.RenderingOptions.EnableJavaScript = true;
renderer.RenderingOptions.WaitFor.RenderDelay(50); // in milliseconds
renderer.RenderingOptions.CssMediaType = IronPdf.Rendering.PdfCssMediaType.Screen;
renderer.RenderingOptions.FitToPaperMode = FitToPaperModes.Zoom;
renderer.RenderingOptions.Zoom = 100;
renderer.RenderingOptions.CreatePdfFormsFromHtml = true;

// Supports margin customization!
renderer.RenderingOptions.MarginTop = 40; //millimeters
renderer.RenderingOptions.MarginLeft = 20; //millimeters
renderer.RenderingOptions.MarginRight = 20; //millimeters
renderer.RenderingOptions.MarginBottom = 40; //millimeters

// Can set FirstPageNumber if you have a cover page
renderer.RenderingOptions.FirstPageNumber = 1; // use 2 if a cover page will be appended

// Settings have been set, we can render:
renderer.RenderHtmlFileAsPdf("assets/wikipedia.html").SaveAs("output/my-content.pdf");
Imports IronPdf
Imports IronPdf.Engines.Chrome
' Instantiate Renderer
Dim renderer As New ChromePdfRenderer()
' Many rendering options to use to customize!
renderer.RenderingOptions.SetCustomPaperSizeInInches(12.5, 20)
renderer.RenderingOptions.PrintHtmlBackgrounds = True
renderer.RenderingOptions.PaperOrientation = IronPdf.Rendering.PdfPaperOrientation.Landscape
renderer.RenderingOptions.Title = "My PDF Document Name"
renderer.RenderingOptions.EnableJavaScript = True
renderer.RenderingOptions.WaitFor.RenderDelay(50) ' in milliseconds
renderer.RenderingOptions.CssMediaType = IronPdf.Rendering.PdfCssMediaType.Screen
renderer.RenderingOptions.FitToPaperMode = FitToPaperModes.Zoom
renderer.RenderingOptions.Zoom = 100
renderer.RenderingOptions.CreatePdfFormsFromHtml = True
' Supports margin customization!
renderer.RenderingOptions.MarginTop = 40 ' millimeters
renderer.RenderingOptions.MarginLeft = 20 ' millimeters
renderer.RenderingOptions.MarginRight = 20 ' millimeters
renderer.RenderingOptions.MarginBottom = 40 ' millimeters
' Can set FirstPageNumber if you have a cover page
renderer.RenderingOptions.FirstPageNumber = 1 ' use 2 if a cover page will be appended
' Settings have been set, we can render:
renderer.RenderHtmlFileAsPdf("assets/wikipedia.html").SaveAs("output/my-content.pdf")Install-Package IronPdf
IronPDF aims to be as flexible as possible for the developer.
In this C# PDF Generation Tutorial Example, we show the balance between providing an API that automates internal functionality and providing one that gives you control.
IronPDF supports many customizations for generated PDF files, including page sizing, page margins, header/footer content, content scaling, CSS rulesets, and JavaScript execution.
We want developers to be able to control how Chrome turns a web page into a PDF. The ChromePdfRenderer Class Overview makes this possible.
Examples of settings available on the ChromePdfRenderer class include settings for margins, headers, footers, paper size, and form creation.
renderer with specific options like paper size, margins, header, and footer.ChromePdfRenderer class is used to render the URL to a PDF.using IronPdf;
using System.IO;
using System.Linq;
// One or more images as IEnumerable. This example selects all JPEG images in a specific 'assets' folder.
var imageFiles = Directory.EnumerateFiles("assets").Where(f => f.EndsWith(".jpg") || f.EndsWith(".jpeg"));
// Converts the images to a PDF and save it.
ImageToPdfConverter.ImageToPdf(imageFiles).SaveAs("composite.pdf");
// Also see PdfDocument.RasterizeToImageFiles() method to flatten a PDF to images or thumbnailsImports IronPdf
Imports System.IO
Imports System.Linq
' One or more images as IEnumerable. This example selects all JPEG images in a specific 'assets' folder.
Private imageFiles = Directory.EnumerateFiles("assets").Where(Function(f) f.EndsWith(".jpg") OrElse f.EndsWith(".jpeg"))
' Converts the images to a PDF and save it.
ImageToPdfConverter.ImageToPdf(imageFiles).SaveAs("composite.pdf")
' Also see PdfDocument.RasterizeToImageFiles() method to flatten a PDF to images or thumbnailsInstall-Package IronPdf
Given a single image located on a computer at C:\images\example.png, you can quickly convert it into a PDF document by calling the IronPdf.ImageToPdfConverter.ImageToPdf method with its file path:
You can also convert multiple images into a single PDF document using CombineImagesIntoPdf along with ImageToPdfConverter:
To explore more about converting images to PDFs using IronPDF for enhancing your applications, or to discover the entire suite of developer tools offered by Iron Software, including IronBarcode, IronOCR, and more, visit the Iron Software website.
Learn to Convert Images to PDF with IronPDF
System.IO.Directory.EnumerateFiles
ImageToPdfConverter.ImageToPdf
using IronPdf;

// Initiate PDF Renderer
var renderer = new ChromePdfRenderer();

// Add a header to every page easily
renderer.RenderingOptions.FirstPageNumber = 1; // use 2 if a cover page  will be appended
renderer.RenderingOptions.TextHeader.DrawDividerLine = true;
renderer.RenderingOptions.TextHeader.CenterText = "{url}";
renderer.RenderingOptions.TextHeader.Font = IronSoftware.Drawing.FontTypes.Helvetica;
renderer.RenderingOptions.TextHeader.FontSize = 12;
renderer.RenderingOptions.MarginTop = 25; //create 25mm space for header

// Add a footer too
renderer.RenderingOptions.TextFooter.DrawDividerLine = true;
renderer.RenderingOptions.TextFooter.Font = IronSoftware.Drawing.FontTypes.Arial;
renderer.RenderingOptions.TextFooter.FontSize = 10;
renderer.RenderingOptions.TextFooter.LeftText = "{date} {time}";
renderer.RenderingOptions.TextFooter.RightText = "{page} of {total-pages}";
renderer.RenderingOptions.MarginTop = 25; //create 25mm space for footer

// Mergeable fields are:
// {page} {total-pages} {url} {date} {time} {html-title} & {pdf-title}
Imports IronPdf
' Initiate PDF Renderer
Private renderer = New ChromePdfRenderer()
' Add a header to every page easily
renderer.RenderingOptions.FirstPageNumber = 1 ' use 2 if a cover page will be appended
renderer.RenderingOptions.TextHeader.DrawDividerLine = True
renderer.RenderingOptions.TextHeader.CenterText = "{url}"
renderer.RenderingOptions.TextHeader.Font = IronSoftware.Drawing.FontTypes.Helvetica
renderer.RenderingOptions.TextHeader.FontSize = 12
renderer.RenderingOptions.MarginTop = 25 'create 25mm space for header
' Add a footer too
renderer.RenderingOptions.TextFooter.DrawDividerLine = True
renderer.RenderingOptions.TextFooter.Font = IronSoftware.Drawing.FontTypes.Arial
renderer.RenderingOptions.TextFooter.FontSize = 10
renderer.RenderingOptions.TextFooter.LeftText = "{date} {time}"
renderer.RenderingOptions.TextFooter.RightText = "{page} of {total-pages}"
renderer.RenderingOptions.MarginTop = 25 'create 25mm space for footer
' Mergeable fields are:
' {page} {total-pages} {url} {date} {time} {html-title} & {pdf-title}Install-Package IronPdf
There are two methods through which headers and footers may be added to a PDF document. They can either be added as a classic text format, with the option to merge in dynamic data. Or, they can be added through the much more flexible HTML format, which allows developers to render dynamic headers and footers through their HTML content.
Today we will be looking at how you can add classic text headers and footers into your PDF documents in just a few simple steps. The first step towards adding customized headers and footers into your PDF documents is to ensure that the IronPdf library is included in your project with the using IronPdf; statement. Then, instantiate the ChromePdfRenderer, which provides the functionality to render your HTML content in pixel-perfect PDF documents.
Next, configure the header settings. The FirstPageNumber property allows you to specify the starting page number, accommodating for a cover page if needed. The TextHeader properties enable you to customize the appearance, such as drawing a divider line, centering text (in this case, the document URL), selecting the font type and size, and creating a margin at the top of the page for the header.
After configuring the header, set up the footer using the TextFooter properties. Similar to the header, you can draw a divider line, choose the font type and size, and include dynamic content like the current date, time, and page numbers with total pages. Finally, a margin is created at the bottom of the page to accommodate the footer.
By following these steps, you can enhance your PDF documents with informative headers and footers that improve their professionalism and readability.
using IronPdf;
using System;

// Instantiate Renderer
var renderer = new IronPdf.ChromePdfRenderer();


// Build a footer using html to style the text
// mergeable fields are:
// {page} {total-pages} {url} {date} {time} {html-title} & {pdf-title}
renderer.RenderingOptions.HtmlFooter = new HtmlHeaderFooter()
{
    MaxHeight = 15, //millimeters
    HtmlFragment = "<center><i>{page} of {total-pages}<i></center>",
    DrawDividerLine = true
};

// Use sufficient MarginBottom to ensure that the HtmlFooter does not overlap with the main PDF page content.
renderer.RenderingOptions.MarginBottom = 25; //mm


// Build a header using an image asset
// Note the use of BaseUrl to set a relative path to the assets
renderer.RenderingOptions.HtmlHeader = new HtmlHeaderFooter()
{
    MaxHeight = 20, //millimeters
    HtmlFragment = "<img src='logo.png'>",
    BaseUrl = new Uri(@"C:\assets\images\").AbsoluteUri
};

// Use sufficient MarginTop to ensure that the HtmlHeader does not overlap with the main PDF page content.
renderer.RenderingOptions.MarginTop = 25; //mm
Imports IronPdf
Imports System
' Instantiate Renderer
Private renderer = New IronPdf.ChromePdfRenderer()
' Build a footer using html to style the text
' mergeable fields are:
' {page} {total-pages} {url} {date} {time} {html-title} & {pdf-title}
renderer.RenderingOptions.HtmlFooter = New HtmlHeaderFooter() With {
.MaxHeight = 15,
.HtmlFragment = "<center><i>{page} of {total-pages}<i></center>",
.DrawDividerLine = True
}
' Use sufficient MarginBottom to ensure that the HtmlFooter does not overlap with the main PDF page content.
renderer.RenderingOptions.MarginBottom = 25 'mm
' Build a header using an image asset
' Note the use of BaseUrl to set a relative path to the assets
renderer.RenderingOptions.HtmlHeader = New HtmlHeaderFooter() With {
.MaxHeight = 20,
.HtmlFragment = "<img src='logo.png'>",
.BaseUrl = (New Uri("C:\assets\images\")).AbsoluteUri
}
' Use sufficient MarginTop to ensure that the HtmlHeader does not overlap with the main PDF page content.
renderer.RenderingOptions.MarginTop = 25 'mmInstall-Package IronPdf
HTML headers and footers provide a flexible method for creating dynamic headers and footers for your PDF documents. By adding headers and footers through this method, developers have complete control over how their headers and footers look, as they are rendered as independent HTML documents capable of containing their own assets and stylesheets.
To begin with, you first need to create an instance of the ChromePdfRenderer class, which handles the rendering of HTML content into a pixel-perfect PDF document.
Next, define a footer using the HtmlHeaderFooter class, where you specify the MaxHeight, HTML content for the footer (which in our case includes page numbering), and base URL for image resolution. The footer is styled to display centered page information.
To avoid overlap between the footer and the PDF’s main content, set a bottom margin using the MarginBottom property. Similarly, create a header that includes an image (such as a logo) by using the HtmlHeaderFooter class. Here we have set up a BaseUrl to the directory containing your image asset, allowing for proper image resolution during rendering.
Finally, use the MarginTop property to set a top margin that prevents overlap between the header and the content. This example demonstrates how easy it is to implement custom HTML headers and footers in your PDF documents with IronPDF.
using IronPdf;
using System.Collections.Generic;

// Instantiate Renderer
var renderer = new ChromePdfRenderer();

// Join Multiple Existing PDFs into a single document
var pdfs = new List<PdfDocument>();
pdfs.Add(PdfDocument.FromFile("A.pdf"));
pdfs.Add(PdfDocument.FromFile("B.pdf"));
pdfs.Add(PdfDocument.FromFile("C.pdf"));
var pdf = PdfDocument.Merge(pdfs);
pdf.SaveAs("merged.pdf");

// Add a cover page
pdf.PrependPdf(renderer.RenderHtmlAsPdf("<h1>Cover Page</h1><hr>"));

// Remove the last page from the PDF and save again
pdf.RemovePage(pdf.PageCount - 1);
pdf.SaveAs("merged.pdf");

// Copy pages 5-7 and save them as a new document.
pdf.CopyPages(4, 6).SaveAs("excerpt.pdf");

foreach (var eachPdf in pdfs)
{
    eachPdf.Dispose();
}
Imports IronPdf
Imports System.Collections.Generic
' Instantiate Renderer
Private renderer = New ChromePdfRenderer()
' Join Multiple Existing PDFs into a single document
Private pdfs = New List(Of PdfDocument)()
pdfs.Add(PdfDocument.FromFile("A.pdf"))
pdfs.Add(PdfDocument.FromFile("B.pdf"))
pdfs.Add(PdfDocument.FromFile("C.pdf"))
Dim pdf = PdfDocument.Merge(pdfs)
pdf.SaveAs("merged.pdf")
' Add a cover page
pdf.PrependPdf(renderer.RenderHtmlAsPdf("<h1>Cover Page</h1><hr>"))
' Remove the last page from the PDF and save again
pdf.RemovePage(pdf.PageCount - 1)
pdf.SaveAs("merged.pdf")
' Copy pages 5-7 and save them as a new document.
pdf.CopyPages(4, 6).SaveAs("excerpt.pdf")
For Each eachPdf In pdfs
eachPdf.Dispose()
Next eachPdfInstall-Package IronPdf
IronPDF offers 50+ features for reading and editing PDFs. The most popular are merging PDFs, cloning pages, and extracting text from rotated content.
IronPDF also allows its users to add watermarks, rotate pages, add annotations, digitally sign PDF pages, create new PDF documents, attach cover pages, customize PDF sizes, and much more when generating and formatting PDF files. Moreover, it supports conversion of PDFs into all conventional image file types, including JPG, BMP, JPEG, GIF, PNG, TIFF, etc.
Read the C# PDF editing tutorial to learn how to make full use of IronPDF to modify PDF documents to best suit project requirements.
FromFile method to import multiple PDF filesusing IronPdf;
// Open an Encrypted File, alternatively create a new PDF from Html
var pdf = PdfDocument.FromFile("encrypted.pdf", "password");
// Get file metadata
System.Collections.Generic.List<string> metadatakeys = pdf.MetaData.Keys(); // returns {"Title", "Creator", ...}
// Remove file metadata
pdf.MetaData.RemoveMetaDataKey("Title");
metadatakeys = pdf.MetaData.Keys(); // return {"Creator", ...} // title was deleted
// Edit file metadata
pdf.MetaData.Author = "Satoshi Nakamoto";
pdf.MetaData.Keywords = "SEO, Friendly";
pdf.MetaData.ModifiedDate = System.DateTime.Now;
// The following code makes a PDF read only and will disallow copy & paste and printing
pdf.SecuritySettings.RemovePasswordsAndEncryption();
pdf.SecuritySettings.MakePdfDocumentReadOnly("secret-key");
pdf.SecuritySettings.AllowUserAnnotations = false;
pdf.SecuritySettings.AllowUserCopyPasteContent = false;
pdf.SecuritySettings.AllowUserFormData = false;
pdf.SecuritySettings.AllowUserPrinting = IronPdf.Security.PdfPrintSecurity.FullPrintRights;
// Change or set the document encryption password
pdf.SecuritySettings.OwnerPassword = "top-secret"; // password to edit the pdf
pdf.SecuritySettings.UserPassword = "sharable"; // password to open the pdf
pdf.SaveAs("secured.pdf");Imports System
Imports IronPdf
' Open an Encrypted File, alternatively create a new PDF from Html
Private pdf = PdfDocument.FromFile("encrypted.pdf", "password")
' Get file metadata
Private metadatakeys As System.Collections.Generic.List(Of String) = pdf.MetaData.Keys() ' returns {"Title", "Creator", ...}
' Remove file metadata
pdf.MetaData.RemoveMetaDataKey("Title")
metadatakeys = pdf.MetaData.Keys() ' return {"Creator", ...} // title was deleted
' Edit file metadata
pdf.MetaData.Author = "Satoshi Nakamoto"
pdf.MetaData.Keywords = "SEO, Friendly"
pdf.MetaData.ModifiedDate = DateTime.Now
' The following code makes a PDF read only and will disallow copy & paste and printing
pdf.SecuritySettings.RemovePasswordsAndEncryption()
pdf.SecuritySettings.MakePdfDocumentReadOnly("secret-key")
pdf.SecuritySettings.AllowUserAnnotations = False
pdf.SecuritySettings.AllowUserCopyPasteContent = False
pdf.SecuritySettings.AllowUserFormData = False
pdf.SecuritySettings.AllowUserPrinting = IronPdf.Security.PdfPrintSecurity.FullPrintRights
' Change or set the document encryption password
pdf.SecuritySettings.OwnerPassword = "top-secret" ' password to edit the pdf
pdf.SecuritySettings.UserPassword = "sharable" ' password to open the pdf
pdf.SaveAs("secured.pdf")Install-Package IronPdf
IronPDF provides developers with strong PDF security options, supporting the customization and setting of PDF metadata, passwords, permissions, and more. With IronPDF's passwords, security, and metadata options, you can create custom permissions and security levels to fit the needs of your PDF document. This is done thanks to the use of classes such as the SecuritySettings and MetaData classes. Some options include limiting the PDF documents to be unprintable, setting them to read-only, and 128-bit encryption, and password protection of your PDF documents.
Setting custom metadata works by implementing the MetaData class to access the various PDF metadata options, and setting them with your customized values. This includes changing the author, keywords, modified data, and more. Setting custom security settings includes the ability to set custom user and owner passwords, printing permissions, read-only mode, and more.
var pdf = PdfDocument.FromFile("encrypted.pdf", "password");System.Collections.Generic.List<string> metadatakeys = pdf.MetaData.Keys;var metadatakeys = pdf.MetaData.Keys;pdf.MetaData.Author = "Satoshi Nakamoto";pdf.SecuritySettings.MakePdfDocumentReadOnly("secret-key");In order to begin customizing the security of your PDF documents, you must first load an existing PDF or create a new one. Here, we have loaded an existing password-protected PDF document, where we have input the password needed to open the PDF document. Once the PDF is loaded, we then use pdf.MetaData.Keys to get the PDF's current metadata. To remove existing PDF metadata values, use the RemoveMetaDataKey method. To begin setting new metadata values, use pdf.MetaData.metadataField (e.g., pdf.MetaData.Keywords), and then just assign the new value to it. Metadata fields such as Title and Keywords take string values, whereas the ModifiedData field takes datetime values.
Next, we have set new security settings using the SecuritySettings class. As you can see, there are a variety of settings that you can set here. This gives you full control over the permissions and security levels for each PDF document you work with. To access these settings, you just need to make sure you use pdf.SecuritySettings, followed by the setting you want to adjust. For example, the MakePdfDocumentReadOnly method sets the PDF document to be read-only, encrypting the content at 128-bit. Other options for SecuritySettings include:
AllowUserAnnotations: Controls whether or not users can annotate the PDF.AllowUserPrinting: Controls printing permissions for the document.AllowUserFormData: Sets the permissions for whether users can fill in forms.OwnerPassword: Sets the owner password for the PDF, which is used to disable or enable the other security settings.UserPassword: Sets the user password for the PDF, which must be entered in order to open or print the document.Once you have set the custom metadata, passwords, and security settings for your PDF document, use the pdf.SaveAs method to save your PDF to a specified location.
using IronPdf;

// Stamps a Watermark onto a new or existing PDF
var renderer = new ChromePdfRenderer();

var pdf = renderer.RenderUrlAsPdf("https://www.nuget.org/packages/IronPdf");
pdf.ApplyWatermark("<h2 style='color:red'>SAMPLE</h2>", 30, IronPdf.Editing.VerticalAlignment.Middle, IronPdf.Editing.HorizontalAlignment.Center);
pdf.SaveAs("watermarked.pdf");
Imports IronPdf
' Stamps a Watermark onto a new or existing PDF
Private renderer = New ChromePdfRenderer()
Private pdf = renderer.RenderUrlAsPdf("https://www.nuget.org/packages/IronPdf")
pdf.ApplyWatermark("<h2 style='color:red'>SAMPLE</h2>", 30, IronPdf.Editing.VerticalAlignment.Middle, IronPdf.Editing.HorizontalAlignment.Center)
pdf.SaveAs("watermarked.pdf")Install-Package IronPdf
IronPDF provides methods to 'watermark' PDF documents with HTML.
Using the ApplyStamp method, developers can add an HTML-based watermark to a PDF file. As shown in the example above, the HTML code for the watermark goes as the first argument to the method. Additional arguments to ApplyStamp control the rotation, opacity, and position of the watermark.
Utilize the ApplyStamp method in lieu of the ApplyWatermark method for more granular control over watermark placement. For example, use ApplyStamp to:
Text, Image, or HTML watermarks to PDFsPdfDocument or use an existing PdfDocument file.ApplyStamp method to add watermarks to the PDF.SaveAs.Ensure you have installed the IronPDF library in your project. You can find more detailed instructions on the IronPDF NuGet package page.
Explanation of the Code:
IronPdf library, which provides all necessary classes and methods for PDF manipulation.PdfDocument.FromFile, specifying the file path of the existing PDF.ApplyStamp method is used to overlay the watermark on the PDF. This method allows for detailed customization:
rotationDegrees: Specifies the rotation, in degrees, of the watermark.left and top: Dictate the X and Y position of the watermark, measured from the top-left corner.opacity: Determines the transparency of the watermark.pageRange: Specifies which pages should receive the watermark, allowing for diverse placement strategies.SaveAs method exports the modified PDF to a new file.In conclusion, the IronPDF ApplyStamp method allows for precise control over watermarking PDF documents using HTML. This approach is flexible, accommodating various customization needs for positioning, styling, and applying watermarks to specified pages.
using IronPdf;

// With IronPDF, we can easily merge 2 PDF files using one as a background or foreground
var renderer = new ChromePdfRenderer();
var pdf = renderer.RenderUrlAsPdf("https://www.nuget.org/packages/IronPdf");
pdf.AddBackgroundPdf(@"MyBackground.pdf");
pdf.AddForegroundOverlayPdfToPage(0, @"MyForeground.pdf", 0);
pdf.SaveAs("complete.pdf");
Imports IronPdf
' With IronPDF, we can easily merge 2 PDF files using one as a background or foreground
Private renderer = New ChromePdfRenderer()
Private pdf = renderer.RenderUrlAsPdf("https://www.nuget.org/packages/IronPdf")
pdf.AddBackgroundPdf("MyBackground.pdf")
pdf.AddForegroundOverlayPdfToPage(0, "MyForeground.pdf", 0)
pdf.SaveAs("complete.pdf")Install-Package IronPdf
You may want to use a specific background and foreground as you create and render your PDF documents in IronPDF. In such a case, you can use an existing or rendered PDF as the background or foreground for another PDF document. This is particularly useful for design consistency and templating.
This example shows you how to use a PDF document as the background or foreground of another PDF document.
You can do this in C# by loading or creating a multi-page PDF as an IronPdf.PdfDocument object.
You can add backgrounds using PdfDocument.AddBackgroundPdf. For more details on background insertion methods, refer to the IronPDF.PdfDocument background documentation; it describes several background insertion methods and their overrides. This adds a background to each page of your working PDF. The background is copied from a page in another PDF document.
You can add foregrounds, also known as “Overlays,” using PdfDocument.AddForegroundOverlayPdfToPage. For detailed information on foreground insertion methods, consult the IronPDF.PdfDocument overlay documentation.
This code illustrates how to integrate additional design elements on top of a base PDF using IronPDF. Always refer to the official documentation for more advanced techniques and additional options.
using IronPdf;
using System;

// Step 1.  Creating a PDF with editable forms from HTML using form and input tags
// Radio Button and Checkbox can also be implemented with input type 'radio' and 'checkbox'
const string formHtml = @"
    <html>
        <body>
            <h2>Editable PDF  Form</h2>
            <form>
              First name: <br> <input type='text' name='firstname' value=''> <br>
              Last name: <br> <input type='text' name='lastname' value=''> <br>
              <br>
              <p>Please specify your gender:</p>
              <input type='radio' id='female' name='gender' value= 'Female'>
                <label for='female'>Female</label> <br>
                <br>
              <input type='radio' id='male' name='gender' value='Male'>
                <label for='male'>Male</label> <br>
                <br>
              <input type='radio' id='non-binary/other' name='gender' value='Non-Binary / Other'>
                <label for='non-binary/other'>Non-Binary / Other</label>
              <br>

              <p>Please select all medical conditions that apply:</p>
              <input type='checkbox' id='condition1' name='Hypertension' value='Hypertension'>
              <label for='condition1'> Hypertension</label><br>
              <input type='checkbox' id='condition2' name='Heart Disease' value='Heart Disease'>
              <label for='condition2'> Heart Disease</label><br>
              <input type='checkbox' id='condition3' name='Stoke' value='Stoke'>
              <label for='condition3'> Stoke</label><br>
              <input type='checkbox' id='condition4' name='Diabetes' value='Diabetes'>
              <label for='condition4'> Diabetes</label><br>
              <input type='checkbox' id='condition5' name='Kidney Disease' value='Kidney Disease'>
              <label for='condition5'> Kidney Disease</label><br>
            </form>
        </body>
    </html>";

// Instantiate Renderer
var renderer = new ChromePdfRenderer();
renderer.RenderingOptions.CreatePdfFormsFromHtml = true;
renderer.RenderHtmlAsPdf(formHtml).SaveAs("BasicForm.pdf");

// Step 2. Reading and Writing PDF form values.
var FormDocument = PdfDocument.FromFile("BasicForm.pdf");

// Set and Read the value of the "firstname" field
var FirstNameField = FormDocument.Form.FindFormField("firstname");
FirstNameField.Value = "Minnie";
Console.WriteLine("FirstNameField value: {0}", FirstNameField.Value);

// Set and Read the value of the "lastname" field
var LastNameField = FormDocument.Form.FindFormField("lastname");
LastNameField.Value = "Mouse";
Console.WriteLine("LastNameField value: {0}", LastNameField.Value);

FormDocument.SaveAs("FilledForm.pdf");
Imports IronPdf
Imports System
' Step 1. Creating a PDF with editable forms from HTML using form and input tags
' Radio Button and Checkbox can also be implemented with input type 'radio' and 'checkbox'
Private Const formHtml As String = "
<html>
<body>
<h2>Editable PDF Form</h2>
<form>
First name: <br> <input type='text' name='firstname' value=''> <br>
Last name: <br> <input type='text' name='lastname' value=''> <br>
<br>
<p>Please specify your gender:</p>
<input type='radio' id='female' name='gender' value= 'Female'>
<label for='female'>Female</label> <br>
<br>
<input type='radio' id='male' name='gender' value='Male'>
<label for='male'>Male</label> <br>
<br>
<input type='radio' id='non-binary/other' name='gender' value='Non-Binary / Other'>
<label for='non-binary/other'>Non-Binary / Other</label>
<br>
<p>Please select all medical conditions that apply:</p>
<input type='checkbox' id='condition1' name='Hypertension' value='Hypertension'>
<label for='condition1'> Hypertension</label><br>
<input type='checkbox' id='condition2' name='Heart Disease' value='Heart Disease'>
<label for='condition2'> Heart Disease</label><br>
<input type='checkbox' id='condition3' name='Stoke' value='Stoke'>
<label for='condition3'> Stoke</label><br>
<input type='checkbox' id='condition4' name='Diabetes' value='Diabetes'>
<label for='condition4'> Diabetes</label><br>
<input type='checkbox' id='condition5' name='Kidney Disease' value='Kidney Disease'>
<label for='condition5'> Kidney Disease</label><br>
</form>
</body>
</html>"
' Instantiate Renderer
Private renderer = New ChromePdfRenderer()
renderer.RenderingOptions.CreatePdfFormsFromHtml = True
renderer.RenderHtmlAsPdf(formHtml).SaveAs("BasicForm.pdf")
' Step 2. Reading and Writing PDF form values.
Dim FormDocument = PdfDocument.FromFile("BasicForm.pdf")
' Set and Read the value of the "firstname" field
Dim FirstNameField = FormDocument.Form.FindFormField("firstname")
FirstNameField.Value = "Minnie"
Console.WriteLine("FirstNameField value: {0}", FirstNameField.Value)
' Set and Read the value of the "lastname" field
Dim LastNameField = FormDocument.Form.FindFormField("lastname")
LastNameField.Value = "Mouse"
Console.WriteLine("LastNameField value: {0}", LastNameField.Value)
FormDocument.SaveAs("FilledForm.pdf")Install-Package IronPdf
You can create editable PDF documents with IronPDF as easily as a normal document. The PdfForm class is a collection of user-editable form fields within a PDF document. It can be implemented into your PDF render to make it a form or an editable document.
This example shows you how to create editable PDF forms in IronPDF.
PDFs with editable forms can be created from HTML simply by adding <form>, <input>, and <textarea> tags to the document parts.
The PdfDocument.Form.FindFormField method can be used to read and write the value of any form field. The field's name attribute is given to that field in your HTML.
The PdfDocument.Form object can be used in two ways:
In the example above, we first import the IronPdf library and define a method CreateEditablePdfDocument. This method contains the HTML structure of a simple form with input fields for username and comments. Using the HtmlToPdf renderer, we convert this HTML content into a PDF document.
The pdfDocument.Form is then used to access and manipulate the form fields. We set default values that will appear when the document is opened in a PDF viewer. Finally, the document is saved with the name "EditableForm.pdf", allowing it to be stored or shared with embedded editable fields.
using IronPdf;
using IronSoftware.Drawing;

var pdf = PdfDocument.FromFile("Example.pdf");

// Extract all pages to a folder as image files
pdf.RasterizeToImageFiles(@"C:\image\folder\*.png");

// Dimensions and page ranges may be specified
pdf.RasterizeToImageFiles(@"C:\image\folder\example_pdf_image_*.jpg", 100, 80);

// Extract all pages as AnyBitmap objects
AnyBitmap[] pdfBitmaps = pdf.ToBitmap();
Imports IronPdf
Imports IronSoftware.Drawing
Private pdf = PdfDocument.FromFile("Example.pdf")
' Extract all pages to a folder as image files
pdf.RasterizeToImageFiles("C:\image\folder\*.png")
' Dimensions and page ranges may be specified
pdf.RasterizeToImageFiles("C:\image\folder\example_pdf_image_*.jpg", 100, 80)
' Extract all pages as AnyBitmap objects
Dim pdfBitmaps() As AnyBitmap = pdf.ToBitmap()Install-Package IronPdf
To convert a PDF document to images, call IronPDF's RasterizeToImageFiles method on a PdfDocument object. A PDF document can be loaded using the PdfDocument.FromFile method or one of the available PDF generation methods for .NET Core.
RasterizeToImageFiles renders each page of the PDF as a rasterized image. The first argument specifies the naming pattern to use for each image. Optional arguments can be used to customize the quality and dimensions for each image. Another option allows the method to convert selected pages from the PDF into images.
Line 24 of the featured code example demonstrates the ToBitMap method. Call this method on any PdfDocument object to quickly convert the PDF into AnyBitmap objects that can be saved to files or manipulated as needed.
FromFile methodRasterizeToImageFiles methodusing IronPdf;
using IronPdf.Signing;
// Cryptographically sign an existing PDF in 1 line of code!
new IronPdf.Signing.PdfSignature("Iron.p12", "123456").SignPdfFile("any.pdf");
/***** Advanced example for more control *****/
// Step 1. Create a PDF
var renderer = new ChromePdfRenderer();
var doc = renderer.RenderHtmlAsPdf("<h1>Testing 2048 bit digital security</h1>");
// Step 2. Create a Signature.
// You may create a .pfx or .p12 PDF signing certificate using Adobe Acrobat Reader.
// Read: https://helpx.adobe.com/acrobat/using/digital-ids.html
var signature = new IronPdf.Signing.PdfSignature("Iron.pfx", "123456")
{
// Step 3. Optional signing options and a handwritten signature graphic
SigningContact = "support@ironsoftware.com",
SigningLocation = "Chicago, USA",
SigningReason = "To show how to sign a PDF"
};
//Step 3. Sign the PDF with the PdfSignature. Multiple signing certificates may be used
doc.Sign(signature);
//Step 4. The PDF is not signed until saved to file, steam or byte array.
doc.SaveAs("signed.pdf");Imports IronPdf
Imports IronPdf.Signing
' Cryptographically sign an existing PDF in 1 line of code!
Call (New IronPdf.Signing.PdfSignature("Iron.p12", "123456")).SignPdfFile("any.pdf")
'''*** Advanced example for more control ****
' Step 1. Create a PDF
Dim renderer = New ChromePdfRenderer()
Dim doc = renderer.RenderHtmlAsPdf("<h1>Testing 2048 bit digital security</h1>")
' Step 2. Create a Signature.
' You may create a .pfx or .p12 PDF signing certificate using Adobe Acrobat Reader.
' Read: https://helpx.adobe.com/acrobat/using/digital-ids.html
Dim signature = New IronPdf.Signing.PdfSignature("Iron.pfx", "123456") With {
.SigningContact = "support@ironsoftware.com",
.SigningLocation = "Chicago, USA",
.SigningReason = "To show how to sign a PDF"
}
'Step 3. Sign the PDF with the PdfSignature. Multiple signing certificates may be used
doc.Sign(signature)
'Step 4. The PDF is not signed until saved to file, steam or byte array.
doc.SaveAs("signed.pdf")Install-Package IronPdf
Digitally signing a PDF document helps ensure the document's integrity by providing a method of adding authentication to the PDF itself. With IronPDF, you have several options when it comes to signing a new or existing PDF file. These include digitally signing the PDF document with a certificate, adding a graphical handwritten version of your signature to the PDF, stamping an image of the certificate on the PDF, or simply creating a signature form field on the PDF to prompt user signing.
The first step in this process is to either load in or create the PDF we want to sign. For this example, we create a new ChromePdfRenderer instance. This is IronPDF's powerful rendering engine used to render HTML, CSS, and JavaScript to PDF without losing quality. We then use the RenderHtmlAsPdf method to render our HTML string into a high-quality PDF document ready to be signed. The resulting PDF is stored in the doc variable.
Next, we need to create our signature. For this example, we sign our PDF document with a certificate. PdfSignature represents the digital signature object for signing the PDF, and it requires the path to the .pfx file we want to use for the signature and the password to access this file. We have included three optional properties: SigningContact adds an email or contact information to the signature metadata, SigningLocation represents where the document is signed, and SigningReason provides the reason for the document being signed.
Next, we sign the PDF document with the PdfSignature object we created. By calling the Sign method, we apply the signature to the PDF document in one easy line. Multiple signing certificates can be applied to the PDF document using this method.
Finally, we save the signed PDF document using the SaveAs method, which saves the PDF to the specified file location.

Choosing support with Iron puts Iron's development team as a support team for your project integration. Contact our team directly for questions on the product, integration or licensing.
Ask a Question
No need to learn new APIs. The Aspx file to pdf converter is Quick and Easy to get to a result in minutes. Supports HTML, Images, Fonts, JS and CSS. IronPDF uses a well tested industry leading Chromium rendering engine to save ASPX pages as PDFs.
See our ASPX to PDF Tutorial
The IronPDF Aspx to PDF converter also supports PDF text reading and Images extraction. Content can be passed to your .NET applications and databases to archive content from legacy documents and systems into new business process apps.
Get Started with documentation
From merging, to splitting, to editing PDFs, use your development skills to output exactly the right PDF at the right time. IronPDF puts a growing array of feature sets directly into your hands, inside your C# / VB.NET Project.
Clear Documentation
Use IronPDF to automatically convert your ASPX forms, CSS, and images to PDF documents on the fly. IronPDF will reference and use all your files directly as referenced in your ASPX documents.
Works with ASPX, C#, .NET, VB, MVC, ASP.NET, .NET Core
HTML to PDF Tutorial
IronPDF puts PDF generation and manipulation tools in your own hands quickly with fully intellisense support and a Visual Studio installer. Whether installing directly from NuGet with Visual Studio or downloading the DLL, you'll be set up in no time. Just one DLL and no dependencies.
NuGet Install Visual Studio DLLFree for Development. Licenses for deployment starting at $749.


C# PDF ASP.NET ASPX

Learn how to turn any ASP.NET ASPX page into a PDF document into a PDF instead of HTML using a single line of code in C# or VB.NET…
View Jacob's ASPX-To-PDF Example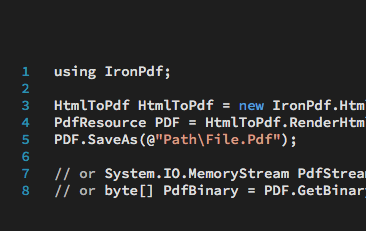
C# PDF HTML

For many this is the most efficient way to generate PDF files from .NET, because there is no additional API to learn, or complex design system to navigate…
See Jean's HTML-To-PDF Examples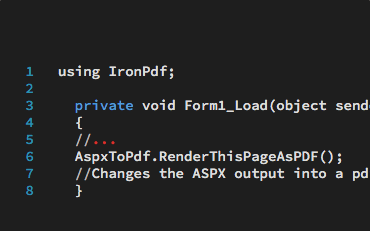
VB PDF ASP.NET

Learn how to create and edit PDF documents in VB.NET applications and websites. A free tutorial with code examples.…
View Veronica's Vb.NET PDF Tutorial


Iron's team have over 10 years experience in the .NET software component market.
Install-Package IronPdf

No credit card required
Your trial key should be in the email.![]() The trial form was submitted
The trial form was submitted
successfully.
If it is not, please contact
support@ironsoftware.com
No credit card required
Test in production without watermarks.
Works wherever you need it to.
Get 30 days of fully functional product.
Have it up and running in minutes.
Full access to our support engineering team during your product trial
A live demo of our product and its key features
Get project specific feature recommendations
All your questions are answered to make sure you have all the information you need. (No commitment whatsoever.)


Book a No-obligation Consult

Complete the form below or email sales@ironsoftware.com
Your details will always be kept confidential.

Book a 30-minute, personal demo.
No contract, no card details, no commitments.


