How to Edit a PDF: Every Method Explained (2026)
Written by the team at Iron Software
Most people run into the same problem sooner or later: you have a PDF, and you need to change something in it. Maybe a contract has the wrong figure, a report needs a new section before it goes out, or a form you received has blank fields that need filling in. The good news is that editing a PDF is entirely manageable once you know which tool fits your situation. The challenge is that PDF files are designed to be a fixed, presentation-ready format, which means editing them requires a purpose-built approach rather than just opening them like a word doc.
Editing a PDF can range from making quick text changes to completely restructuring a document. This guide covers every reliable method to edit PDF files in 2026: using Adobe Acrobat Pro for the most complete editing experience, working with free online PDF editors for quick tasks, converting PDFs through Microsoft Word or Google Drive, editing directly in your browser, filling and creating PDF forms, and handling scanned documents using optical character recognition. Each method section includes exact steps, when to use it, and what to watch out for. Developers building .NET applications can find a dedicated section at the end showing how IronPDF handles PDF editing programmatically without requiring Microsoft Office.
One important note before you start: always keep a copy of the original file before editing. Conversions and edits can occasionally shift layouts or alter formatting, and having the original means you can always return to a clean starting point.
Why Editing a PDF is Different from Editing a Word Document
Understanding the difference saves time. A word doc is built for editing from the ground up. Everything in it, from the fonts to the paragraph spacing, is stored as editable instructions that your word processor reads and renders. A PDF document, by contrast, is closer to a printed page. It captures the exact visual layout of content and fixes it in place so it renders identically across every device and operating system.
This architecture is what makes PDFs ideal for easy sharing and distribution. It also makes direct editing more involved. When you edit existing text in a PDF, you are working inside a structure that was not originally designed to be changed. Some tools approach this by converting pdfs to an editable format first. Others allow you to edit existing pdf text directly within the file. Each approach has trade-offs, and the methods below cover the full range.
Method 1: Adobe Acrobat Pro (Most Complete PDF Editor)
Best for: Professional editing, complex documents, sensitive data, offline work.
Adobe Acrobat Pro remains the most capable pdf editor available. It is the only tool that lets you truly edit existing text within the original PDF structure, reflow paragraphs, resize and reposition images, manage pdf pages, add watermarks, sign pdfs, add comments, and handle advanced security features, all within a single platform. It is the right choice whenever formatting accuracy matters or the document contains sensitive data that should not be uploaded to an online service.
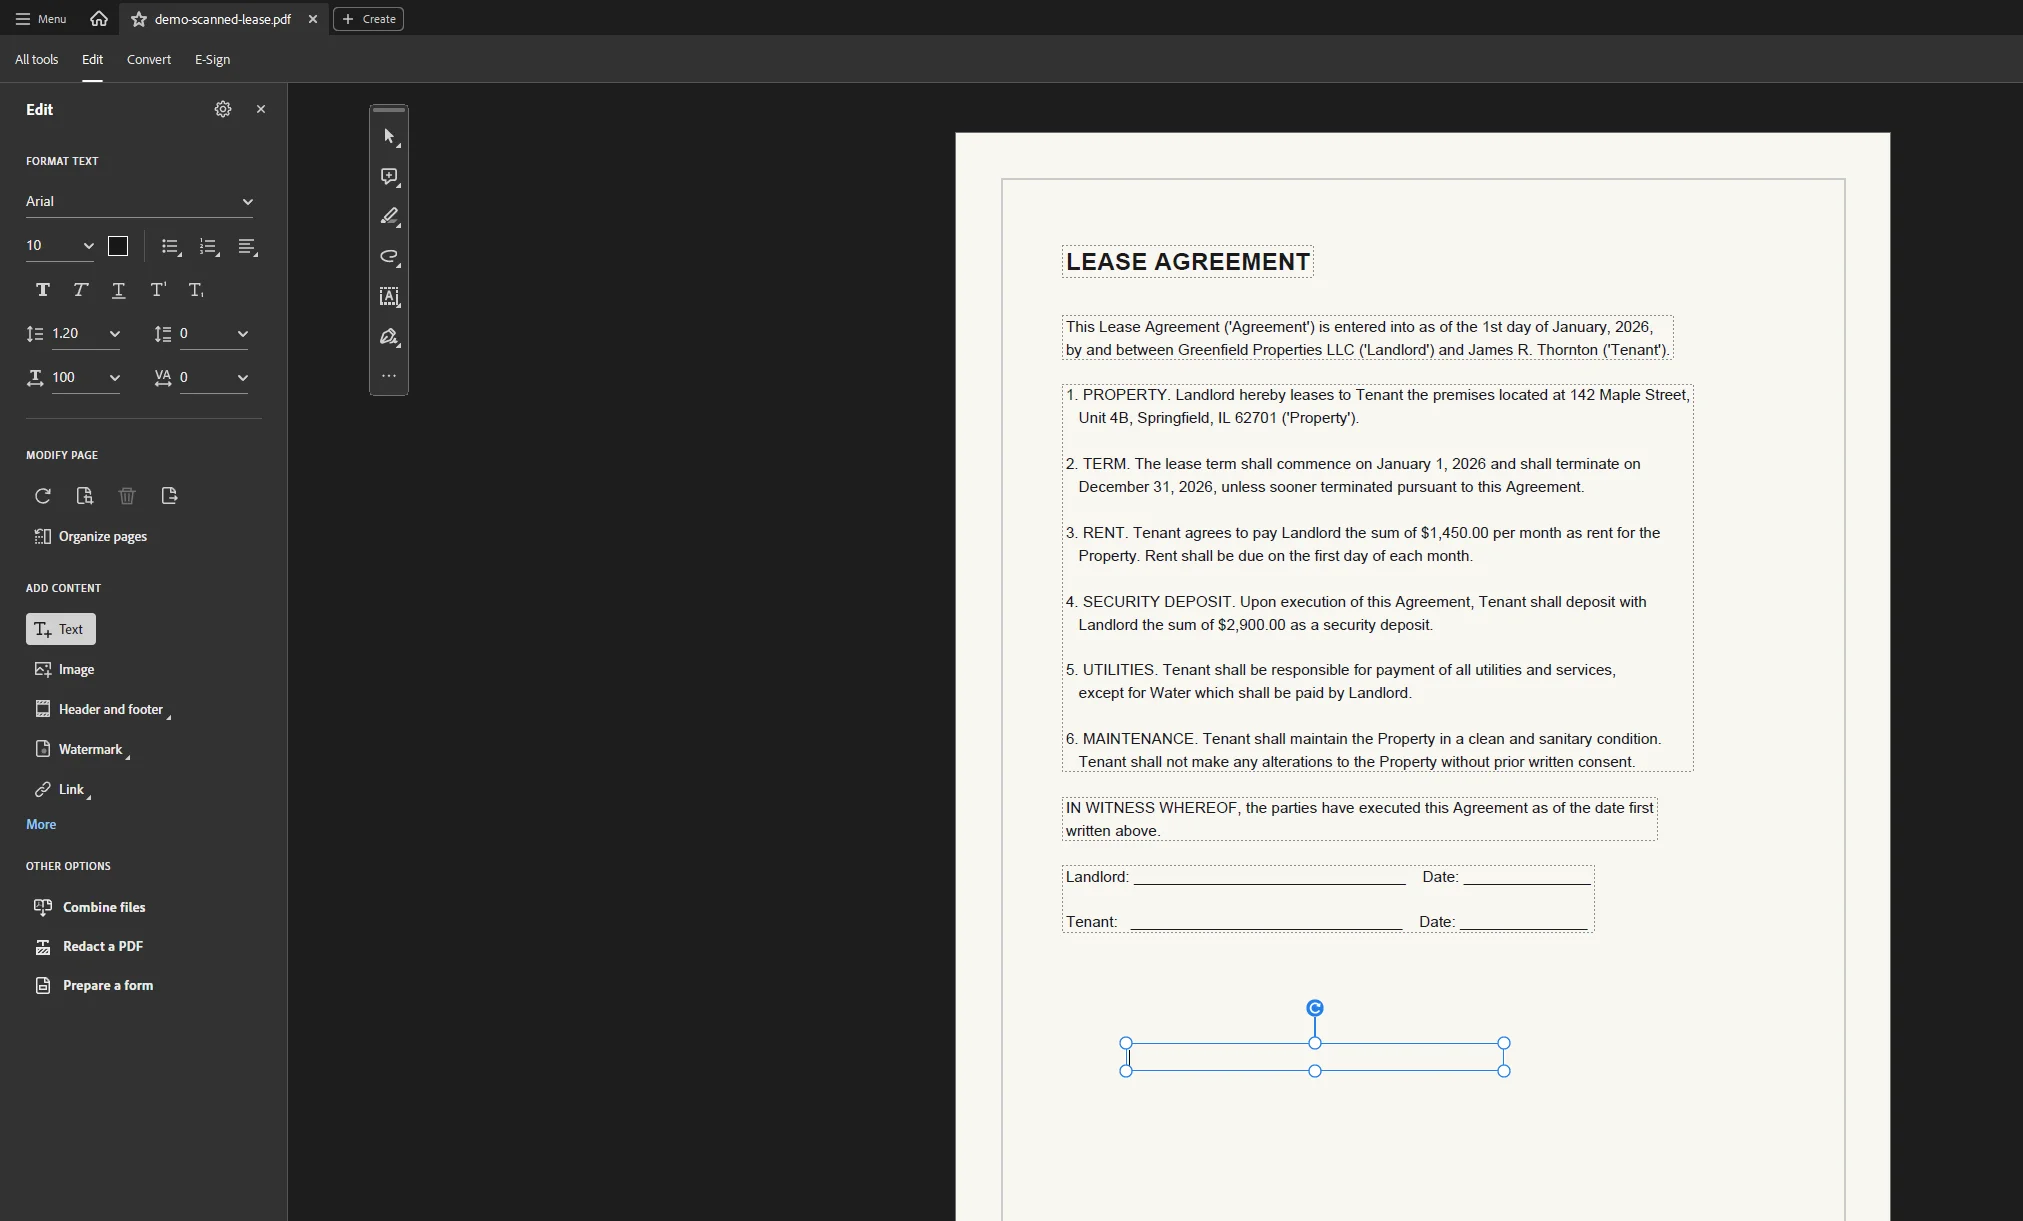
Steps to edit existing pdf text in Acrobat Pro:
- Open your PDF file in Adobe Acrobat Pro.
- Go to the top toolbar and click Edit PDF (in older versions, look under Tools > Edit PDF).
- Click any text on the page. A blue bounding box appears around the text block you selected.
- Edit the existing text directly. You can change words, fix numbers, adjust font size, and change text color using the Format panel that appears on the right side.
- To add text in a new location, click Add Text in the top menu and click anywhere on the page to place a new text box.
- To add images or a new image to the document, click Add Image in the toolbar, then select your file and drag it to the desired position. Use the handles to resize the image as needed.
- Click outside the editing area when done, then go to File > Save to save the edited document, or File > Save As to create a new copy.
Acrobat Pro preserves the original document structure when you edit text, which means line spacing, kerning, and font embedding all stay intact. This is what separates it from tools that simply layer new content on top of the original pdf content.
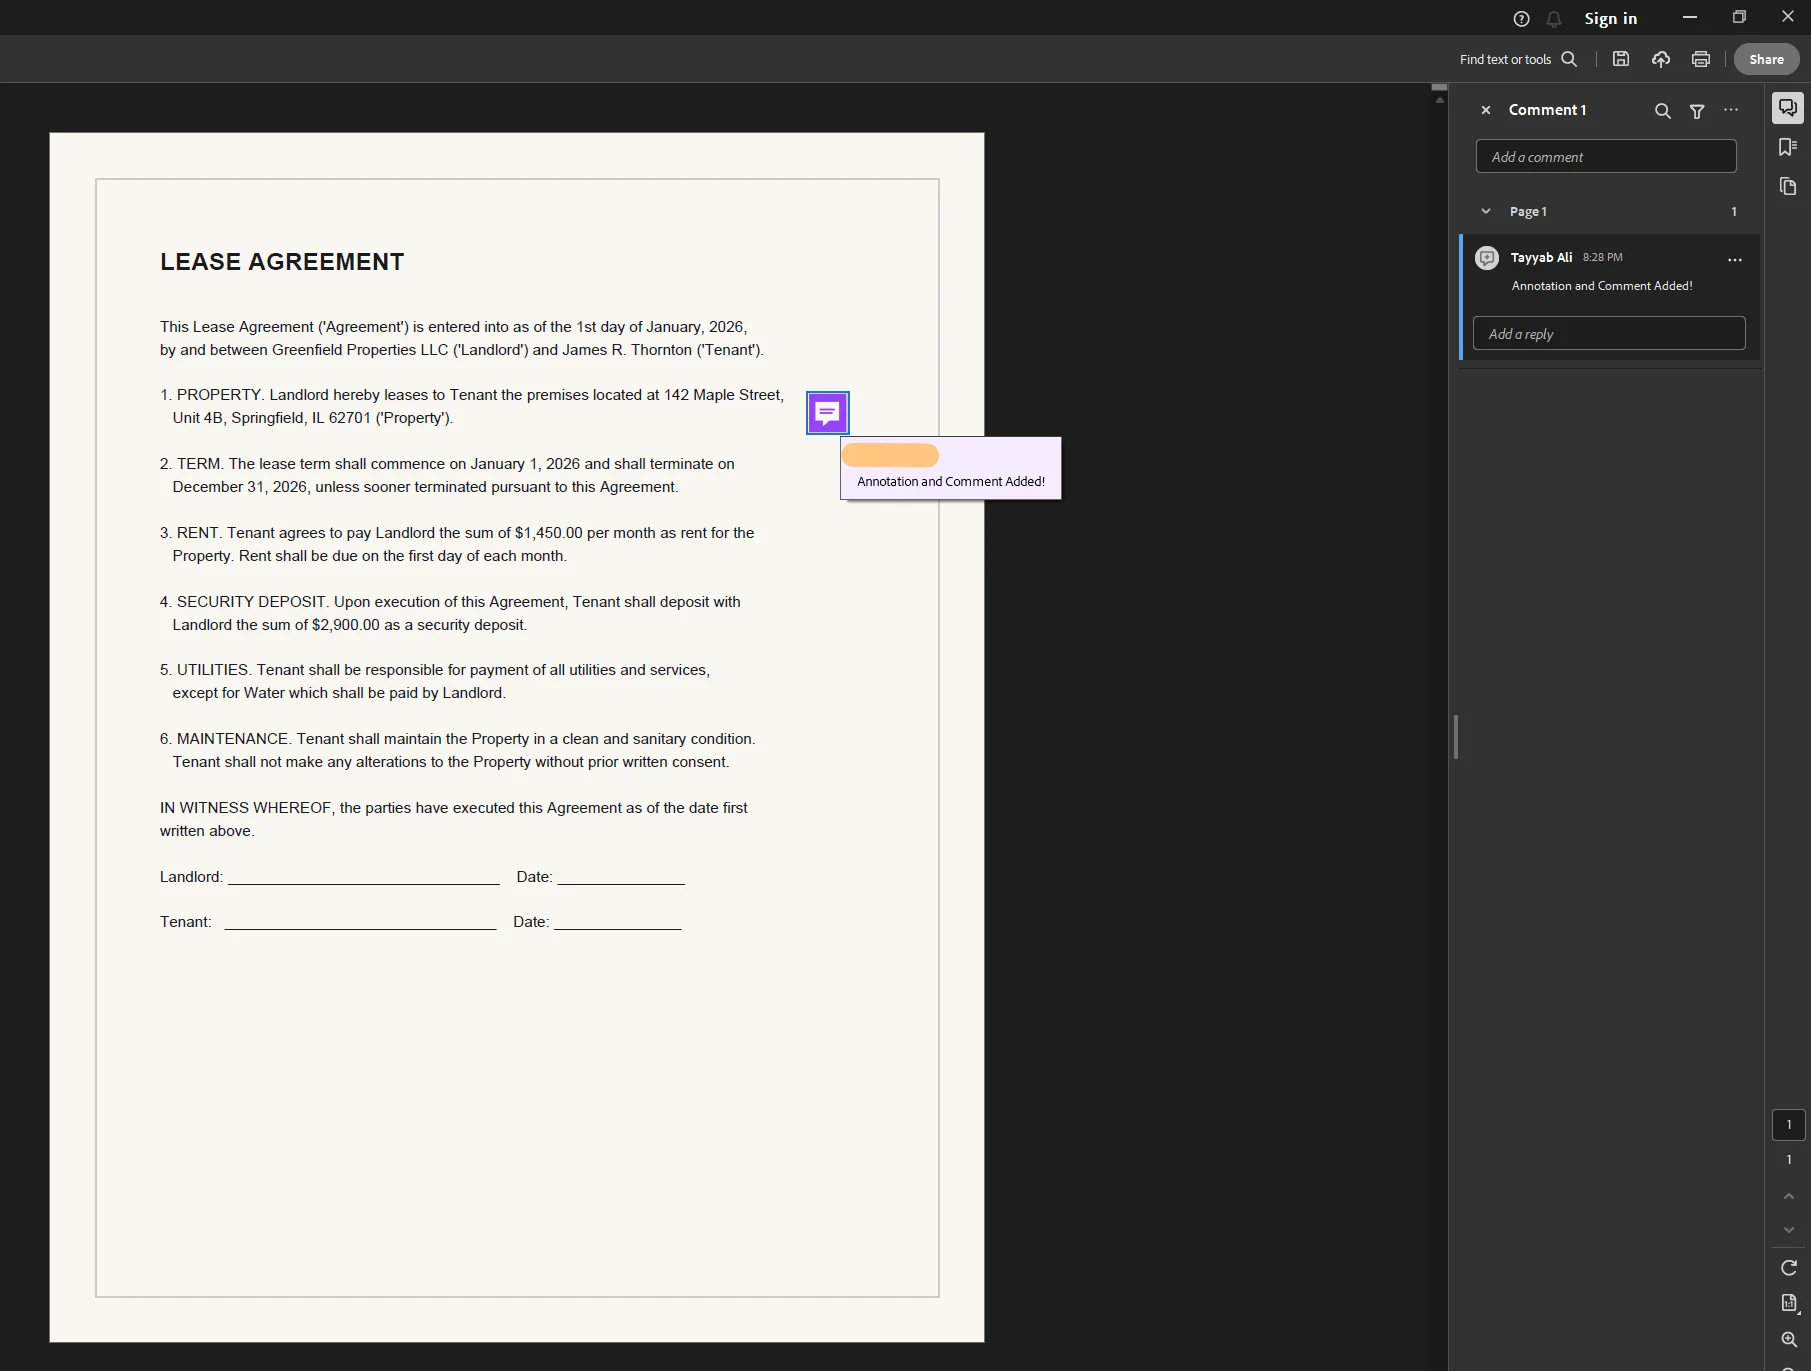
To add comments, sticky notes, or annotations:
Open the Comment panel from the top toolbar. From there you can add sticky notes, highlight or underline text, draw markups, and add comments that collaborators can reply to. Real-time collaboration features allow multiple users to comment and edit PDF documents simultaneously, making Acrobat's annotation toolset particularly useful for document review workflows.
To add watermarks:
Go to Tools > Edit PDF > Watermark > Add. You can configure text or image watermarks and control placement, opacity, and which pdf pages they appear on.
 Cost: Adobe Acrobat Pro requires a subscription via Adobe Creative Cloud or as a standalone plan. A limited free version is available online at adobe.com for occasional conversions, but the desktop application is needed for full editing.
Method 2: Free Online PDF Editors (No Installation Required)
Best for: Quick, one-off edits, adding text boxes, images, and annotations without installing software.
Online tools are perfect for quick, one-off edits without installing software. If you need to add a few text boxes, drop in a new image, add links, add drawings, or apply a simple annotation, a free online pdf editor can handle the task in just a few clicks. The main limitations are file size caps, limited ability to edit existing pdf text directly (most online tools add content on top rather than modifying the original), and the inherent privacy consideration of uploading documents to a third party server.
For sensitive documents, prefer offline desktop editors rather than online tools.
The most reliable free pdf editor options in 2026:
Smallpdf (smallpdf.com): A clean, browser-based tool that lets you add text boxes, images, shapes, and annotations. Use the drag and drop interface to upload your file, then start editing directly in your browser. Smallpdf also handles compress, merge, split, convert, and sign pdfs functions. The free plan allows a limited number of tasks per day.
ILovePDF (ilovepdf.com): Similar to Smallpdf in scope and includes an edit pdf online mode for adding text, images, shapes, and form fields. It is completely free for basic operations with no account required. Files are encrypted during transmission for security.
PDF24 (tools.pdf24.org): One of the most feature-complete free pdf tools available. The pdf online editor supports adding text, images, sticky notes, links, and drawings. PDF24 also offers a desktop application that works offline, which is a strong option if you frequently edit pdfs and prefer not to upload files to the cloud.
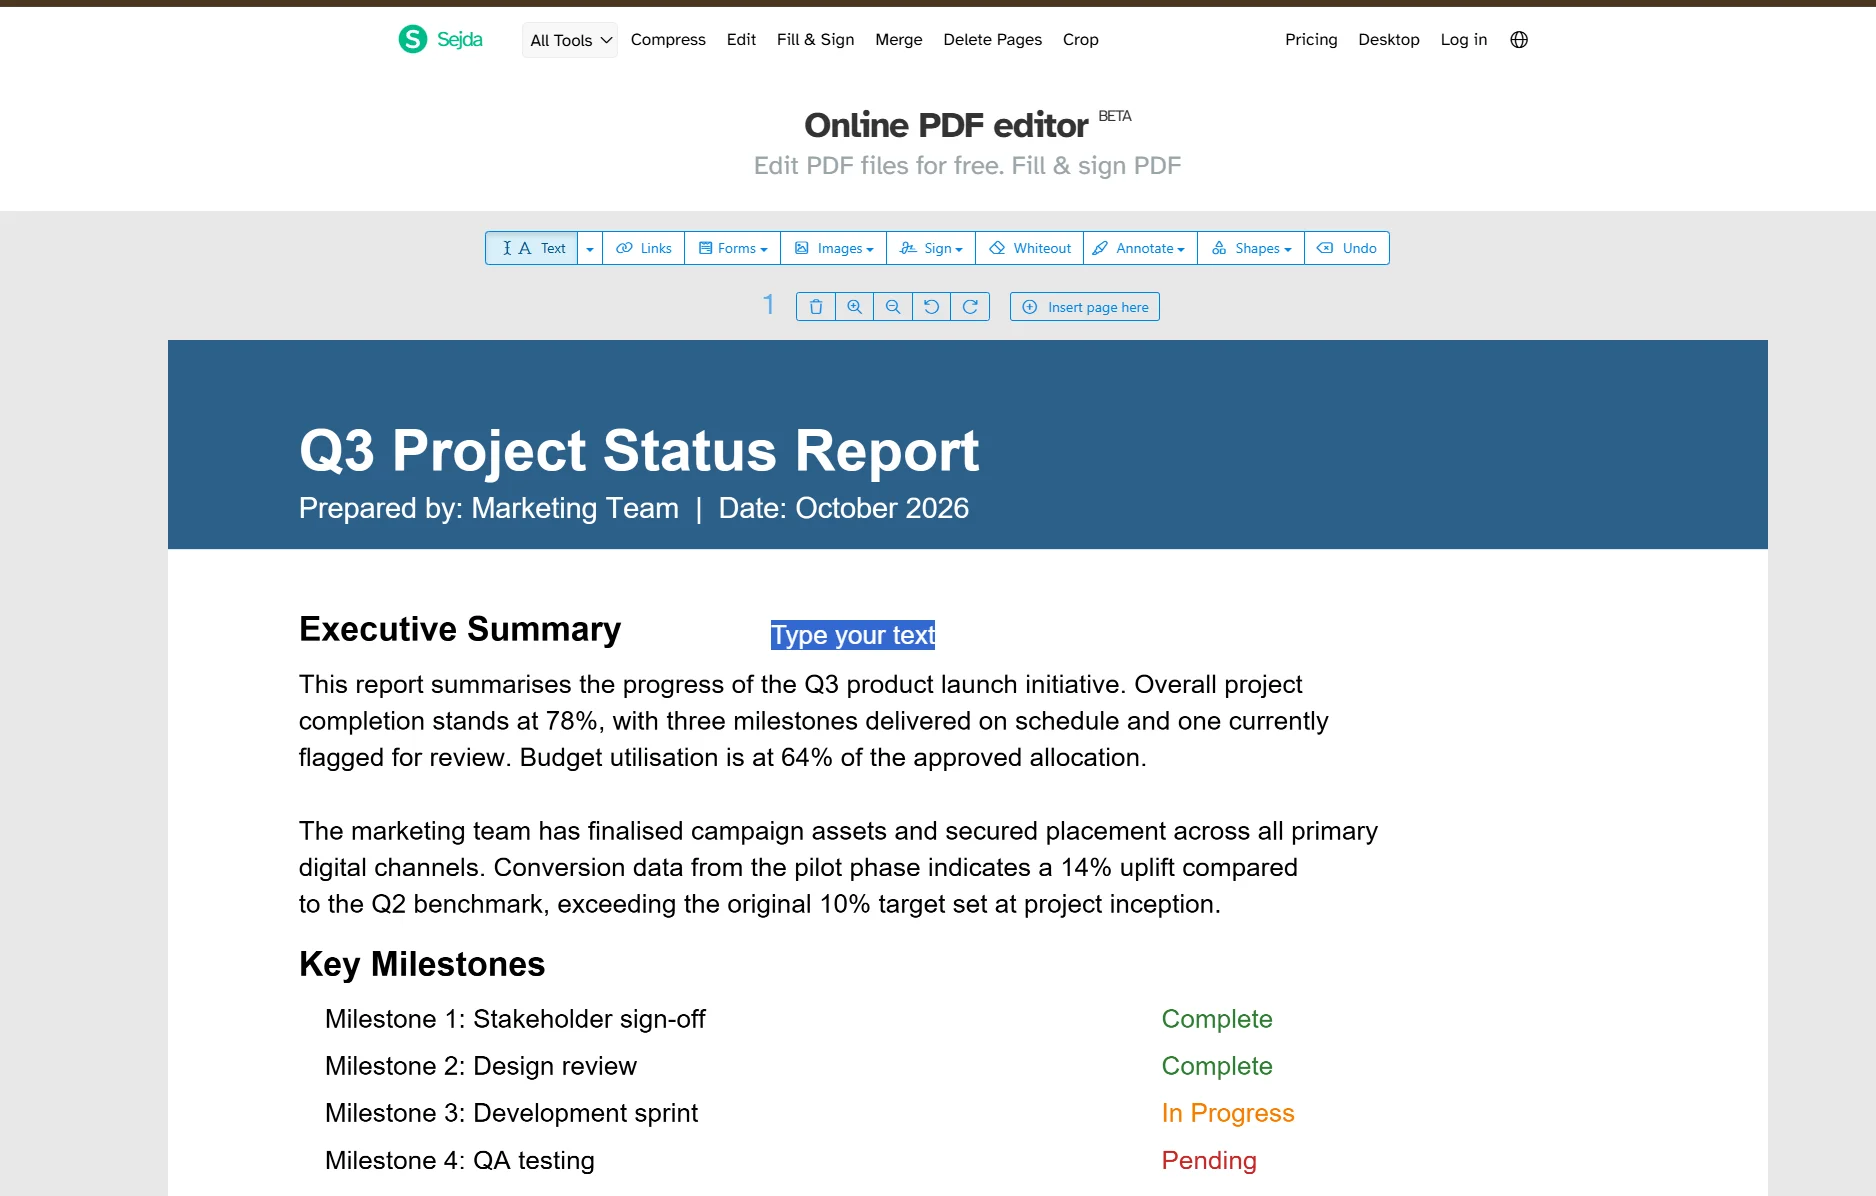
Sejda (sejda.com): Stands out for its ability to edit existing text directly rather than just add text boxes on top. This is rare among free online tools. Upload a PDF, click Edit > Text, click any paragraph to select it, and modify the existing text inline. It supports three free tasks per hour.
How to use a free online pdf editor (general steps):
- Go to your chosen editor in your browser (Smallpdf, PDF24, Sejda, or iLovePDF).
- Click Upload or drag and drop your PDF file into the upload area.
- Once the file loads, select your editing tool from the toolbar: add text, add text boxes, add images, add sticky notes, add links, or add drawings depending on what you need.
- For text edits, click Add Text or Edit Text, position your text box or click the existing text, then type your changes.
- To add images, select the image tool, then click to place or drag and drop a new image onto the page.
- Click Download or Save when finished. Most tools will prompt you to create an account for cloud storage of your edited file.
Many online PDF editing tools provide features such as highlighting, underlining, or striking through text for annotation purposes. Look for a highlight or markup tool in the toolbar if you need to mark up a document for review rather than permanently changing it.
Method 3: Convert to Word, Edit, Then Export Back to PDF
Best for: Heavy text editing, restructuring content, documents that were originally created in Word.
When you need to make substantial changes to the text of a PDF, converting it to a word doc first gives you the full power of a word processor. Microsoft Word (2013 and later, including Microsoft 365) can open PDF documents directly and convert them to editable Word format.
Steps:
- Open Microsoft Word.
- Click File > Open, navigate to your PDF file, and select it.
- Word displays a message confirming it will convert the PDF to an editable document. Click OK.
- Edit the document as you normally would. You can change text, adjust font size, move images, add or delete pages, resize elements, and reformat content.
- To save the result as a PDF again, go to File > Save As, choose PDF from the format dropdown, and click Save.
Formatting changes can occur when converting PDFs, especially through Word or Google Docs. Simple, text-heavy documents convert cleanly. Documents with complex layouts, multiple columns, or custom fonts may need manual cleanup after conversion. Always compare the output against the original PDF before finalising.
 Using Google Drive instead of Word:
If you do not have Microsoft Word installed, Google Drive offers a completely free alternative.
- Open Google Drive in your browser.
- Click + New > File Upload and upload your PDF.
- Right-click the uploaded PDF in Google Drive and select Open with > Google Docs.
- Google Docs will open the PDF as an editable document.
- Make your edits, then go to File > Download > PDF Document (.pdf) to export the finished file.
Google Drive handles text extraction well, though tables, headers, and multi-column layouts may shift during the conversion. This method is best for straightforward, text-focused documents.
Method 4: Edit PDFs Online Using Your Browser (Chrome, Edge, or Mac Preview)
Best for: Annotating, signing, filling in form fields, and making lightweight edits without any software.
Several tools are built directly into the platforms you already use.
Microsoft Edge (Windows):
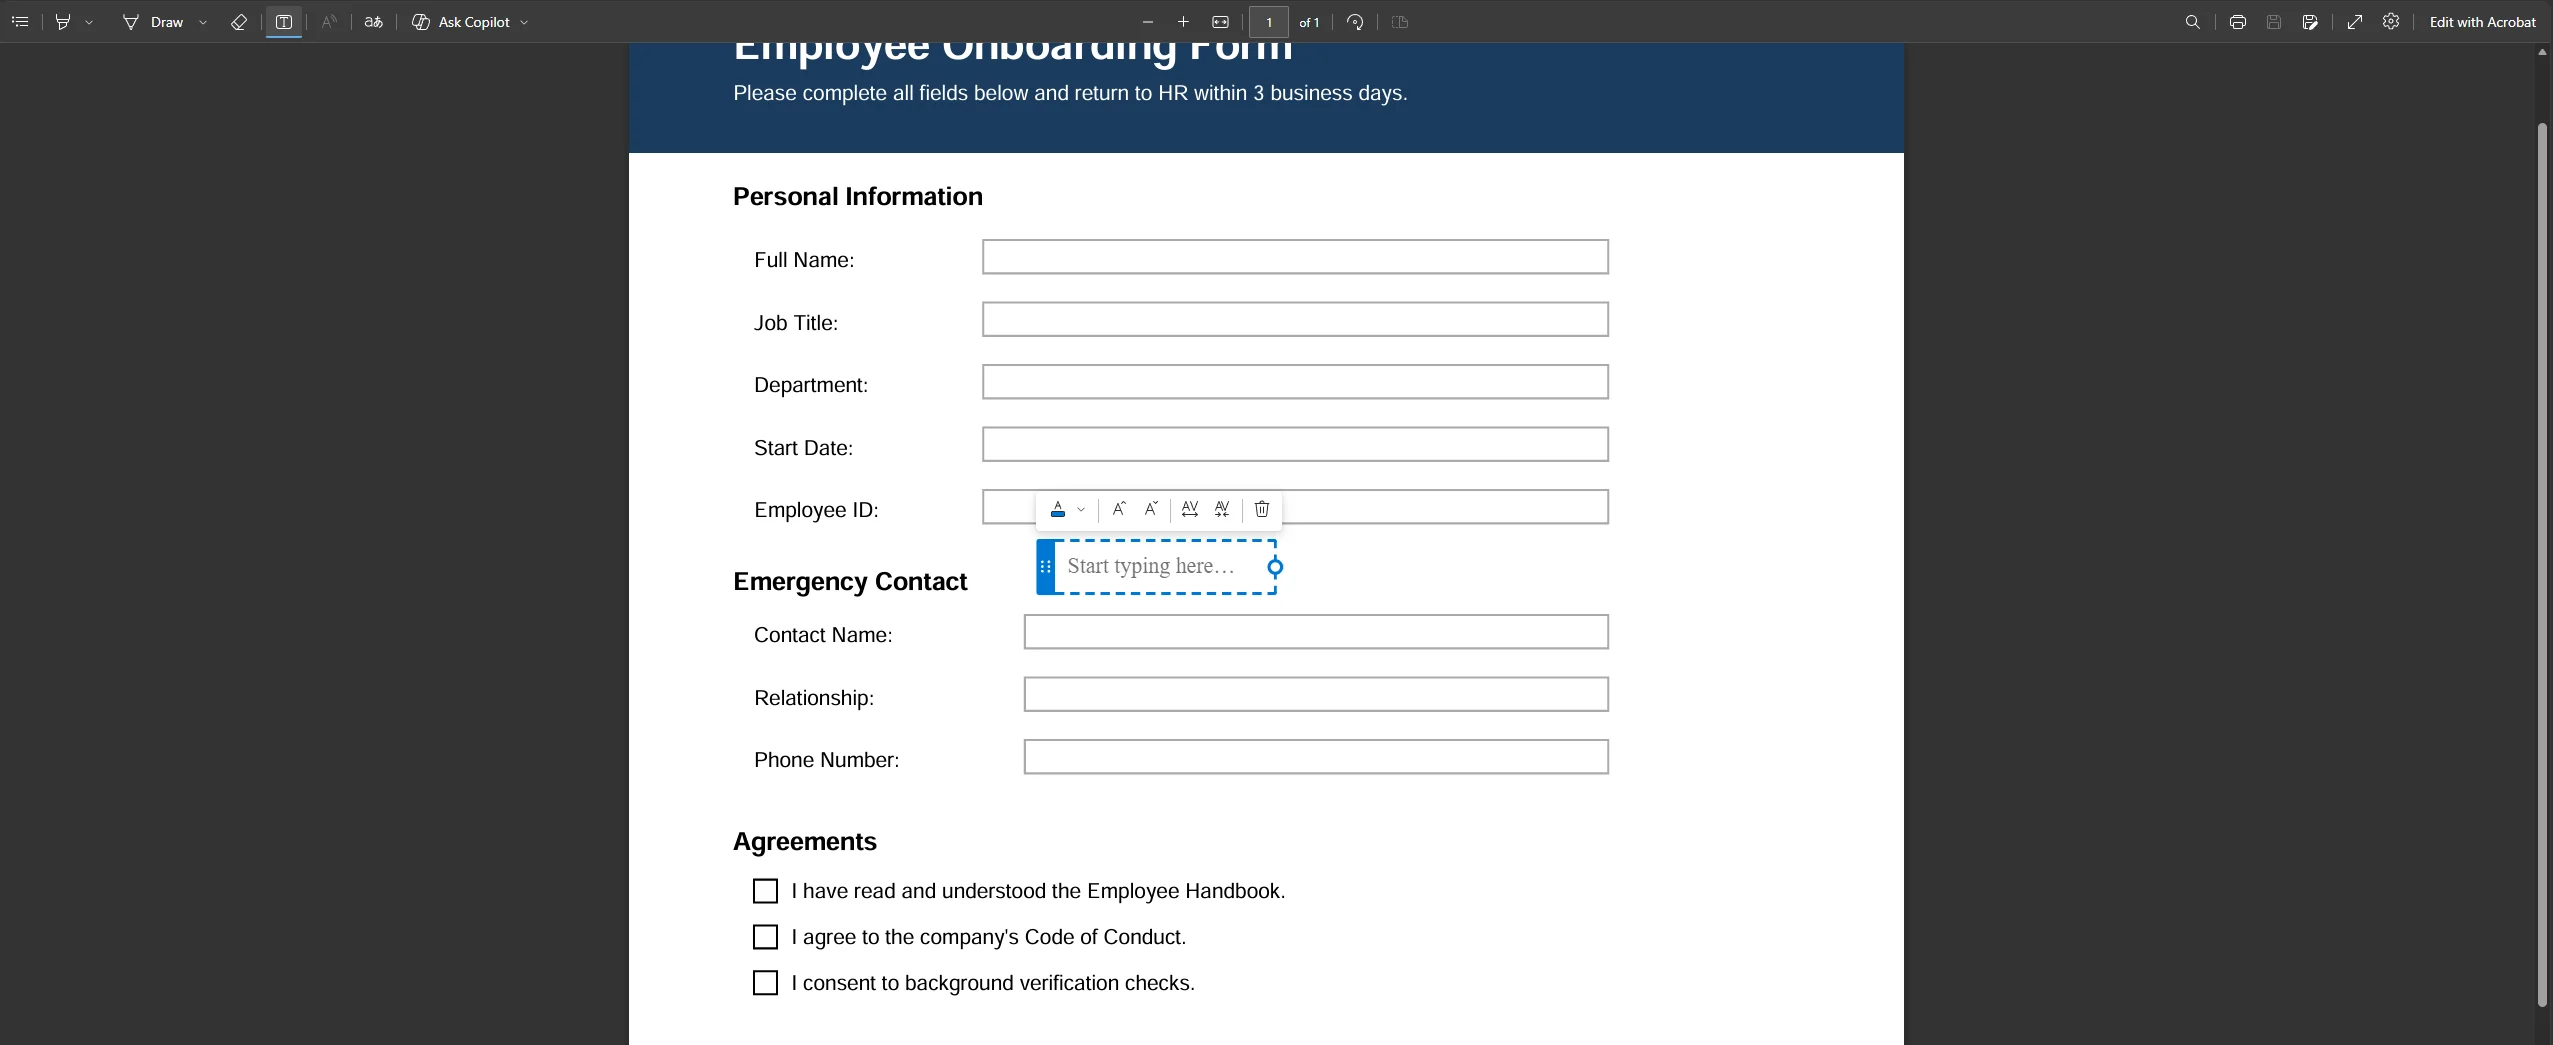
Edge has a built-in PDF editor that lets you add text, highlight content, draw, add sticky notes, and sign pdfs directly from the top toolbar. Open your PDF in Edge by dragging it into a tab or right-clicking the file and choosing Open with > Microsoft Edge. The editing tools appear in the toolbar along the top of the pdf page. Scroll through the document to find the section you want to mark up, then select your tool from the toolbar. Click Draw, Highlight, or Add notes to annotate. Click the pen icon to sign pdfs by drawing your signature. When finished, click the save or download button to keep your changes.
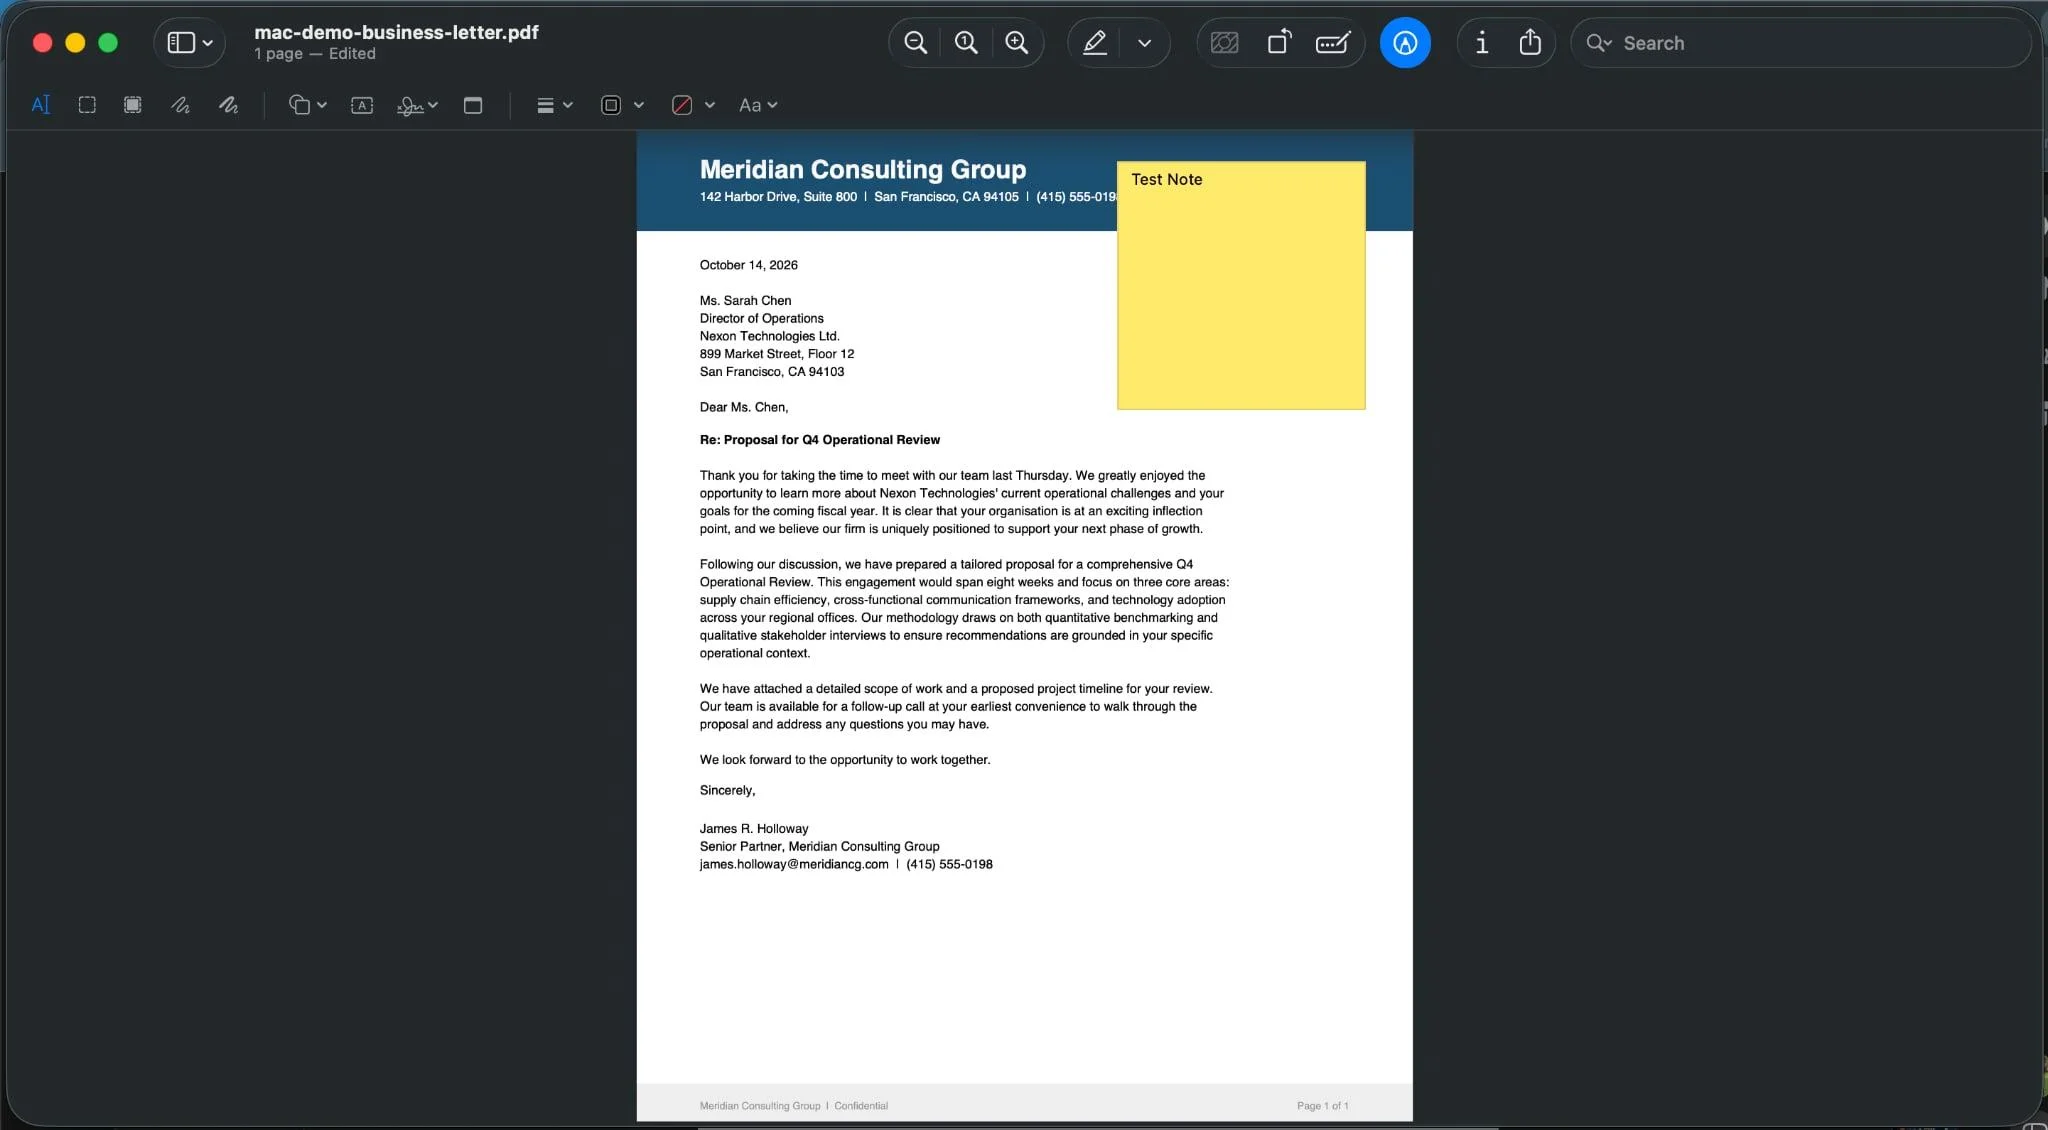
 Mac Preview:
On a Mac, the Preview application handles basic PDF editing without any additional software. Open the PDF in Preview, then click the Markup toolbar button (the pencil icon near the top right). From there you can add text, add sticky notes, draw shapes, highlight existing text, and sign documents using your trackpad or camera. Go to File > Export as PDF to save the annotated version.
Google Chrome (PDF viewer):
Chrome's built-in PDF viewer recently added an annotation layer. Open a PDF in Chrome, right-click it and select Open with > Google Chrome. Click the pen icon in the top toolbar to access drawing and highlight tools. This is the lightest-weight option and suits quick markups, not text edits.
Method 5: Fill and Edit PDF Forms
Best for: Completing interactive forms, filling in fields, adding checkmarks, and signing.
PDF forms can include various types of input fields such as text fields, checkboxes, dropdowns, and signature fields, allowing users to fill out forms interactively. If a PDF has been built with interactive form fields, filling it in is straightforward.
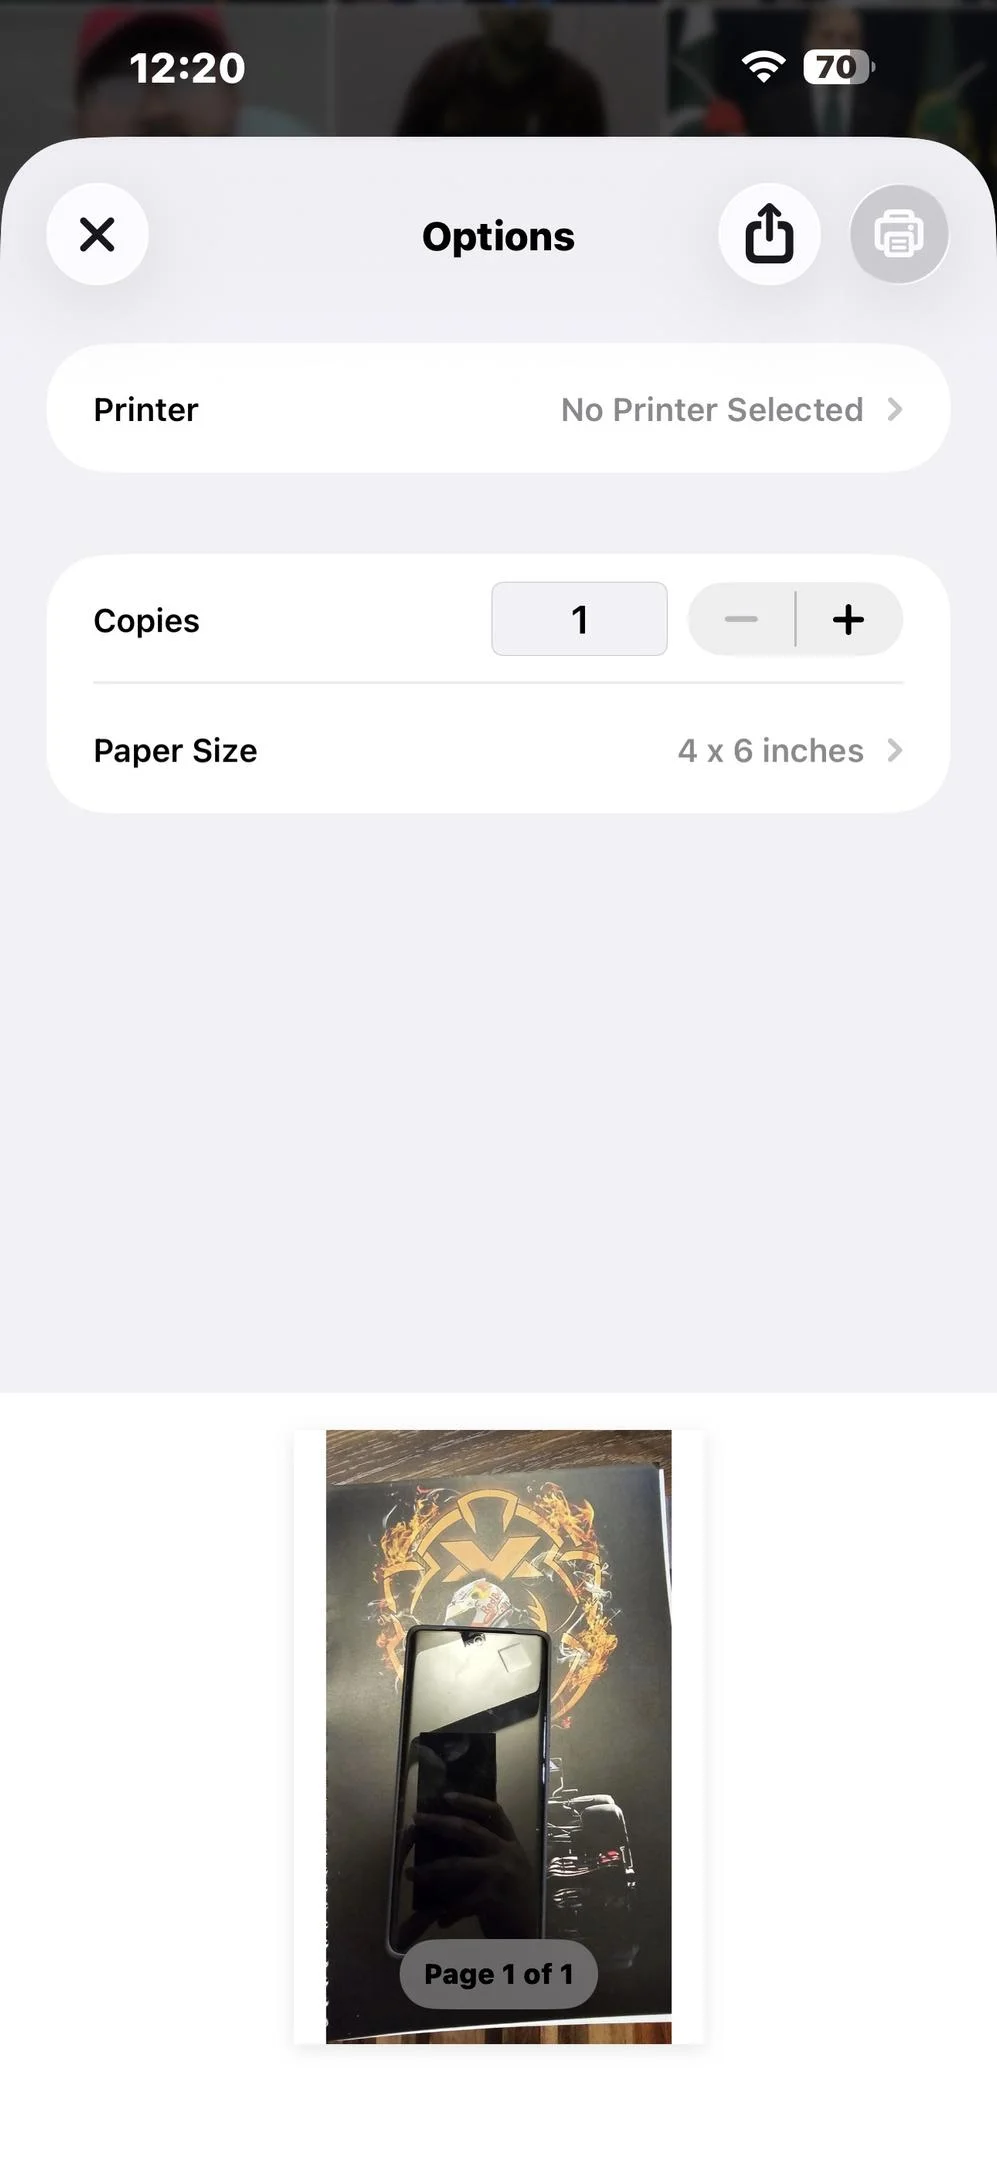
How to fill out a PDF form:
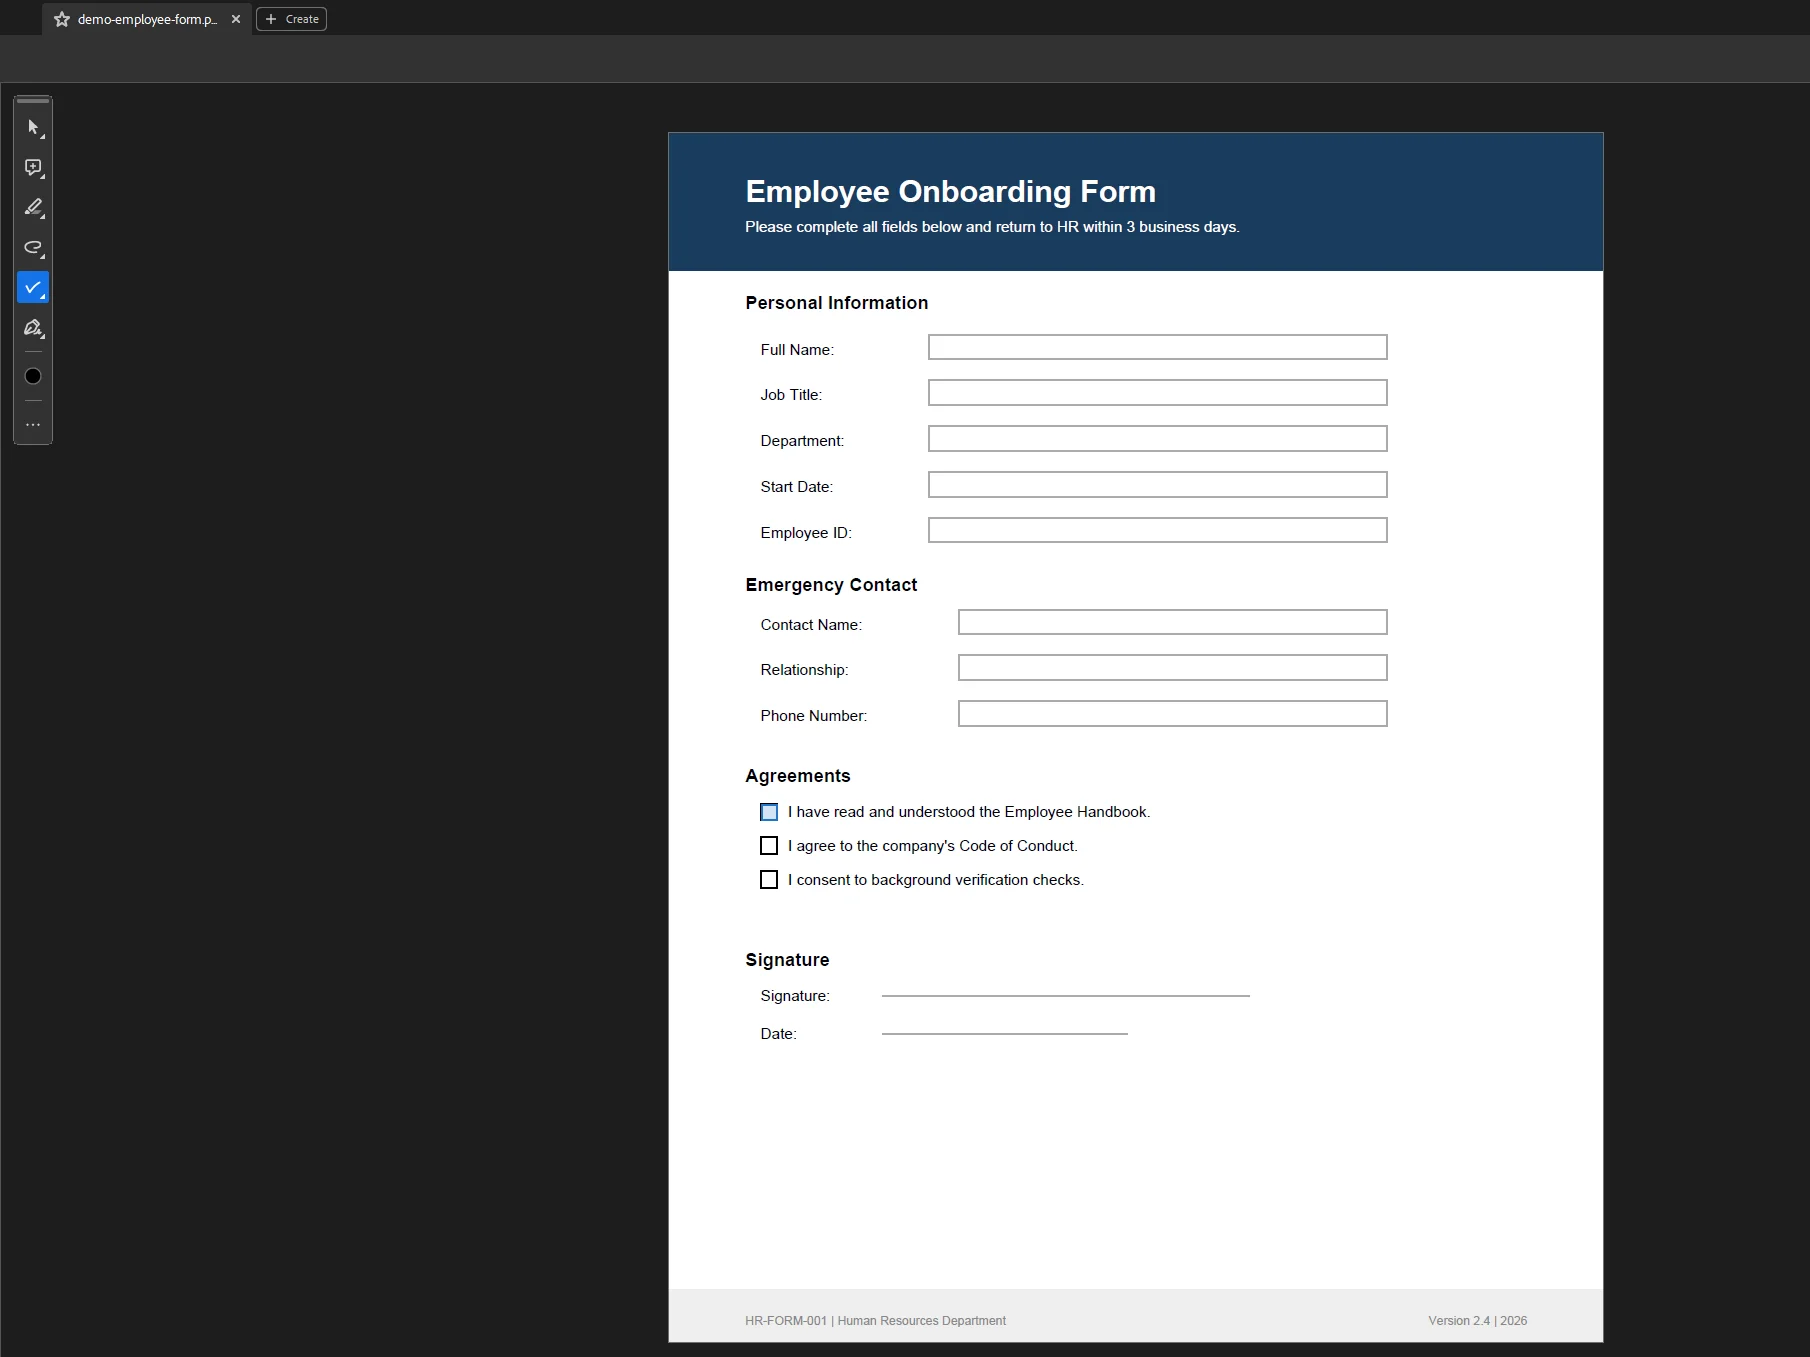
- Open the PDF form in Adobe Acrobat Reader (free), your browser, or any PDF editor.
- Click on any form field and start typing. For checkboxes and radio buttons, click the box or circle to select it.
- For signature fields, click the field and choose to draw, type, or upload your signature image.
- Once all fields are filled, go to File > Save or click the download button to keep a copy.
 If the form does not have interactive fields:
Documents like lesson plans, invoices, or application forms are often shared as flat PDFs with no interactive fields. Some PDF forms are flat, meaning they are essentially an image of a form with no clickable fields. To fill out a PDF form in this case, you need to add text boxes manually on top of the form using Acrobat, an online editor, or a tool that supports placing text over existing pdf content.
Creating fillable forms:
Many online PDF editors allow users to create fillable forms by adding interactive elements like text boxes and checkboxes, which can be shared for completion. In Acrobat Pro, go to Tools > Prepare Form. Acrobat will detect existing form structure and offer to convert it to an interactive form automatically, or you can manually add text fields, checkboxes, dropdown menus, and signature fields from the form tools panel.
Method 6: Handle Scanned Documents with OCR
Best for: PDFs created by scanning physical documents that contain no selectable text.
If the PDF is a scan, ensure your editor has OCR (Optical Character Recognition) to make text editable. Scanned documents are essentially images embedded in a PDF file. The PDF contains no actual text layer, which means you cannot click on the words, select text, or search the document. OCR solves this by analysing the image and converting it into a real text layer that sits on top of the scanned content.
Using Adobe Acrobat Pro for OCR:
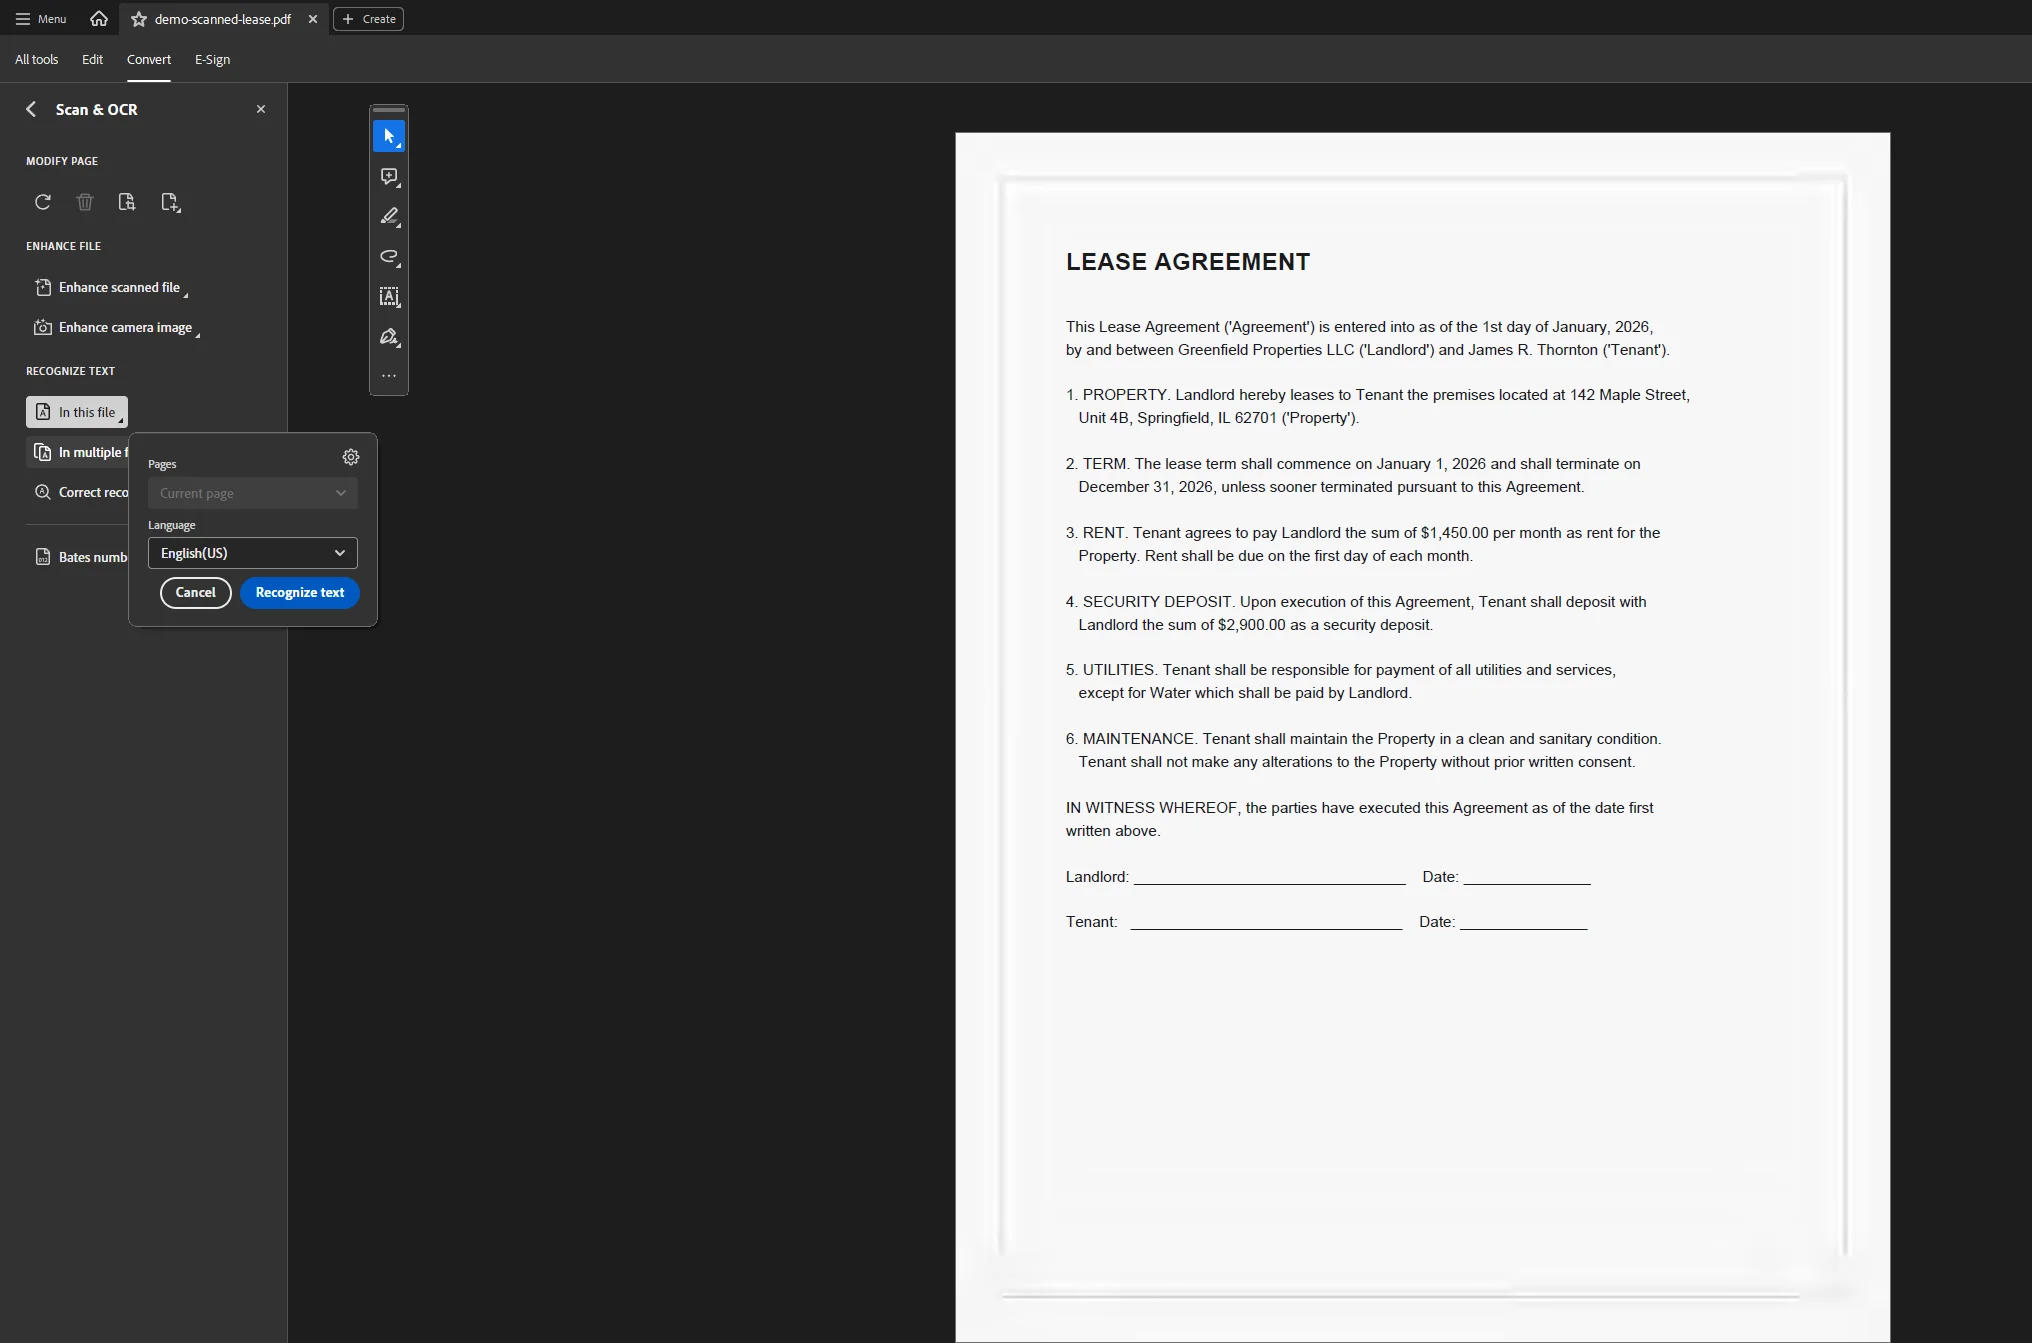
- Open the scanned PDF in Acrobat Pro.
- Go to Tools > Scan & OCR.
- Click Recognise Text and choose the pages you want to process, then click Recognise Text again to run the OCR engine.
- Acrobat will process each page and create a selectable, searchable text layer. You can then use the Edit PDF tool to modify the recognised text.
 Using online OCR tools:
Tools such as Smallpdf, ILovePDF, and PDF24 all include OCR functionality accessible from their respective online tools menus. Upload the scanned document, select the OCR option, choose the document language, and download the processed file. Online OCR tools are a solid free option for converting PDFs in non-English languages as well.
OCR accuracy depends heavily on the quality of the scan. High-contrast, clearly printed text on a clean white background gives the best results. Handwritten content, low-resolution scans, or documents with coloured backgrounds will produce less accurate results and may require manual corrections after processing.
Method 7: Add and Manage Annotations, Comments, and Sticky Notes
Best for: Document review, collaborative feedback, markup without altering the underlying content.
PDF editors often include annotation tools such as sticky notes, highlights, and comments, which facilitate clear communication and feedback among team members. These tools are distinct from direct editing: annotations sit on top of the PDF content without changing the underlying pdf text or structure.
In Adobe Acrobat (Reader or Pro):
Open the Comment panel from the right-hand side or the top toolbar. Options include:
- Sticky notes: Click anywhere on the page to leave a note visible only when clicked.
- Highlight, underline, strikethrough: Select text and choose from the text markup tools.
- Add comments: Type a comment that attaches to selected content.
- Drawing tools: Draw freehand lines, arrows, rectangles, or circles to mark up specific areas.
Many PDF editing tools offer the ability to share documents via links, enabling easy access for collaborators without the need for email attachments. In Acrobat, use File > Share or the share icon to generate a link that gives collaborators view or comment access directly in the browser.
In online editors (Smallpdf, PDF24, ILovePDF):
Most online PDF editors provide annotation tools in their toolbar. Select the sticky notes, highlight, or add drawings option, position it on the relevant part of the document, and download when complete.
Managing Sensitive Data: Redaction and Security
When working with documents that contain sensitive data such as personal identification numbers, financial records, or confidential legal content, standard editing is not enough. Covering text with a white box or black rectangle is not a secure method because the underlying pdf content may still be accessible to anyone who views the document's raw data.
True redaction permanently removes sensitive content from the document structure. PDF editing tools often include features for true redaction, which permanently removes sensitive content from documents rather than just overlaying it. In Acrobat Pro, use Tools > Redact and choose Mark for Redaction. Select the text or region to remove, then click Apply Redactions. Acrobat permanently deletes the selected content and sanitises the file.
Bank-level encryption (256-bit AES) is commonly used to protect PDF documents during transmission and storage when using professional tools. Compliance with security standards such as HIPAA, GDPR, and PCI-DSS is essential for PDF editing tools that handle sensitive information. For regulated industries, use a desktop tool rather than an online editor so that the document never leaves your controlled environment. Acrobat Pro's redaction toolset is more thorough in this regard than other pdf editors, which may only overlay content rather than permanently removing it from the file structure.
Using desktop software is often the best choice for handling sensitive documents or large files that require advanced formatting.
Common Issues and Troubleshooting
The text looks different after editing
This usually happens because the original PDF used a font that is not installed on your system. Acrobat Pro attempts to match the closest available font, but for unusual or branded typefaces the substitute may look noticeably different. If font consistency is critical, request the original source file from the document author rather than editing the PDF directly.
The PDF is locked and will not let me edit
Some PDFs are password-protected or have editing restrictions applied by the author. In Acrobat Pro, go to File > Properties > Security to see which restrictions are in place. Removing these restrictions requires the owner password. Without it, you will not be able to unlock editing permissions directly.
Flash Fill produces incorrect results (for text-layer edits)
If you are editing text via a converted Word doc or Google Docs and the resulting formatting looks broken, try selecting all content, applying a clean paragraph style, then exporting back to PDF. This removes residual formatting from the conversion process.
OCR produces gibberish or incorrect characters
This is common with low-resolution scans or documents with unusual fonts. Increase the scan resolution to at least 300 DPI if you have access to the original scanner. In Acrobat, after OCR, use Find & Replace to correct systematic errors across the entire document at once.
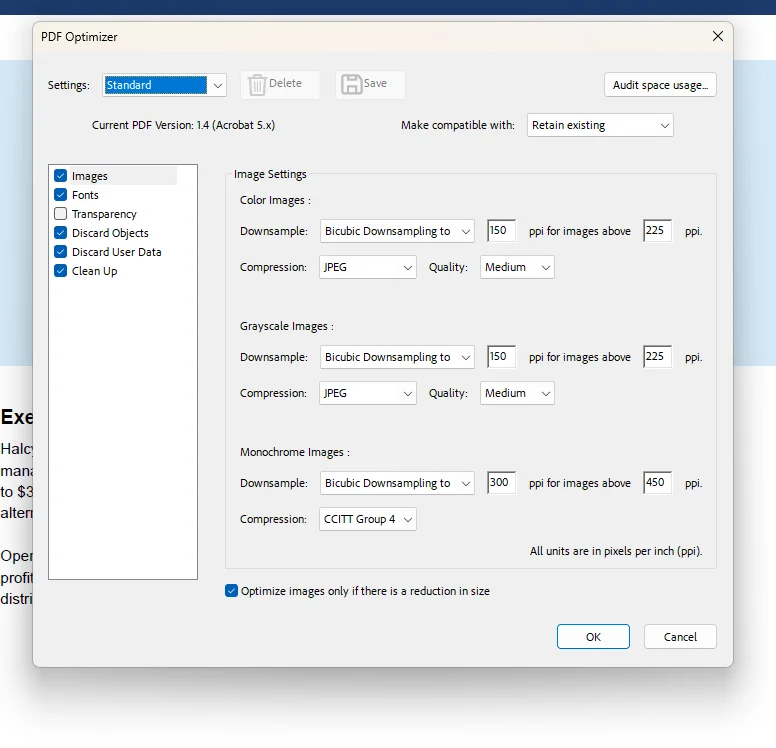
The file is too large to upload to an online editor
Most free online tools cap uploads at 10–50 MB. For larger files, use a desktop tool like Acrobat Pro, Adobe Reader with an Acrobat subscription, or PDF24's desktop application, which handles large files without size limits and does not require an upload.
Images shift or disappear after conversion
This is a common side effect of converting PDFs through Word or Google Docs. If image placement is critical, use a dedicated PDF editor like Acrobat Pro to make changes directly rather than converting the format first.
Choosing the Right Method: Quick Reference
| Goal | Best Method |
|---|---|
| Edit existing pdf text directly | Adobe Acrobat Pro or Sejda (online) |
| Add text boxes, images, links without converting | Free online pdf editor (Smallpdf, PDF24) |
| Heavy text restructuring | Convert to Word or Google Docs, then export |
| Fill out a PDF form | Acrobat Reader, browser, or any online PDF editor |
| Create fillable pdf forms | Acrobat Pro (Prepare Form tool) |
| Annotate and add comments for review | Acrobat, Edge, Mac Preview, or any online editor |
| Edit on Mac without extra software | Mac Preview |
| Quick edit in browser without installing anything | Microsoft Edge or Chrome built-in viewer |
| Handle scanned documents | Acrobat Pro OCR or online OCR tools |
| Permanently remove sensitive data | Acrobat Pro Redact tool |
| Add watermarks | Acrobat Pro or any online PDF editor with watermark tool |
For Developers: Edit PDF Files Programmatically with IronPDF
If you are building a .NET application that needs to create, edit, annotate, redact, or secure PDF files at scale, handling this manually does not work. IronPDF is a .NET library that gives C# developers complete control over PDF editing programmatically, with no dependency on Microsoft Office or any external process.
IronPDF supports a wide range of PDF editing operations:
- Edit existing pdf text and pdf content by rendering updated HTML into a PDF
- Add watermarks, stamps, and images directly onto existing pdf pages
- Add comments and annotations programmatically
- Fill pdf forms, including text fields, checkboxes, and dropdown fields
- Sign pdfs with digital signatures using X.509 certificates
- Redact sensitive data permanently from the PDF structure using RedactTextOnAllPages()
- Add or delete pdf pages, merge and split documents, and reorder content
- Apply 256-bit AES encryption and set user permissions for document security
Here is an example that loads an existing PDF, adds a watermark, redacts a sensitive phrase, and saves the result:
using IronPdf;

// Load an existing PDF document
PdfDocument pdf = PdfDocument.FromFile("q3-report.pdf");

// Add a watermark using an HTML string
string watermarkHtml = "<h1 style='color:rgba(150,150,150,0.3); transform:rotate(-45deg);'>CONFIDENTIAL</h1>";
pdf.ApplyWatermark(watermarkHtml);

// Permanently redact sensitive data from all pages
pdf.RedactTextOnAllPages("Project Budget: $240,000", drawRectangles: true, replacementText: "[REDACTED]");

// Save the edited file
pdf.SaveAs("q3-report-final.pdf");
Imports IronPdf

' Load an existing PDF document
Dim pdf As PdfDocument = PdfDocument.FromFile("q3-report.pdf")

' Add a watermark using an HTML string
Dim watermarkHtml As String = "<h1 style='color:rgba(150,150,150,0.3); transform:rotate(-45deg);'>CONFIDENTIAL</h1>"
pdf.ApplyWatermark(watermarkHtml)

' Permanently redact sensitive data from all pages
pdf.RedactTextOnAllPages("Project Budget: $240,000", drawRectangles:=True, replacementText:="[REDACTED]")

' Save the edited file
pdf.SaveAs("q3-report-final.pdf")To edit a PDF form programmatically and fill in field values:
using IronPdf;

PdfDocument pdf = PdfDocument.FromFile("employee-onboarding-form.pdf");

// Fill existing form fields
pdf.Form.FindFormField("FullName").Value = "James R. Thornton";
pdf.Form.FindFormField("Department").Value = "Engineering";
pdf.Form.FindFormField("StartDate").Value = "January 6, 2026";

pdf.SaveAs("onboarding-form-filled.pdf");
Imports IronPdf

Dim pdf As PdfDocument = PdfDocument.FromFile("employee-onboarding-form.pdf")

' Fill existing form fields
pdf.Form.FindFormField("FullName").Value = "James R. Thornton"
pdf.Form.FindFormField("Department").Value = "Engineering"
pdf.Form.FindFormField("StartDate").Value = "January 6, 2026"

pdf.SaveAs("onboarding-form-filled.pdf")IronPDF runs on .NET 6 and later, and is compatible with Windows, Linux, macOS, Docker, Azure, and AWS. Because it uses a Chrome-based rendering engine, PDFs generated or edited through IronPDF match the visual output of a browser with full CSS, JavaScript, and image support.
Getting started: Install via NuGet with Install-Package IronPdf. A free trial is available with full functionality for 30 days, no credit card required. See the full IronPDF documentation and PDF editing tutorial for the complete API reference.
Further reading:
Wrapping Up
Knowing how to edit a PDF comes down to matching the right tool to the right task. For direct, professional-grade editing of existing pdf text, add images, add watermarks, sign pdfs, and handle sensitive data, Adobe Acrobat Pro remains the most capable pdf editor available, offering powerful features that no free tool fully replicates. It is the only tool that lets you truly edit existing text within the original PDF structure, reflow paragraphs, resize and reposition images, manage pdf pages, add watermarks, sign pdfs, add comments, and handle advanced security features, all within a single platform.
If you are on a Mac, Preview handles basic annotation and form filling without any additional software. Microsoft Edge and Chrome both offer lightweight built-in PDF annotation tools for document markups that do not require saving to cloud storage. For heavy text restructuring, converting to a word doc via Microsoft Word or Google Drive remains the most practical approach, even if it requires some cleanup afterward.
Whatever method you choose, keep a copy of the original PDF before you start. It takes a second and gives you a reliable fallback if any tool shifts your formatting in an unexpected direction. For developers who need to automate PDF editing across applications, IronPDF provides a complete programmatic solution with one-platform coverage for editing, redacting, form filling, watermarking, signing, and securing PDF documents in .NET.
If you found this guide useful, leave a comment below or visit the Iron Software blog for more articles on PDF, Excel, and document automation.