How to Minimise PDF File Size: Every Method Explained (2026)
Written by the team at Iron Software
Large PDF files create problems fast. A document that exceeds an email attachment limit, stalls on upload, or eats through a shared drive's storage space is a genuine productivity obstacle. Large pdf files can slow down system performance and user experience, making it difficult to share electronically. Reducing the size of a pdf improves upload speeds, saves storage space, and ensures documents are email-friendly, making the whole process of getting a file from your computer to your recipient noticeably smoother. The good news is that you do not need expensive software to get results. Minimizing a PDF's file size can be achieved using built-in tools, specialized software, or online services, and in many cases the fix takes just a few clicks.
The root cause of a bloated pdf file usually falls into one of three categories: high-resolution images that were never optimised for screen delivery, embedded fonts that carry the full character set even when only a fraction of those characters are used in the document, and redundant data accumulated from edits, metadata, hidden layers, and comments. PDF compression can be achieved through various methods, including removing redundant data, downsampling images, and optimizing internal file structures. Once you know which of these is driving up the pdf size, choosing the right tool and method becomes much simpler.
This guide covers every reliable approach to compress a pdf in 2026: the Acrobat Optimize PDF tool for professional-grade control, the Save As and Print to PDF workarounds that work on any computer, browser-based pdf online compressors for quick one-off tasks, the built-in mac Preview method, converting a pdf through Microsoft Word, and targeted techniques for images, fonts, and scans. Developers who need to automate pdf compression at scale will find a dedicated section at the end covering how IronPDF handles it programmatically in .NET with complete control over quality and compression settings.
Why PDF File Size Grows Larger Than It Should
Before choosing a method, it helps to understand what actually takes up space inside a pdf file. Most bloated documents fall into one or more of these categories.
Images are the most common culprit. A pdf exported from a design application or a presentation often embeds images at full resolution, sometimes 300 DPI or higher, even when the document will only ever be read on a screen. Image compression alone can reduce pdf file size by 50 to 80 percent in image-heavy documents. Downsampling images within a pdf can significantly reduce its size without losing quality, making it particularly useful for image-heavy documents.
Embedded fonts are the second major factor. When a pdf file includes a custom or non-standard font, the full font file is embedded so the document renders correctly on any computer. Subset embedded fonts to include only specific characters used in the document, which can significantly shrink file size while ensuring text remains sharp.
Redundant data covers everything from revision history, hidden comments and annotations, form fields that are no longer needed, bookmarks, and hidden metadata attached by the application that created the file. Remove unnecessary elements such as bookmarks, form fields, annotations, tags, and hidden metadata to reduce pdf file size before running any compression tool.
Unoptimized internal structure develops when a pdf is saved repeatedly after edits. Each save cycle can append data to the file rather than rewriting it cleanly. Using the Save As function can optimize the internal file structure of a pdf, eliminating redundant data and potentially reducing file size significantly.
Method 1: Adobe Acrobat Pro, Optimize PDF (Most Control)
Best for: Professional documents, image-heavy files, complete control over every compression setting.
Specialized software like Adobe Acrobat is regarded as the gold standard for professional PDF optimization, offering advanced tools for image and font management. Adobe Acrobat Pro includes an Optimize PDF feature to efficiently reduce file size, and it gives you full control over exactly which elements are compressed and by how much without compromising quality in ways you cannot predict.
Using the Optimize PDF tool:
- Open your pdf file in Adobe Acrobat Pro.
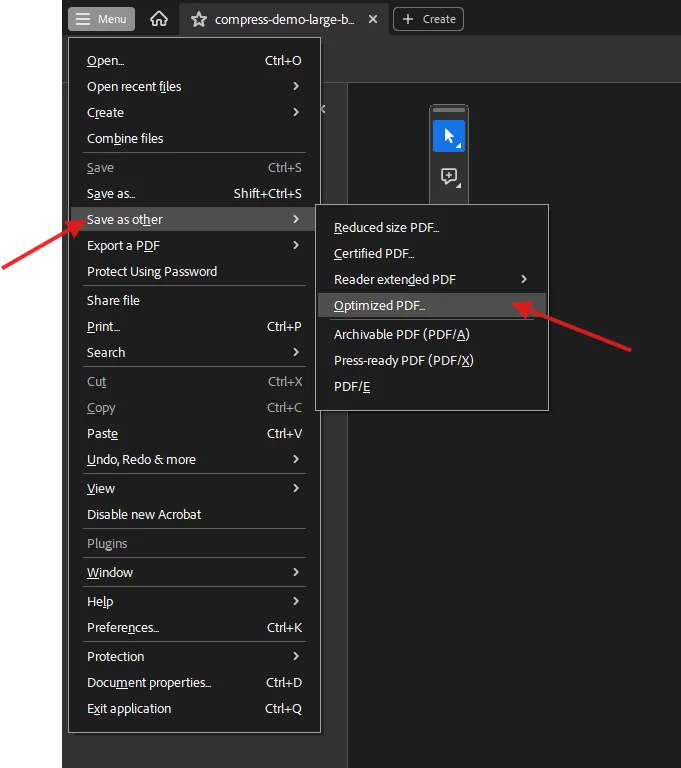
- Go to File > Save As Other > Optimized PDF (in some versions this appears as File > Reduce File Size or under Tools > Optimize PDF).
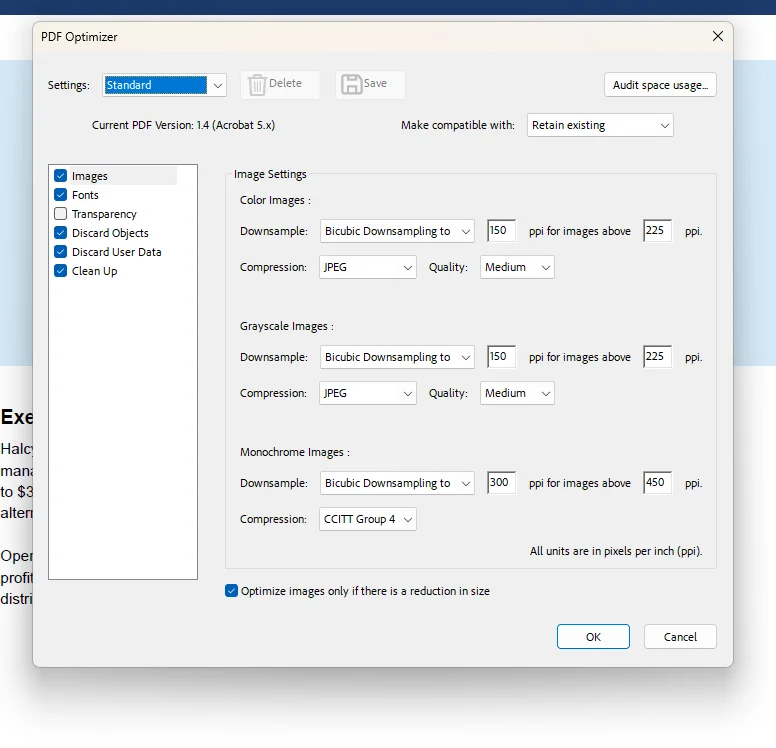
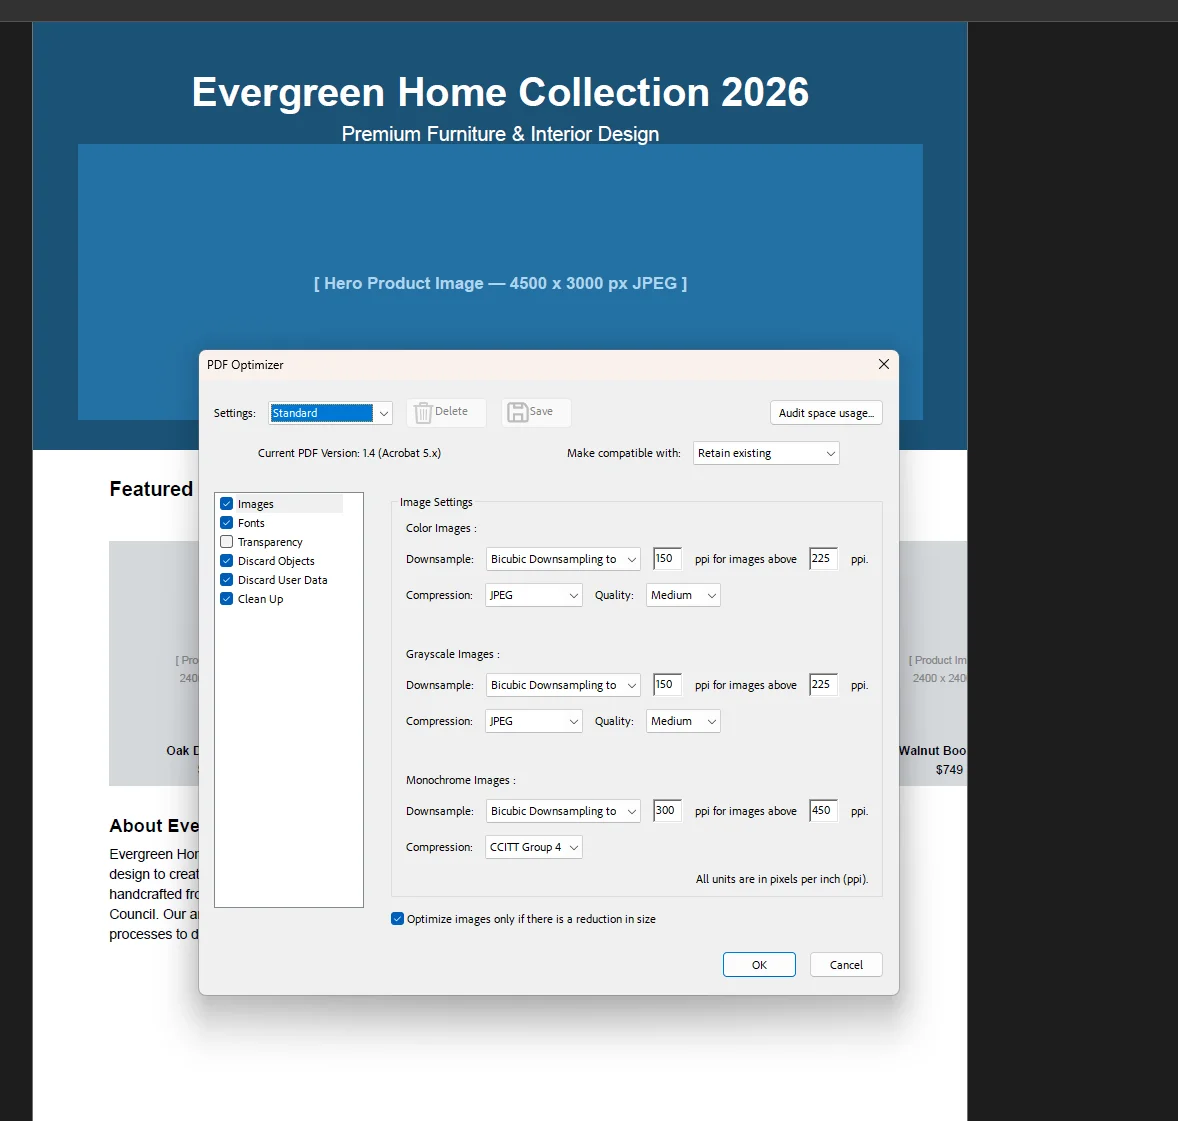
- The dialog box opens showing the current pdf size and full details of optimization options across several categories: Images, Fonts, Transparency, Discard Objects, and Discard User Data.
- In the Images section, set the jpeg resolution for colour and greyscale images. For documents shared electronically or viewed on screen, 150 ppi is typically sufficient for screen or web viewing without visible quality loss. For print, keep colour images at 300 ppi.
- In the Fonts section, enable subset embedded fonts for any font using less than 100 percent of its characters. This removes unused glyphs from the font data.
- In the Discard Objects section, tick unused items such as form fields, javascript actions, and embedded thumbnails.
- In the Discard User Data section, remove metadata, hidden layers, comments, and document information that is not needed in the final file.
- Click OK, then click save. Acrobat processes the file and saves an optimized pdf.
Advanced Optimization in Adobe Acrobat allows for granular control over images and fonts for pdf reduction, which is why it remains the preferred tool when the output needs to meet specific quality standards. Before opening Acrobat, you can check the current file size directly in File Explorer on Windows: right-click the pdf file and click Properties to see the exact size in MB and KB. This gives you a baseline to measure compression results against.
To see how much space each element is consuming before you optimize, click the Audit space usage button in the Optimize PDF dialog box. This shows a breakdown of file size by category so you can focus on the largest contributors first.
 Using Reduce File Size (quick option):
For a faster result with less configuration, go to File > Reduce File Size (or File > Save As Other > Reduce File Size). Acrobat applies a standard set of compression settings automatically. This produces a smaller file in just a few clicks with no manual configuration required, though you have less control over image quality than the full Optimize PDF workflow.
Using Save As to clean internal structure:
One effective method to reduce pdf file size is to re-render the document using the Save As function rather than Save. Go to File > Save As, give the file a new name or rename it with a version suffix, and click save. Acrobat rewrites the internal file structure cleanly, stripping accumulated redundant data from previous edit sessions. This alone can reduce pdf size by 10 to 30 percent on frequently edited documents.
Method 2: Adobe Acrobat Pro, Advanced PDF Optimization Settings
Best for: Power users who need to control image resolution, grayscale conversion, and ClearScan OCR on scans.
For the deepest level of compression, the Advanced Optimization panel in Acrobat gives complete control over every element in the pdf. Advanced compression algorithms are employed in tools to shrink files without noticeable quality loss, and this is where you access them directly.
Downsampling images with precision:
In the Optimize PDF dialog box, the Images section has separate settings for Colour Images, Greyscale Images, and Monochrome Images. For each category you can set:
- Downsample method: Bicubic Downsampling gives the best visual result when reducing resolution.
- Resolution: 150 ppi for screen viewing, 300 ppi for print output.
- Compression: JPEG for colour and greyscale (adjust quality slider), JBIG2 for monochrome (scanned text pages).
Setting colour and greyscale images to Bicubic Downsampling to 150 ppi for images above 225 ppi produces the largest size reduction with the least visible quality loss for standard business documents.
Converting to grayscale:
If the document does not require colour, converting all images to grayscale removes the colour data from every jpeg and image element in the file. In the Images section, set the Colour Images compression type to Grayscale conversion. This does not affect text or vector elements, only the raster images. Grayscale images are typically one-third the size of equivalent colour images at the same resolution.
ClearScan for scanned documents:
In Adobe Acrobat Pro, selecting ClearScan during OCR can yield high-quality results with smaller file sizes. When running OCR on a scanned document, choose Tools > Scan & OCR > Recognise Text and set the output style to ClearScan. This converts recognised text into actual vector text rendered over a compressed background image, replacing the large raw scan bitmap with a much smaller hybrid representation. Using OCR for scanned documents can significantly reduce file size while maintaining clarity.
Method 3: Print to PDF (Works on Any Computer, Free)
Best for: Any computer without specialist software. Works on Windows and mac with no extra tools.
One effective method to reduce pdf file size is to re-render the document using the Print to PDF function, which removes unnecessary metadata and simplifies the file structure. This works because the print driver creates a clean new pdf from the visual output of the document, discarding all accumulated edit history, form data, hidden layers, and internal redundancies.
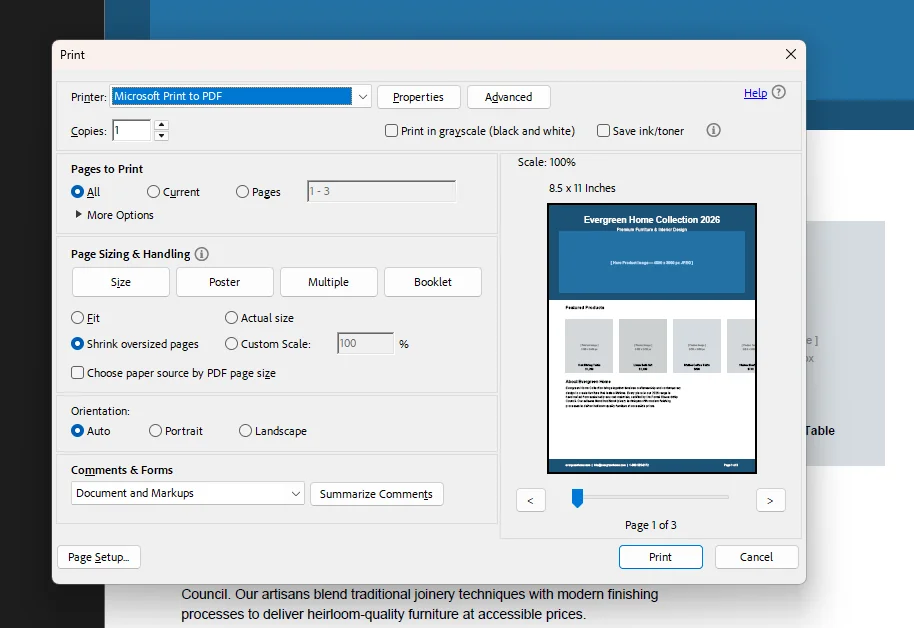
On Windows:
- Open your pdf file in any pdf reader (Adobe Acrobat Reader, Edge, or Chrome).
- Press Ctrl + P to open the print dialog box.
- Select Microsoft Print to PDF as the printer.
- Click Print.
- Choose a save location, rename the file if needed, and click save.
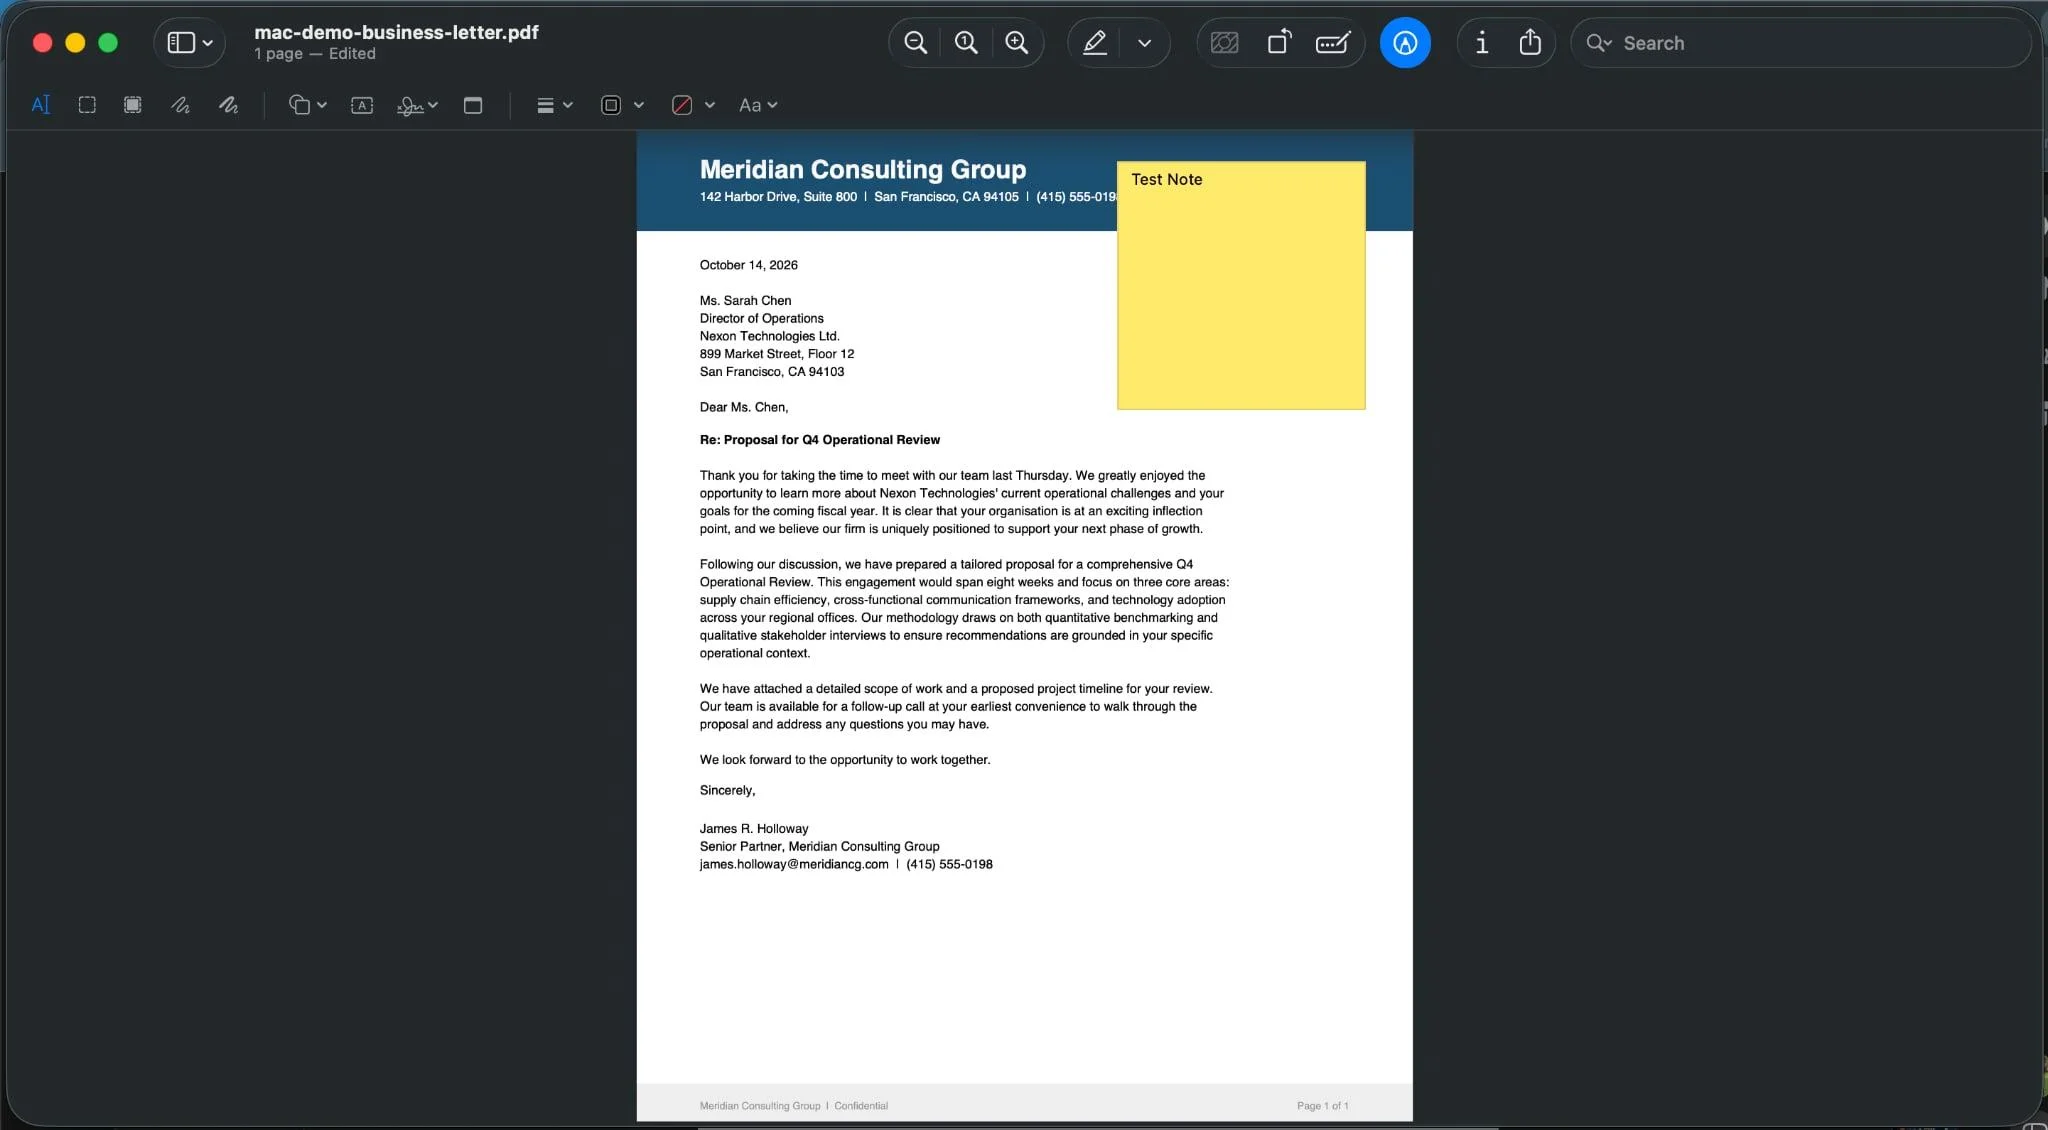
On Mac:
- Open the pdf in any application (Preview, Chrome, or Safari).
- Press Cmd + P to open the print dialog.
- Click the PDF dropdown at the bottom left of the dialog box.
- Select Save as PDF.
- Choose a location and click save.
The resulting file is typically significantly smaller than the original because the print process flattens layers, strips metadata, and removes embedded form fields and annotation data. This method works particularly well on documents exported from Microsoft Word or other applications that embed large amounts of application-specific metadata.
Note that avoiding repeated compression helps prevent degradation of quality without saving significant space. If you have already compressed a pdf once, running Print to PDF again on the compressed version will not yield meaningful additional reduction and may degrade image quality further.
Method 4: Free Online PDF Compressors (No Installation Required)
Best for: One-off tasks, any device with a browser, documents that do not contain sensitive data.
Using online tools offers a method for one-off tasks that works on any device with a browser. Several free pdf online compressors handle compression well for everyday business documents without requiring any software to install.
Smallpdf (smallpdf.com):
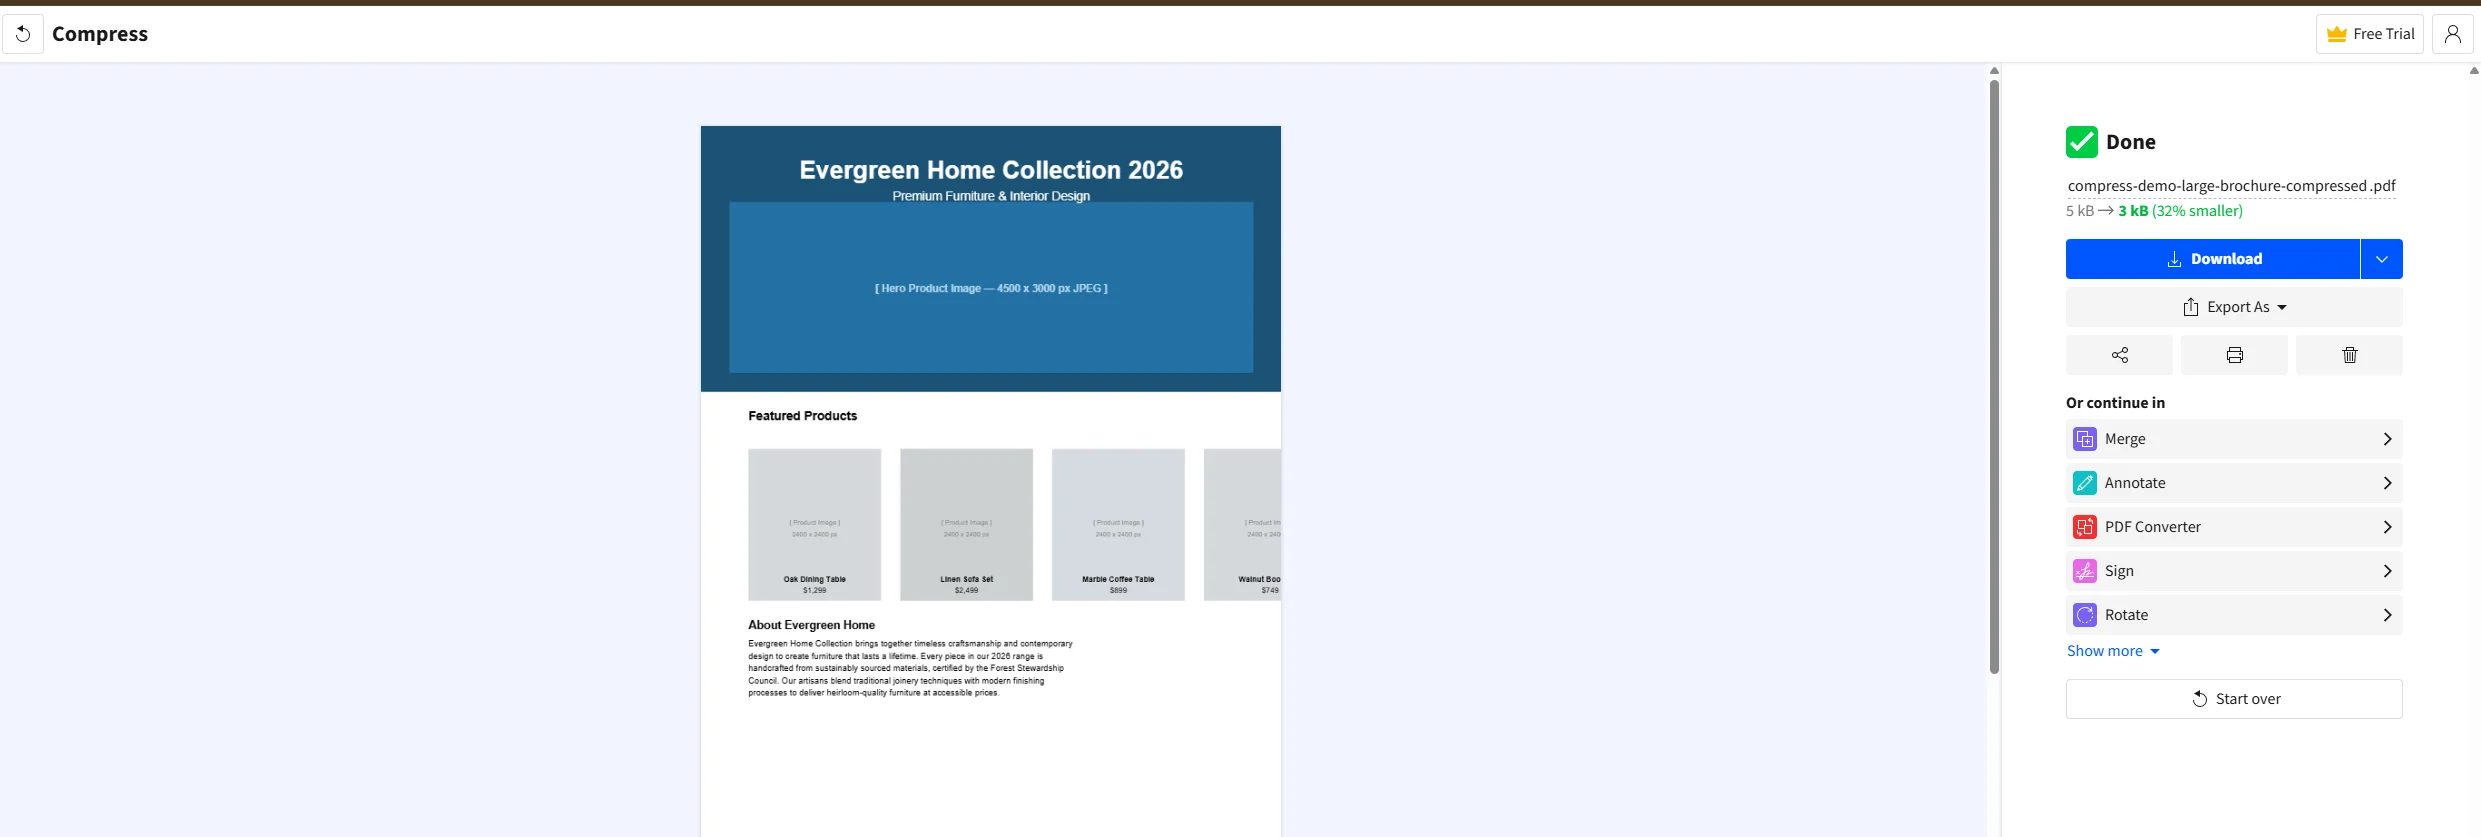
- Go to smallpdf.com and click Compress PDF.
- Simply drag your pdf file into the upload area, or click to browse and select it.
- Smallpdf automatically applies compression. You can choose between Basic and Strong compression levels to balance quality and file size reduction. Many online PDF compression tools offer options for different levels of compression, allowing users to balance quality and file size.
- Click Download to save the compressed file.
Smallpdf handles files up to 5 GB on paid plans. The free tier allows a limited number of tasks per day.
ILovePDF (ilovepdf.com):
- Go to ilovepdf.com and select Compress PDF.
- Upload your pdf file using drag and drop or the file browser.
- Select a compression level: Extreme Compression for the smallest file, Recommended Compression for a balance of quality and size, or Less Compression for minimal quality loss.
- Click Compress PDF then download the result.
Online compression tools can offer recommended settings that balance file size and quality automatically, which makes ILovePDF's recommended preset a reliable default for most business documents.
PDF2Go and PDF24 (pdf24.org):
PDF24 is one of the most capable free options available. PDF compression tools can reduce file sizes significantly, with some tools capable of handling files up to 2GB. PDF24 also offers a desktop application for users who prefer not to upload files to a remote server, which addresses the privacy consideration of sending sensitive documents to an online platform.
Online tools are best for non-sensitive documents. For files containing confidential financial data, legal agreements, or personal information, use a desktop tool such as Adobe Acrobat, the mac Preview method, or IronPDF so the file never leaves your computer.
IronPDF's free online compress tool:
IronPDF also provides a free online PDF compressor that uploads and processes the file securely. This is particularly useful for developers who want to test compression output before implementing the same logic programmatically.
Method 5: Mac Preview, Free Built-In Compression
Best for: Mac users who want a free, offline option without installing anything.
Built-in system tools on macOS can reduce PDF file sizes efficiently. Using the built-in Preview app on macOS is a free option for reducing pdf file size, and it requires nothing beyond what every Mac already has installed.
- Open your pdf file in Preview by double-clicking it or right-clicking and selecting Open With > Preview.
- Go to File > Export as PDF.
- In the export dialog box, click the Quartz Filter dropdown.
- Select Reduce File Size from the list of available filters.
- Choose a save location, rename the file to distinguish it from the original, and click save.
Preview applies Apple's Quartz filter, which primarily compresses images within the pdf. The degree of reduction depends heavily on how image-heavy the document is. Text-only documents see minimal reduction. Documents with large jpeg images or scans can see substantial size savings.
The macOS Reduce File Size filter can be aggressive with image quality on some documents, occasionally producing visible jpeg artefacts. Always compare the output against the original before sending. If the quality drop is too significant, use Acrobat or an online tool with adjustable compression levels instead.
Method 6: Compress via Microsoft Word
Best for: Documents that originated in Word and were exported to PDF, where the source file is still available.
If the original document was created in Microsoft Word, re-exporting it from Word with image compression enabled often produces a smaller file than compressing the pdf after the fact.
Optimising images before export:
- Open the original word document in Microsoft Word.
- Click on any image in the document.
- Go to the Picture Format tab in the ribbon and click Compress Pictures.
- In the dialog box, choose Email (96 ppi) for the smallest output or Web (150 ppi) for a balance of size and quality.
- Check the box to Delete cropped areas of pictures to remove any hidden image data from crops.
- Click OK, then save the document.
- Go to File > Save As, choose PDF as the file format, and click save.
Using Save As PDF settings:
In the Word Save As dialog box, click More Options (or Options in the PDF export panel). Select Minimum Size (publishing online) under the Optimise for section. This instructs Word to apply additional jpeg compression to all images during the pdf export process.
Method 7: Targeted Techniques for Images, Fonts, and Metadata
Best for: Users who want to understand what to remove before compressing, and how to get the most reduction without quality loss.
Removing unnecessary elements before compressing helps minimise pdf file size more effectively than compression alone. The following targeted steps address the three main contributors to oversized pdf files.
Optimise Images Before They Enter the PDF
The most effective time to reduce image data is before the pdf is created. If you are building a document from source files:
- Resize images to the dimensions they will actually appear at in the document before importing them. A full-width image in a PDF is approximately 600 pixels wide at 96 DPI. Embedding a 4,500-pixel-wide jpeg for that same space adds millions of unnecessary pixels.
- Save images as jpeg with a quality setting of 70 to 80 percent before import. This is visually indistinguishable from 100 percent quality at normal viewing sizes.
- Convert images to jpeg format rather than PNG or TIFF for photographs. PNG and TIFF are lossless formats with much larger file sizes. For diagrams, logos, and graphics with flat colours, PNG is still preferable.
Selective image downsampling allows for setting image resolution manually, with 150 ppi typically sufficient for screen or web viewing.
Subset and Remove Fonts
In Acrobat Pro, the Fonts section of the Optimize PDF dialog box shows every font embedded in the document. Subsetting fonts removes all characters from each font that are not actually used in that specific pdf. For a document using only standard Latin characters, subsetting a font can remove 80 to 90 percent of the font file data from the pdf. To effectively reduce a pdf's size without losing quality, focus on optimizing internal structures and smart image management alongside font subsetting.
Strip Metadata and Hidden Elements
Every pdf carries metadata: the author name, the application that created it, the creation date, revision history, and sometimes even deleted content still embedded in the file structure. In Acrobat, the Discard User Data section of the Optimize PDF dialog box lists all removable metadata categories. Selecting all of these before saving is a safe step for any document that is being prepared for distribution rather than ongoing editing, and can noticeably reduce the overall size without touching a single image or font. Flattening layers in a document can also reduce size while maintaining visual appearance, particularly for documents created in InDesign or Illustrator with complex layer structures.
Common Issues and Troubleshooting
The file is barely smaller after compression
This usually means the document is mostly text with very few or no images. Text in a pdf compresses extremely well by default and leaves almost no room for further reduction. The remaining size is driven by font embedding. Use font subsetting in Acrobat or check whether all fonts in the document are standard system fonts (Arial, Times New Roman, Helvetica), as these do not need to be embedded at all.
Image quality is unacceptably low after compression
The compression level was set too aggressively. Lower quality settings produce a smaller file but at lower quality. In Acrobat, rerun the optimization with a higher jpeg quality setting (60 to 75 percent is a good balance). For online tools, switch from Strong to Basic compression. Avoiding repeated compression prevents degradation of quality without saving significant space, so always work from the original uncompressed pdf rather than a previously compressed version.
The PDF is still too large for email after compression
Some email providers impose limits as low as 10 MB. If the compressed file still exceeds the limit, consider uploading the file to Google Drive or another cloud storage service and sharing a link instead. If the recipient does not specifically require a PDF, saving the content in other file formats such as .docx can reduce the overall size further before sending. This removes the size limit entirely and gives the recipient access regardless of their email provider's attachment restrictions.
The compressed file looks fine on screen but prints poorly
This is the result of downsampling images to screen resolution (72 to 96 ppi) when the document is intended for print. For files that need to print well, keep images at 300 ppi and use the Medium or Low compression preset in Acrobat rather than Minimum Size.
The online tool says the file is too large to upload
Most free online pdf compressors cap uploads at 10 to 50 MB. For files above that threshold, use a desktop tool. Acrobat Pro and PDF24's desktop application both handle large files without size limits. PDF compression tools can handle files up to 2 GB in some professional tools, but this requires a desktop installation rather than a browser-based service.
The PDF was already compressed once and further compression does nothing
Once jpeg images inside a pdf have been compressed to a given quality level, recompressing them does not meaningfully reduce size further and can introduce visible banding or artefacts. If further reduction is needed on a compressed pdf, the most reliable approach is to return to the source document and re-export with optimised settings from the start.
Choosing the Right Method: Quick Reference
| Goal | Best Method | Cost |
|---|---|---|
| Maximum control over image and font settings | Acrobat Optimize PDF | Paid (Acrobat Pro) |
| Quick reduction without configuration | Acrobat Reduce File Size | Paid (Acrobat Pro) |
| Clean internal file structure | Save As (Acrobat or any app) | Free |
| Free, no installation, any device | Online compressor (Smallpdf, ILovePDF, PDF24) | Free |
| Free, offline, Mac only | Preview Export with Reduce File Size filter | Free (built-in) |
| Document originated in Word | Compress in Word before PDF export | Free |
| Reduce scan file size with text layer | Acrobat OCR with ClearScan output | Paid (Acrobat Pro) |
| Free, offline, any OS | Print to PDF (Microsoft Print to PDF / Mac PDF) | Free (built-in) |
| Automate compression at scale in code | IronPDF CompressImages() in .NET | Paid (free trial) |
For Developers: Compress PDF File Size with IronPDF in .NET
If your application generates or processes PDF documents and file size is affecting performance, storage costs, or upload speed, manual compression does not scale. IronPDF is a .NET library that gives C# developers programmatic and complete control over pdf compression, including image quality, resolution scaling, and structural optimisation, without requiring Adobe Acrobat or any desktop application.
IronPDF's CompressImages() method targets the most common driver of pdf bloat: oversized embedded images. The method accepts a quality value from 1 to 100, where 100 represents the original image quality and lower values produce progressively smaller files. Advanced compression algorithms are employed to shrink files without noticeable quality loss, and a second optional parameter enables resolution downsampling based on each image's visible size in the pdf.
Here is a complete example that loads an existing pdf, compresses its images at two different quality levels, and saves both outputs for comparison:
using IronPdf;

// Load the existing large PDF document
PdfDocument pdf = PdfDocument.FromFile("marketing-brochure.pdf");

// Compress images to 60% quality - good balance for screen viewing
pdf.CompressImages(60);
pdf.SaveAs("brochure-compressed-60.pdf");

// Reload original and apply stronger compression with resolution scaling
PdfDocument pdf2 = PdfDocument.FromFile("marketing-brochure.pdf");

// The second parameter scales down image resolution based on visible size in the PDF
// This can cause minor distortion on some image configurations - test before deploying
pdf2.CompressImages(40, true);
pdf2.SaveAs("brochure-compressed-40-scaled.pdf");
Imports IronPdf

' Load the existing large PDF document
Dim pdf As PdfDocument = PdfDocument.FromFile("marketing-brochure.pdf")

' Compress images to 60% quality - good balance for screen viewing
pdf.CompressImages(60)
pdf.SaveAs("brochure-compressed-60.pdf")

' Reload original and apply stronger compression with resolution scaling
Dim pdf2 As PdfDocument = PdfDocument.FromFile("marketing-brochure.pdf")

' The second parameter scales down image resolution based on visible size in the PDF
' This can cause minor distortion on some image configurations - test before deploying
pdf2.CompressImages(40, True)
pdf2.SaveAs("brochure-compressed-40-scaled.pdf")For applications that generate PDFs programmatically from HTML and need to control image quality at creation time, IronPDF's rendering settings allow you to configure jpeg quality, grayscale output, and resolution before the pdf is created:
using IronPdf;

ChromePdfRenderer renderer = new ChromePdfRenderer();

// Set grayscale output to reduce colour image data
renderer.RenderingOptions.GrayScale = true;

// Render HTML content to PDF with optimised settings
PdfDocument pdf = renderer.RenderHtmlAsPdf("<h1>Annual Report 2026</h1><p>Content here...</p>");
pdf.CompressImages(70);
pdf.SaveAs("annual-report-optimised.pdf");
Imports IronPdf

Dim renderer As New ChromePdfRenderer()

' Set grayscale output to reduce colour image data
renderer.RenderingOptions.GrayScale = True

' Render HTML content to PDF with optimised settings
Dim pdf As PdfDocument = renderer.RenderHtmlAsPdf("<h1>Annual Report 2026</h1><p>Content here...</p>")
pdf.CompressImages(70)
pdf.SaveAs("annual-report-optimised.pdf")IronPDF's compression works cleanly alongside its other features including watermarking, digital signatures, form filling, and merging, so you can optimize images as part of a larger document processing pipeline rather than as a separate step. The .NET PDF compression library tutorial on the IronPDF documentation site covers additional scenarios including batch compression and processing scanned documents.
Getting started: Install via NuGet with Install-Package IronPdf. A free trial is available with 30 days of full functionality and no credit card required.
Further reading:
Wrapping Up
Reducing a pdf file to a manageable size does not have to mean a visible drop in quality. The right approach depends on what is actually making the file large in the first place. For image-heavy documents like brochures or scanned reports, image compression and downsampling to 150 ppi delivers the biggest reduction. For documents with large embedded fonts, subsetting fonts strips out unused glyph data without changing how a single word looks on screen. For files that have been edited repeatedly, a clean Save As cycle removes layers of redundant data that have built up invisibly inside the file structure.
Adobe Acrobat Pro remains the most capable optimize pdf tool for professional work, giving you complete control over every compression parameter from a single dialog box. For free options, the Print to PDF method works on any computer without installing anything, online compressors like Smallpdf and ILovePDF handle most standard documents in just a few clicks, and mac Preview covers basic compression natively for macOS users. Whatever method you choose, always keep a copy of the original file before editing, compare the output carefully, and avoid compressing the same file repeatedly to prevent unnecessary quality loss.
For developers building .NET applications where pdf compression needs to be part of an automated process, IronPDF provides the CompressImages() method and full rendering control so generated files arrive at the right size without any manual intervention. Start with a free trial to test compression in your own environment with no commitment required.
Have a question about a specific compression scenario or a document type we did not cover? Leave a comment below, or visit the Iron Software blog for more guides on PDF optimisation, editing, and document automation.